Akuvox intercom devices support registering two SIP accounts. Users can make Speed Dial SIP Calls using either account 1 or account 2 without switching between them manually.
This is useful in scenarios where different call targets should use different SIP servers or accounts.
The selected SIP account is defined directly in the Speed Dial number format.
Before You Start
Before configuring this feature, ensure that:
The device firmware version meets the minimum requirement.
SIP Account 1 and/or SIP Account 2 are registered successfully.
The target SIP number is reachable.
The device and SIP server are properly connected.
Compatible Models and Minimum Versions
S539: 539.30.10.608
X915V2: 2915.30.10.8
R29: 29.30.3.3
E16V2: 216.30.10.136
E18: 18.30.10.255
S535: 535.30.11.13
How SIP Account Selection Works
In the Speed Dial value field, add /1 or /2 after the SIP number to specify which SIP account should be used for the call.
Examples:
1011/1 — Call extension 1011 using SIP Account 1.
1012/2 — Call extension 1012 using SIP Account 2.
If multiple numbers are configured, separate them with semicolons.
102/1;103/2;104
If no account index is specified (e.g., 104), the device falls back to the default account logic.
Model | Default Account Logic |
|---|---|
S539/R29/X915 | If the account index is not specified, the device will use the registered account to make SIP calls. If both are registered, Account 1 will be used. |
E16/E18 | See the Dial Type Logic section. |
Configuration by Device
Navigate to the device IP in a browser. The default login credentials are admin/admin.
X915/R29/S539
For X915/R29, the Speed Dial tab is supported in the Villa, Building, and Office themes.
For S539, the Speed Dial tab is supported in the Villa, Building, Office, and Multi-factor Authentication themes.
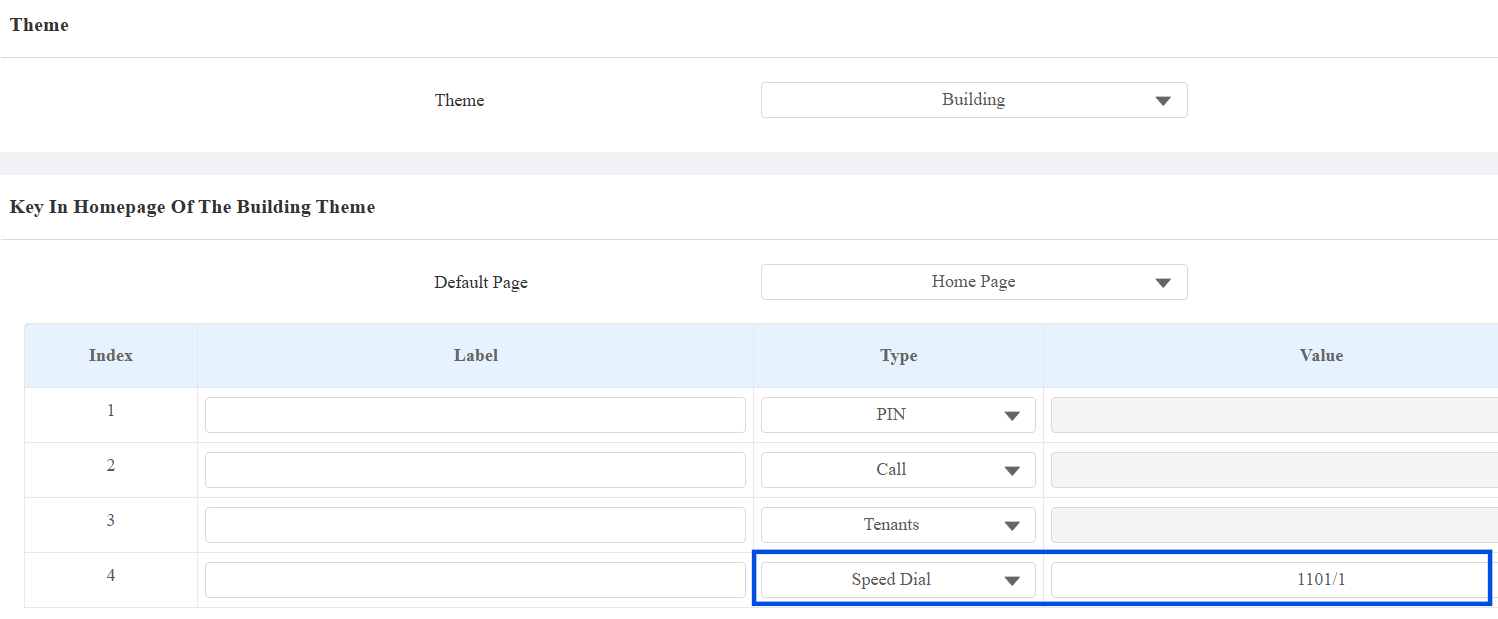
Take the Building theme as an example.
Go to Setting > Key/Display > Key In Homepage Of The Building Theme.
Set the desired tab’s Type to Speed Dial.
Enter the Speed Dial number in the Value field using the syntax described above.
After configuration, the configured Speed Dial button appears on the device homepage.
When users tap the button, the device places the SIP call using the specified SIP account.
E16/E18
For E16, the Speed Dial tab is supported in the Default, Speed Dial, and Custom UI themes.
For E18, the Speed Dial tab is supported in the Default and Speed Dial themes.
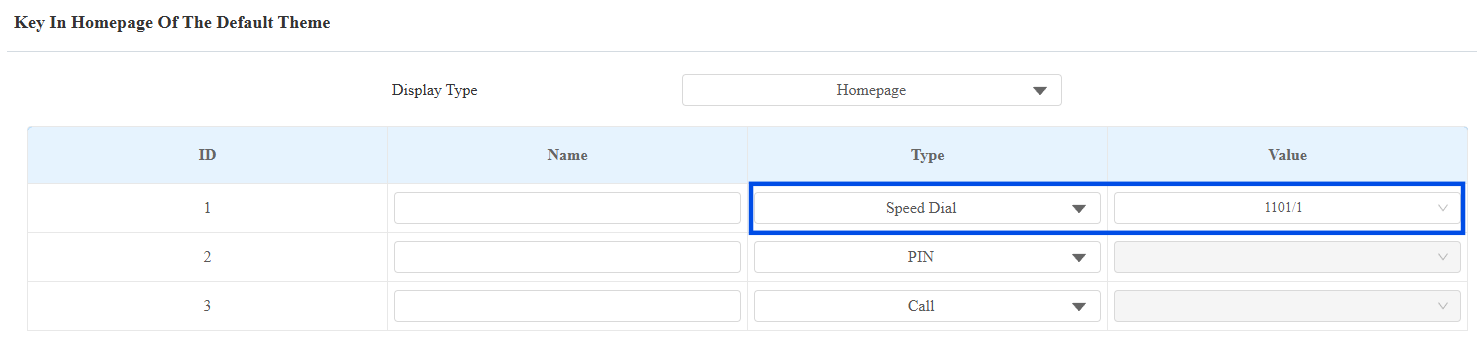
Take the Default theme as an example.
Go to Device > LCD > Key In Homepage Of The Default Theme.
Set the desired tab’s Type to Speed Dial.
Enter the Speed Dial number in the Value field using the syntax described above.
After configuration, the configured Speed Dial button appears on the device homepage.
When users tap the button, the device places the SIP call using the specified SIP account.
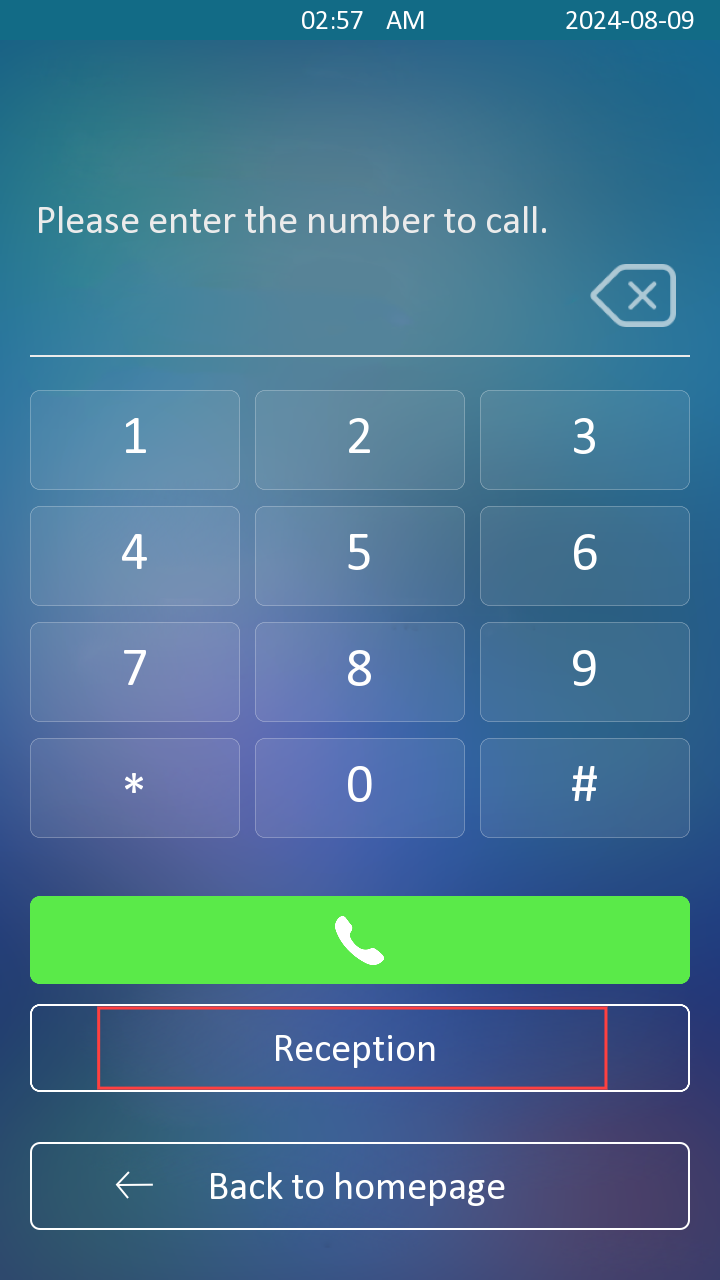
Reception Key Configuration
The same account selection rule also applies to the Reception Key displayed on the Dial page.
To set it up, go to Intercom > Basic > Key Setting.
Enter the number in the Number field.
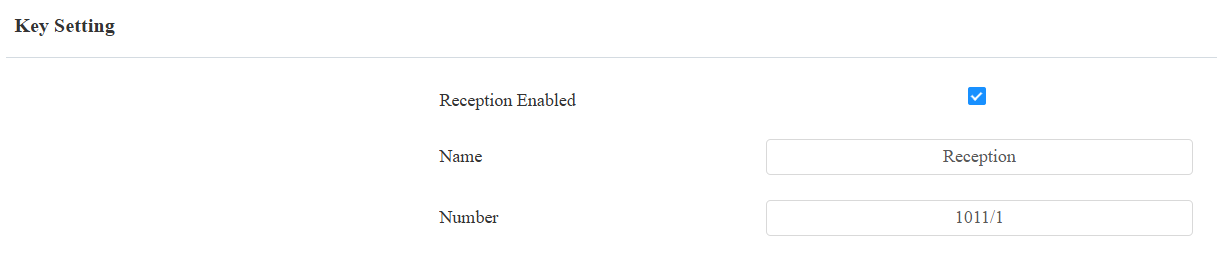
When users tap the Reception Key, the device calls the configured number using the specified SIP account.
Dial Type Logic
On E16/E18, if no account index is specified or an invalid index, such as 3, is entered, the device uses the Dial Type account selection logic.
Go to Intercom > Call Feature > Dial Type.
Select the desired mode: Auto, Account 1, or Account 2.
Auto indicates that the device will use the registered account to make SIP calls. If both are registered, Account 1 will be used.
