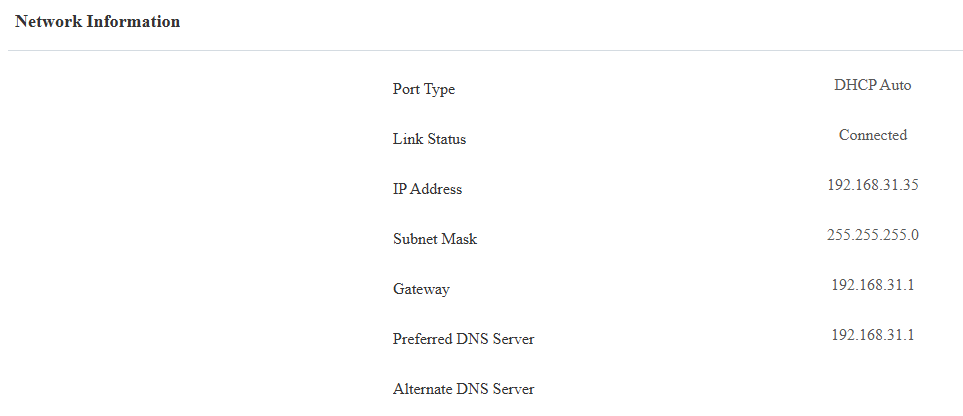
Network Status
Check the network status on the web Status > Info > Network Information interface.
Device Network Configuration
To ensure normal functioning, make sure that the device has its IP address set correctly or obtained automatically from the DHCP server.
To set it up, go to Network > Basic interface.
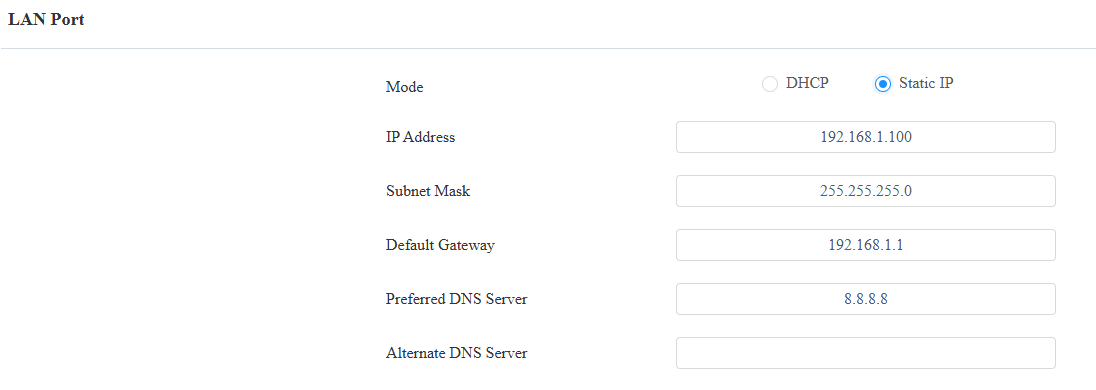
DHCP: DHCP mode is the default network connection. In this mode, the device is assigned by the DHCP server with an IP address, subnet mask, default gateway, and DNS server address automatically.
Static IP: In this mode, the IP address, subnet mask, default gateway, and DNS server address have to be manually configured according to the actual network environment.
IP Address: Set up the IP address when the static IP mode is selected. To access the device’s web settings, your computer should be on the same local network as the device.
Subnet Mask: A subnet mask tells your device which IP addresses are part of your local network and which ones are not. For example, if the subnet mask is 255.255.255.0, it means that devices with similar starting IPs (like 192.168.1.x) are in the same network.
Default Gateway: The gateway is like a bridge between your device and other networks, such as the internet. Usually, it’s the IP address of your router.
Preferred/Alternate DNS Server: Domain Name System(DNS) is the overall system or network that handles the translation of domain names (like www.example.com) into IP addresses (like 192.0.2.1), which computers use to identify each other on a network. The device connects to the alternate DNS server when the primary one is unavailable.
Wi-Fi Connection
The device supports connecting to the network via Wi-Fi. Set it up on the Network > Basic interface.
Connect to the desired Wi-Fi by clicking Connect and entering the password.
Refresh the Wi-Fi list by clicking Scan.
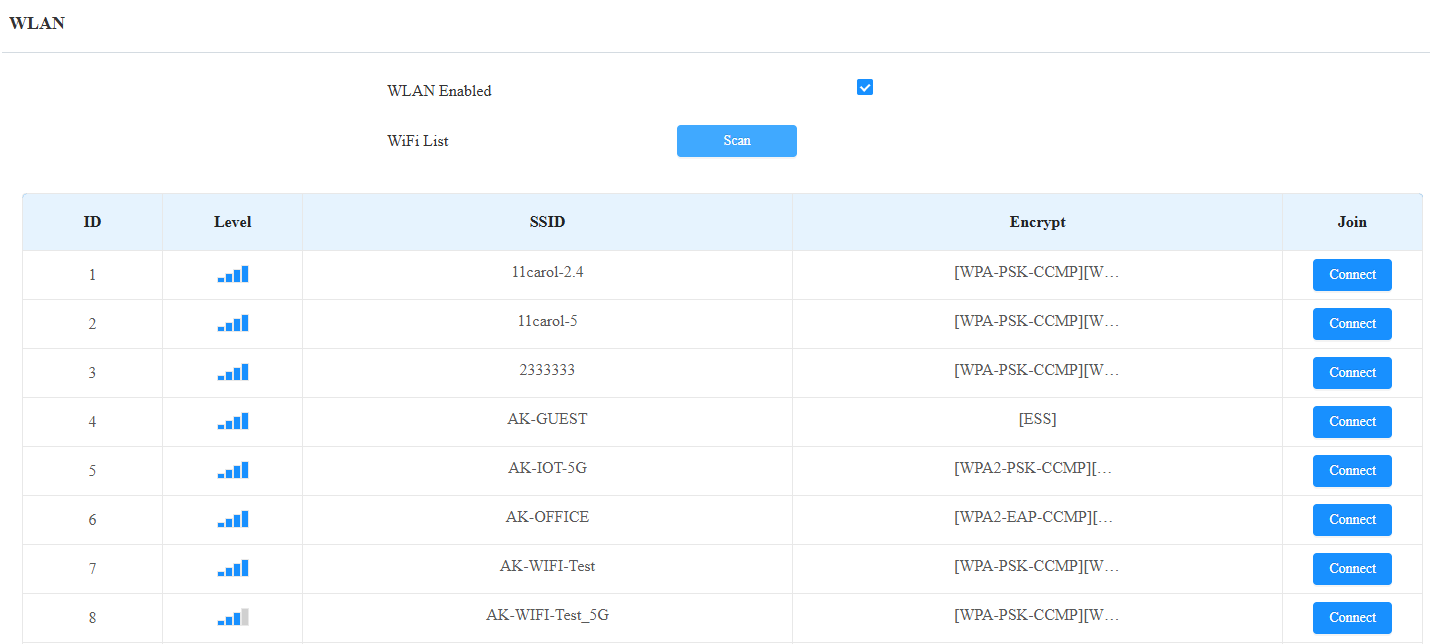
Level: Display the signal strength.
SSID: The Wi-Fi name.
Encrypt: Display the Wi-Fi encryption method.
LTE Wireless Connection
The LTE module enables cellular network connectivity for the device in areas where wired networks are unavailable, particularly beneficial for installations in older buildings.
The device supports the insertion of a SIM card for a 4G network connection. Please refer to the device’s quick guide for instructions on installing the SIM card.
Set this feature up on the Network > Basic interface.
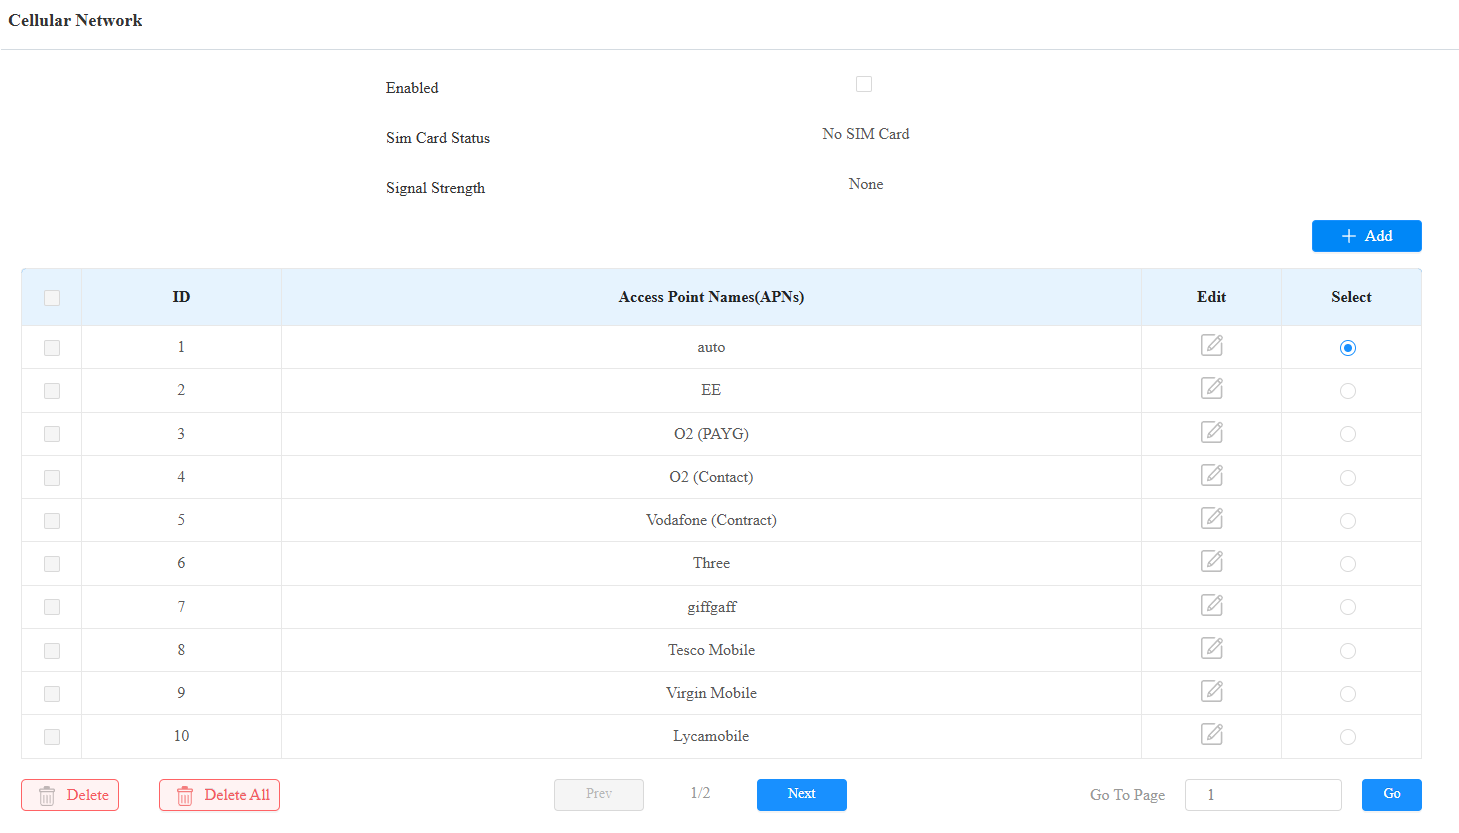
SIM Card Status: Display whether a SIM card is inserted.
Signal Strength: Indicate the network connection.
None: No SIM card inserted or the SIM card is not properly inserted, unable to detect signal.
Weak: The network signal is poor, typically when the signal strength is below -100 dBm.
Fair: The network signal is average, usually when the signal strength is between -90 and -100 dBm.
Good: The network signal is good, generally when the signal strength is between -70 and -90 dBm.
Excellent: The network signal is excellent, typically when the signal strength is between -50 and -70 dBm.
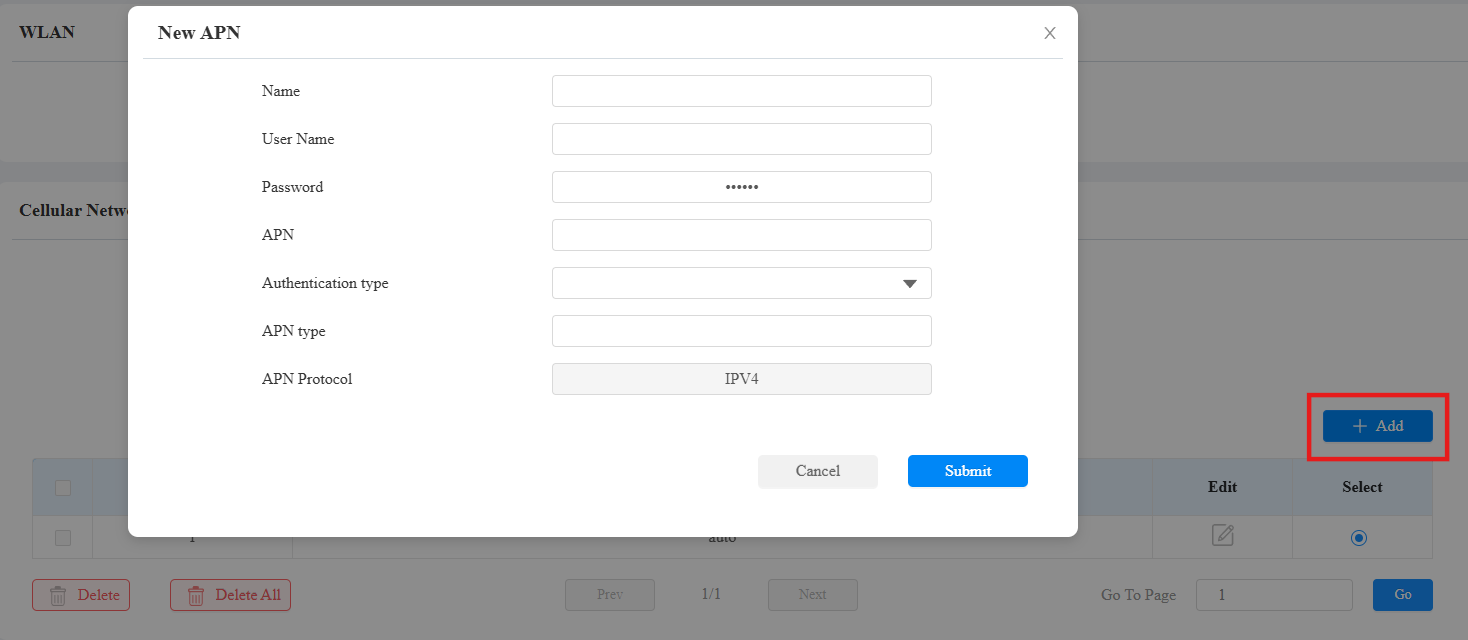
Access Point: Select the access point or click Add to add a new one.
Fill in the following information before clicking Submit. These can be found from the network provider of your SIM card.
SNMP
Simple Network Management Protocol(SNMP) is a protocol for managing IP network devices. It allows network administrators to monitor devices and receive alerts for attention-worthy conditions. SNMP provides variables describing system configuration, organized in hierarchies and described by Management Information Bases (MIBs).
Set it up on the Network > Advanced interface.

Port: Set a specific port for the data transmission from 1024-65535.
Trusted IP: Enter the third-party IP address.
TR069
TR-069 (Technical Report 069) provides the communication between Customer-Premises Equipment (CPE) and Auto-Configuration Servers (ACS). It includes both a safe auto configuration and the control of other CPE management functions within an integrated framework. For door phones, the administrators can manage all the devices on a common TR-069 Platform. IP phones can be easily and securely configured on the TR-069 platform to make mass deployment more efficient.
Set it up on the Network > Advanced interface.
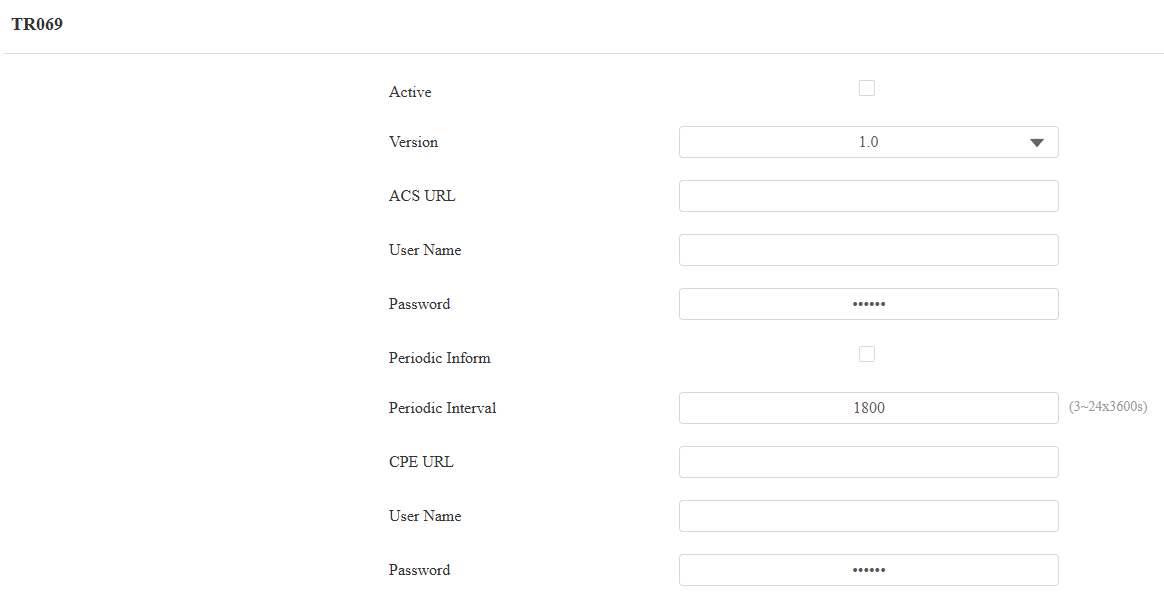
Version: Select the TR069 version.
ACS URL: Set the URL of the ACS server, for example, http://192.168.1.47:8080/openacs/acs.
User Name: Set the ACS server username for authentication.
Password: Set the ACS server password for authentication.
Periodic Inform: Allow the device to send requests to the ACS server for automatic configuration and update.
Periodic Interval: Set the time interval for the device to send the request to the ACS server for the automatic configuration and update.
CPE URL: Set the device URL, for example, http://192.168.1.48:8882/.
User Name: Set the device authentication username.
Password: Set the device authentication password.
Device Web HTTP Setting
This function manages device website access. The device supports two remote access methods: HTTP and HTTPS (encryption).
Set it up on the Network > Advanced interface.

HTTP/HTTPS Enabled: HTTP and HTTPS are enabled by default.
HTTP/HTTPS Port: Specify the web server port for accessing the device web interface via HTTP/HTTPS.