The indoor monitor has a built-in PBX server which allows the device to serve as an intercom monitor and a SIP PBX, so users do not bother to prepare an extra SIP PBX again. The PBX supports call forward, transfer, conference, ring group features, and so on. You can set it up on the device screen or web interface.
To set it up on the device, go to Advanced Settings.
PBX Configuration on the Device
You need to enable the PBX feature before you can create PBX numbers and manage the SIP Accounts and so on.
Enable PBX Service
In the PBX interface, tap  on the upper right corner to enable the PBX.
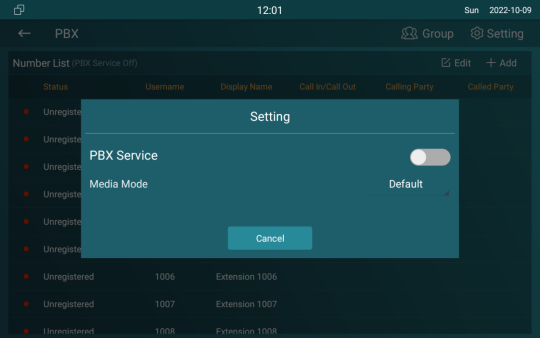
Parameter Set-up:
- Media mode: select Default if the intercom devices are deployed in the same LAN network. Select Bypass if the devices are deployed in the different LAN networks where PBX serves as a bridge or a media for the network data.
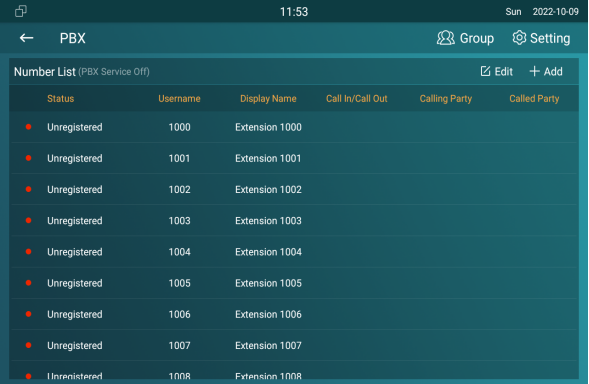
Manage PBX Accounts
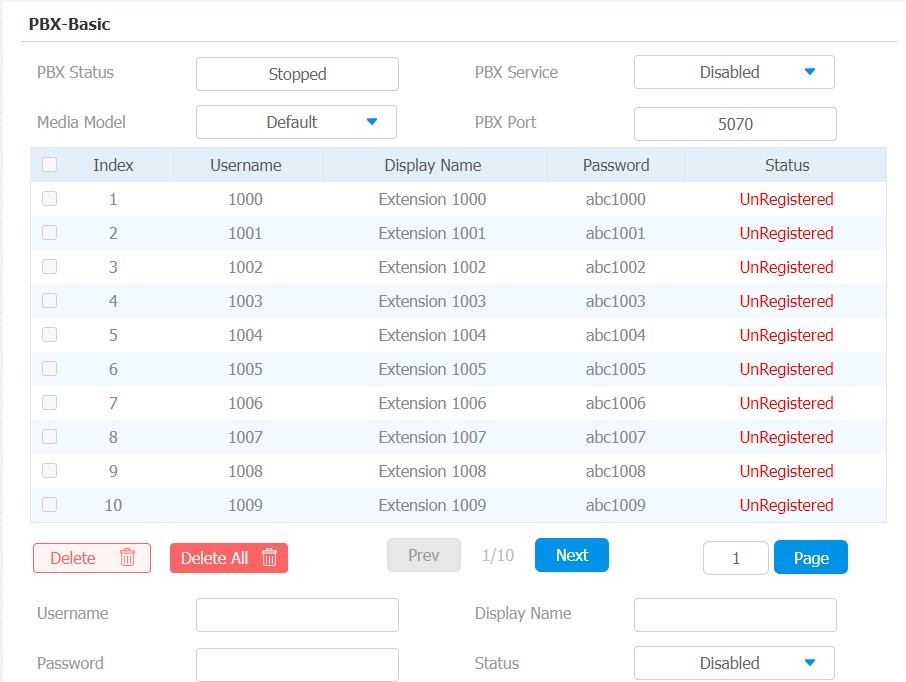
You can check the basic PBX information like PBX server and port and accounts status.
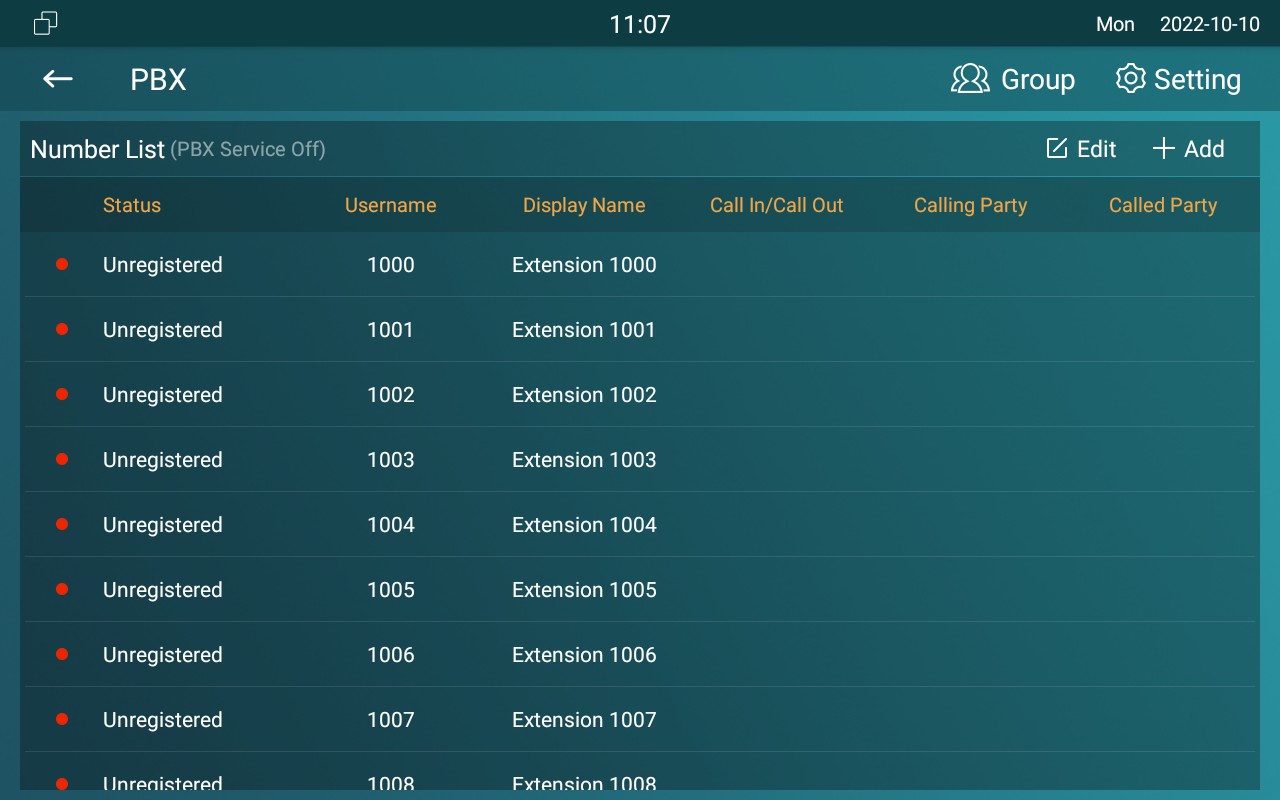

Parameter Set-up:
- Status: to show whether the account is registered or not.
- Username: to enter the extension number registered onto the SIP server
- DisplayName: enter the display name of this account, which will be shown on other devices when making calls.
- Password: enter the password of the corresponding users.
- Enabled Status: to activate the SIP account
- Call IN/Call Out: the calling status of this account
- Calling Party: the calling party number
- Caller Party: the caller party number.
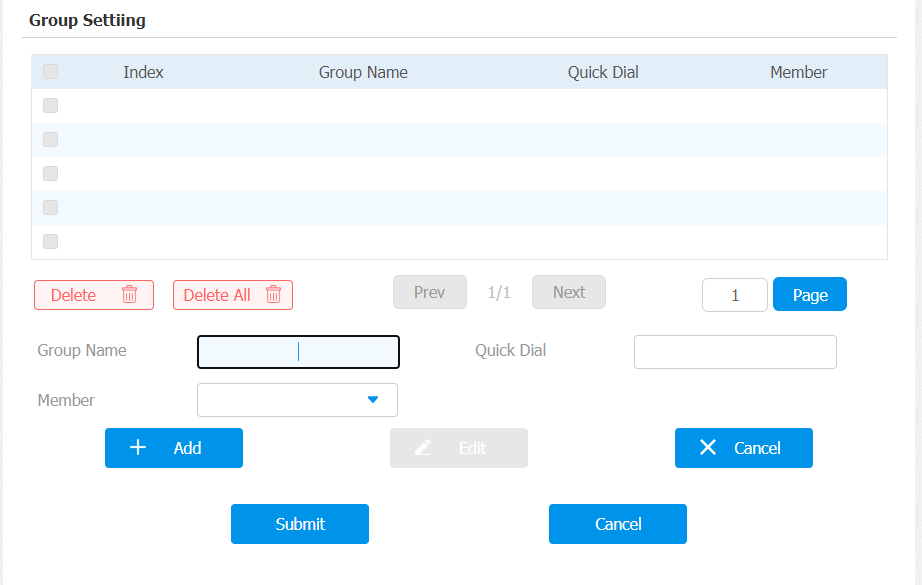
Manage PBX Groups
Click Group  on the right top corner to add a new ring group or edit the existing group. One number can be added to different ring groups. Once receiving an incoming call, the numbers in one group will ring up at the same time.

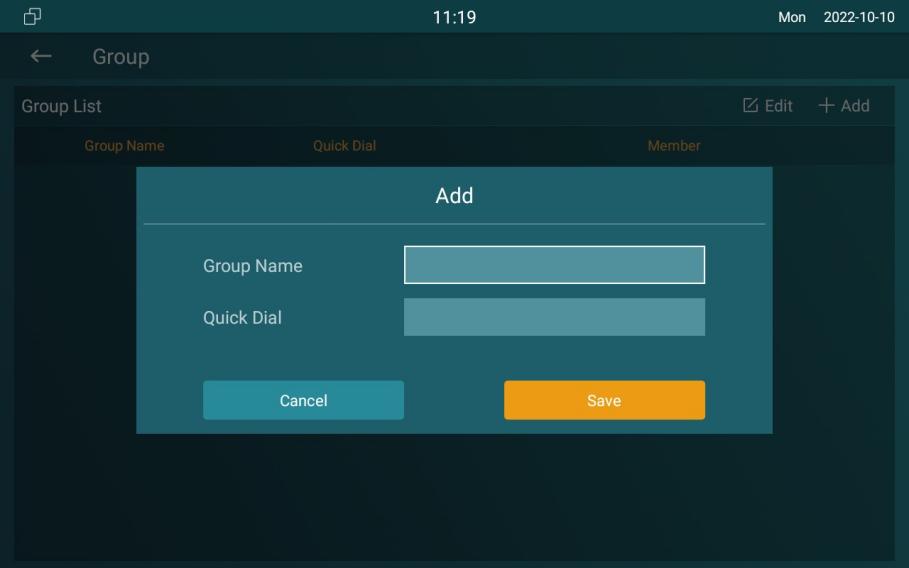
Parameter Set-up:
- Group Name: the name of a ring group.
- QuickDial: a number of this ring group.
PBX Configuration on the Web Interface
You can do the same configuration on web PBX > Basic and PBX > Ring Group interface.