Monitor and Image
Monitor Setting
You can add video streams using RTSP. If the Display in Call function is enabled, the video of the added monitor device will show up when it calls the indoor monitor.
To set it up, go to the Device > Monitor interface.

Monitor Display:
Multiple Windows: Display four video monitoring channels on the screen.
Single Window: Display only one video monitoring channel.
24/7 Monitor Mode: When enabled, the indoor monitor displays the monitoring screen for 6 hours, then plays a 10-second screensaver before resuming the monitoring stream. This feature ONLY applies to door phones added via local RTSP.
Note
If devices are deployed on SmartPlus Cloud, the video stream from door phones is limited to 3 minutes and is not controlled by the 24/7 Monitor Mode.
On the Device > Monitor > Door Phone interface, click +Add to add a monitor.


Device Number: The device's SIP/IP number for identification.
Device Name: The device name for identification.
RTSP Address: The RTSP address of the monitoring device. RTSP format: rtsp://Device IP address/live/ch00_0.
Username: The username of the monitoring device for authentication.
Password: The password of the monitoring device for authentication.
Display In Call: Enable it to display the monitoring video during a call.
Note
You can import and export the monitoring device settings via a template in .xml format.
You can also set it up on the device Settings > Advance > Monitor screen. Tap +New to add the monitor device.
When the monitoring device is an Akuvox door phone and its RTSP username and password are not changed(admin by default), you can directly scan and add the door phone on the indoor monitor’s Monitor screen. If the username and password are changed, make sure they are consistent between the devices.


View Monitoring Streams
After adding the monitored device’s RTSP URL, tap Monitor on the home screen and select the desired channel to view the stream.
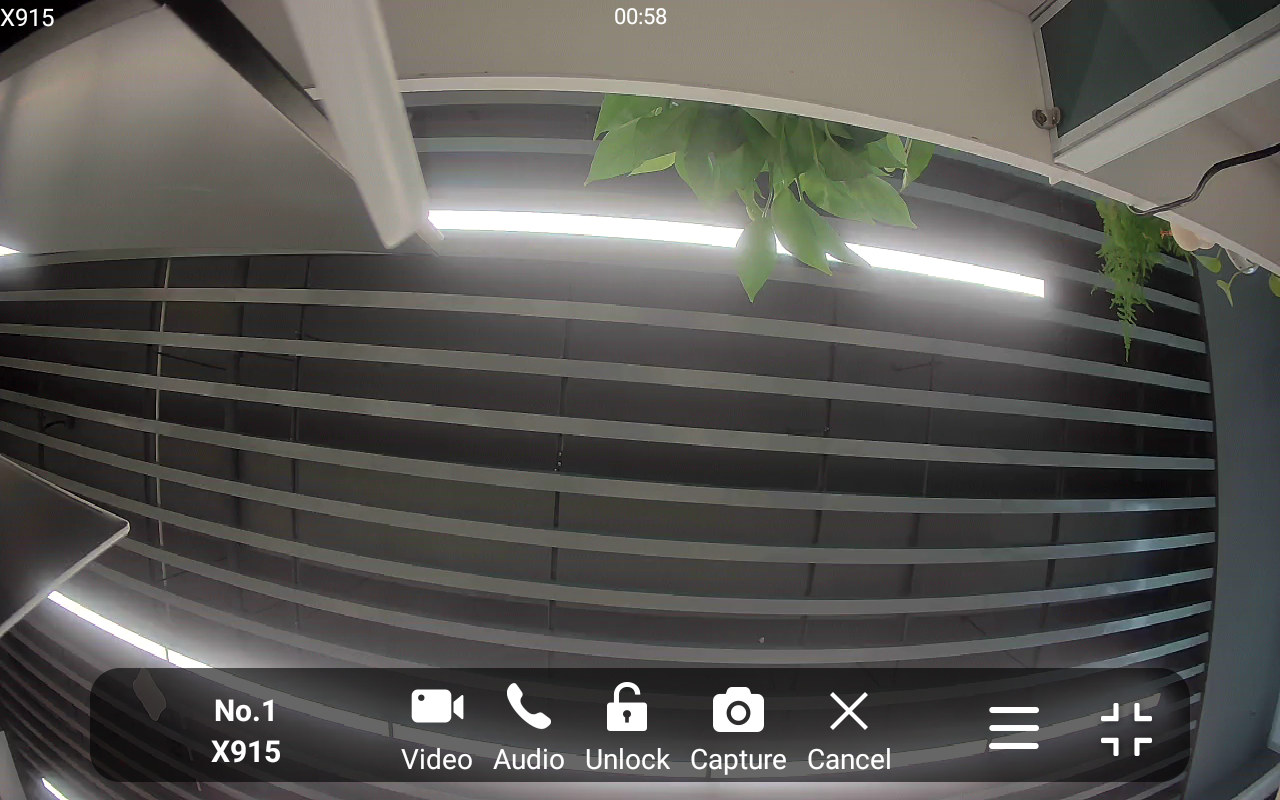
Video: Tap to make a video call to the monitored door phone.
Audio: Tap to make an audio call to the monitored door phone.
Unlock: Tap to open the door.
Capture: Tap to take a screenshot.
Cancel: Tap to exit the monitoring.
 : Tap to display the monitor list.
Note
During monitoring, calls can only be made to Akuvox door phones, neither access control terminals nor third-party devices.
RTSP Authentication
With RTSP authentication, users can monitor the indoor monitor via RTSP audio stream. This feature can be applied to, for example, listen to the baby in the baby’s room for safety.
To set it up, go to Settings > Basic interface.

Authorization Type: There are three options, Basic, Digest, and None. None will allow all authorization types for the RTSP audio stream.
Basic: The username and password are joined in the form “username: password”, followed by the Base64 encoding before being sent to the server. The server then decrypts the string to retrieve the username and password for verification.
Digest: Use hashing instead of the easily reversible Base64 encoding. A token is used for verification.
Username: Set the username for the authentication.
Password: Set the password for the authentication.
Alarm and Arming Configuration
The Arming function is designed to enhance home security by offering three modes with custom zone settings for connected sensors. When armed, the device will sound a siren and notify specific people if a sensor detects something unusual.
Set up Location-based Alarm Sensors
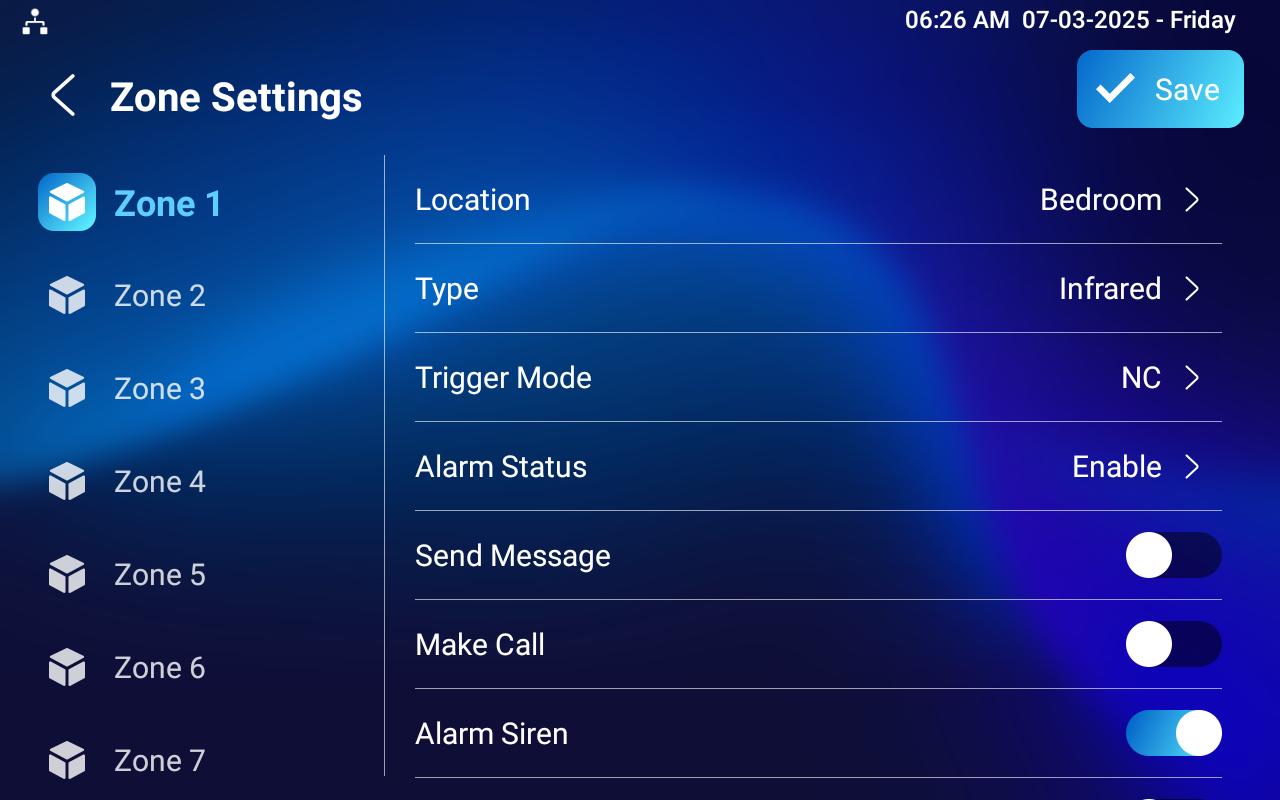
To set up a location-based alarm sensor, go to the web Arming > Zone Setting > Zone Setting interface.

Location: Indicate where the alarm sensor is installed. There are ten location types: Bedroom, Gate, Door, Guest room, Hall, Window, Balcony, Kitchen, Study, and Bathroom.
Zone Type: The alarm sensor types.
Trigger Mode: Set sensor trigger mode between NC and NO.
Status: Set the alarm sensor status among three options: Enabled, Disabled, and 24H.
Enabled: The alarm needs to be set again after disarming.
Disabled: Disarm the alarm.
24H: The alarm sensor will stay enabled for 24 hours without setting up the alarm manually again after the alarm is disarmed.
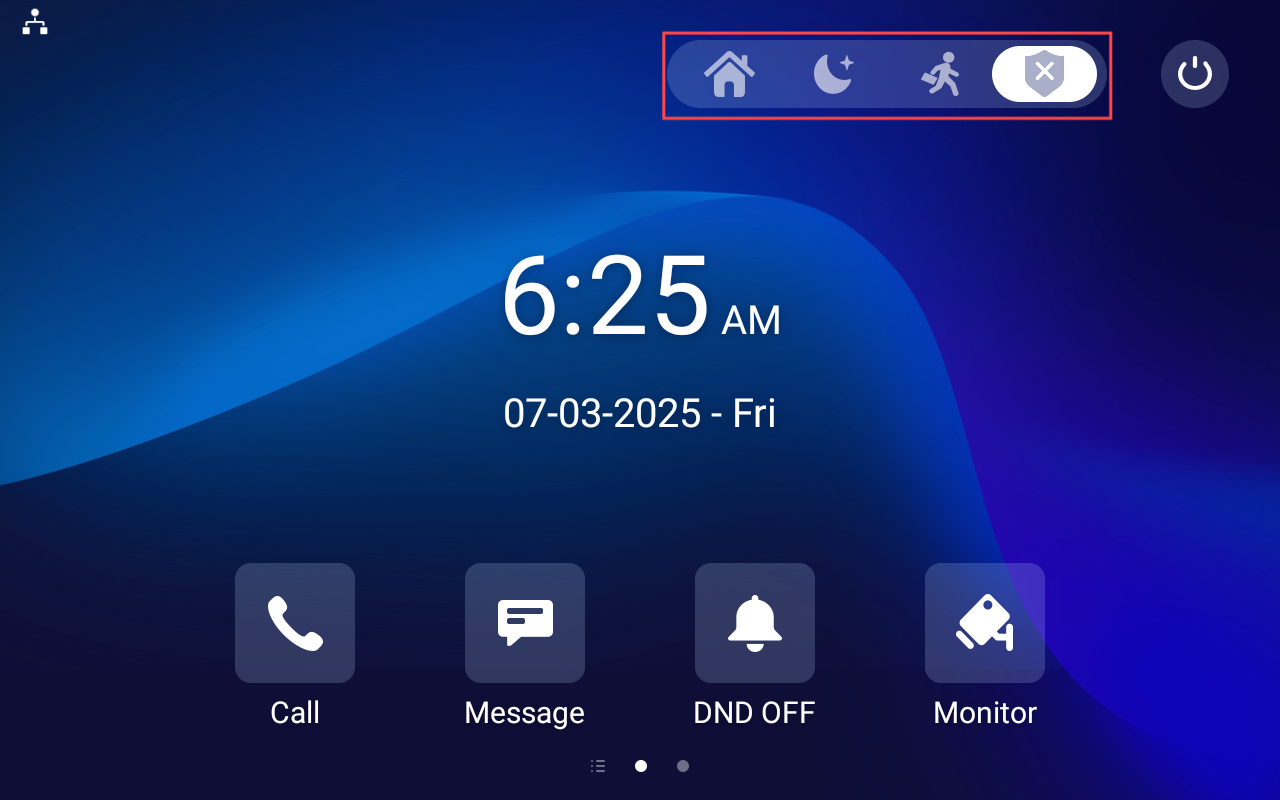
If any of the zones is enabled or set to 24H, the alarm-related icons will be displayed on the home screen for quick access.
You can also set up alarm sensors on the Settings > Advance > Arming screen.
Select an Arming Mode
To select an arming mode, go to the Arming > Arming Mode interface.

After displaying the Arming tab on the device screen, users can switch arming mode on the Arming screen.
Set the arming tab display on the Device > Display Setting interface.
.png "screenshots (14).png")
Set up Alarm Sensors in Different Arming Modes
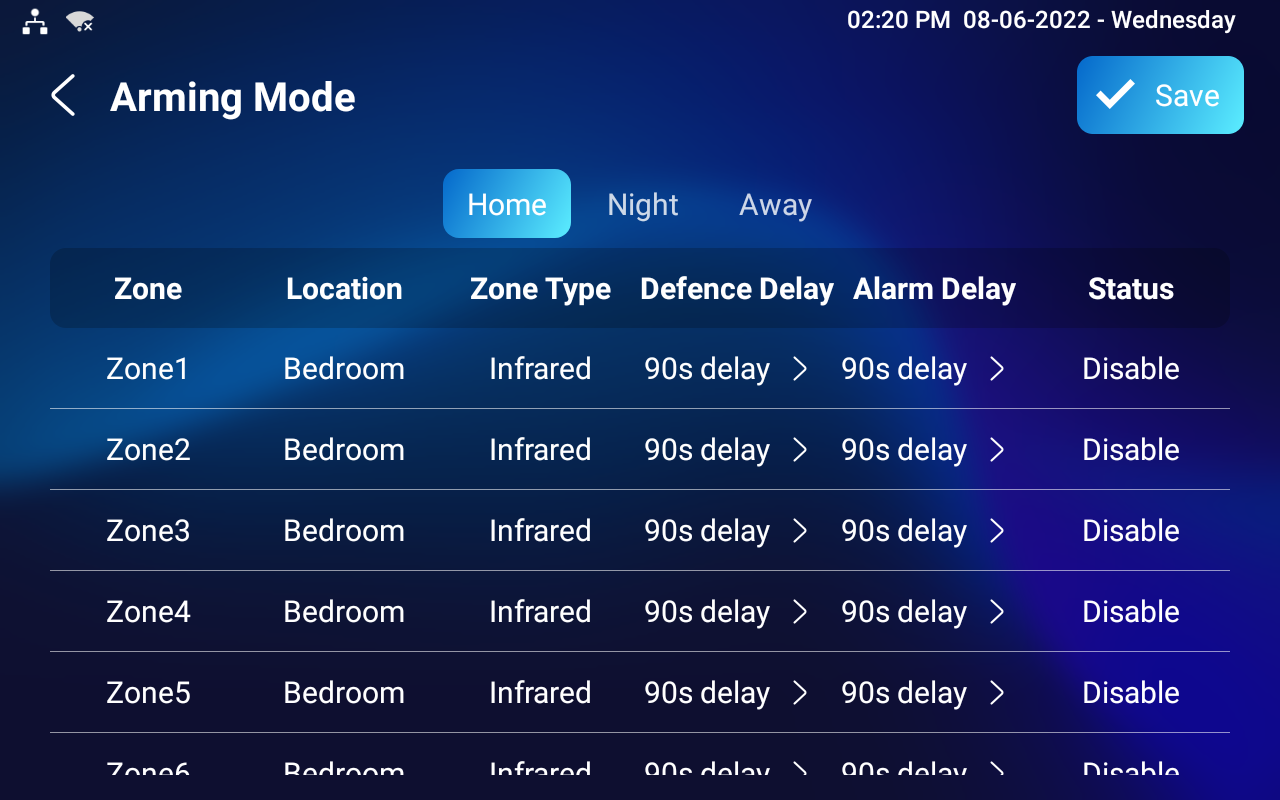
To configure the alarm in different modes, go to the Arming > Arming Mode interface.
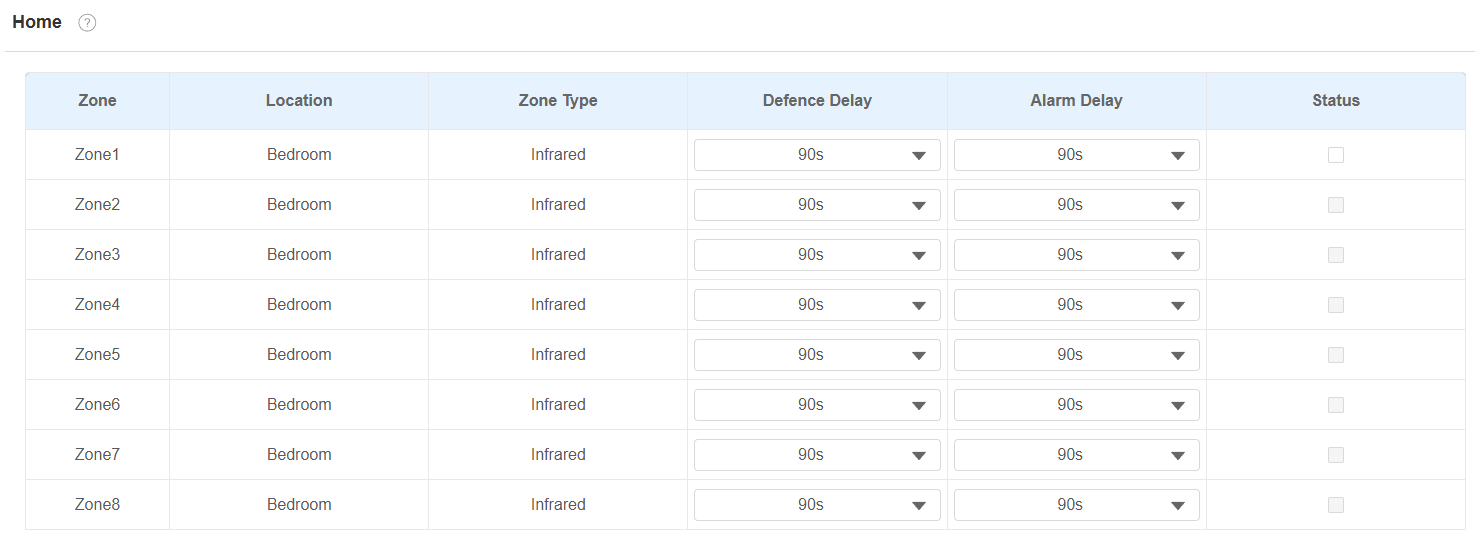
Location: Display which location the detection device is in, including Bedroom, Guest room, Hall, Window, Balcony, Kitchen, Study, and Bathroom.
Zone Type: Display the alarm sensor type.
Defence Delay: It means when users change the arming mode from other modes, there will be 90 seconds delay time to get activated.
Alarm Delay: It means when the sensor is triggered, there will be 90 seconds delay time to announce the notification.
Status: Enable or disable Arming Mode on the corresponding zone.
You can also set it up on the Arming > Arming Mode screen.
Set up the Disarm Codes
To configure the arming and disarm codes, go to the Arming > Disarm Code interface.
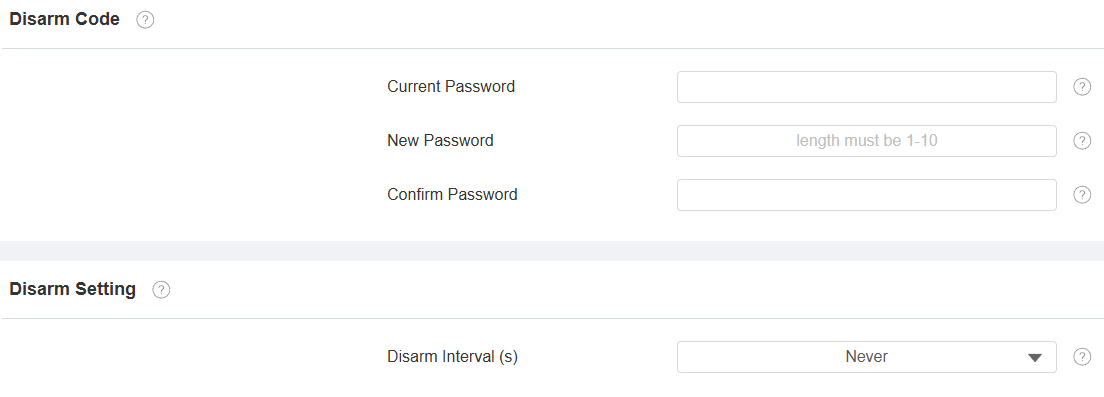
Disarm Interval(Sec): Set the alarm sound duration after the alarm is triggered.
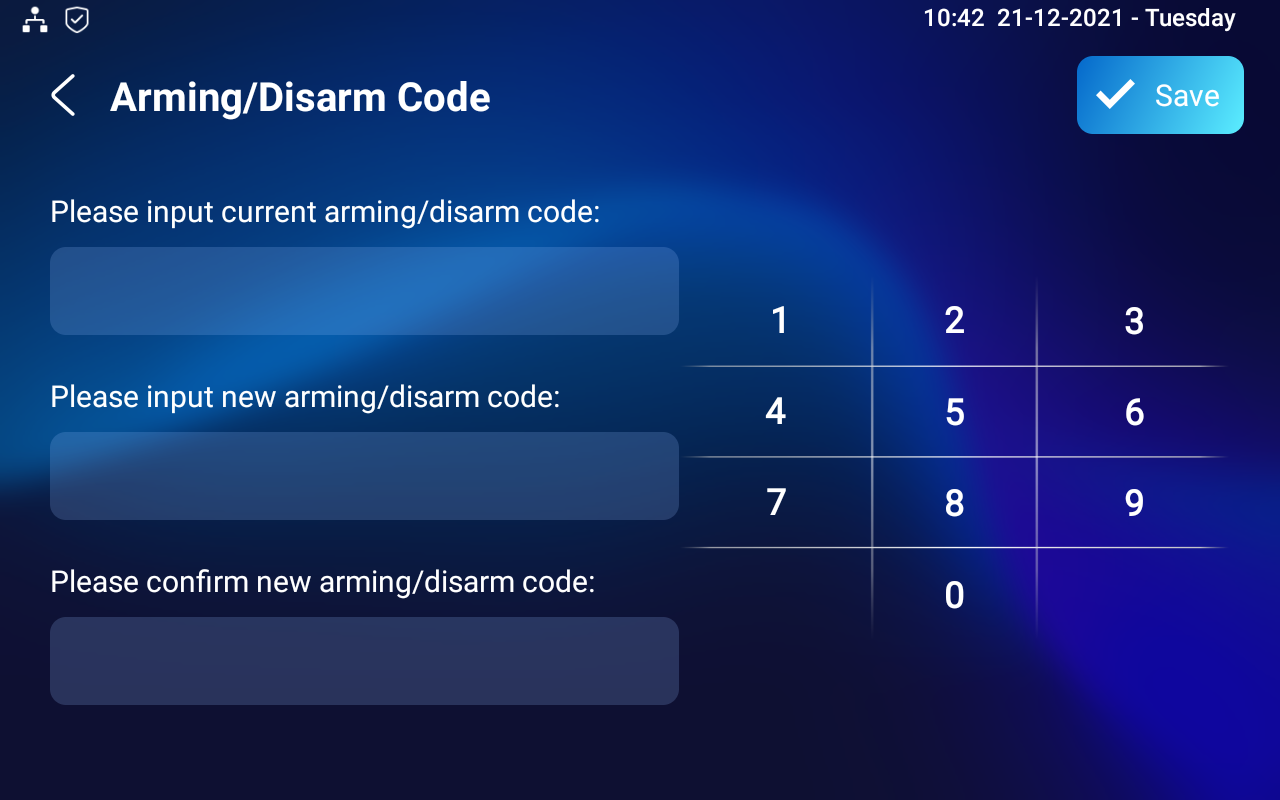
You can also set it up on the Arming > Arming/Disarm Code screen.
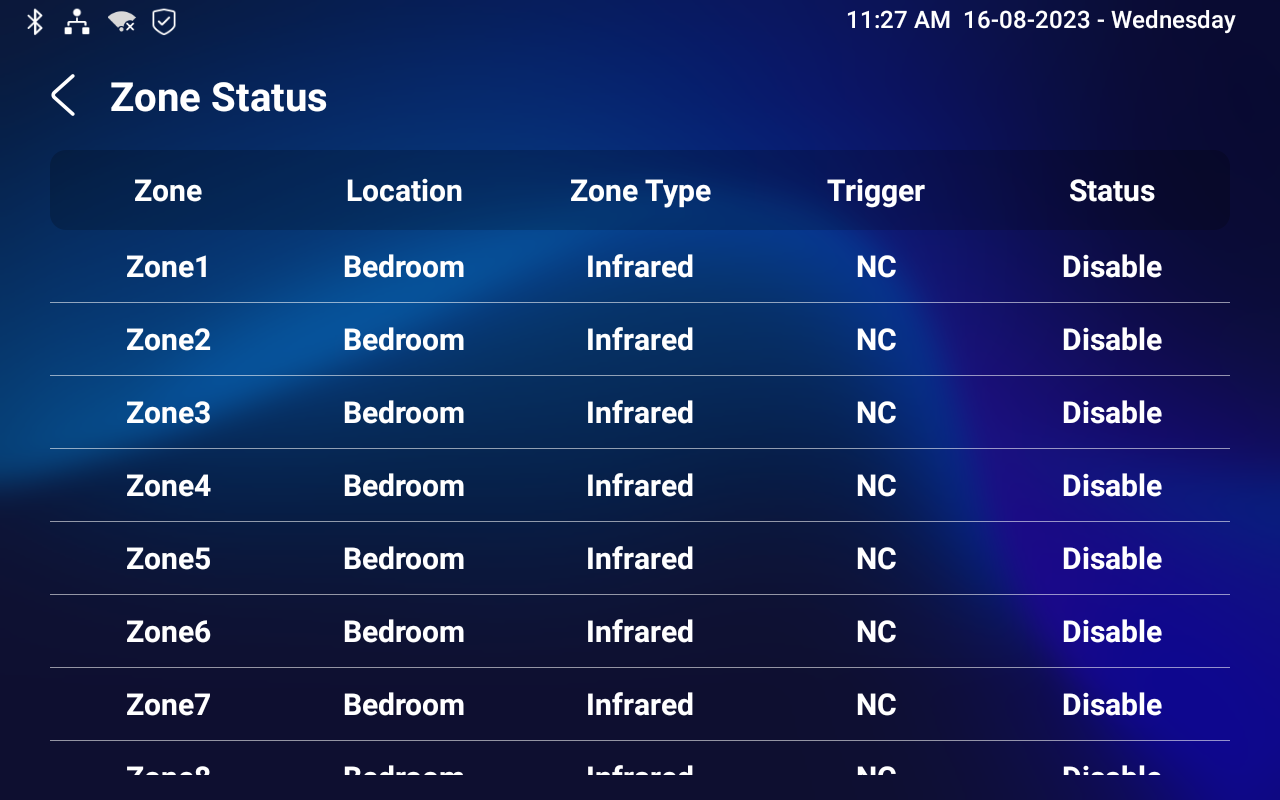
Check Zone Status
Check the zone status on the Arming > Zone Status screen.
Check Alarm Logs
To check the alarm log, go to the Arming > Alarm Log screen.

Configure Alarm Text
Once the alarm sensor is configured, you can access the device's web interface to personalize the alert content displayed on the screen when an alarm is triggered.
To set it up, navigate to the web Arming > Zone Setting > Customized Alarm interface.

Alarm Content: The alarm text will be displayed on the device screen when an arming is triggered.
Configure Alarm Ringtone
You can upload a customized alarm ringtone by choosing the local audio file on the web Device > Audio > Alarm Ringtone Upload interface.

Note
The file format of customized ringtone should be in WAV or MP3 format.
No limitation to the file size.
Alarm Action Configuration
When the alarm sensor is triggered, it can start different actions, such as HTTP commands, SIP messages, and calls.
To select and set up actions, go to the web Arming > Alarm Action interface.
Alarm Action via HTTP Command
To set up the HTTP Command action, you can click Enable in the Send HTTP field to enable the actions for the alarm sensor installed in different locations. Then enter the HTTP command provided by the manufacturer of the device on which the action is to be carried out.

Zone Type: Display the zone type set on the Arming > Zone Setting interface.
HTTP Command: Enter the HTTP command provided by the third-party device manufacturer.
Send HTTP Enabled: Enable it if you want the action to be implemented on a designated third-party device.
Send Delay: This option is only available when the Zone Type is Motion and Send HTTP is enabled.
It is disabled by default, indicating that the HTTP command will be carried out immediately when the sensor is triggered.
When enabled, the HTTP command will be sent in a delay time that is the same as the Alarm Delay set on the Arming > Arming Mode interface.
Alarm Action via SIP Message
The device can send messages to a designated device when the alarm is triggered. To set this up, enter a SIP number or IP address along with the message content.

SIP Account: The SIP number to receive the message.
SIP Message: The message sent to the designated SIP number when the alarm is triggered.
Alarm Action via SIP Call
The device can send messages to a designated device when the alarm is triggered. To set this up, enter a SIP number or IP address along with the message content.

Call Number: The SIP number or IP number to receive the calls when the alarm is triggered.
Make Call Enable: Enable it so that a call will be made to the designated SIP or IP number when the alarm is triggered.
Alarm Siren: Enable it to trigger an alarm siren on the indoor monitor when the alarm is triggered.
Alarm-Triggered Local Relay
You can select the local relay to be triggered by the alarm.

Zone Type: Display the zone type set on the Arming > Zone Setting interface.
Local Relay 1/2: Enable it if you want the local relay to be triggered with the sensor.
Open Delay: This option is only available when the Zone Type is Motion and Local Relay 1/2 is enabled.
It is disabled by default, indicating that the relay will be opened immediately when the sensor is triggered.
When enabled, the relay will be opened in a delay time that is the same as the Alarm Delay set on the Arming > Arming Mode interface.
Screen Unlock Setting
To prevent unauthorized access to the device when it is not being used, enable the Screen Lock function. This feature automatically locks the device after a period of inactivity, requiring a password to unlock.
The screen unlock feature can be enabled directly on the device Settings > Display screen.

Screen Unlock by PIN code
To unlock the screen, users need to enter the preset PIN code.
Navigate to Settings > Advance Settings > Protect Code screen and select Settings Code to change the password.

Note
The default unlock PIN is 123456.
Voice Encryption
Secure Real-time Transport Protocol (SRTP) is a protocol derived from the Real-time Transport Protocol (RTP). It enhances the security of data transmission by providing encryption, message authentication, integrity assurance, and replay protection.
To set it up, go to the Account > Advanced > Encryption interface.

Voice Encryption:
Disabled: The call will not be encrypted.
SRTP(Compulsory): All audio signals(technically speaking it is RTP streams) will be encrypted to improve security.
SRTP(Optional): Encrypt the voice from the caller. If the caller also enables SRTP, the voice signals will also be encrypted.
ZRTP(Optional): The protocol that the two parties use to negotiate the SRTP session key.
Remote Control
The remote control function allows a specific server to send HTTP commands or requests to the indoor monitor for actions like unlocking a local relay.
To set it up, navigate to the web Device > Relay > Remote Control interface.

Allowed Access IP List: Set up the server IP address that can be allowed to send the HTTP commands to the indoor monitor.
Location
With users’ permission, Location service uses information from cellular, Wi-Fi, Global Positioning System (GPS), and Bluetooth to determine the device’s location. Users can turn off this service or change its settings anytime.
To set it up, navigate to the web Security > Advanced interface.

Disabled: Not allow any app to find the device location.
Only Device: The device location can be determined using GPS.
High Accuracy: The device location can be determined via WAN, Bluetooth, or cellular networks.
Web Interface Automatic Log-out
You can set up the web interface's automatic log-out timing, requiring re-login by entering the user name and the passwords for security purposes or for the convenience of operation.
To set it up, go to the web Security > Basic > Session Time Out interface.

High Security Mode
High security mode is designed to enhance the security. It employs encryption across various facets, including the communication process, door opening commands, password storage methods, and more.
To set it up, go to the web Security > Basic > High Security Mode interface.
Important Notes
1. The High Security mode is off by default when you upgrade the device from a version without the mode to one with it. But if you reset the device to its factory settings, the mode is on by default.
2. This mode makes the old version tools incompatible. You need to upgrade them to the following versions or higher to use them.
PC Manager: 1.2.0.0
IP Scanner: 2.2.0.0
Upgrade Tool: 4.1.0.0
SDMC: 6.0.0.34
3. The supported HTTP format for relay triggering varies depending on whether high secure mode is enabled or disabled.
If the mode is on, the device only accepts the new HTTP formats below for door opening.
http://username:password@deviceIP/fcgi/OpenDoor?action=OpenDoor&DoorNum=1
http://deviceIP/fcgi/OpenDoor?action=OpenDoor&DoorNum=1
If the mode is off, the device can use both the new formats above and the old format below:
http://deviceIP/fcgi/do?action=OpenDoor&UserName=username&Password=password&DoorNum=1
4. It is not allowed to import/export configuration files in tgz. format between a device with the high security mode and another one without it. For assistance with file transfer, please contact Akuvox technical support.