This guide applies to version 3.4.3 of akubela Cloud.
The akubela Cloud enables the creation of community projects featuring both intercom and smart home devices.
Before Getting Started
NOTE:
Projects on akubela and SmartPlus clouds are bidirectionally synced(SmartPlus projects must have their Home Automation feature enabled), including their creation, changes, deletions, and other modifications.
To enable the Home Automation feature for a project: Log in to SmartPlus, go to Sites > Community > [your desired project] >
> Advanced Info, then toggle akubela Smart Home Enabled to On.
For detailed instructions on creating projects on the SmartPlus Cloud, refer here.
If you already have a SmartPlus project with its Home Automation function enabled, and need to configure smart home settings, start from Step 4 of this guide.
To make the creation process as smooth as possible, have the following items or information available.
Your installer account with home automation permission enabled.
Have no account or no home automation permission? See the first note in Further Helpful Notes.
Resident’s home information, including the home center device’s MAC address, house layout, devices to be installed, floor number, door number, and address. Make sure all the information is correct and accurate.
(Optional) End user’s full name and mail address for the administrator account registration. Make sure all the information is correct.
TIP:
Administrator account can be added on the akubela Cloud or SmartPlus after the installation, or created by users.
A computer connecting to the Internet.
Create a Project
Step 1 Log into the Cloud
Log in to the Cloud website using your installer account. Refer to the login portals below corresponding to your region:
Click on the akubela image on the right.
Step 2 Create a project
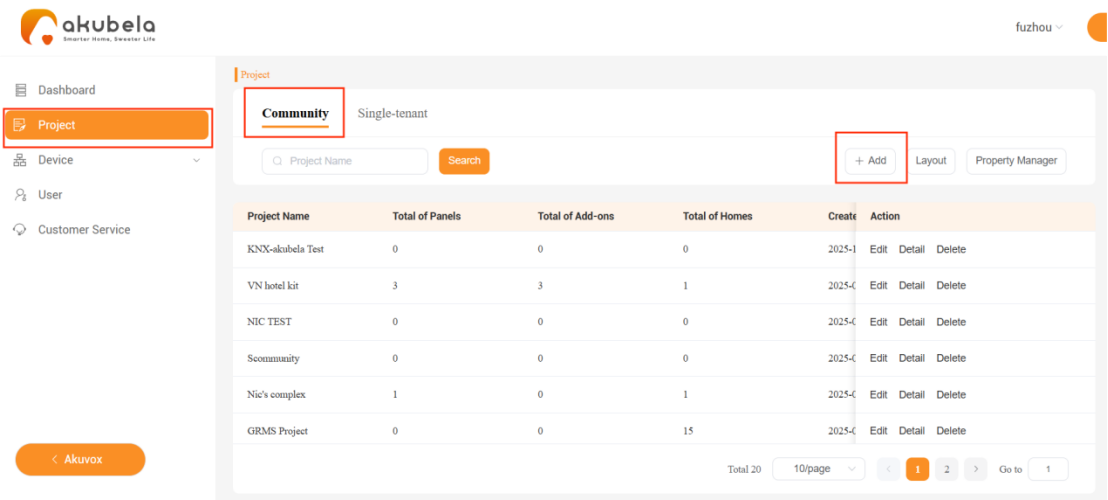
Select Project > Community > Add.
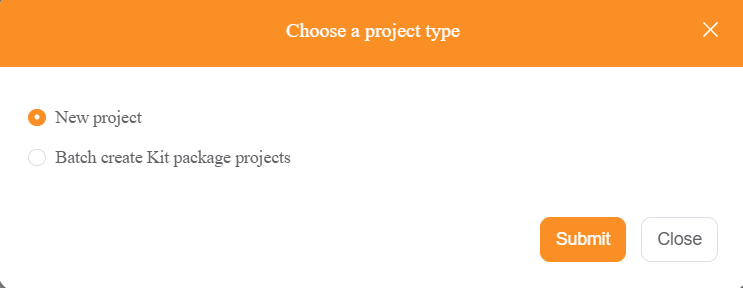
Select New project in the pop-up window.
Enter the project details. Make sure the address is accurate so that devices can obtain precise weather data for the specified city.

Enter the project name.
Name the home.
Choose the correct time zone to ensure panels display the accurate local time.
Enter a detailed and accurate address to enable precise weather data.
Set the access permissions.
NOTE:
This setting cannot be changed after the project is created.
Public Area + Private Area: Access credentials created by property managers (PMs) can unlock both public and private devices.
Only Public Area: Access credentials created by PMs can unlock only public devices.
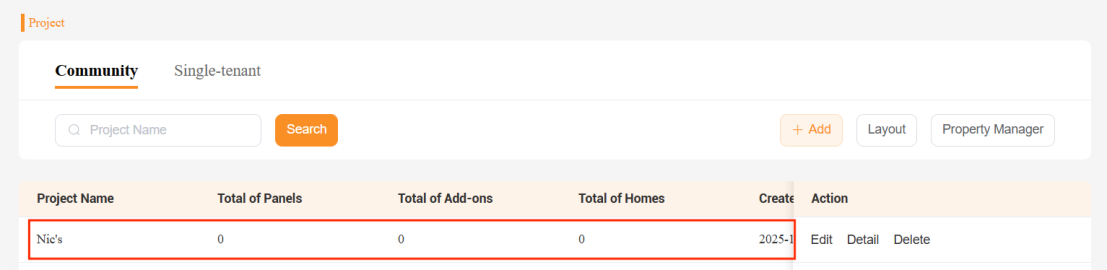
Click Submit. The newly-created project will be displayed in the project list.
Step 3 Add homes to the project
In this step, you can add homes to the projects either individually or in batches, and include intercom devices for buildings and public areas.
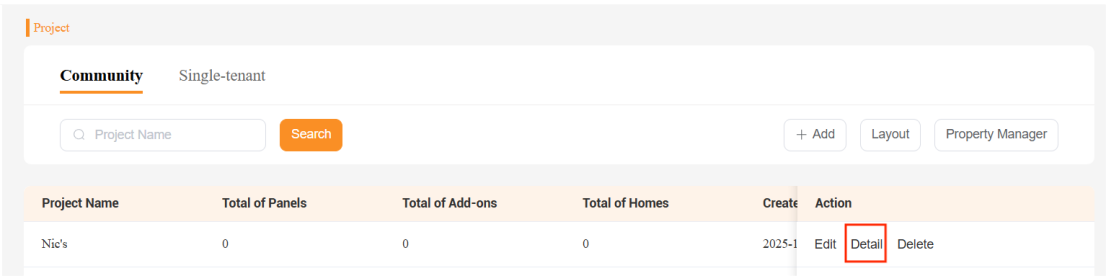
On the Project screen, click the Detail button of the project.
Click
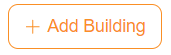 and name the building.
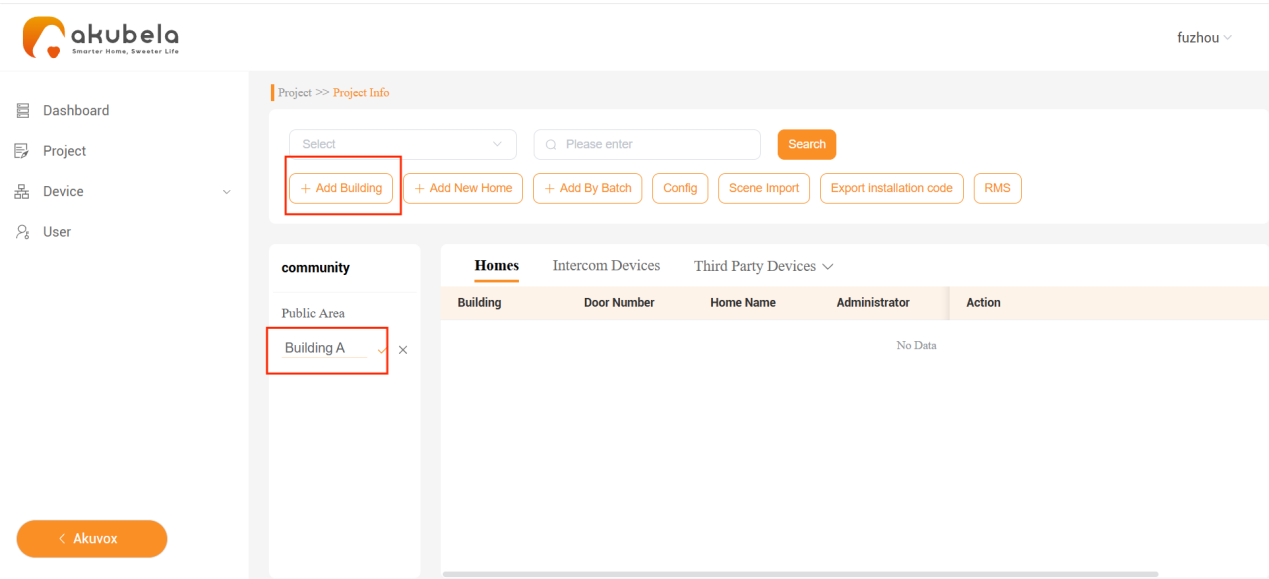
Select the building and add homes. You can either add them one by one, or create in batch.
To add homes individually, click
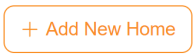 . Fill in the necessary information based on your preferred installation mode for the device's initial setup.
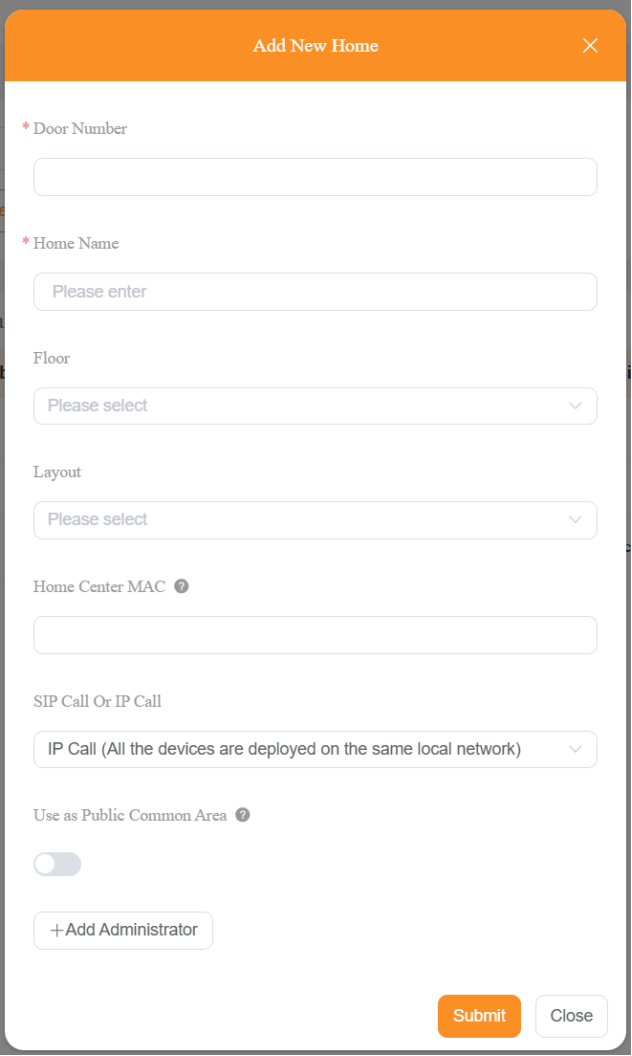
Enter the room number.
Name the home.
Enter the floor number.
NOTE:
For hotel or rental projects, you must set the room’s floor number to enable related configuration in the GRMS platform.
(Optional) Select or customize a layout to match the house. Follow Step 4 for the creation guidance.
For Local Installation: Not necessary.
For Cloud Installation: Setting the layout is recommended.
(Optional) Fill in home center device’s MAC address.
For Local Installation: Required for subsequent automatic cloud connection.
For Cloud Installation: Not necessary.
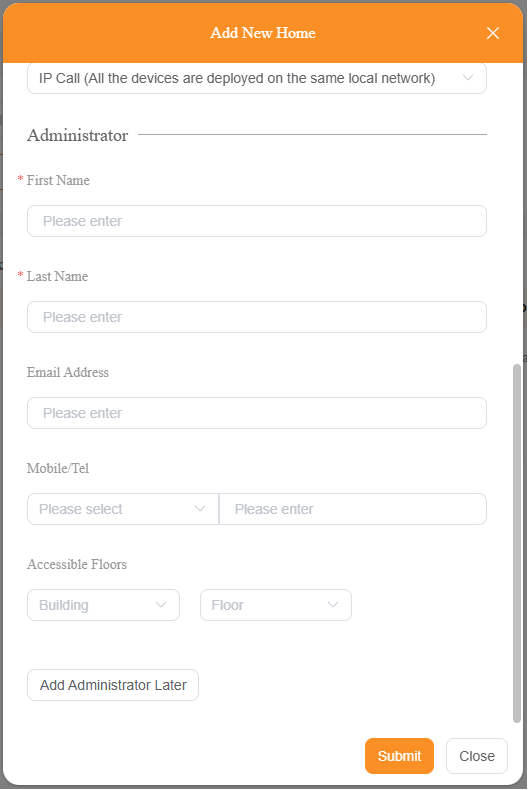
(Optional) Add the family’s administrator account.
Choose the call method between HyPanel devices and door phones:
SIP Call: Use this when HyPanel devices and door phones are on different networks.
IP Call: Use this when both devices are on the same local network.
(Optional) Enable or disable Use as Public Common Area to activate emergency alarm features when HyPanel Elite 7 (PG42) serves as the home center. After enabling, security alarm settings must be configured (see related settings).
NOTE:
This feature cannot be enabled after the room is created.
Once enabled, it cannot be disabled.
It is currently supported only on HyPanel Elite 7 (PG42) running firmware 42.1.38.26 or later when acting as the home center.
(Optional) Add the family’s administrator account.
TIP:
The administrator account can be changed or deleted after it has been added.
To add homes in batch, click
 .
.(1) Click Download The Template to download an Excel format template.
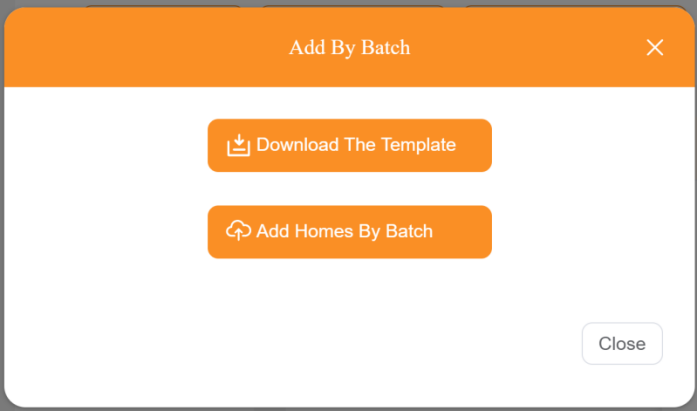
(2) Fill in the information. Fields with an asterisk* are required. Save the file once finished.

(3) Click Add Homes By Batch to upload the template file.
(Optional) Add public intercom devices.
NOTE:
Before adding a device, make sure the door phone’s MAC address has been added to the distributor’s MAC library on the SmartPlus Cloud.
TIP:
To add intercom devices for individual homes, please see Step 4 - Add door phones.
(1) Choose where to add the intercom device:
In common areas: Click Public Area >
 .
.
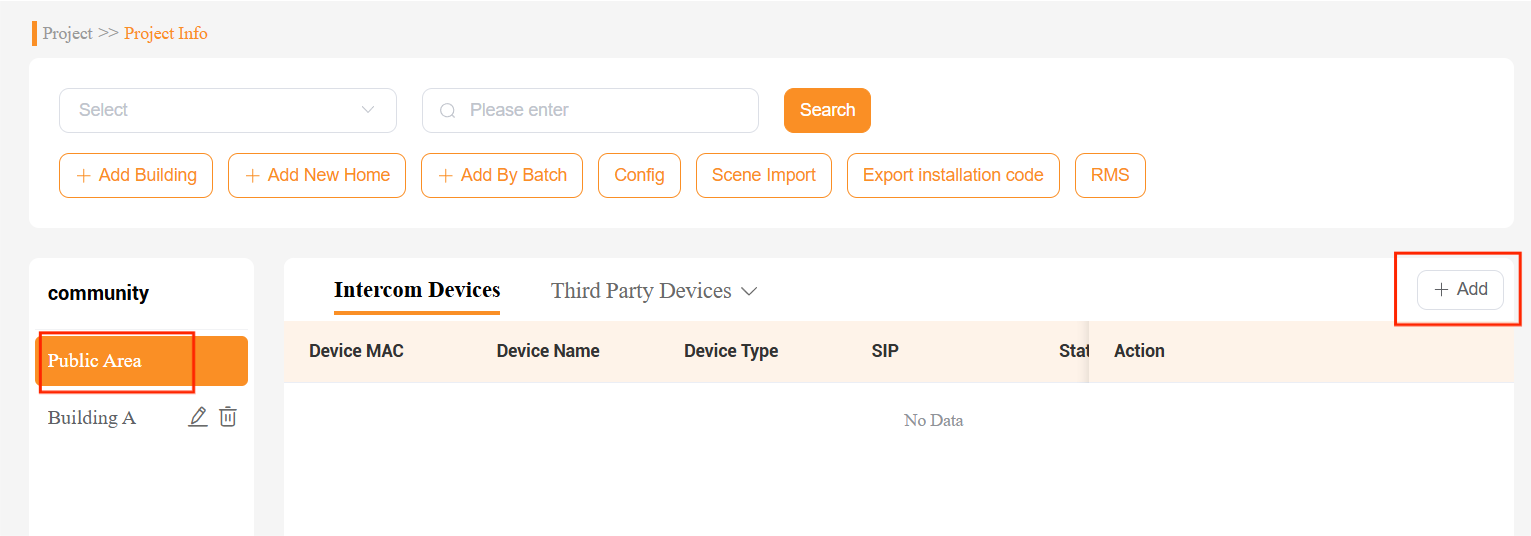
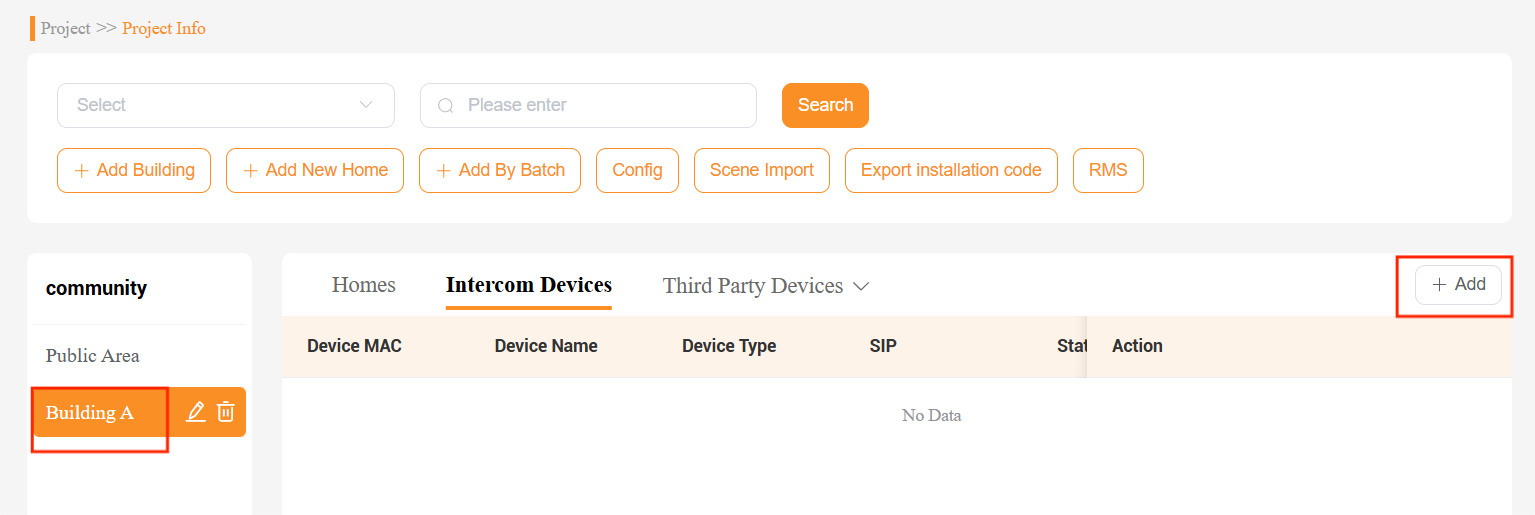
In a specific building: Select the desired building, and click Intercom Devices >
 .
.
(2) Enter device details:
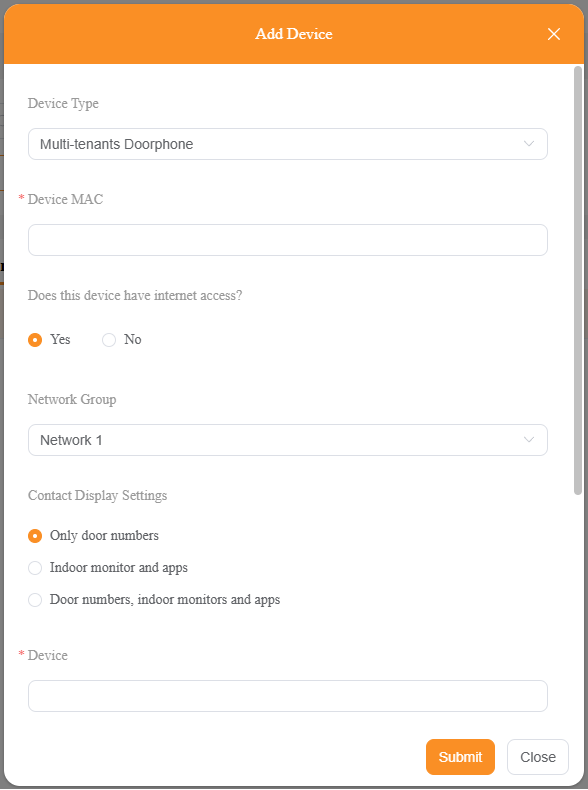
Select the device type.
Enter the device MAC address.
Choose whether the device connects via Internet or LAN, then specify the network group or IP address as required.
(For building devices) Set contact display options: choose to display door numbers, indoor monitors and apps, or all.
Enter a device name.
Select the building(s) that can access the device.
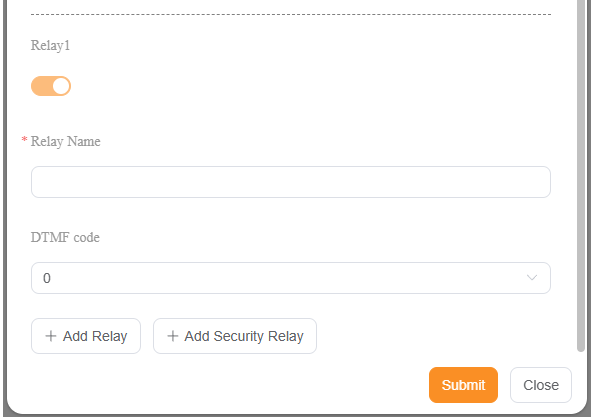
Configure the relay settings: Enable or disable the relay, name it, set its DTMF unlock code, and add additional or security relays as needed.
(Optional) Add public third-party cameras.
(1) Choose where to add the intercom device.
In common areas: Click Public Area > Third Party Devices > Camera > Add.
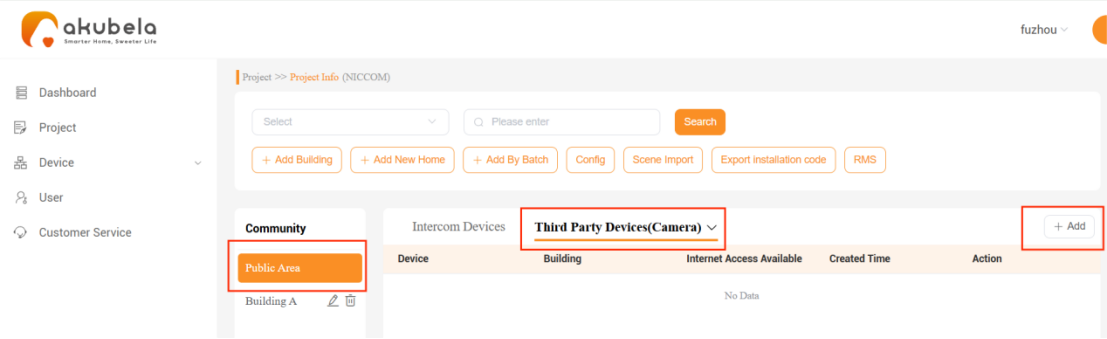
In a specific building: Select the desired building, then click Third Party Devices > Camera > Add.


Enter device details and specify whether it has Internet access.
Configure the camera:
Enter a camera name.
Enter the RTSP URL for the live video stream. Follow the format shown under the input field.
Enter the camera username and password.
Specify whether the camera has internet access. If the camera does not have internet access, it must be on the same LAN as the home center.
(2) Enter device details and specify whether it has Internet access.

Step 4 Add a house layout
TIP:
If you’ve already selected a template in the step 3, you can skip this step.
In this step, you’ll create a layout and set up akubela panels, door phones for individual homes, emergency numbers, and other features within it.
For efficiency, it is recommended to configure security zones, SOS numbers, and other settings during layout creation to reduce on-site work. These settings will automatically synchronize after installation.
Create a house layout
Select one of the following paths.
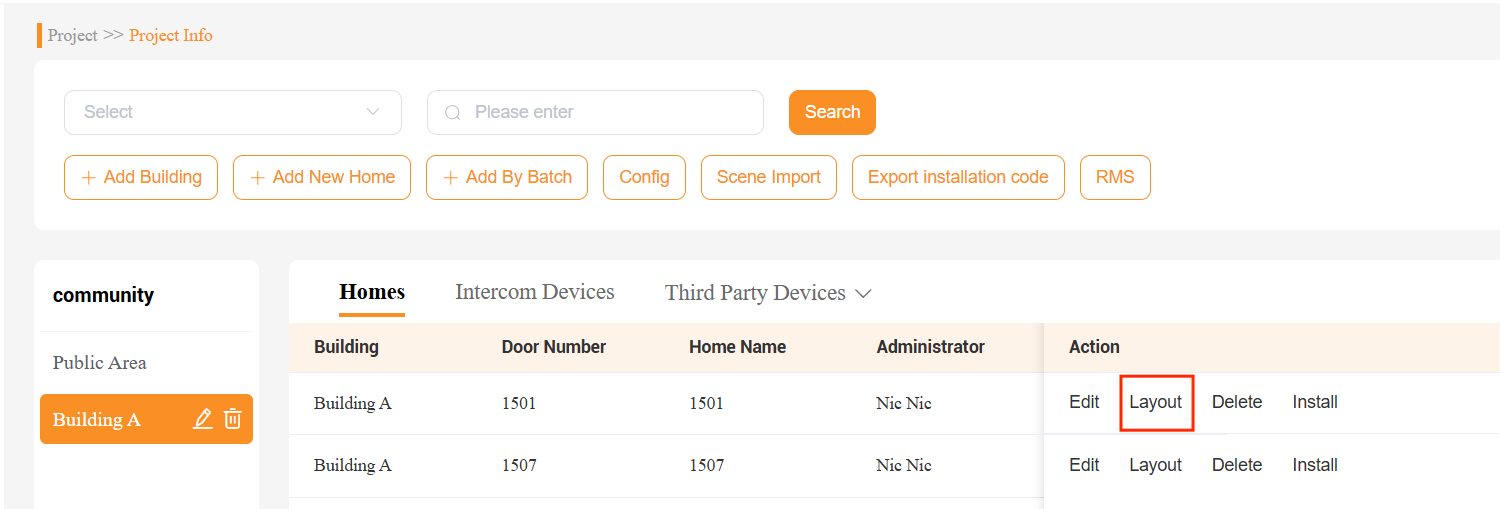
To customize a layout exclusively for a specific home, go to Project > Community > Detail, and click the Layout button of the desired home.
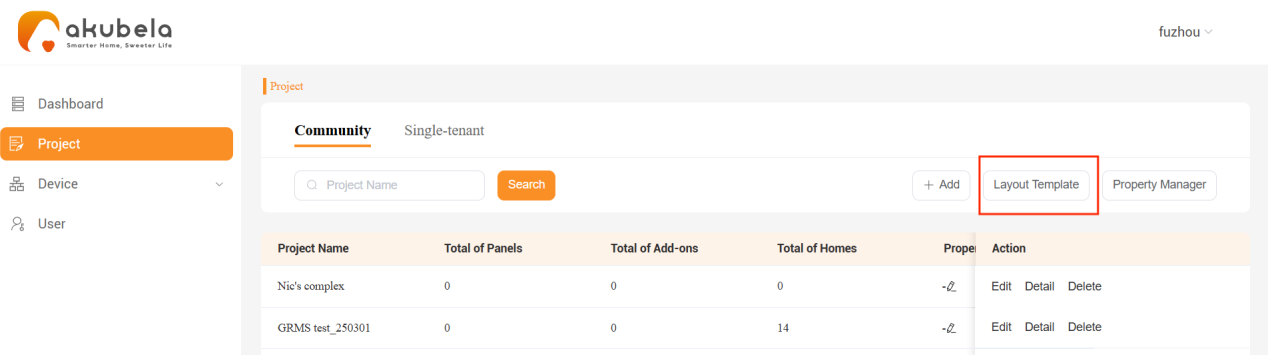
To create a universal template for homes with the same floor plan, go to Project > Community > Layout.
Edit, add, or delete the room or floor options. Click Submit.
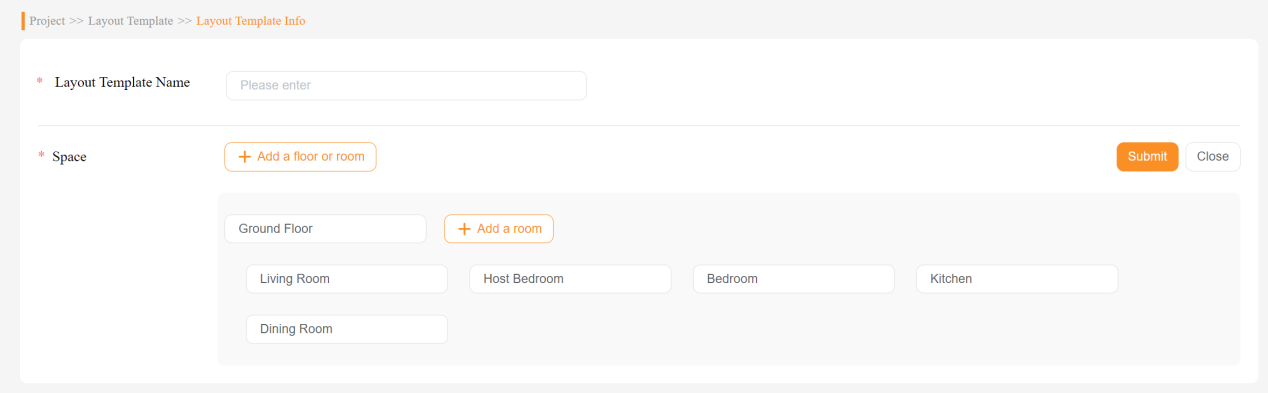
Stay on the same page, you’re able to add akubela panels, door phones, SOS numbers and more.
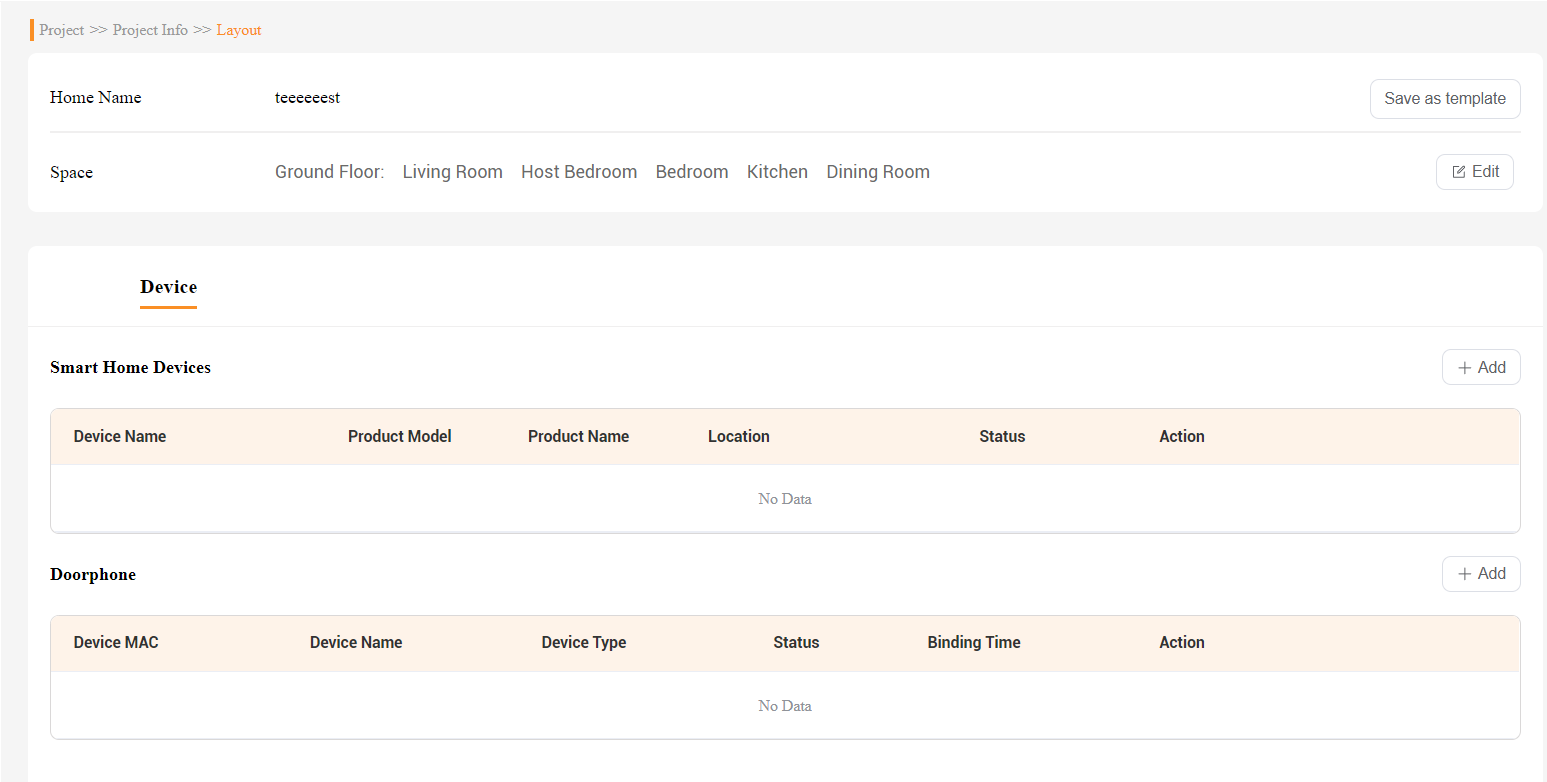
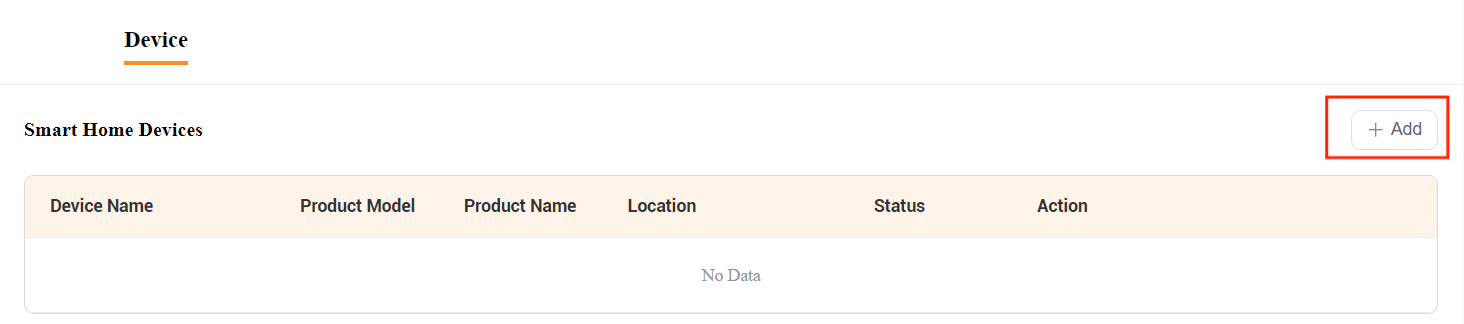
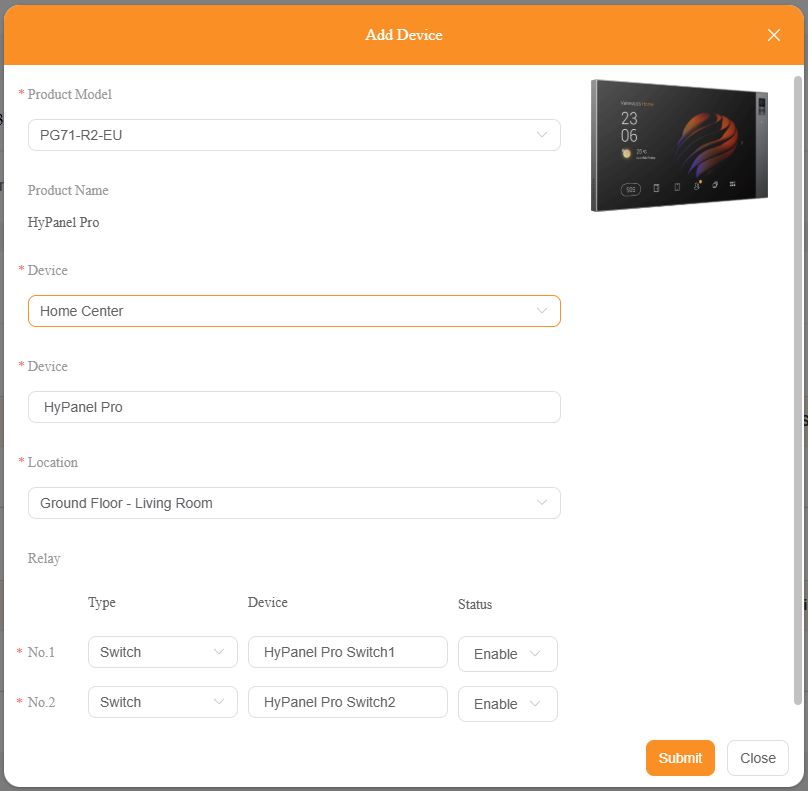
Add akubela panels
Click Device > Smart Home Devices >
 .
. Select the device’s model.
NOTE:
The selected model must match the panel’s actual flush-mounted module version; otherwise, it will not connect to the cloud.
Select the device role between Home Center and Sub Gateway.
NOTE:
Each home must have exactly one home center, serving as both a gateway and the central hub for managing all devices and automation scenes.
A sub-gateway(CT61-PoE excluded) can connect Zigbee devices such as sensors, switches, and more.
Name the device.
Select its installation location.
Choose the connected relay type. Note that not all models have this option.
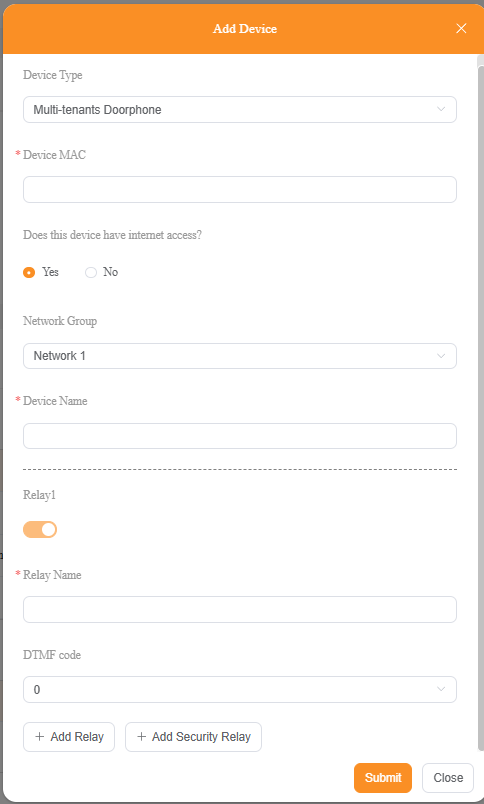
Add home’s door phones
NOTE:
Before adding a device, make sure the door phone’s MAC address has been added to the distributor’s MAC library on the SmartPlus Cloud
Scroll down to the Doorphone section, and click
 .
.

NOTE:
This section is not available for universal templates. To add door phones to a home using a universal template, find the home within its community project and click Detail > Layout.
Select the door phone’s type.
Enter its MAC address.
Check if the door phone is connected to the Internet. If not, enter its IP address to access it locally.
(Optional) Specify the network group it belongs to.
Name the door phone.
Name the relay the door phone controls.
(Optional) Set up a DTMF code for door opening.
(Optional) Add more relays or security relays by clicking the corresponding buttons at the bottom.

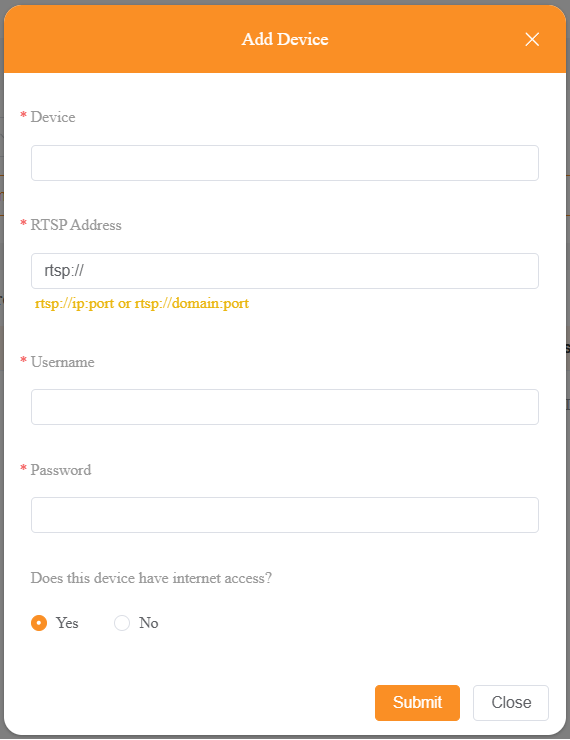
Add home’s cameras
Scroll down to the Camera section, and click .
Configure the camera:
Enter device details and specify whether it has Internet access.
Configure the camera:
Enter a camera name.
Enter the RTSP URL for the live video stream. Follow the format shown under the input field.
Enter the camera username and password.
Specify whether the camera has internet access. If the camera does not have internet access, it must be on the same LAN as the home center.
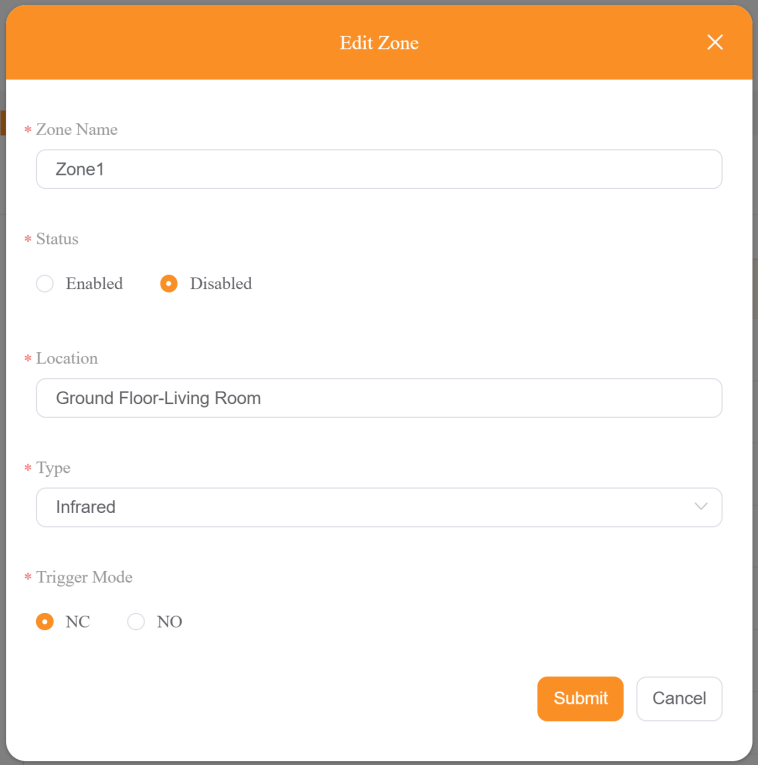
(Optional) Set up security zones
This section is available only for certain panel models included in the template.
If you’ve connected wired sensors to the panel terminals, configure the corresponding zones as described below.
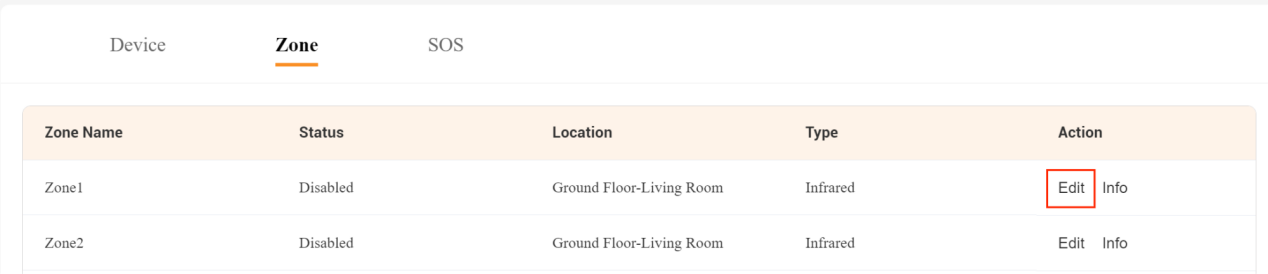
Click the Edit button of the specific zone.
Name the zone.
Check off Enabled in the Status field.
Specify its location.
Select the wired sensor’s type.
Select the trigger mode: NC for normally-closed contact and NO for normally-open contact.
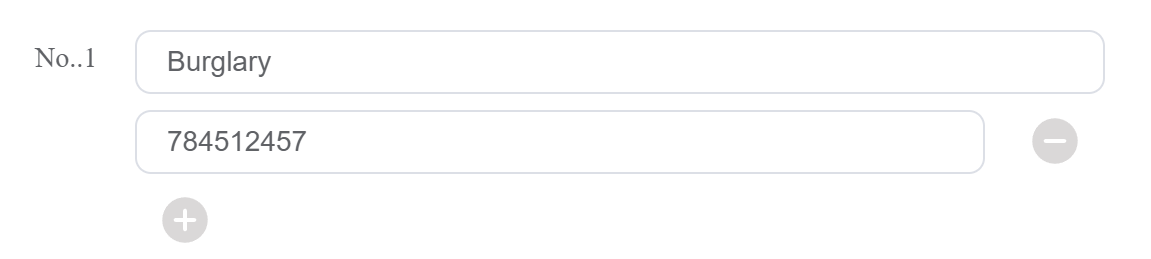
(Optional) Add SOS numbers
Set up SOS or custom emergency contact numbers.
NOTE:
Once devices are cloud-connected, SOS settings can only be configured via the user web portal.
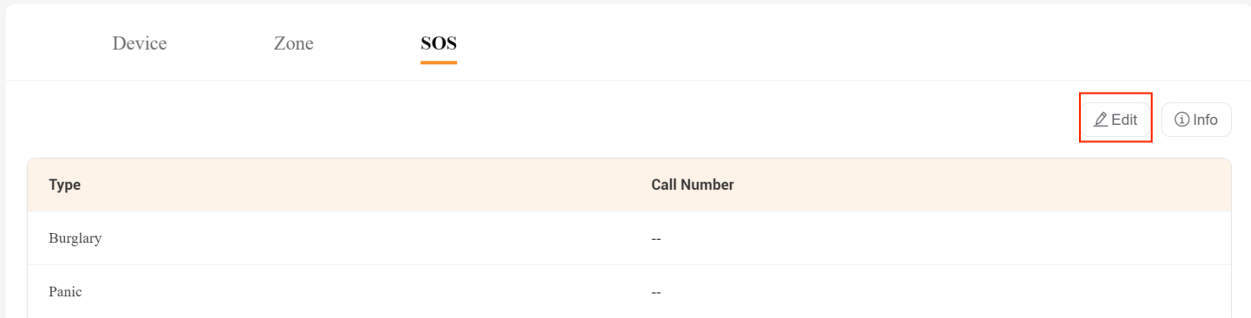
Click Edit.
Click
 in the desired number type field, and enter the SIP number in the typing box.
NOTE:
You can only add service providers’ SIP numbers. Ensure they’re correct and that communication between service providers and the akubela device is normal.
Tick the checkbox(es) for the desired number types in the SOS Call Settings field. The selected numbers will be sent to the devices.

Specify how many times the selected SOS numbers to be called.

(Optional) Configure Security Alarms
NOTE:
This setting is available only when all of the following conditions are met:
The project is a community project.
HyPanel Lite 7 is set as the home center.
Use as Public Common Area feature is enabled when the project is created.
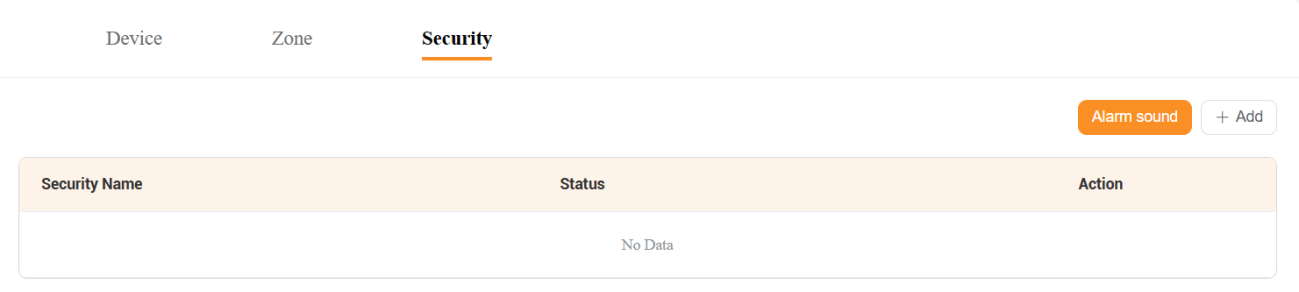
Go to Projects > Community > Detail > Layout > Security.
(Optional) Click Alarm Sound > Add to upload a custom alarm sound.
NOTE:
The sound file must be a WAV file under 100 KB.
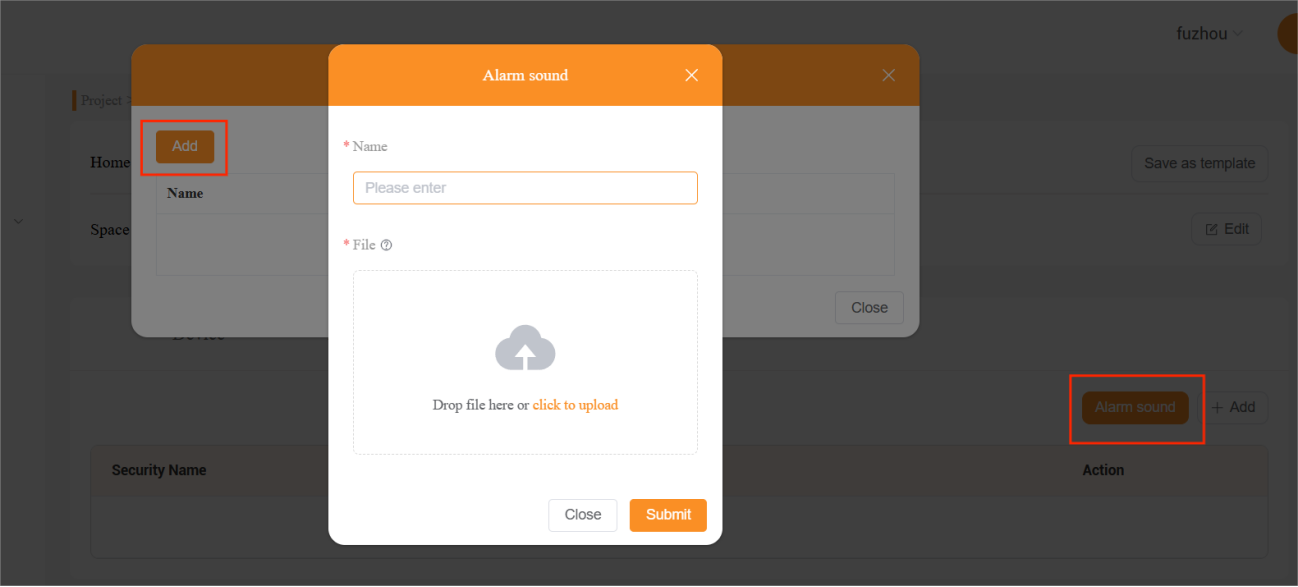
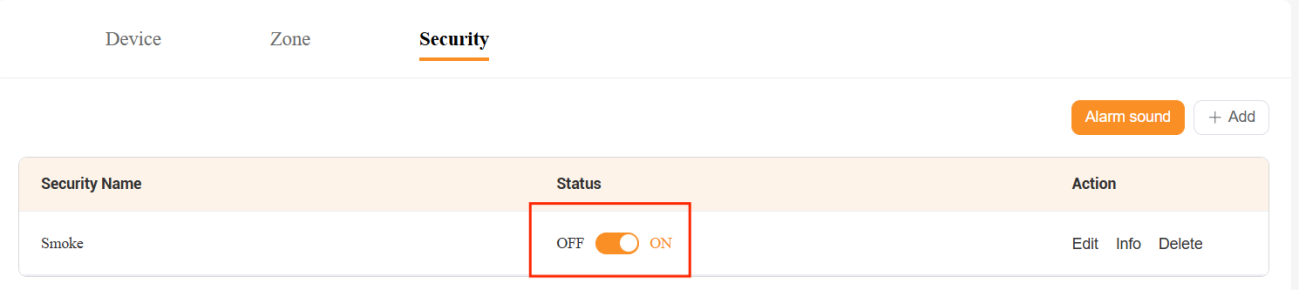
Click Add to create a security alarm, configure the required parameters, then click Submit.

Security Name: Name the alarm.
Defense Delay: Delay time before the alarm is triggered.
Device: Alarm trigger device(s). If multiple devices are selected, triggering any one of them will activate the alarm.
API: Add a third-party system as an alarm trigger via API, without connecting with a physical sensor.
Alarm Sound: Select the default sound or a custom sound.
Alarm Range: Define which building(s) can receive the alarm.
Toggle the Status switch to enable the alarm.
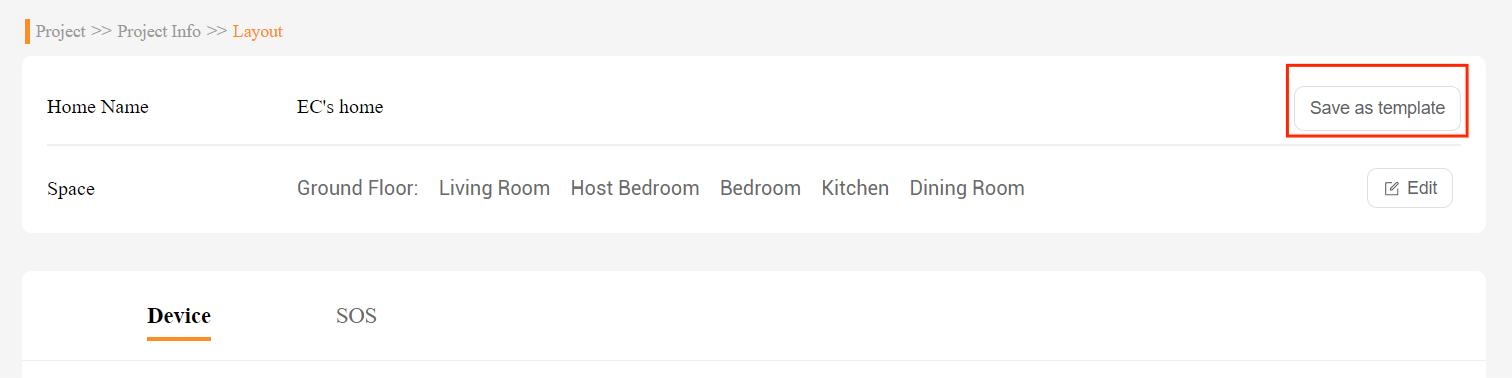
After completing the creation and settings
For a custom layout exclusive to a specific home, you can save this layout as a template for future use.
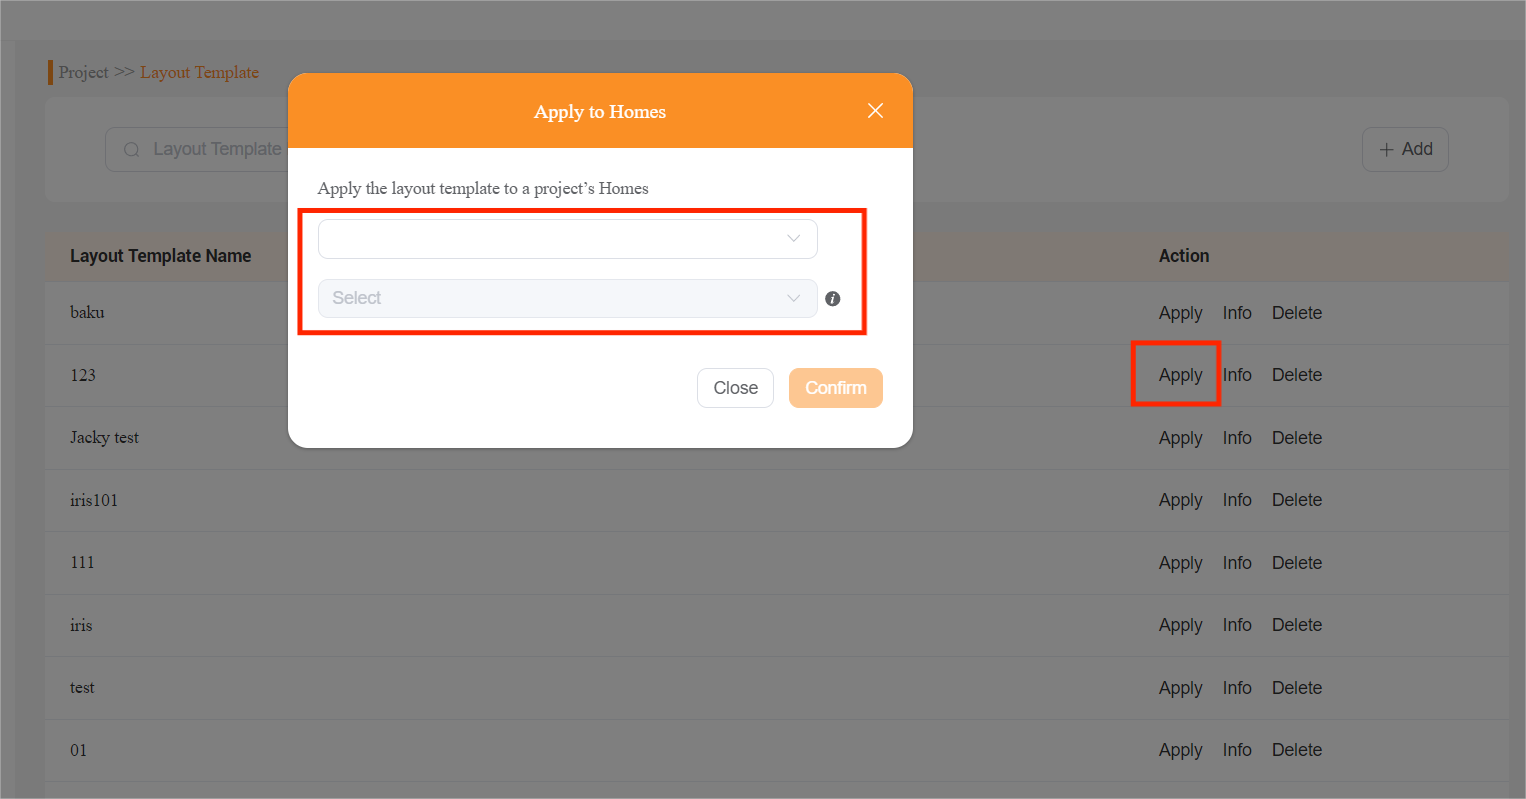
For a universal template, remember to apply it to the desired compound and homes by going to Project > Community > Layout > Apply.
NOTE:
Modifying a layout template applied in a project will not alter the original template.
Changes made to the original template will be applied to families that have not completed installation, while those with completed installations will remain unchanged.
Once the installation is completed, the floor plan can only be modified via the BelaHome app(Go to Me > Family Management > Space Management) or large-screen HyPanel devices.
Step 5 Obtain installation codes
TIP:
This step is unnecessary if you’d like to choose Local Installation during the initial setup.
NOTE:
Installation codes are available only after a home center device is added to the home layout. If the layout contains only sub-devices, installation codes will not be shown.
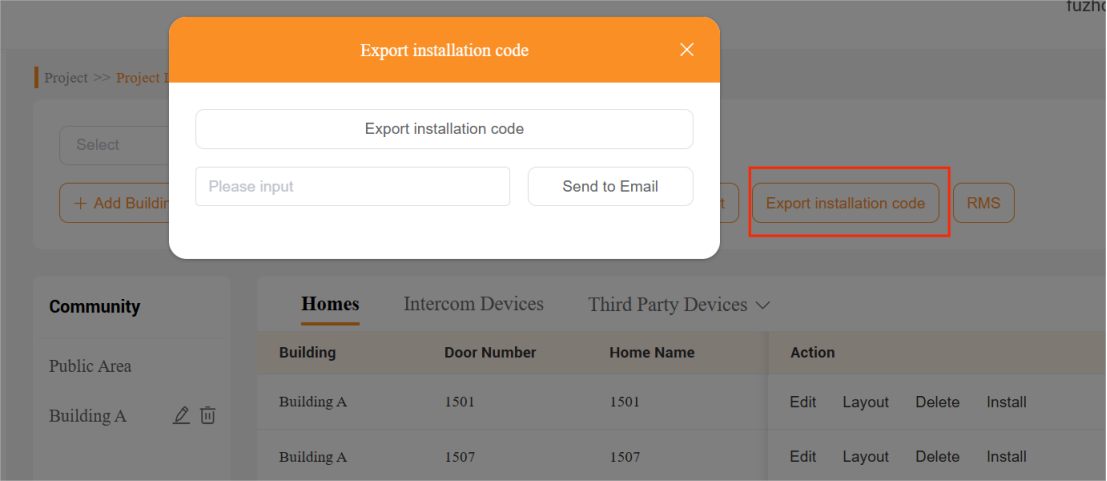
To obtain the entire project’s installation codes
Go to Project > Community > Detail > Export Installation Code > Export Installation Code to download the file directly; or
Go to Project > Community > Detail > Export Installation Code, enter a valid email address, and send the file to it.

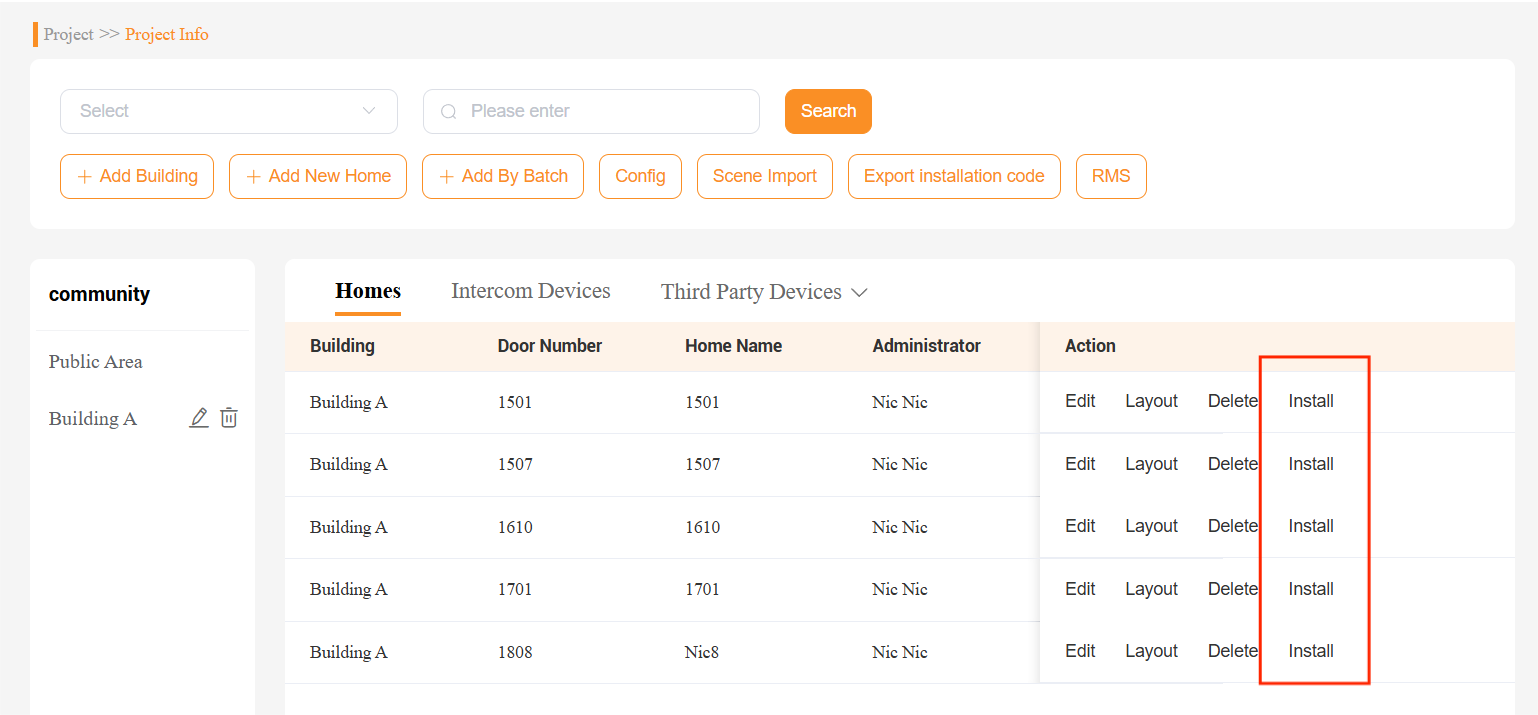
To obtain the installation codes of a specific ome
Go to Project > Community > Detail > Install, the needed codes are marked in the picture below.

Additionally, you can do any of the following to suit your needs:
Click
 to revert to the previous codes that match earlier device firmware versions.
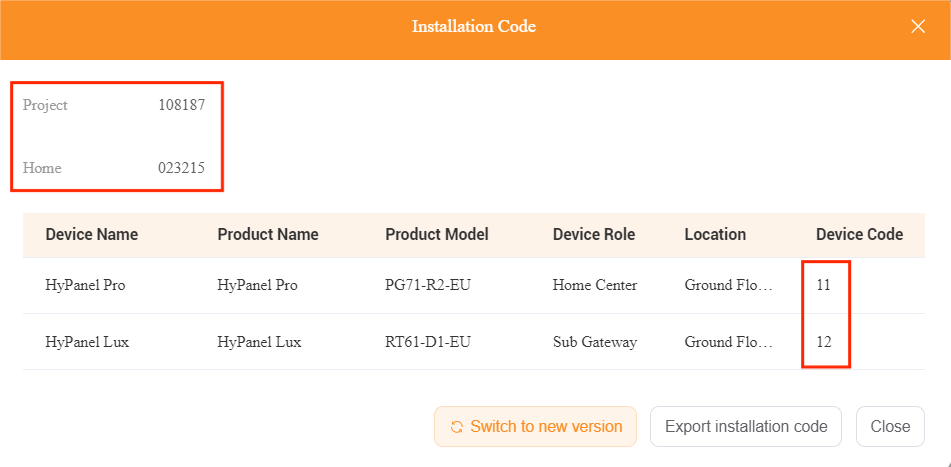
Click
 to download an EXCEL file containing this homes’ installation codes.

Further Helpful Notes
The following notes may provide helpful additional information.
Cloud account. To access the akubela Cloud, you must have an account with the home automation permission enabled.
If you’re an installer, please contact your distributor for the account and permission.
If you’re a distributor, please contact akubela for the account and permission.
Installation modes. The following are two installation modes to be chosen in the initial setup:
Local Installation: Automatically detect all smart home and intercom devices within the same LAN. To connect all akubela panels within the home to the Cloud, you need to add the MAC addressof the home center device.
Cloud Installation: Install and connect the devices to the Cloud by entering corresponding installation code for each device
Home center device.
During the initial setup, you can designate any device as the home center when choosing Local Installation. While using the installation code, the home center is assigned during the creation of the layout template.
If unsure which device is the home center after the installation, go to devices’ Settings > System Settings > About screen to check the home center device’s MAC address.
Intercom devices.
Intercom devices, including door phones, access controls, and guard phones, can be controlled using akubela panels and BelaHome app.
Before adding door phones, access controls, or guard phones to a smart home project, their MAC addresses must first be registered in the distributor’s MAC library on SmartPlus Cloud.
The following basic settings of door phones can be modified on both SmartPlus and akubela Cloud, and will be synced bidirectionally between them.
MAC address
Network Group
Relay settings, including enable/disable, Relay Name, DTMF, Add Relay, Add Security, Relay, and Contacts Display settings.
Advanced settings of door phones can only be modified through the SmartPlus Cloud and will be synced to the akubela Cloud. These include:
Access Method
Work Offline
Unlock in Homepage
Unlock in Talking Page
Intercom permissions. There are three cases regarding the permission associated with door phones for family members:
Within the free member account limit, new member accounts can be added on the BelaHome app or user web portal with the intercom permission granted automatically.
To add more members beyond the free limit, follow these steps:
Create member account(s) on either the SmartPlus Cloud or the BelaHome app;
Visit the SmartPlus Cloud, and pay the activation and subscription fees for the newly-created accounts.
Add additional gateways. To add extra gateway devices after installation, do one of the following.
Local installation(Universal method for all devices, with or without cloud connectivity.)
Connect the gateway device to the same local network as the home center device.
During its initial setup, select Local Mode (or Auto Discovery in some versions), then choose a home center device when prompted.
Cloud installation
Add the desired gateway device to the associated project on the Cloud.
Connect the device to the Internet.
Enter the device’s installation code.
Replace devices. To replace a device after installation, first ensure the old device is offline. Then follow the instructions below based on the device type and working mode.
NOTE:
If you have not back up the data, replacing a device will erase all data stored on it:
If you replace the home center, all home data, including ZigBee devices added through any gateways, will be lost.
If you replace a gateway device, only the ZigBee devices added through that gateway will be removed—others will remain intact.
Devices running in local mode
Replacing home center/gateway device: Not supported.
Devices connected to akubela Cloud
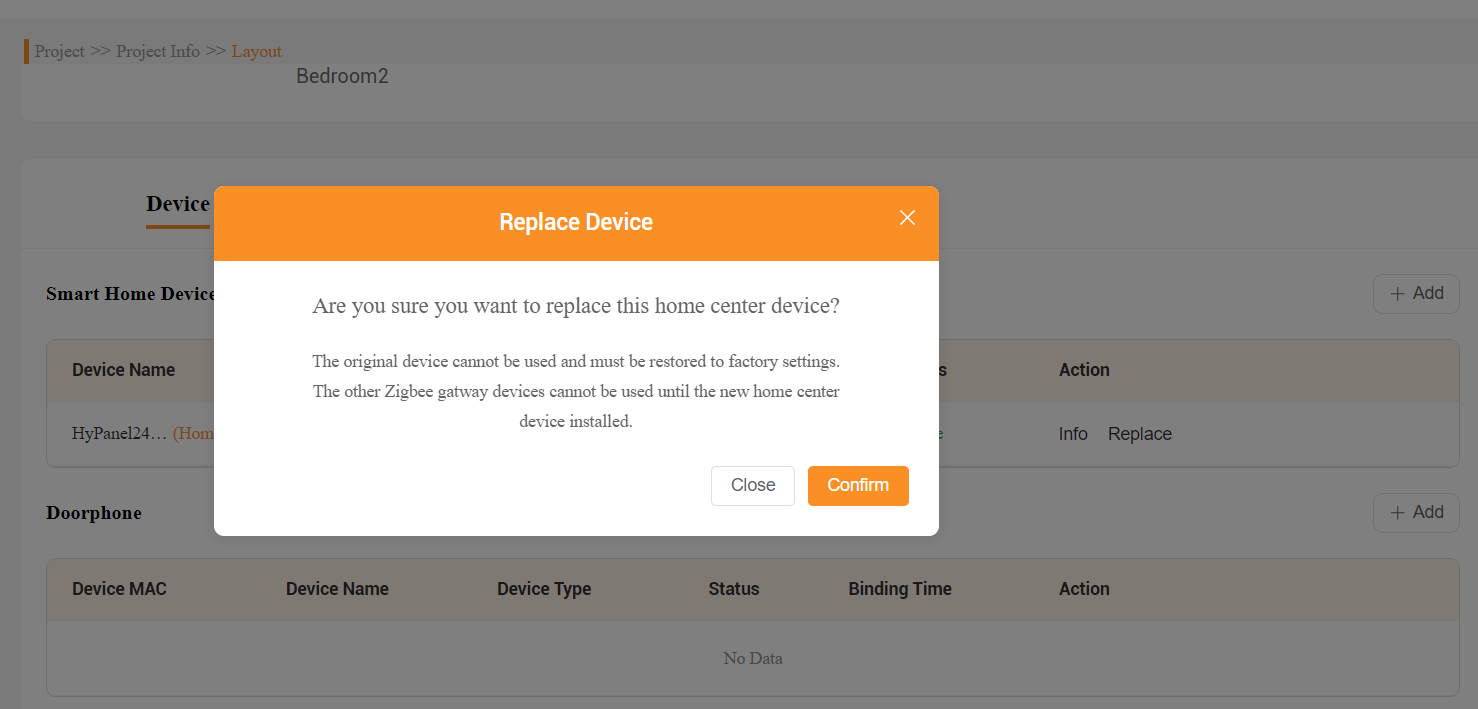
Replacing home center device
NOTE:
The new home center device must be brand-new or undergo a complete removal from the cloud, followed by a full factory reset.
For the same product model only
(1) Enter the existing installation code into the new home center device.
(2) Remove the replaced devices’ MAC addresses from the distributor’s MAC library.
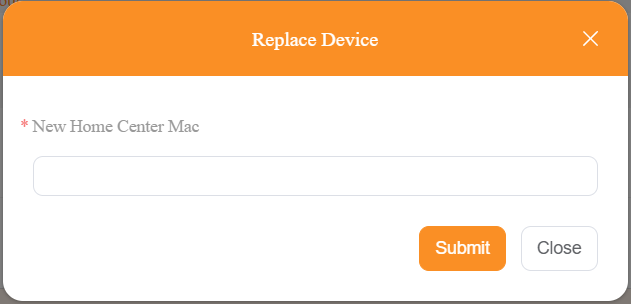
For a different(or same) product models
(1) Go to Project > Detail > Layout > Device > Replace, and enter the new home center device’s MAC address.
(2) Factory reset the old home center device.
(3) Connect the new device to the Internet, and complete initial setup in local mode.
(4) Remove the replaced device’s MAC addresses from the distributor’s MAC library.
Replacing a gateway device:
(1) Enter the existing installation code to the new gateway device (Must be the same model as the previous one)
(2) Remove the old device’s MAC address from the Distributor’s MAC library.
Delete HyPanel devices. To delete devices for families after the installation, do the following.
When devices are grouped and running in local mode
Deleting home center device: NOT supported.
Deleting gateway device: Go to BelaHome app or the home center’s device web portal, find the desired device, go to its settings screen and remove it.
When devices are connecting to akubela Cloud
Deleting home center device: NOT supported. Unless you delete the entire associated family.
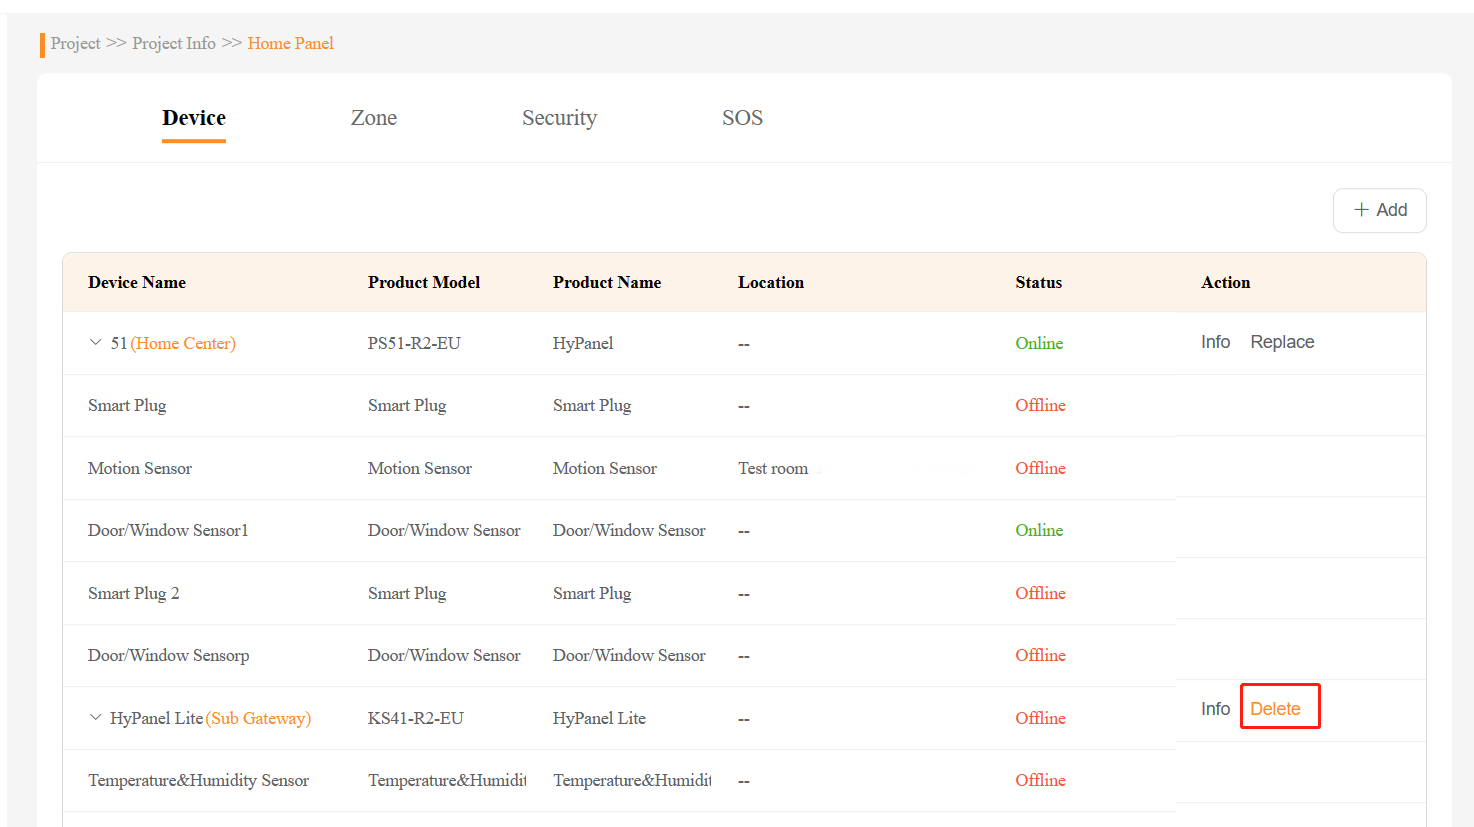
Deleting gateway device:
Go to Project > Detail > Layout> Device, find the desired gateway device, and click on Delete;
Remove the devices’ MAC addresses associated with the project from the distributor’s MAC library.
Delete intercom devices.
(1) On the akubela Cloud, go to Project > Community > Detail, select Public Areas or the desired building, then click Intercom Devices > Delete.
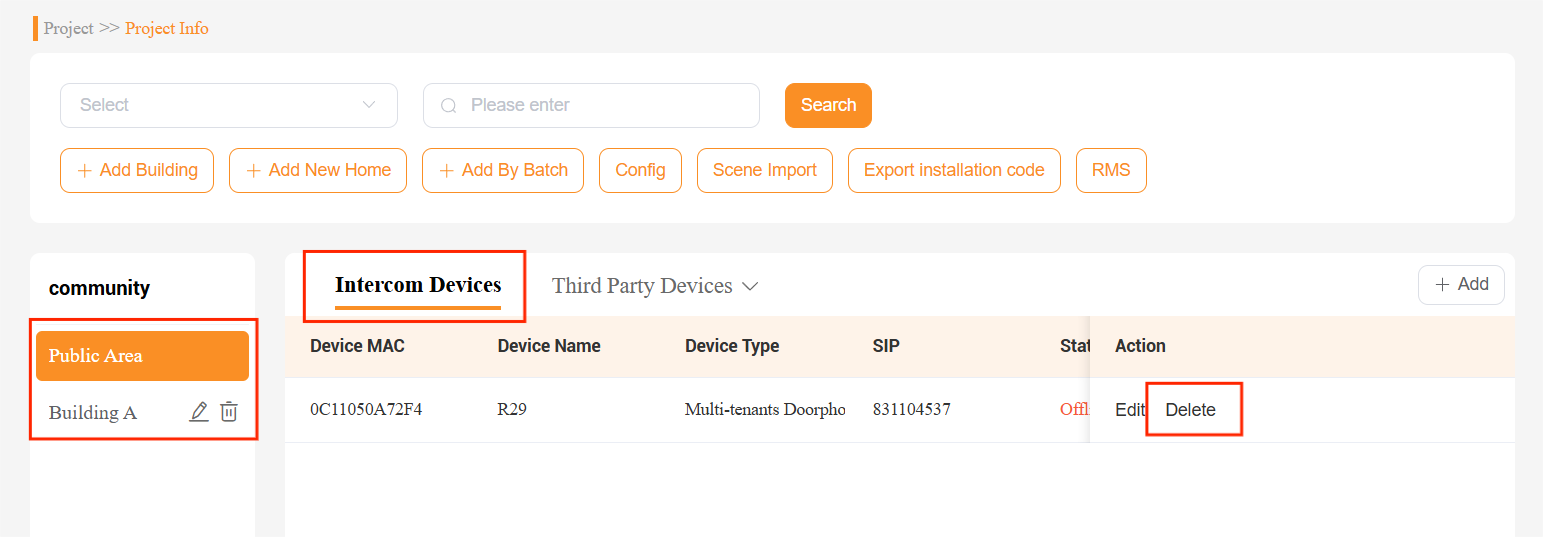
(2) Go to SmartPlus Cloud, remove the MAC addresses of intercom devices from the Distributor’s MAC library.
Delete a home or an entire project.
Go to the akubela Cloud, and do one of the following based on the needs:
To remove a single home within the compound, select Project > Community > Detail > Delete.
To delete the entire compound project, select Project > Community > Delete.
Go to SmartPlus Cloud, remove the MAC addresses of intercom devices from the Distributor’s MAC library.