This guide applies to the v3.3.0 Guest Room Management System (GRMS).
The GRMS platform streamlines hotel operations by integrating room management, staff management, and service coordination for improved efficiency and guest experience.
Before Getting Started
All projects, smart home panels, and intercom devices must be added on the akubela Cloud and complete the installation process to enable the related GRMS functions, such as room check-in and RF card issuing.
Ensure your smart home panel models are compatible with the GRMS platform and have the required firmware versions.
Compatible Device | Required Firmware Version | Serve as Home Center in GRMS Project | Serve as Gateway in GRMS Project |
HyPanel | 51.1.36.417 and later | √ | √ |
HyPanel (V2) | 251.1.36.408 and later | √ | √ |
HyPanel Plus | 52.1.36.407 and later | √ | √ |
HyPanel KeyPlus | 53.1.36.412 and later | √ | √ |
HyPanel Pro | 71.1.38.431 and later | √ | √ |
HyPanel Ultra | 281.1.38.421 and later | √ | √ |
HyPanel Supreme | 1001.1.38.418 and later | √ | √ |
SmartPanel | 933.1.38.415 and later | √ | √ |
SmartPanel Elite 10 | 119.1.38.414 and later | √ | √ |
Create a Cloud-Based Project
To use the GRMS, you must first create a cloud-based project on the akubela Cloud and ensure that all devices are correctly installed. Once set up, the configuration will automatically sync with the GRMS.
(1)Log in to the akubela Cloud platform using your installer account. Use the appropriate login portal based on your region:
(2)Create a community project: Add buildings, homes, administrators, and home center devices with their MAC addresses for cloud connection.
TIP:
Homes created here will sync to the GRMS platform as hotel rooms.
For detailed instructions, please refer to Create a Community Project on akubela Cloud.
NOTE:
Assign a floor to each room when creating homes.
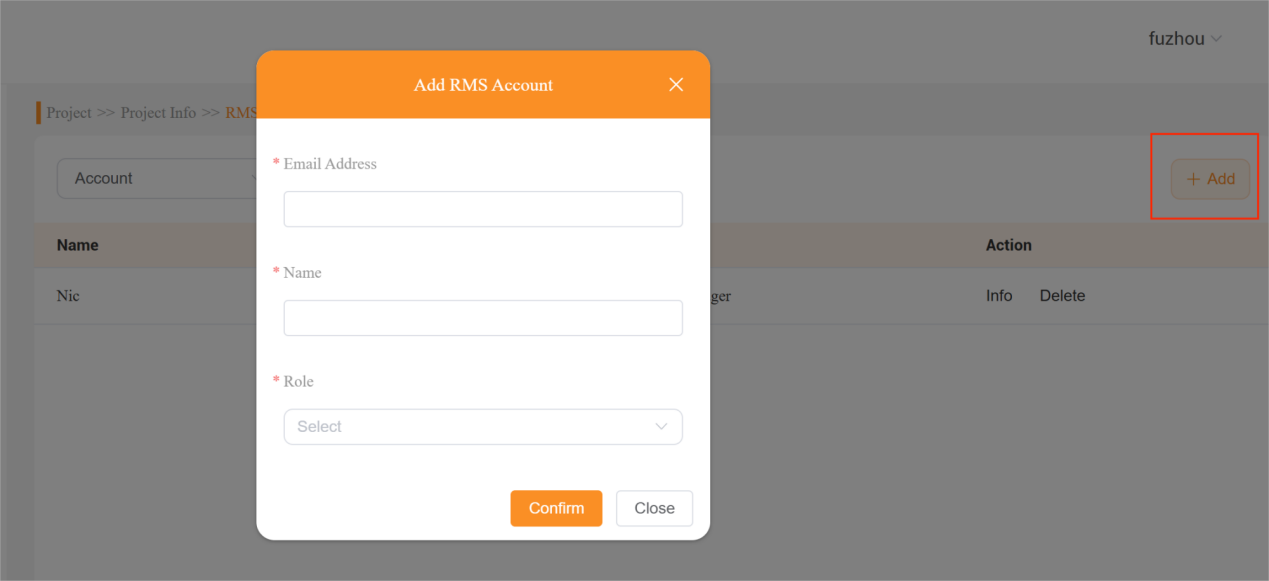
(3)On the project’s Details screen, click RMS > Add to add the hotel manager(s) and staff.
Note:
Contact technical support to enable RMS access for your installer account. Once activated, the RMS button will appear in the interface.

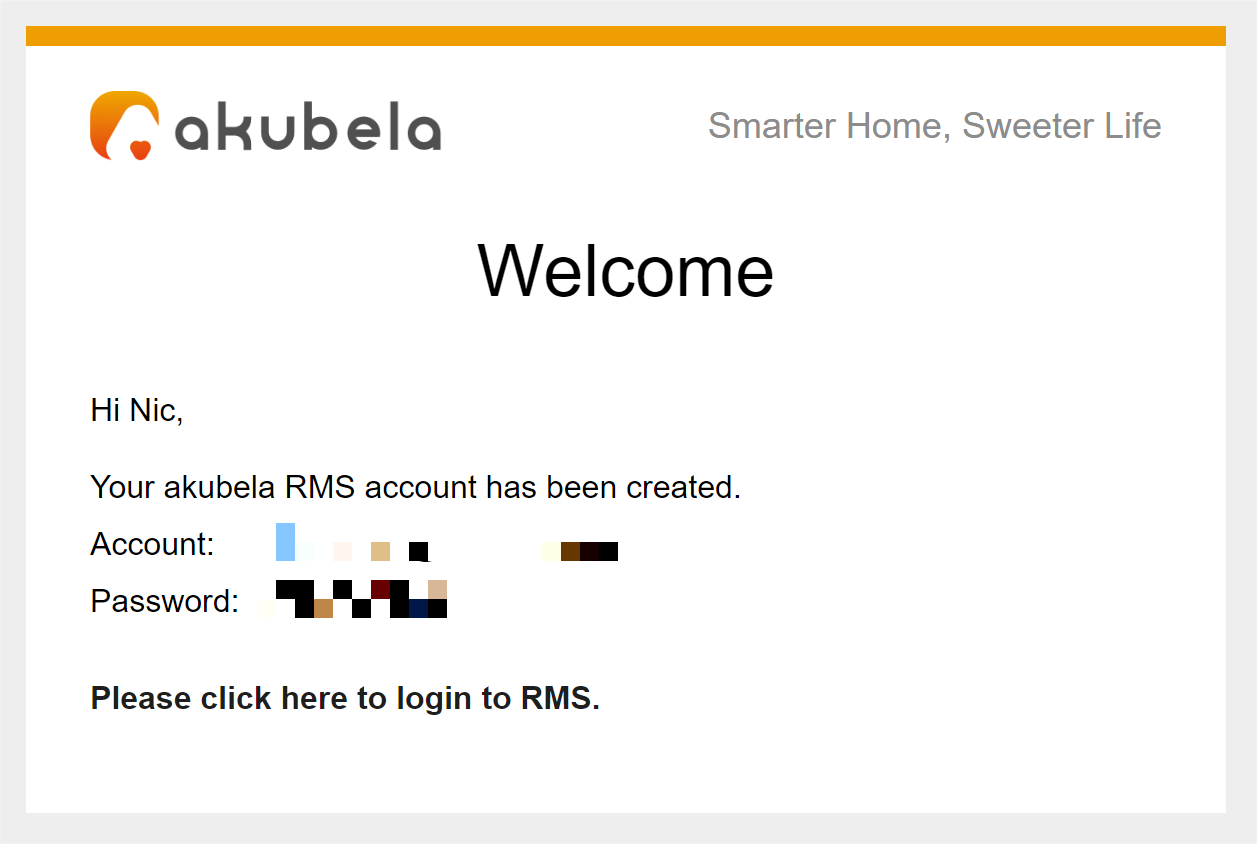
Once completed, these hotel manager(s) and staff will receive a welcome email containing their GRMS account credentials and the login portal.
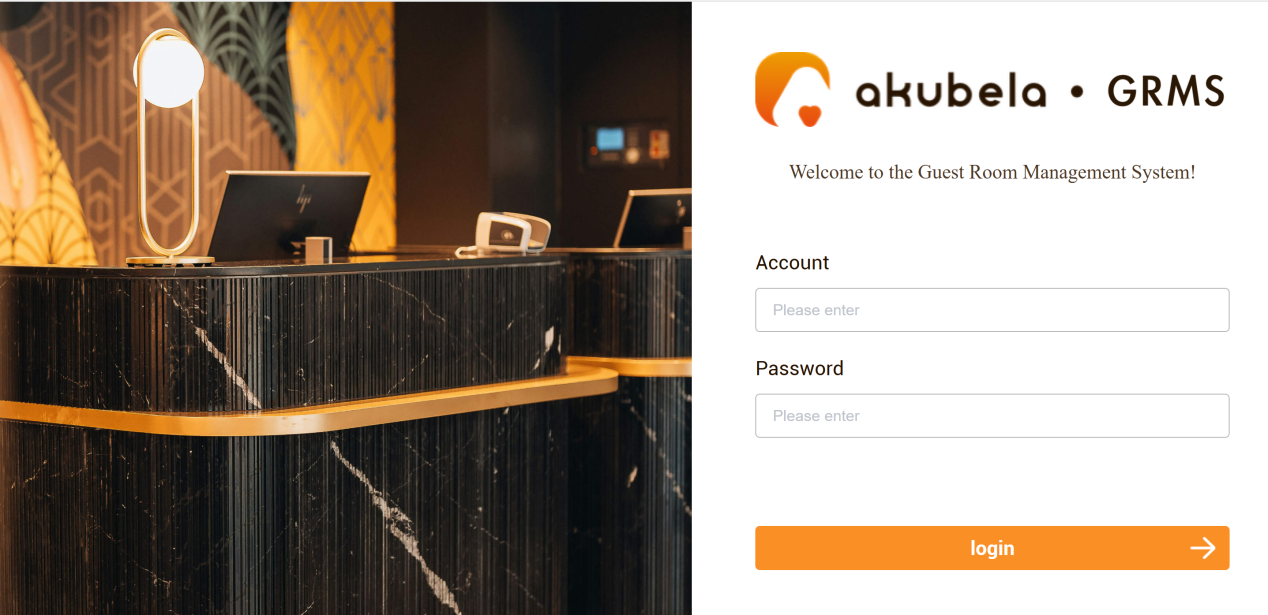
Log into GRMS platform
Log into the GRMS platform with the manager or staff account. You can either click the link in the welcome email or use the appropriate regional login portal.
Room and Stay Management
1. Room Settings
All configurations made on the akubela Cloud are automatically synchronized with the GRMS platform, and vice versa.
On the GRMS platform, you can manage room-related settings such as defining hotel room types and configuring alarm notifications.
1.1 Define Room Types
Rooms must be assigned a room type before they can appear on the Room page for reservations.
To Create Room Types
(1)Create room types. Go to Setup > Room Type > New room type.
(2)Enter the room details, assign rooms, and click Submit.
.png)
(3)Repeat the process until all room types are added.
.png)
To Assign a Room Type to Each Room
(1)Go to Setup > Room List > Rooms > Edit.
(2) Select a room type, and enter the landline number if needed.
.png)
(3)Repeat until all rooms have been assigned a type.
.png)
1.2 Add Room Tags
Room tags help you categorize rooms by their status or shared features. Tagged rooms can also be used as conditions in automation scenes.
To Add a Room Tag
Go to Setup > Room Tag > New room tag.
.png)
Enter the tag name, then click
 to confirm.
.png)
(Optional) Select the rooms you want to associate with the tag.
.png)
TIP:
You can assign or update room tags anytime via Room > Room Status > Set Tag.
.png)
To View or Filter Rooms by Tag
Go to Room > Room Status > Tags.
.png)
1.3. Configure Alarm Notification Methods
To set how alarm notifications from room sensors are delivered:
Go to Setup > Alarm Settings.
Select the alarm type, and choose one or more push method(s).
.png)
Message Record: Alarms will be listed under Setup > Message > Alarm.
.png)
Website pop-up: Alarms will appear as pop-ups on the GRMS platform.
2. Room Status Confirmation
You can view the status of all rooms on the Room > Room Status or Room Calendar page. The color of the room card represents its current status:
Each room card is color-coded to indicate its status:
Green: Vacant and ready, available for booking
Blue: Currently occupied
Yellow: Reserved for today but not yet checked in
.png)
.png)
3. Check Booking Orders
If a guest has a reservation, go to the Orders page to search using their name, booking number, or other provided details to find and verify the booking.
You can also browse all current and past orders directly from this page.
.png)
4. Check-in
(1)To check-in, do any of the following:
Go to Room > Room Status, hover your mouse over a green vacant room to display the menu, and then click Check in.
NOTE:
If the Check In button does not appear, ensure the room has a home center and all its devices installed. Once installation is complete, the button will be available.
.png)
Go to Room > Room Calendar, then click on the desired date and room.
.png)
(2)Fill in the following guest details, and click Submit to confirm.
Selecting the check-in and check-out times.
Entering the guest’s information.
(Optional) Click Add Guest to include additional guest(s).
(Optional) Issue a room card, PIN, and/or QR code for the guest. See detailed instructions here.
(Optional) Enable the guest’s facility booking permission so they can use the H5 interface on their phone to control the room.
.png)
5. Add Access Credentials for Guests
If “Issue Card” is selected in the previous step, the system will automatically redirect you to the Assign Access Rights page.
You can also add access credentials later by going to Room > Room Status > [Desired Room Card] > Assign access rights.
NOTE:
The required intercom devices and/or smart locks must be installed for the specific room; otherwise, when issuing cards or PINs, the system will display: “No access control equipment for this room.”
Access credentials are valid from check-in and automatically expire upon checkout. If a guest checks out early, the credentials are instantly deactivated.
You can add access credentials in any of the following ways:
5.1. Issue Cards
NOTE:
Only rooms equipped with a Smart Lock C6 and door phone or access control devices that support card access can issue cards through the platform.
You can assign up to two cards per guest.
(1)Click RF Card
(2)Enter the card number, or swipe the card on the card reader.
(3)Click Issue Card.
.png)
TIP:
To reissue a card, click Reissue Card. This will automatically invalidate the previous card.
.png)
5.2. Generate a PIN Code
NOTE:
Only rooms with smart locks and door phone or access control devices that support PIN access can use this function.
Click Pin > Generate Pin to generate a PIN code automatically.
.png)
.png)
5.3. Generate a QR Code
NOTE:
QR code issuing function is available only for the following Akuvox door phone and access control models:
Supported Model
Required Firmware Version
S539
Version number starting with 539
E16
Version number starting with 116
E16V2
Version number starting with 216
E18
Version number starting with 18
X912
Version number starting with 912
X915
Version number starting with 915
X915S
Version number starting with 2915
X916
Version number starting with 916
R29
Version number starting with 29
A08
Version number starting with 108
Ensure the guest’s email address is entered before generating the QR code. If not, go to Room > Room Status > [The guest’s room] > Modify Contact Information to add the email address.
Click Generate QR Code. The system will automatically generate a QR code and send it to the guest’s email.
.png)
.png)
.png)
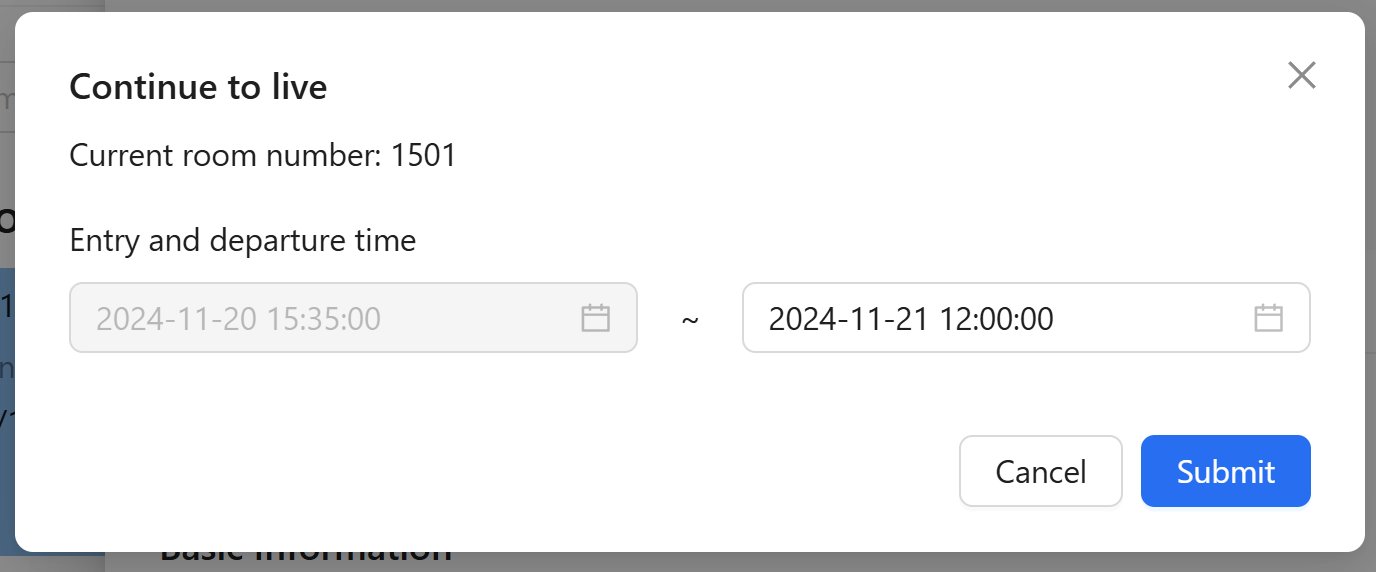
6. Extension of Stay
To extend checkout or a room booking:
(1)Click the room card and select Orders > Continuing.
.png)
(2)Select the new departure date or time, and click Submit.
7. Housekeeping Services
Guests can request housekeeping services directly, or hotel staff can initiate it via the GRMS platform.
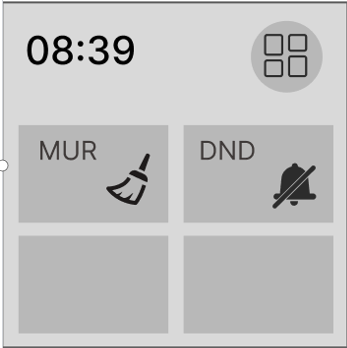
(1)To request housekeeping:
By guest: Tap the cleaning button on the HyPanel devices in their room.
By hotel staff: Go to Room > Room Status, hover your mouse over the room to display the menu, and then click Set as dirty room.
.png)
(2)The “Dirty” status is pushed to the GRMS platform, and a housekeeper will be assigned.
.png)
Once cleaning is completed, remove the Dirty status by clicking the Set as clean room button.
.png)
8. Check-out
On the Room > Room Status page, find the room, hover your mouse over it to display the menu, and then click Check out.
.png)
Room Control
You can check device status in individual rooms or throughout the hotel, including smart home and intercom devices, and remotely control them as needed.
1. Check Device Status
Devices in a Specific Room
Go to Room > Room Status, click the room card, then select Room Control. Offline and low-battery devices are listed here.
.png)
TIP:
To view all devices in the room, click Room Control > Device management.
For All Devices in the Hotel
Go to Device > Device List.
.png)
2. Remote Control Devices
(1) Go to Device > Device Control.
TIP:
Filter devices by room number to quickly find devices in a specific room.
(2) Do any of the following:
To control a single device, click Settings, and toggle the Power on or off.
.png)
To control multiple devices, select their checkboxes, and click Turn all on/off.
.png)
NOTE:
The Batch Setting button works only for fan, ventilation, and thermostat devices. To batch control these, filter by device type, select the devices, then click Batch Setting.
.png)
3. Automate Devices with Scenes
Create automation scenes on the GRMS to control devices automatically when preset conditions are met.
3.1. Create Automation Scenes
Currently, the GRMS supports scenes that trigger devices when room status changes or room tags are modified.
NOTE:
Up to 200 scenes can be created per project.
Scenes apply to all guest rooms, but when an event (check-in, check-out, tagging, or tag removal) occurs in a room, only tasks related to that room’s devices are executed.
(1) Go to Device > Automation > New.
.png)
(2) Name the scene. Note that names can not be duplicated.
.png)
(3) Click Trigger to add up to 20 conditions, then click Submit. Conditions can include:
Room Status: Trigger when the room status changes (checked in/out).
Room Tag: Trigger when a specified tag is assigned or removed.
.png)
(4) Click Task to add up to 20 actions, then click Submit. Actions are categorized by device type; set desired actions for all devices of that type.
.png)
(5) Click Submit in the upper right corner.
.png)
Scenes will appear on the Automation page.
.png)
TIP:
You can also create scenes via the BelaHome app or user web portal using an administrator account added on the akubela cloud. These scenes are room-specific. If a scene has a manual trigger, you can activate it remotely via Room > Room Status > [Room Card] > Room Details > Scenes.
.png)
3.2. Manage Automation Scenes
On the Device > Automation page, you can activate, disable, edit, or delete the scenes created on the GRMS.
To disable a scene, toggle the Status off.
To manually activate a scene, click Execute in the Operate field and then select the room(s).
To modify or remove a scene, click Edit or Delete.
.png)
4. View Device and Scene Logs
4.1. View Device Logs
All device on/off and parameter setting made via the cloud are recorded under Device > Device Logs. The specific action is shown in the Event Name field.
.png)
4.2. View Scene Logs
Activation of automation scenes created on the GRMS is logged under Device > Automation Logs page.
.png)
Facility Management
The GRMS platform simplifies managing guest facilities by allowing you to add facilities for reservation, set booking rules, and review booking records efficiently.
1. Create Facility Types
(1) Go to Setup > Facility Management > Facility Type > New.
(2) Enter the facility name, and choose if it is a public device.
(3) Click Submit.
.png)
The newly created facility types will appear on the Facility Type page.
.png)
2. Add New Facility
(1) Go to Setup > Facility Management > New.
.png)
(2) Enter the facility details, set reservation rules, and configure the billing plan.
NOTE:
If “Required Approval” is turned off, bookings for this facility will be automatically approved without manual intervention.
.png)
(3) Click Submit.
All facilities will be listed on the Facility Management page.
3. Modify Facility Booking Availability
To quickly enable or disable booking availability for a facility, go to Setup > Facility Management and toggle the Status switch.
.png)
To view available facilities, go to Facility > Facility Status.
.png)
4. Process Facility Bookings
When guests book facilities via the H5 interface on their phones, requests appear under Facility > Booking Orders with a Pending status. You can review and approve these requests to ensure proper scheduling and fair use.
.png)
To process a booking:
(1) Filter the pending request(s) that require your verification.
.png)
(2) Select the request(s), click Verify, then choose to accept or reject.
.png)
Once approved, the booking status changes to Success, and a QR code for facility access will be available on the request’s detail page. The guest will also receive this QR code via email.
.png)
.png)
TIP:
Approved reservations can be canceled anytime by clicking the Cancel button.
.png)
Staff Management
The GRMS platform enables managers to add new staff and manage their access credentials.
1. Add New Staff
NOTE:
Only manager accounts can access the Staff Management option.
(1) Click Setup > Staff Management > New.
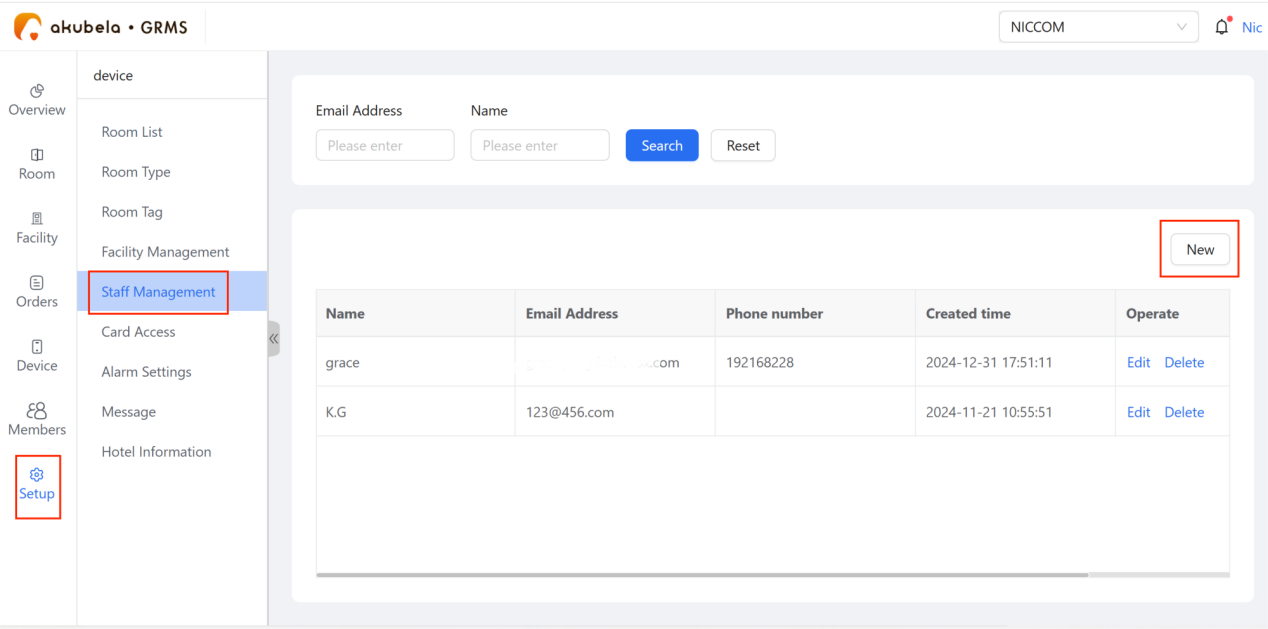
(2) Enter the staff details.

The new staff member will receive an email with GRMS login credentials.
2. Create Access Permission Groups
You can define access groups to grant permissions for designated service areas and/or specific guest rooms based on roles or predefined rules.
(1) Go to Setup > Card Access > Permission Group.
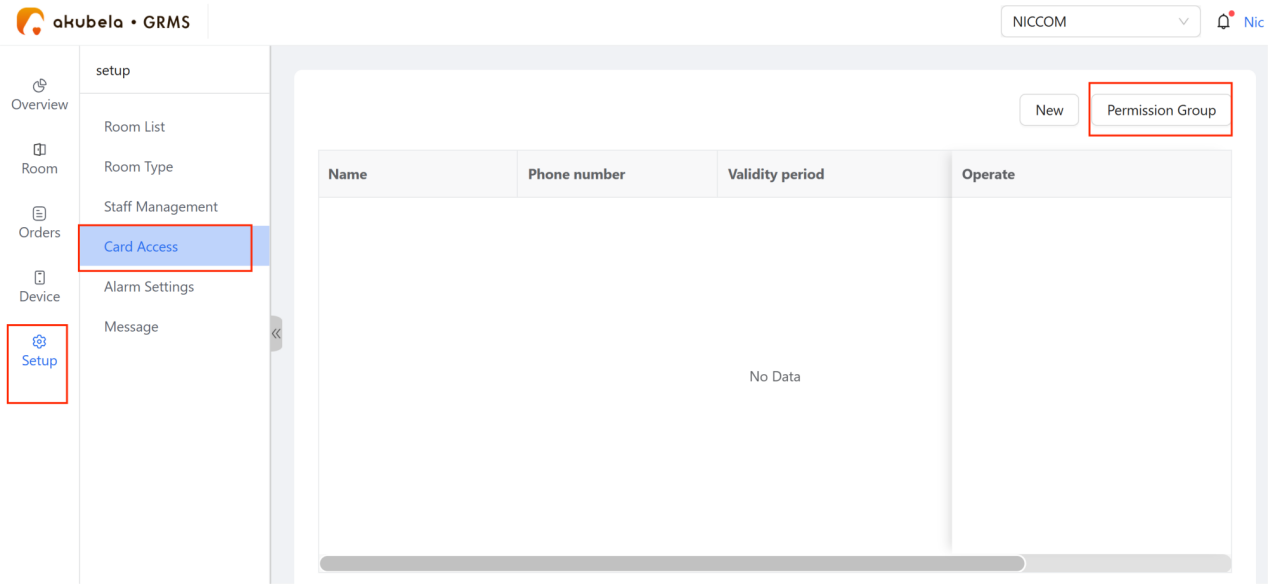
(2) Click New to create a group. Name the group, select the assigned rooms and public devices, and then click Submit.
.png)
The new groups will be listed on the Permission Group page.
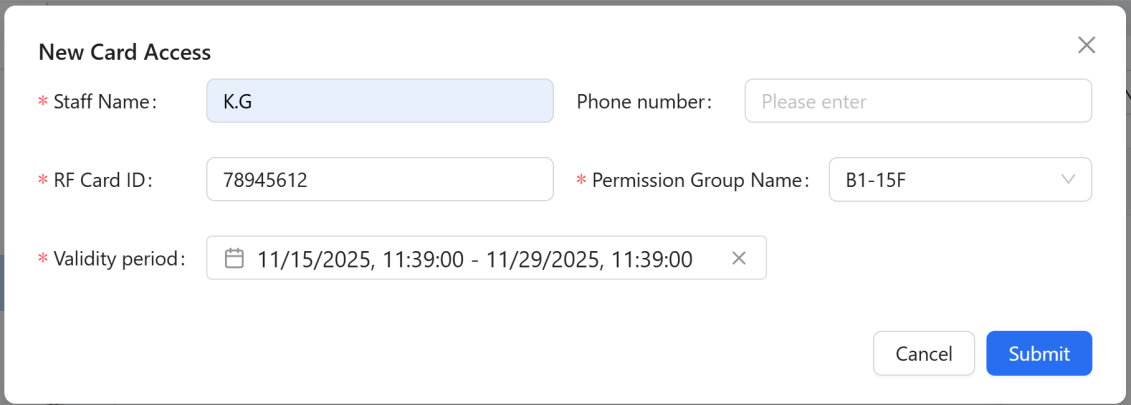
3. Add Cards for Staff
(1) Click Setup > Card Access > New.
.png)
(2) Fill in the required information, assign the access group, set the validity period, and click Submit.
Membership Management
Manage memberships on GRMS to grant members exclusive facility booking access.
1. Add New Member
(1) Click Member > New.
(2) Enter the member’s information.
.png)
(3) Click Submit.
The new member will appear on the Members page and receive an email with login credentials for the member portal to book facilities.
.png)
.png)
2. Manage Member Booking Records
To view a member’s complete booking history, go to Members > Detail.
.png)
To process their bookings, still go to Facility > Booking Orders. See detailed instructions here.
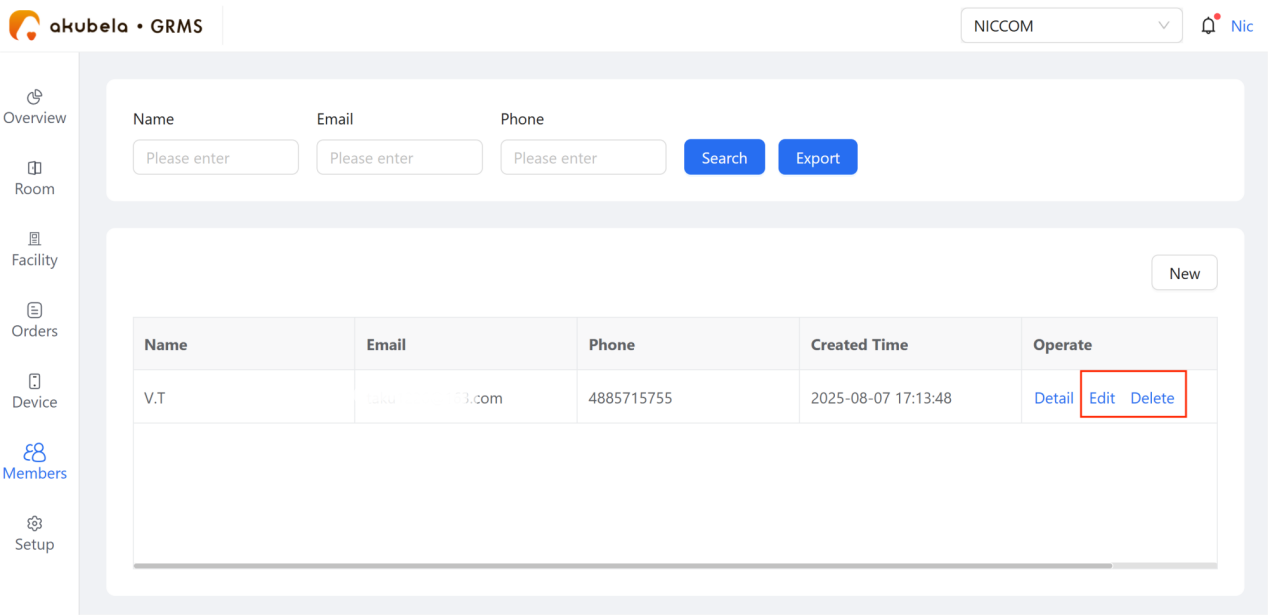
3. Edit and Remove Members
To update member information or delete a membership, go to the Members page and click Edit or Delete accordingly.