Property managers need an efficient way to monitor shared spaces in their communities, check camera availability, review recorded footage, and respond to detected events.
This guide explains how to configure camera settings, view live camera feeds, search and play back recorded videos, and manage detection alarm records from the PM SmartPlus Cloud portal.
Note
As a PM, you can only manage cameras added to the Public Area of the whole community or building entrances by your installer, not the apartment cameras.
Before You Start
Model Compatibility
Camera
VC50B/VC50T: 650.30.0.31 or later.
SmartPlus App
7.50.0003(Android)/7.50.3(iOS) or later.
Note
PM SmartPlus App is a paid feature and isn't enabled for every PM account. Your installer controls whether it's enabled for you.
Door Phone/Access Control Terminal
Model | Minimum Version | Model | Minimum Version |
|---|---|---|---|
X915V2 | 2915.30.10.811 | A095 | 95.30.11.104 |
R20V5 | 320.30.12.103 | A01/A02 | 101.30.11.204 |
A03 | 103.30.11.204 | A08 | 108.30.12.6 |
S535 | 535.30.11.32 | A05V2 | 205.30.11.127 |
E16V3 | 416.30.12.104 | X916 | 916.30.10.604 |
R28V2 | 228.30.11.108 | E18 | 18.30.11.202 |
X912 | 912.30.13.3 | R29 | 29.30.10.743 |
S532 | 532.30.10.404 | E16V2 | 216.30.12.103 |
Indoor Monitor
The following models with specific versions or higher support viewing the live video from the camera.
Model | Minimum Version | Model | Minimum Version |
|---|---|---|---|
S567 | 567.30.115.222 | X937 | 937.30.15.213 |
S563 | 563.30.15.217 | R49 | 49.30.10.97 |
S562 | 562.30.16.158 | S565 | 565.30.15.532 |
C313V3 | 313.30.16.216 |
System Requirements for Live Video and Playback
It is recommended to use the latest stable version of your OS or browser. Playback quality may also be affected by device performance, system decoding capability, and network conditions.
Feature | Minimum Version | Recommended Version |
|---|---|---|
Live Video | Android 10+, iOS 13+, Chrome/Edge 94+, Firefox 130+, Safari 16.4+ | Android 13+, iOS 17+, Chrome/Edge 130+, Firefox 137+, Safari 17+ |
Playback | Android 10+, iOS 16.4+, Chrome/Edge 94+, Firefox 130+, Safari 16.4+ | Android 13+, iOS 17+, Chrome/Edge 130+, Firefox 137+, Safari 17+ |
Part 1: Configure the Camera Settings
Log in to the PM SmartPlus Cloud portal with your PM account.
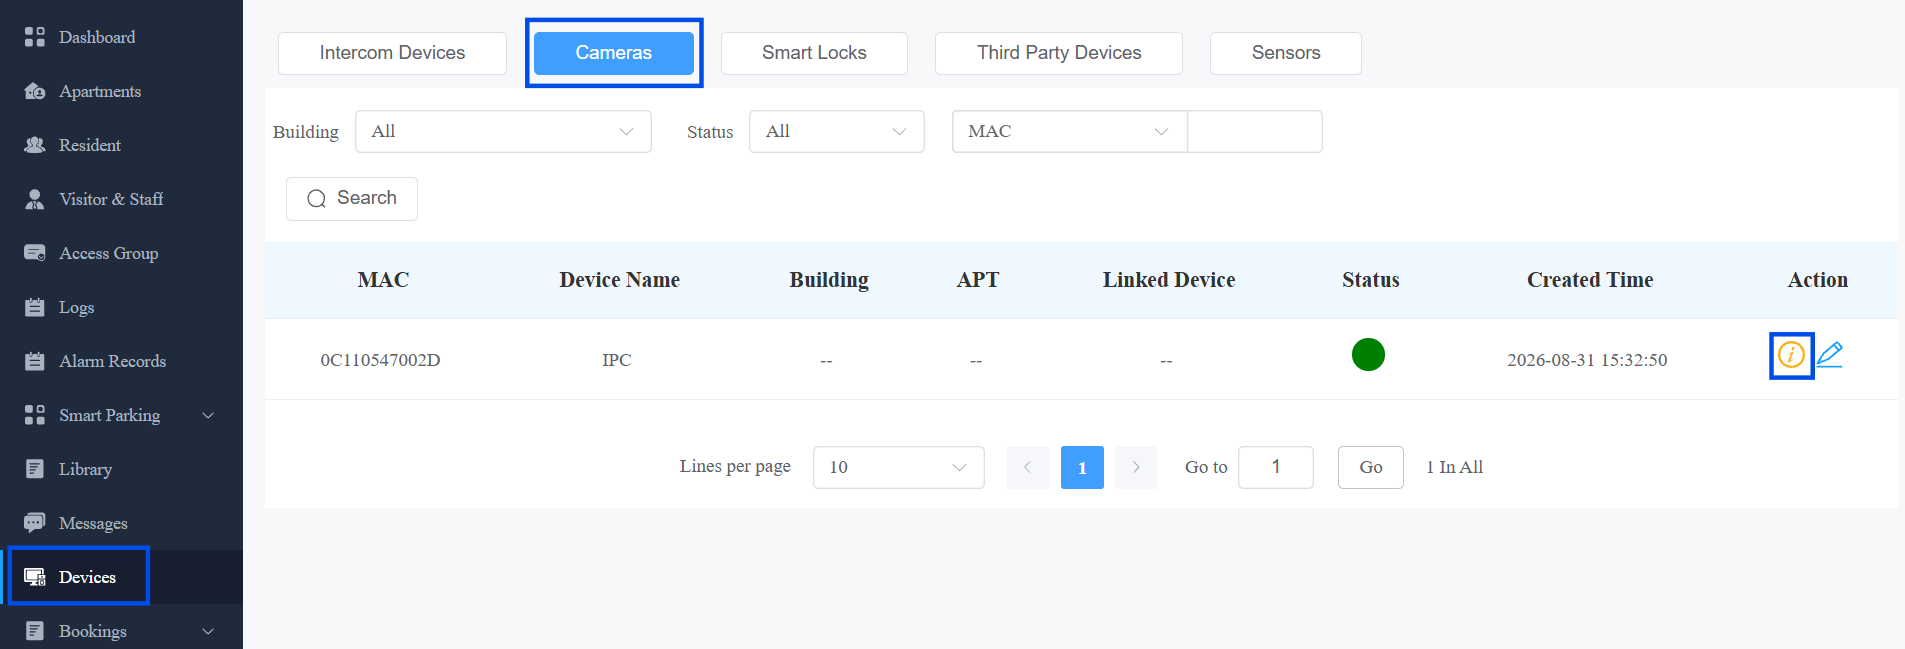
Go to Devices > Cameras.
Click
 of the target camera.
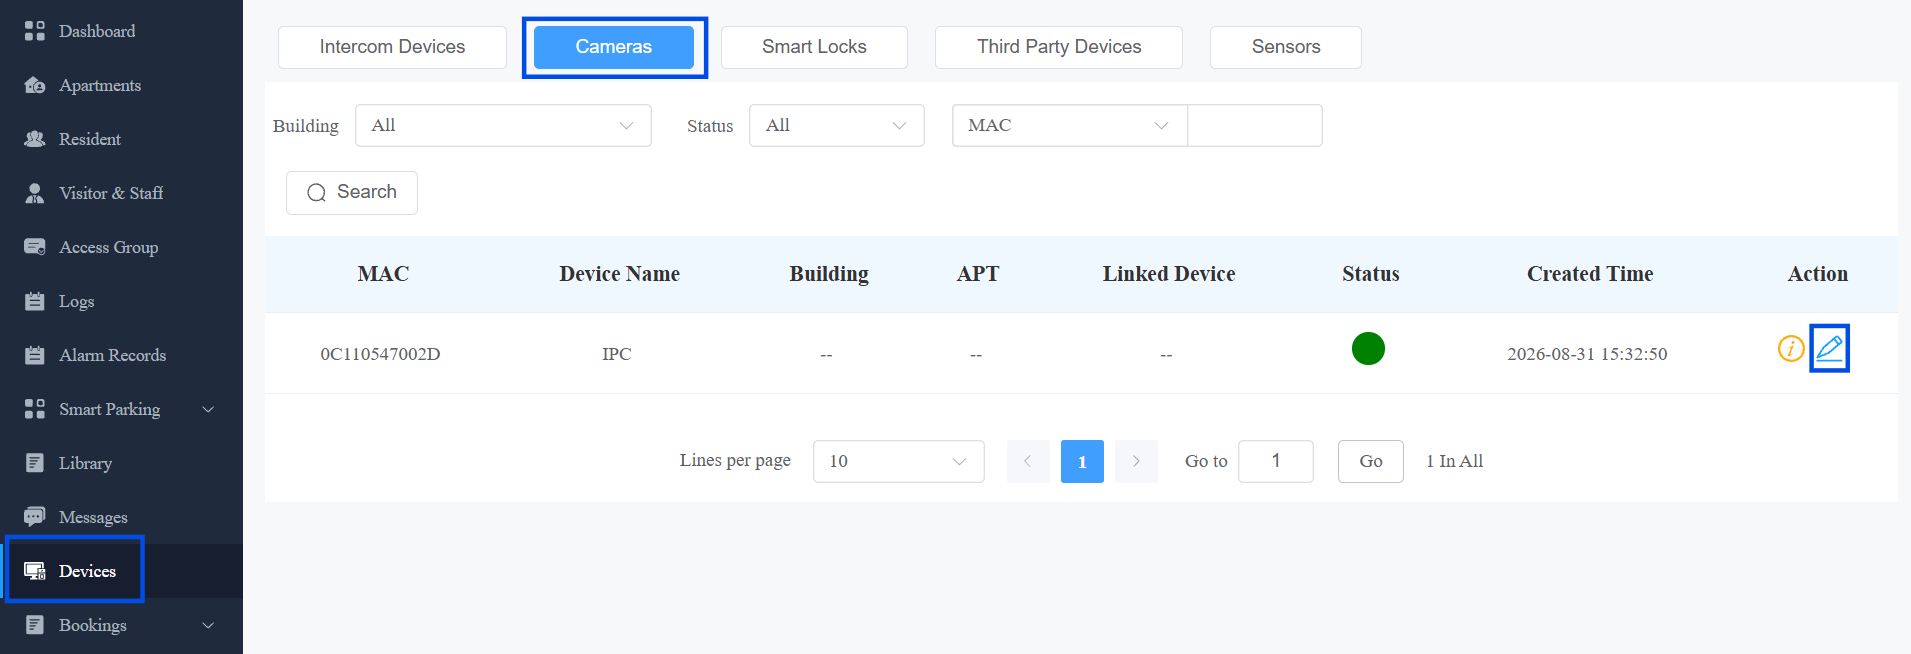
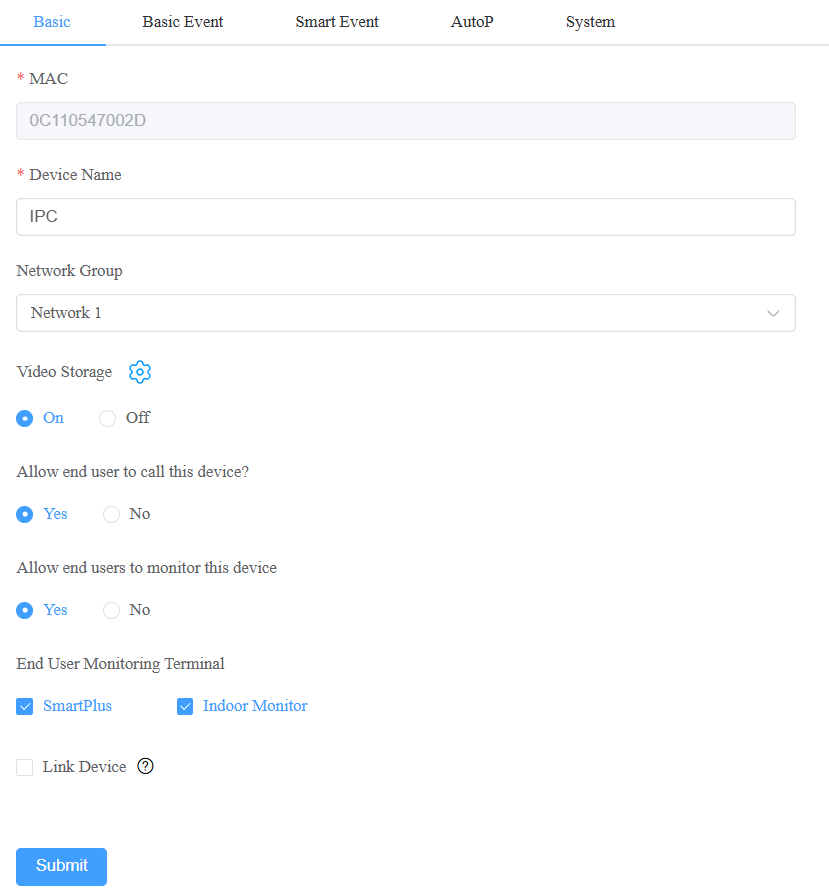
From here, you can configure the camera's basic settings and detection events.
Basic Settings
Modify the Device Name if needed.
Select the Network Group. For most single-network deployments, use the default network group.
Enable the Video Storage feature to store recorded videos. Without it being enabled, videos will not be recorded.
Click
 to open the feature setting.
See the Video Recording and Storage guide for storage plans and playback details.
Turn Allow end user to call this device on or off (on by default).
Turn Allow end user to monitor this device on or off (on by default).
When enabled, select which terminal(s) end users can monitor from: SmartPlus App and/or Indoor Monitor.
Enable Link Device if needed. Then specify which device is linked to the camera. This determines how the camera's video is viewed in the app — for both end users and PMs using the PM SmartPlus App.
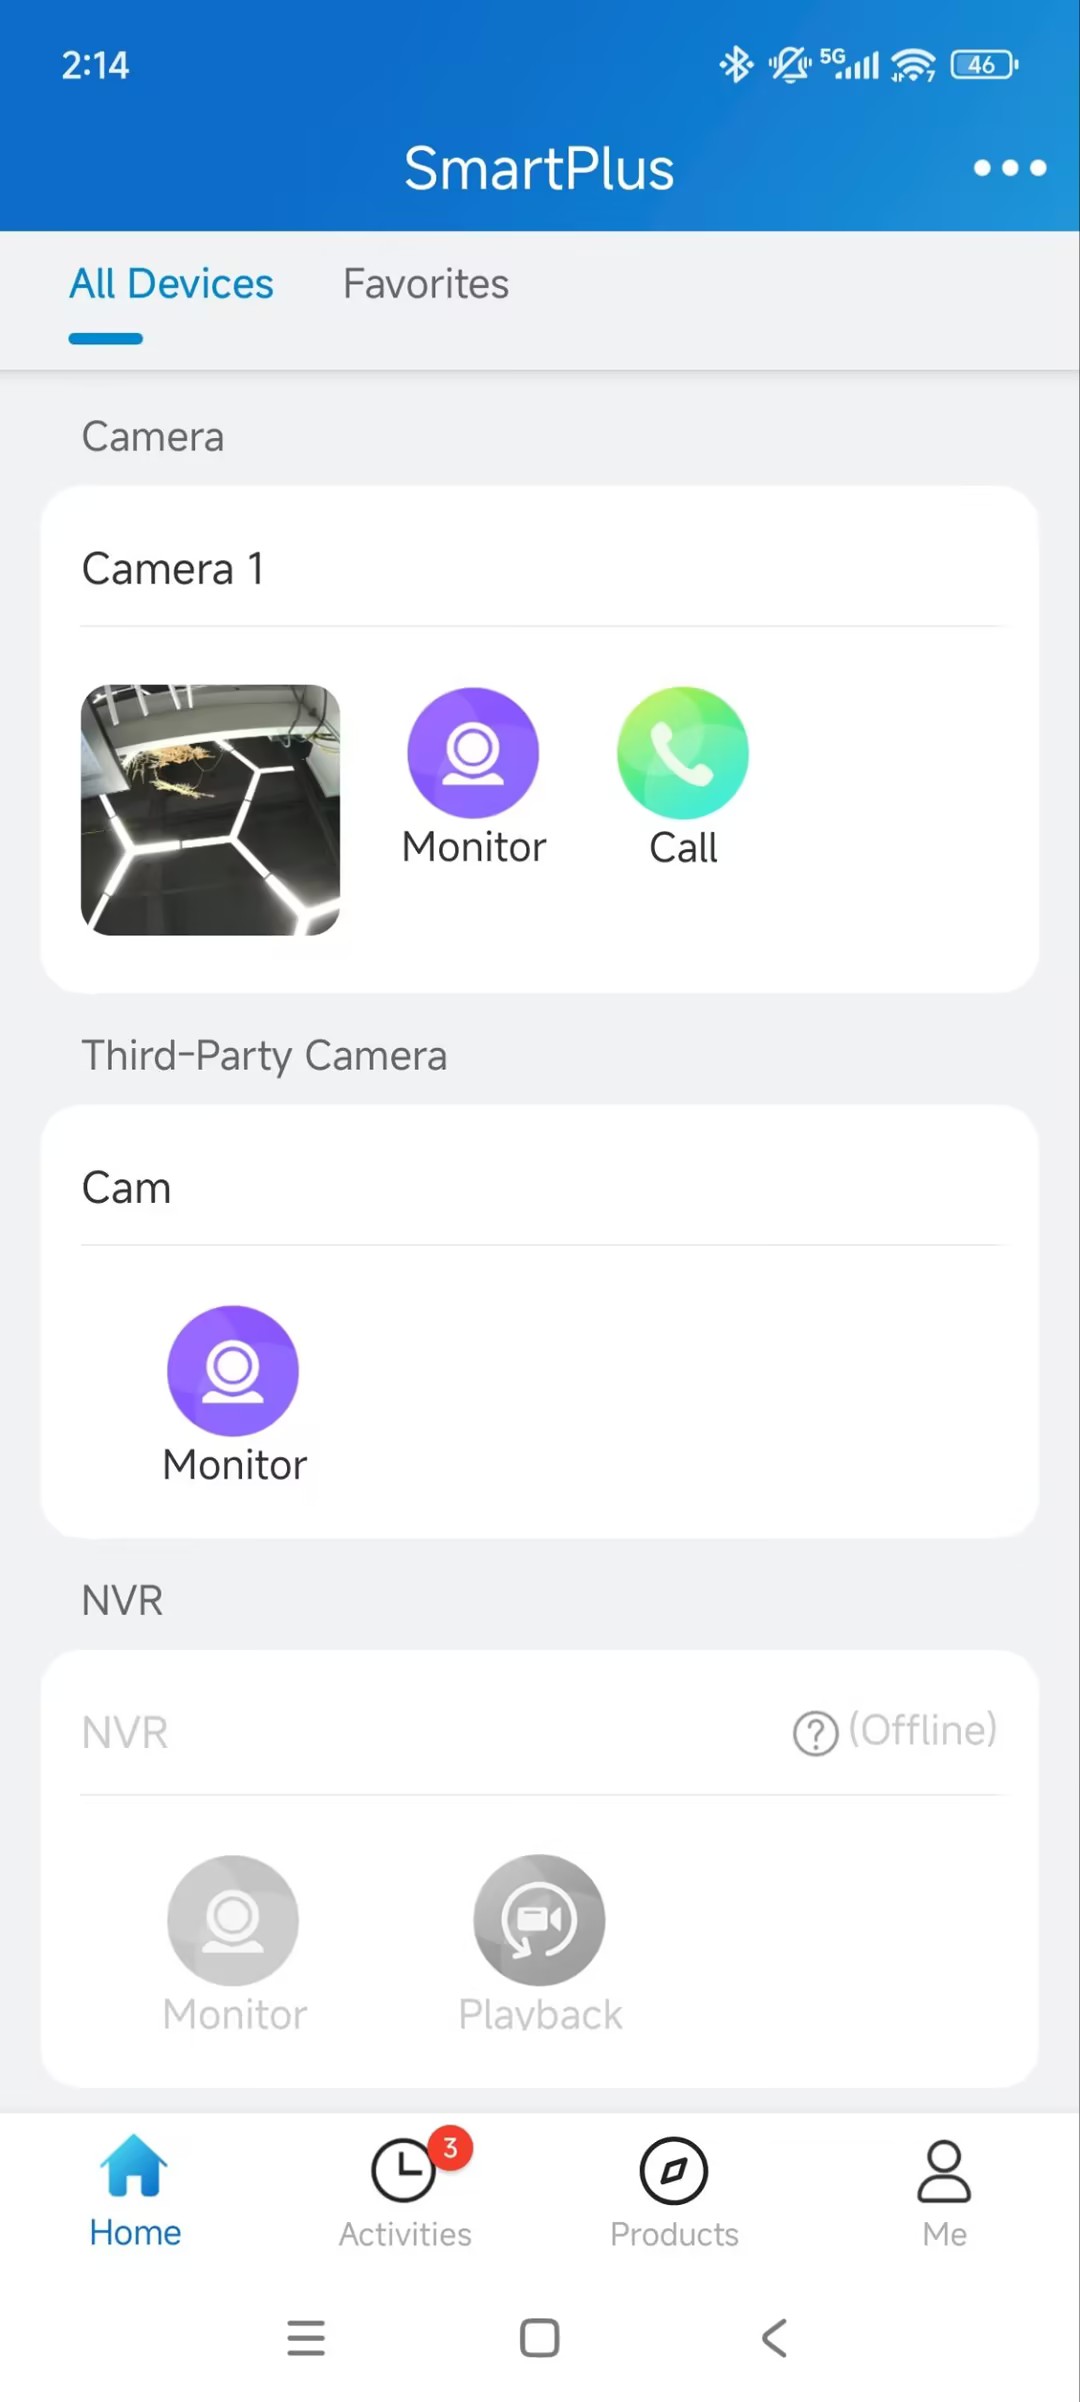
If not linked, the camera appears as its own icon on the SmartPlus App homepage.
If linked, the icon will be hidden. Tap Monitor of the linked device and switch to the camera’s video stream.
Note
Specific models and versions support linking to the camera. See Model Compatibility.
One device can only be linked to one camera.
Detection Events
The camera supports basic and smart detection events. When an enabled event is triggered, SmartPlus Cloud sends an alarm notification to the PM cloud platform and to the PM SmartPlus App.
Note
On SmartPlus Cloud, detection events only generate an alarm notification. Currently, the cloud does not support configuring additional linked actions for these events.
Basic Events
Select Basic Event.
Enable and configure the desired event. See the chart below.
Set the detection schedule: the times during which the enabled event(s) are active.
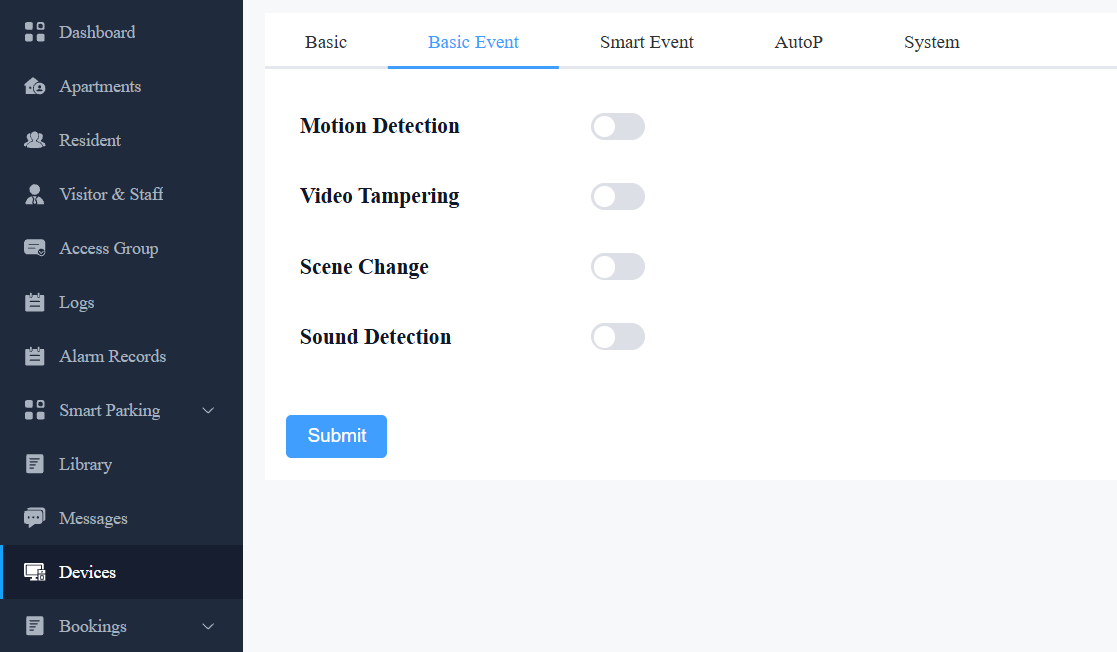
Basic Events
Event | What It Detects | Configuration |
Motion Detection | General movement in the camera's view. | Click Draw to draw up to 4 detection areas in the video frame. Sensitivity: 0–100 (default 50). Higher values detect smaller or subtler movement. |
Video Tampering | The camera view being blocked, covered, or redirected. | Sensitivity: 1 (Low) – 5 (High), default 3 (Medium). |
Scene Change | A sudden change in the camera's background or field of view (e.g., the camera was moved or knocked out of position). | Sensitivity: 1 (Low) – 5 (High), default 3 (Medium). |
Sound Detection | Abnormal sound levels picked up by the camera. | Detection Type:
For these three types, set Difference: the volume change (in dB) required to trigger an alarm. Range 1–90, default 20.
|
Smart Events
Select Smart Event.
Enable and configure the desired event. See the chart below.
Configure the detection schedule when the detection is activated, whichever detection event is enabled.
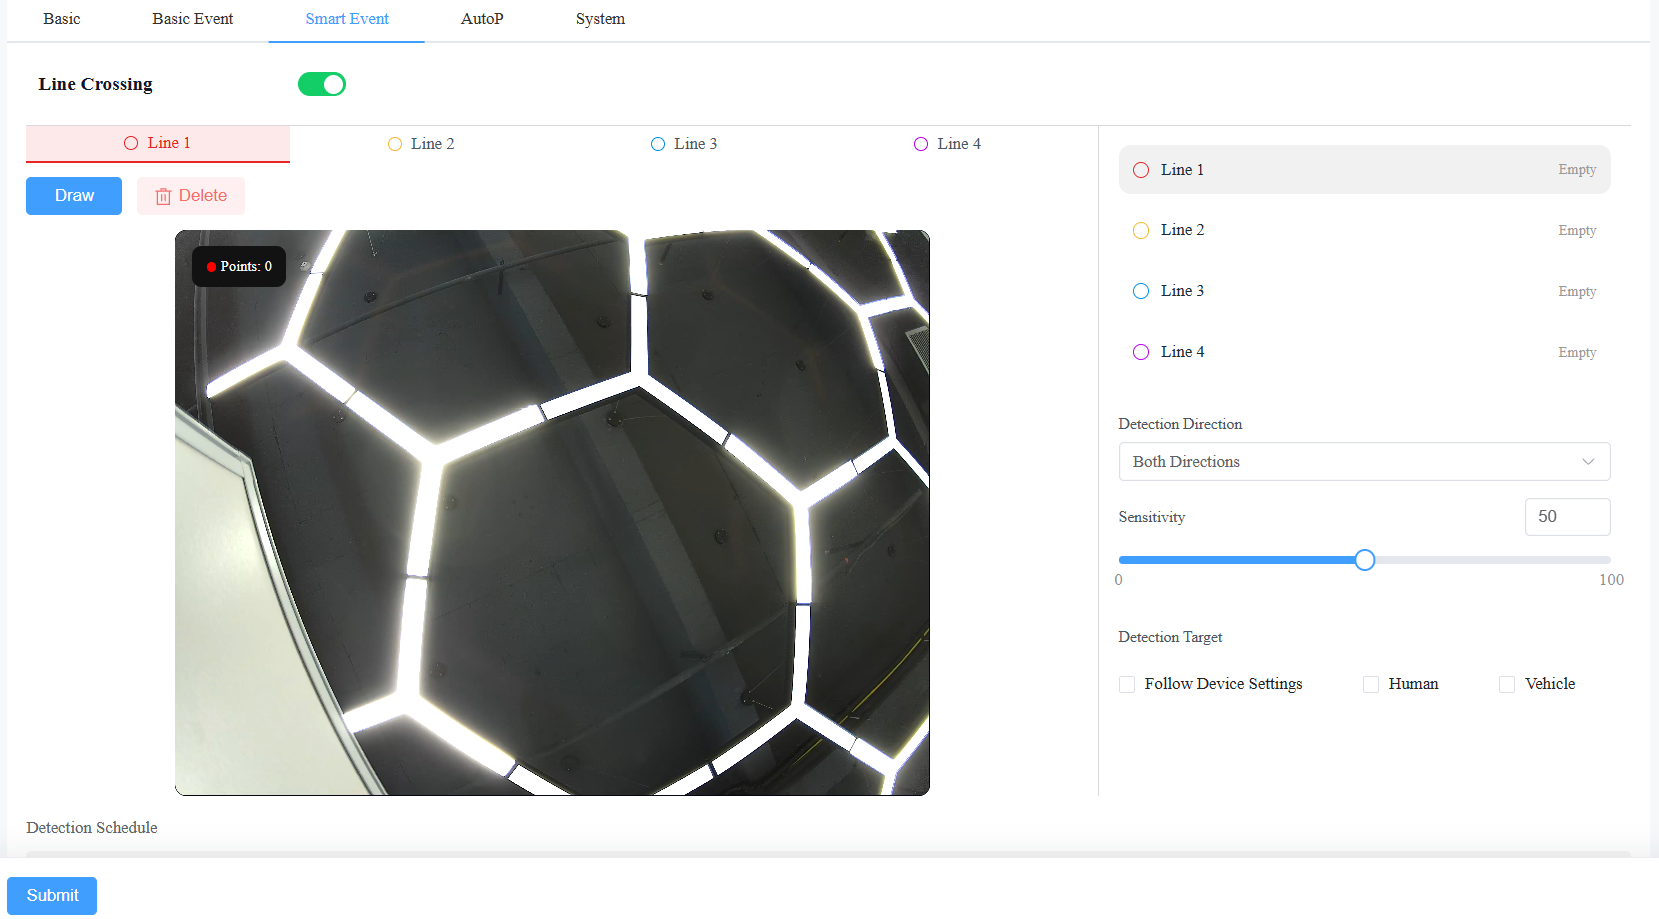
Smart Events
Event | What It Detects | Configuration |
Line Crossing | A person or object crossing a defined virtual line. | Click Draw to draw a line in the video preview.
Detection Direction: The direction of crossing that triggers an alarm. Default: Both.
Sensitivity: 0–100, default 50. Detection Target:
|
Intrusion | A person or object entering a defined restricted zone. | Click Draw to draw a zone in the video preview. Up to four zones can be defined. Sensitivity: 0–100, default 50. Duration Threshold: The minimum duration a target must remain within the detection area before an alarm is triggered. Range: 1–30 s. Default: 5. Detection Target:
|
Part 2: View Live Monitoring
On the Cloud Portal
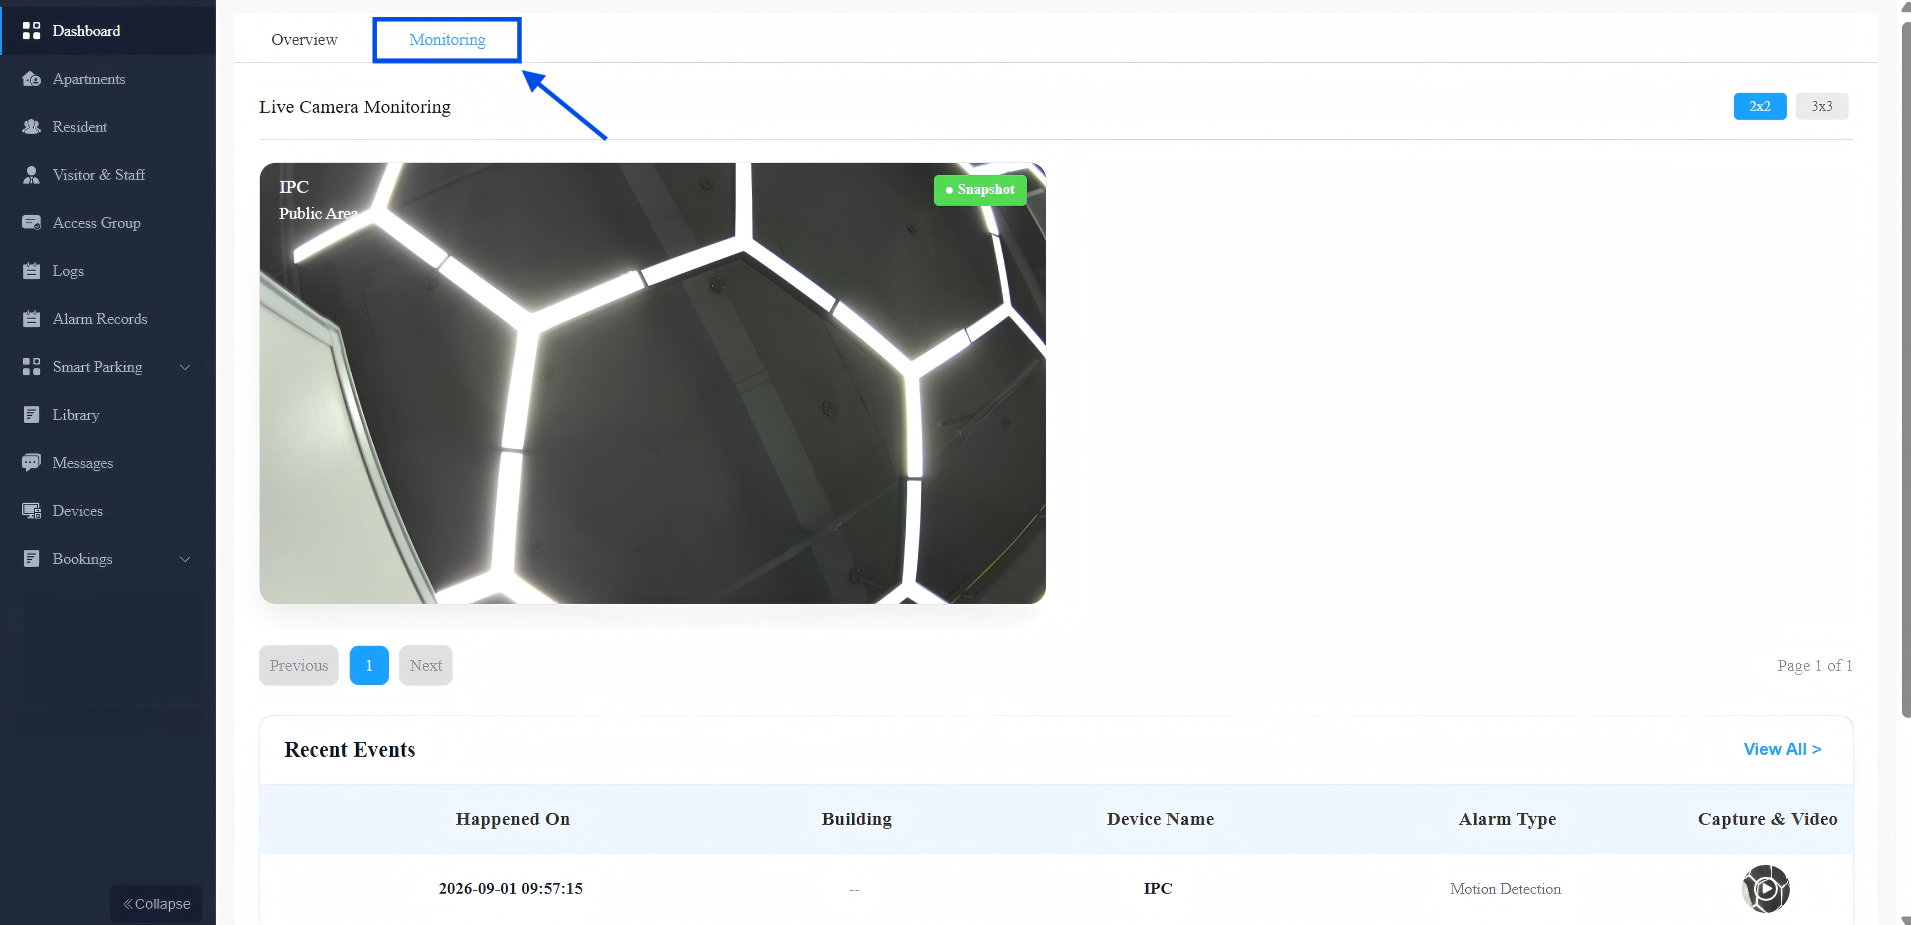
Once logged in, switch to the Monitoring page to see live video from cameras in public areas. From here, you can:
Get an overview:
Check each camera card for online/offline status and unread alarm indicators.
Review recent events — the dashboard shows up to 10; click View All for more.
Interact with the dashboard:
Choose a layout: 2×2 or 3×3.
Drag cards to reorder them.
Click a camera card to open its monitoring page.
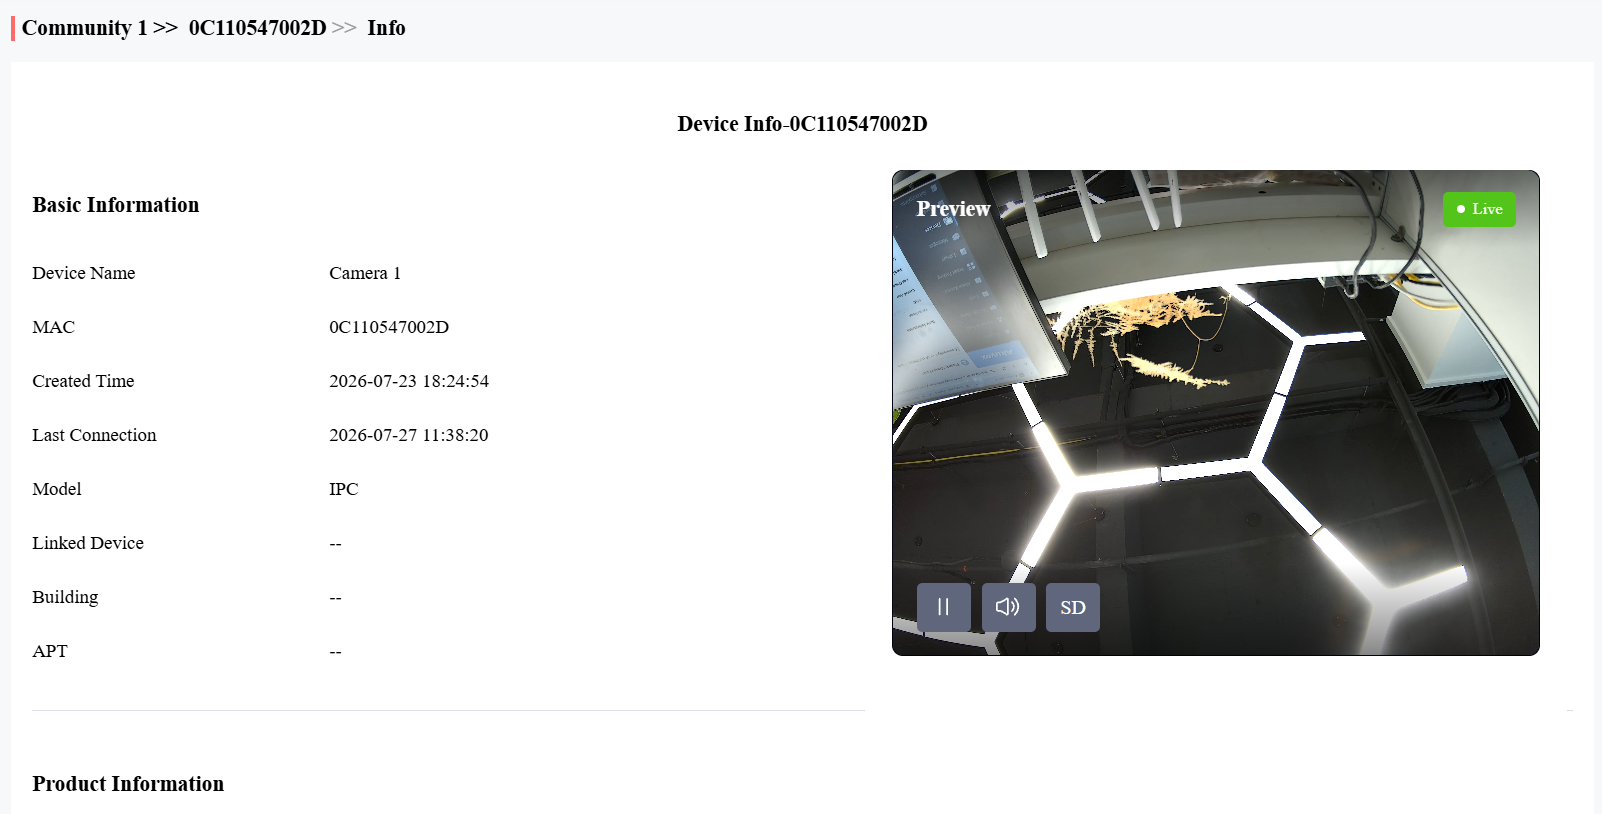
You can also navigate to the Devices module. Click  to open the camera’s detail page to view the live video.
On the PM SmartPlus App
If the SmartPlus App feature is enabled for your account, you can view the camera’s live video in the app.
How you view it depends on whether the camera is linked to an Akuvox device.
Camera Not Linked
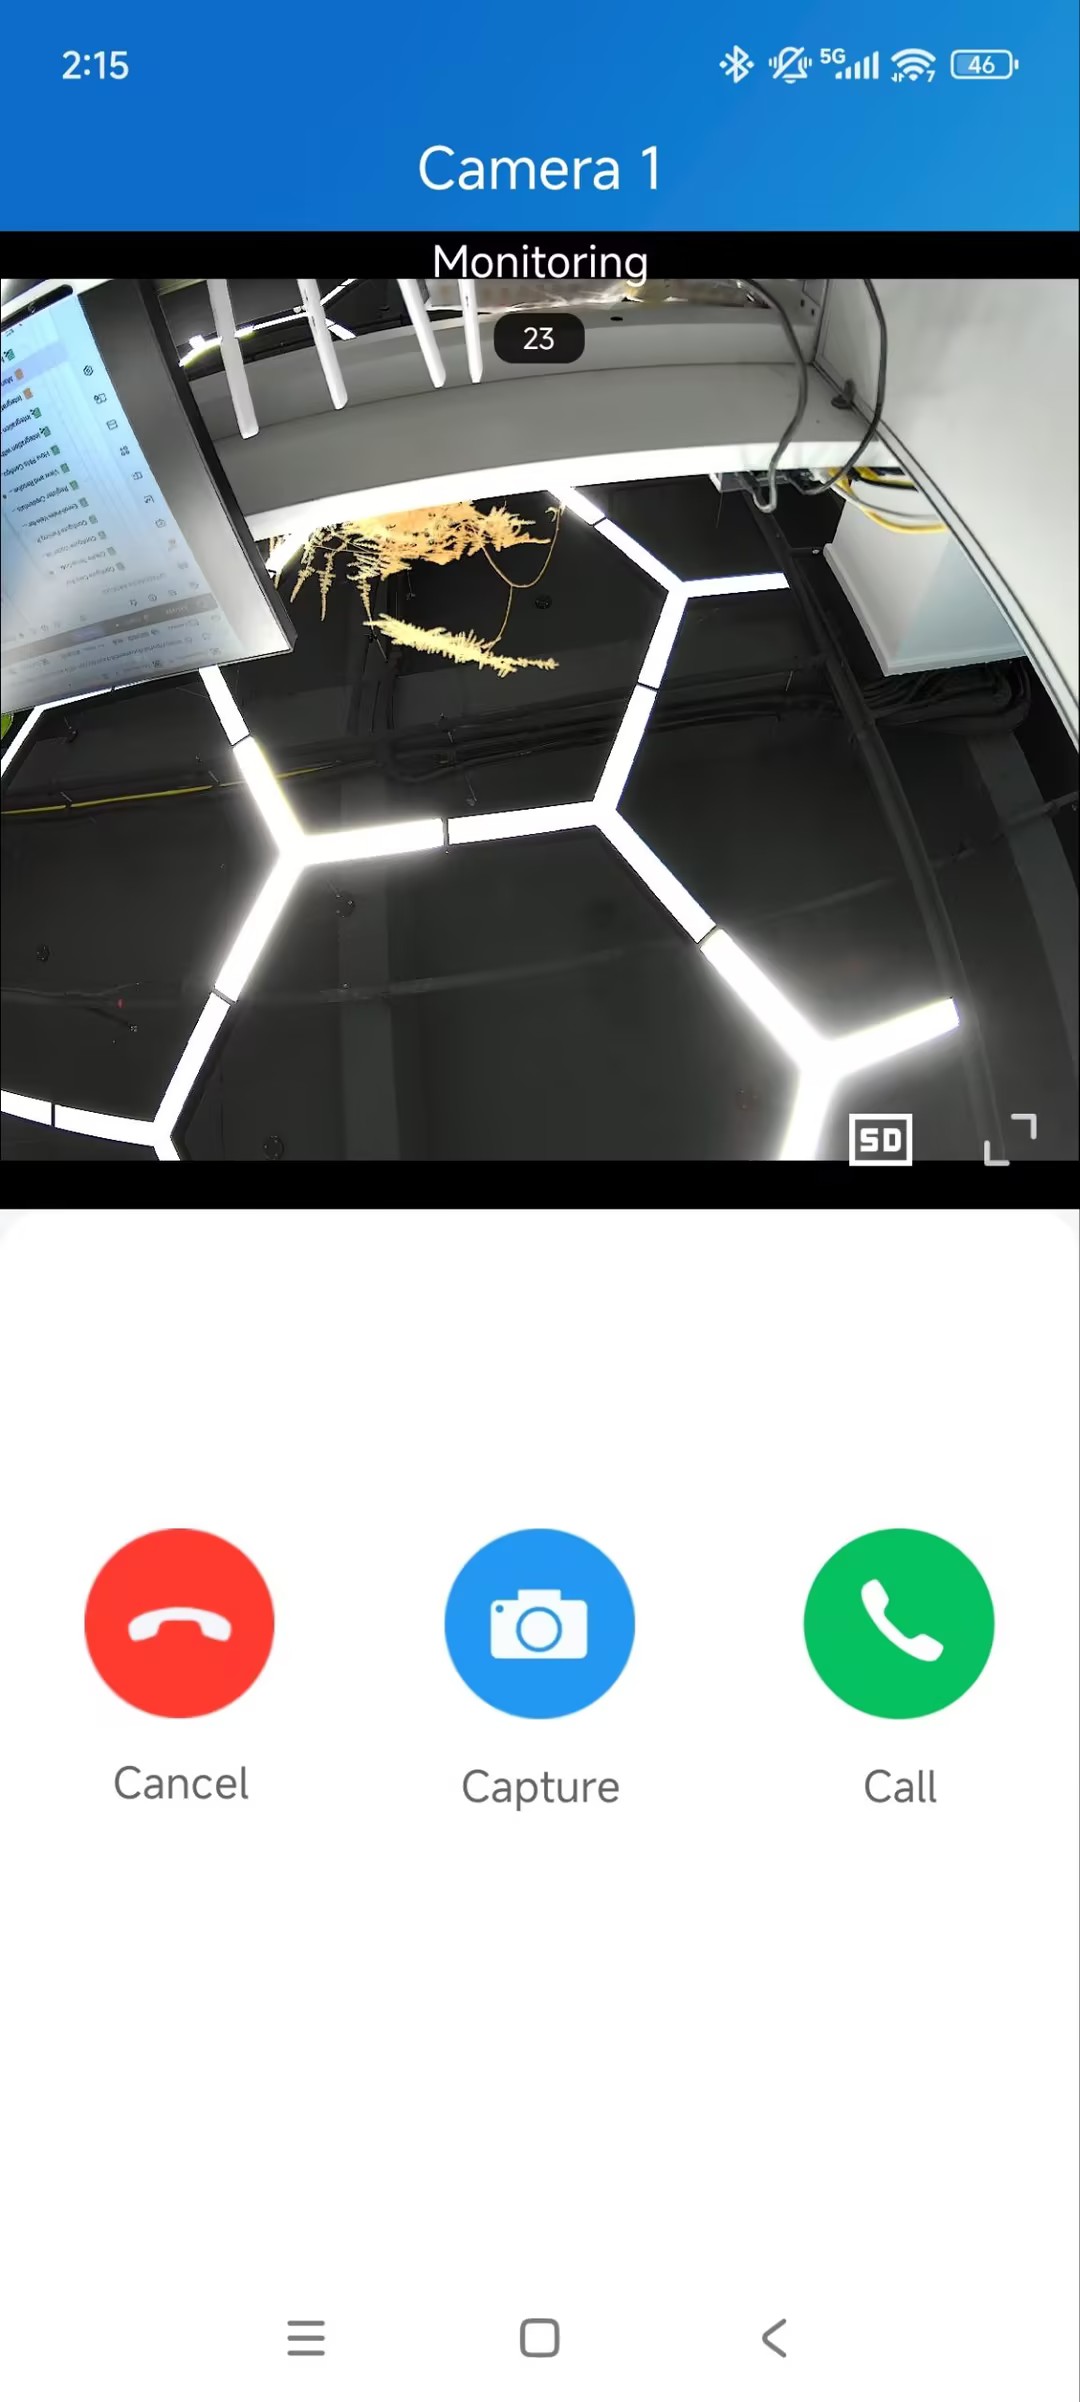
Tap Monitor to open the camera's monitoring page directly. From here you can tap:
Capture to take a screenshot.
Call to call the camera.
Camera Linked
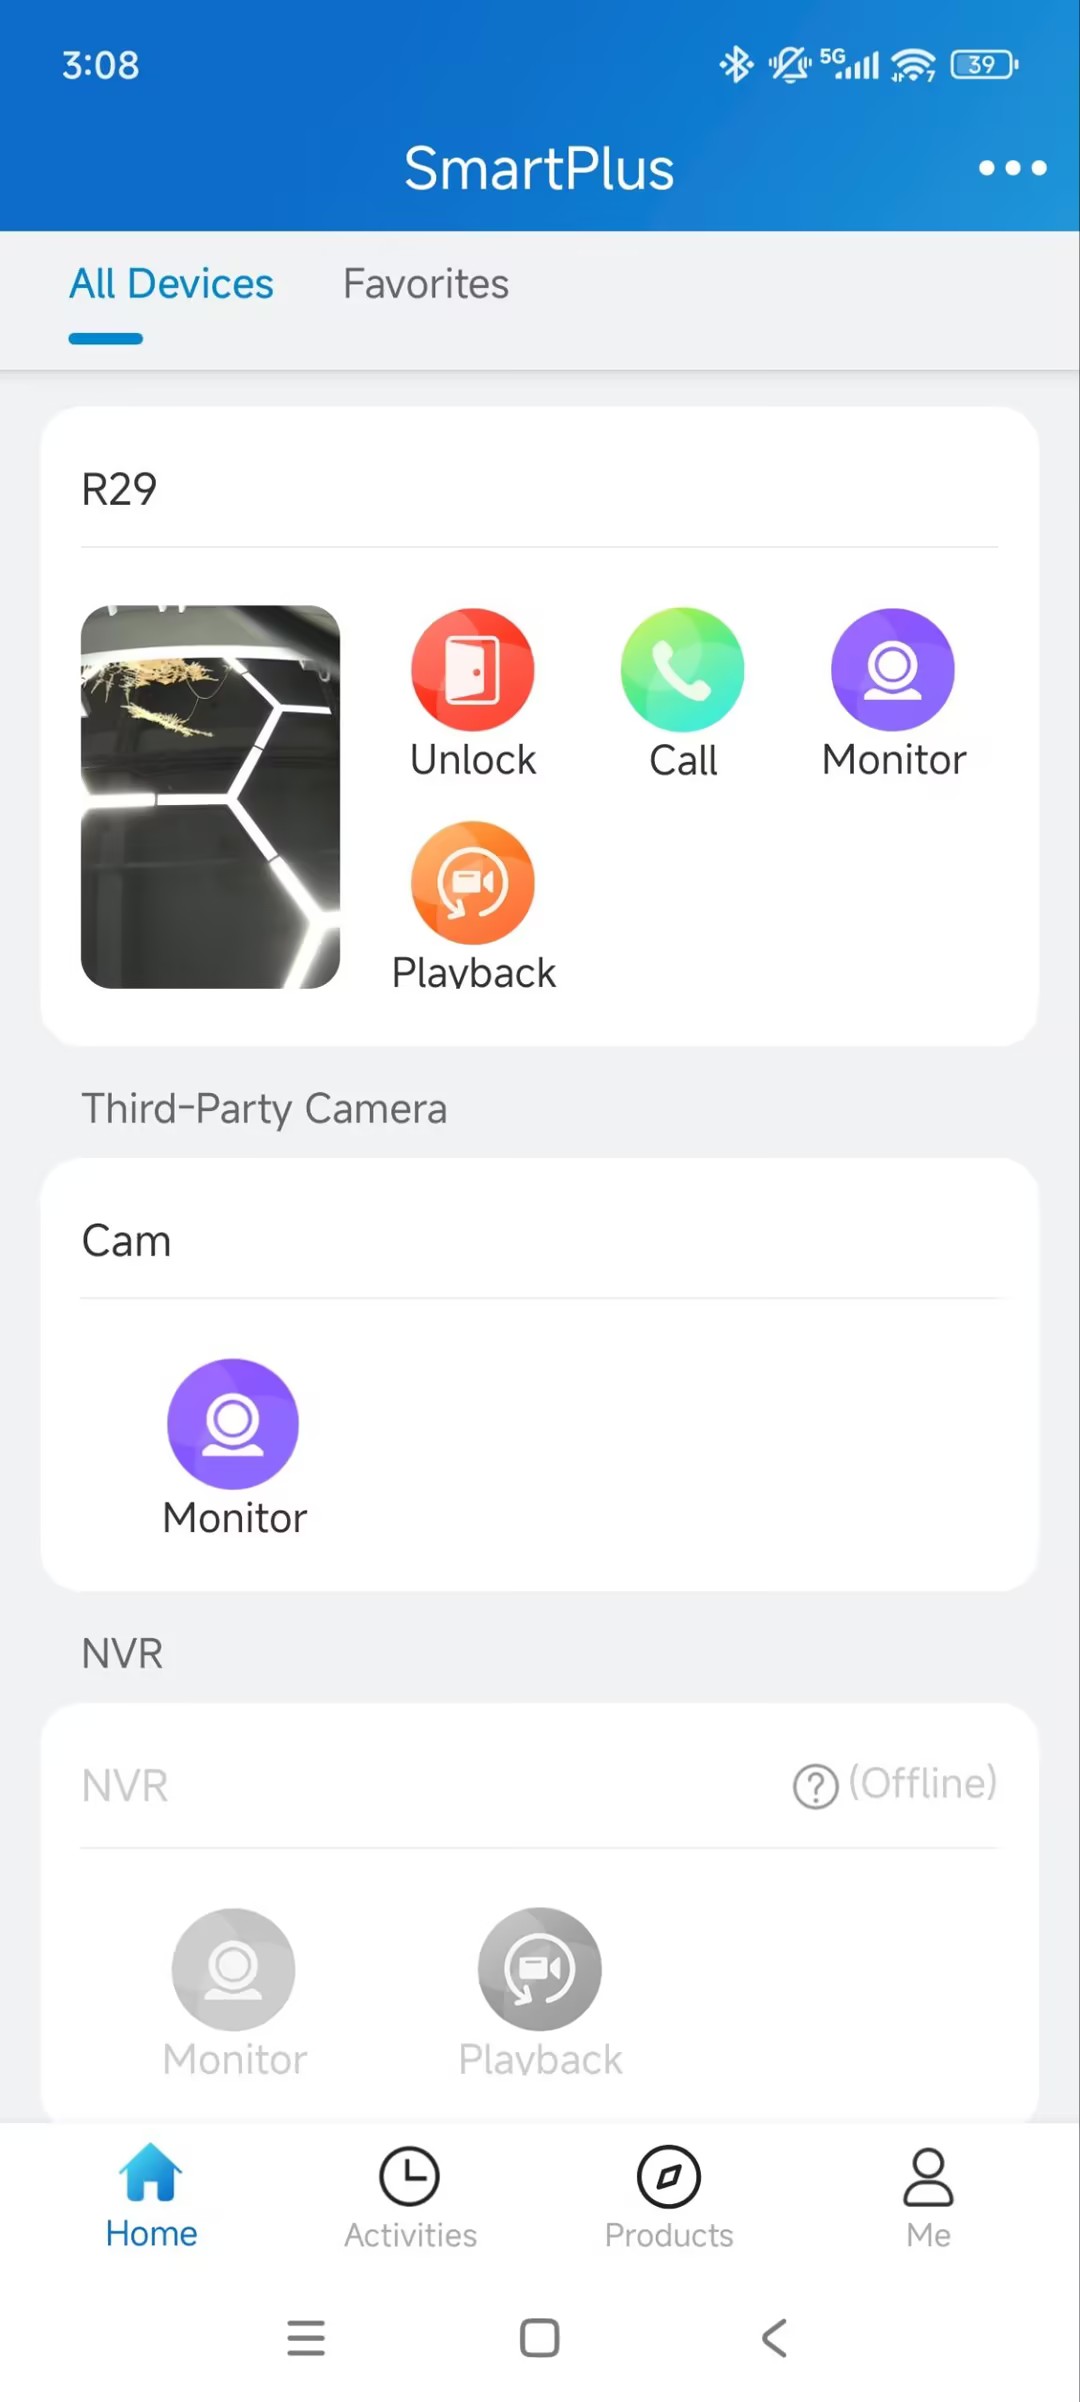
When a camera is linked, it no longer has its own entry in the app — you access it through the linked device instead. A thumbnail on the linked device's card shows a live camera snapshot that refreshes every 10 seconds, indicating the link.
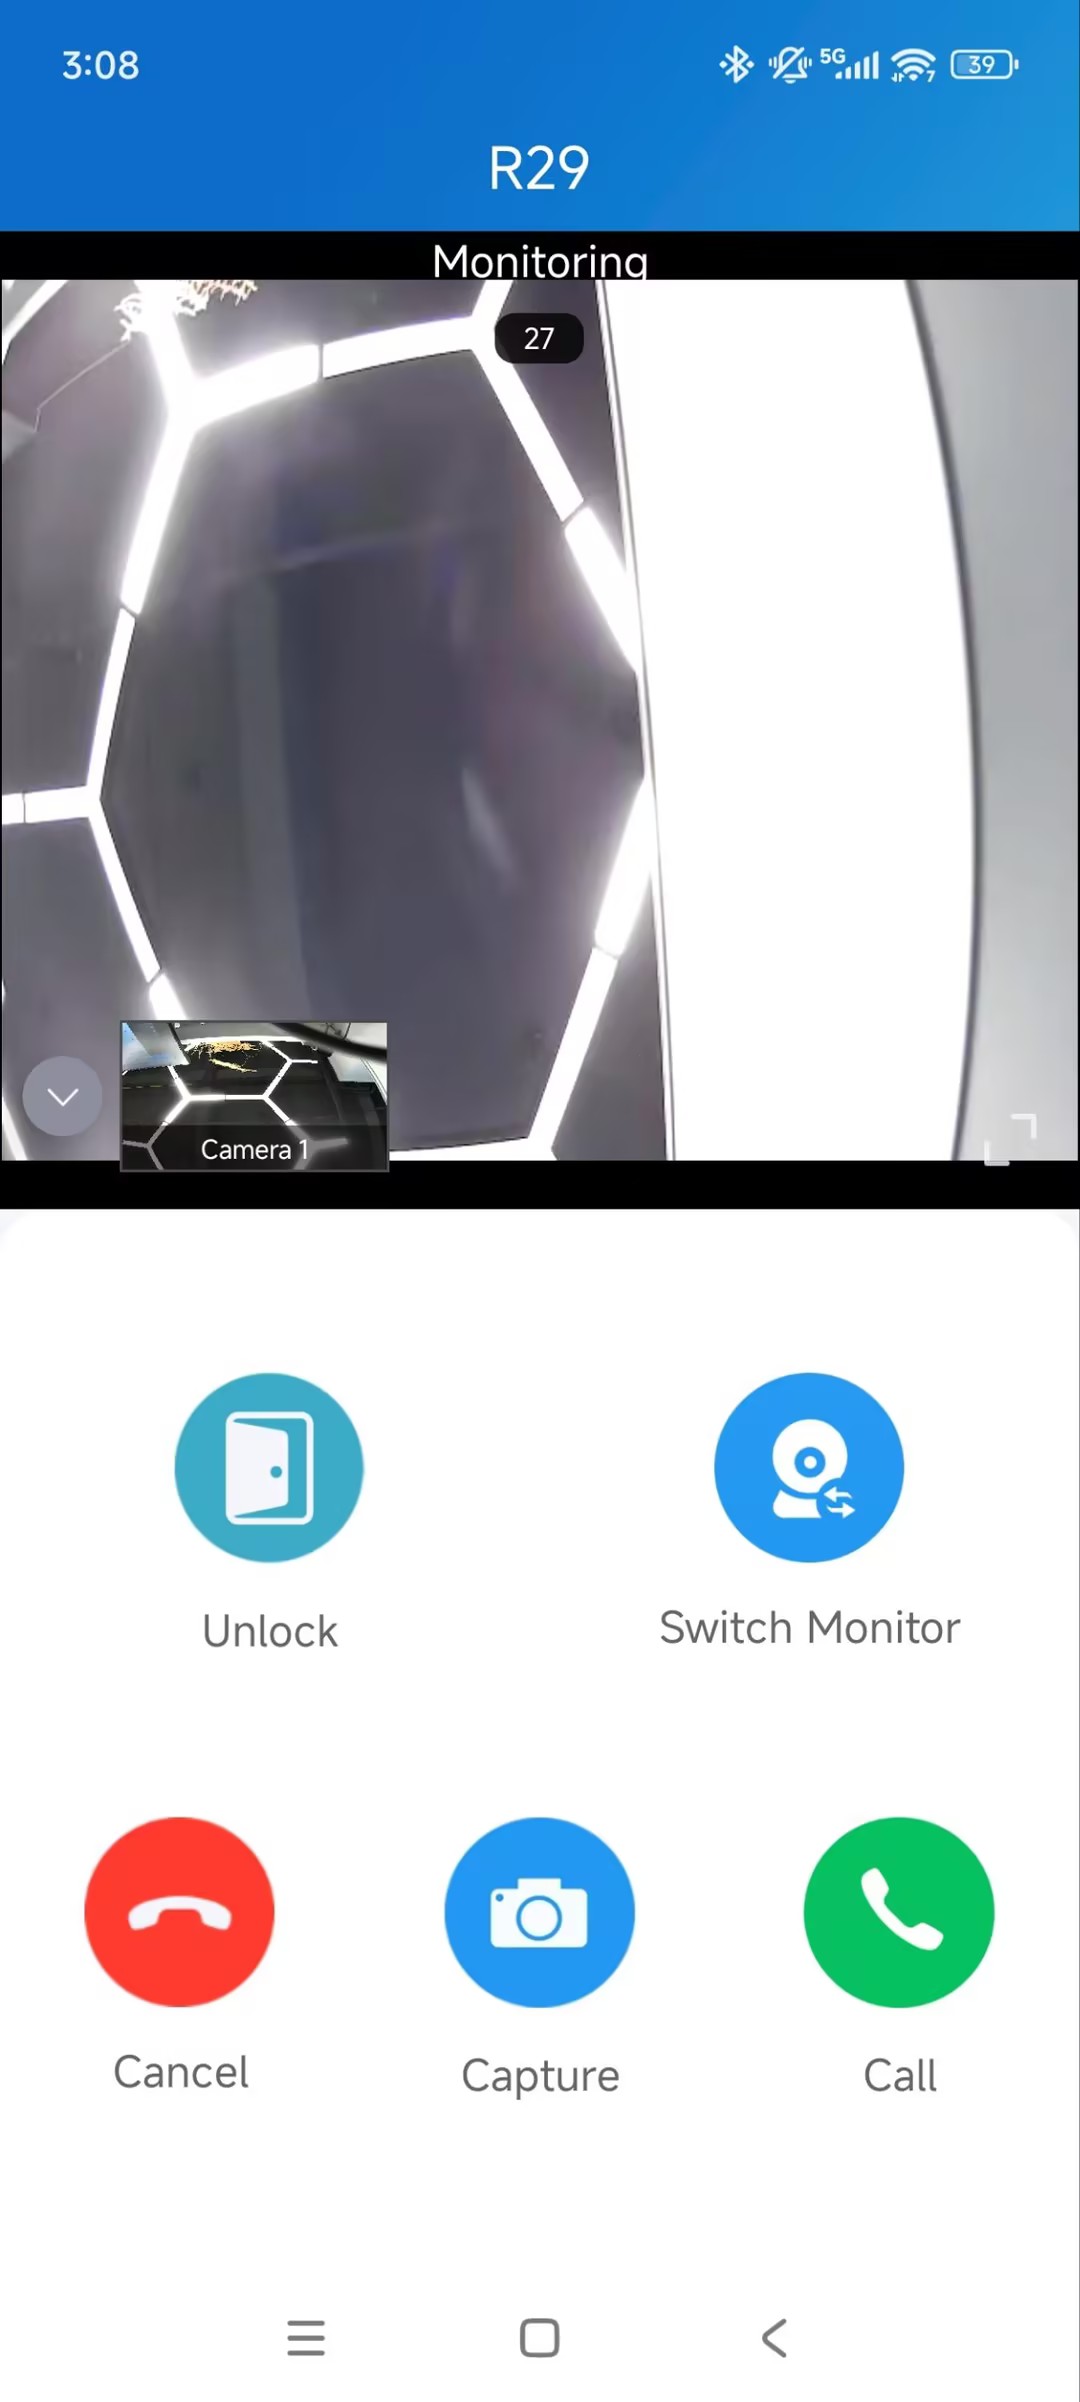
Tap Monitor to open the device’s monitoring page, then tap Switch Monitor to toggle the live video between the device and the camera.
If the linked device has no camera of its own, the app shows the camera's live video directly.
On the Indoor Monitor
Camera Not Linked
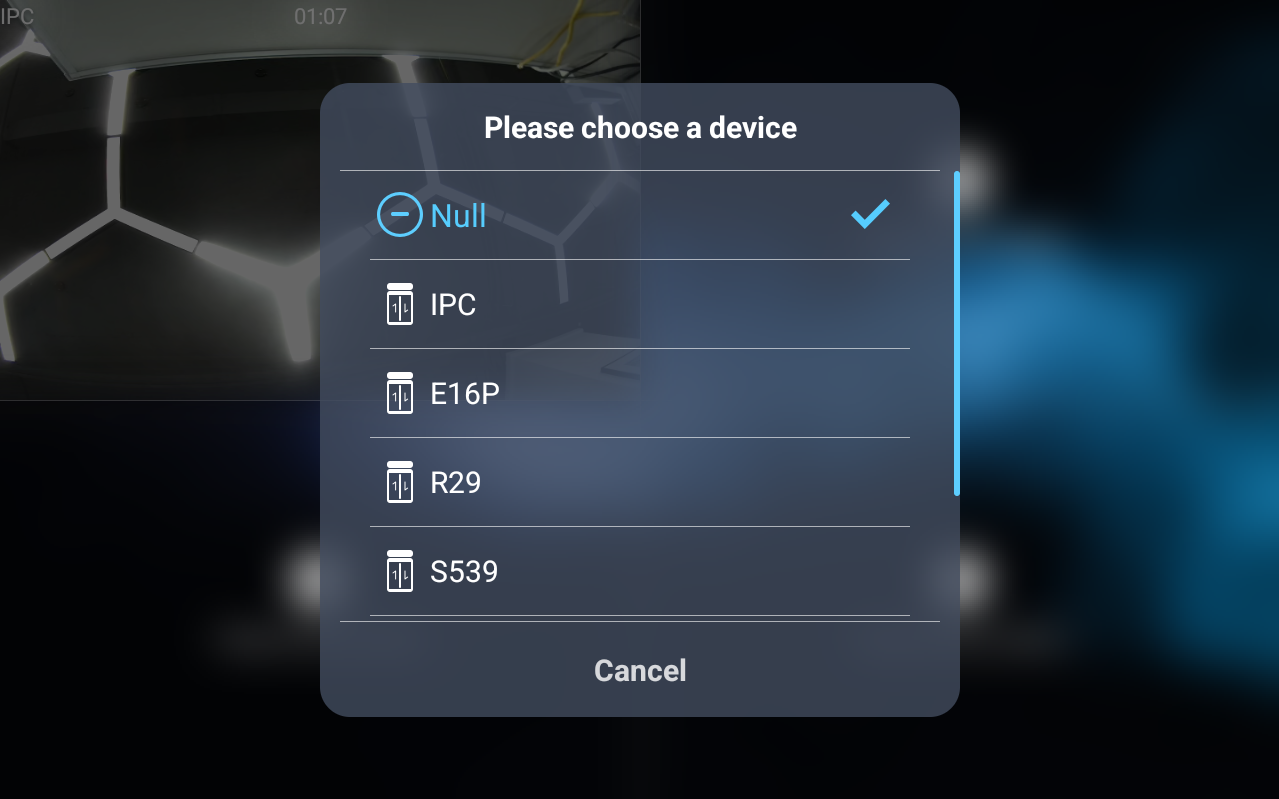
When the camera is NOT linked to any device, tap Monitor on the home screen and tap the Add icon.
You can see the camera name in the list. Tap it to display the live stream.
Camera Linked
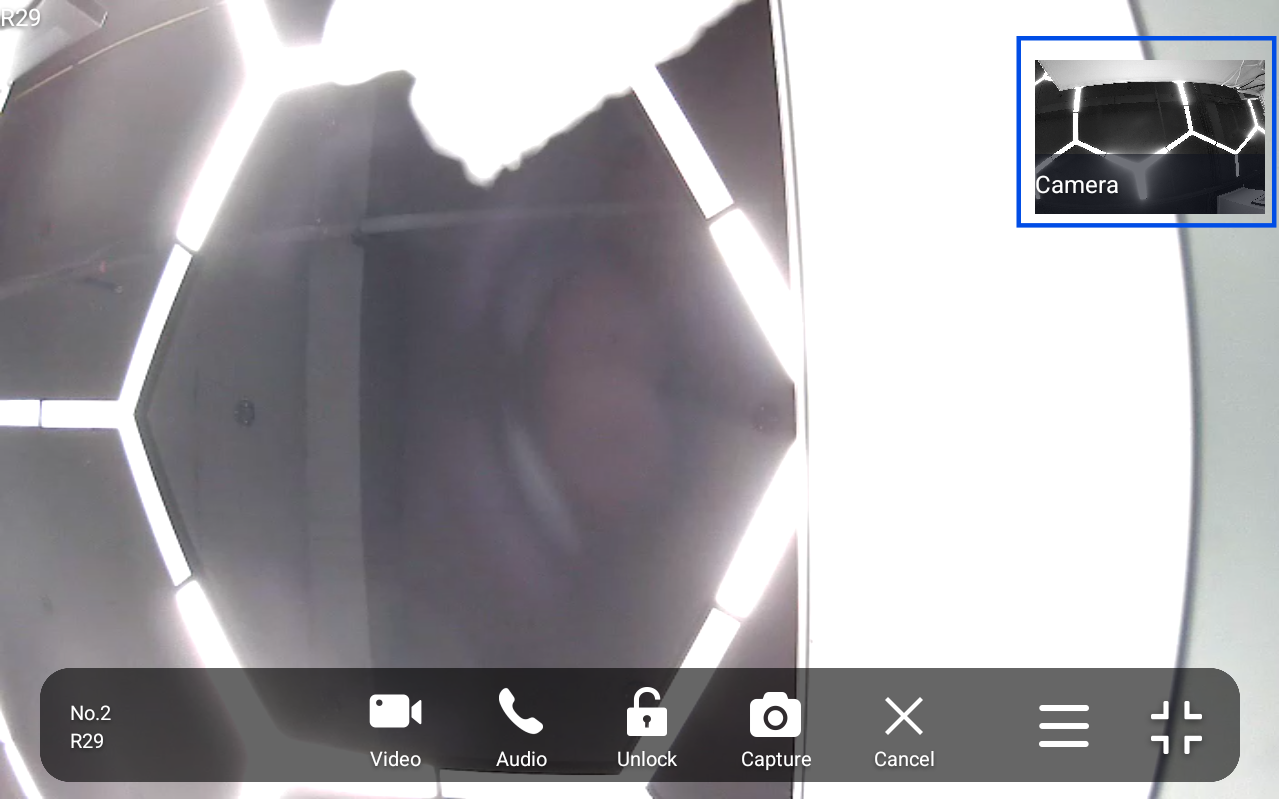
When the camera is linked to a device with a built-in camera, you can switch the live video between the linked device and camera.
If the camera is linked to an access control terminal without a built-in camera, the terminal’s name will be displayed on the monitor list, but the video stream shown is from the camera.
Part 3: Play Back Recorded Video
Note
On the cloud, recordings are only generated when a detection event is triggered — there's no continuous recording. A recording is only available if Video Storage was enabled for the camera (see Basic Settings in Part 1); otherwise, no video exists to play back, even for triggered events.
On the Cloud Portal
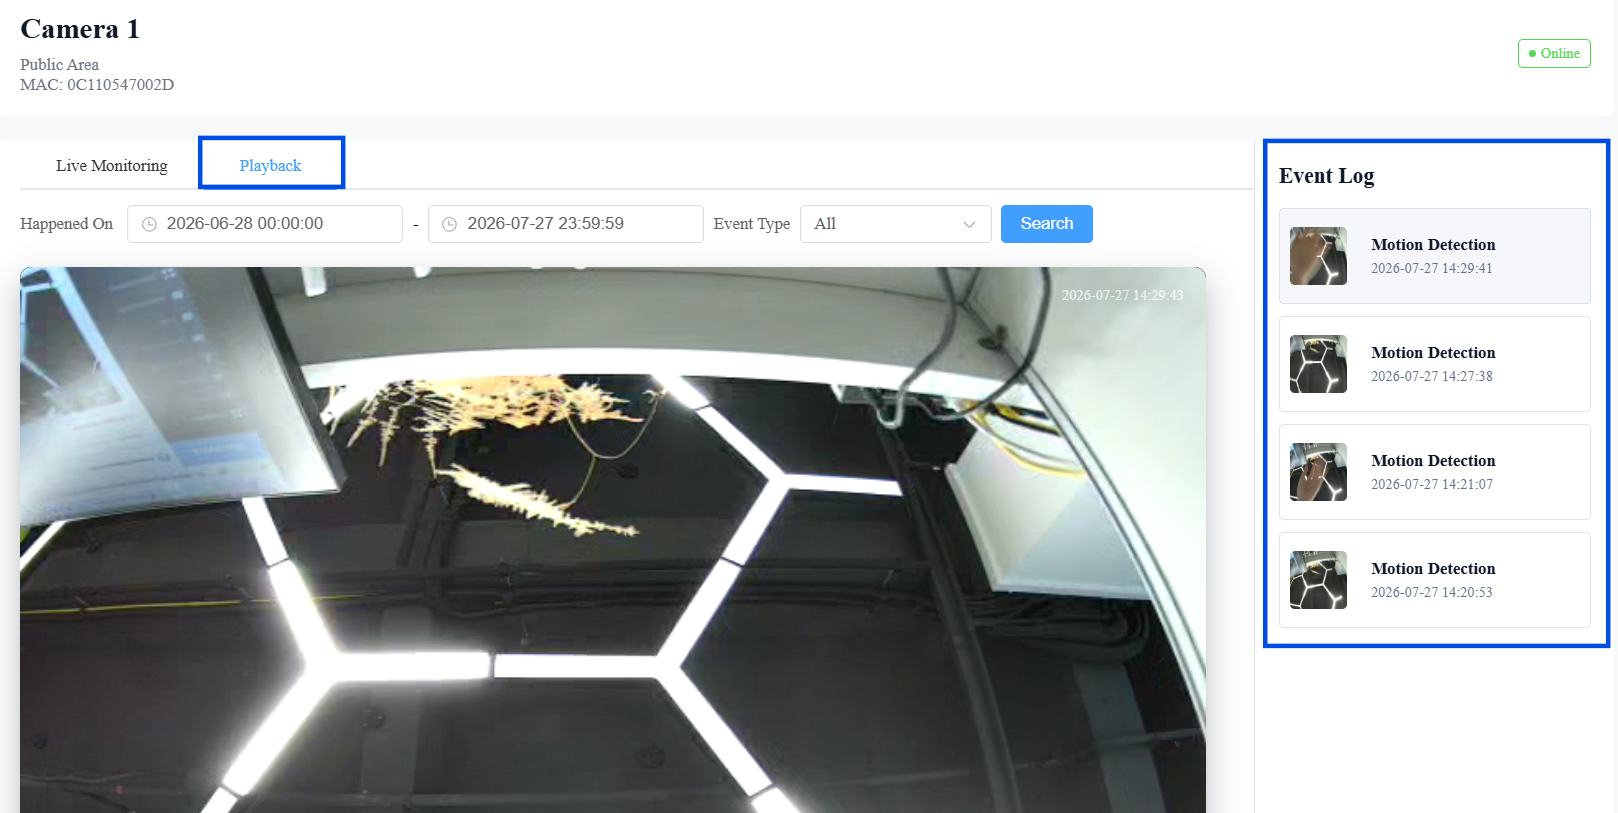
Switch to the Monitoring page on the Dashboard and click a camera card to open its monitoring page.
Select Playback.
Filter by occurrence time, date, or event type as needed, then select a recording from the Event Log.
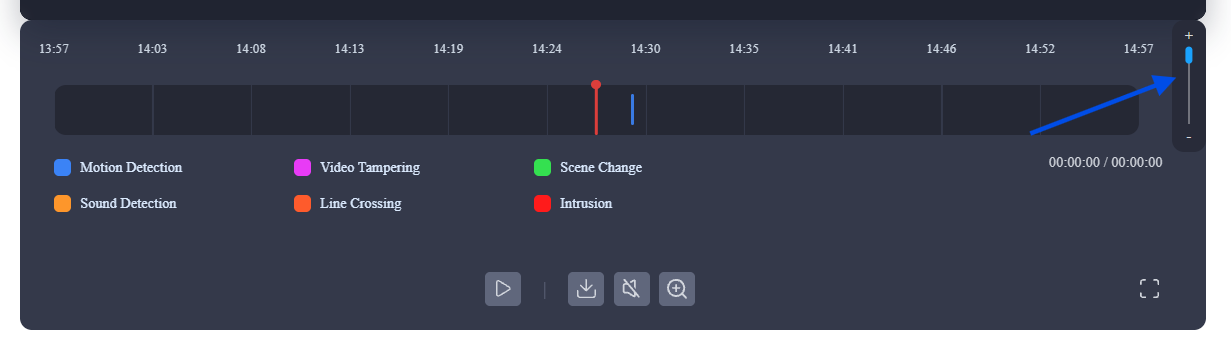
Alternatively, use the timeline to select a time range. Adjust its granularity from 1 week down to 1 hour.
On the PM SmartPlus App
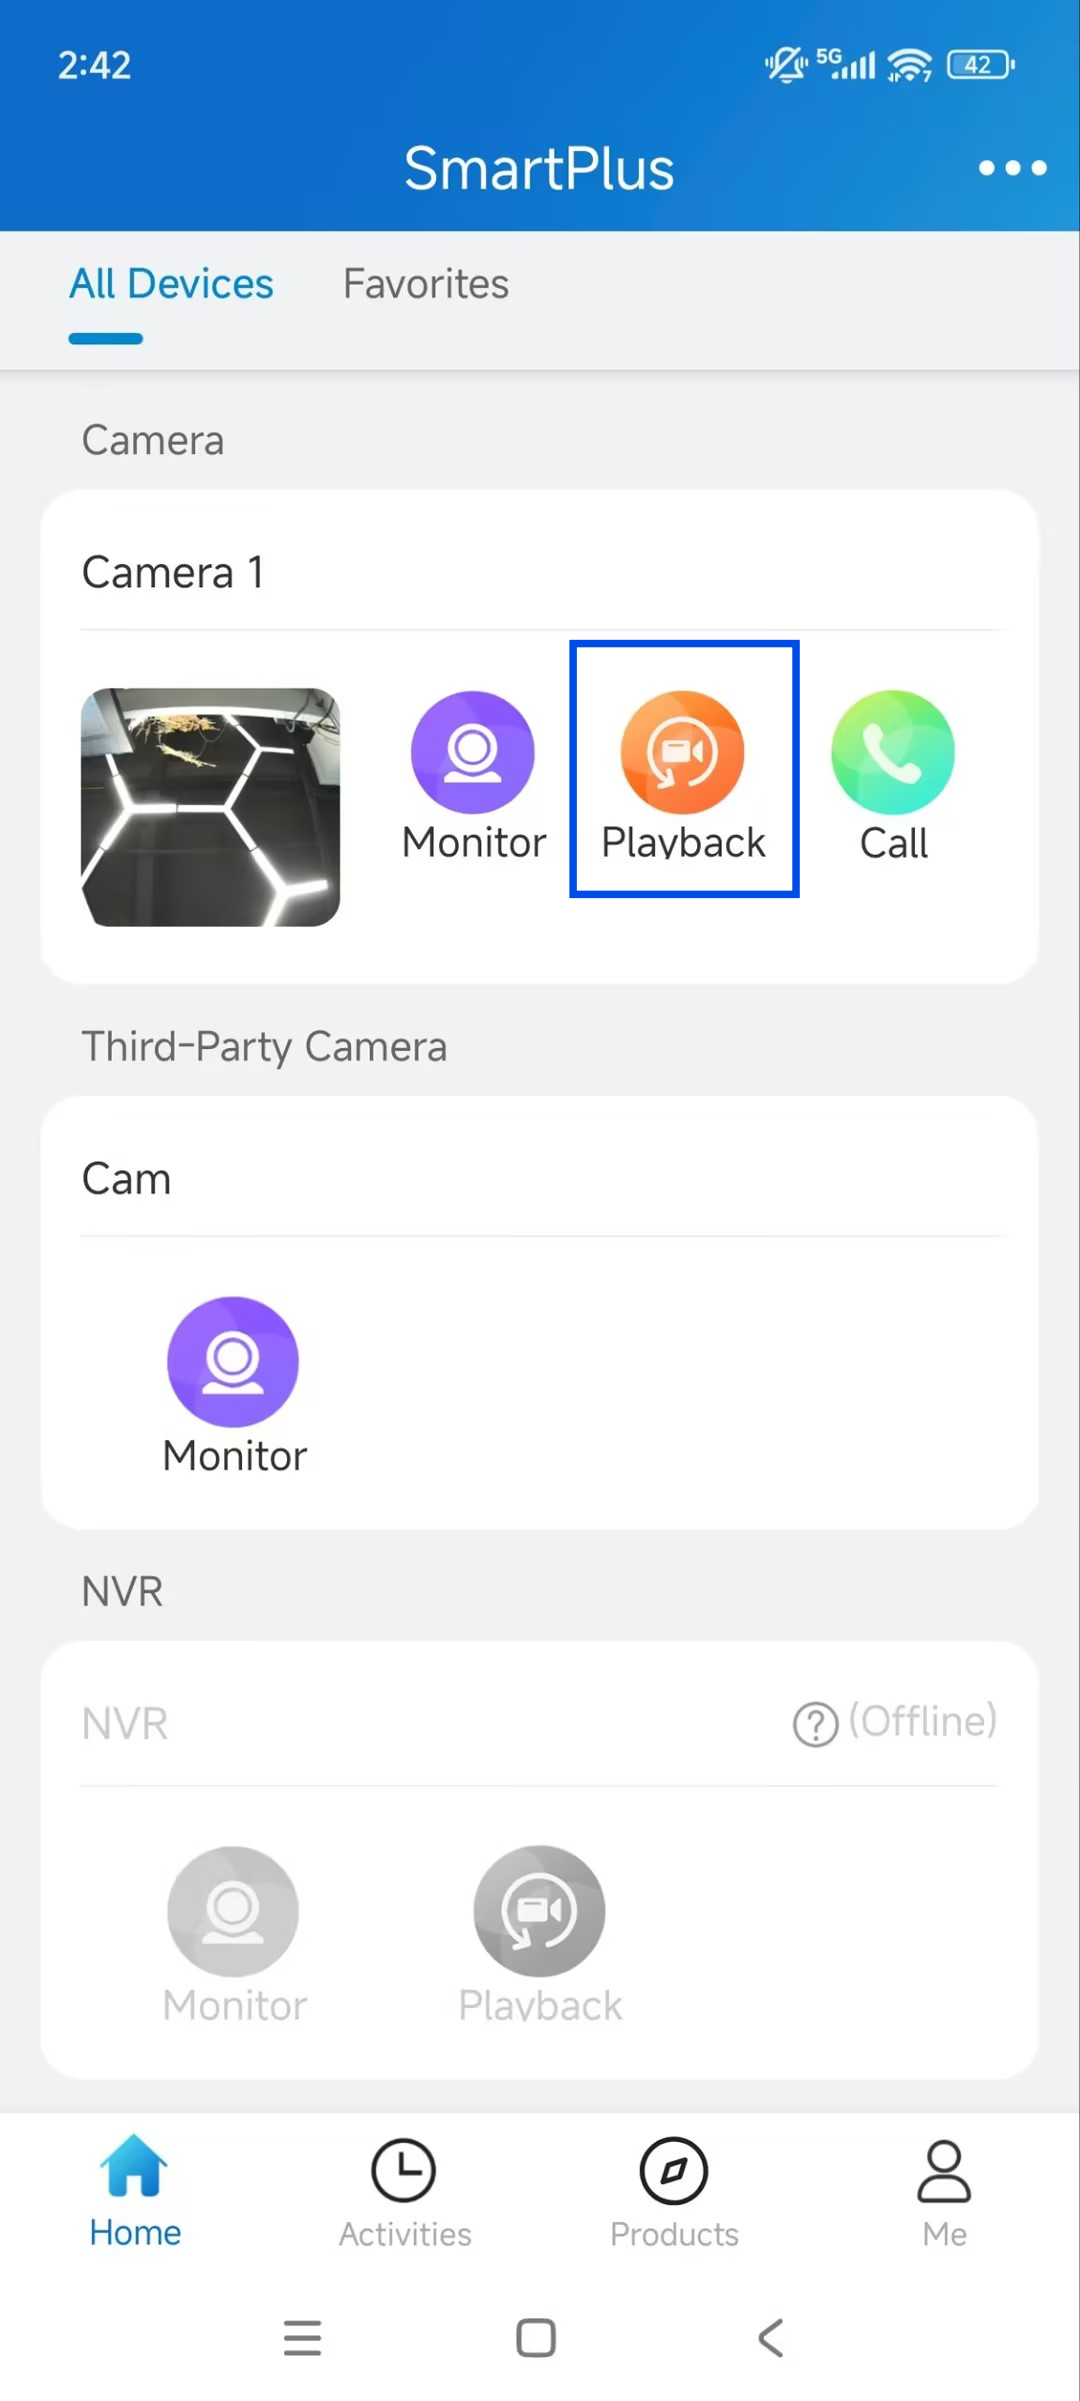
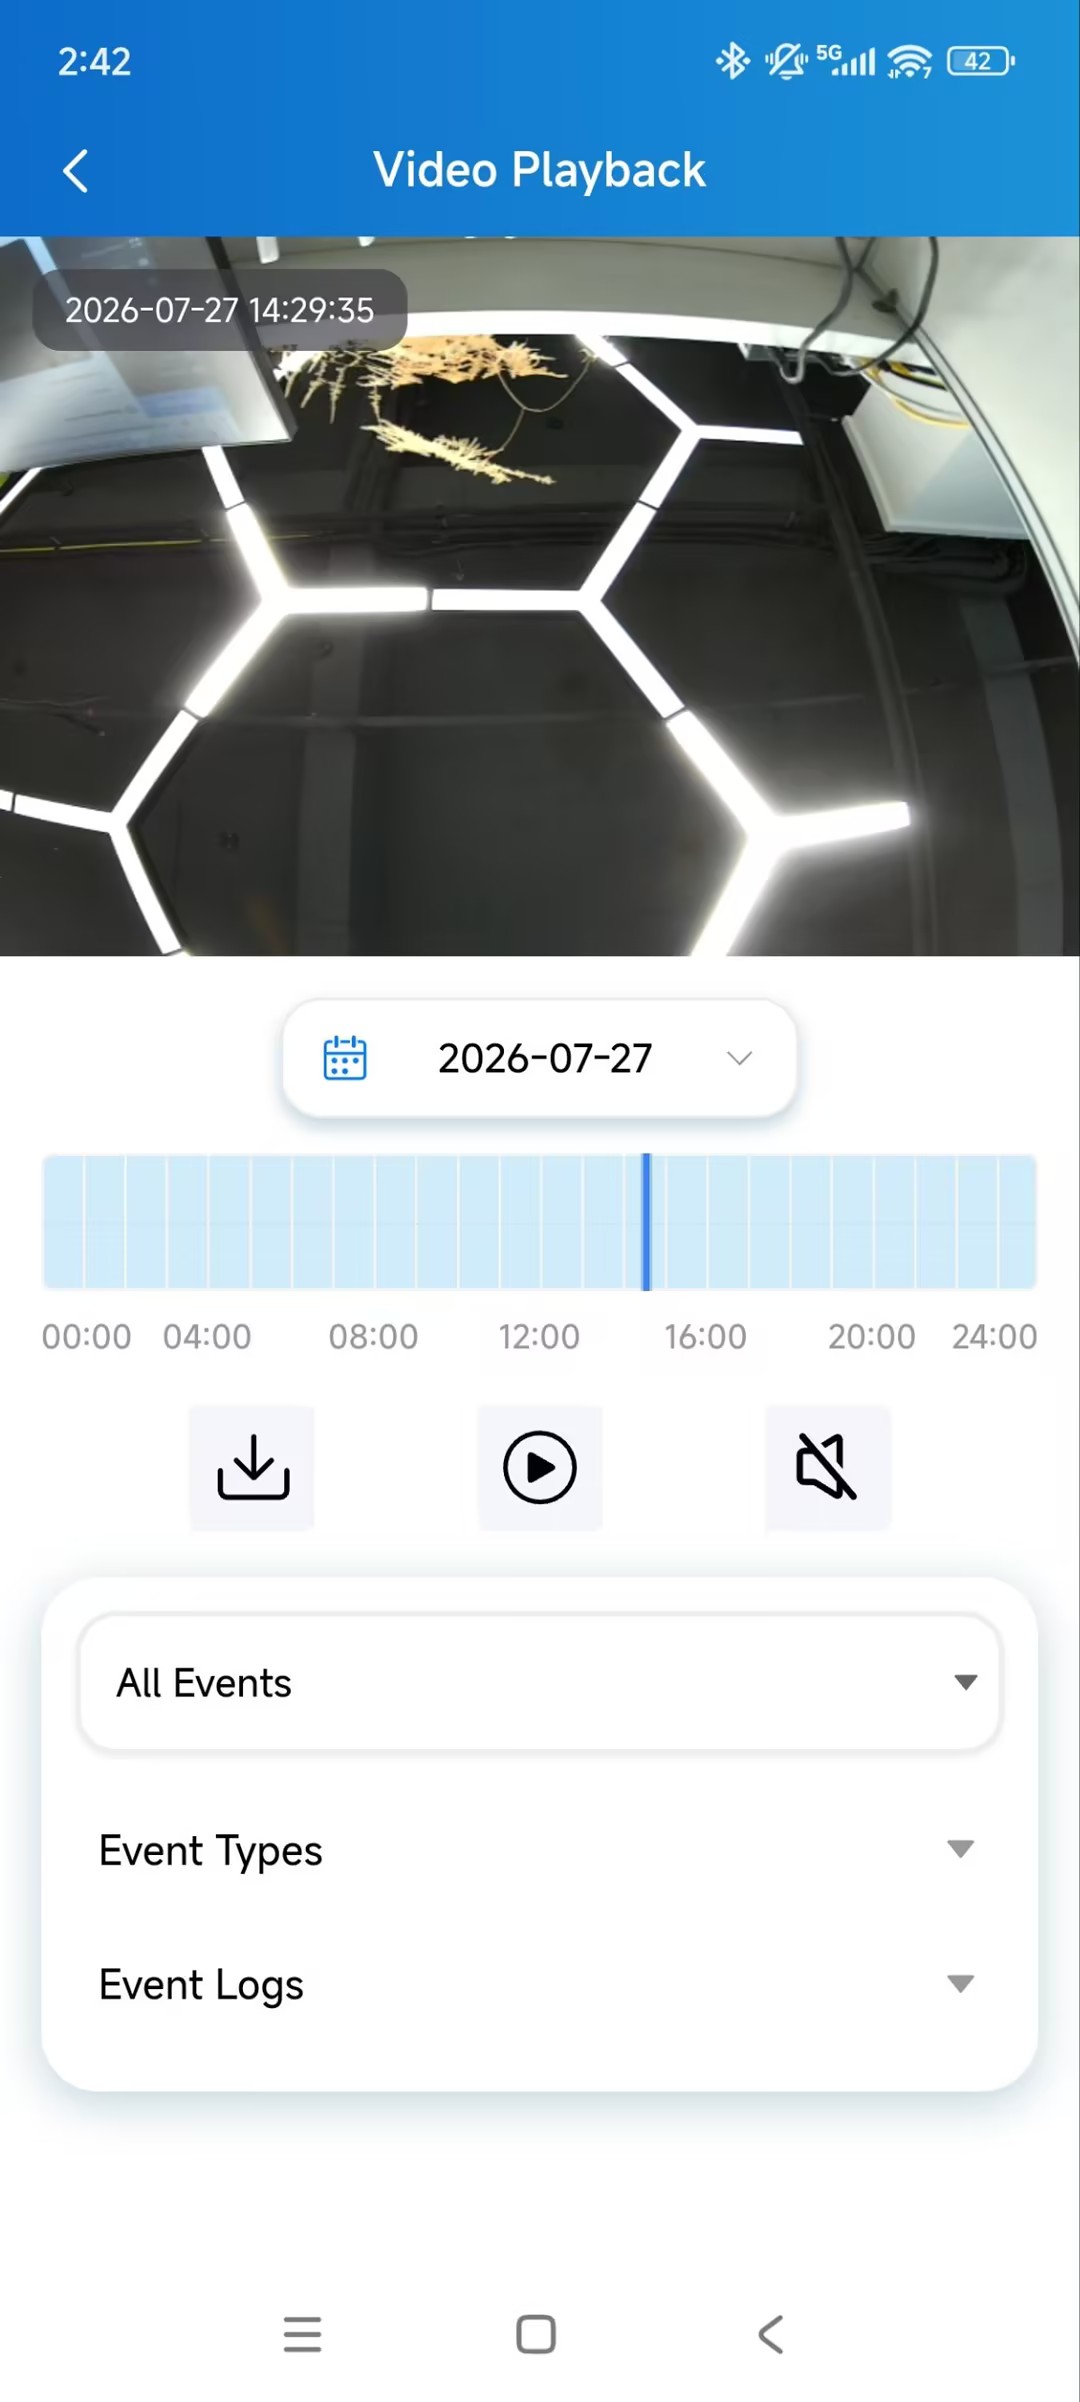
Once a recording is available for a time range, the Playback icon becomes active.
Camera Not Linked
Tap Playback to open the camera’s playback page directly.
Camera Linked
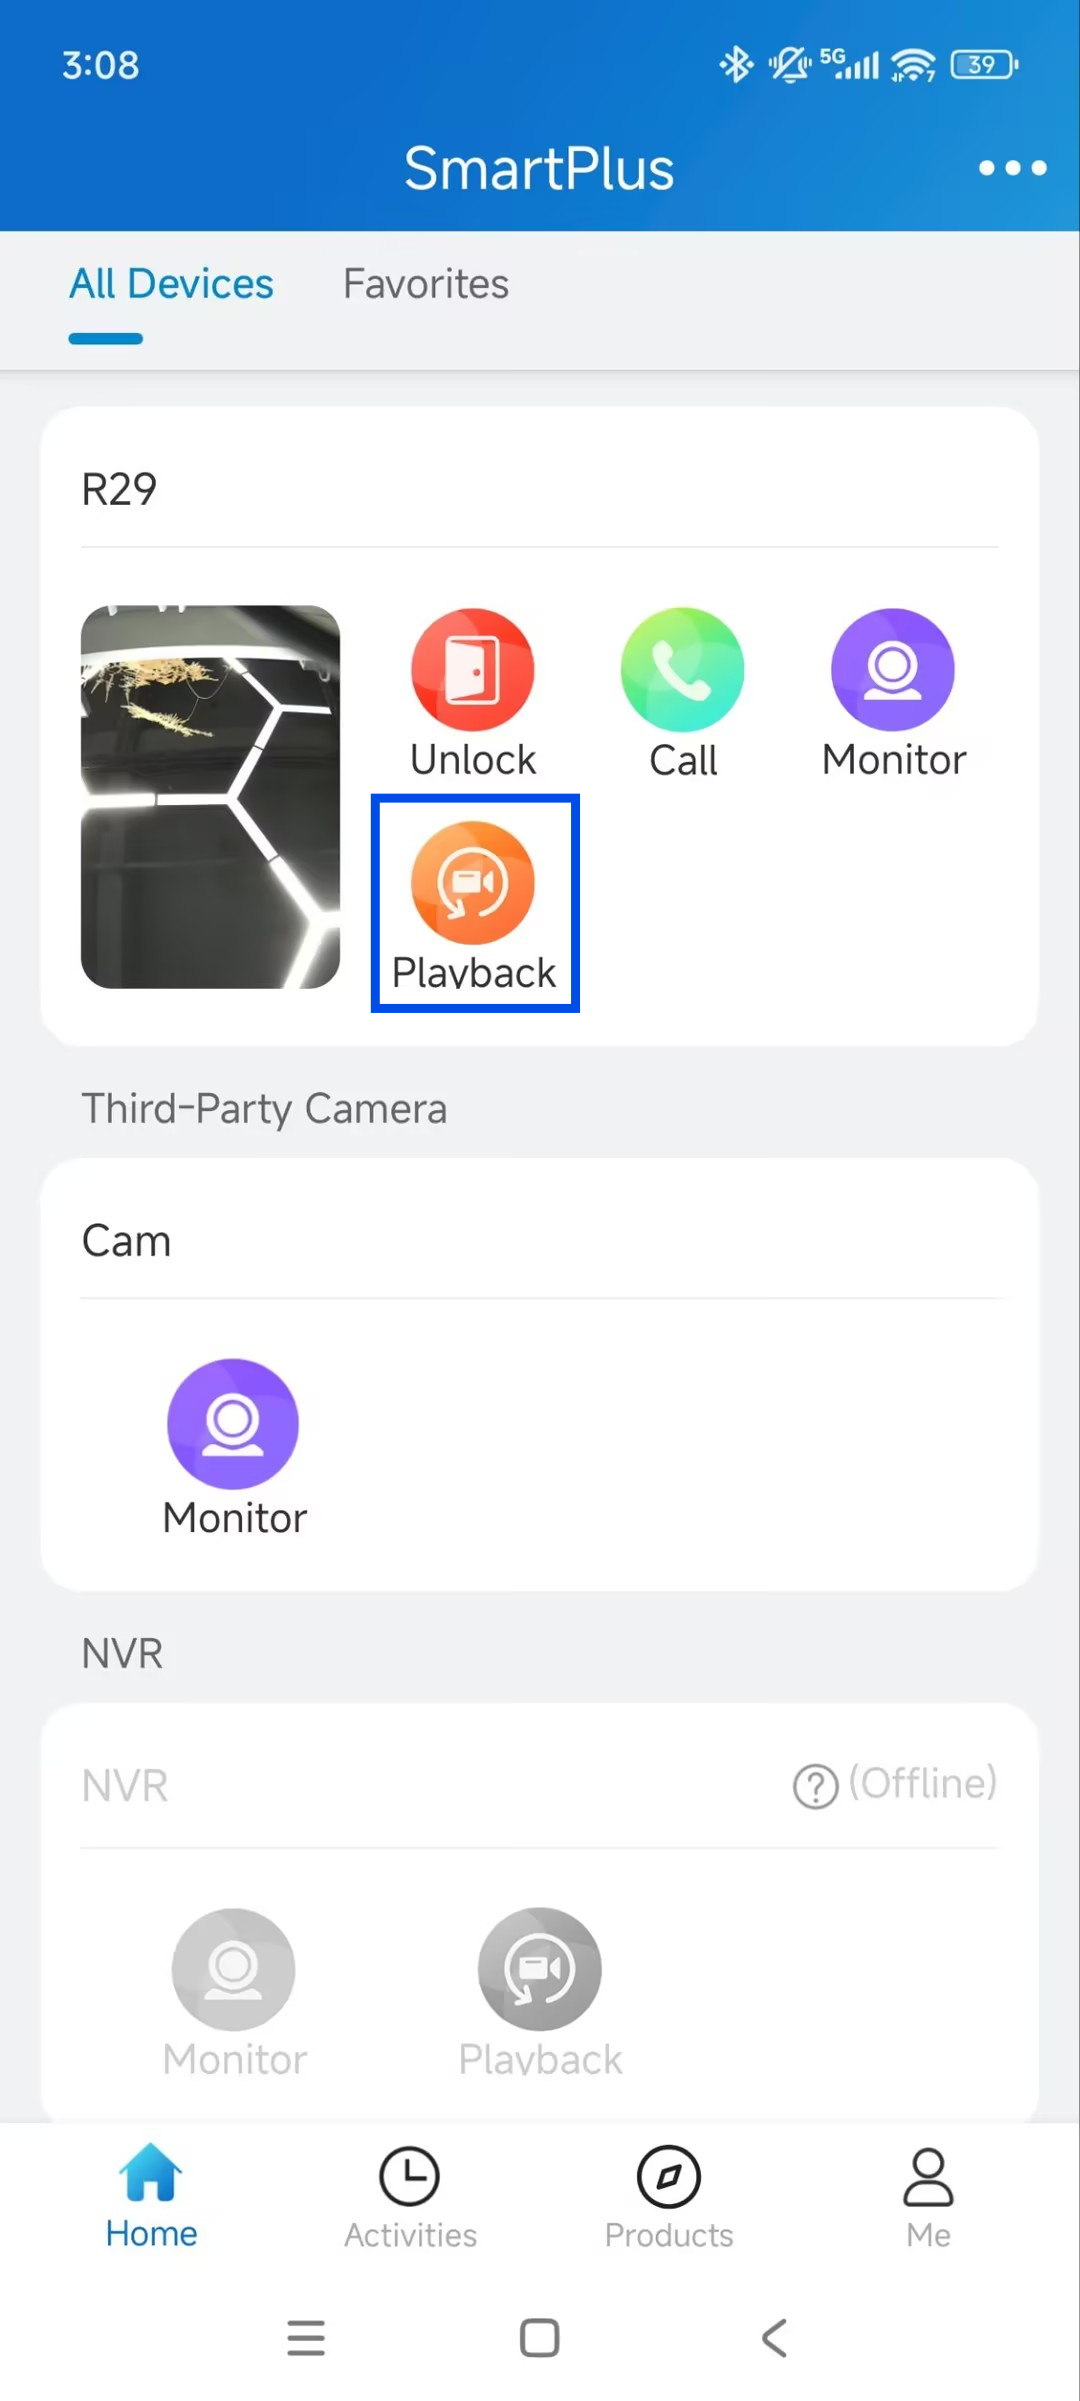
A linked camera has no entry of its own. A thumbnail on the linked device's card shows a live camera snapshot that refreshes every 10 seconds, indicating the link.
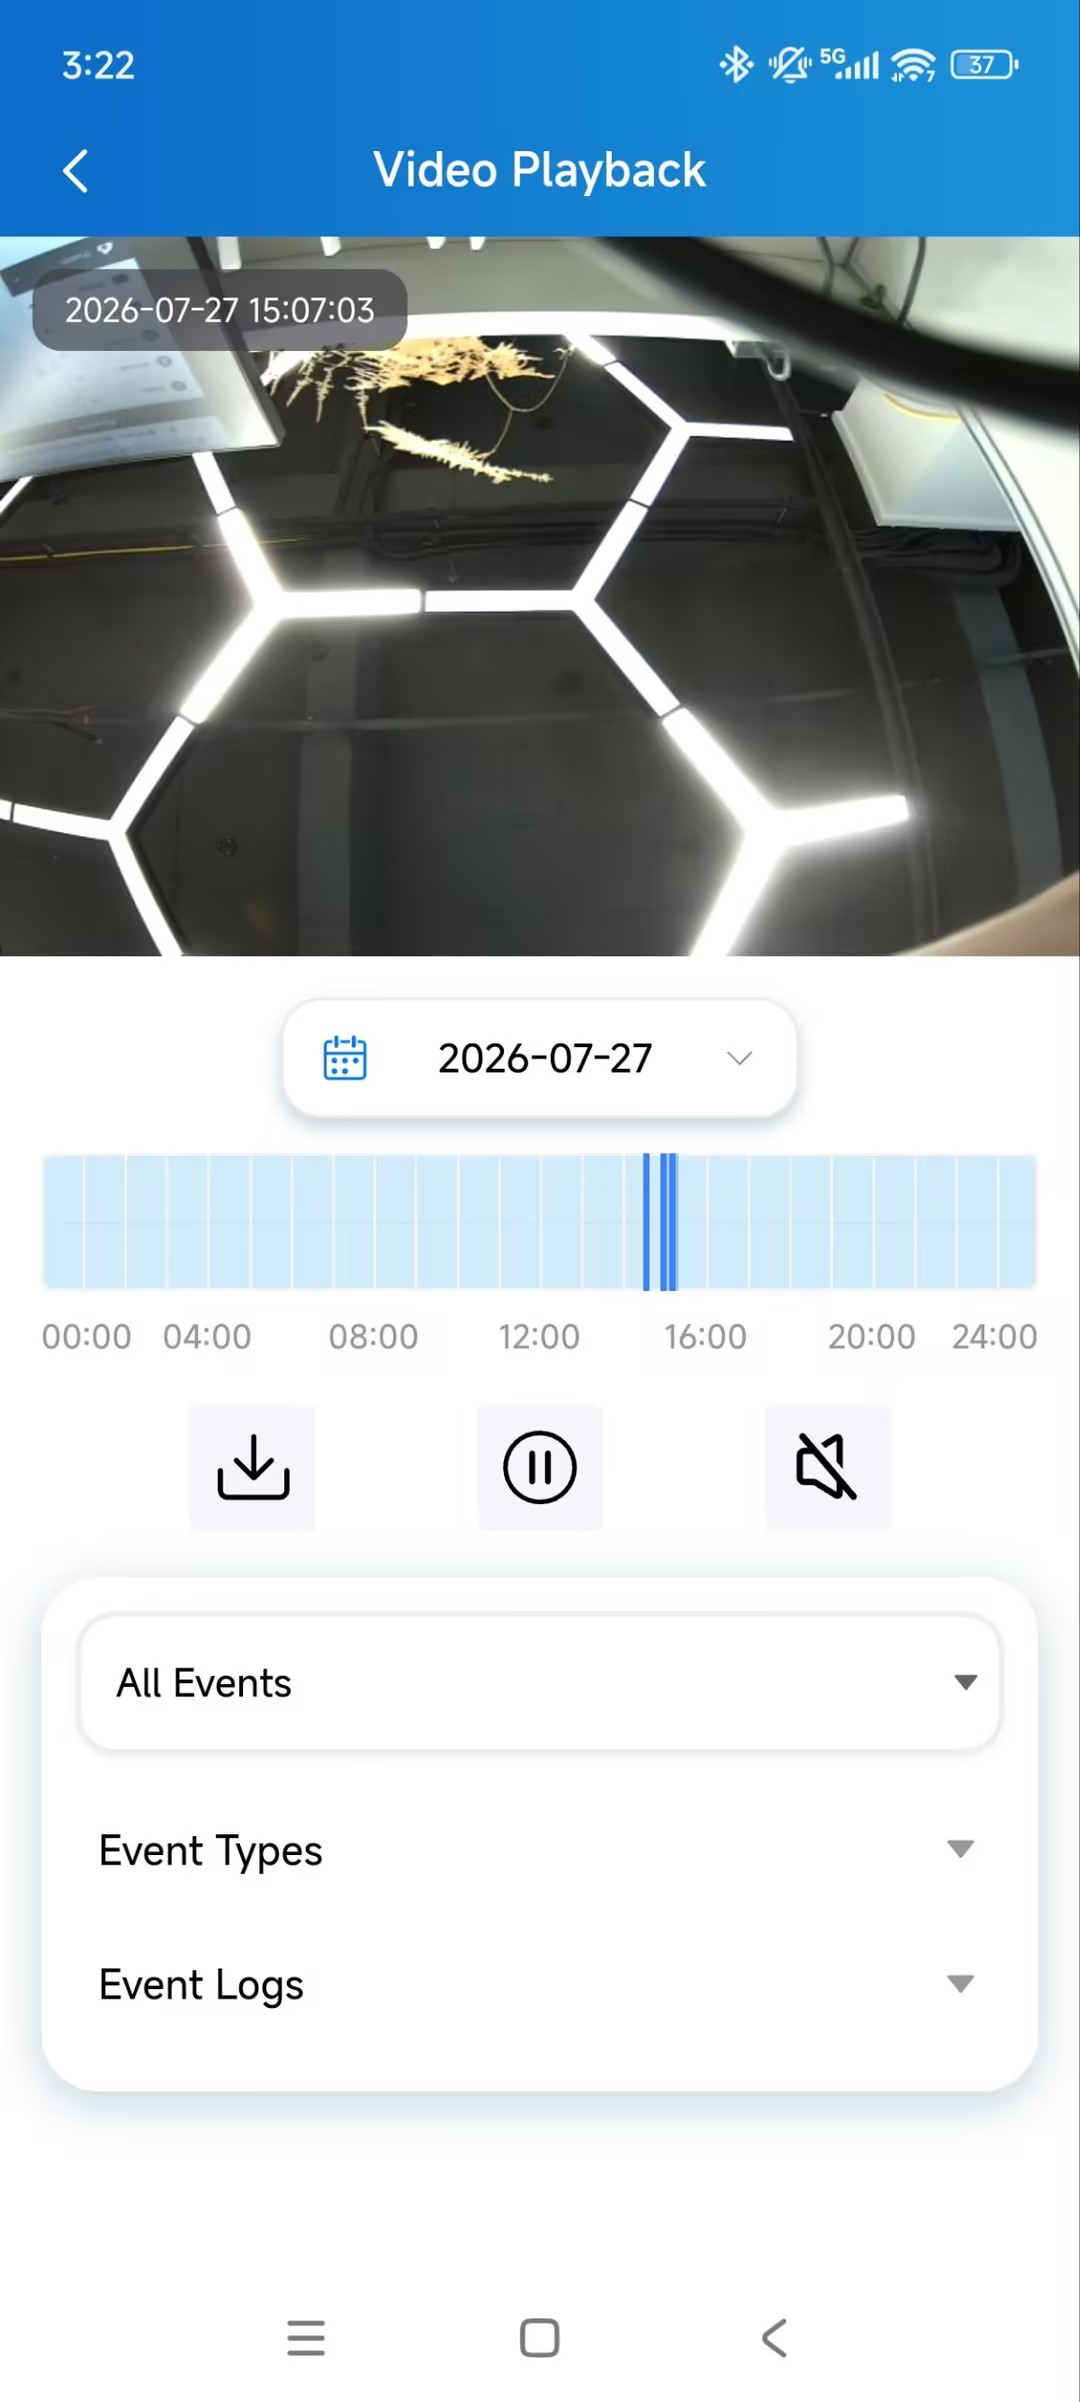
Tap Playback on the linked device to open the camera’s playback page.
Part 4: Review and Export Alarm Records
On the Cloud Portal
Switch to the Monitoring page on the Dashboard.
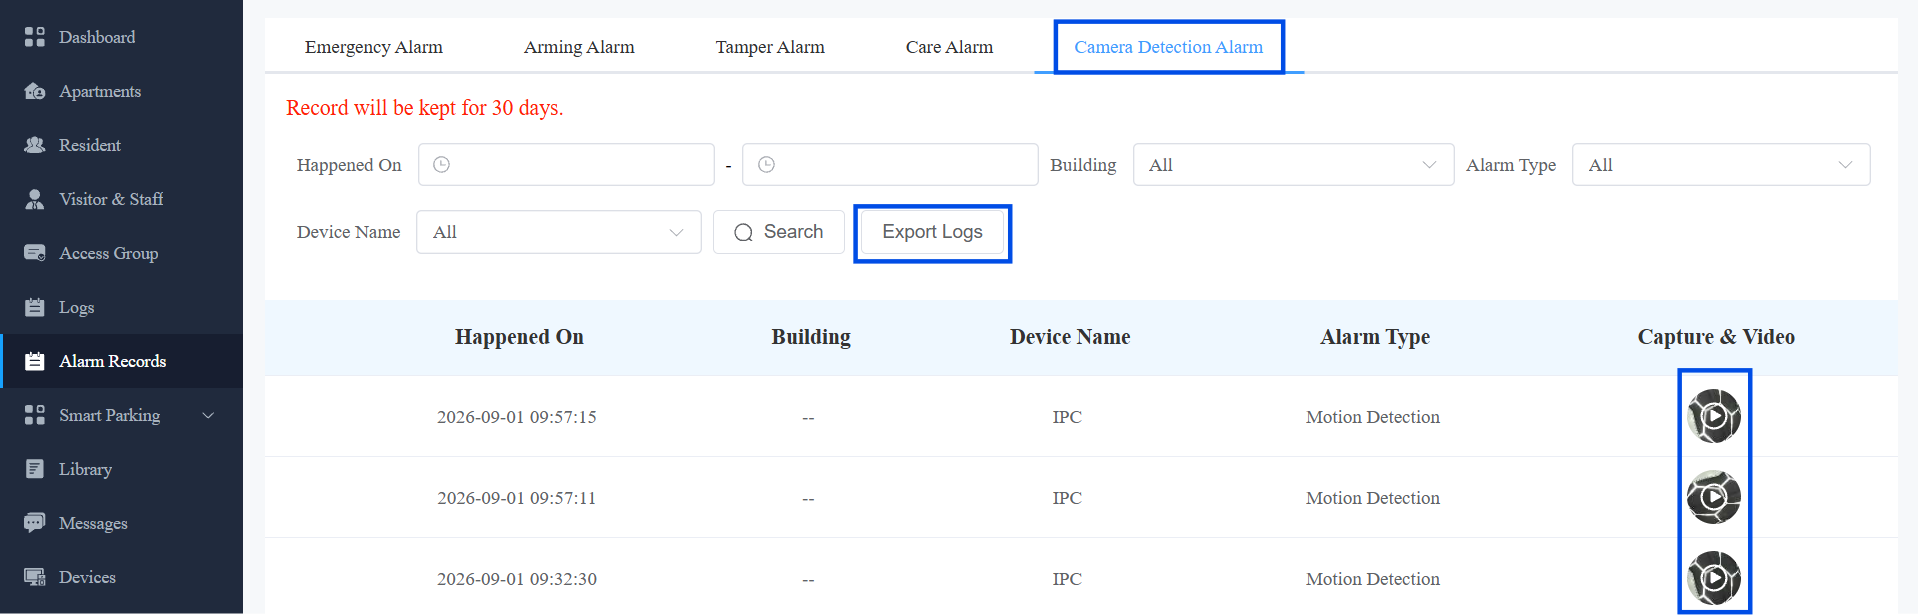
Click View All to open the Camera Detection Alarm page. Unread alarms are marked with a red dot.
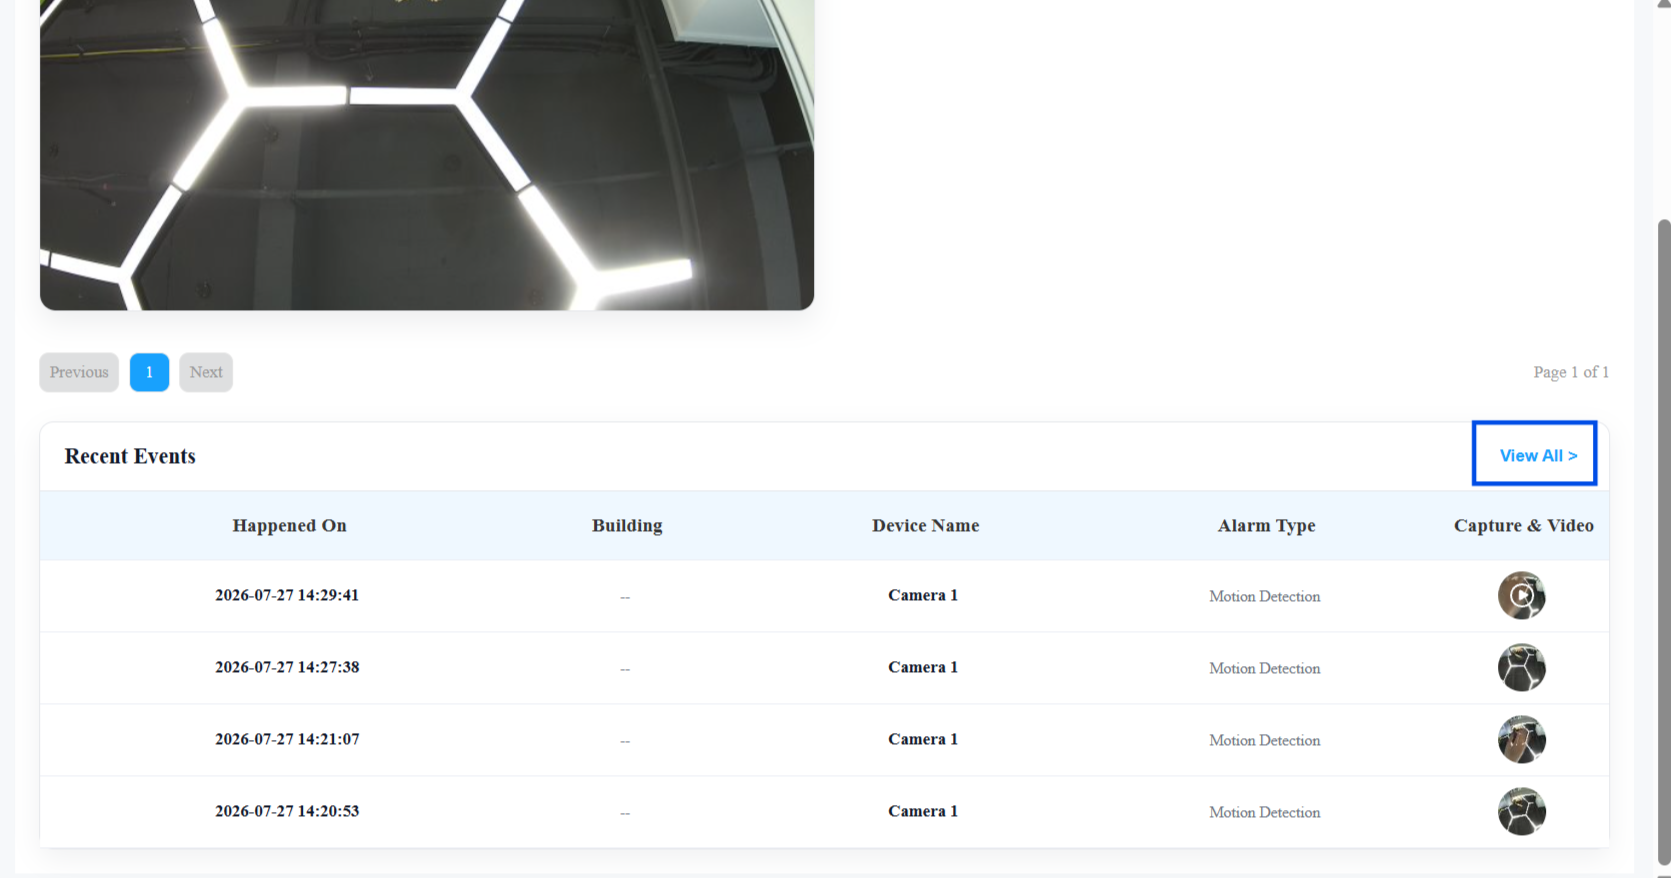
Click the image in the Capture & Video column to view the screenshot, or recorded video if Video Storage is enabled.
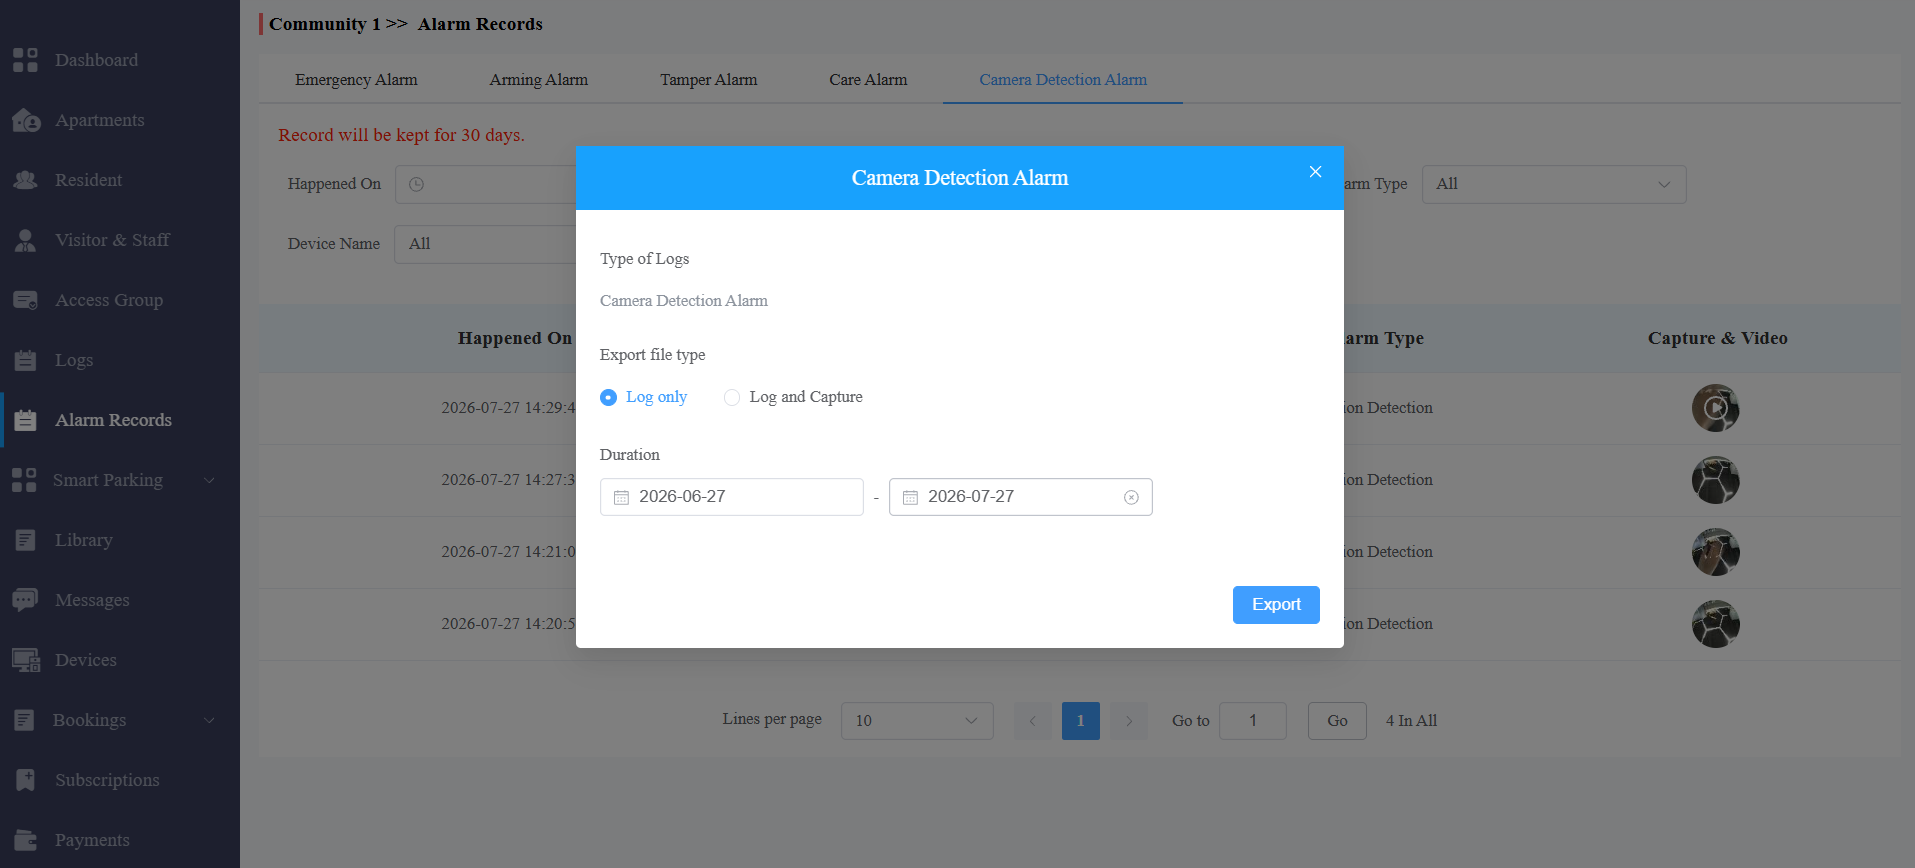
Click Export Logs to download logs.
Select the Export File Type: Log only, or Log and Capture (includes a screenshot; if video storage is enabled, the screenshot is taken from the first frame of the recorded video).
Select the date range and click Export.
On the PM SmartPlus App
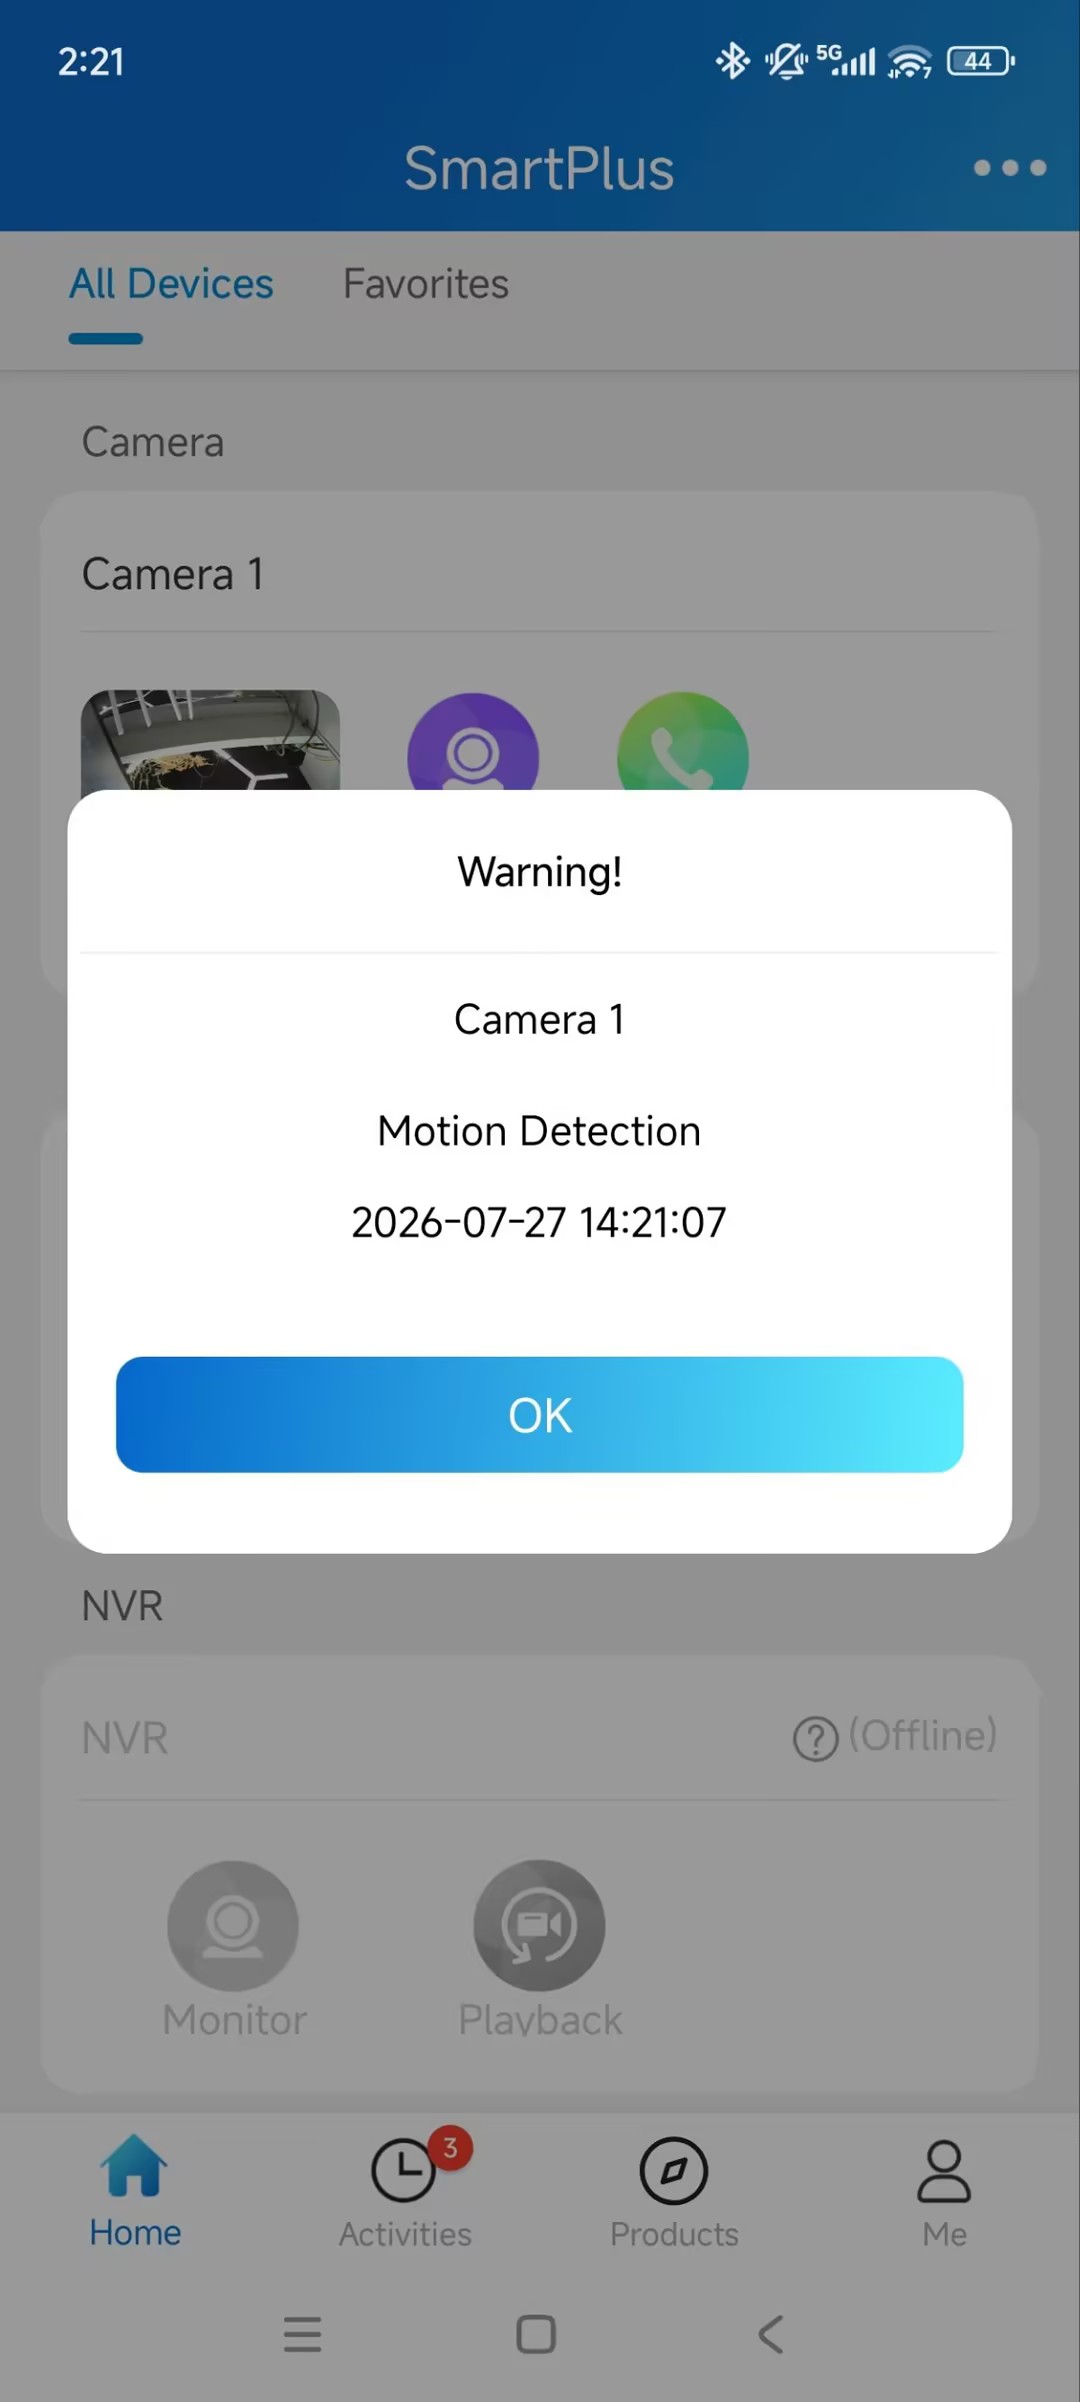
When the configured event is triggered, a notification pops up in the app.
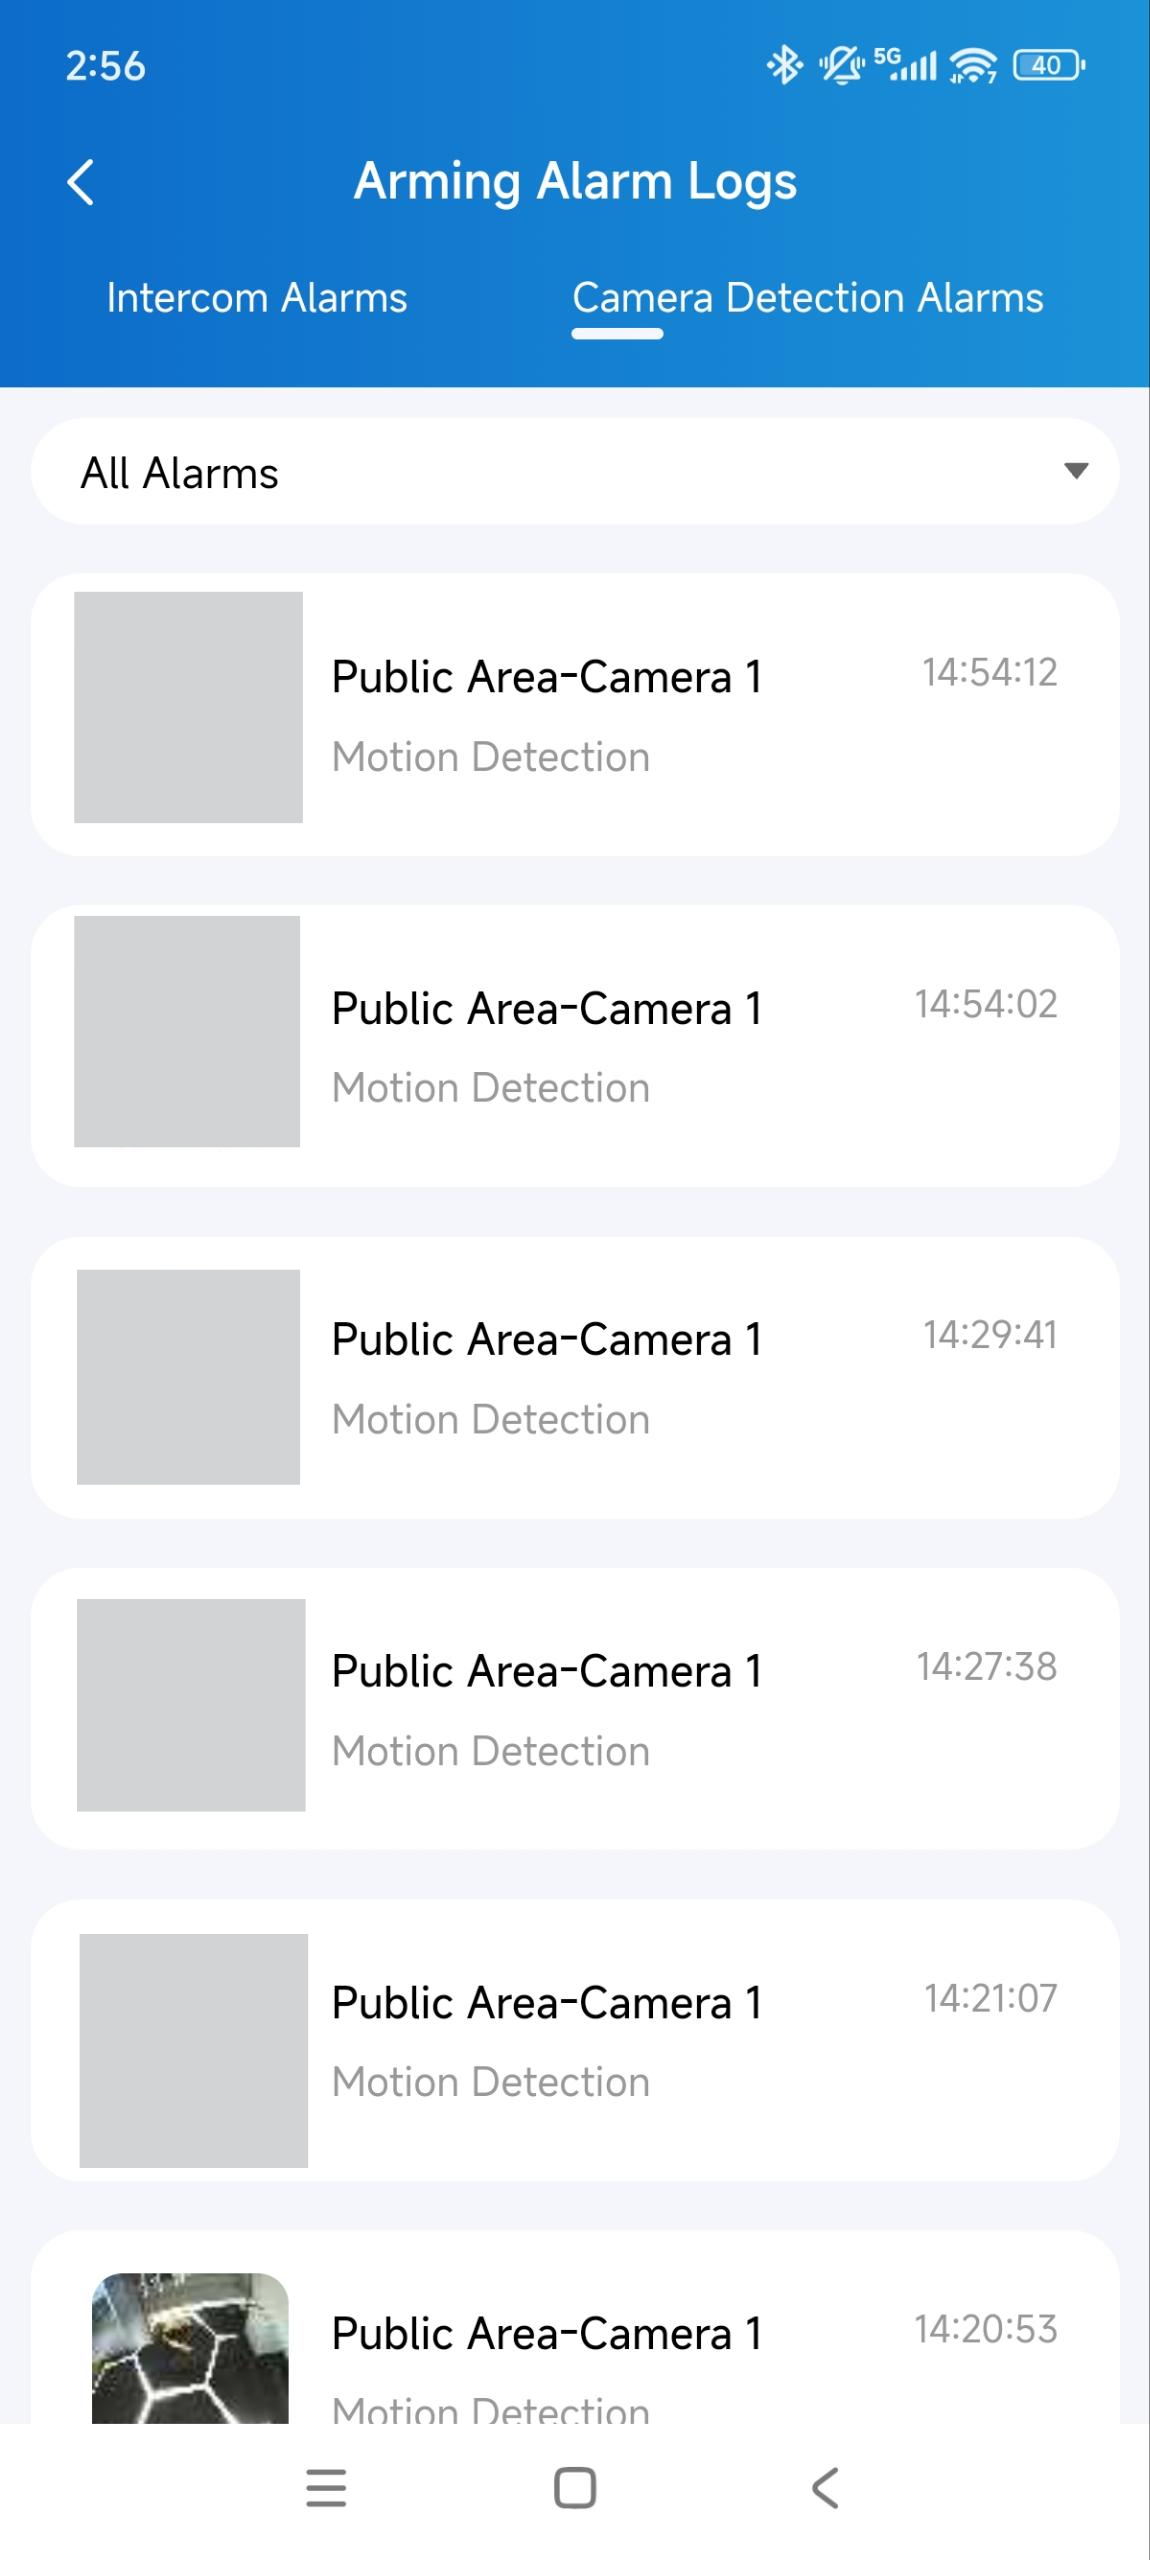
To view all alarms, go to Me > Arming Alarm Logs > Camera Detection Alarms page.
Troubleshooting
Issue | Possible Cause | Solution |
Can't find or configure a specific camera (e.g., an apartment entrance camera). | PMs can only manage cameras added to the Public Area or building entrances. | Confirm the camera's location with your installer; apartment cameras are out of scope for PM management. |
Link Device option fails, or the target device isn't in the linkable list. | The device model/firmware doesn't support linking, or it's already linked to another camera — one device can only be linked to one camera. | Check the device against the Model Compatibility list; if already linked elsewhere, unlink it first. |
Playback icon stays greyed out, or an alarm has no video attached — only a screenshot. | Video Storage wasn't enabled for that camera in Basic Settings — the cloud only records footage when Video Storage is on, and only for triggered events (no continuous recording). | Confirm Video Storage is enabled in Part 1: Basic Settings; without it, only screenshots are available, never recorded video. |
A linked camera doesn't show up as its own tile in the app. | This is expected — once linked, the camera has no separate entry; it's accessed through the linked device's card instead. | Open the linked device's card and tap Monitor/Playback, then use Switch Monitor to view the camera feed. |
Exported alarm log has no image/video attached. | "Log only" was selected as the Export File Type instead of "Log and Capture", or Video Storage wasn't enabled. | Re-export with "Log and Capture" selected, and confirm Video Storage is enabled for a video (not just a screenshot). |