The attendance feature allows you to:
Set up independent attendance for each company.
Designate a specific door as the attendance point.
Flexibly make timetables and schedule shifts.
Record leaves and attendance easily.
Installers, project managers, and administrators have permission to set up this feature.
Note
This feature is available in commercial projects created after October 15, 2024.
Except for X916, all door phones and access control terminals are compatible.
Watch the Video Guide
Prefer a visual walkthrough?
Watch: [Installer][PM]Set up Attendance on the Smart Access Cloud
Select Attendance Points
You can select specific doors as the attendance points. Every successful door-opening means a clock-in/out.
Click Attendance > Attendance Point > New.
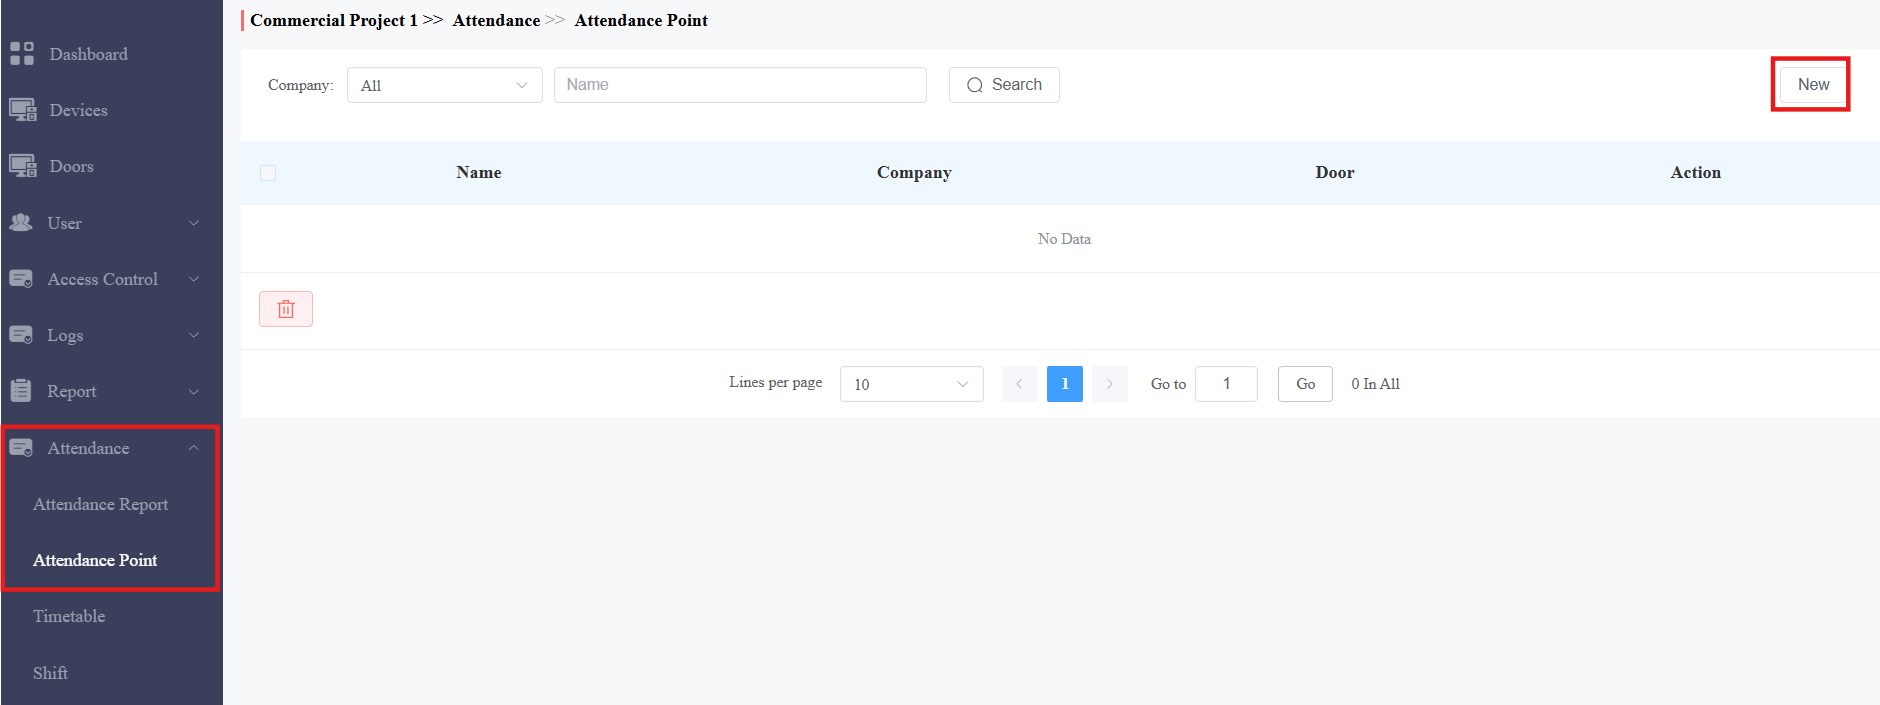
Select the company and name the attendance point.
Select the door.
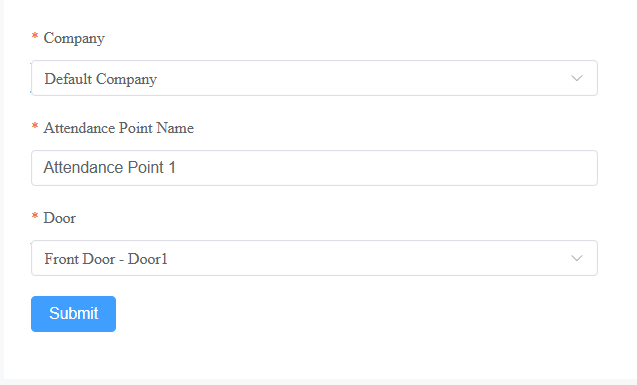
Click Submit.
Set up Timetables
There are two timetable modes, fixed and flexible. You can choose the mode based on the company’s working schedule.
Click Attendance > Timetable > New.
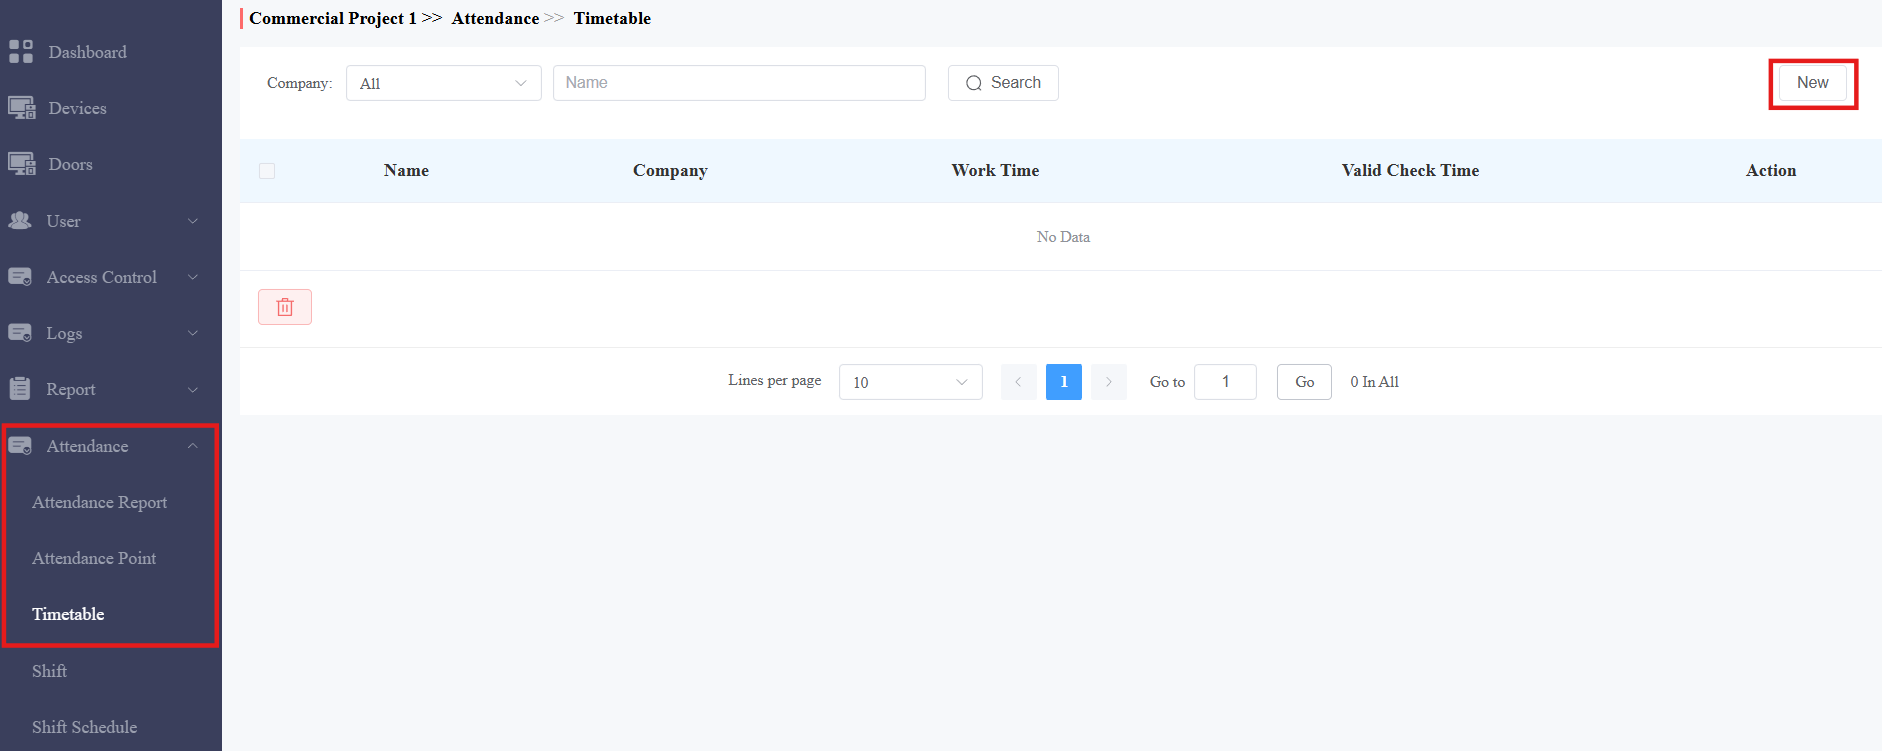
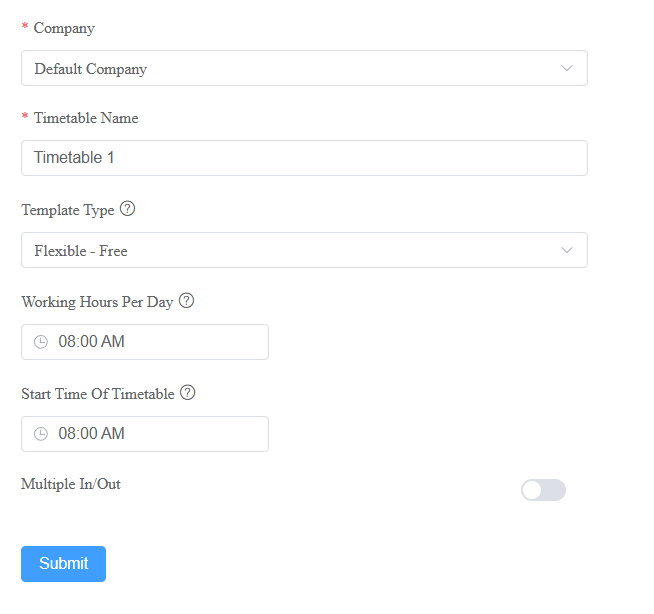
Select the company and name the timetable.
Select the timetable template type:
Fixed: Employees commute at fixed times, like a 9-to-5.
Flexible - Free: Employees work a certain number of hours without clocking in and out at fixed times.
Fixed Timetable | |
|---|---|
Item Name | Description |
Schedule 1-3 | You can specify up to three working periods. The working hours can span over two days, such as from 6:00 p.m. to 7:00 a.m. the next day. |
Valid Check Time | Employees can only clock in/out within this period. |
Auto Deduct Break Time | When enabled, you can specify a break time. When calculating the total working hours of employees, the system automatically subtracts the break time. |
Allow Late Arrival(Minutes) | If late arrivals are allowed in the company, specify the time. Employees will not be recorded as tardy in the attendance report if the time they are late does not exceed this limit. |
Allow Early Out(Minutes) | If early out is allowed in the company, specify the time. Employees will not be recorded as leaving early in the attendance report if the time they leave early does not exceed this limit. |
Example: If you set the start time to 8:00 a.m., the end time to 5:00 p.m., the valid check time from 7:00 a.m. to 6:00 p.m., and the break time from 12:00 p.m. to 1:00 p.m. Employees can only clock in after 7:00 a.m. and out before 6:00 p.m. They can have a lunch break from 12:00 p.m. to 1:00 p.m. | |
Flexible - Free | |
Item Name | Description |
Working Hours Per Day | Specify the working hours of employees. |
Start Time of Timetable | Specify the time after which employees can clock in. |
Multiple In/Out | You can enable this feature for employees who frequently enter and exit the company.
|
Example: If you set the working hours to 8 hours, and the start time to 7:00 a.m. Employees can clock in after 7:00 a.m. and cannot start clocking out until 3:00 p.m. Otherwise, they will be recorded as early leave. | |
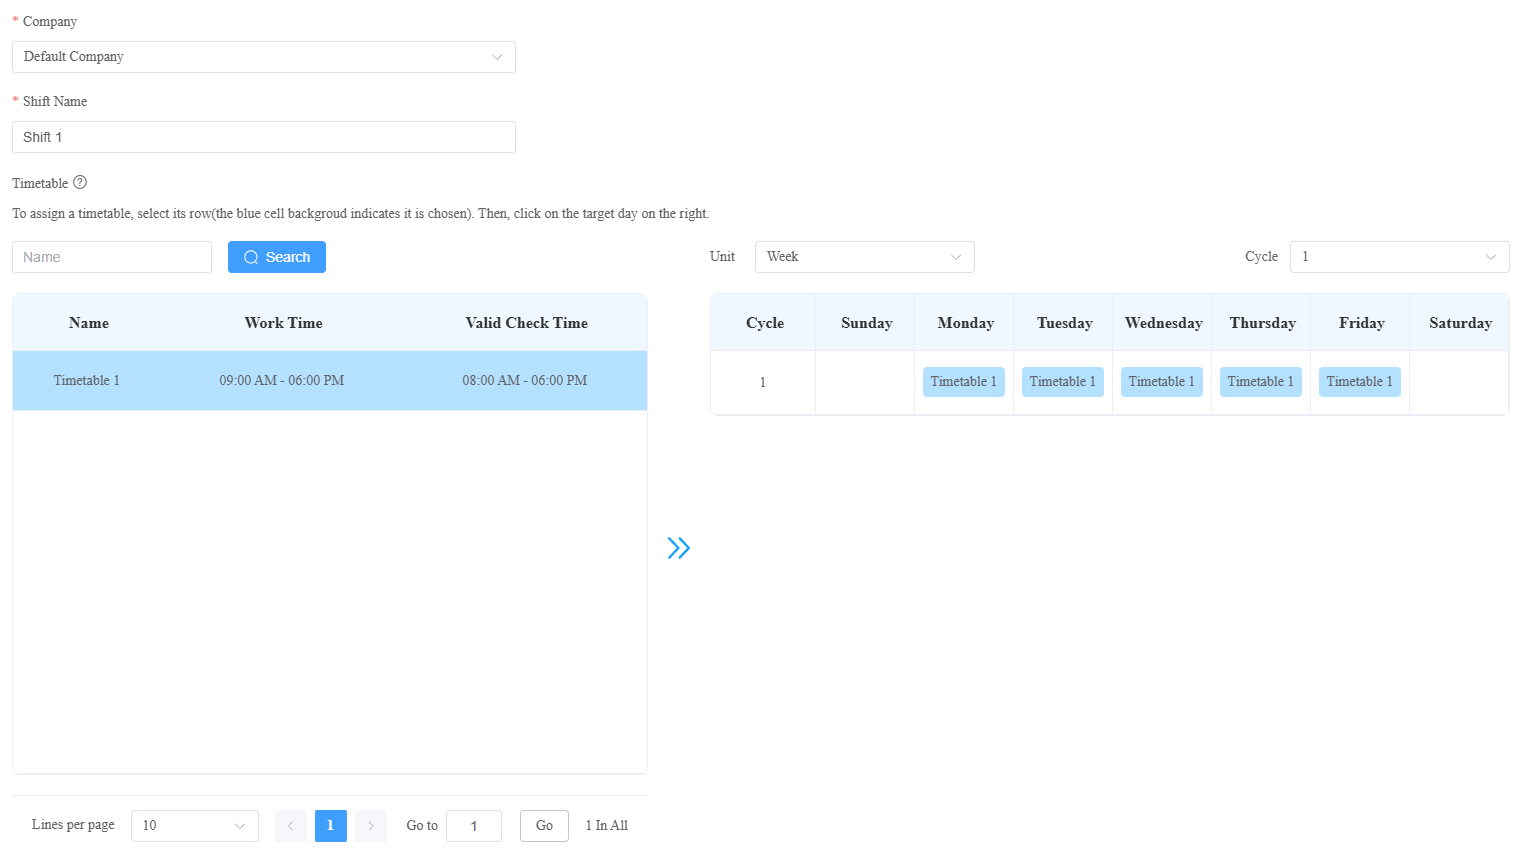
Set up Shifts
You can decide how to repeat the timetables in one day, a week, or a month by setting up shifts.
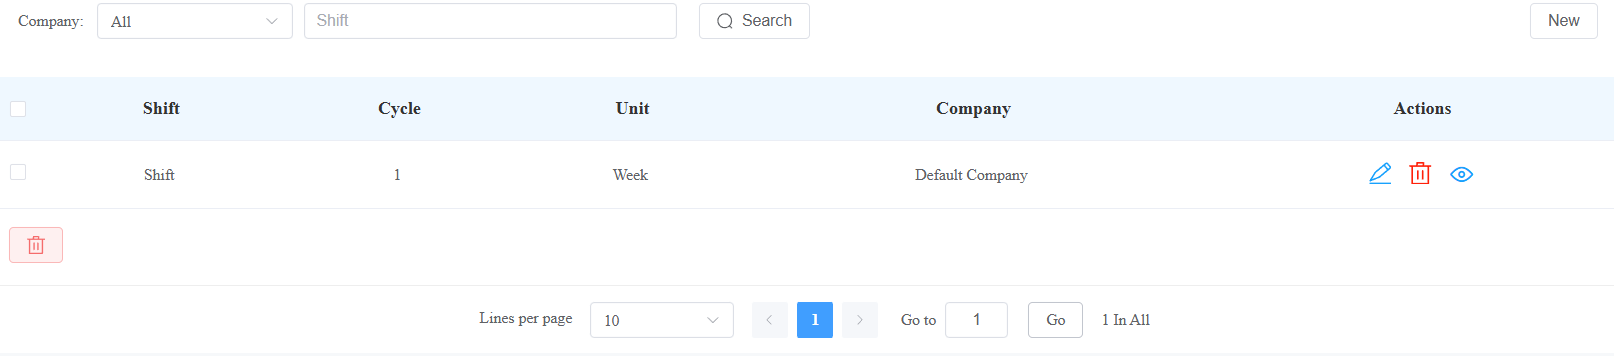
Click Attendance > Shift > New.
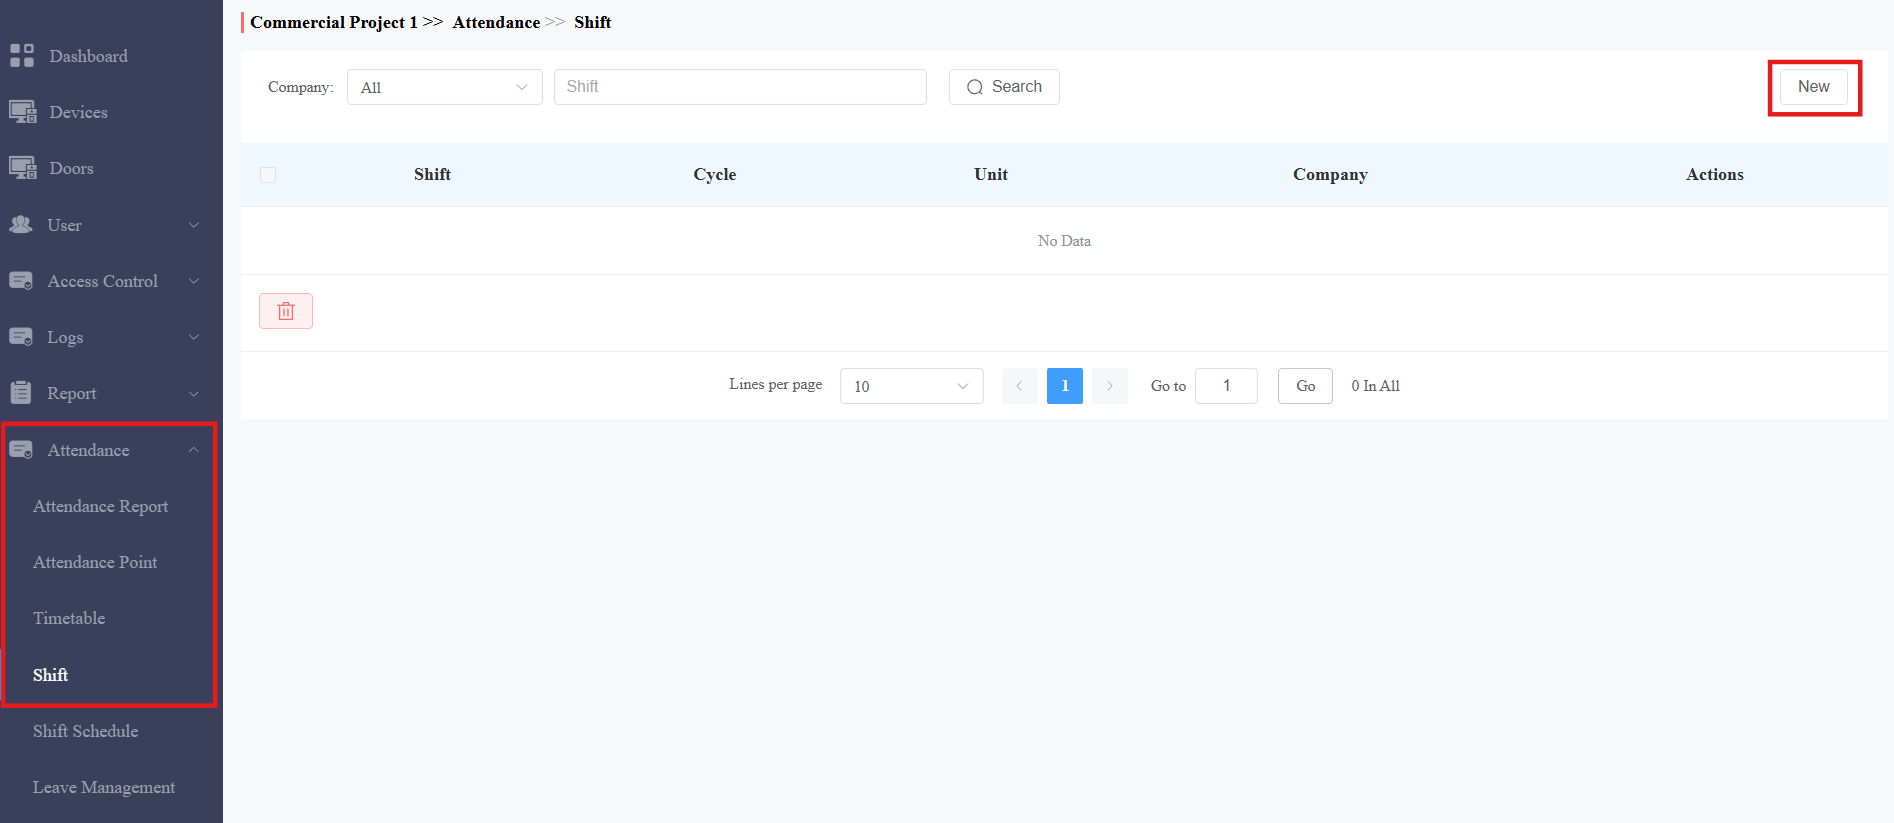
Select the company and name the shift.
Select the repeat mode.
Daily: The timetable is effective immediately.
Weekly: Arrange timetables for a week.
Monthly: Arrange timetables for a month.
Select the Number of Cycle. You can select 31 days, 52 weeks, or 12 months.
Click the desired timetable. The blue background color indicates it has been chosen.
Click the desired date area, and the timetable name will display.
Click Submit.
Arrange Shifts for Personnel
You can arrange the configured shifts for personnel.
Click Attendance > Shift Schedule > New.
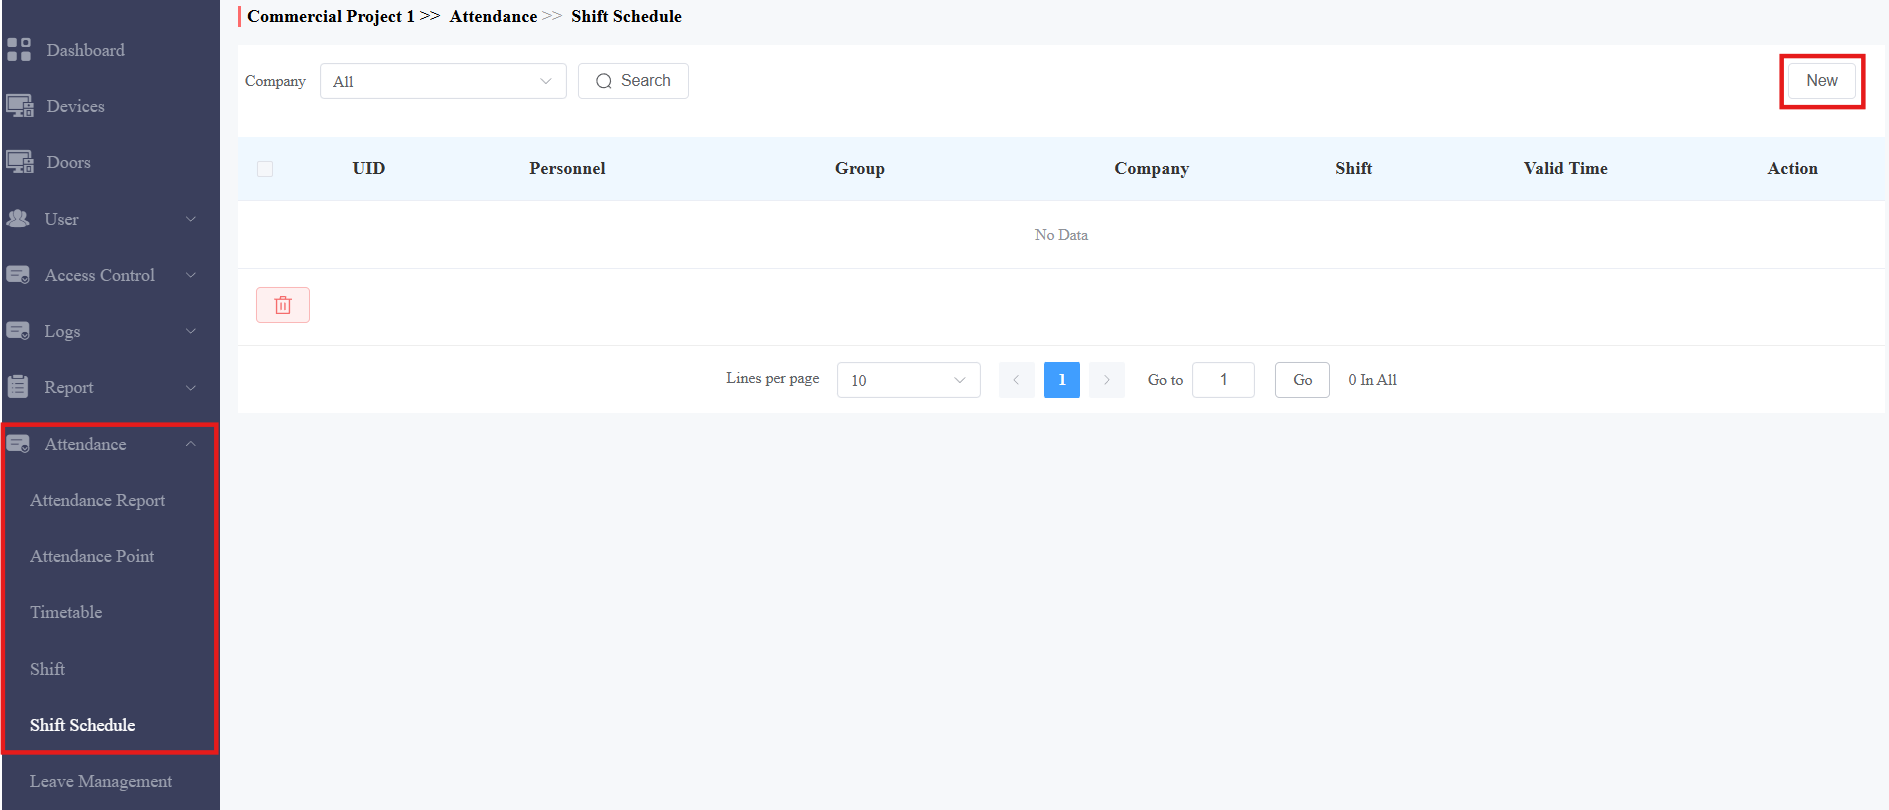
Select the company.
Select the shift type. The temporary type has higher priority over the normal. It can be chosen when arranging for personnel to work overtime temporarily.
Search for and select the personnel.
Select the shift. You can click
 to view the shift.
Select the Valid Time within which the shift schedule is effective.
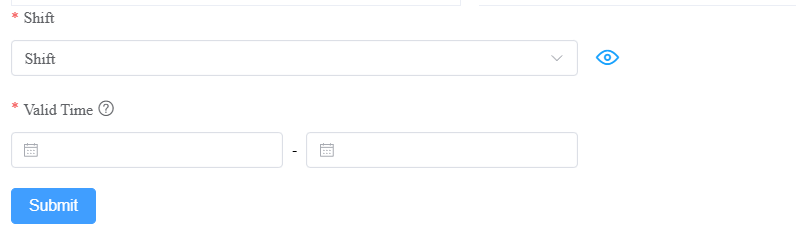
Click Submit.
After arranging shifts, you can modify, delete them, and view details by clicking ,
,  , and
, and  respectively.
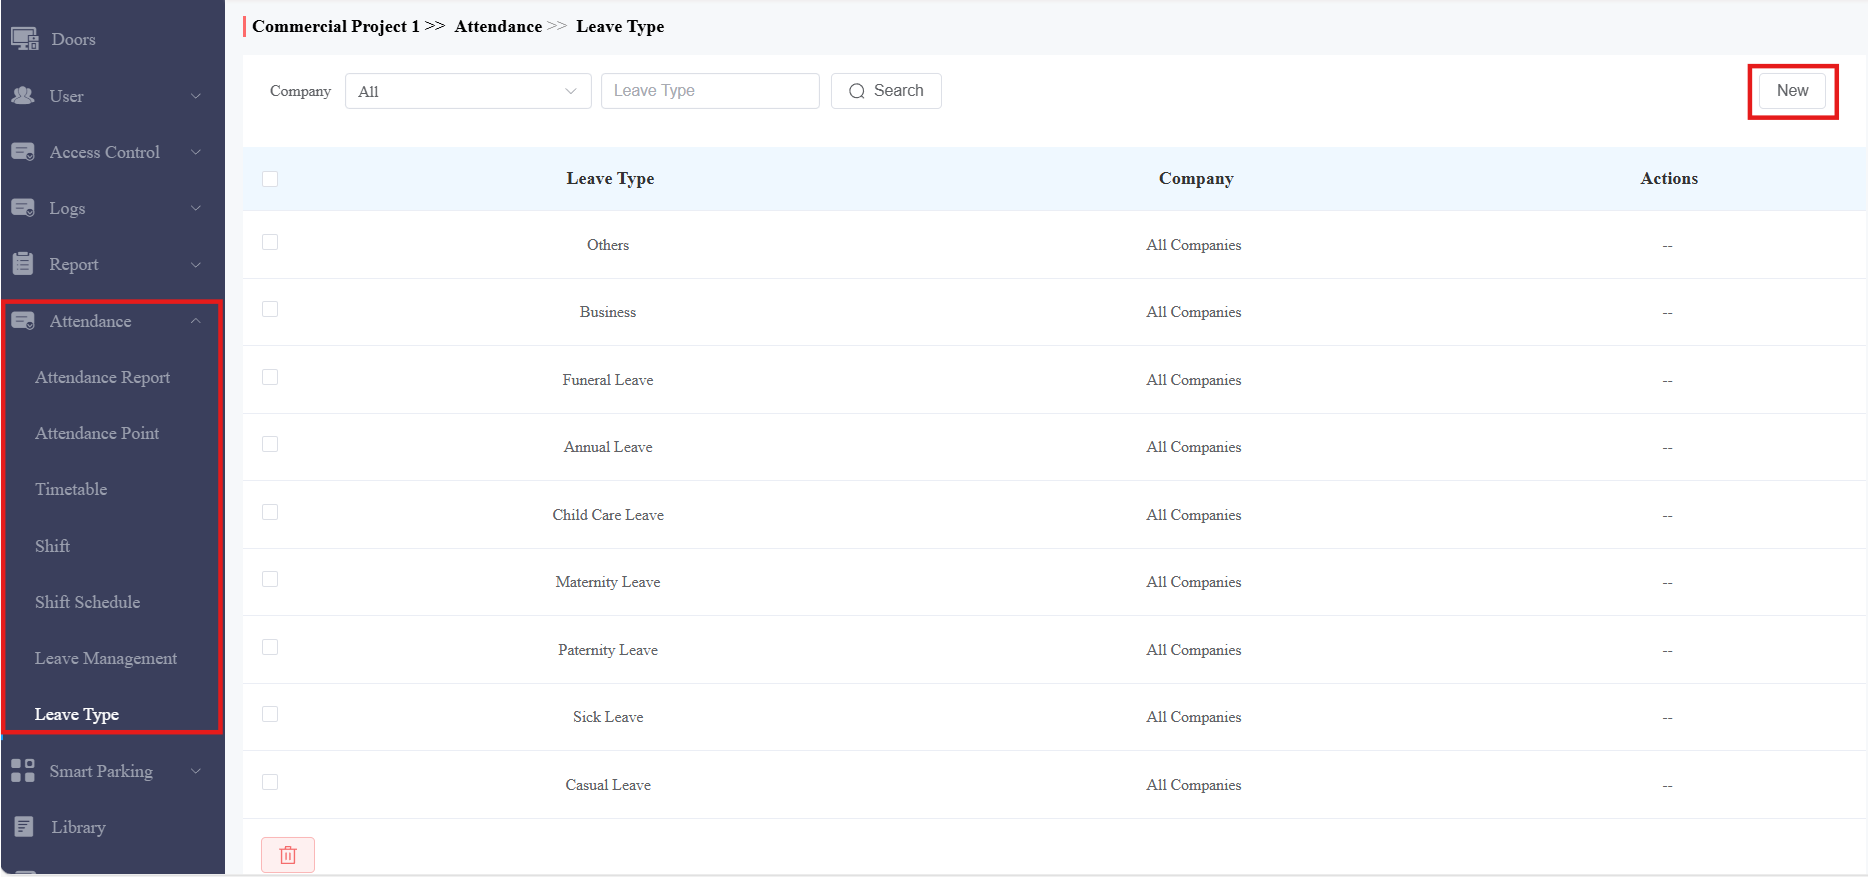
Manage Leave Type
You can add, edit, and delete various leave types for leave management.
On the Attendance > Leave Type module, you can check the system-generated leave types that cannot be modified or deleted.
Click New to add a new one.
Select the company and name the leave type.
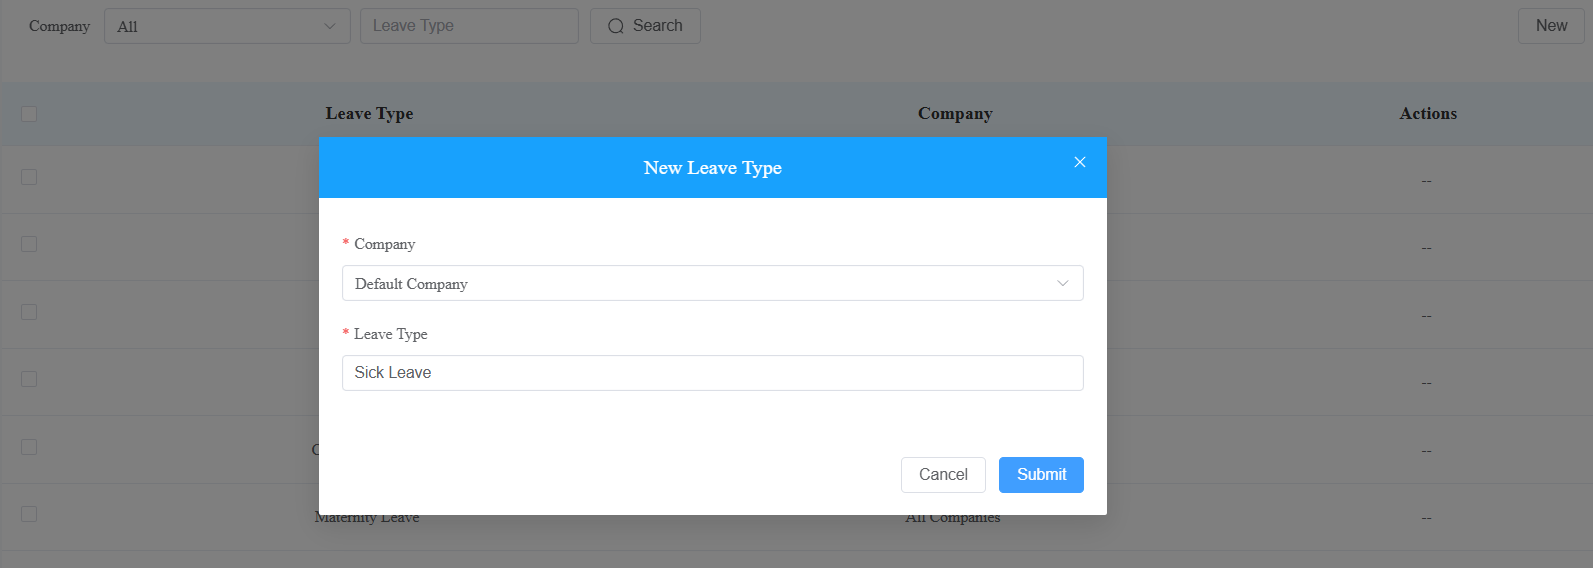
Click Submit.
Manage Leaves
You can manage leaves and check leave reports on the Attendance > Leave Management module.
Click New on the right.
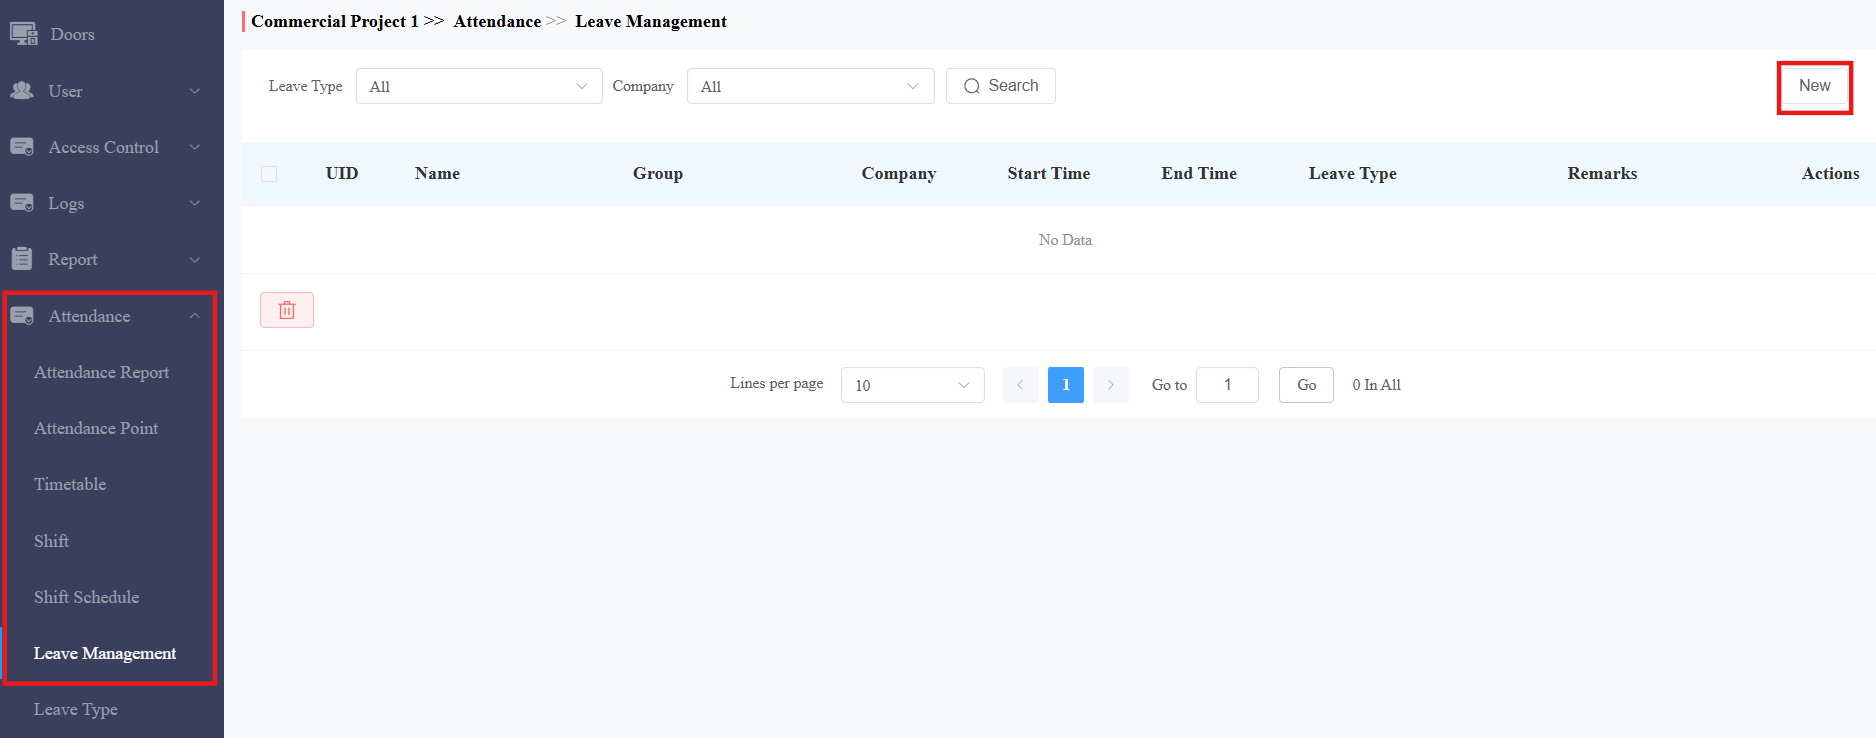
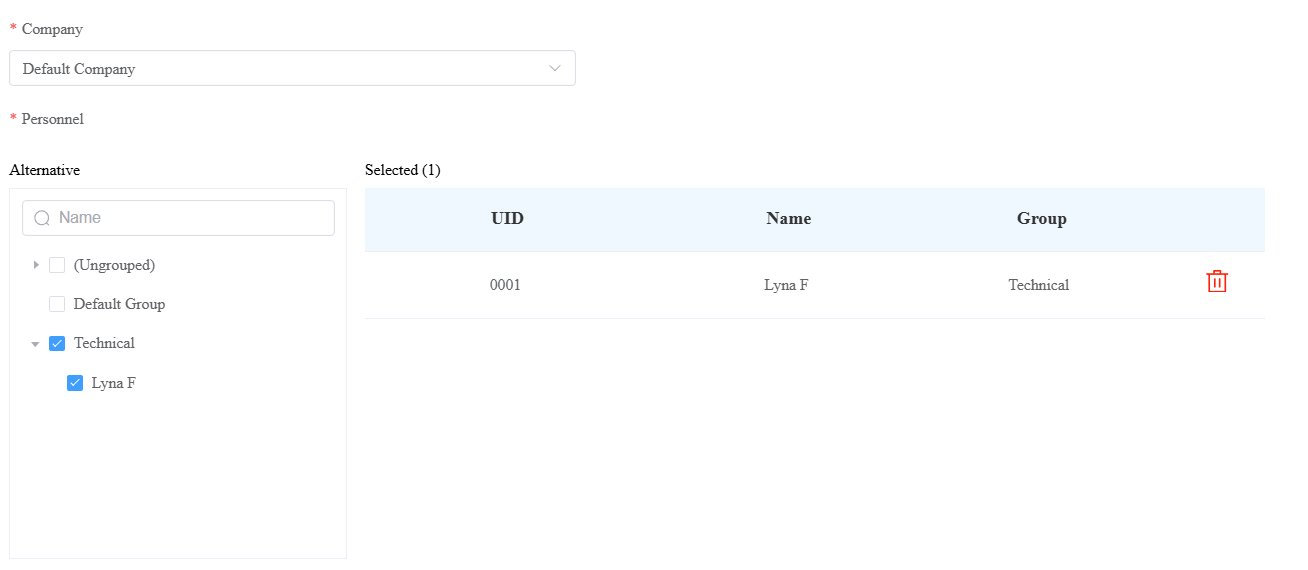
Select the company.
Search for or select the personnel.
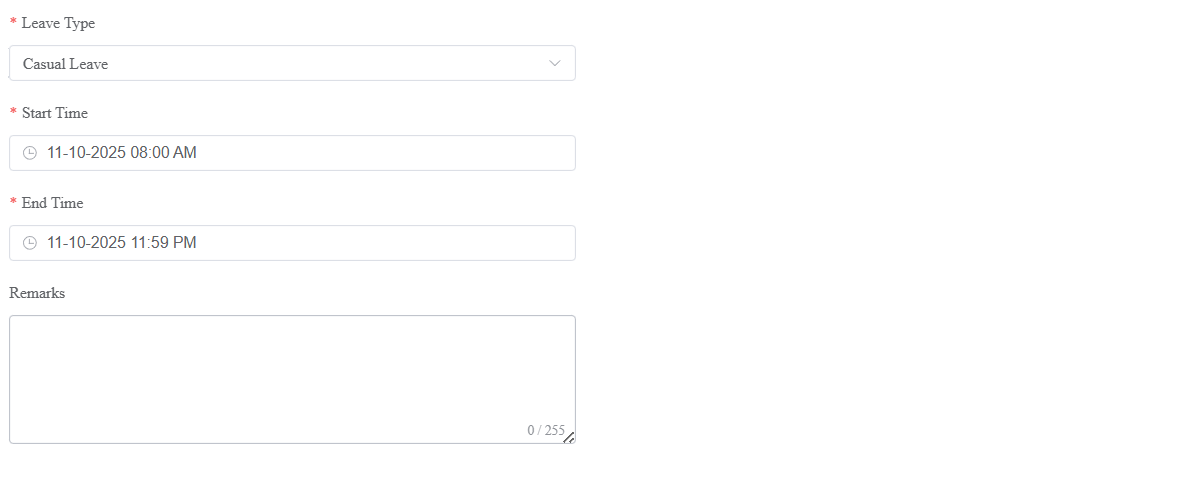
Select the Leave Type.
Set the Leave Time.
You can add some remarks to the leave.
Click Submit.
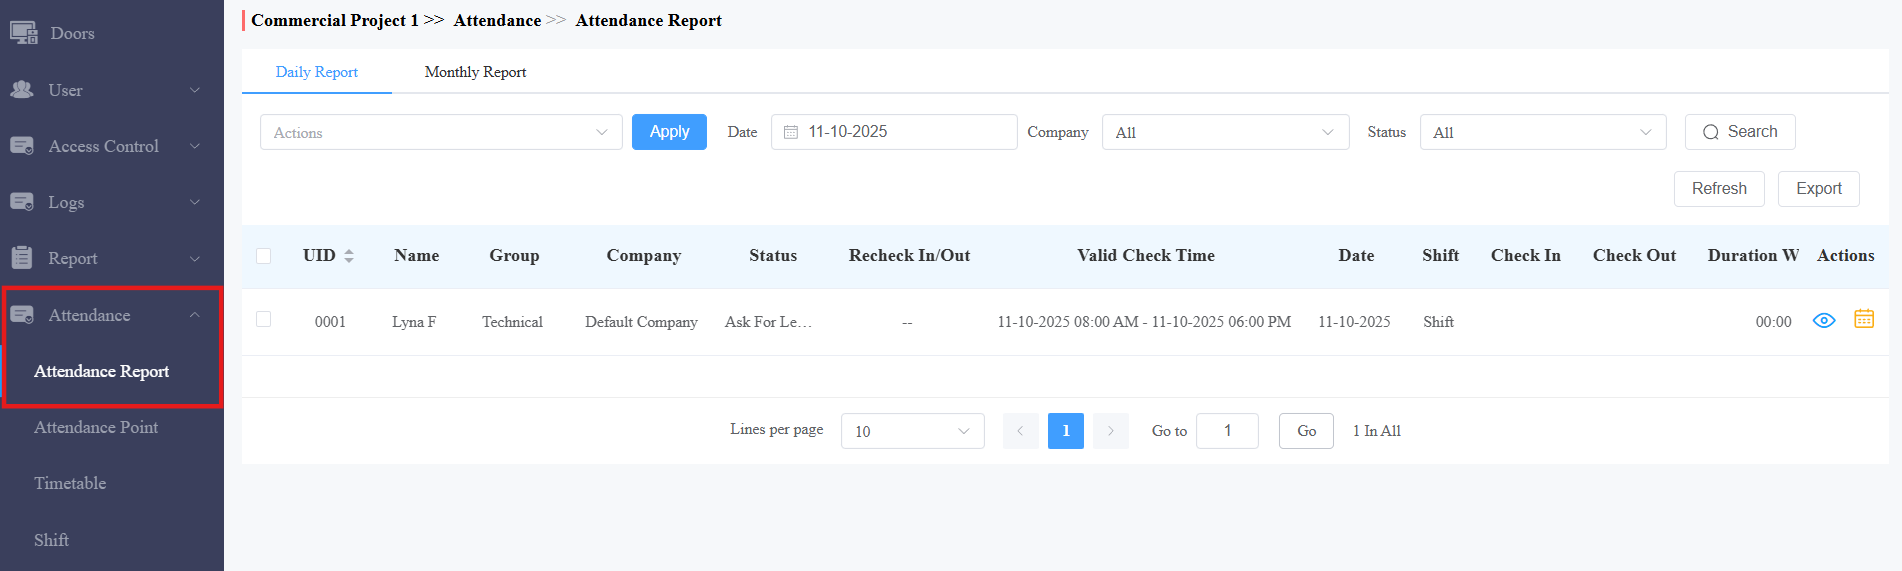
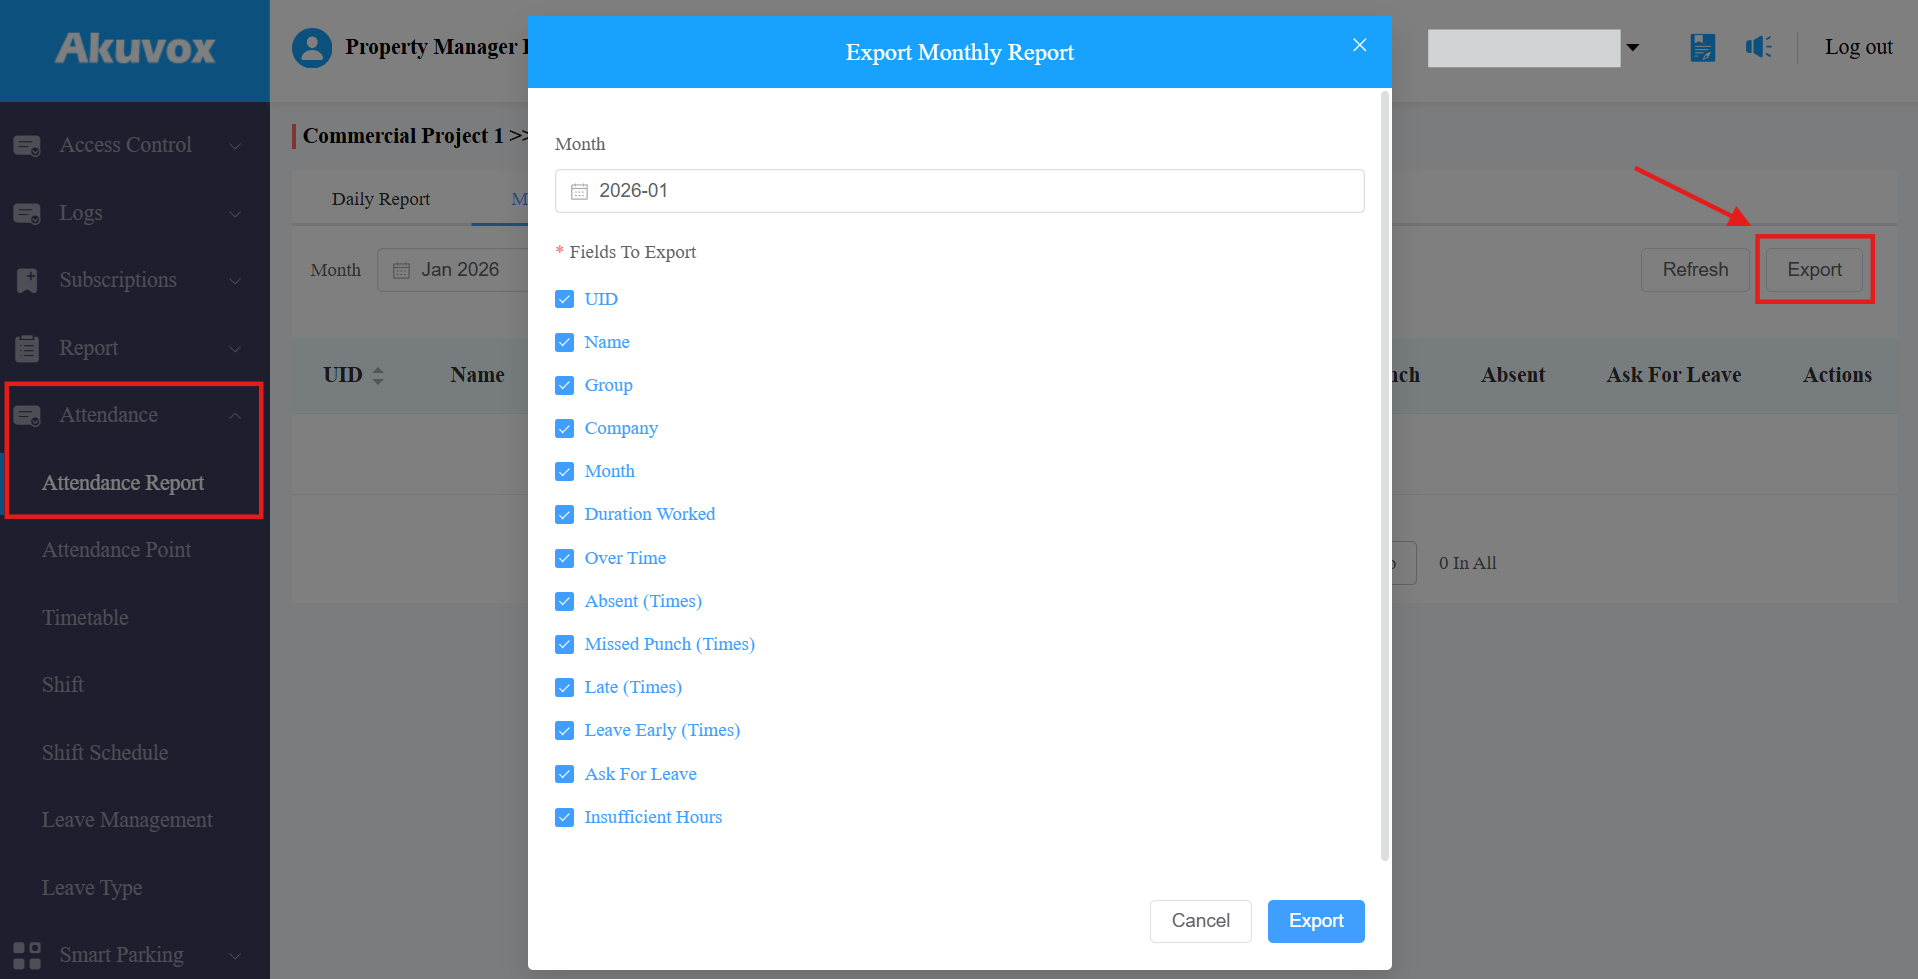
Check and Export Attendance Reports
New attendance records are generated during off-peak hours each day and updated each time attendance changes.
On the Attendance > Attendance Report module, you can check the latest daily or monthly reports by clicking Refresh on the right.
Click Export on the right to download the report. You can select items to be exported and define the period.
Daily | |
|---|---|
Item Names | Description |
Personnel ID | Display the personnel ID. |
Name | Display the personnel name. |
Group | Display the group of personnel. |
Company | Display the company of the personnel. |
Status | Display the following status: Normal, Absent, Missed Punch, Insufficient Hours, Late, Leave Early, Ask For Leave, Holiday, and/or No Shift. |
Recheck In/Out | Display the attendance correction records. See details in the Attendance Correction section. |
Valid Check Time | Display the period within which employees should clock in/out. |
Date | Display the date. |
Shift | Display the shift name. |
Check In Time | Display the clock-in time. |
Check Out Time | Display the clock-out time. |
Duration Worked | Display the working time, precise to minutes. 10:00 means 10 hours. |
Actions |
|
 : Click to view the monthly report in a graphical form.
Monthly | |
|---|---|
Item Names | Description |
Personnel ID | Display the personnel ID. |
Name | Display the personnel name. |
Group | Display the group of personnel. |
Company | Display the company of the personnel. |
Month | Display the month. |
Duration Worked | Display the working time, precise to minutes. 10:00 means 10 hours. |
Over Time | Display the overtime, precise to minutes. -10:00 means 10 hours. |
Late | Display the times of being late. |
Missed Punch | Display the check-in time. The personnel only check in without checking out. |
Absent | Display the times of being absent. |
Ask For Leave | Display the times of asking for leave. |
Actions |
|
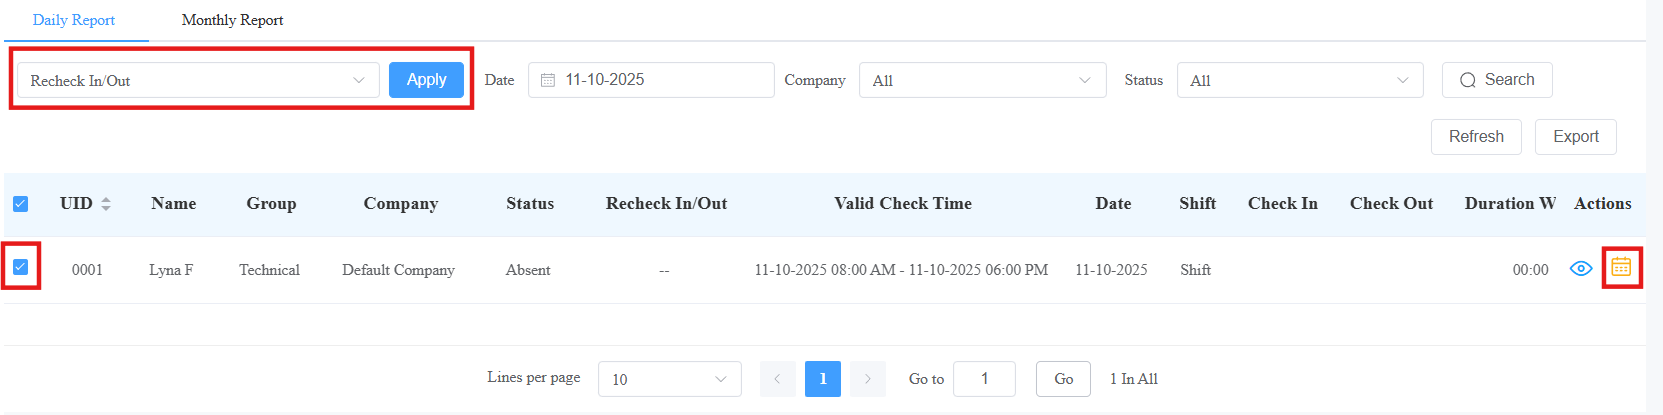
Attendance Correction
When employees work on time but forget to clock in/out, you can correct the attendance for them.
In this case, the Status column will display Absent, and the Recheck In/Out column will display “—”.
Check a log and select Recheck In/Out in the action box.
Click Apply. Or, you can click
 of the target log.
Correct clock-in and/or clock-out.
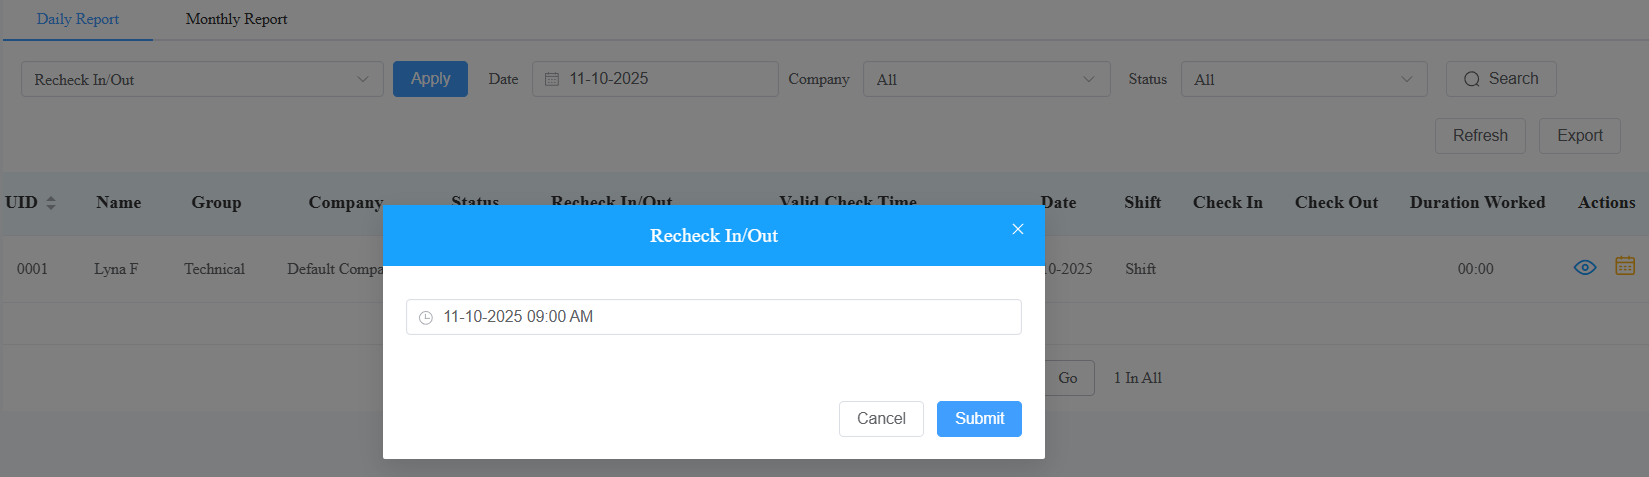
Click Submit. The Status will change to Normal.