Batch Construction Configuration allows installers to save the configuration of a completed home as a reusable template. The template can then be applied to other homes with identical layouts within the same project or across different projects.
After a template is applied, the system automatically synchronizes configuration data and guides the installer through device matching and verification, significantly reducing deployment time for large residential projects.
What You Should Know
Before using Batch Construction Configuration function, ensure that:
All homes and devices have been added to the akubela Cloud.
All devices are installed correctly and connected to the network.
The source home has been fully configured before creating the template.
Supported Panels and Firmware Versions:
Panel | Required Version |
HyPanel (PS51) | 51.1.40.181 (only) |
HyPanel Plus (PS52) | 52.1.40.129 (only) |
HyPanel KeyPlus (KS53) | 53.1.40.133 (only) |
HyPanel Pro (PG71) | 71.1.40.41 or later |
HyPanel Ultra (PH81) | 281.1.40.29 or later |
HyPanel Supreme (PHX1) | 1001.1.40.23 or later |
HyPanel Elite 10 (PH59) | 159.1.40.111 or later |
SmartPanel (X933H) | 933.1.40.10 or later |
SmartPanel Elite 10 (PH58) | 119.1.40.11 or later |
Synchronized Data Scope:
Type | Data |
System Settings | Display settings Screen saver DND Alarm clock Sound settings Motion settings Temperature scale Time zone Screen lock Setting lock Cloud backup settings (Automatic backup status & Last backup time) Network priority Zone settings Relay parameters Homepage Display Family space Device name |
Scenes & Security Modes | All scenes and security modes are supported, including name, location, icon, conditions, and tasks |
Contacts | Local contacts |
Devices | For Zigbee devices, akubela-developed devices, and KNX devices, supported synchronized data including:
For panel flush mounted modules, the following settings are supported:
|
User Web Portal Configuration | Password Permission management settings |
Step 1 Upload a Template
TIP:
Up to 100 templates can be uploaded per project.
To save the current home settings to the cloud:
Open the Batch Configuration page:
Large-screen panels: Go to
 > Installer Settings (default password: 000000) > Batch Configuration.
Small-screen panels: Go to
 > System Settings > Installer Settings (default password: 123456) > Batch Configuration.
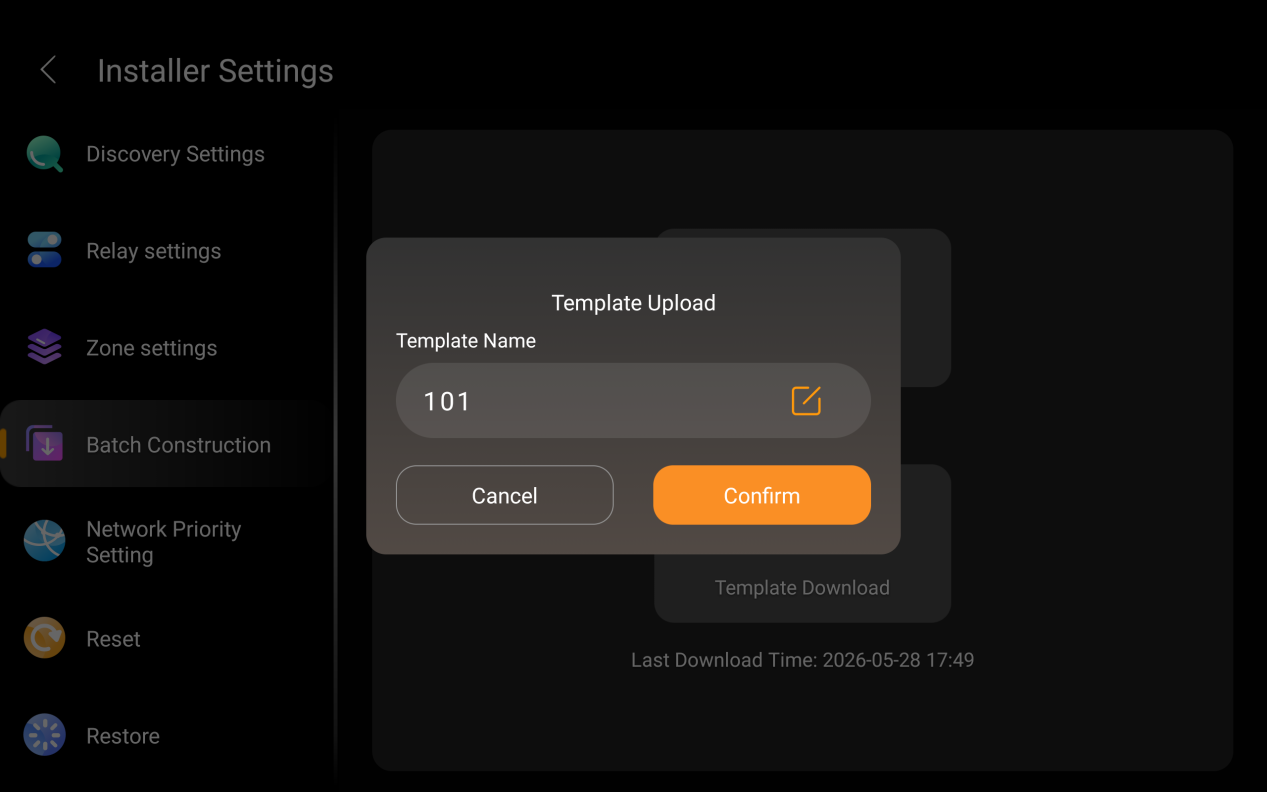
Tap Template Upload.

Name the template and tap Confirm.
Step 2 Download and Reuse a Template
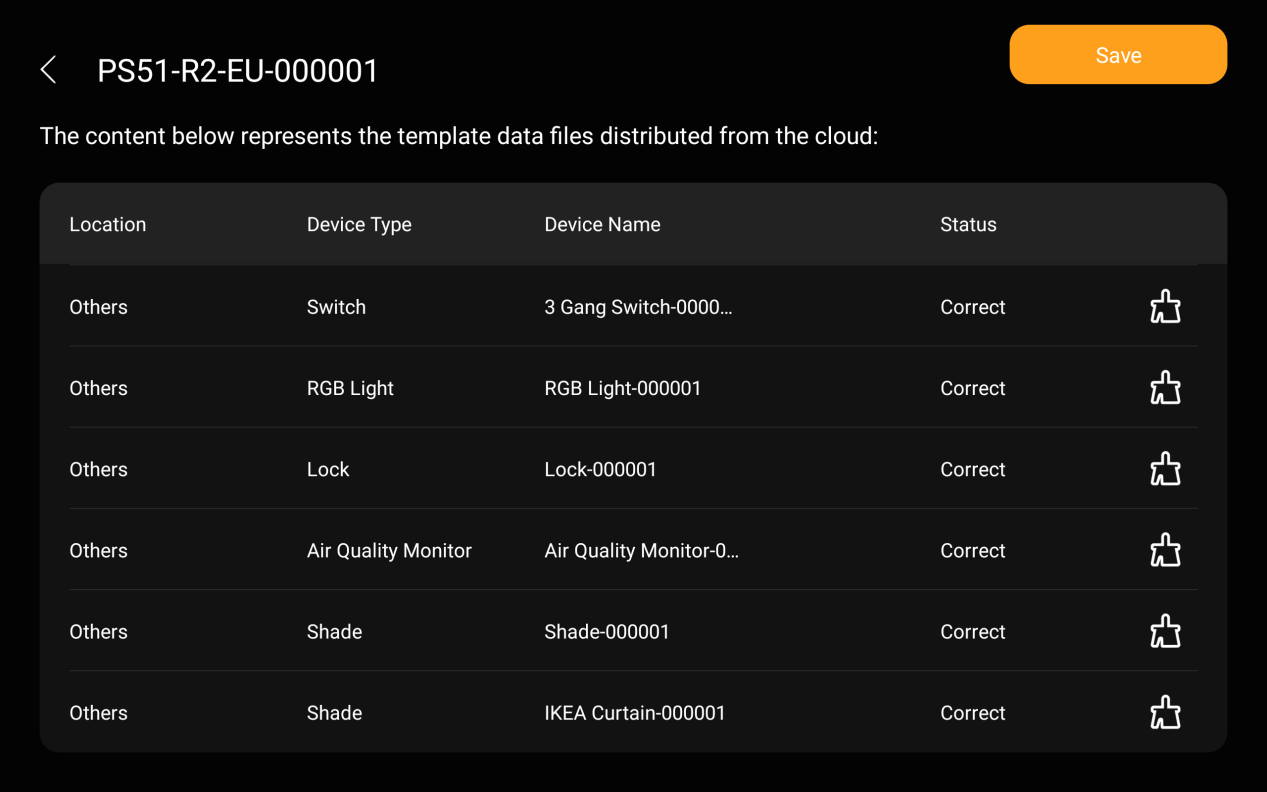
When a template is imported, the system automatically attempts to match devices. Successfully matched devices display a Correct status; Unmatched or incorrectly matched devices require manual verification and reassociation.
NOTE:
When a template is applied, the room structure will match the template exactly:
Rooms not included in the template will be removed.
Devices from deleted rooms will automatically be moved to the Others space.
Existing scenes not included in the template will be deleted.
TIP:
If you want to reuse template from another project, apply the template through the akubela Cloud first. See the Advanced Template Management section below for detailed instructions.
Open the Batch Configuration page:
Large-screen panels: Go to
 > Installer Settings (default password: 000000) > Batch Configuration.
Small-screen panels: Go to
> System Settings > Installer Settings (default password: 123456) > Batch Configuration.
Tap Template Download.
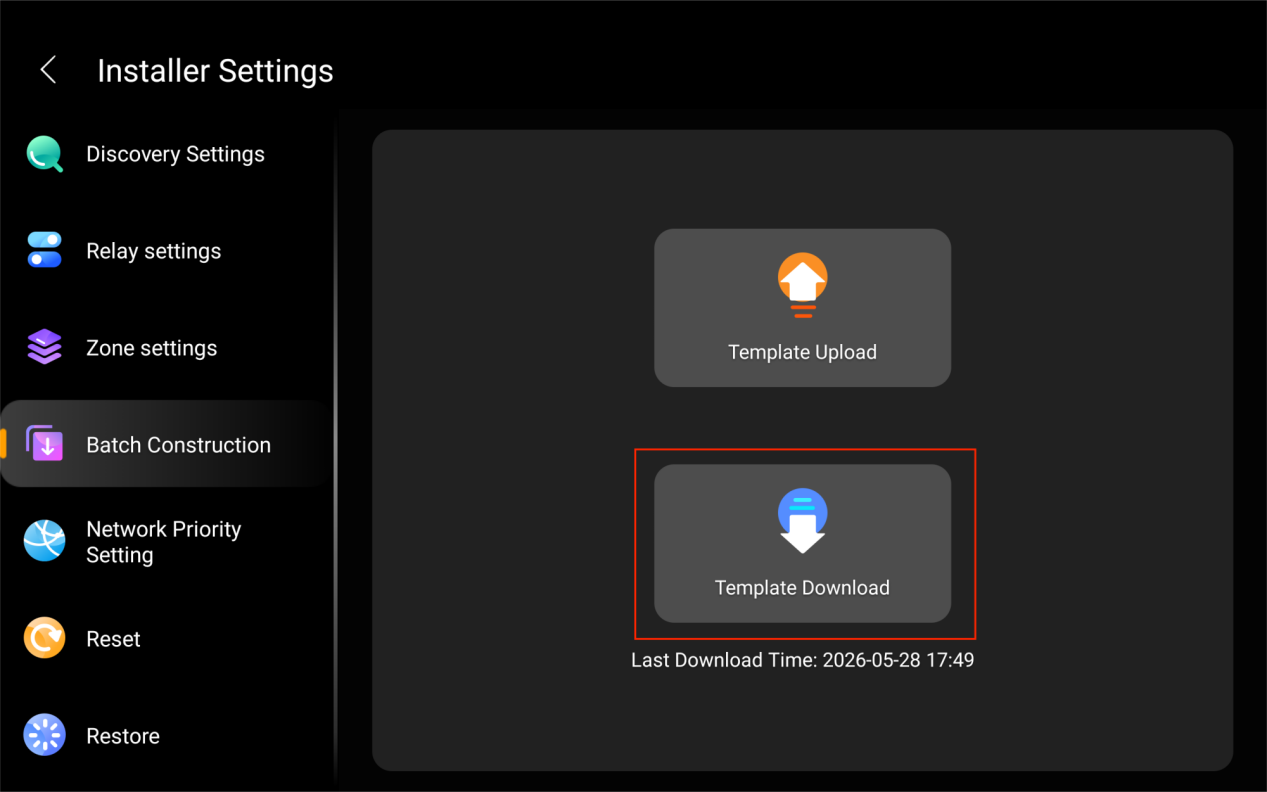
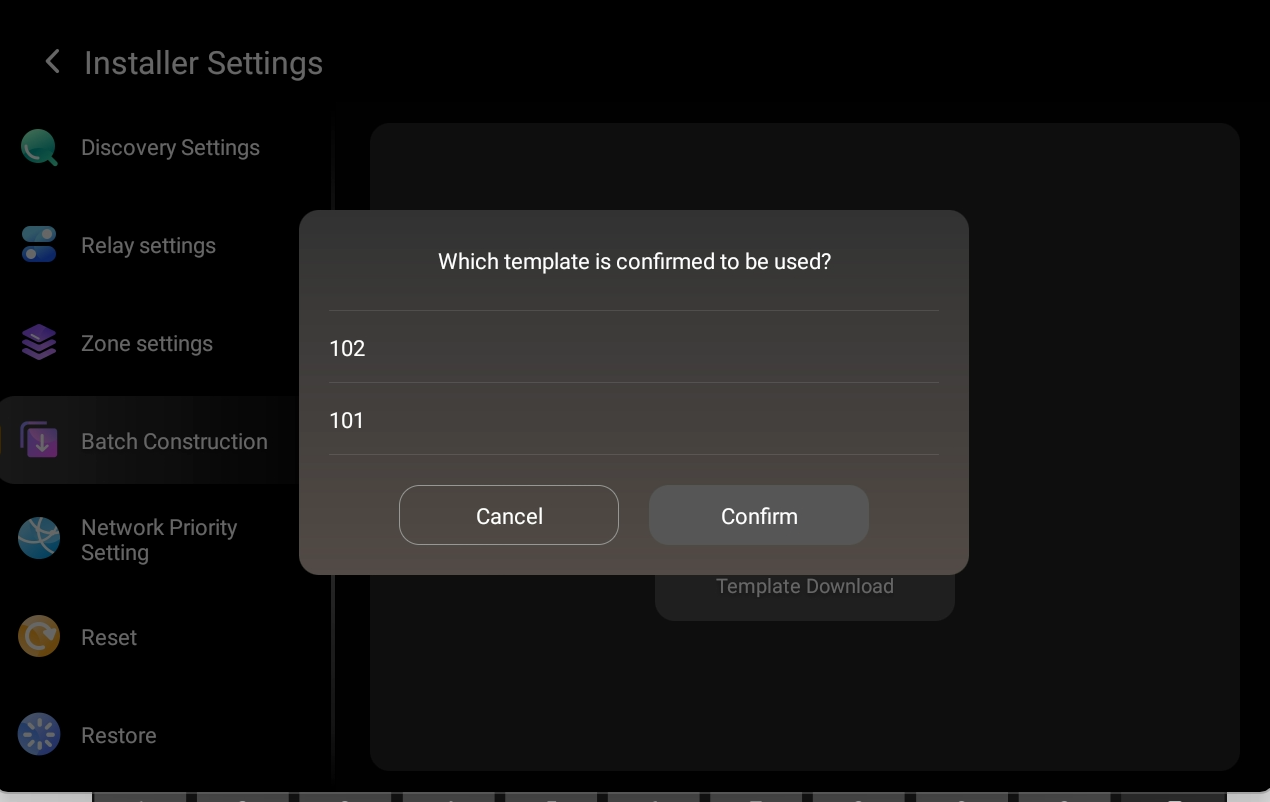
Select the desired template from the list.
Review the import result:
All devices match successfully: Tap Finish to complete the setup
An automatic match needs adjustment: Select the gateway, tap
 to remove the current association, and proceed to Step 3 below.
Devices are Unmatched: Proceed directly to Step 3 below.
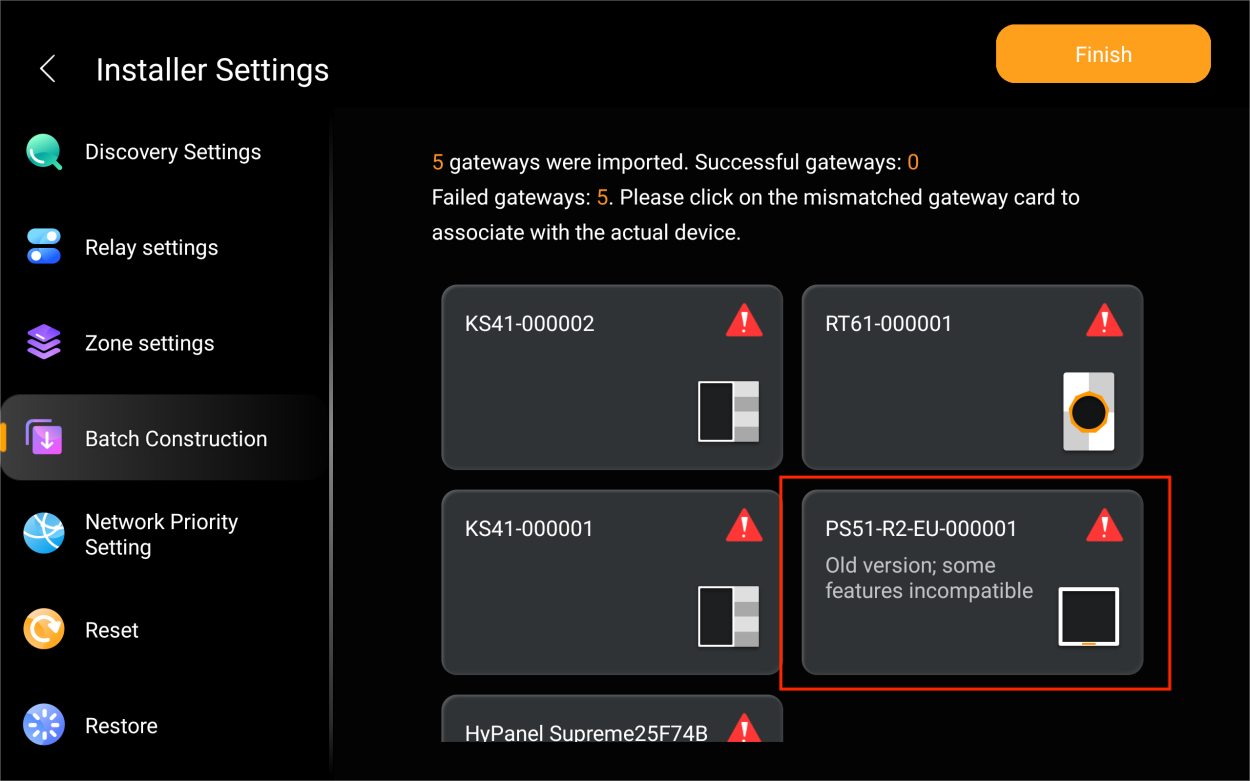
Step 3 Handle Mismatched Devices
If the system cannot automatically identify a device, an error icon appears.
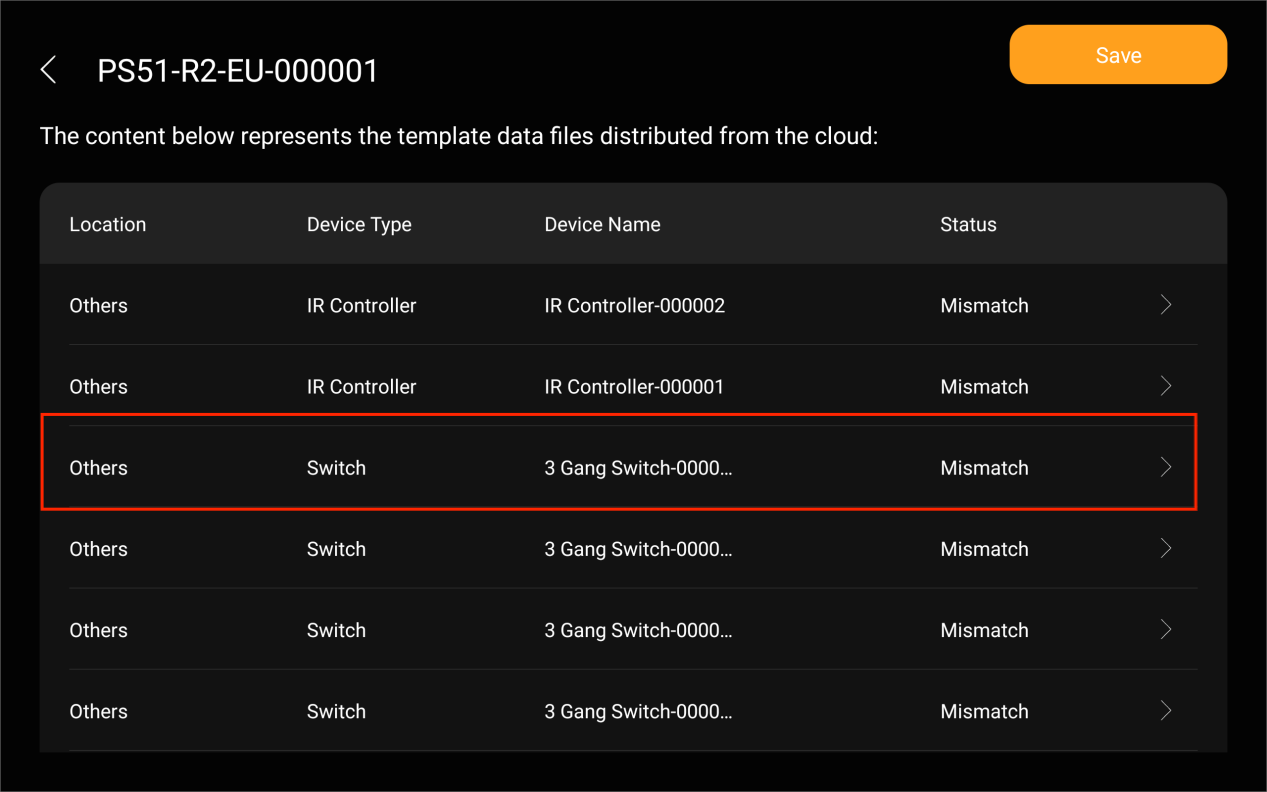
Tap the device card marked with the error icon.
Select the mismatched device.
Use the available Test options (e.g., On/Off) to physically identify the device.
NOTE:
Test functions are supported only for devices with On/Off control or curtain/shade devices.
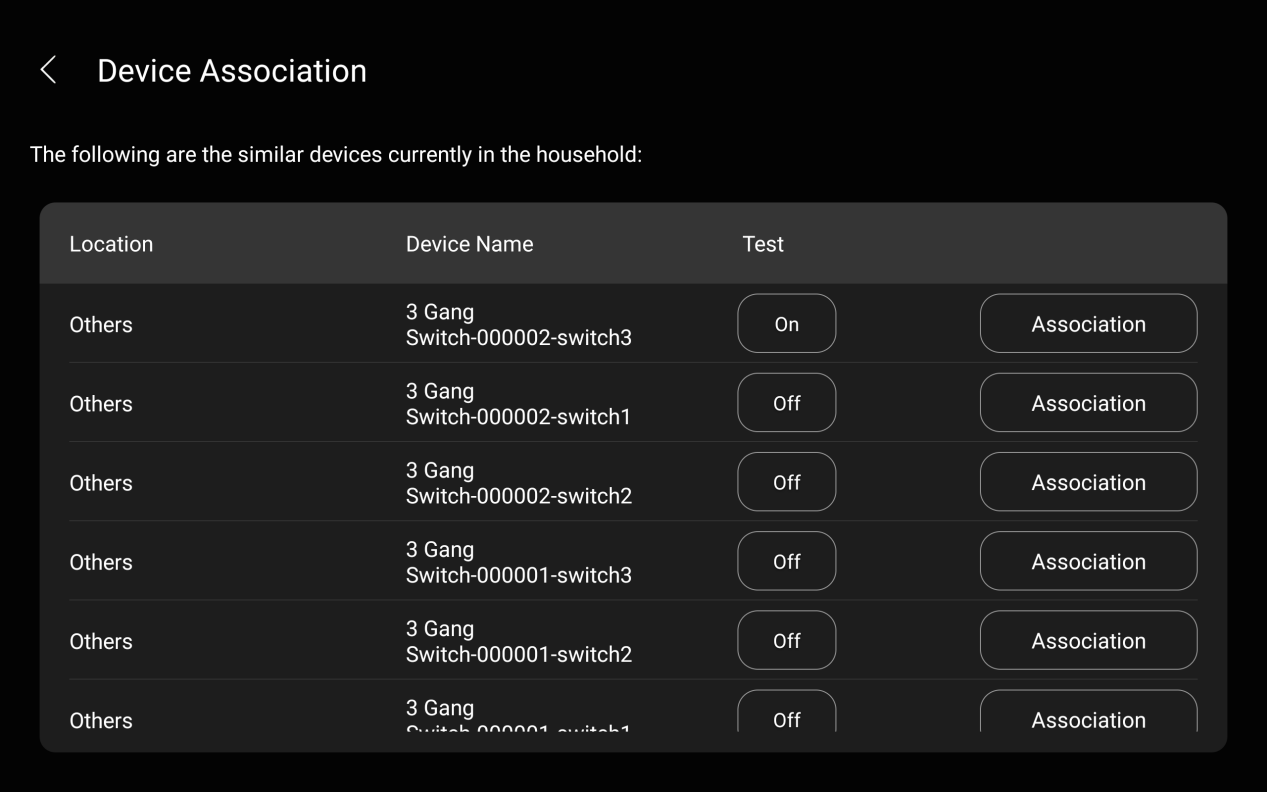
Tap Association to manually bind the device to the corresponding template slot.
Tap Save > Finish once all required devices are associated.
Advanced Template Management
Use the following procedures if you want to:
Reuse a configuration template across different projects
Reuse a specific configuration template across multiple homes within the same project
Manage templates, including renaming or deleting templates
View template history or restore a previous template version
Log in to the akubela Cloud using your installer account.
Go to Project > Community/Single-tenant > [select project] > Cofig Template.
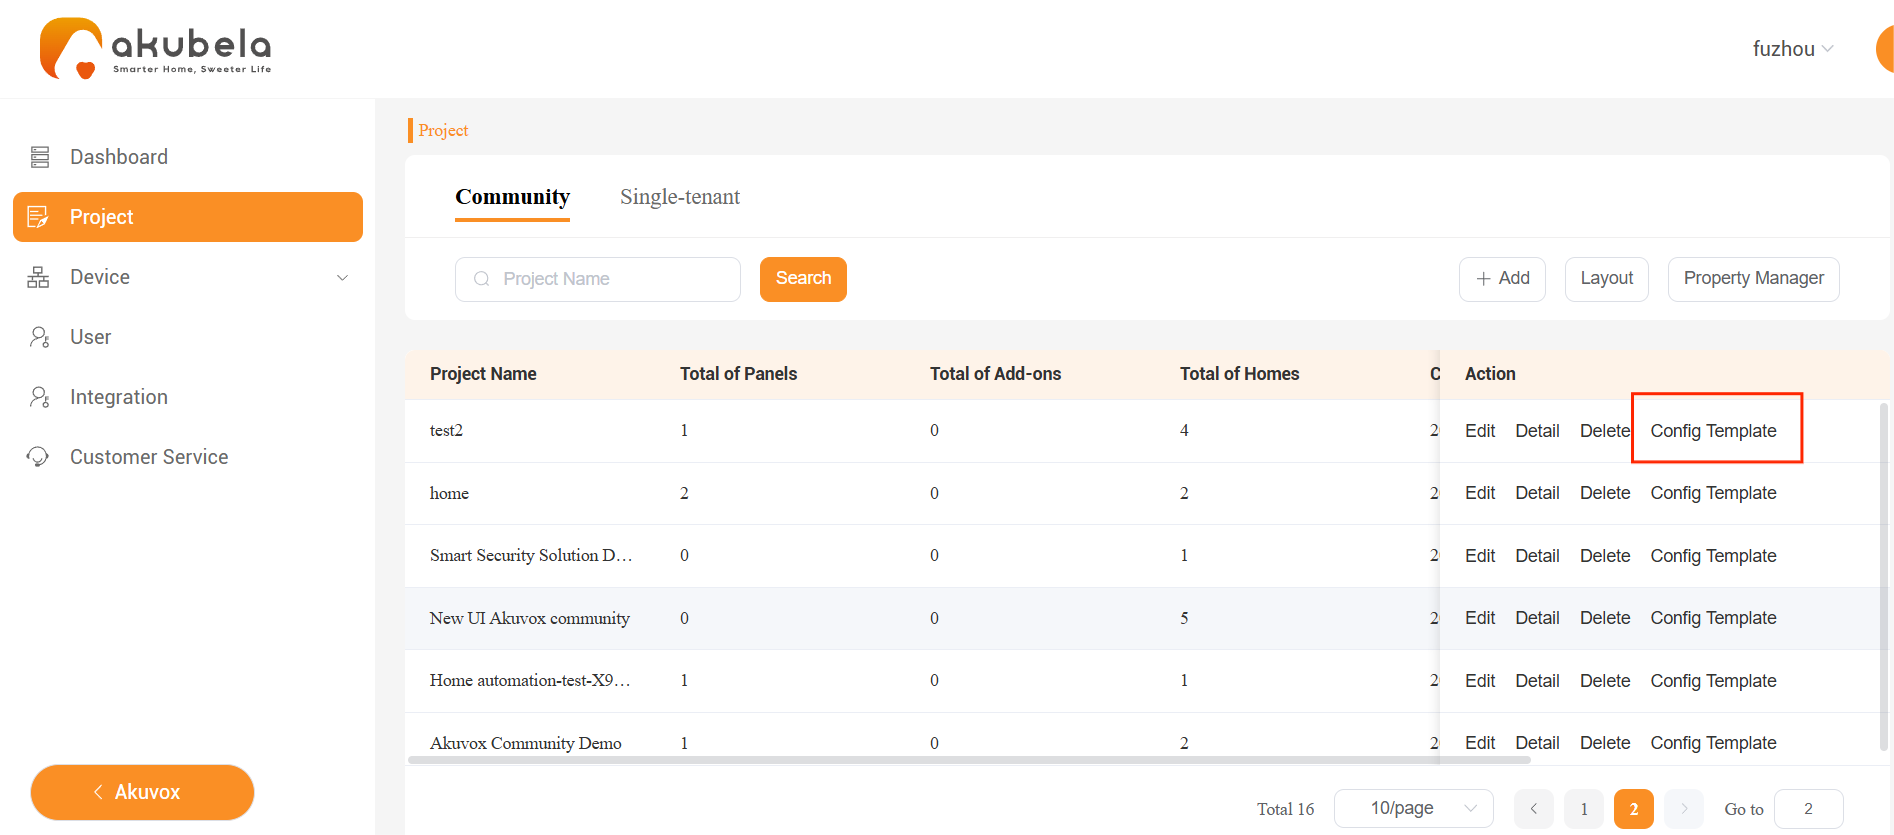
Select the desired configuration template.
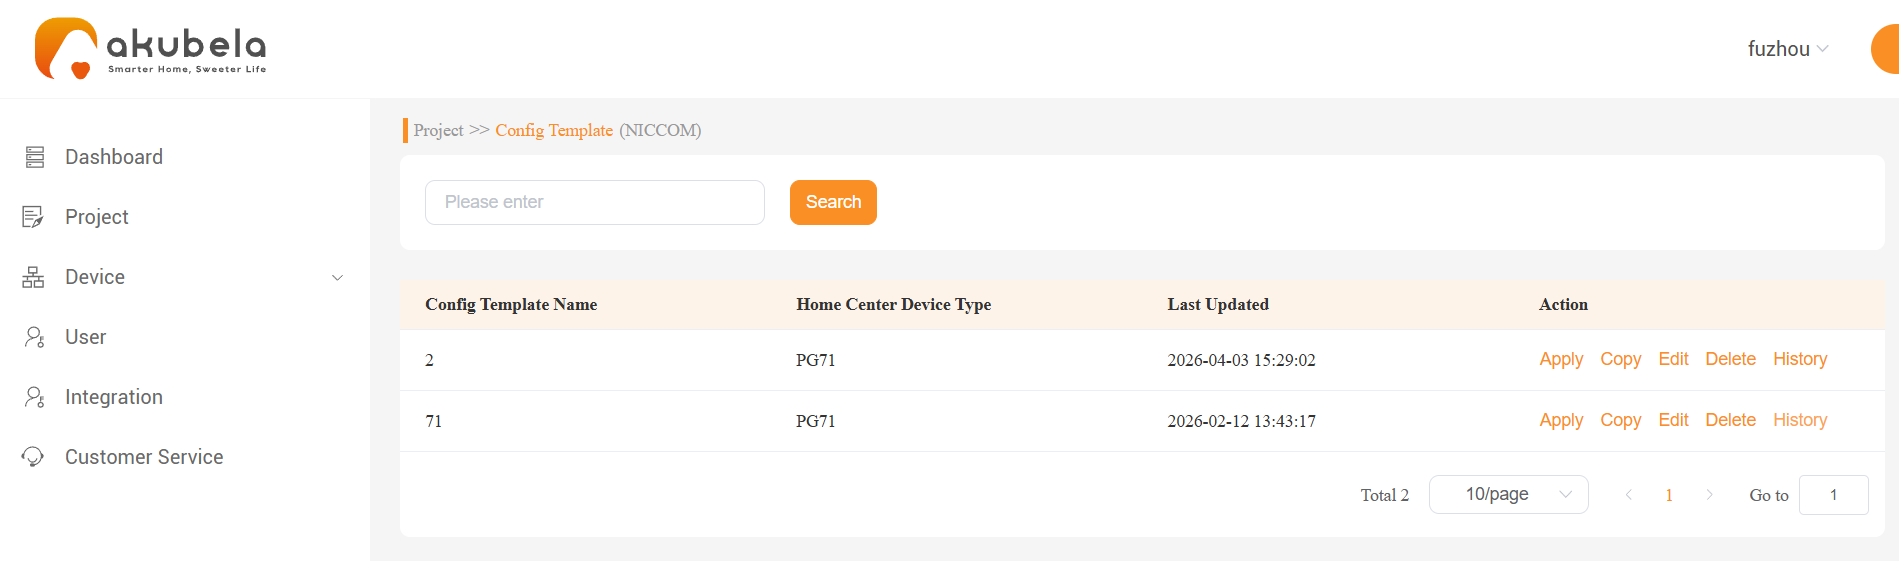
Execute an action:
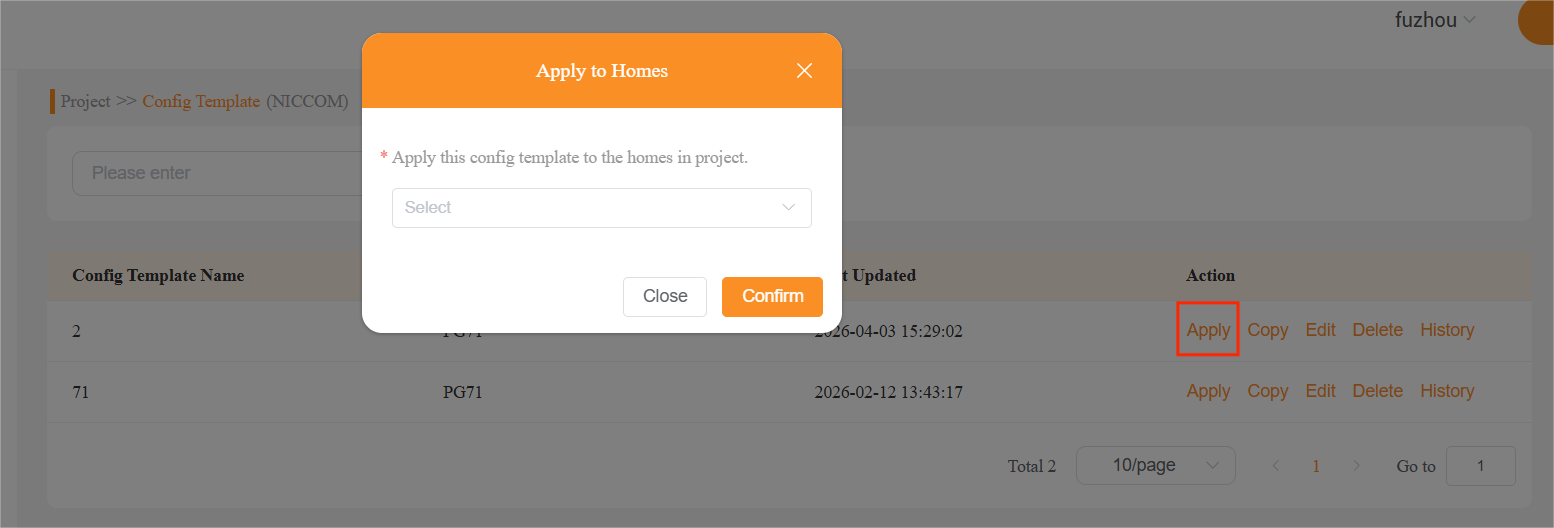
Apply: Deploy the selected template directly to specific homes within the current project. Afterward, follow Step 2 and Step 3 on the panel to download and match the configuration.
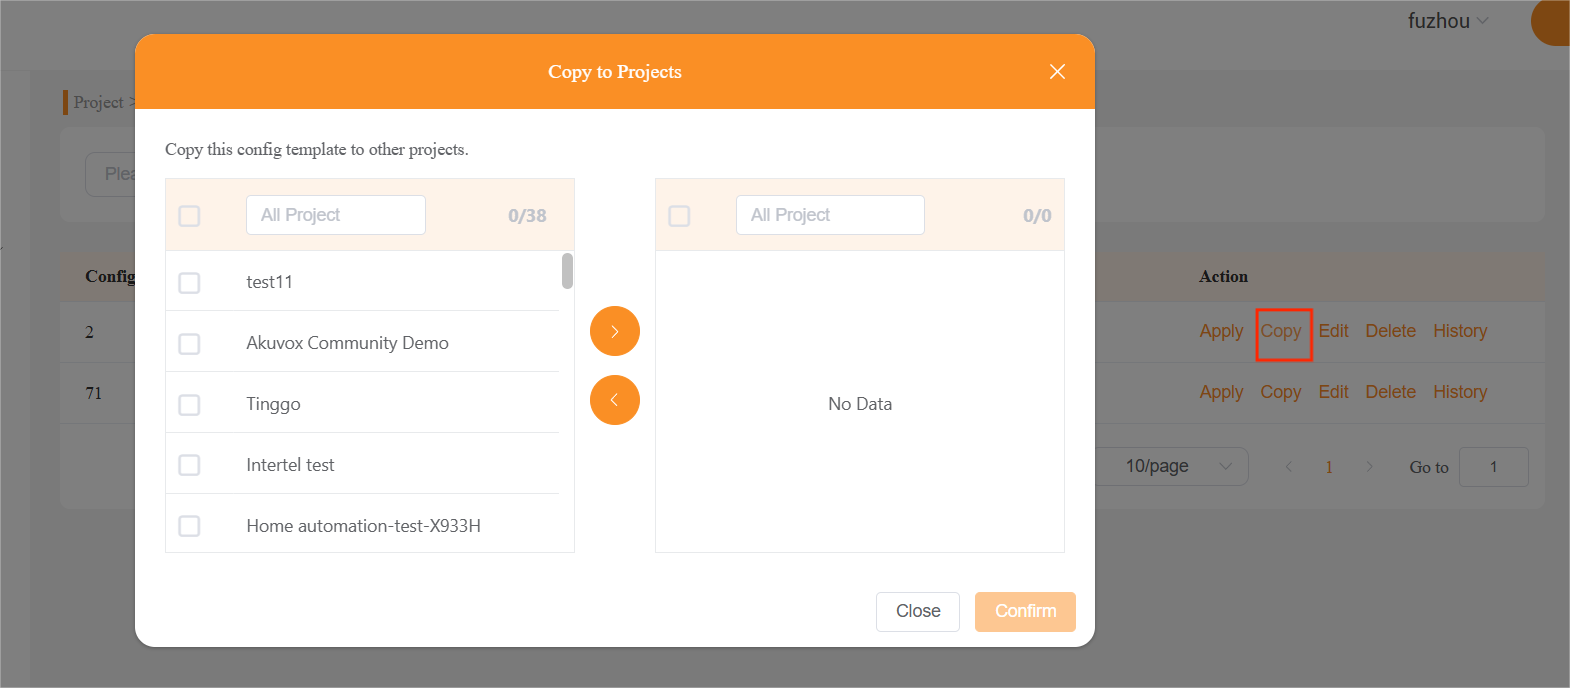
Copy: Duplicate the template to other projects. Once copied, navigate to that target project's Config Template menu, apply it to the desired homes, and then follow Step 2 and Step 3 on the panel to complete the download.
Edit/Delete: Modify the template name or delete the selected template permanently.
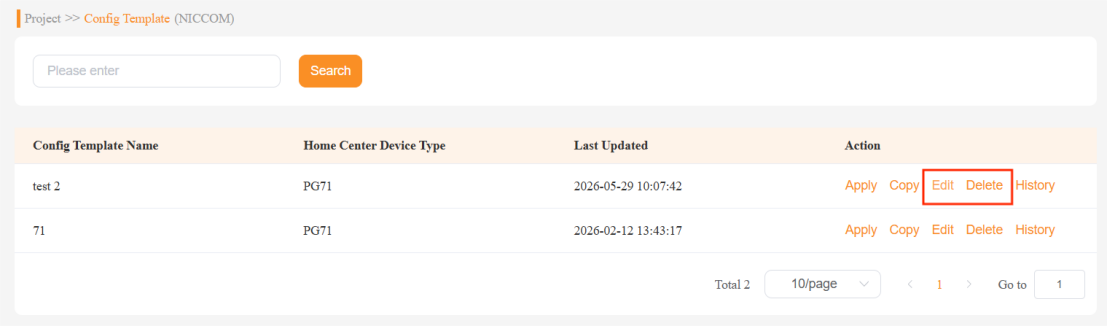
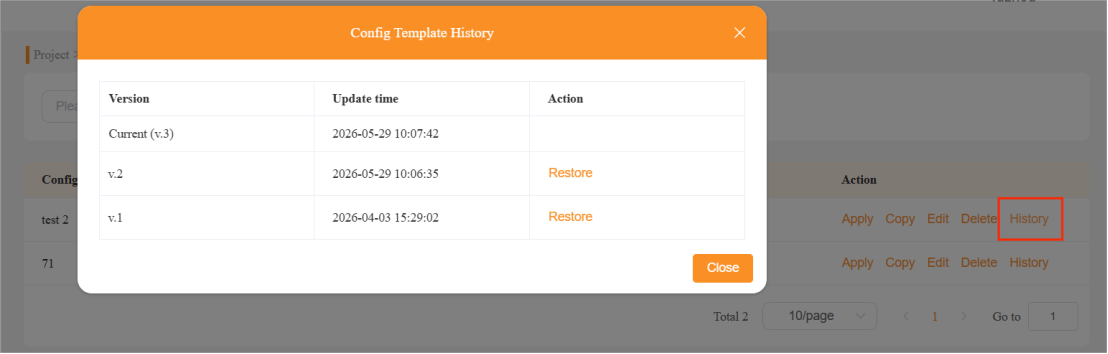
History: View the template version history or restore a previous version if required.