Batch scene configuration allows you to export customized automation scenes from one home as a template and reuse them in other homes. Once set up, scenes can be quickly applied without the need for manual configuration.
Before Getting Started
To ensure a smooth process, confirm the following requirements are met:
Batch scene configuration is only supported on the following HyPanel models with the specified firmware versions:
HyPanel Pro: 71.1.35.30 and later
HyPanel Supreme: 1001.1.35.8 and later
HyPanel Ultra: 281.1.35.8 and later
TIP:
For update instructions, refer to Update akubela Panels.
Connect your computer to the same local network as the HyPanel devices.
Confirm that the scenes to be reused have already been created and configured on the source device.
Step 1 Export Scene Template
Here we use a HyPanel device to export the scene template.
Log into the HyPanel device web portal at http://device’s IP address. The default username and password are both admin.

TIP:
To find the HyPanel device’s IP, swipe down from the top of the screen, then tap
> System Settings > About.

Click
 to enter the scene configuration interface.
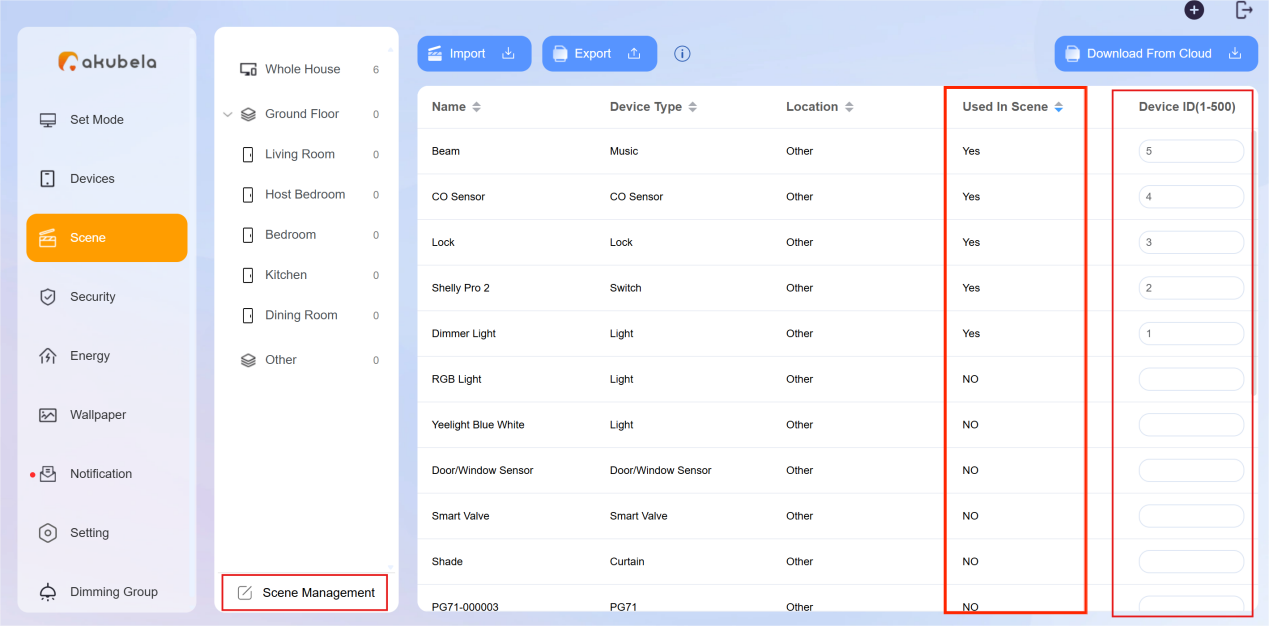
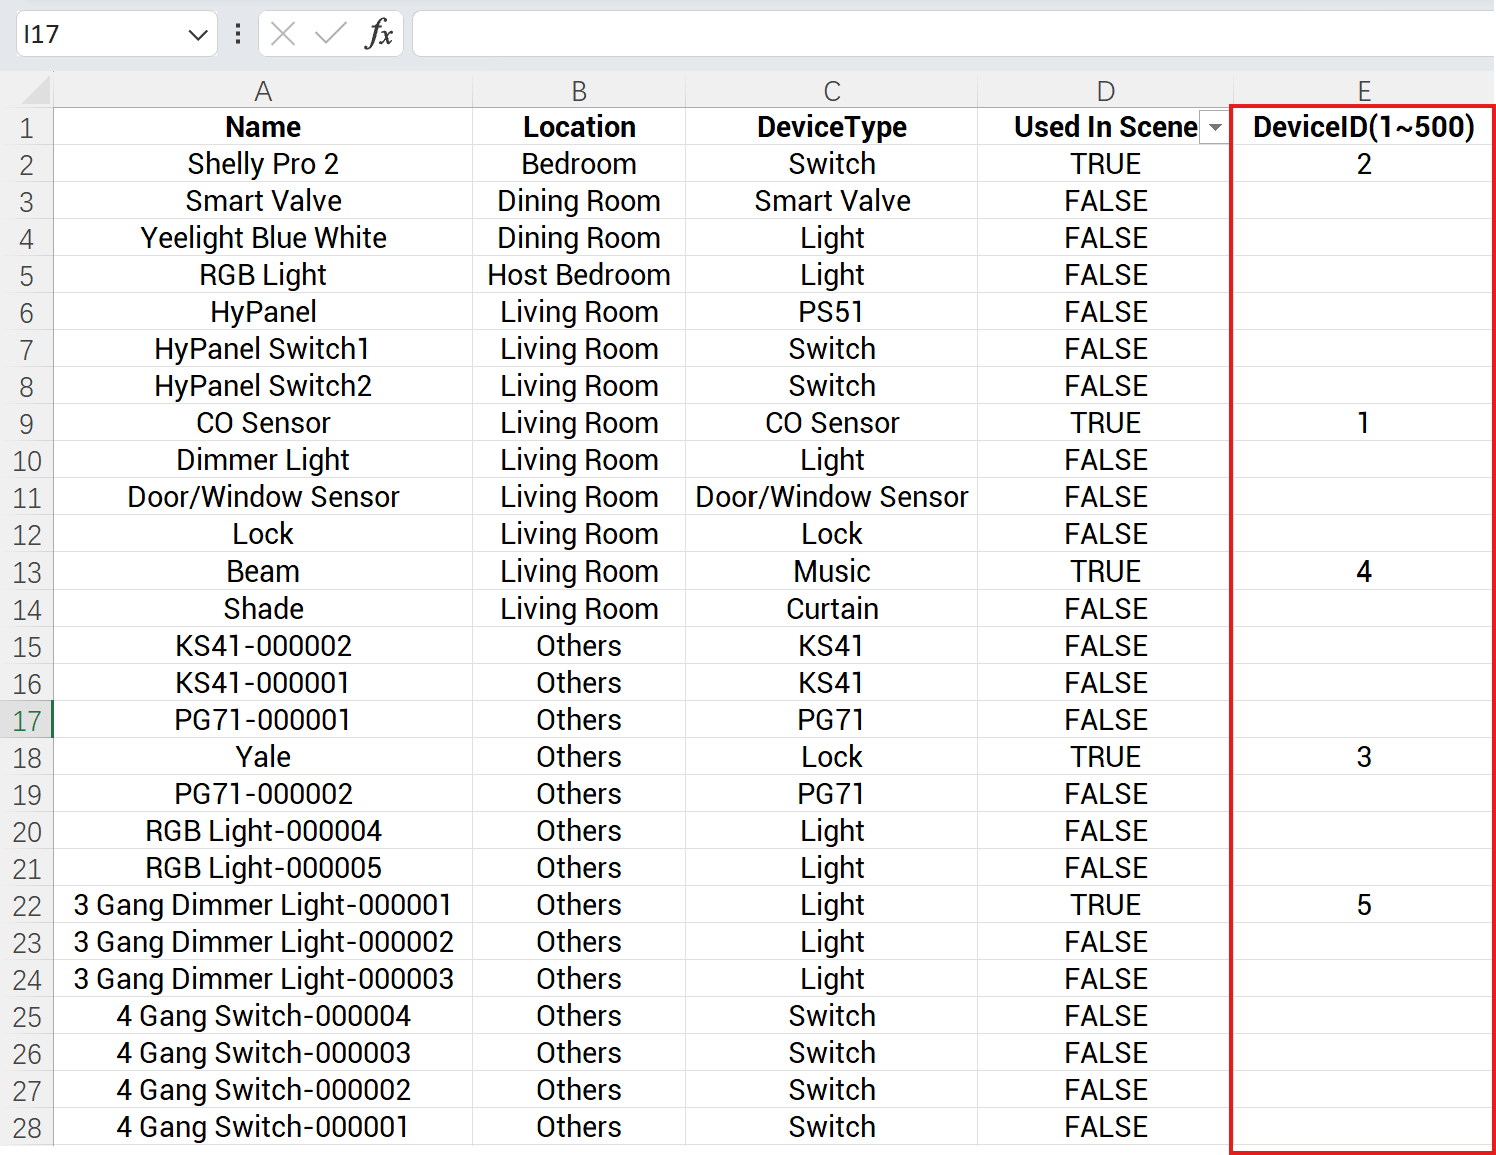
Click Scene Management to check if the device is used in scenes, and assign custom Device IDs.
Used In Scene: Indicate whether this device is involved in any automation scenes.
- Yes: The device is included in scenes. You must assign it a unique device ID(0-500) for matching. Ensure the same device exists in the target home.
- No: The device is not involved in any scenes. No further action is required.
Device ID: A custom identifier (0–500) used to match devices across homes.
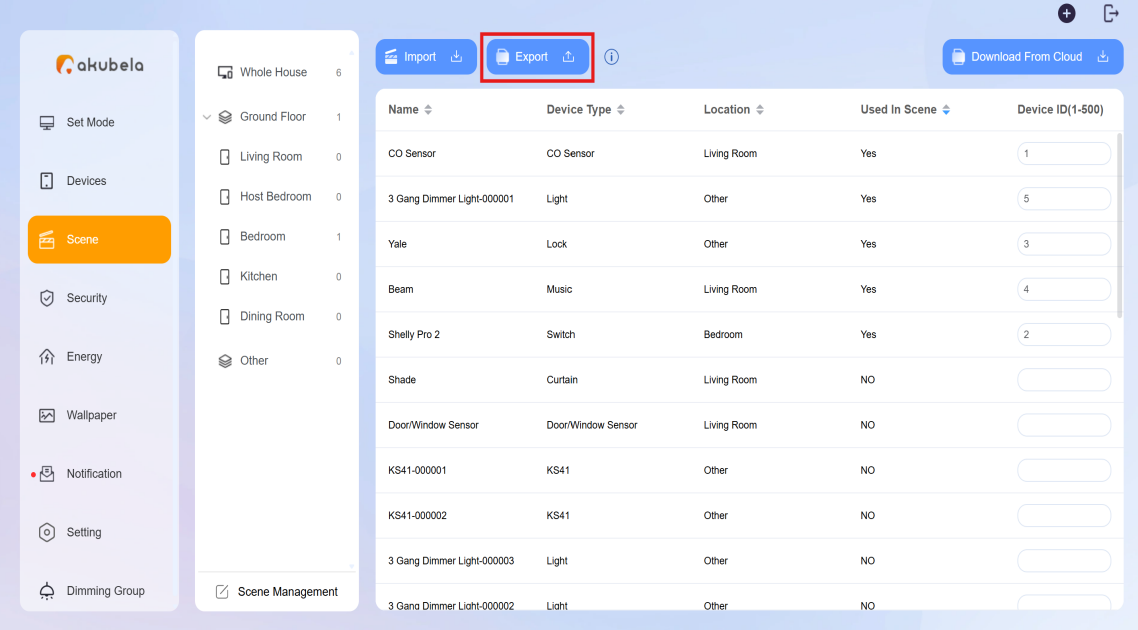
Click Export to download the DeviceIDList and scene files.
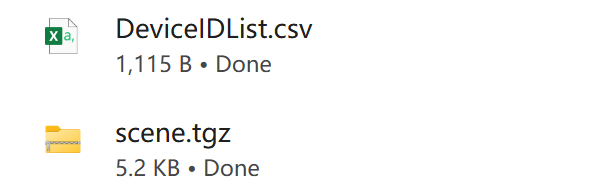
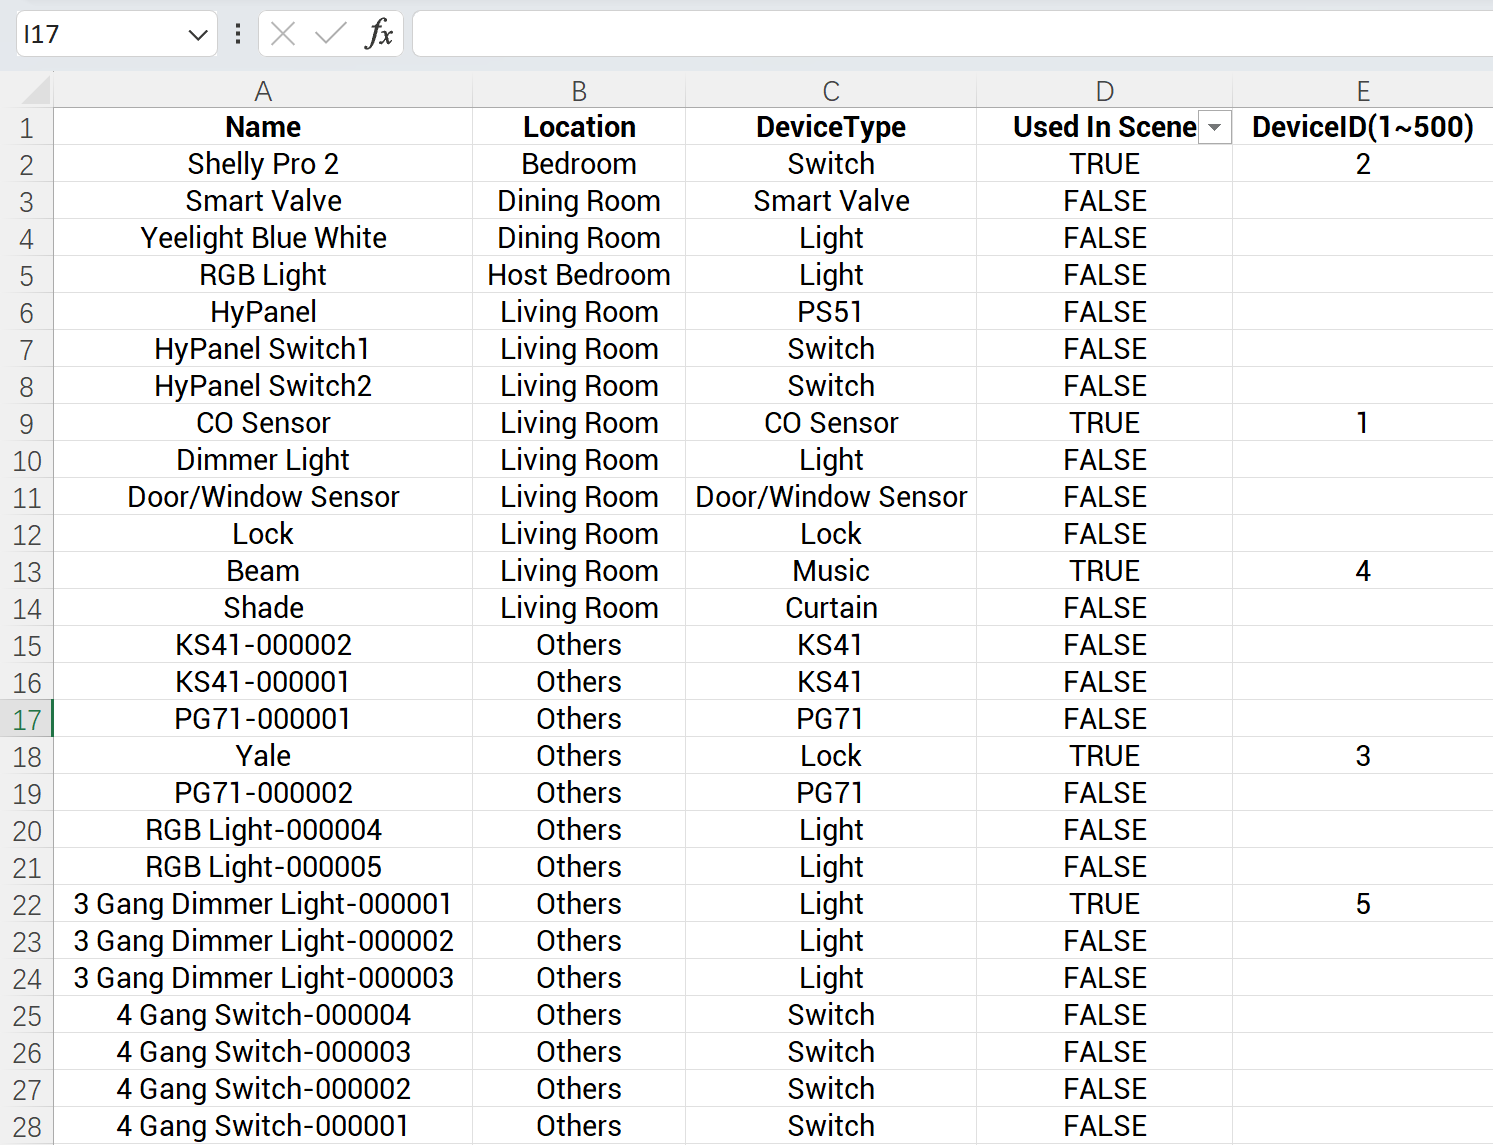
DevicelDList.csv: A table listing each device’s name, location, type, association status, and assigned Device ID.
- Use this file as a reference to ensure Device IDs and other parameters are correctly matched when importing scenes.
Scene.tgz: A compressed template file containing all scene configuration data.
- This file must be uploaded when importing scenes through either the akubela Cloud or the device web portal.
Step 2: Import Scene Configuration File
You can import the scene file in two ways:
Via akubela Cloud (recommended for multiple cloud-connected homes)
Via device web portal (can be used for homes in Local mode)
NOTE:
Importing a scene file will overwrite all existing scenes in the target home.
Option 1 Via akubela Cloud
Use this method if you want to reuse scenes across multiple cloud-connected homes. After uploading the scene file to the cloud, you’ll download it to each HyPanel Pro for final setup.
NOTE:
Only installer accounts can access the scene import feature.
1. Upload scene file to the cloud
NOTE:
Before you start, ensure a cloud-based Community or Single-Tenant project has been created and HyPanel devices are connected to the cloud and all other smart home devices have been added to the home.
(1) Log into the akebela Cloud using the installer account.
(2) Click Project and follow the instructions based on the project type.
For a community project
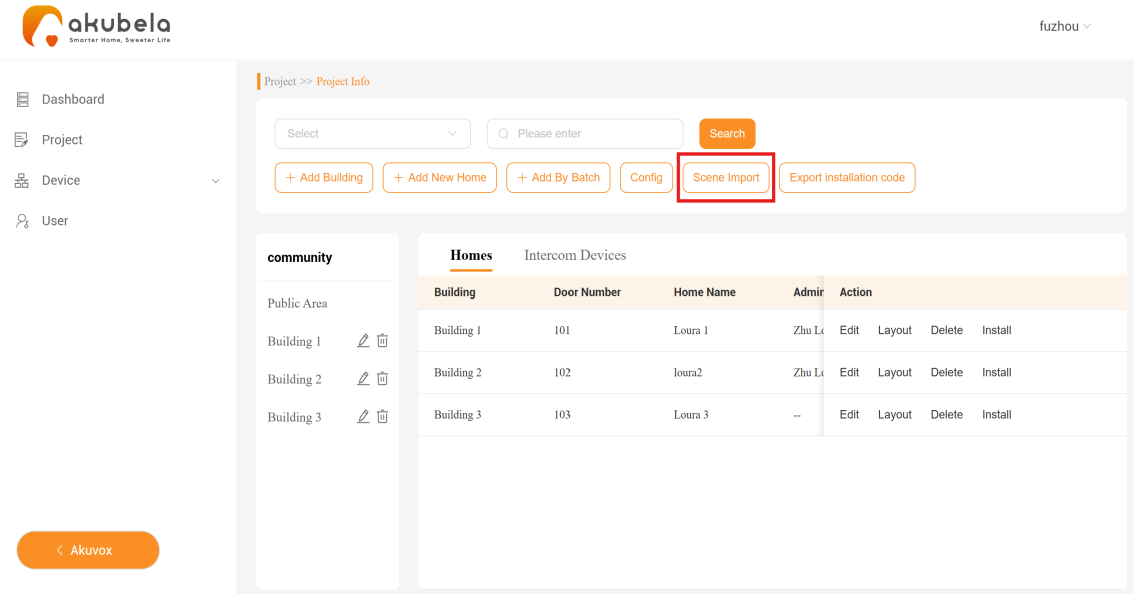
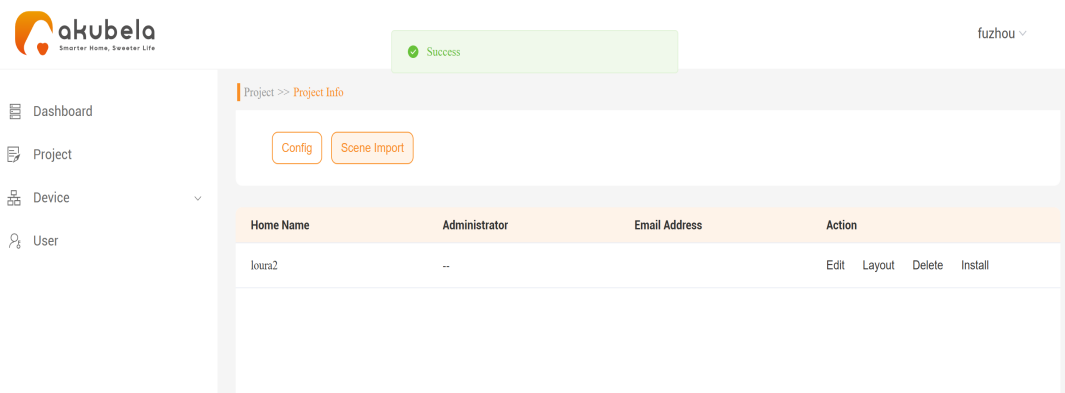
Click Detail to enter the Project Info interface.
Click Scene Import and upload the scene.tgz file you’ve downloaded.
c. Select homes where you want to apply the scene template.
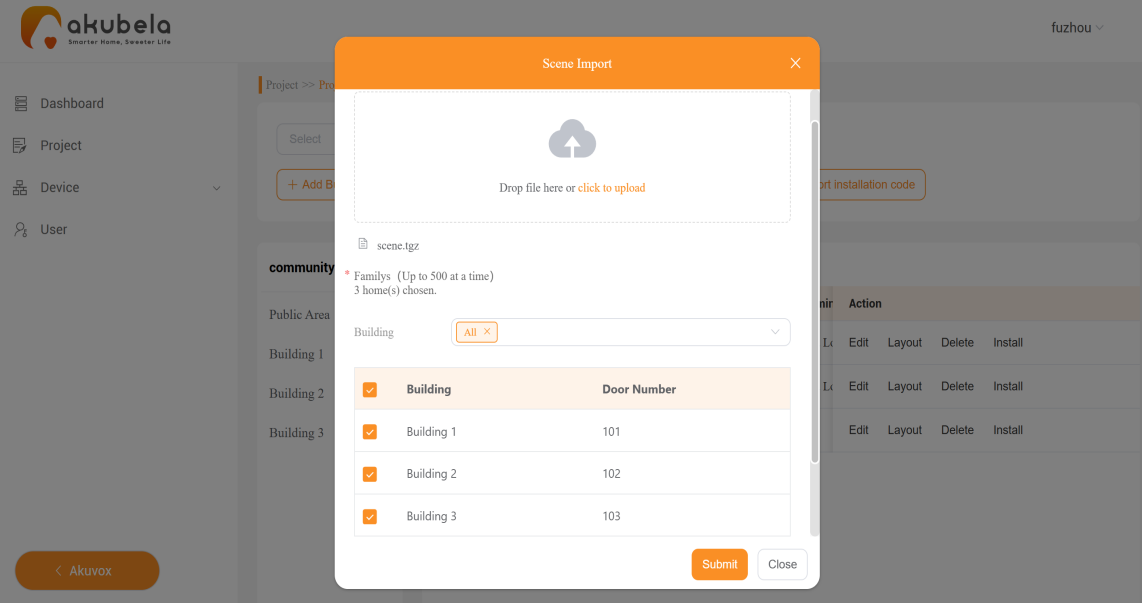
d. Click Submit.
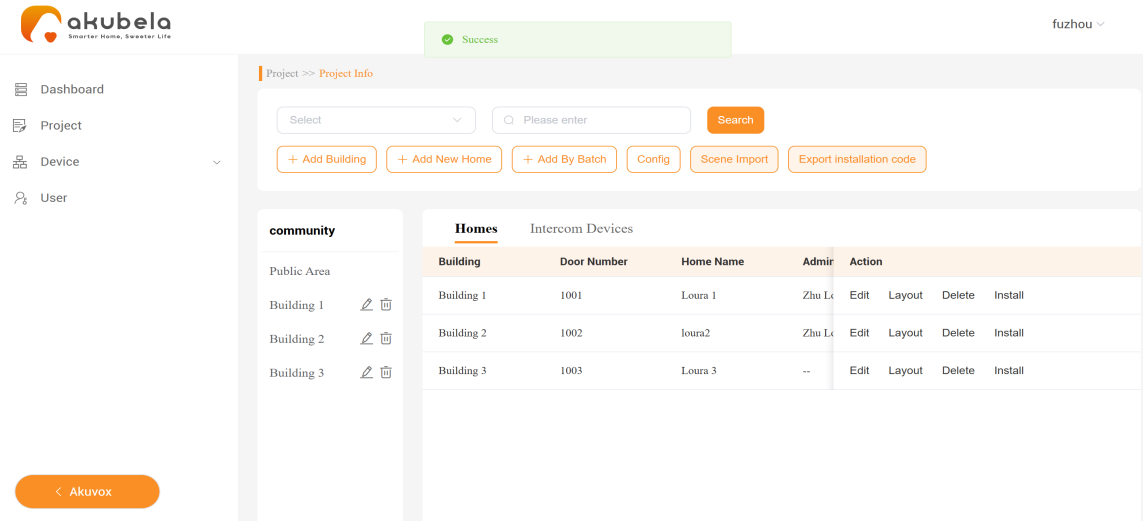
The pop-up indicates the scene import is complete.
For a single-tenant project
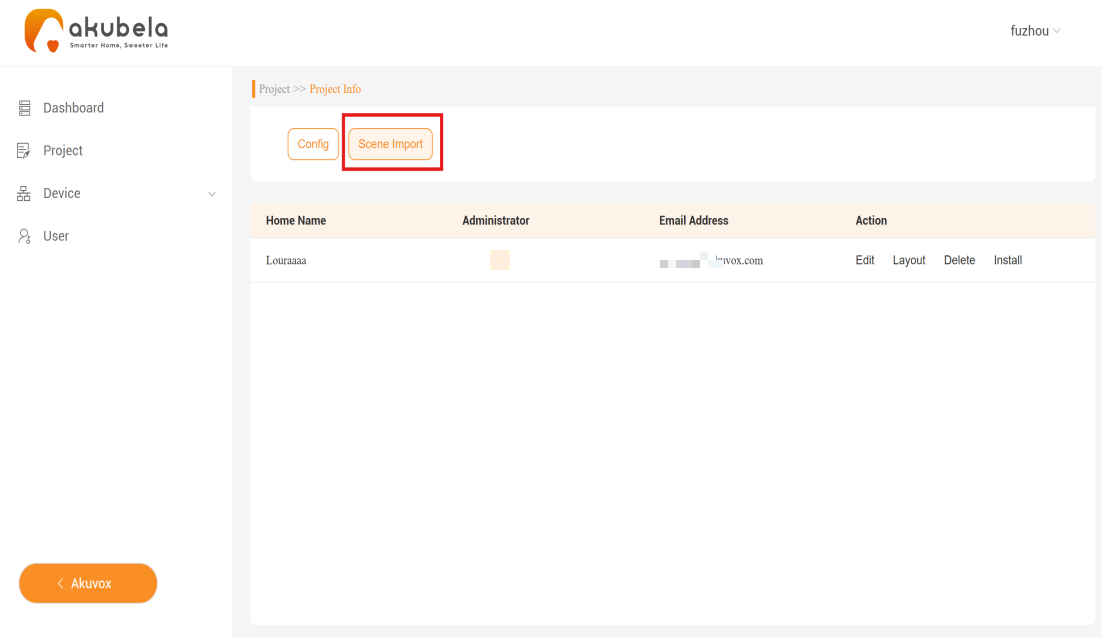
Click Detail to enter the Project Info interface.
Click Scene Import and upload the scene.tgz file you’ve downloaded.
c. Click Submit to complete.
The pop-up indicates the scene import is complete.
2. Download scene file on HyPanel Pro
Before downloading, ensure that the target homes where scenes will be reused meet the following parameters as specified in the DeviceIDList file:
Space-related scenes: Room name must match
Contacts-related scenes: Contact name must match
Arming-related scenes: Arming mode must match
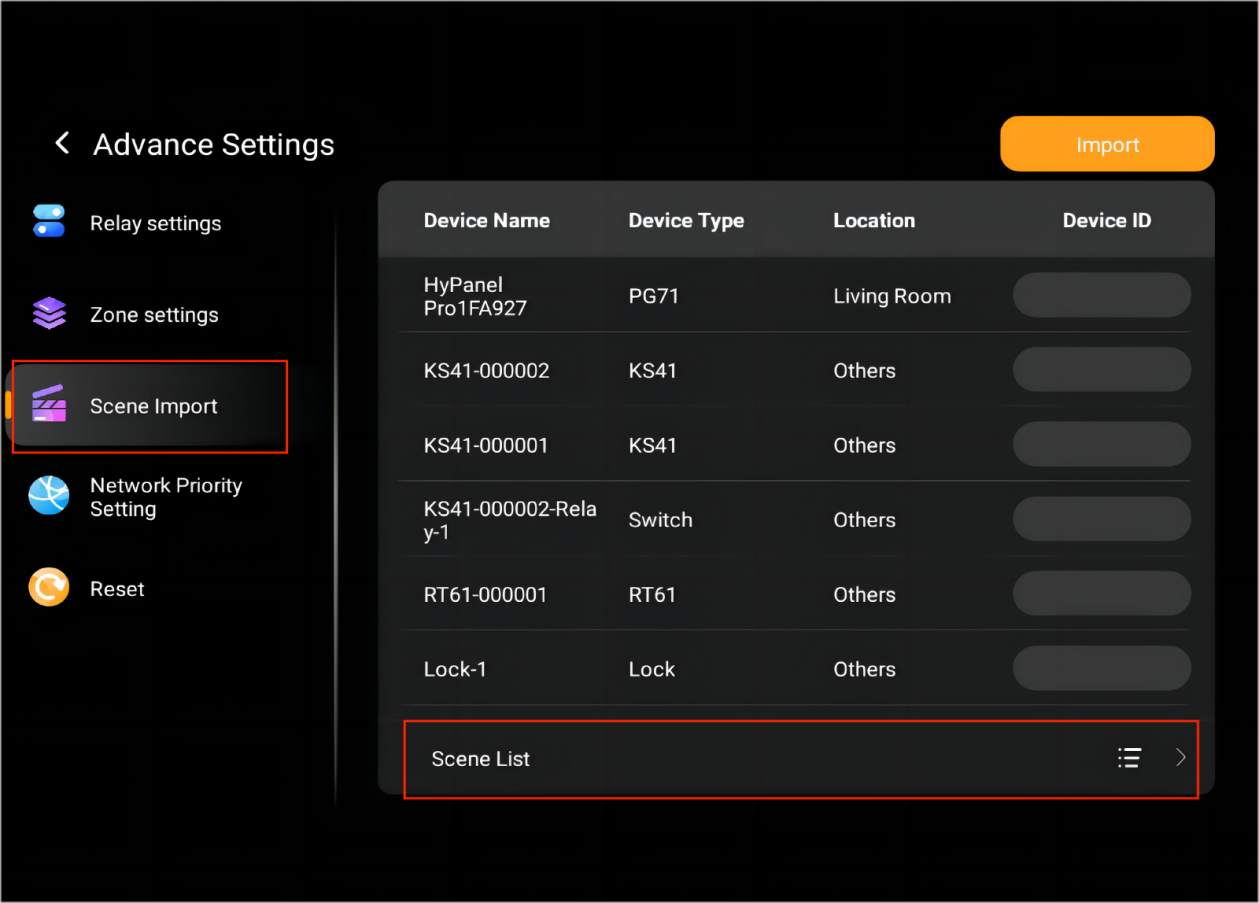
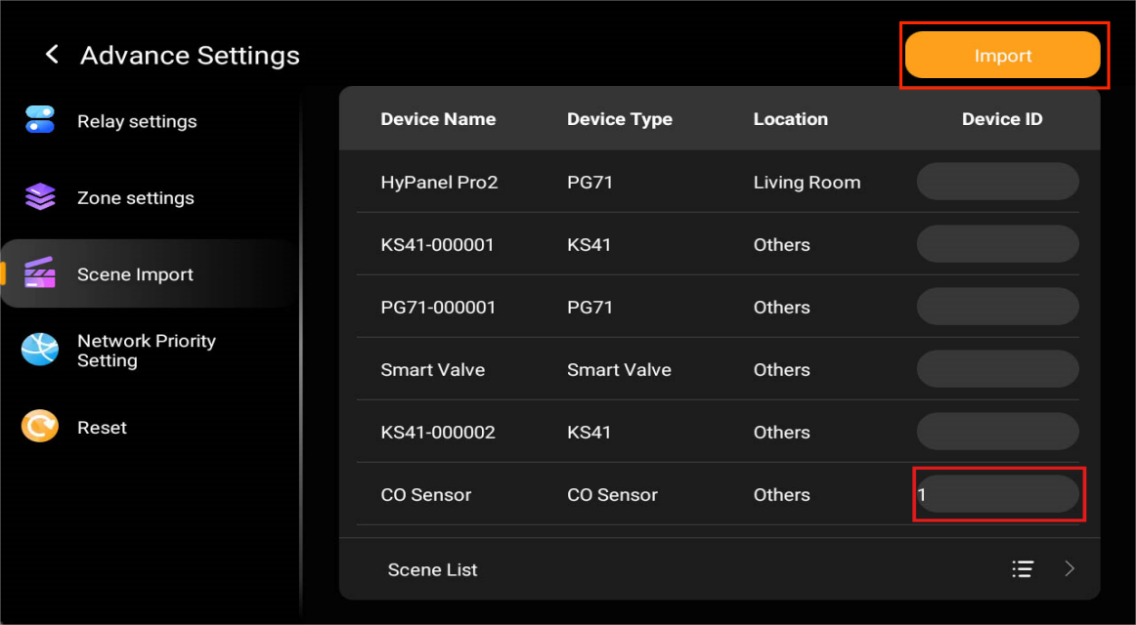
(1) On Hypanel Pro, swipe down from the top edge of any screen, and go to ![]() > Advanced Settings > Scene Import.
> Advanced Settings > Scene Import.
(2) Enter all Device IDs exactly as listed in the DeviceIDList file, then tap Import.
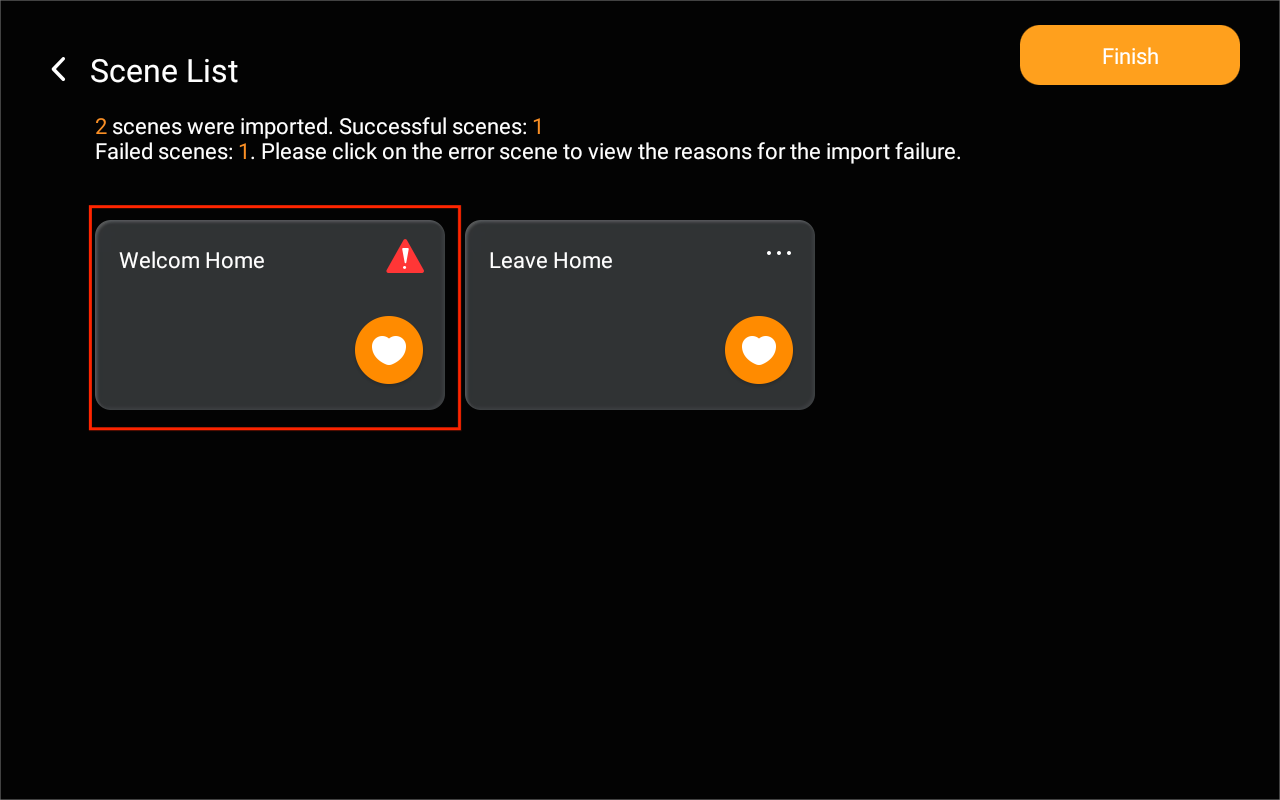
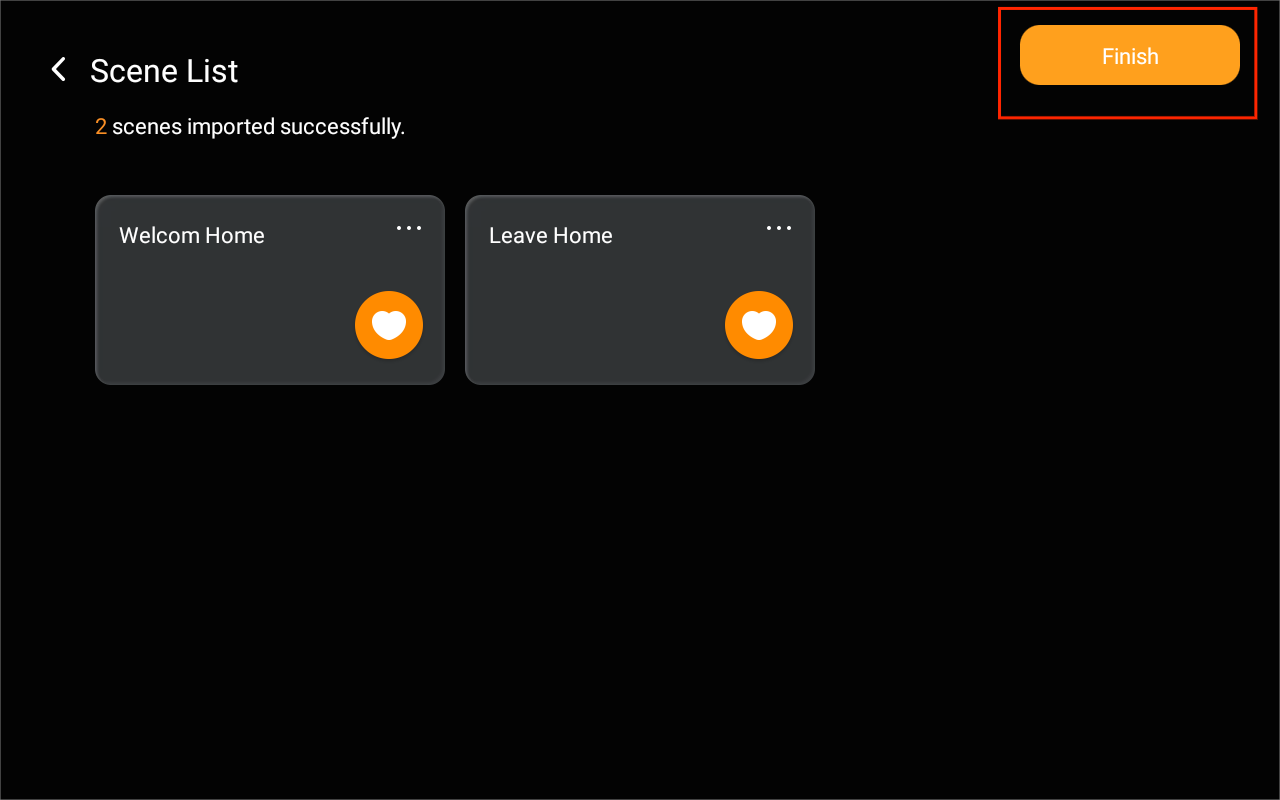
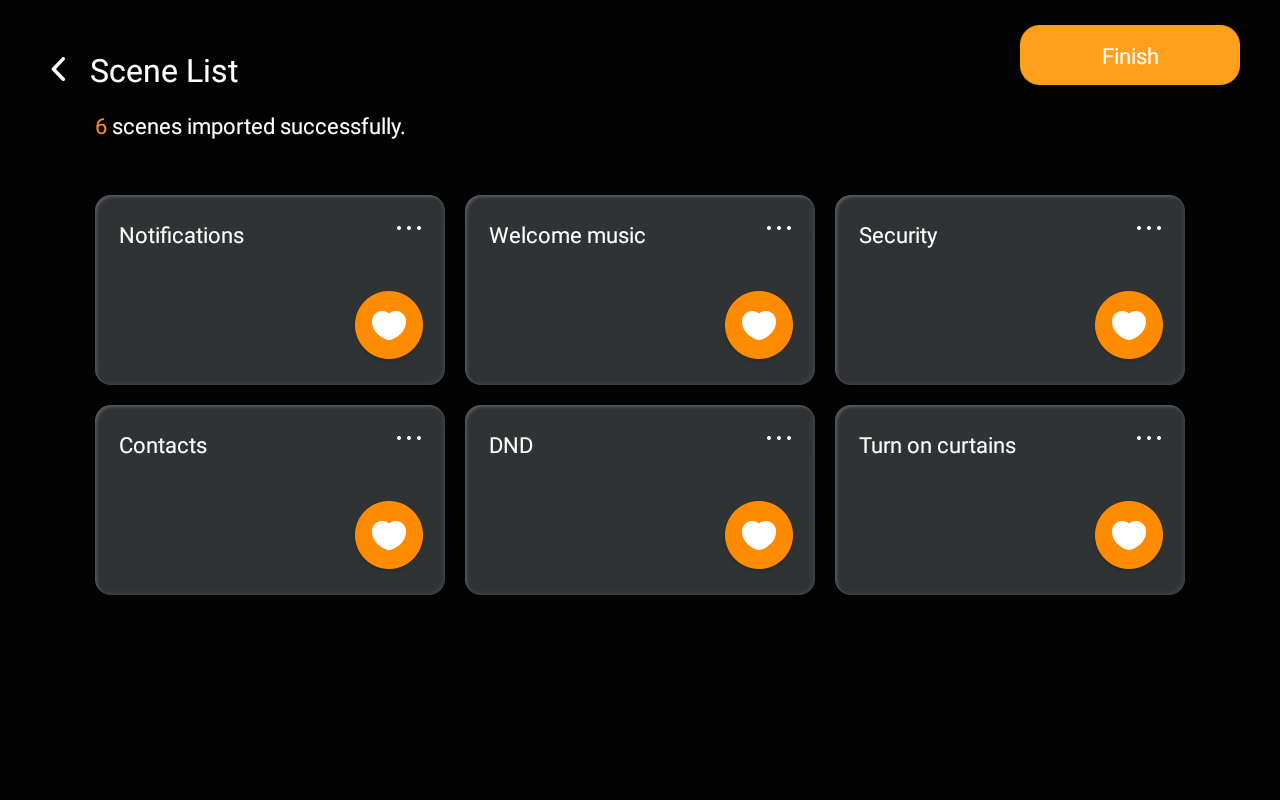
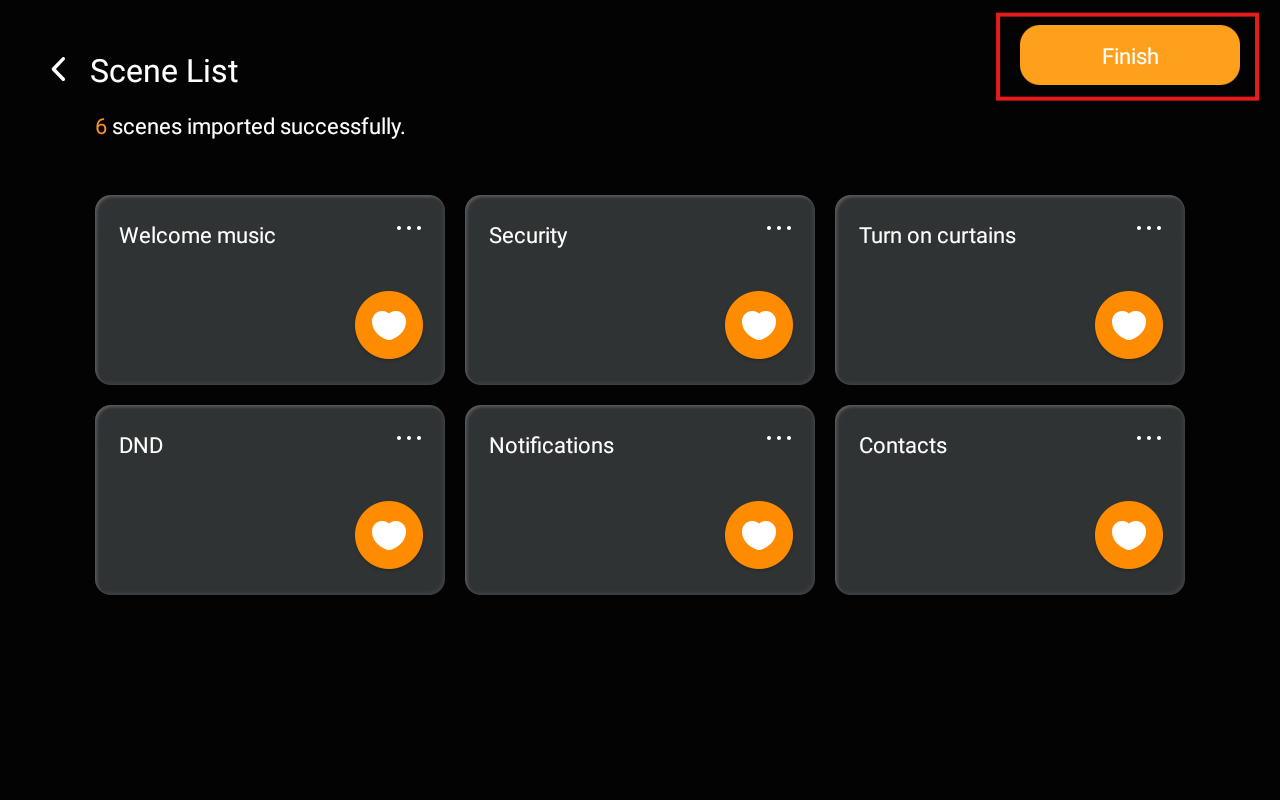
(3) Tap Go to Scenes to view the import results.
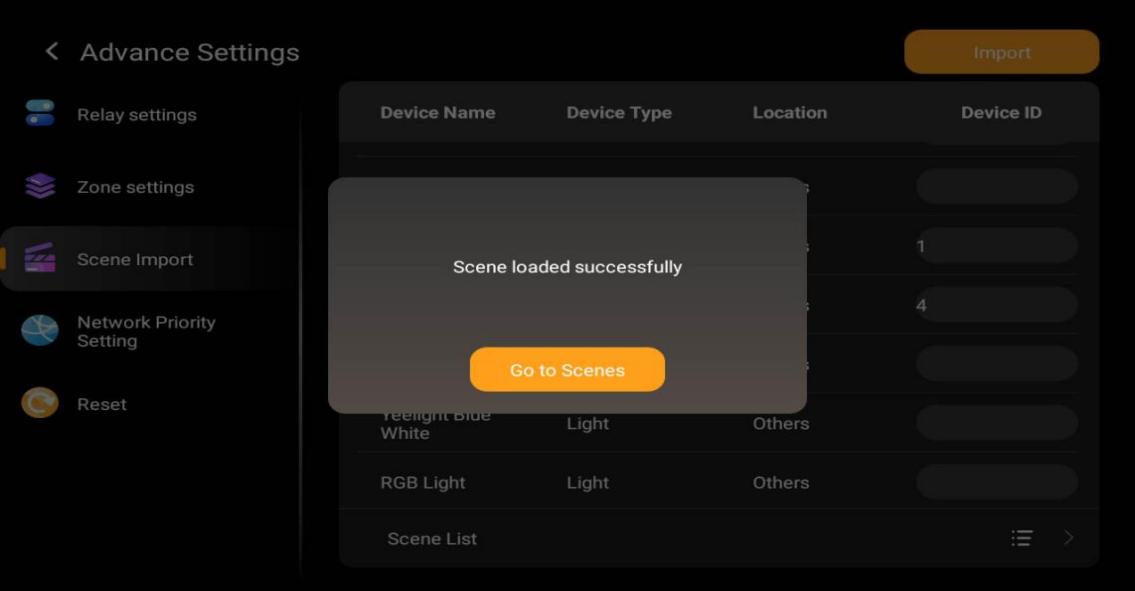
(4) Tap Finish to complete the import.
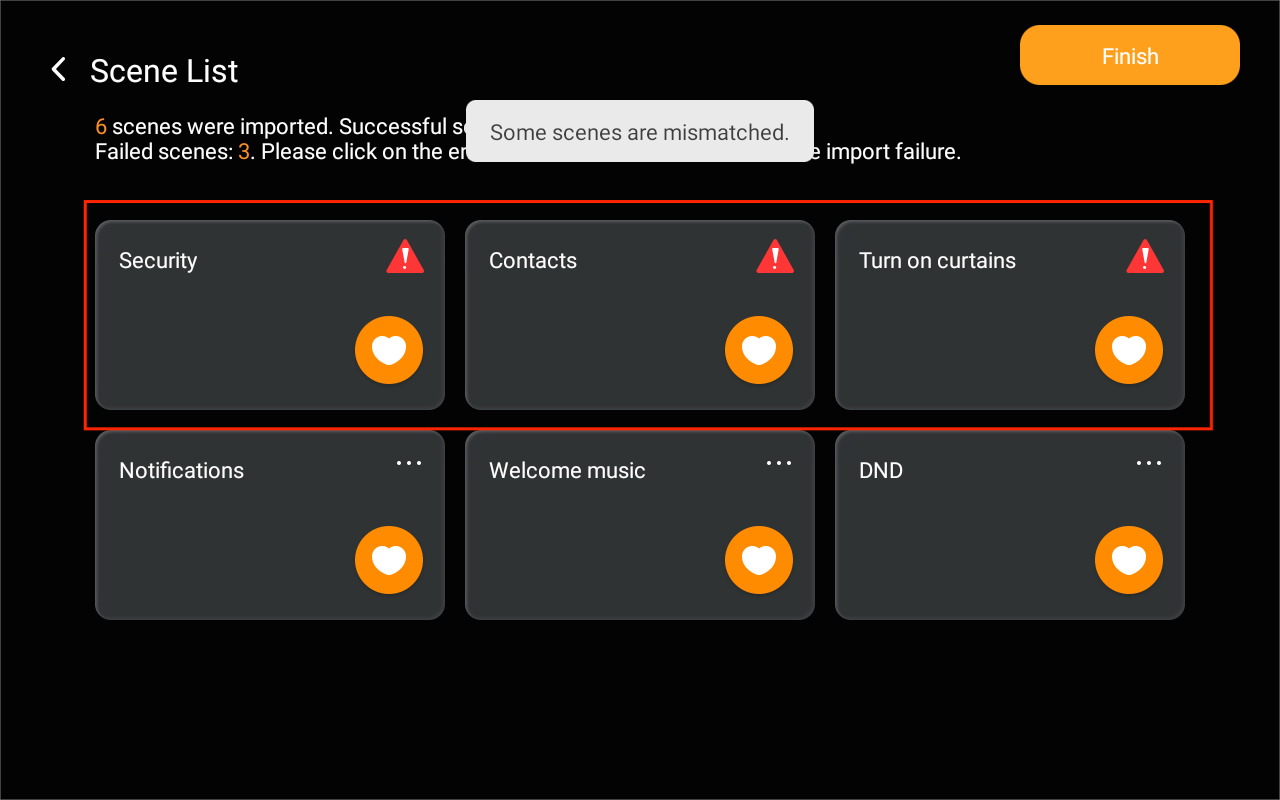
TIP:
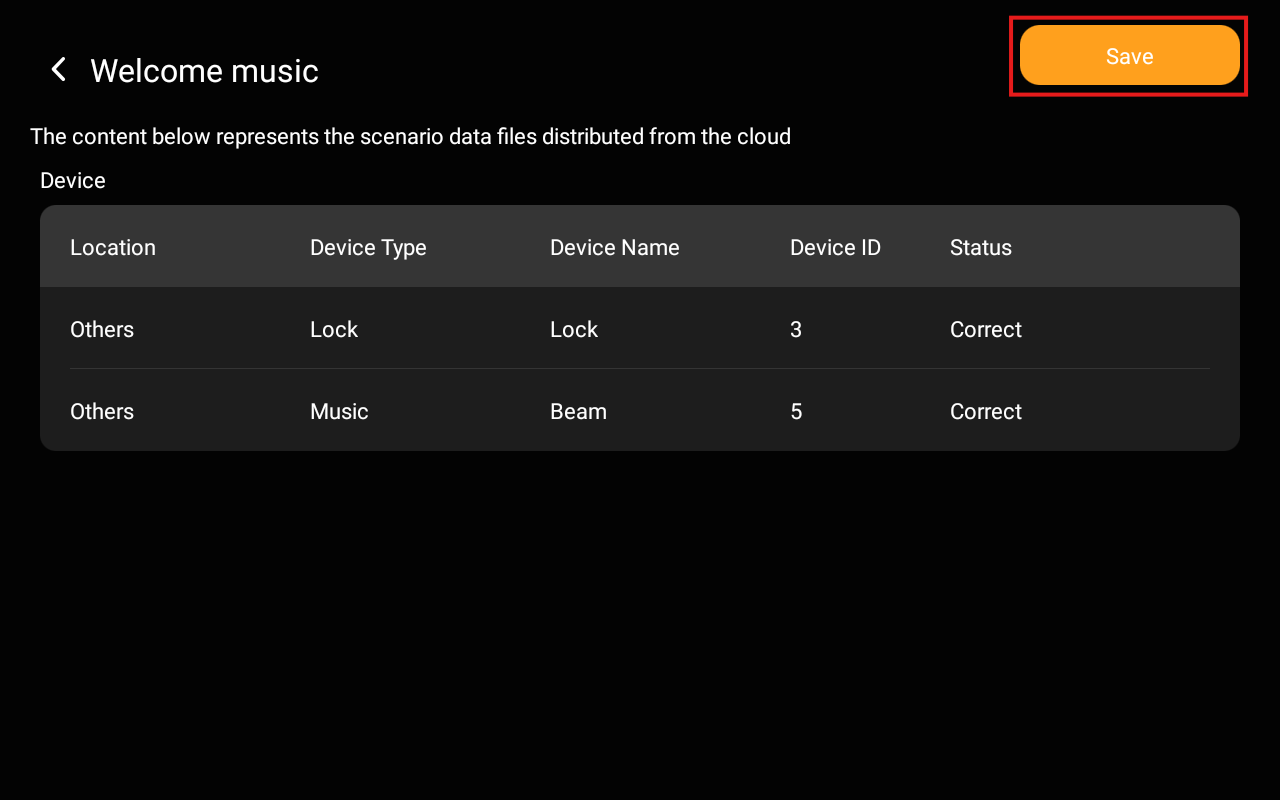
If a mismatch is detected, do as the following:
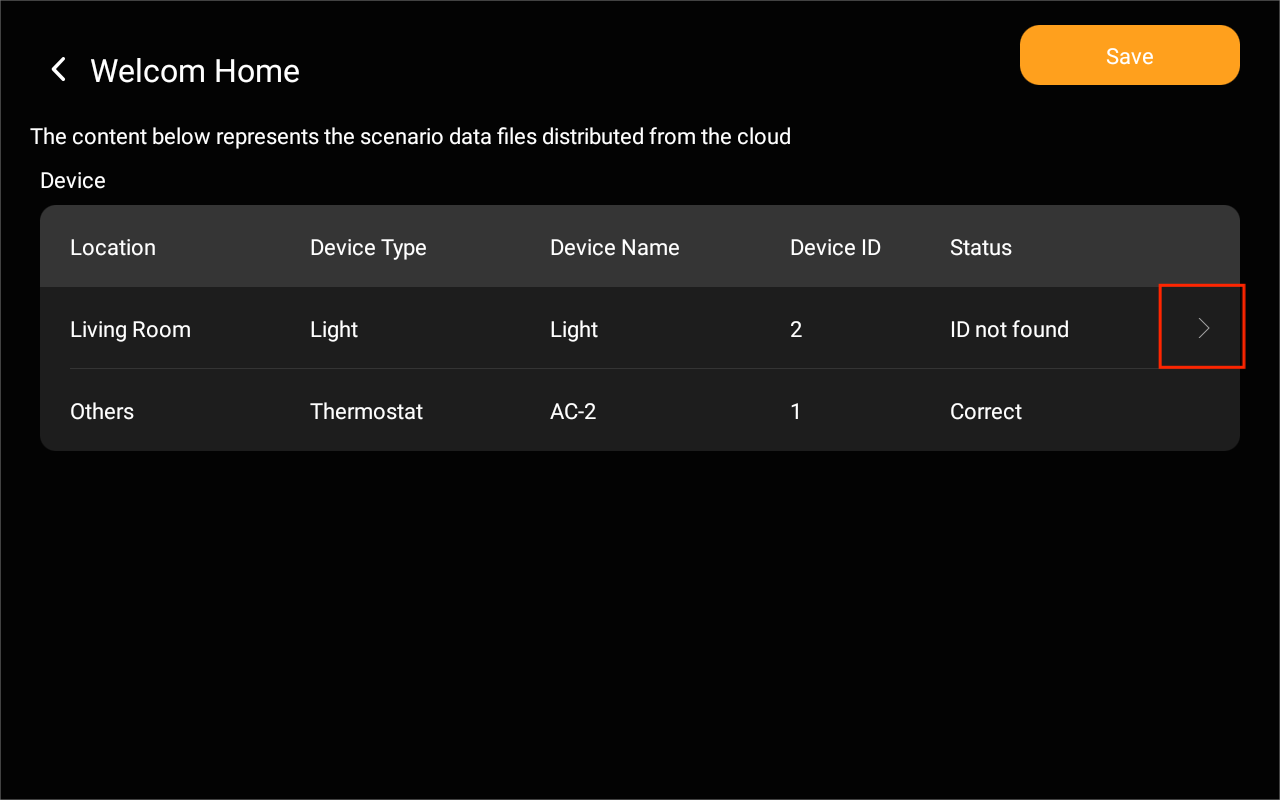
(1) Tap the unmatched scene card.
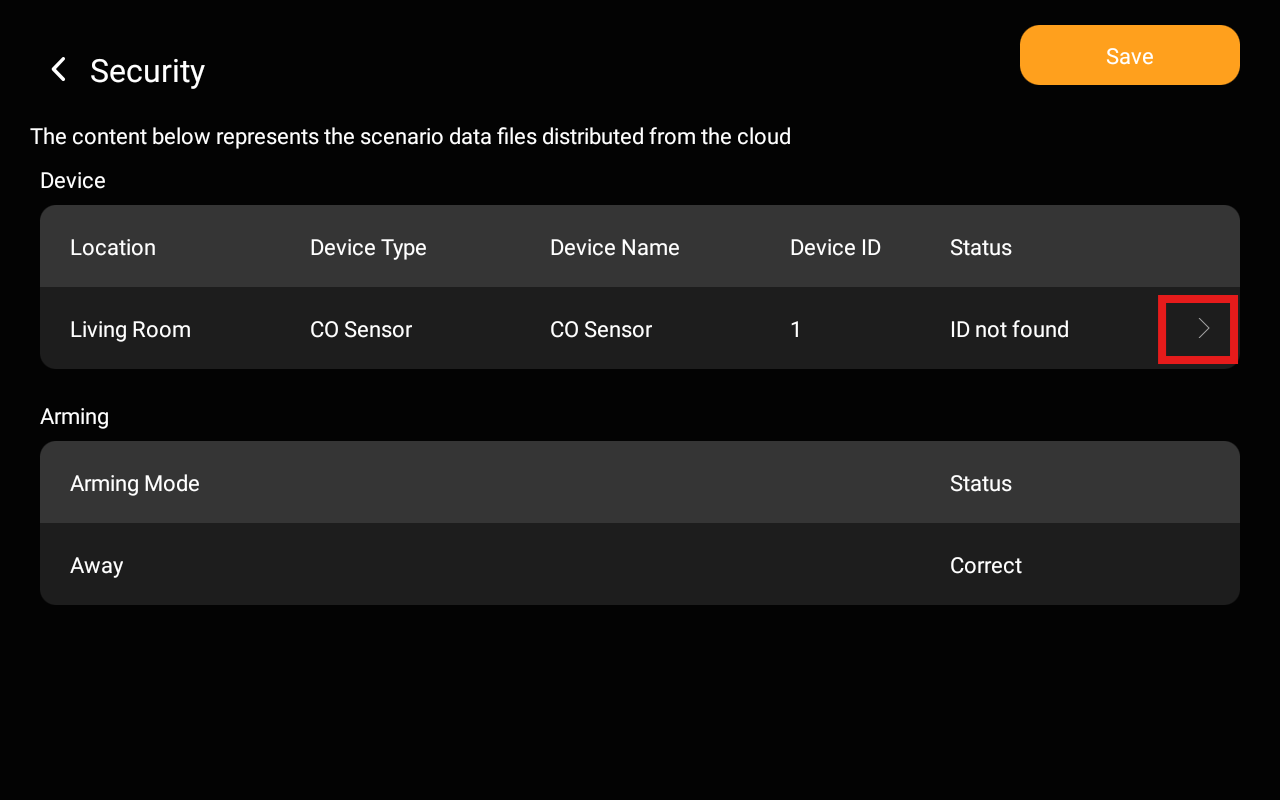
(2) Tap
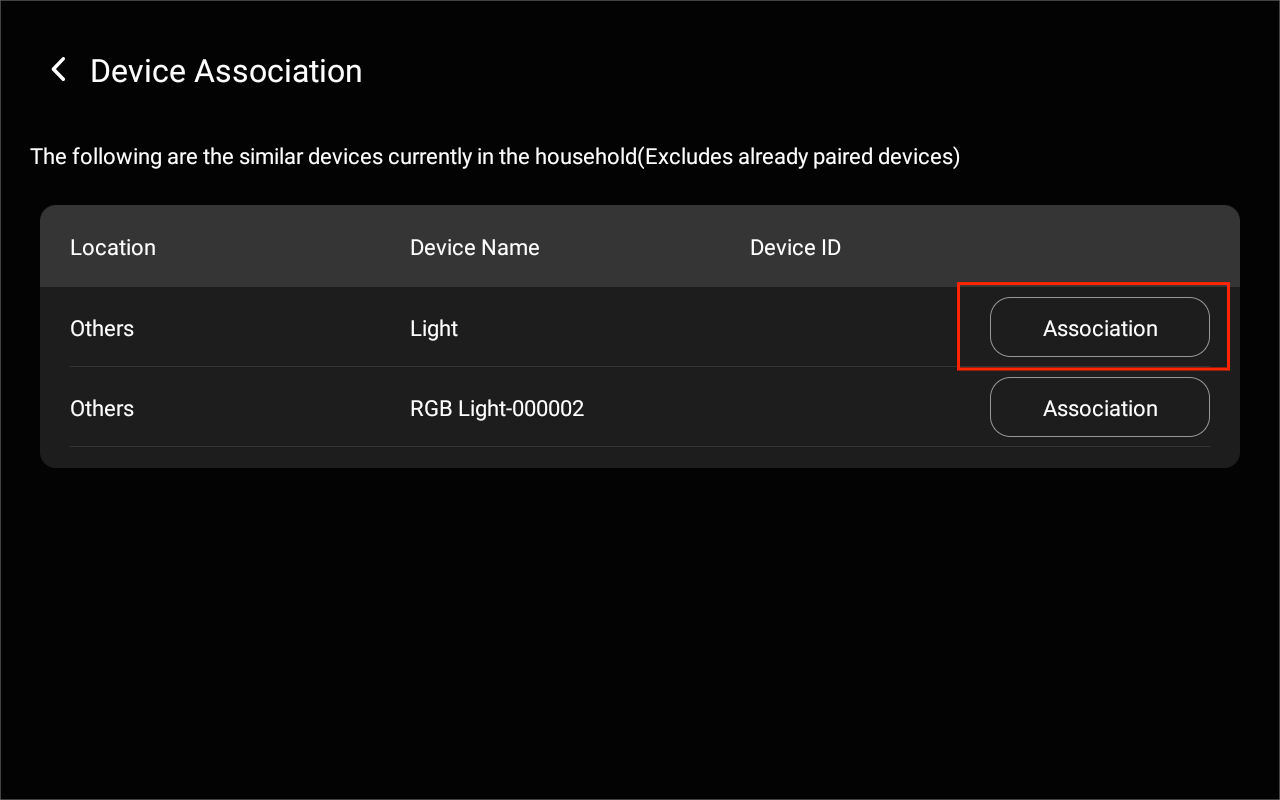
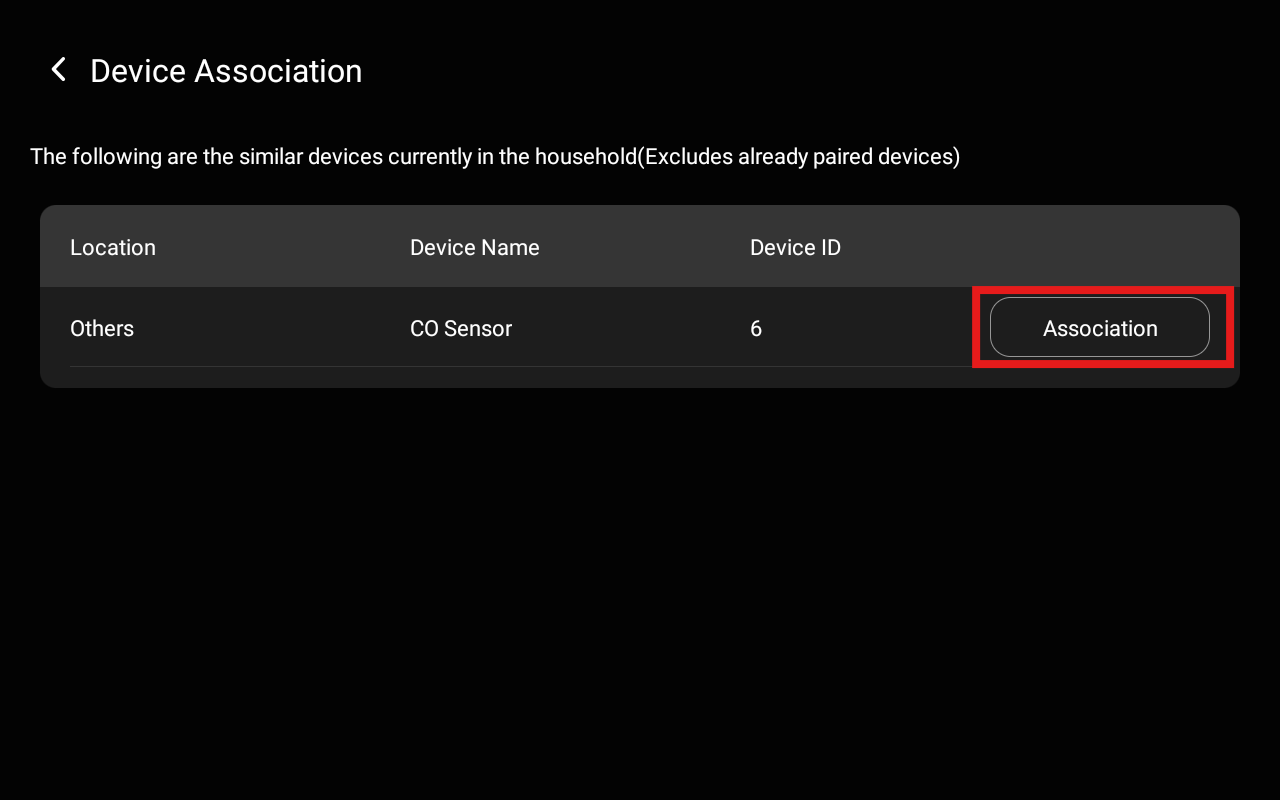
> Association to manually match devices.
(3) Tap Save > Finish to complete.
Option 2 Via device web portal
Use this method if the homes where you want to reuse the scenes are in Local Mode.
NOTE:
Before importing, ensure that the target homes where scenes will be reused meet the following parameters as specified in the DeviceIDList file:
Space-related scenes: Room name must match
Contacts-related scenes: Contact name must match
Arming-related scenes: Arming mode must match
(1) Log into the device web portal using the IP address. The default username and password are both admin.
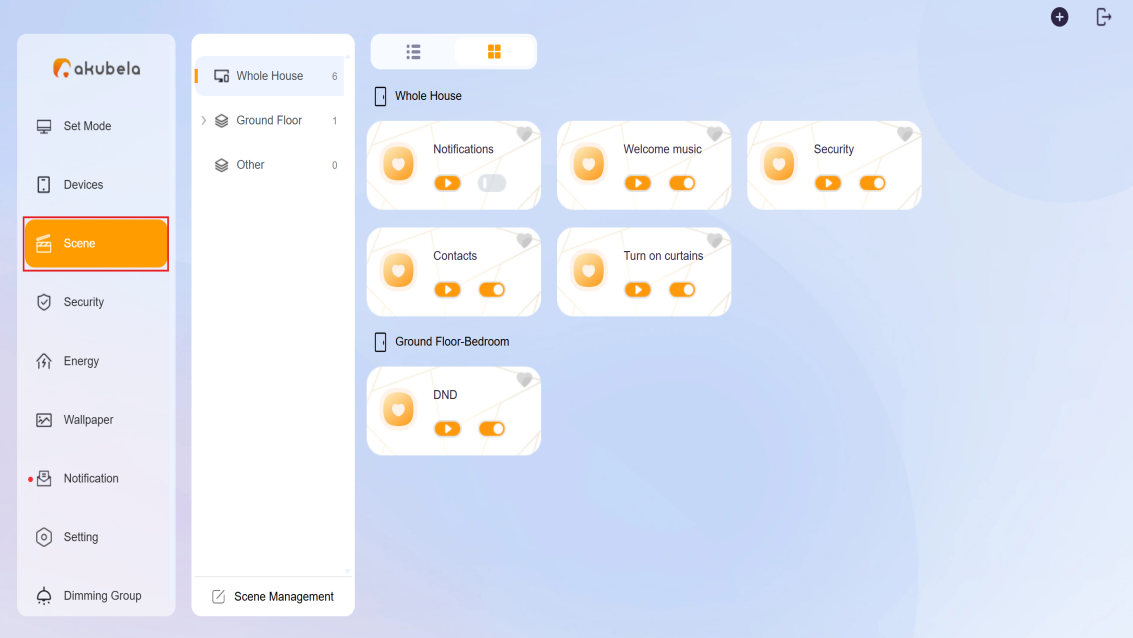
(2) Go to Scene > Scene Management.
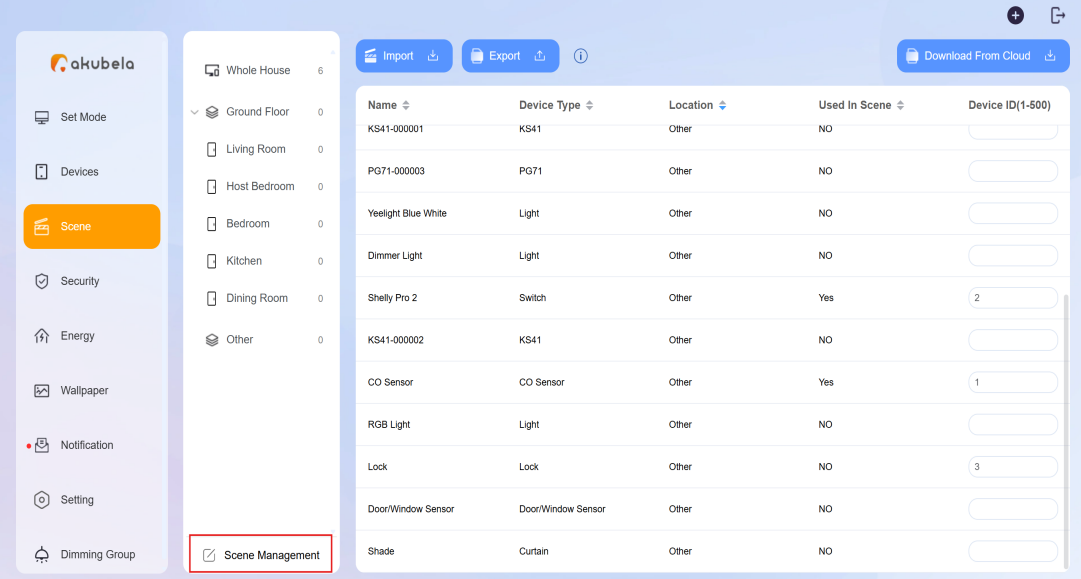
(3) Enter the Device IDs according to the DeviceIDList file. Click Import.

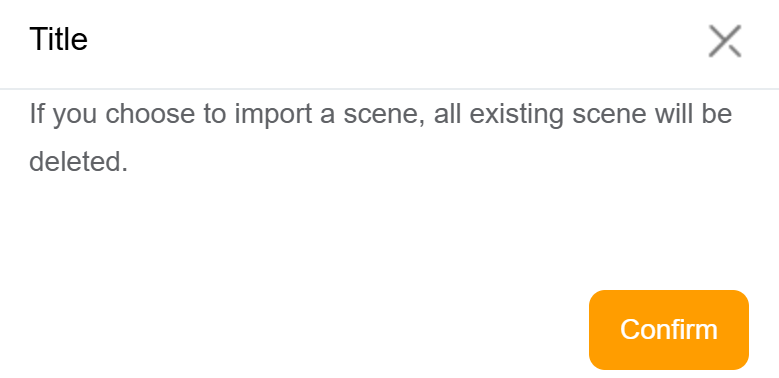
(4) Confirm that all existing scenes will be overwritten, then click Confirm.
(5) Click Select File to upload the scene.tgz file.
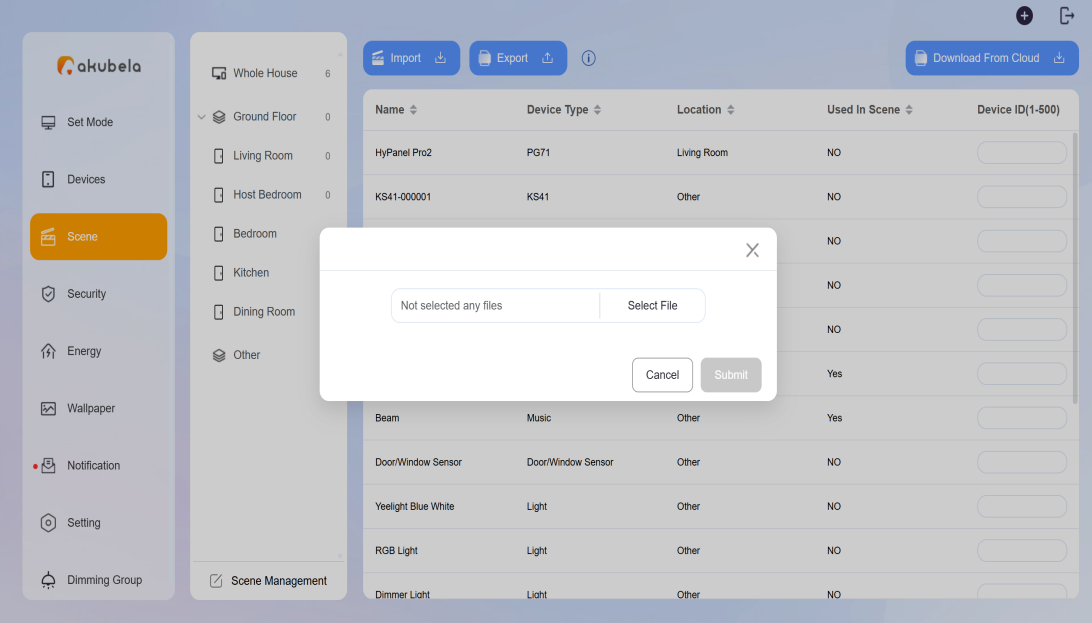
A “Success” pop-up will indicate that the scene import is complete.

TIP:
If you see a failure pop-up, it may be due to incorrect Device IDs or other mismatched parameters. Follow the steps below to manually match scenes:
(1) On the HyPanel Pro, swipe down from the top, and go to
> Advanced Settings > Scene Import > Scene List.
(2) Tap the unmatched scene card to view the error.
(3) Tap
> Association to manually configure the device match.
(4) Tap Save > Finish.
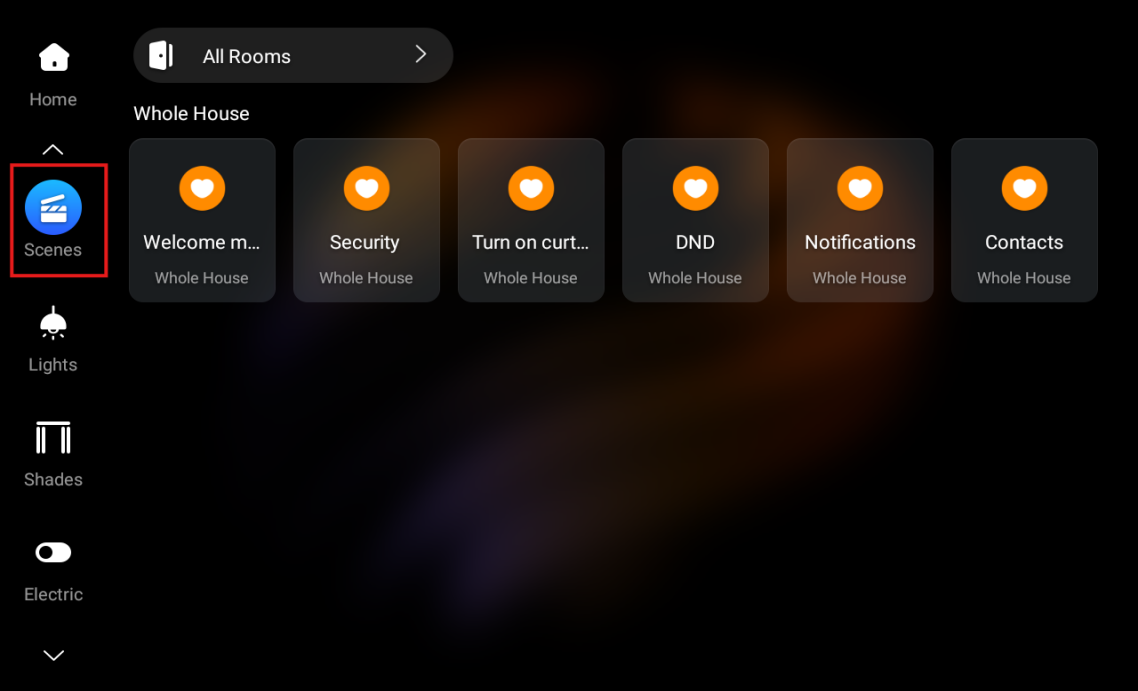
Once completed, all imported scenes will appear under the Scene screen.