Open Supervised Device Protocol(OSDP) is a communication protocol designed for security and access control systems. Akuvox door phones and access control terminals can communicate with OSDP-compatible readers through the RS485 interface.
Depending on the deployment scenario, an Akuvox device can work as:
OSDP Input Device: Receives credential information from an OSDP reader and controls door access.
OSDP Output Device: Works as an OSDP reader and sends credential information to an OSDP input device.
When users present credentials on the OSDP output device, the credential information is transmitted through RS485 to the OSDP input device. After verification, the input device triggers the relay to unlock the door.
OSDP Version Comparison
Akuvox devices support both standard OSDP communication and OSDP V2.0 communication depending on the device model and firmware version.
OSDP V2.0 is an enhanced version of OSDP that provides improved security and device management capabilities while maintaining compatibility with the basic OSDP communication framework.
Supported Devices
Device Model | Minimum Firmware Version | Supported Role |
|---|---|---|
S539 | 539.30.10.219 | Input / Output |
S538 | 538.30.10.705 | Input / Output |
S535 | 535.30.10.233 | Input / Output |
S532 | 532.30.10.23 | Input only |
X915 V2.0 | 2915.30.10.219 | Input / Output |
X916 | 916.30.10.216 | Input / Output |
X912 | 912.30.11.7 | Input only |
X910 | 2910.30.10.240 | Input / Output |
R29 | 29.30.10.227 | Input / Output |
R20 V5.0 | 320.30.10.206 | Input only |
A094 | 92.30.10.123 | Input only |
A08 | 108.30.10.120 | Input / Output |
A05 V2.0 | 205.30.10.111 | Input / Output |
A15 | 1115.30.10.407 | Input / Output |
For OSDP V2.0 compatibility, see Configure OSDP V2.0.
Configure the OSDP Input Device
In this example, X912 works as the OSDP Input Device.
Set up RS485
Enter the X912’s IP in a browser and enter the username and password. The defaults are both admin.
Go to the Device > RS485 interface.
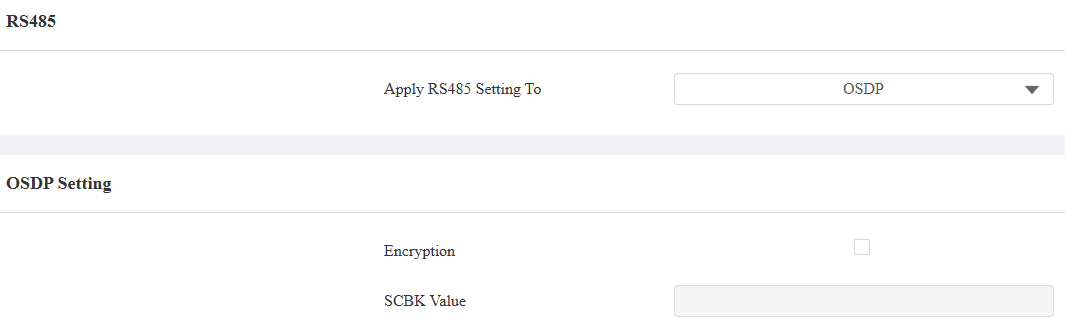
Select OSDP as the Apply RS485 Setting To option. Its default RS485 mode is Input.
Set the Encryption.
When the Akuvox intercom device serves as the card reader, such as A08, you can:
Check the encryption box and customize the SCBK(Secure Channel Key Block) value. Make sure the value is consistent between the X912 and A08.
Check the encryption box and leave the SCBK field blank on both X912 and A08. The devices will adopt the default encryption key set by Akuvox.
Uncheck the encryption box. The data transmission is not encrypted.
If it is an encrypted third-party card reader, please check the Encryption box and confirm the SCBK value with the third-party service provider.
Set up User Credentials
Go to X912’s Directory > User interface.
Click Add to add a new user or click the Edit icon to modify an existing user.
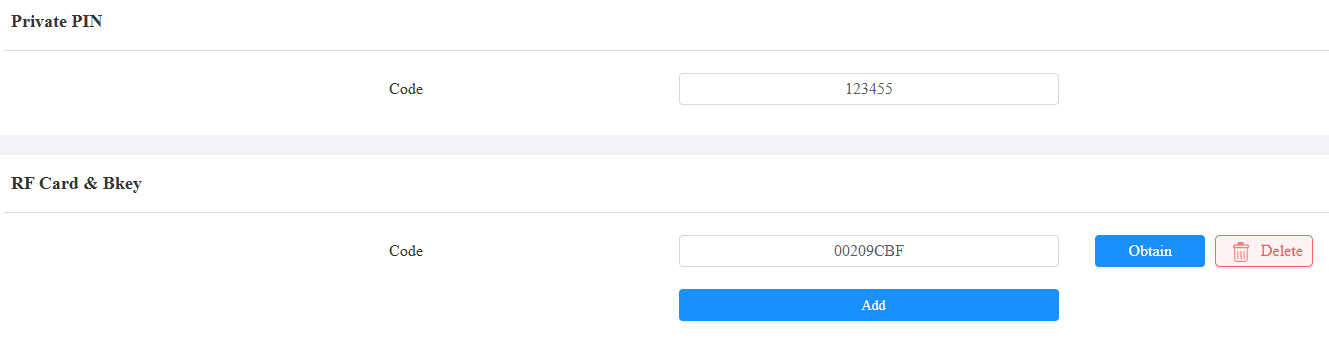
Set the Private PIN code and/or the RF Card code.
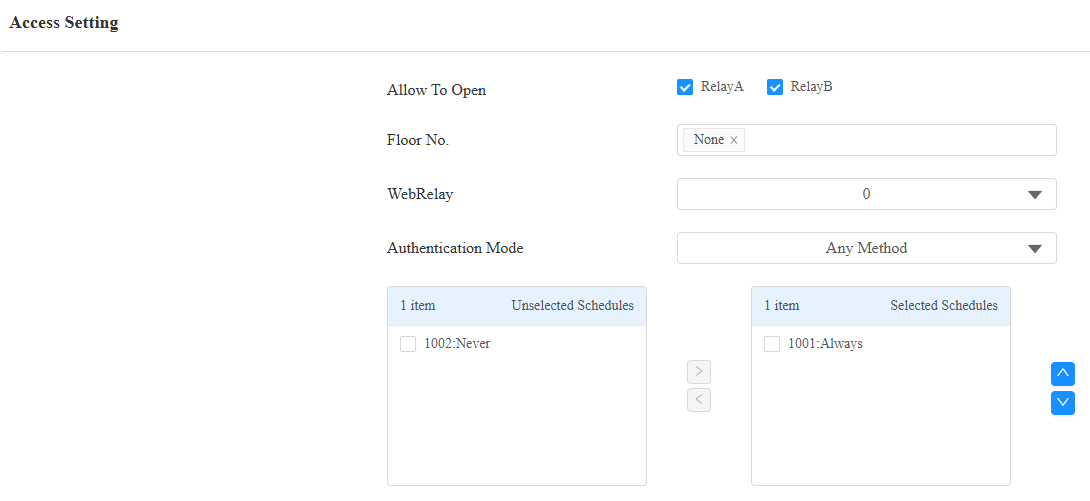
Check the relay to be triggered and apply the schedule.
Click Submit.
Configure the OSDP Output Device
In this example, A08 works as the OSDP Output Device.
Enter A08’s IP address in a browser. You can search its IP with IP scanner software.
Enter the username and password. The defaults are both admin.
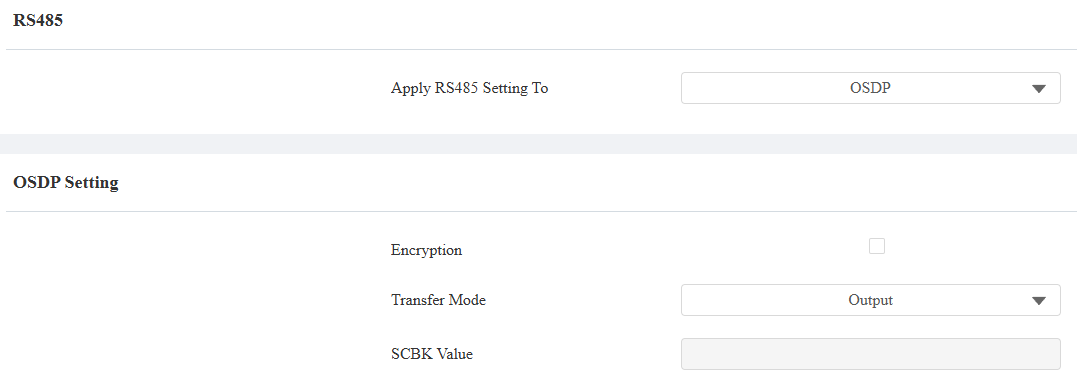
Go to Device > RS485 interface and select OSDP as the Apply RS485 Setting To option.
Set the Transfer Mode to Output.
Set the Encryption. When checked, make sure the SCBK value is the same as that set in the X912.
[Optional]Set up the Local Relay Verification.
When enabled, the card reader will verify the credentials first before transmitting the data. You need to set up the credentials in the card reader as well for successful door opening.
When disabled, the card reader will directly output the data without verification.
Click Submit to save the settings.
When users swipe cards or enter PINs on A08, the door will be opened.
Configure OSDP V2.0
Specific devices support the OSDP V2.0, optimizing the interaction between the OSDP input and output devices.
Compatible models and versions(or higher)
A095: 95.30.10.110
A094: 92.30.10.208
A08: 108.30.11.50
X915V2: 2915.30.10.532
R29: 29.30.10.607
S539: 539.30.10.507
S538: 538.30.10.705
E16V3: 416.30.12.20
Only A08 can work as the OSDP output. Other models can only work as the OSDP input.
This chapter takes A095 as the input device and A08 as the output device.
Set up the Output Device
Use the device IP to log in to its web interface. The initial username and password are admin.
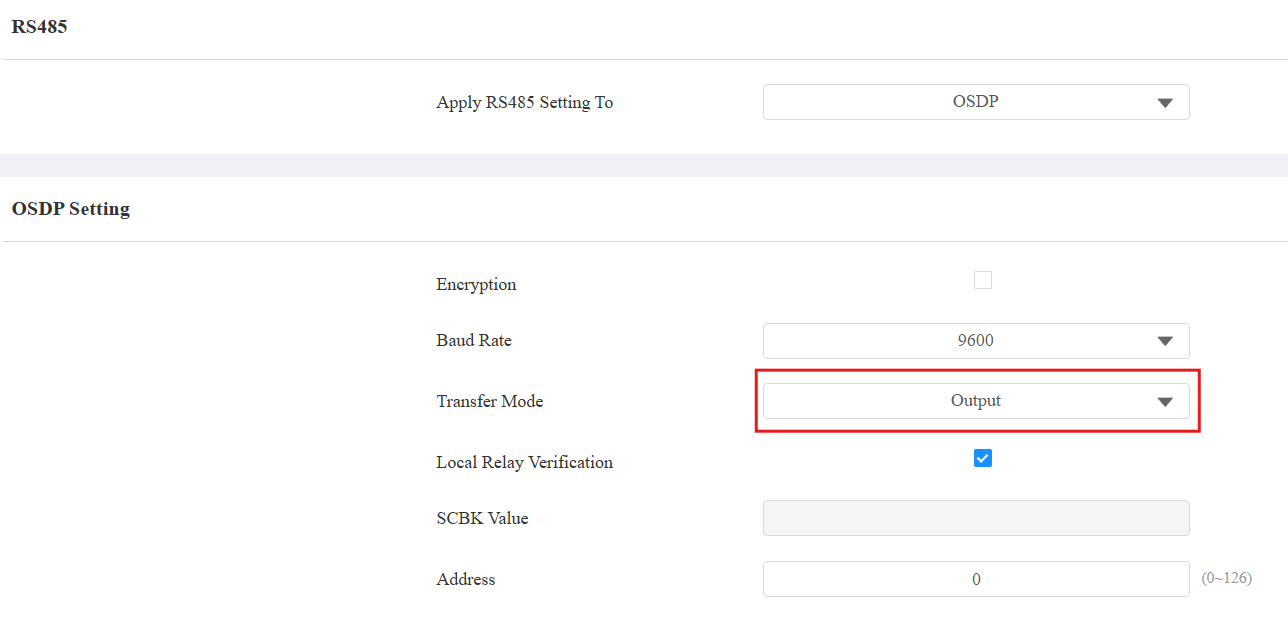
Go to the Device > RS485 interface.
Select OSDP in the Apply RS485 Setting To dropdown menu.
Set Transfer Mode to Output.
Optionally, you can:
Check Encryption and customize the SCBK Value(32 characters, only 0-9, A-F allowed), which should be consistent with the OSDP input side.
Check Local Verification. When enabled, the device will verify the credentials first before transmitting the data.
Set up the RS485 Address to distinguish this device from others.
Submit the settings.
Set up the OSDP Input
Use the device IP to log in to its web interface. The initial username and password are admin.
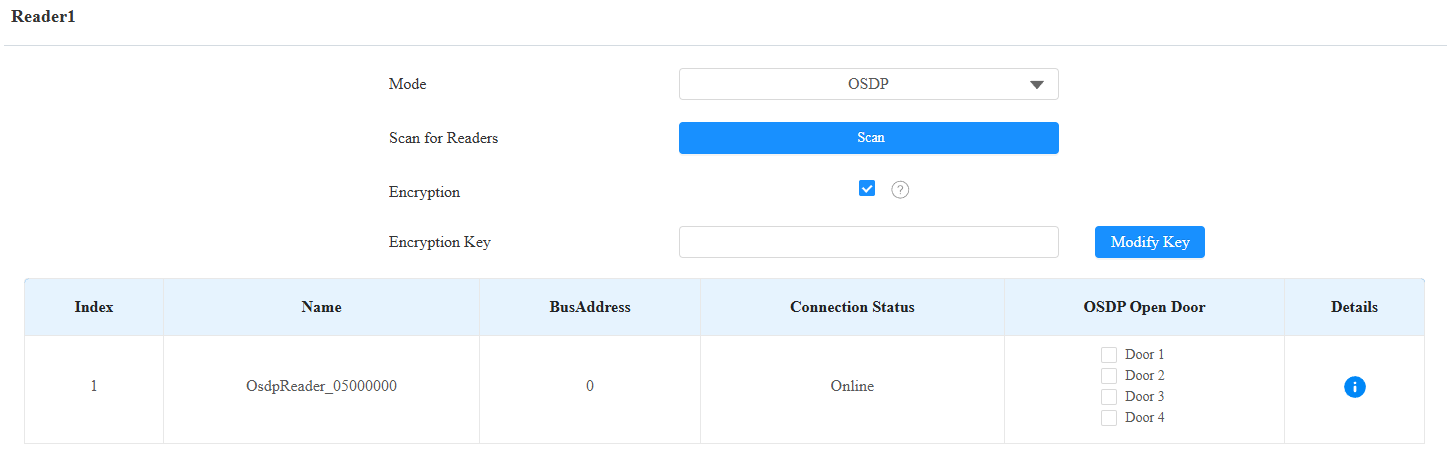
Go to the Device > Reader interface.
Specify which reader interface is connected to the OSDP output device, and set its mode to OSDP.
With the output device not encrypted, A095 will automatically scan the connected device and display its information.
If it is encrypted, enter the Encryption Key(SCBK value) and click Scan.
When connected, the Connection Status changes to Online. You can click
 to view the information, such as the serial number and firmware version.
Check the door(s) to be opened.
Submit the settings.
Then, assign credentials to a user.
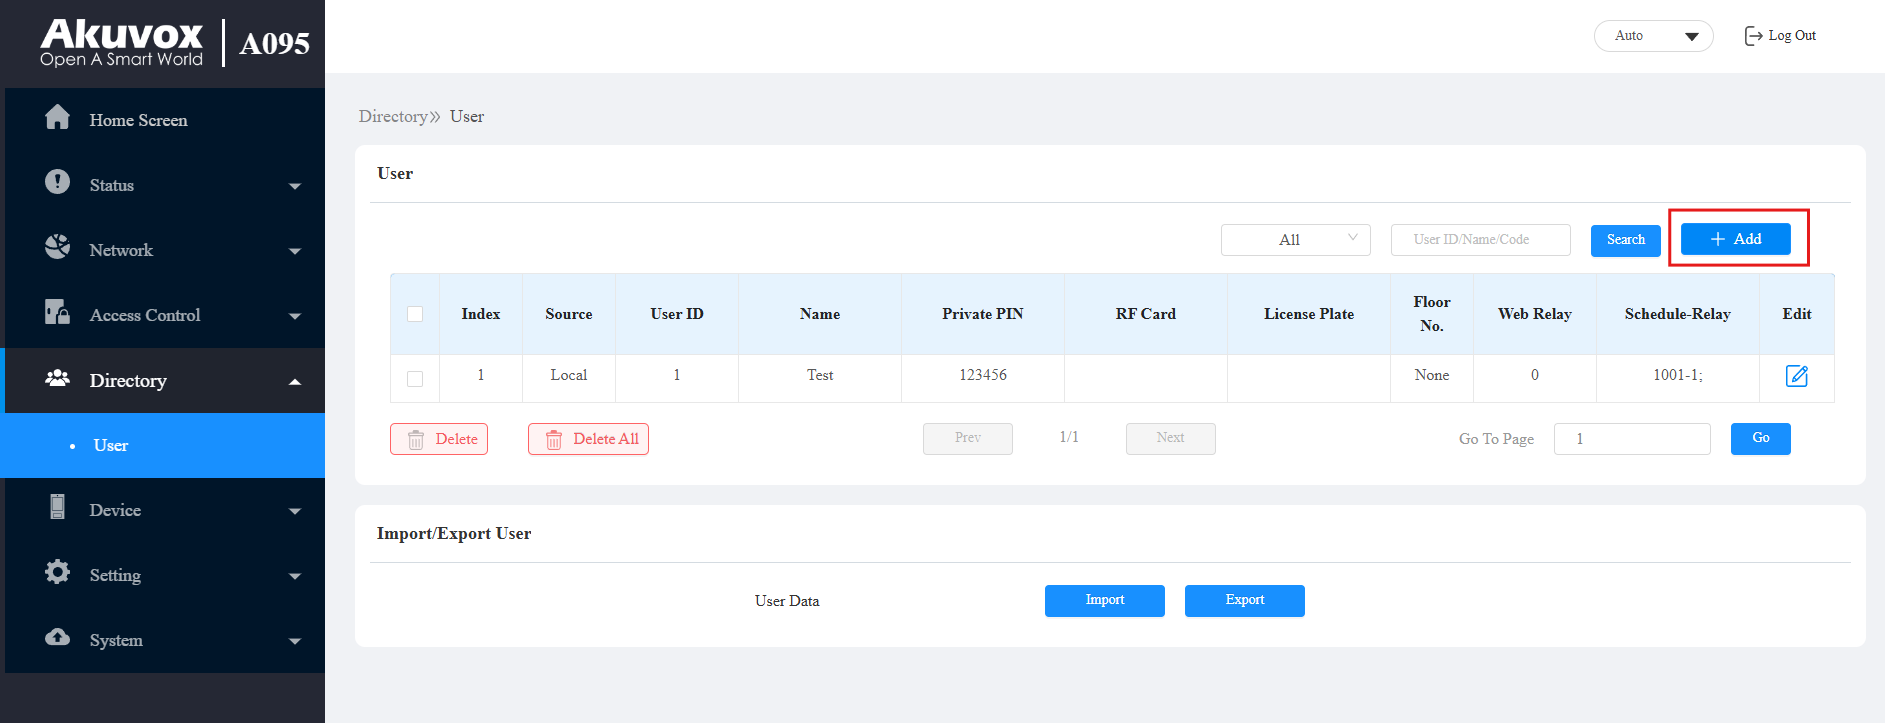
Go to the Directory > User interface.
Click Add to add a user.
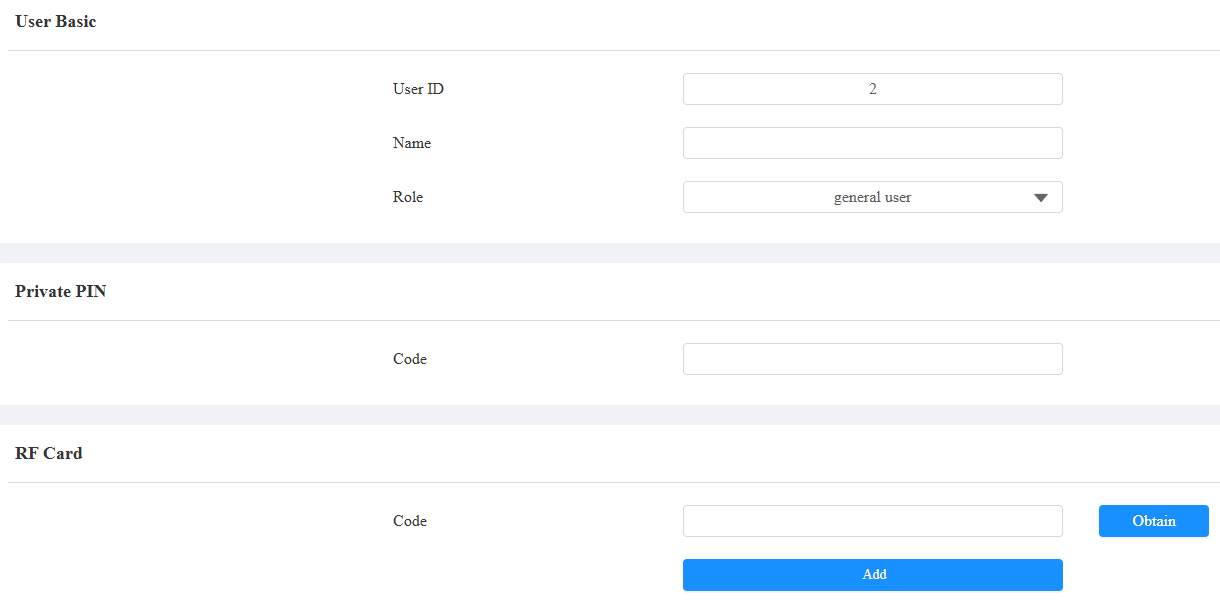
Enter the username.
Enter the private PIN and/or RF card code.
Scroll to the Access Setting part.
Check the door(s) to be opened by the user.
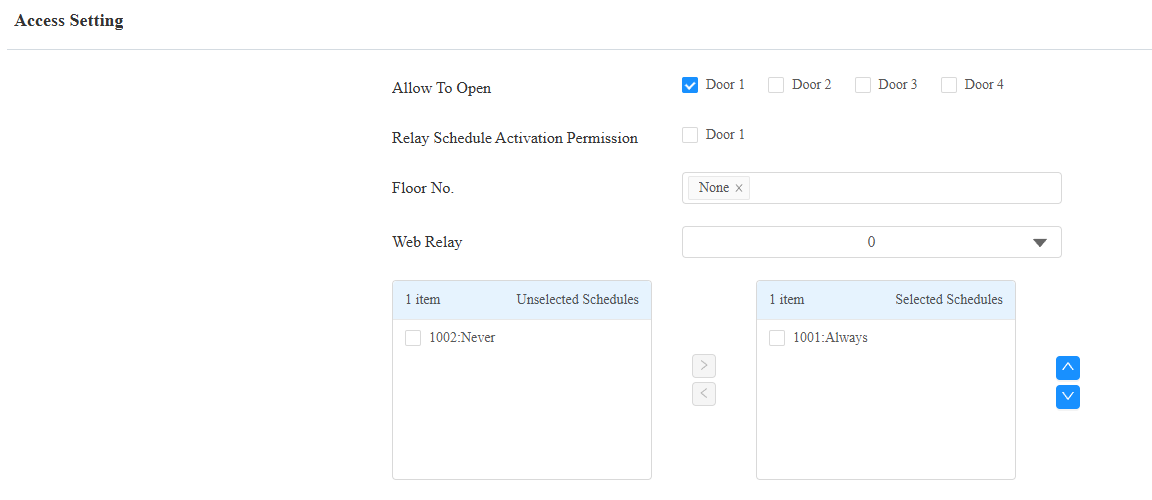
When the user uses this credential on the A08, the door will be opened.
Configure RS485 on the Smart Access Cloud
When the Akuvox device is deployed on the Smart Access Cloud and used in a new commercial project(created after Oct.15, 2024), you can set up the RS485 feature on the cloud.
This feature only applies to devices that work as OSDP input.
Installers have permission to add and edit devices, while project managers can only modify devices’ settings.
Compatible models and minimum versions
R29: 29.30.10.404;
R20: 320.30.11.30;
X916: 916.30.10.508;
X915 V2: 2915.30.10.420;
X912: 912.30.11.107;
X910: 2910.30.11.28;
S539: 539.30.10.507;
S538: 538.30.10.705;
S535: 535.30.11.8;
S532: 532.30.10.336;
A08: 108.30.11.8;
A05V2: 205.30.11.114;
A094: 92.30.10.205;
A095: 95.30.10.110.
Take an installer account as an example.
Log in to the cloud with your account.
Navigate to the target office project and click Devices on the left column.
Click New to add a device or click
 to modify a device’s settings.
Select the relay to be triggered by OSDP, for example, Relay A.
Specify that the OSDP card reader is used as the entry or exit reader.
Enter the RS485 address if the device is connected to more than one card reader.
Select the device’s RS485 port that is connected to the card reader. If the device only has one port, choose RS485 A.
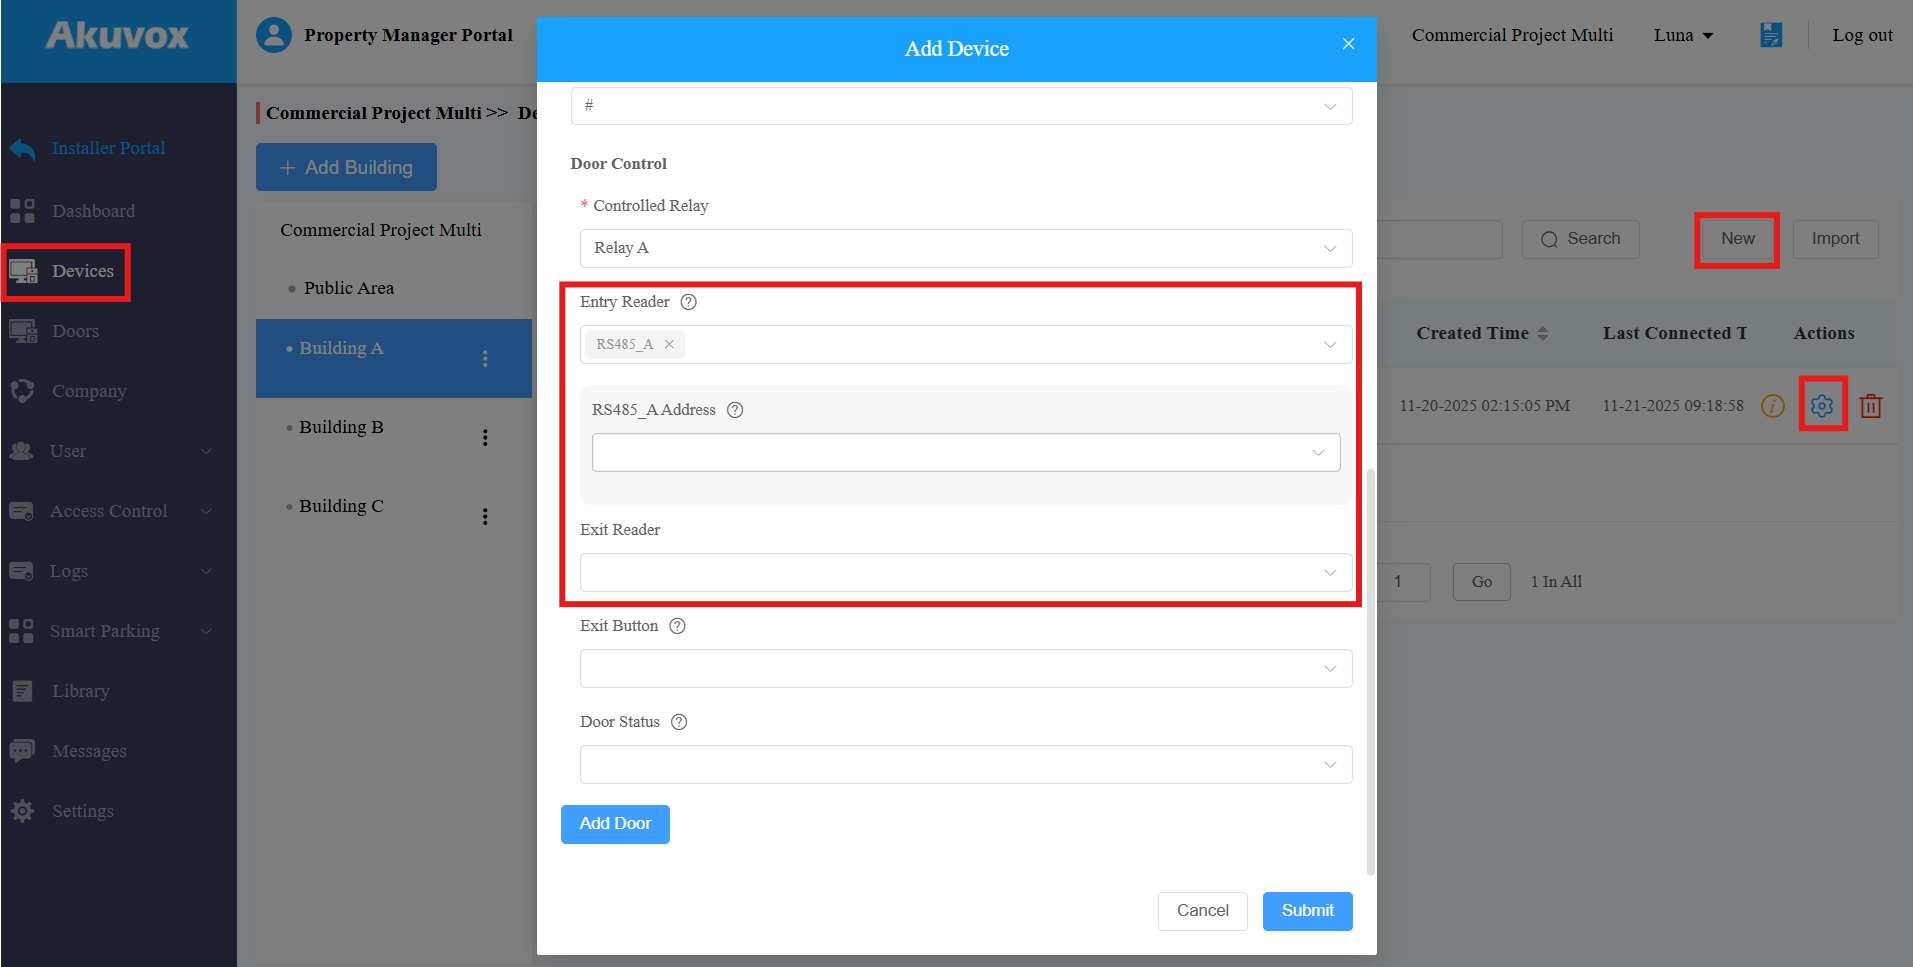
Click Submit.
After configuration, users can open doors with their credentials issued from the cloud.