The PM platform enables you to send messages, vote and activity notices, and package pickup notifications to residents. You can also manage utility meter readings directly on the platform.
Messages and Notifications
Messages
Use the Messages section to send notices to selected homes instead of an entire building or the whole community.
To create a message:
Go to Customer Service > Message > New.
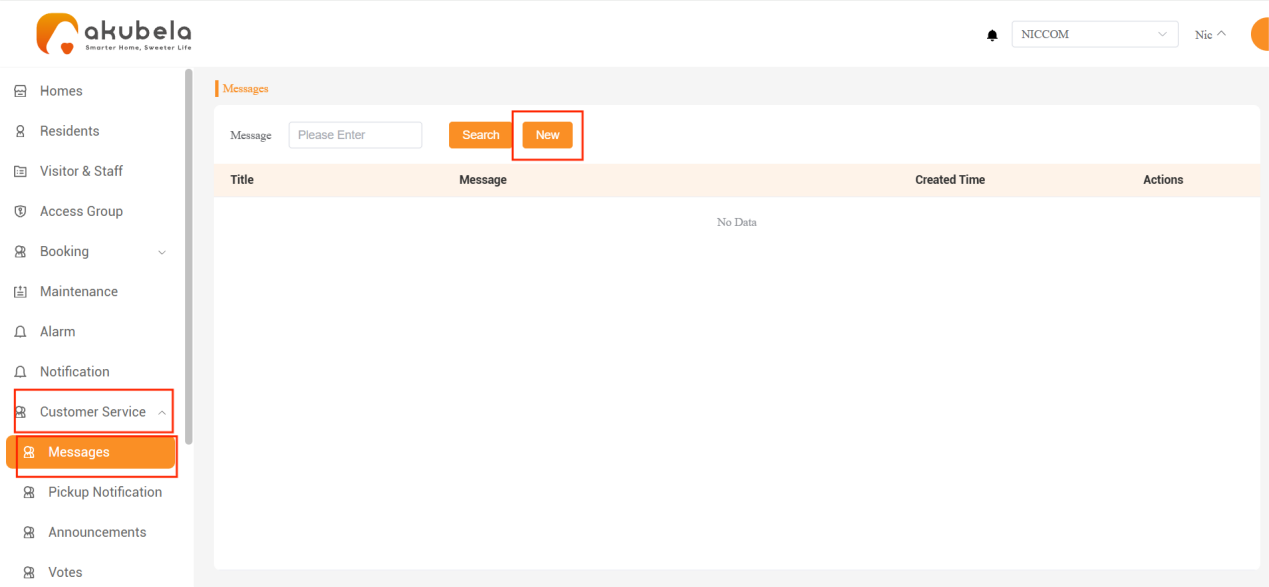
Enter the required information, select the receiving device(panels and/or app), choose the target home(s), then click Send.
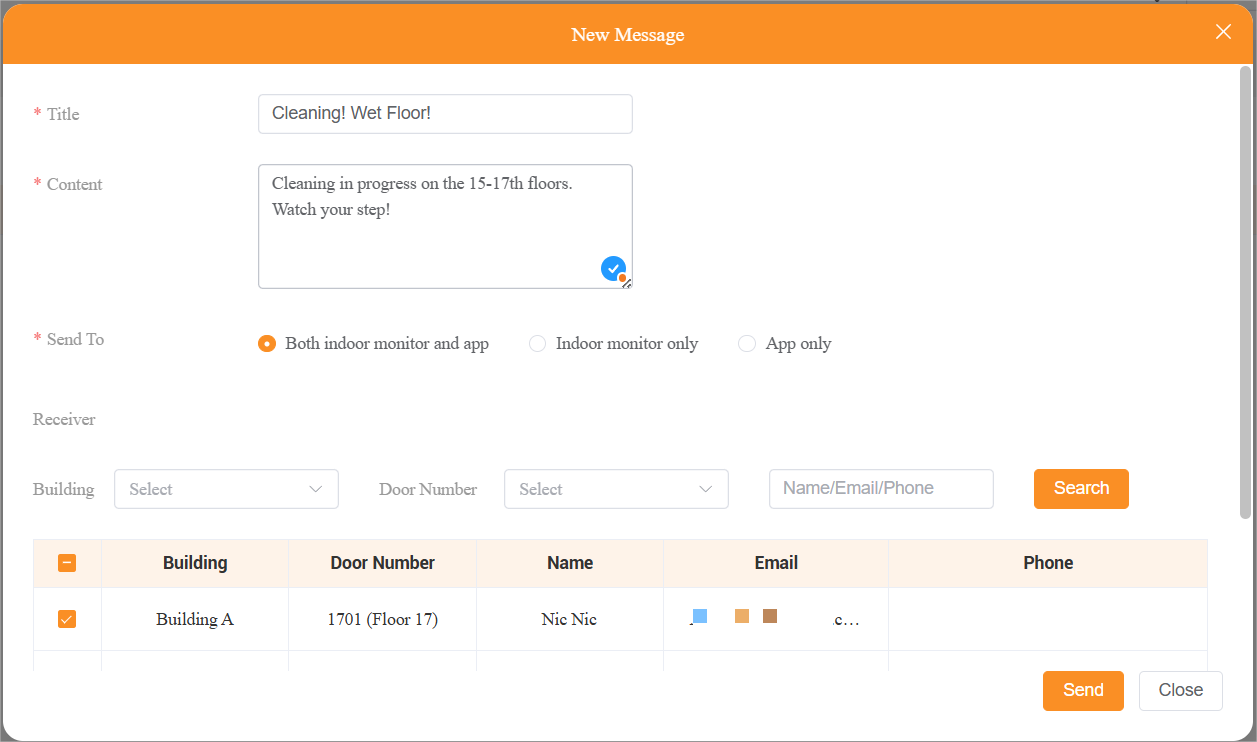
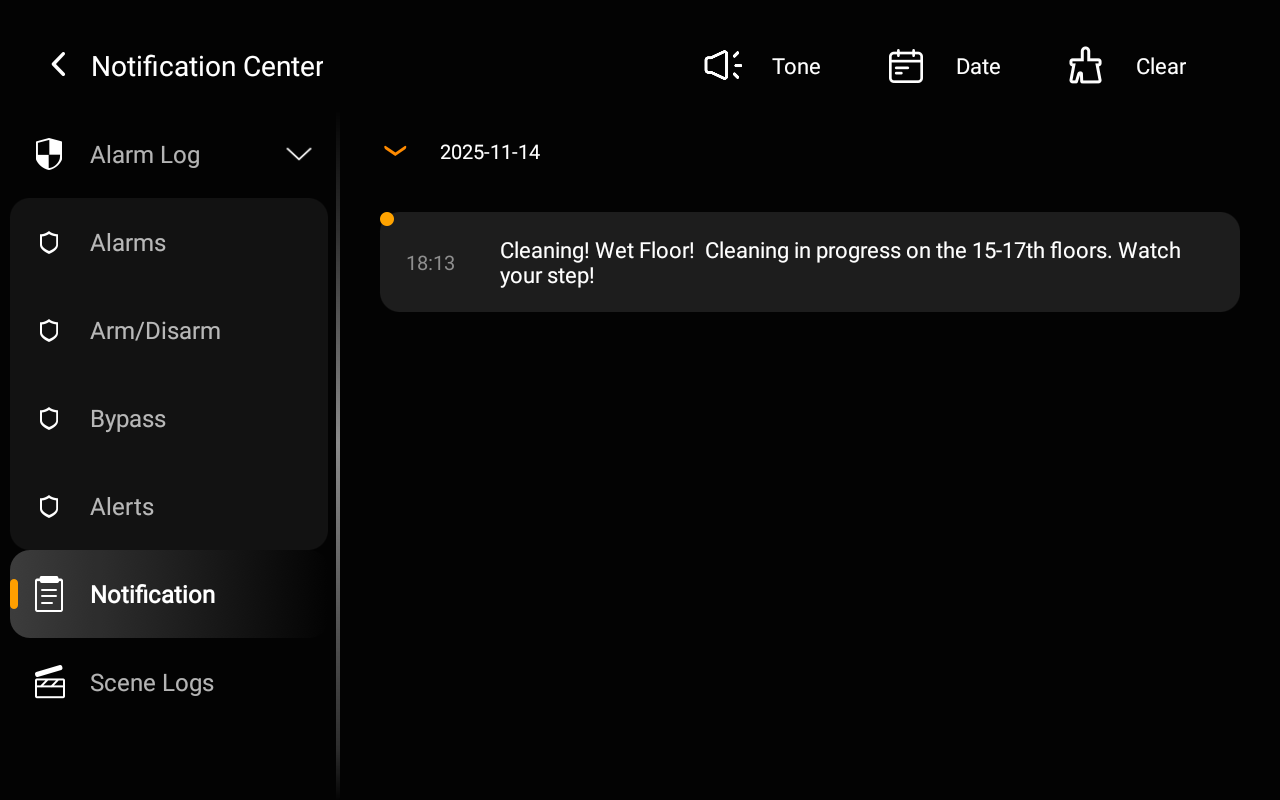
Residents will receive the message immediately on the selected devices.
All sent messages will appear in the list, where you can view details or delete a record.

Pickup Notifications
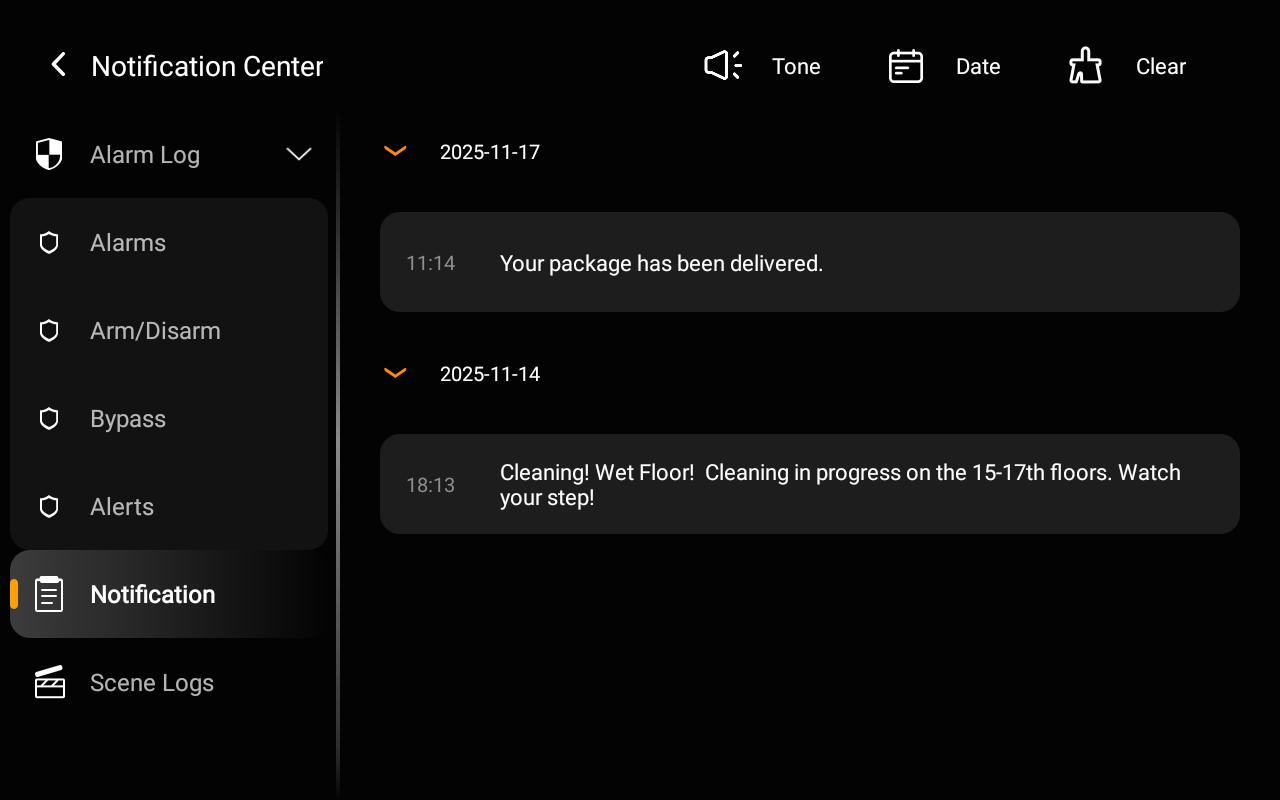
When a resident has packages delivered to the delivery room, staff can send a pickup notification to the resident’s panels and app.
NOTE:
Before configuring pickup notifications, go to Setting > Feature Management and enable this feature. Once enabled, it will appear under the Customer Service section.
To send a pickup notification:
Go to Customer Service > Pickup Notification > New.
Select the building and home, enter the number of packages, then click Confirm.
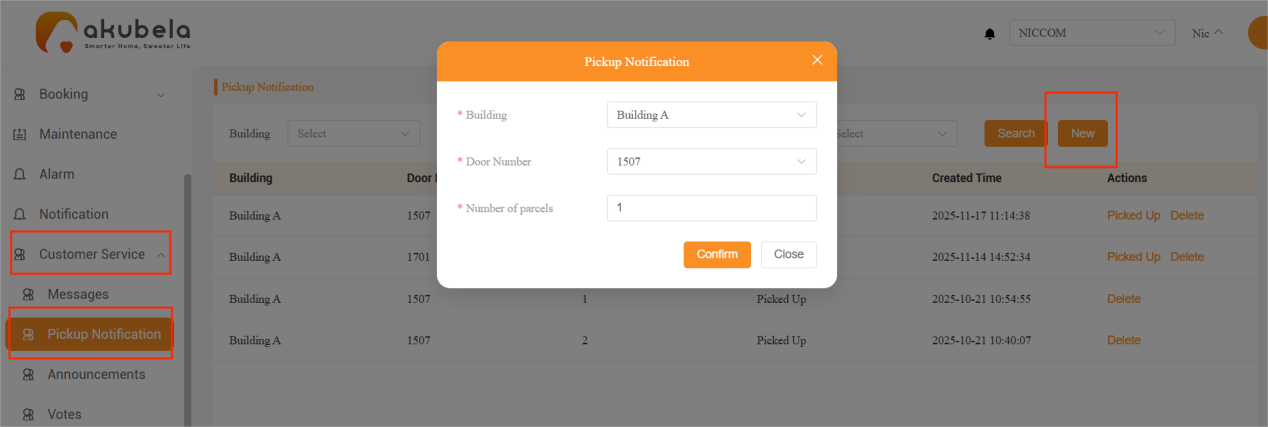
The notification will be sent immediately to the home’s panels and the BelaHome app.
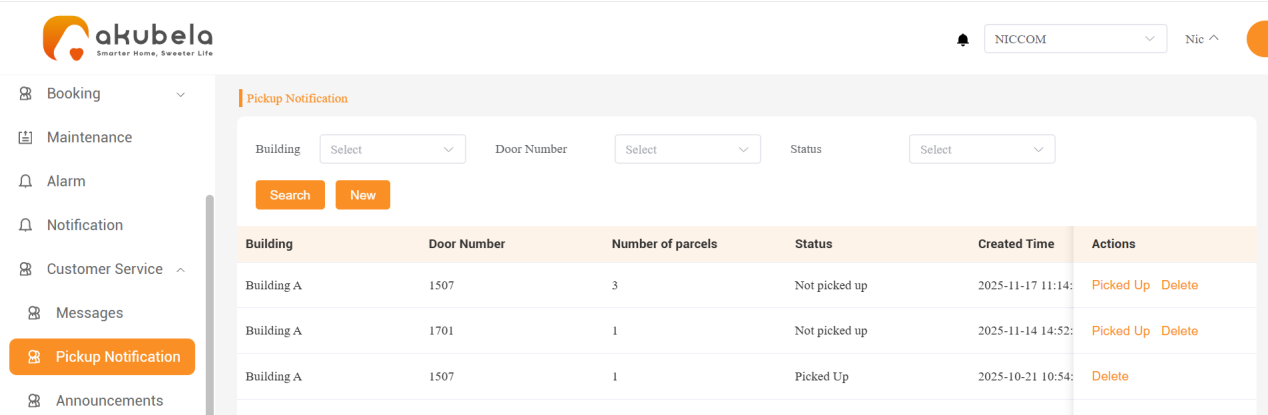
All records will appear in the list. After the resident picks up the package, click Picked Up to complete the record. You may also delete the record if needed.
Announcements
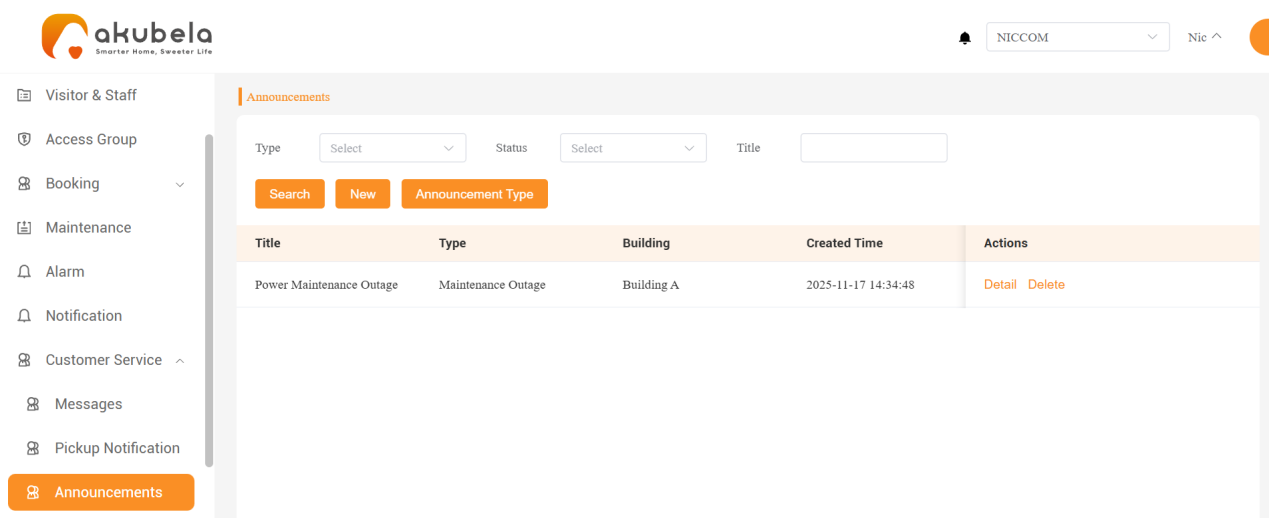
Use the Announcements section to send notices to specific buildings or the entire community to keep residents informed and prepared.
To send an announcement:
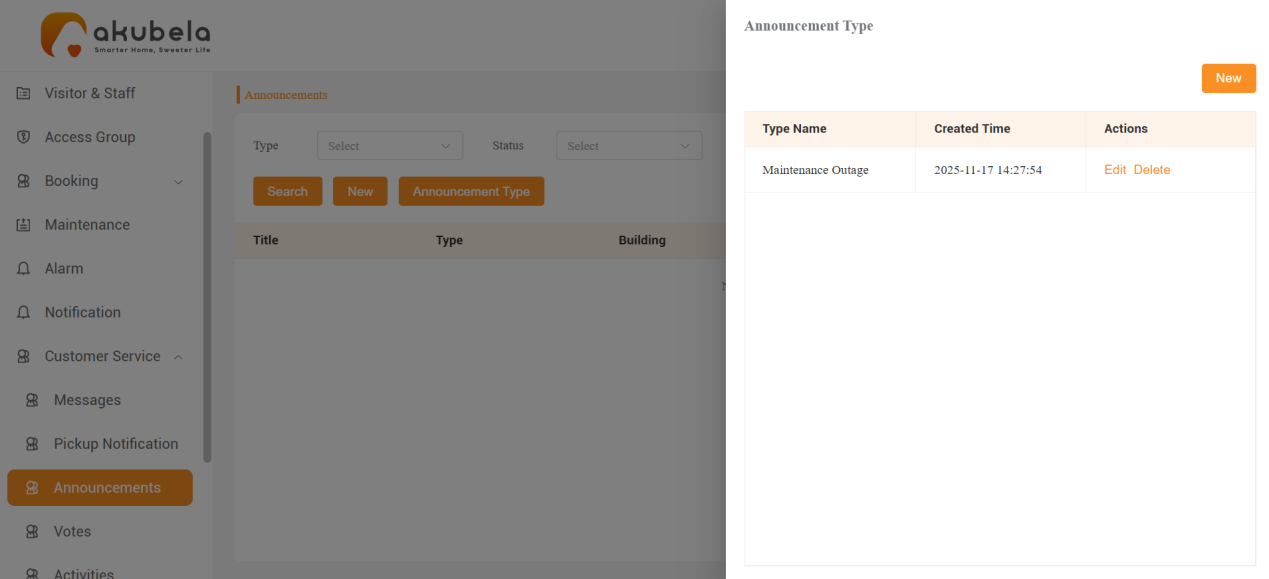
Click Customer Service > Announcements > Announcement Type > New.
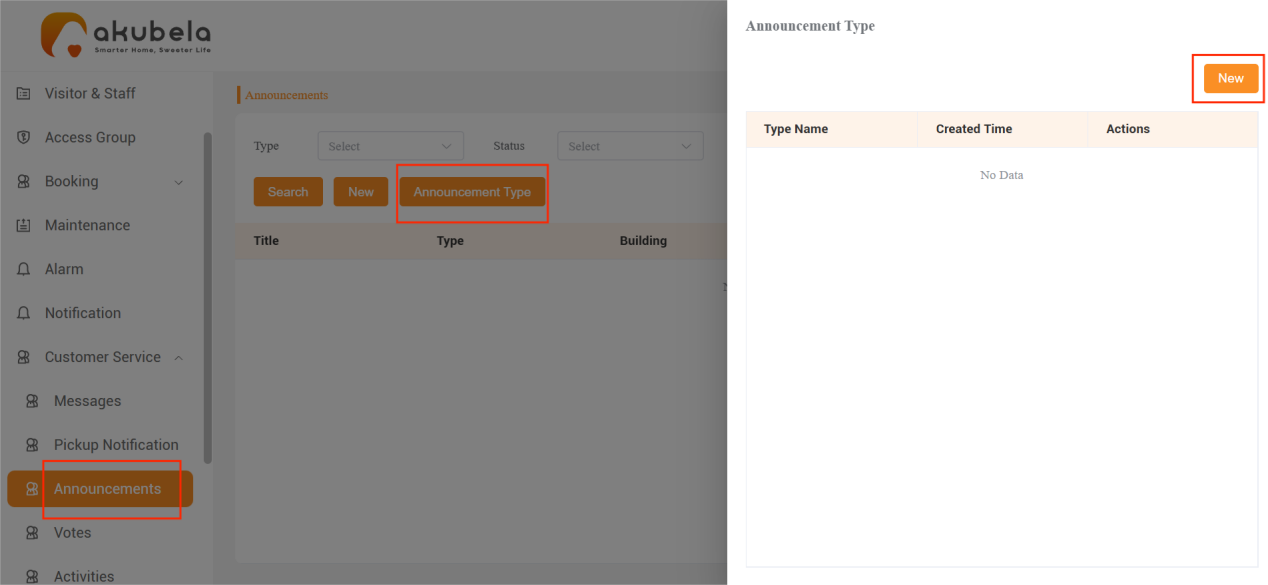
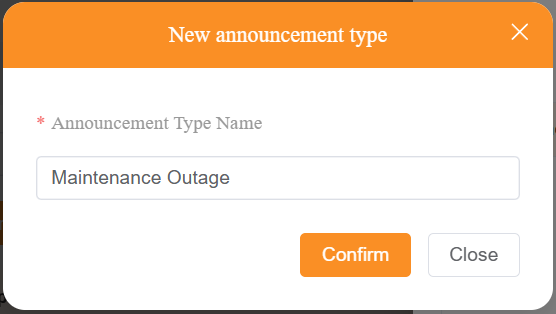
Enter an announcement type and click Confirm. The new type will be added to the list.
NOTE:
Deleting an announcement type will also delete all announcements under that type.
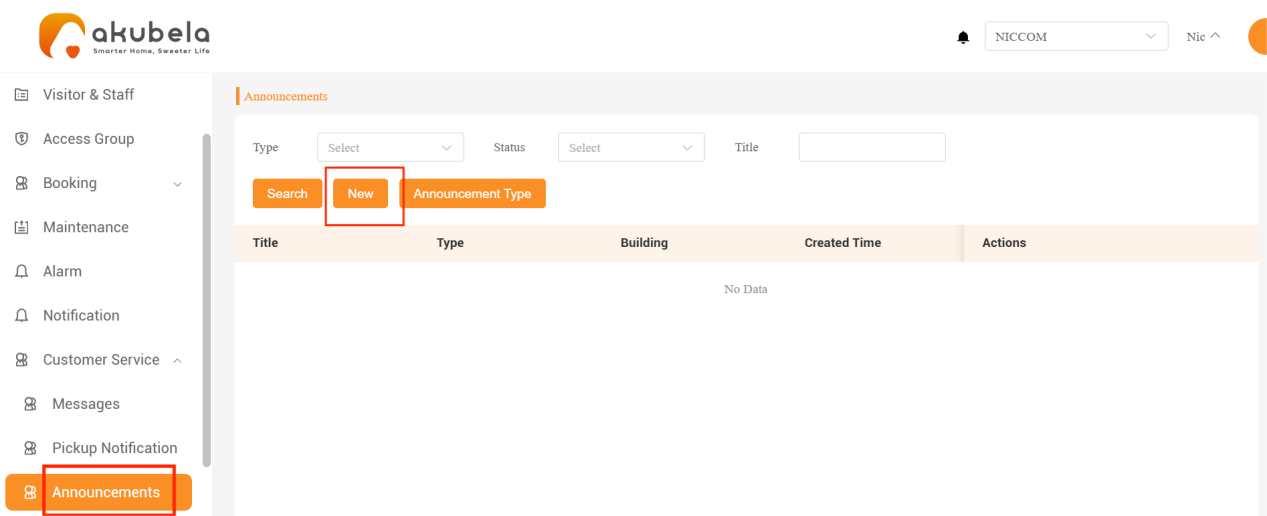
In the Announcements page, click New.
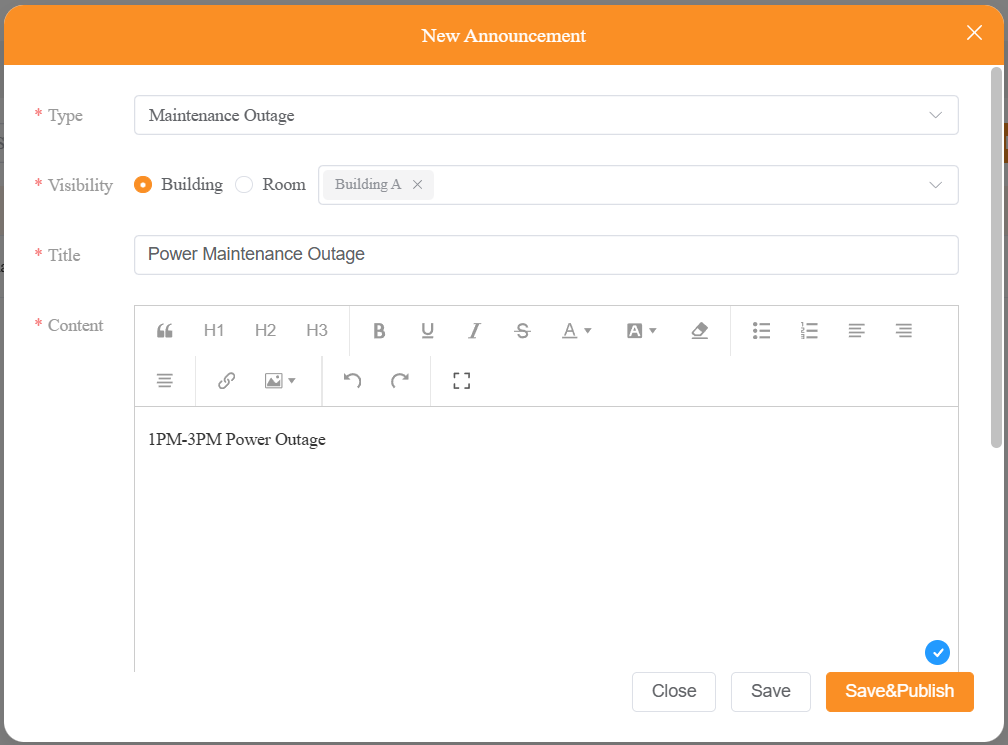
Enter the required information, select the target building(s) or room(s), then click Save to publish later or Save&Publish to send the notice immediately.
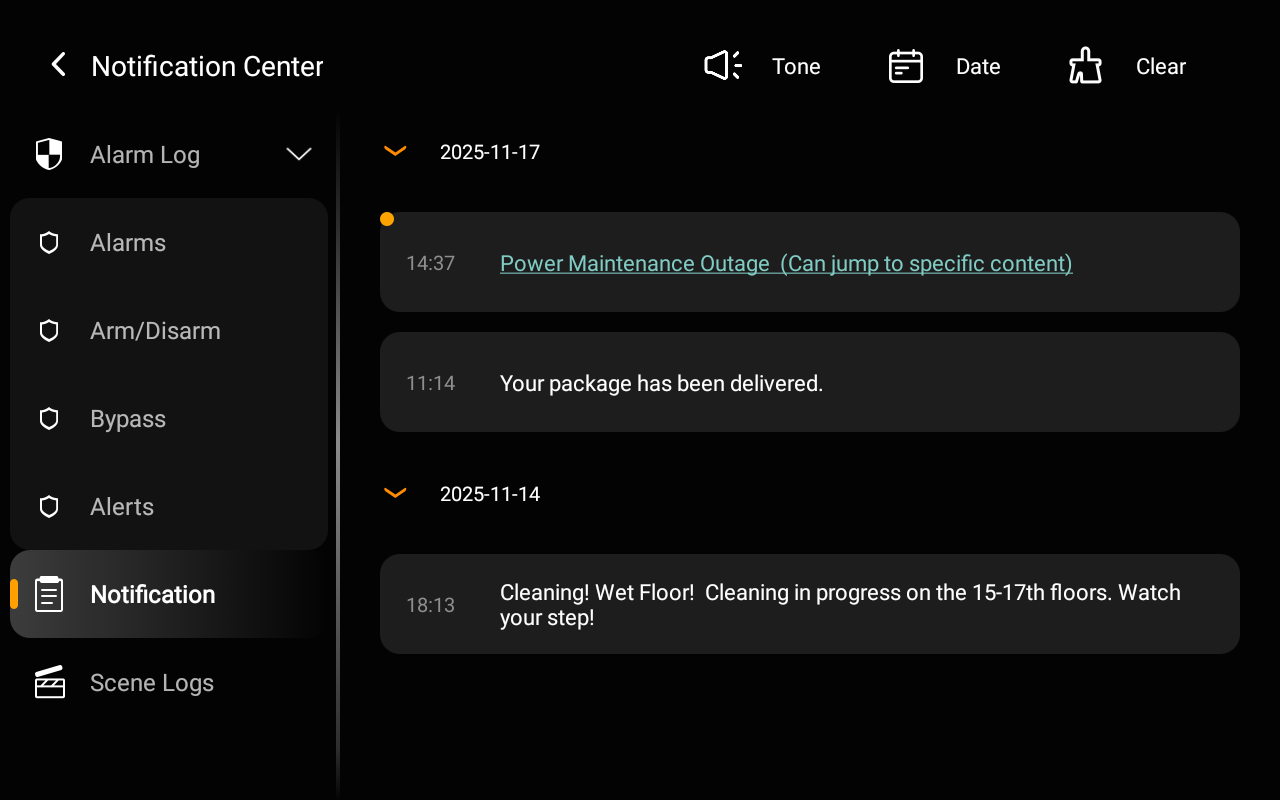
Once published, the notice will be sent immediately to the home’s panels and the BelaHome app. Residents can tap the notification to view details.
All announcements will be listed in the record, where you can view details or delete them
Votes
The Votes section allows you to create polls and easily collect residents’ responses.
To create a vote:
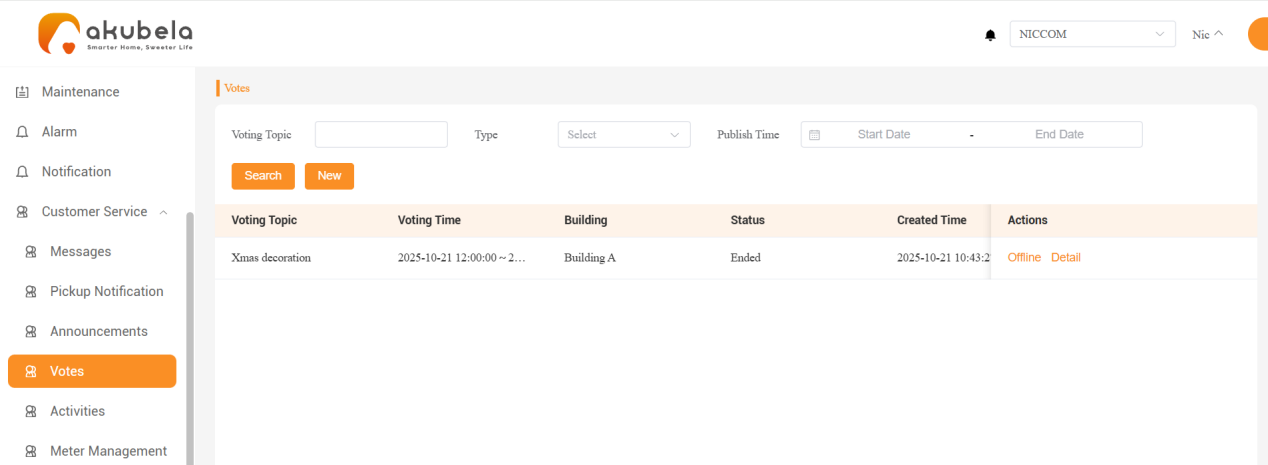
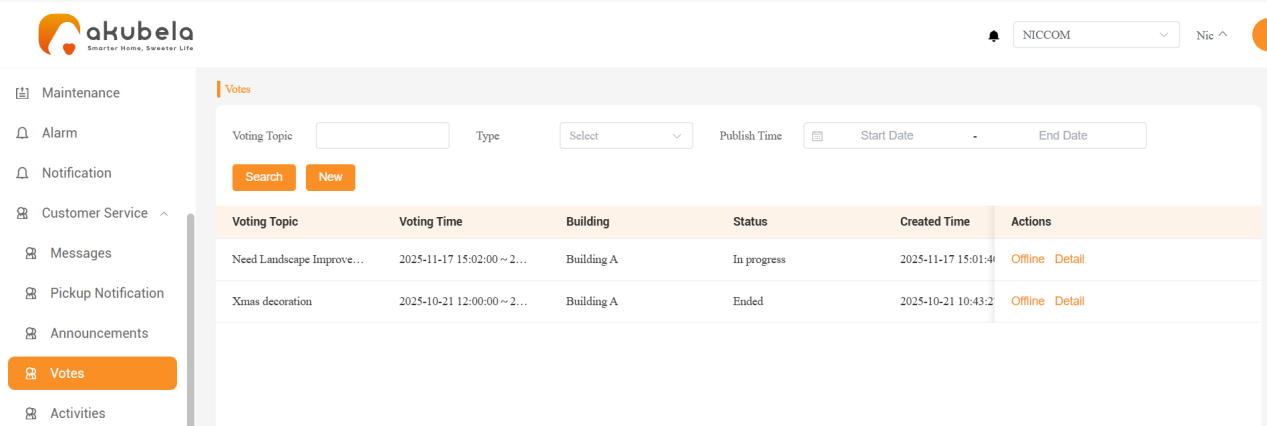
Click Customer Service > Votes >New.
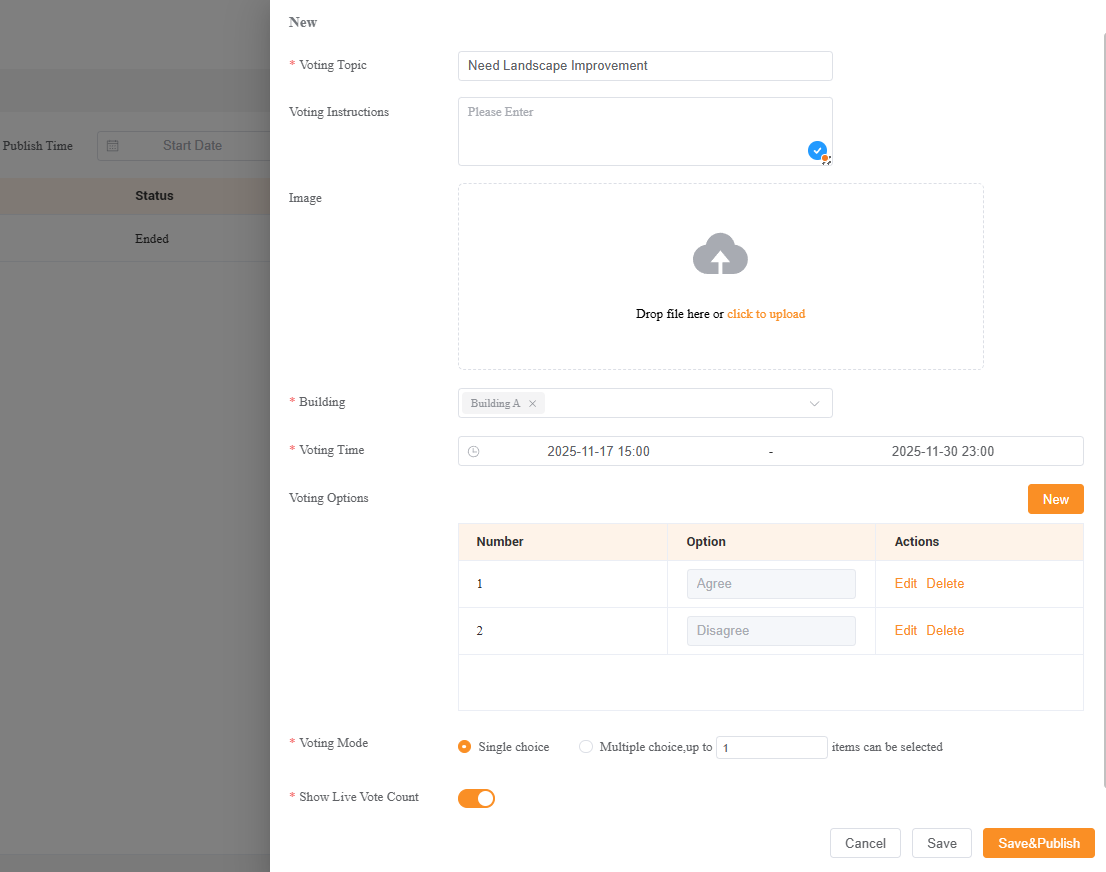
Enter and configure the required information, then click Save to publish later or Save&Publish to send the vote immediately.
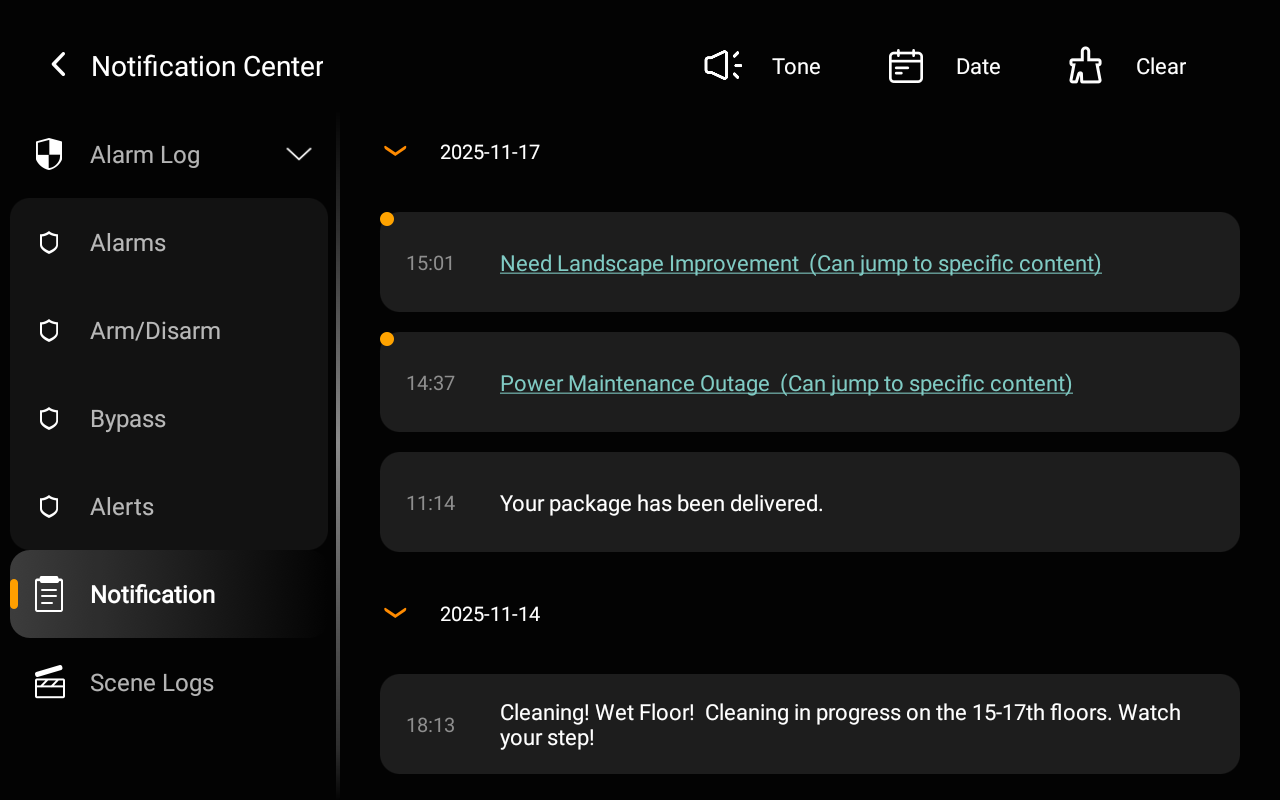
Once published, the vote will be sent immediately to the home’s panels and the BelaHome app. Residents can tap the notification to cast their vote.
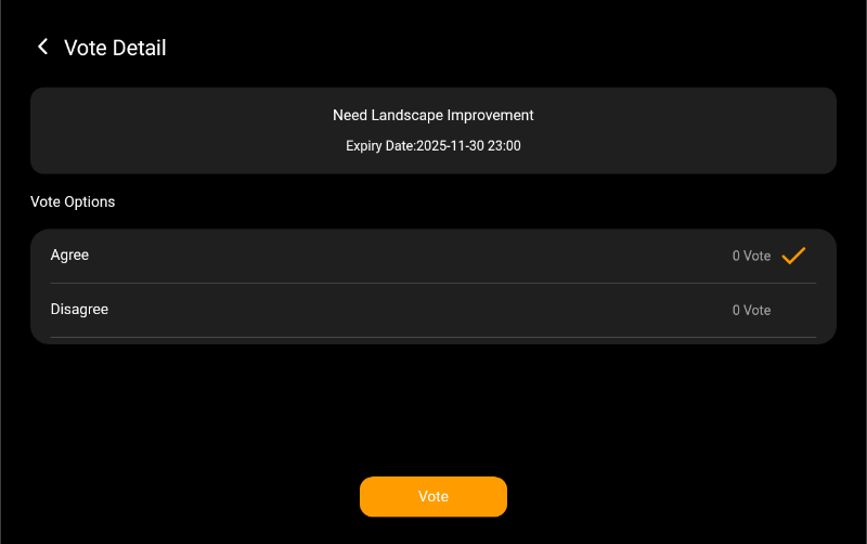
All vote records will appear in the list. You can click Details to view current voting results or click Offline to remove the vote from residents’ voting lists on their panels and apps.
Activities
Use the Activities section to send activity notices to specific buildings or the whole community.
To send an activity notice:
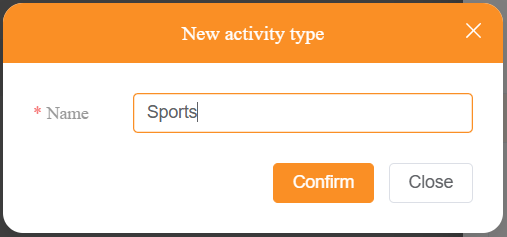
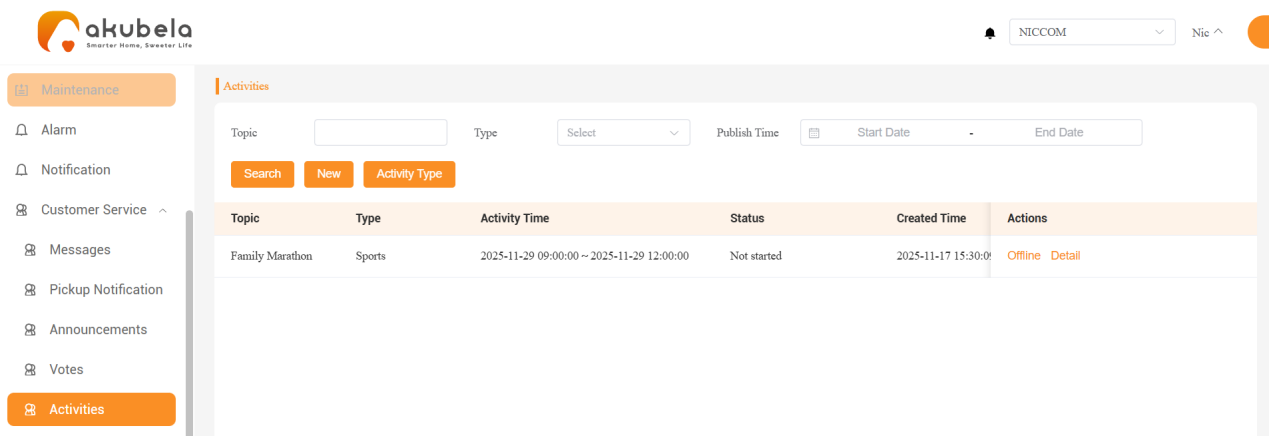
Click Customer Service > Activities > Activity Type > New.
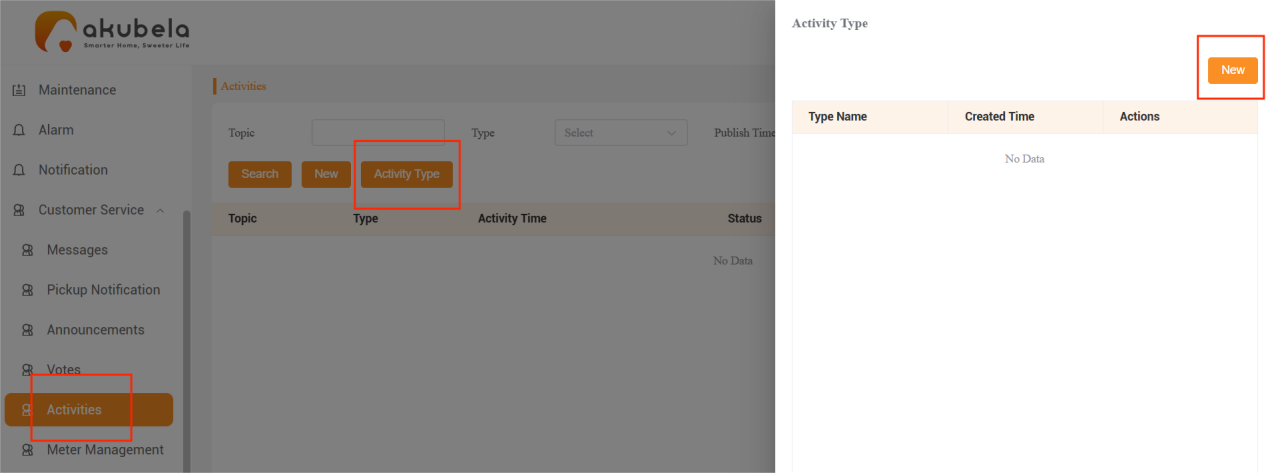
Enter an activity type and click Confirm. The new type will appear in the list.
NOTE:
Deleting an activity type will also remove all activity records under that type.
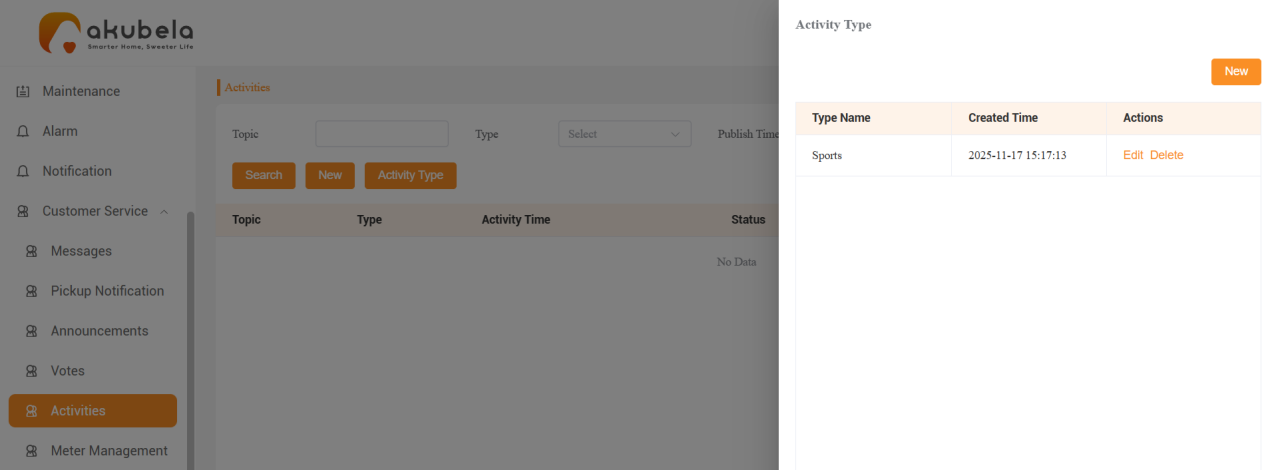
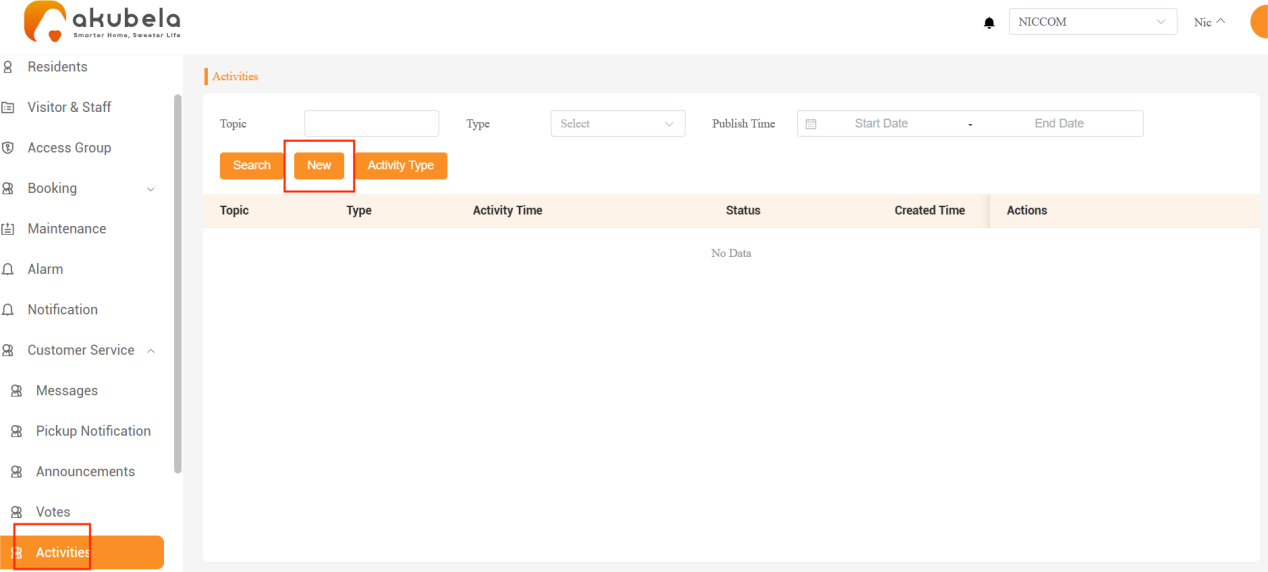
In the Activities page, click New.
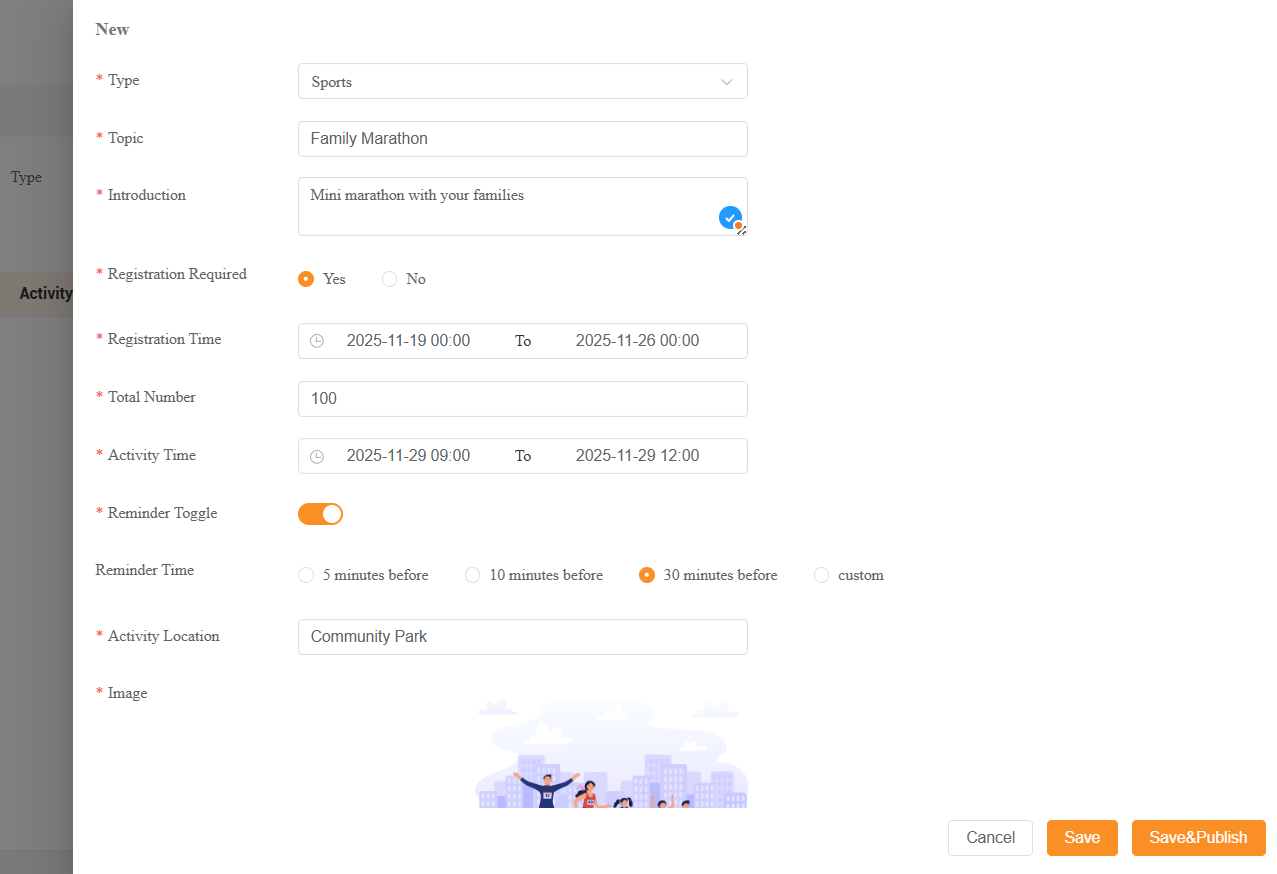
Enter the required information, then click Save to publish later or Save&Publish to send the activity notice immediately.
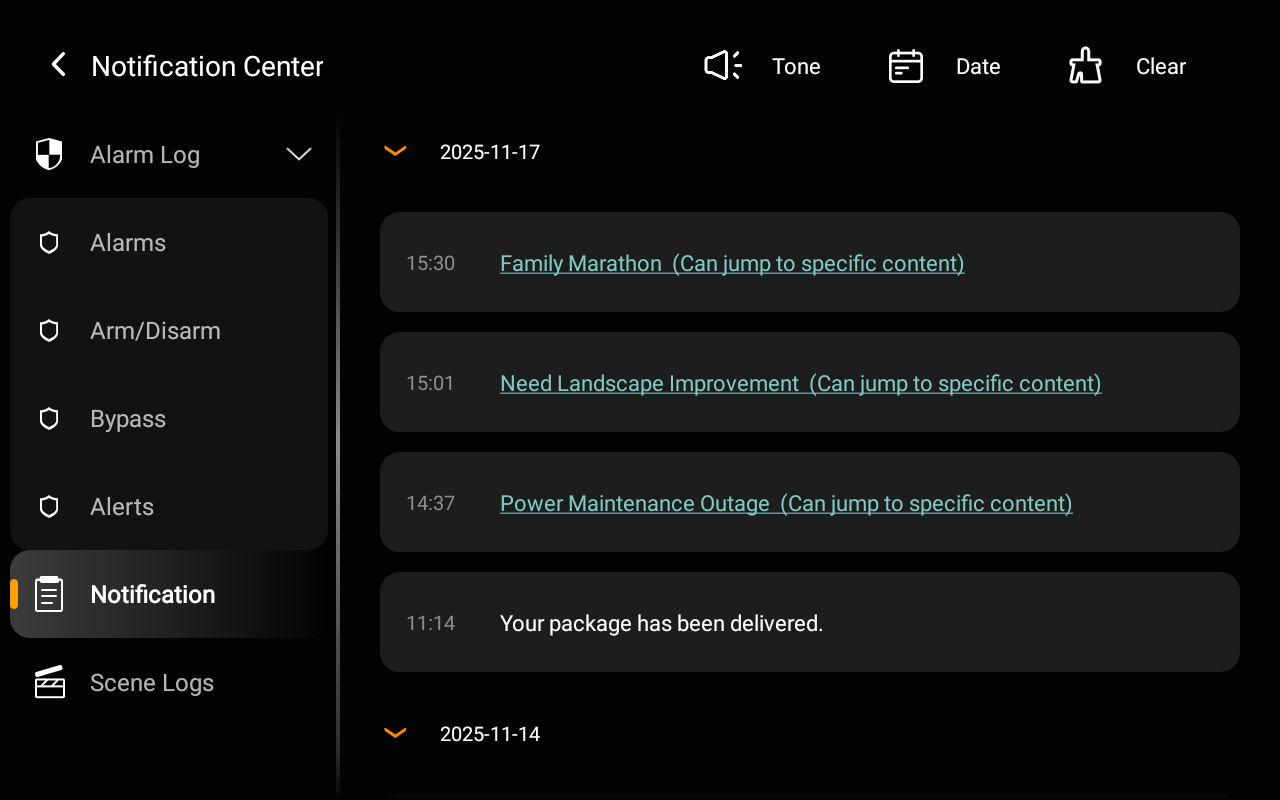
Once published, the notice will be sent immediately to the home’s panels and the BelaHome app. Residents can tap to see the details.
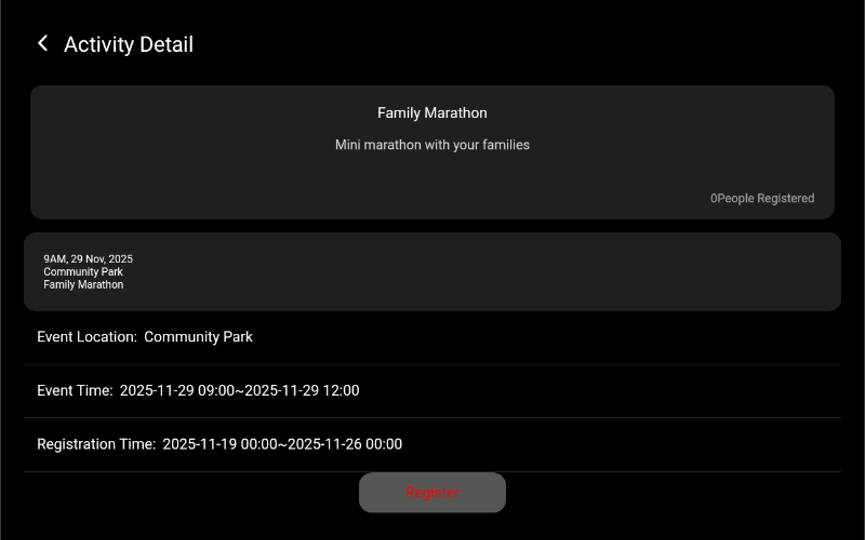
You can click Details to view the current registration results(if Registration Required is enabled). You may also click Offline to remove the activity from residents’ lists on their panels and apps.
Utility Readings
The Meter Management section allows you to easily manage and record utility readings.
NOTE:
Before using this feature, go to Setting > Feature Management and enable Meter Management. Once enabled, it will appear under the Customer Service section.
Add Meter Types
Add the required meter types before entering or managing utility readings.
To add a meter type:
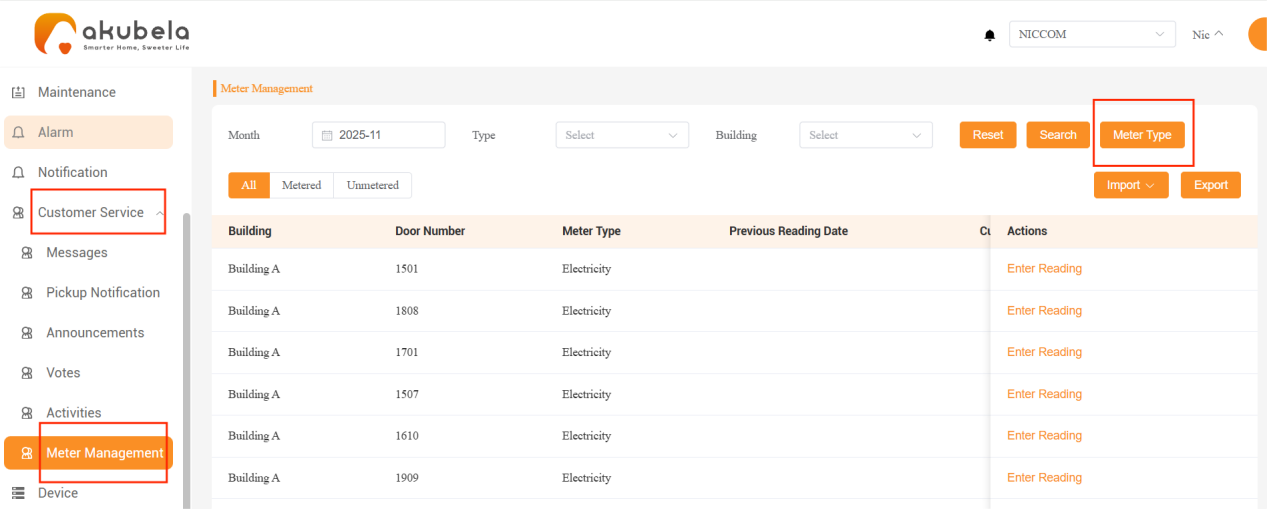
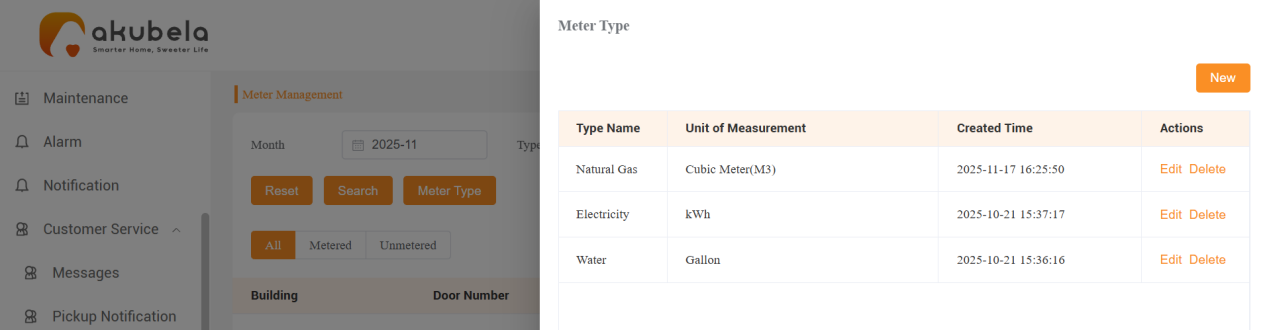
Go to Customer Service > Meter Management > Meter Type.
Click New, then enter the reading name and its unit.
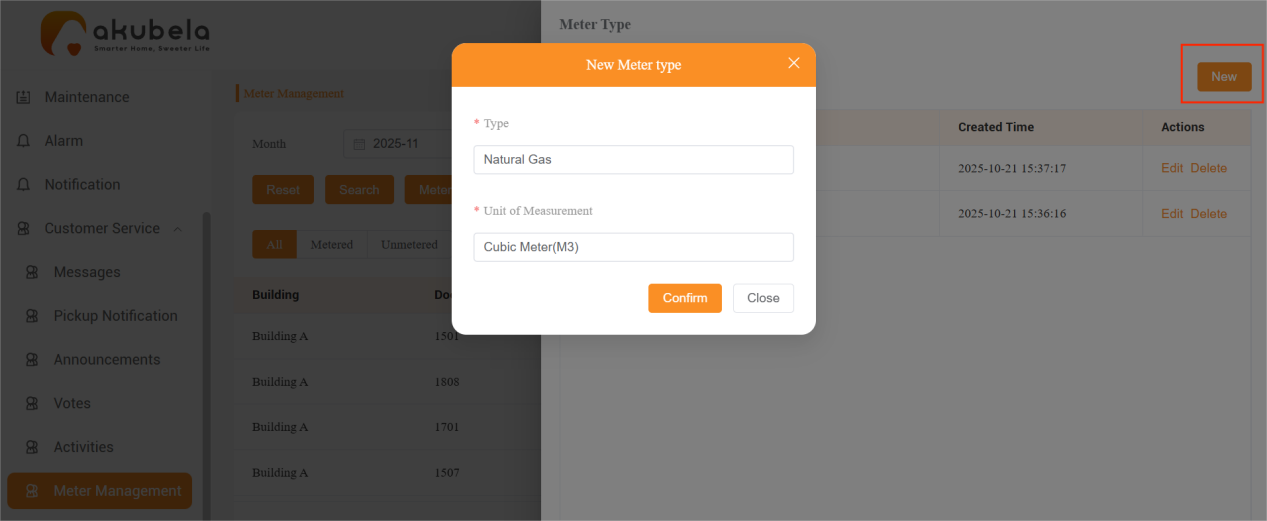
Click Confirm. The new type will appear in the meter type list.
NOTE:
Deleting a meter type will also remove all meter reading records under that type.
Enter Meter Readings
Make sure you have added the necessary meter types before entering readings.
To enter meter readings:
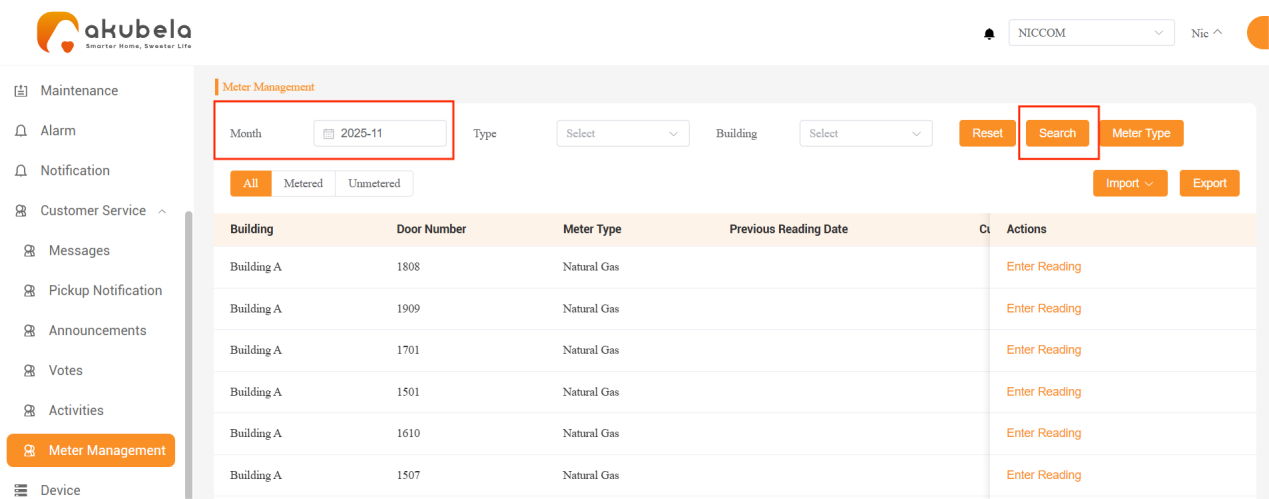
Go to Customer Service > Meter Management.
Select the reading month and click Search.
Choose one of the following methods:
NOTE:
The current month’s reading must be higher than the previous month’s reading.
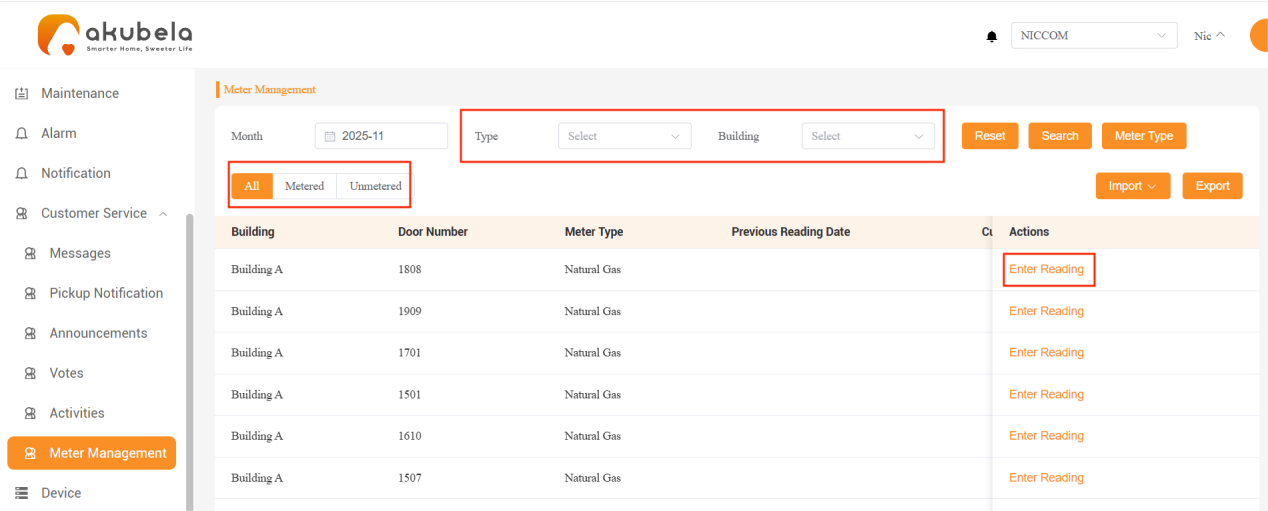
Individually: Click Enter Reading to input each home’s reading data or revise submitted data.
TIP:
Use filters to quickly locate the desired home.
Batch Import:
NOTE:
Make sure you select the correct month, as the imported data will be recorded under the currently selected month.
Click Import > Download Template to download the template file.
Fill in the readings and save the file.

Click Import > Import Reading Data to upload the file.