View Device Status
Offline Status
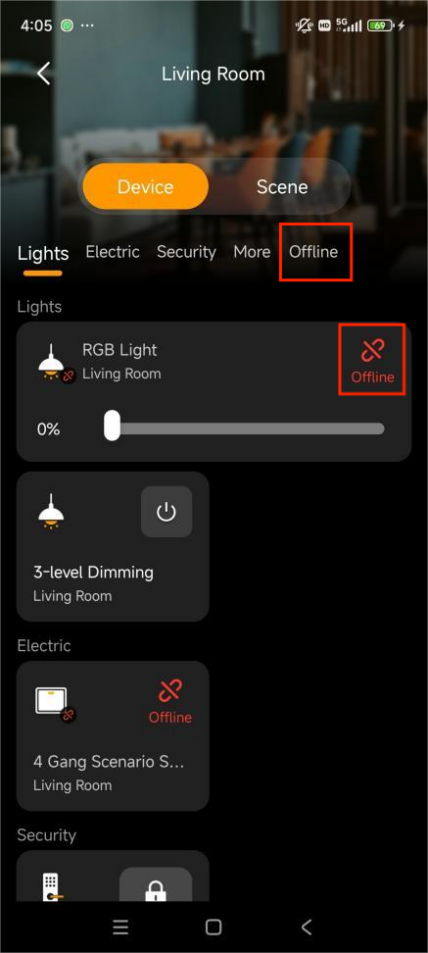
Devices that are offline are indicated by an icon in the upper-right corner of a device card.
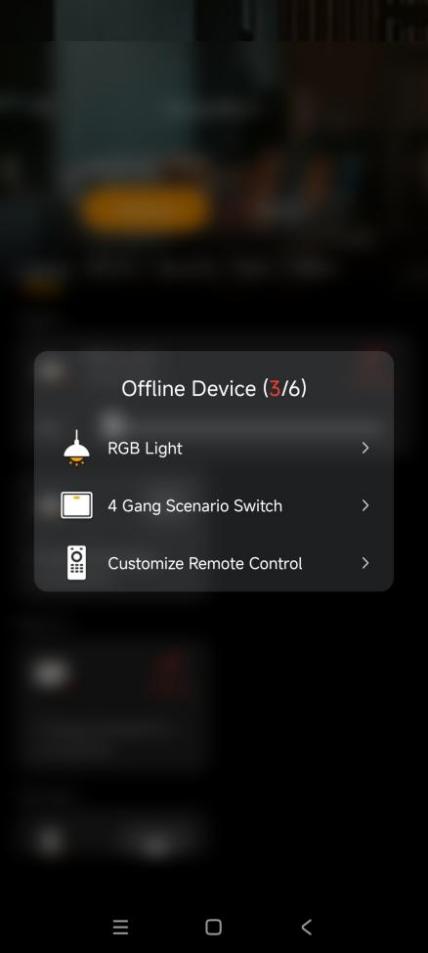
In any specific room view, all offline devices are listed under Offline tab for easy identification.
Offline devices cannot be controlled via the app.
Active (Turned-On) Status
The app provides visual indicators to help you quickly identify and access active devices.
On the Home Screen
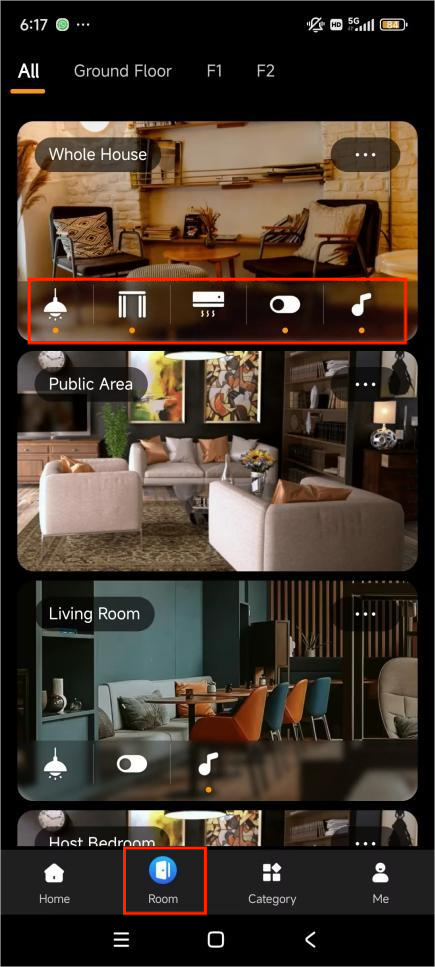
When a device (e.g., a light or air conditioner) is turned on, a corresponding Type Button appears at the top of the Home screen. This button displays the exact number of devices of that type currently active.
Tap the button to quickly navigate to the corresponding category screen for detailed control.
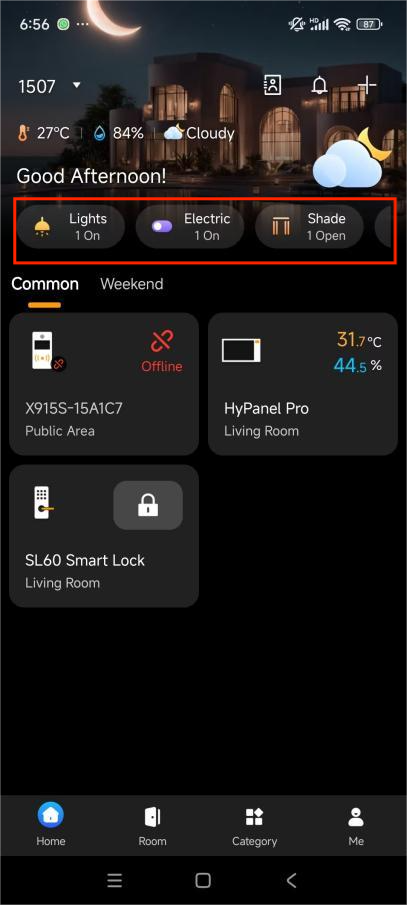
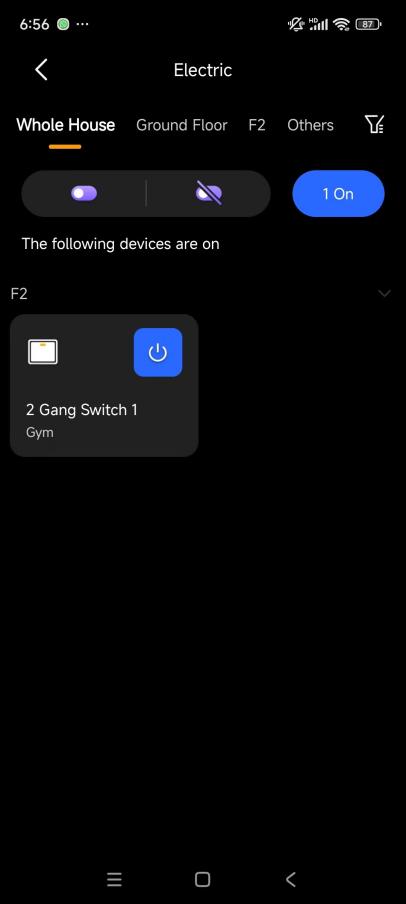
These quick-access buttons are automatically removed from the Home screen when all devices of that type are turned off.
In the Room View
When any device is turned on, an orange dot appears below its corresponding device-type icon.
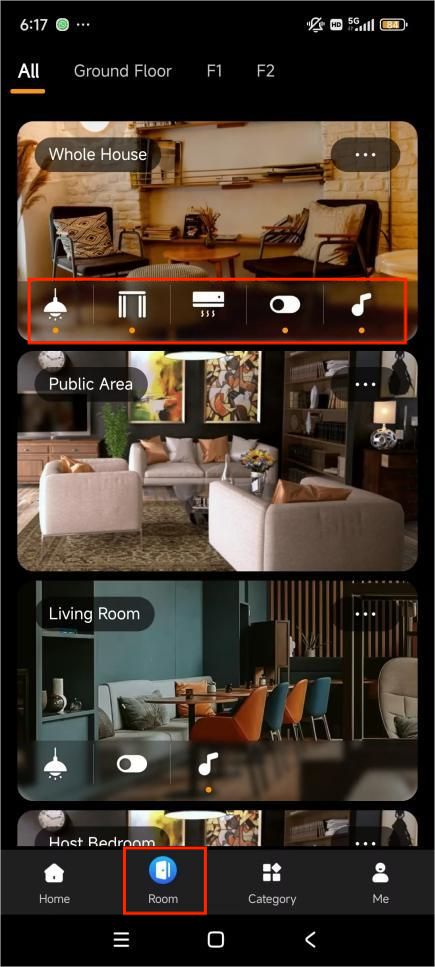
Check Notifications and Logs
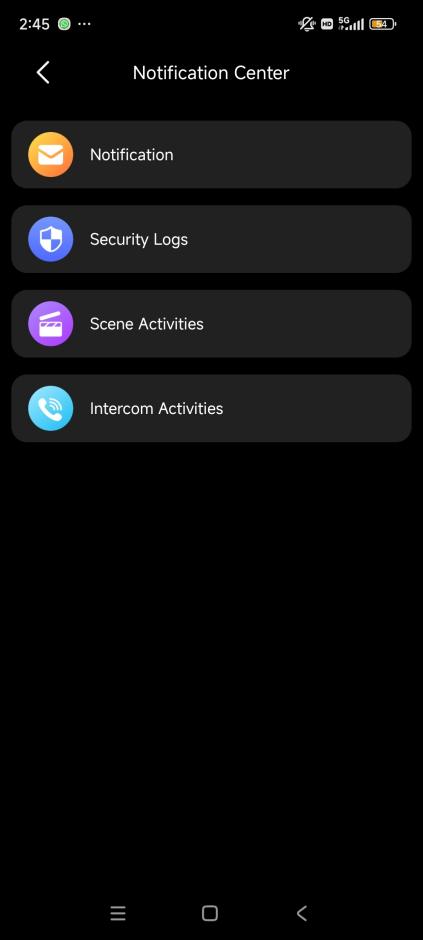
Online/Offline Notifications
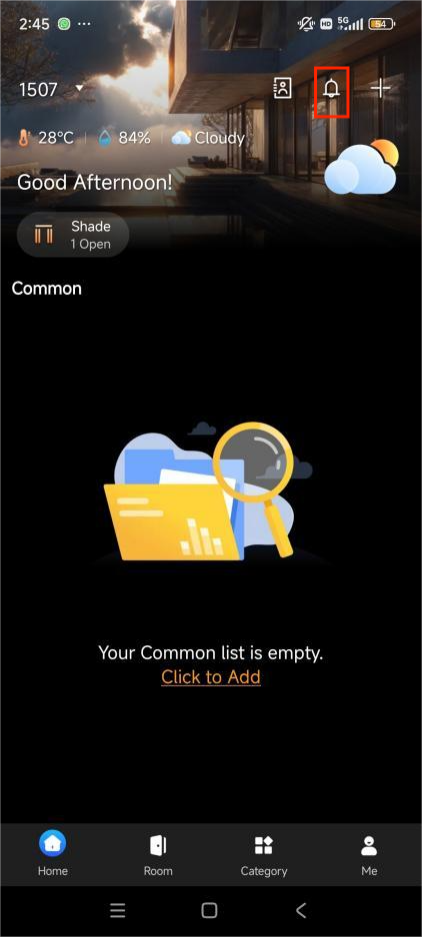
You will receive a notification when a device’s connection status changes.
To view or delete notifications, go to Home >  > Notification.
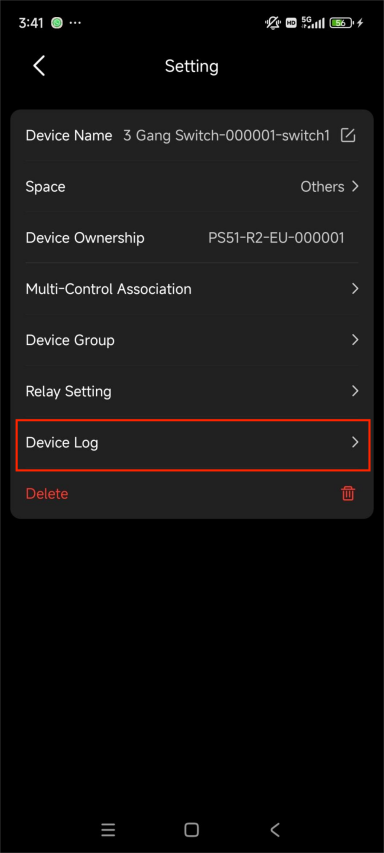
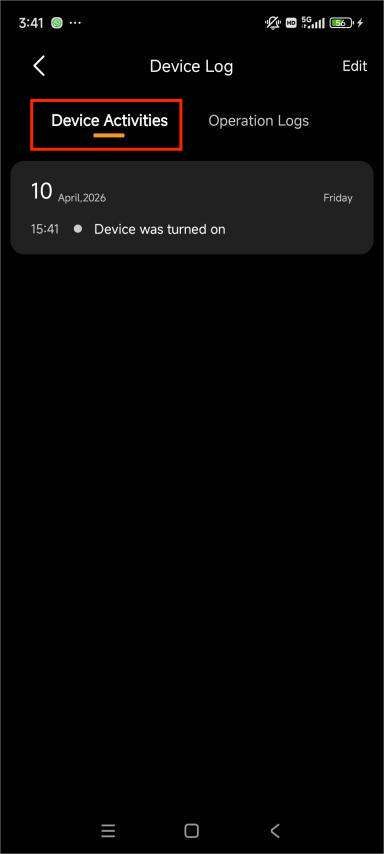
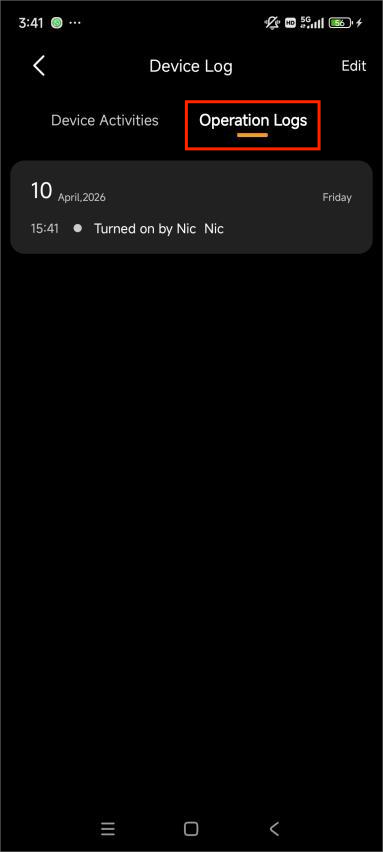
Device Logs
For Zigbee devices (locks, sensors, switches, etc.), tap the device card >  > Device Log to view activity history and operator.
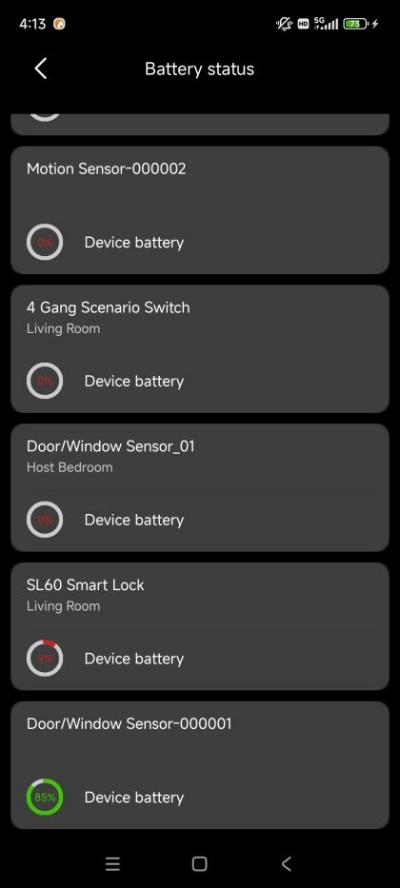
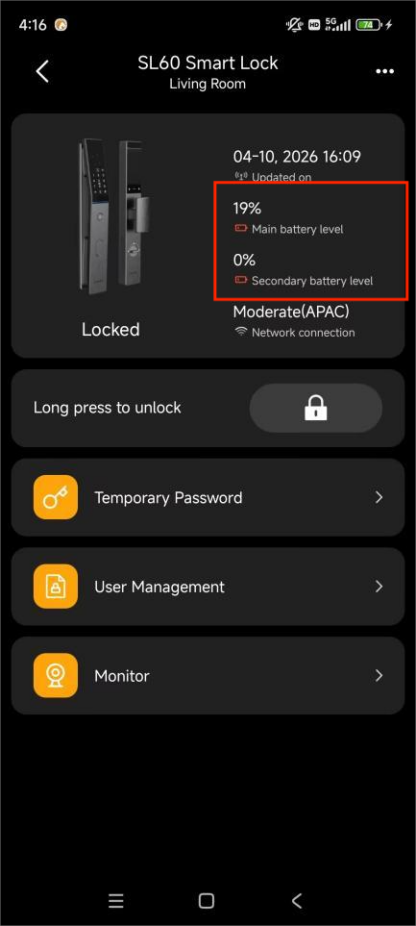
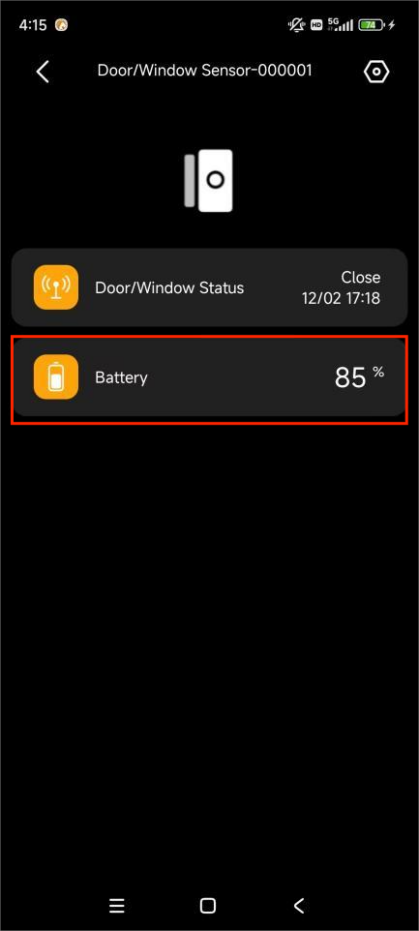
Check Device Battery
For devices that report battery status:
Go to Me > Battery status
Go to [specific device card] > Battery.
Add Devices
Administrators and Managers can add Zigbee and compatible third-party devices.
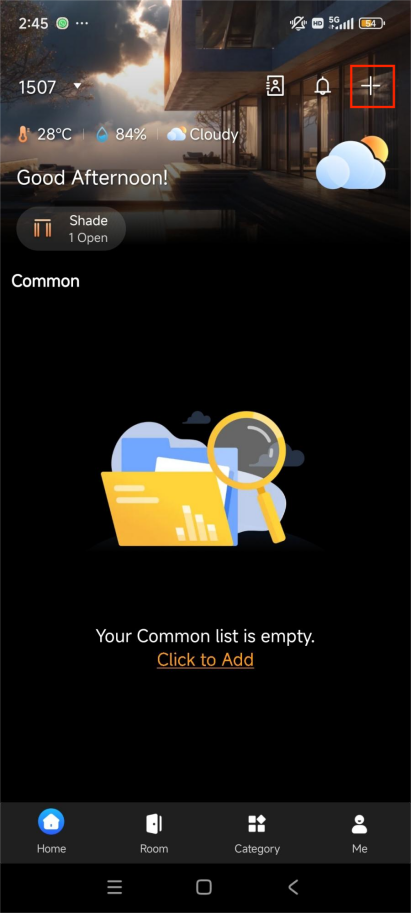
Add Zigbee Devices
Go to Home , then tap
 in the upper right corner.
Select the desired Gateway.
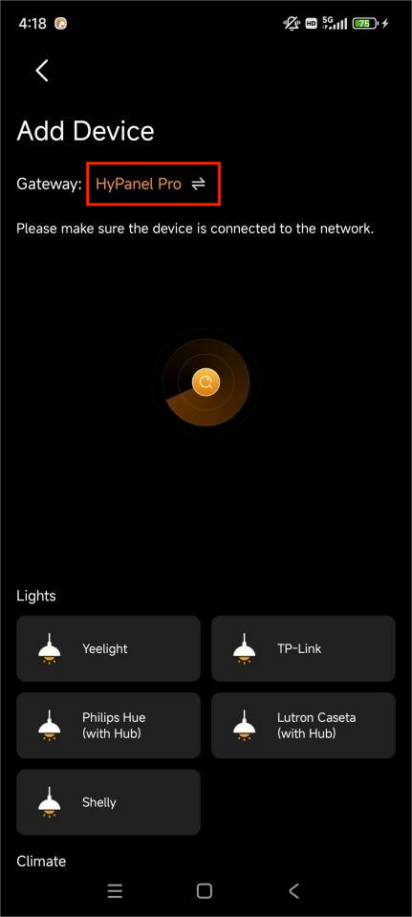
Put the device in pairing mode.
TIP:
Place devices close to the gateway (ideally in the same room; within 10 meters if separated by a wall).
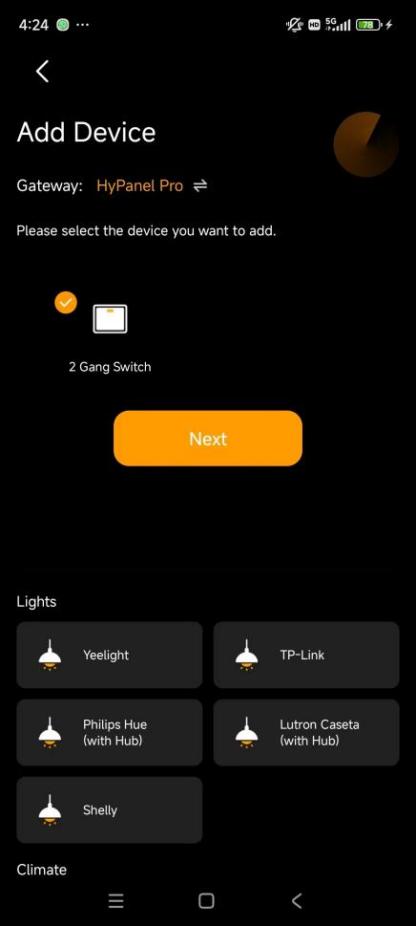
Multiple devices can be added at once.
Wait for detection, then select device(s).
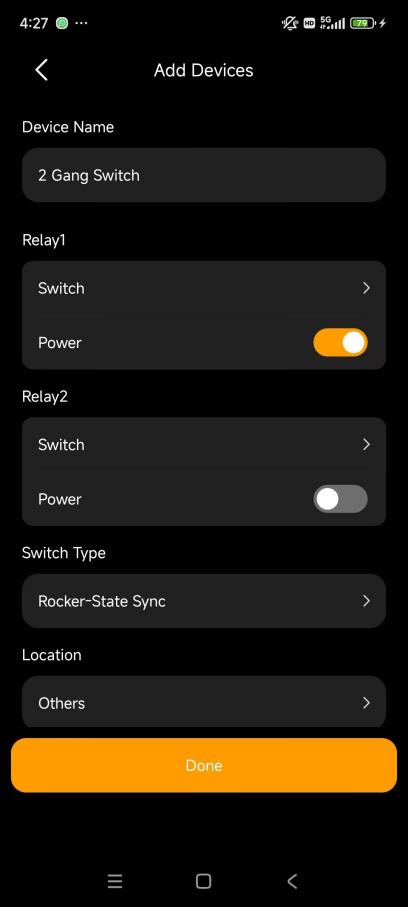
Set the device name and location for each device, then tap Finish.
TIP:
Use on/off control (if available) to confirm correct device mapping.
Add Third-Party Devices
NOTE:
HyPanel Lite does not support adding third-party devices.
Tap Home >
 .
Select the desired Gateway.
Choose the device type from the provided list.
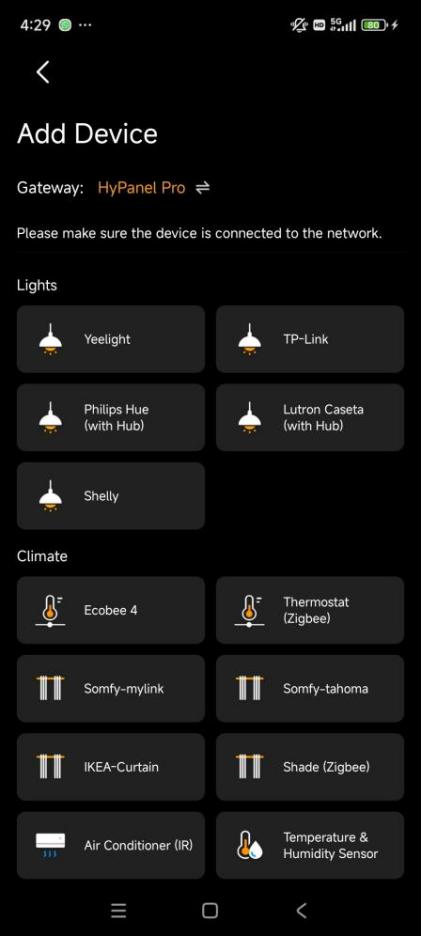
Follow the onscreen instructions and the device manual.
Set the device location and name, then tap Done.
Configure Devices
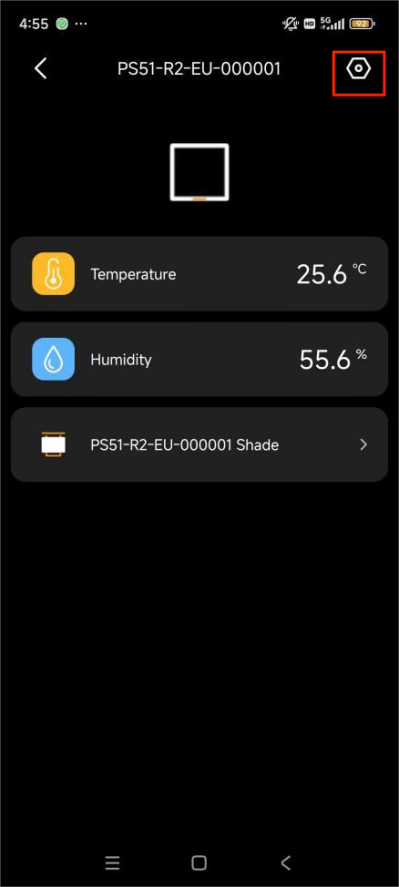
Change Relay Type for HyPanels
Customize how the physical relays on your HyPanel function (e.g., changing a switch to a shade controller).
Go to Room screen or Category > More.
Select the panel card and tap
 in the upper right corner.
Tap Relay 1/2 and choose a new type.
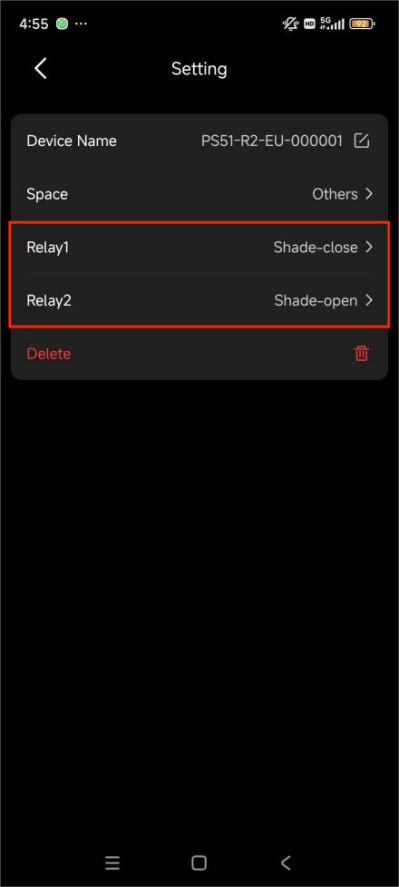
NOTE:
Heating + Cooling relays appear as a thermostat.
For shades: Relay 1 = Open, Relay 2 = Close (reverse the Shade Direction in their Settings if wiring is reversed).
Bypass Sensors
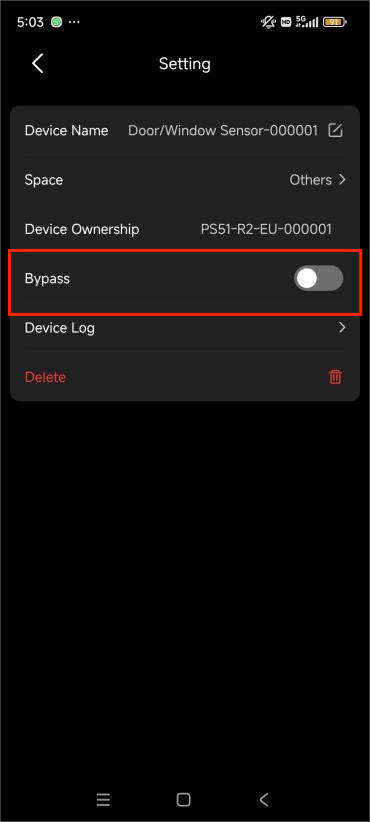
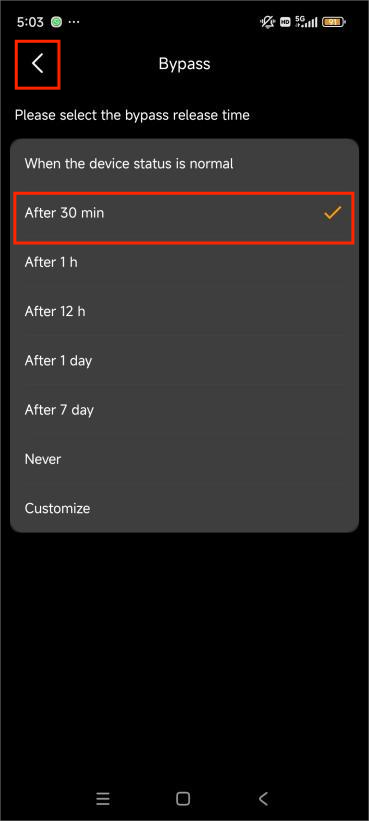
Temporarily disable sensors to prevent false alarms in scenarios such as maintenance.
To bypass:
Go to Room or Category > Security > All Devices.
Select a sensor.
Tap
 > Bypass.
Set a duration and tap
 to confirm.
Quick access:
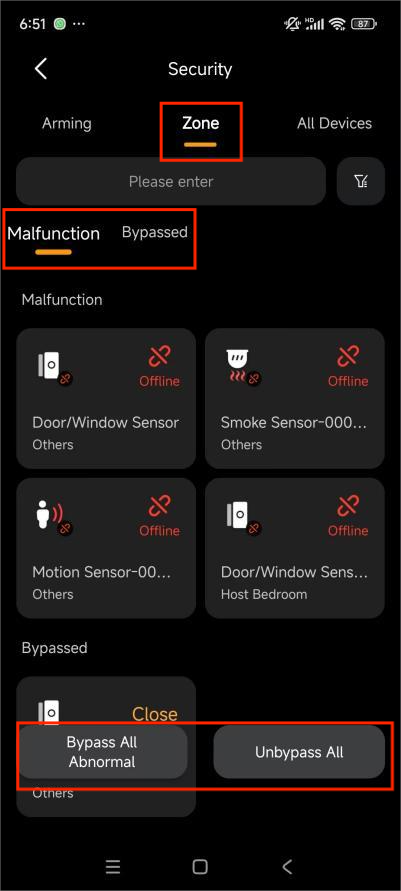
Go to Category > Security > Zone to malfunctioned or bypassed sensors or bypass/unbypass all sensors at one touch.
Change Device Location
To move a device (except for wired sensors) to a different room:
Go to Room or Category.
Select the device card.
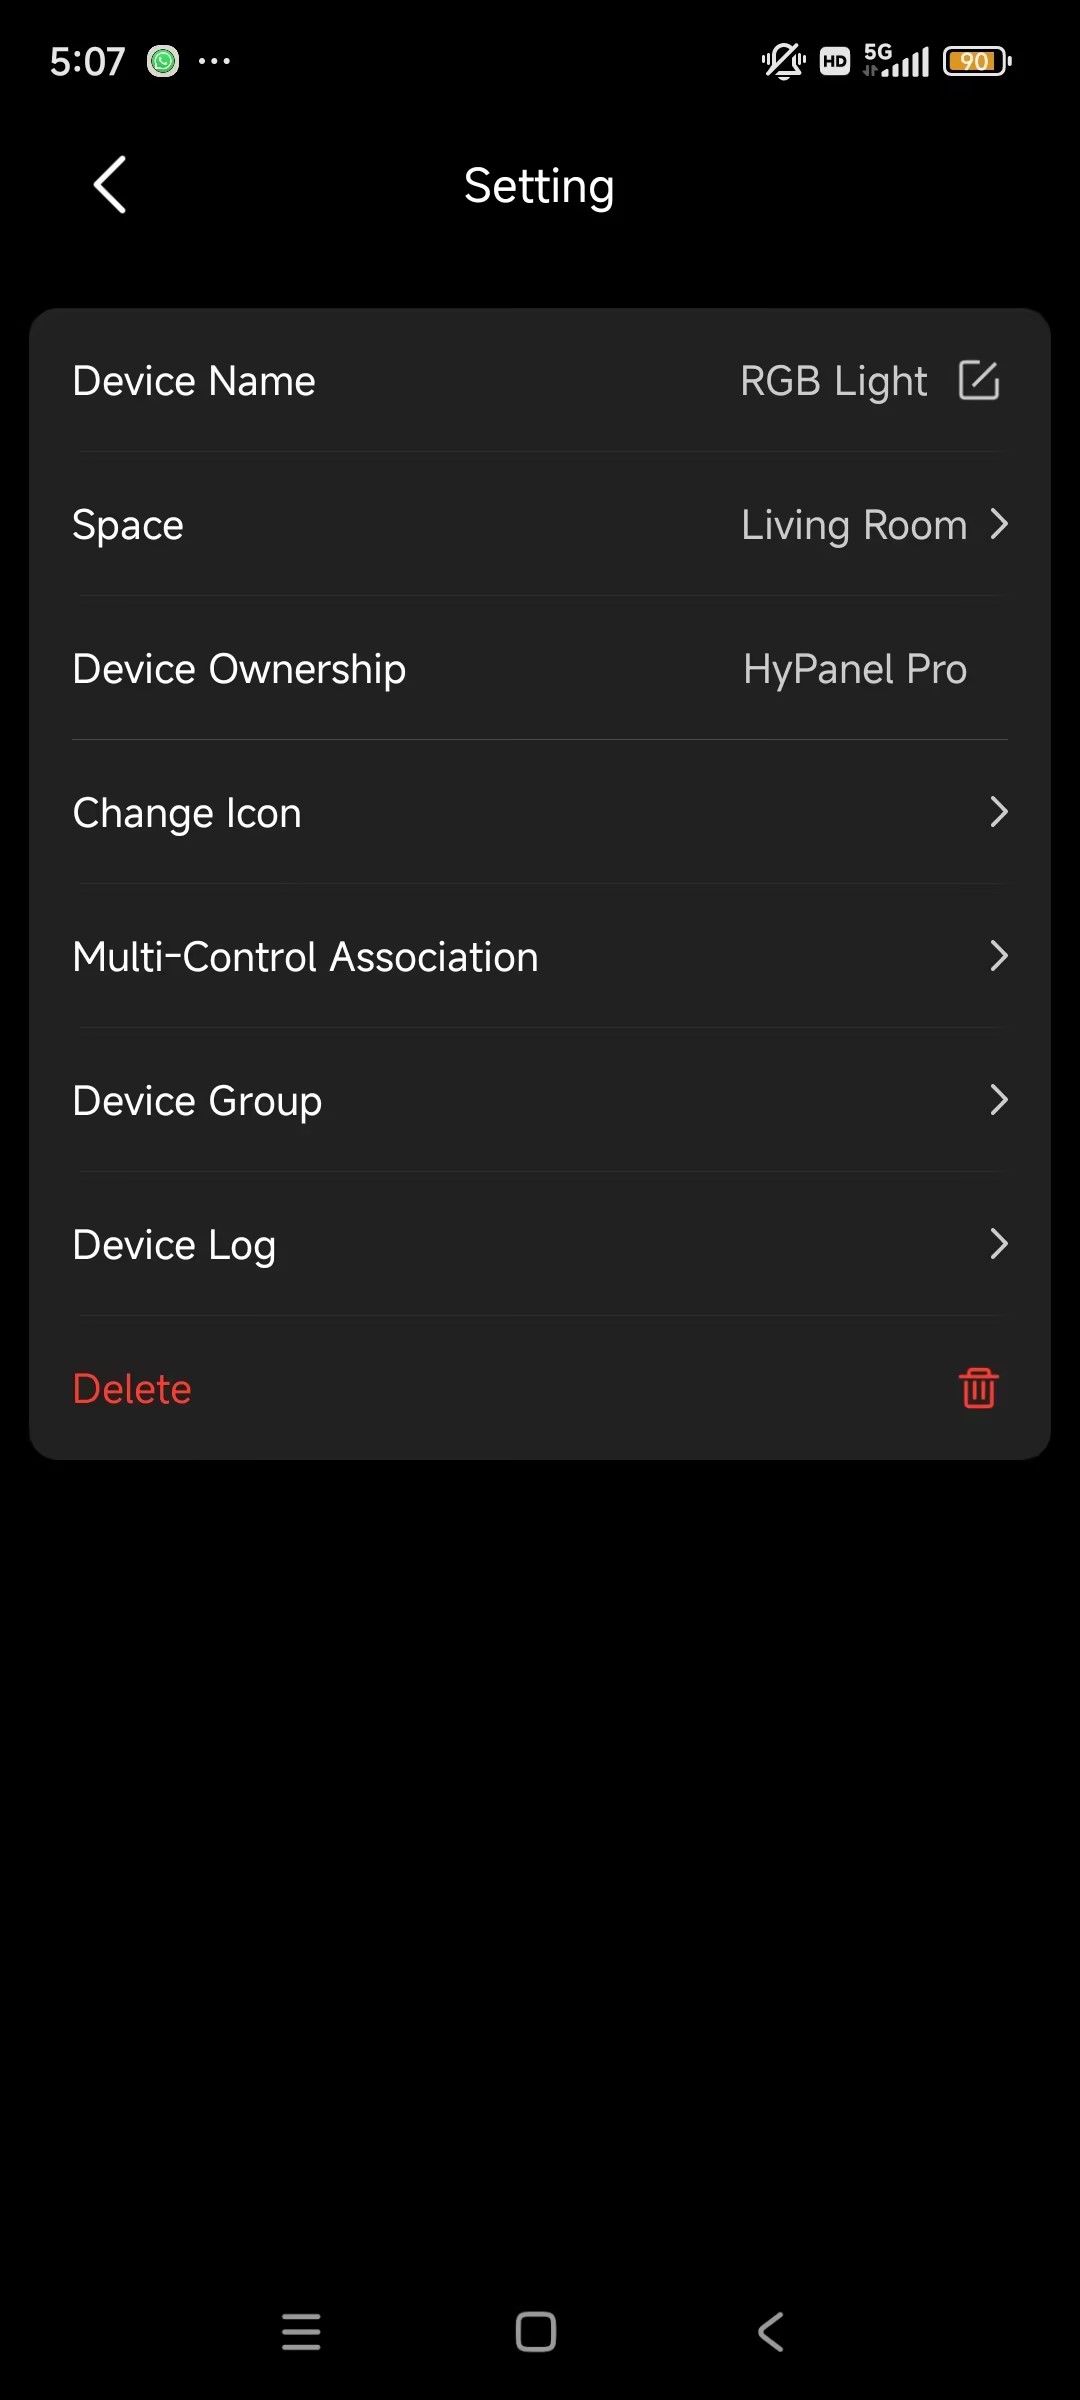
Tap
 in the upper right corner.
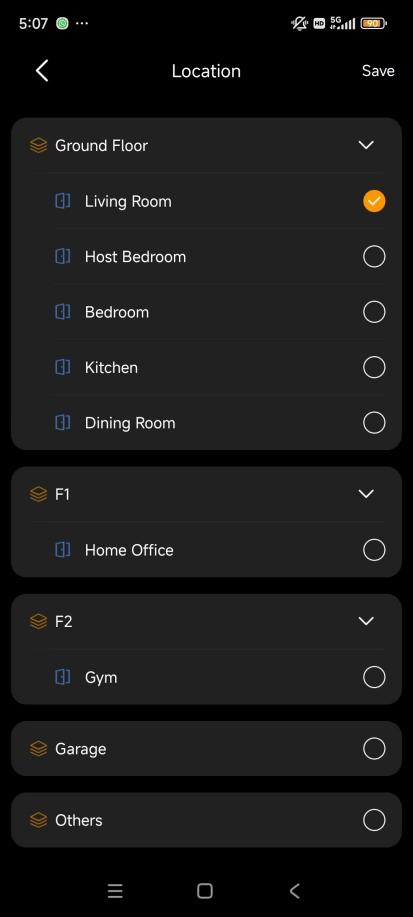
Tap Space, and select a new room.
Tap Save.
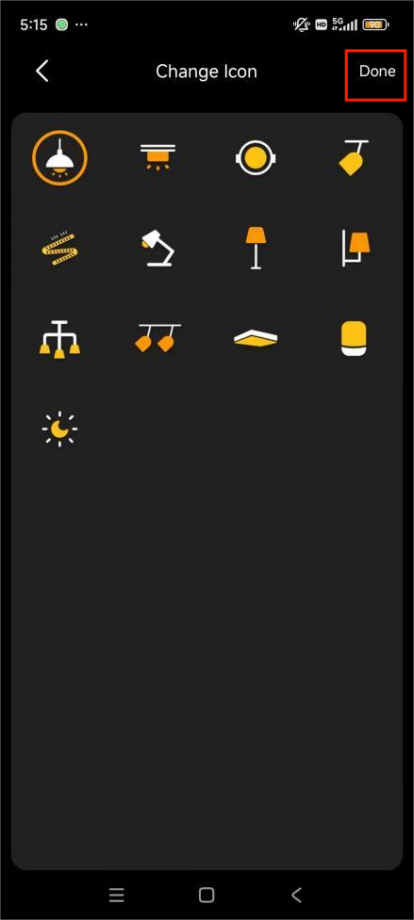
Change Device Icon
Personalize icons for lights, AC, and ventilation.
NOTE:
Supported only when the home center is running version 4.0.1 or later.
Go to Room or Category.
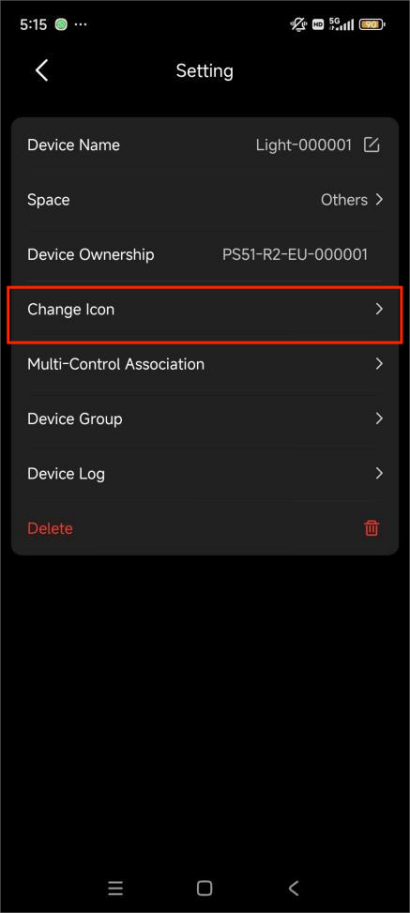
Tap [specific device card] >
 > Change Icon.
Select a new icon and tap Done.
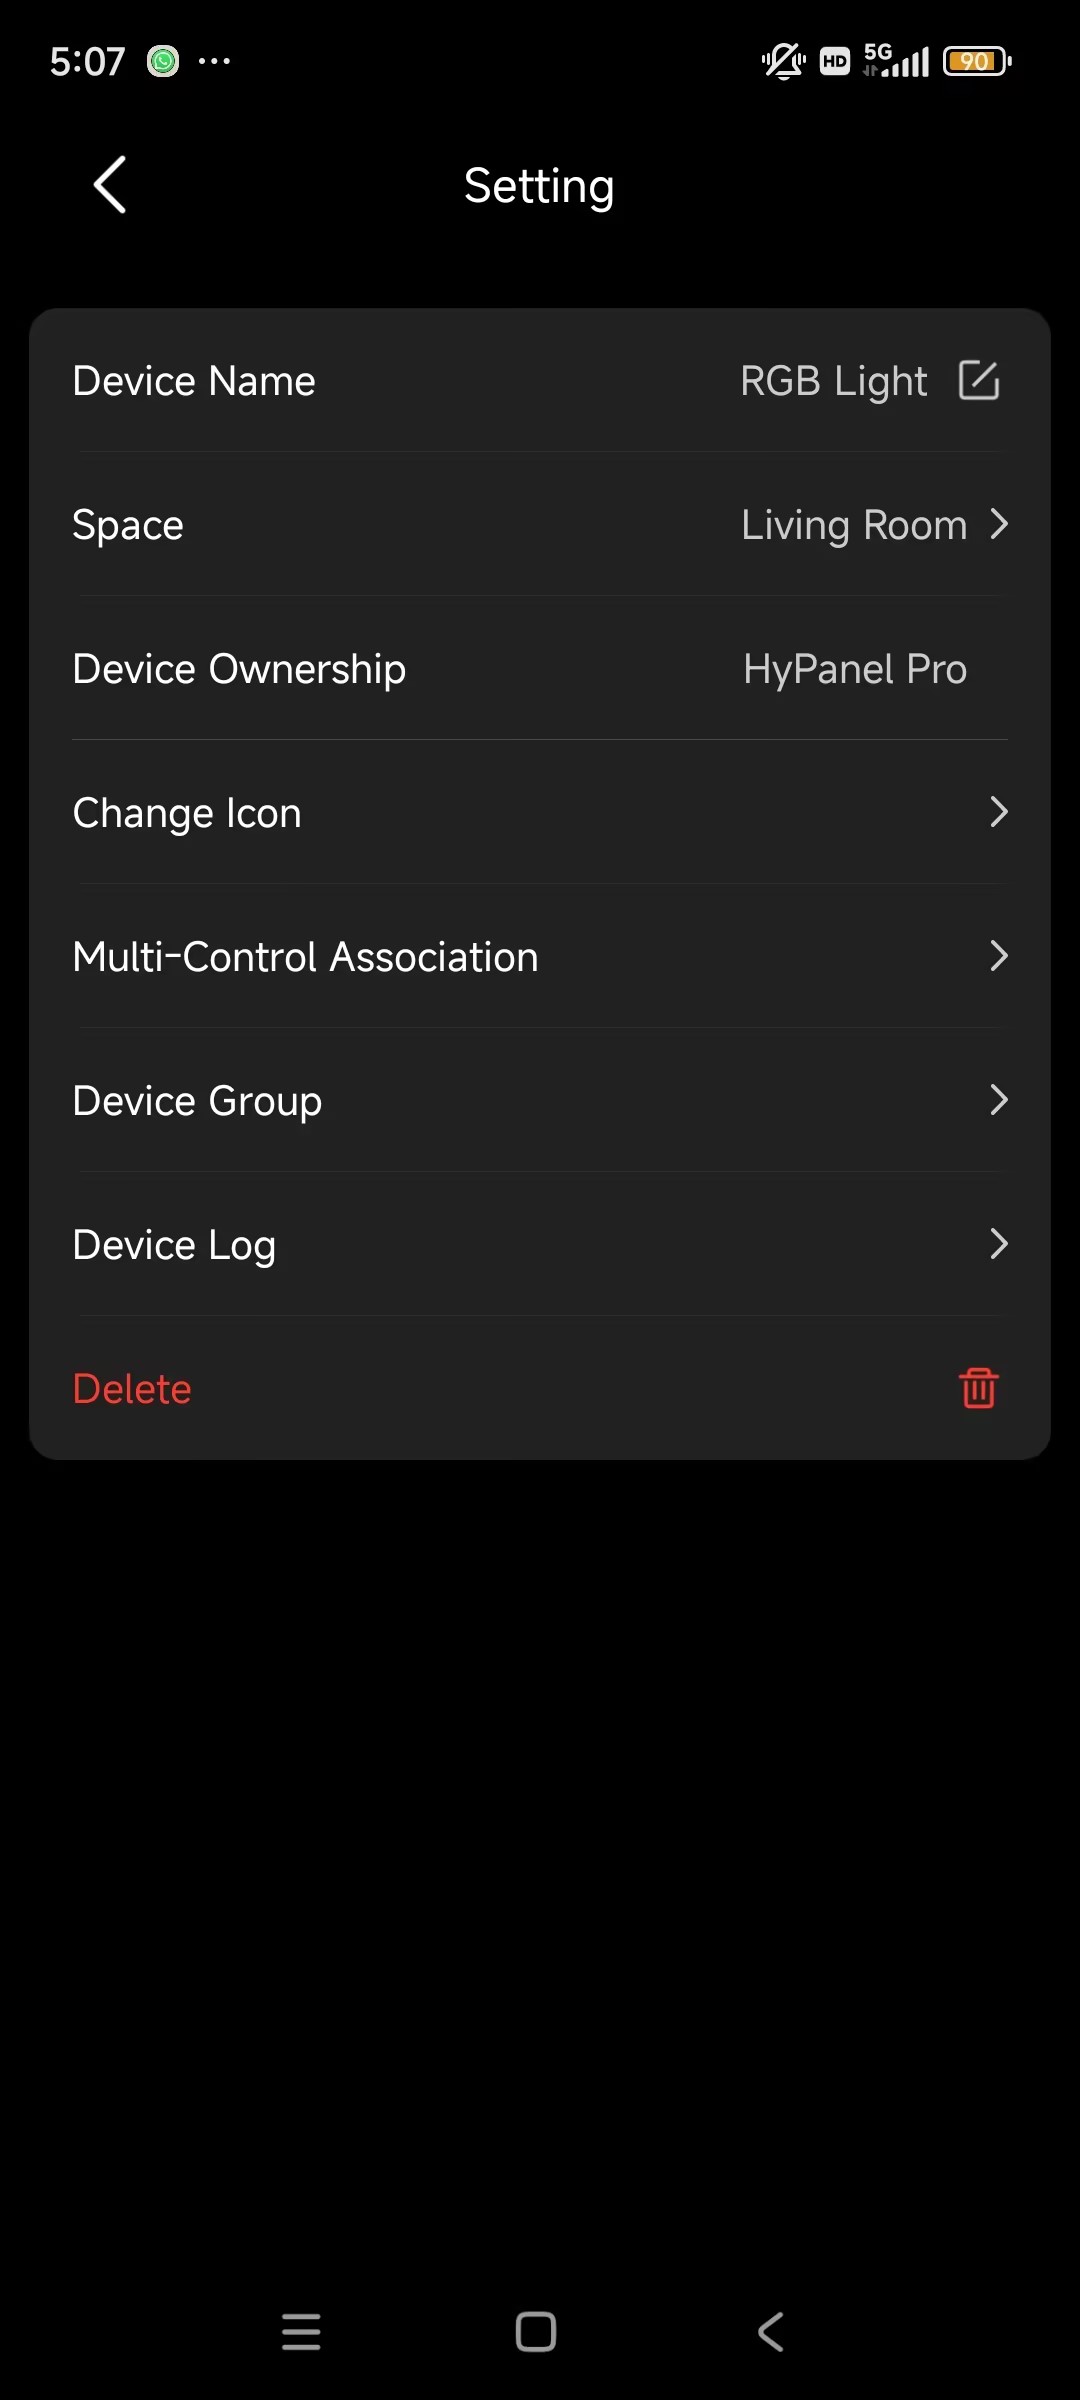
Remove a Device
To remove a damaged or offline device, tap [specific device card] >  > Delete.
NOTE:
This will permanently delete all device data and configurations.
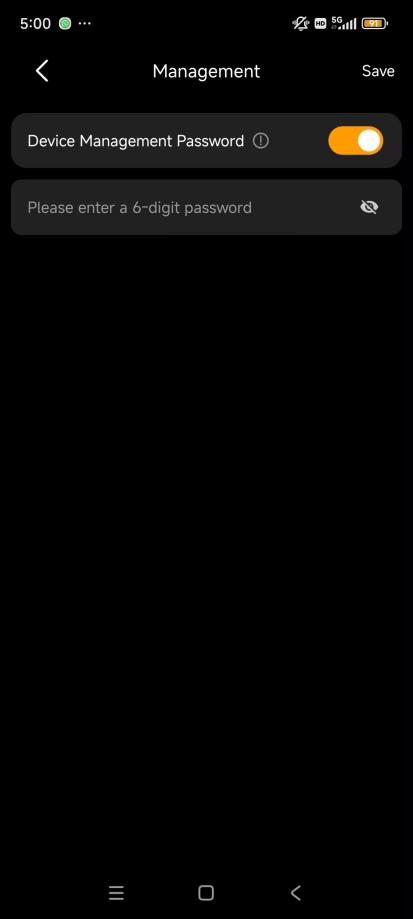
Restrict Device Editing
To prevent accidental changes by setting a 6-digit PIN:
Go to Me > Setting > Authorization Management.
Toggle on Device Management Password, and set your PIN.
Tap Save.
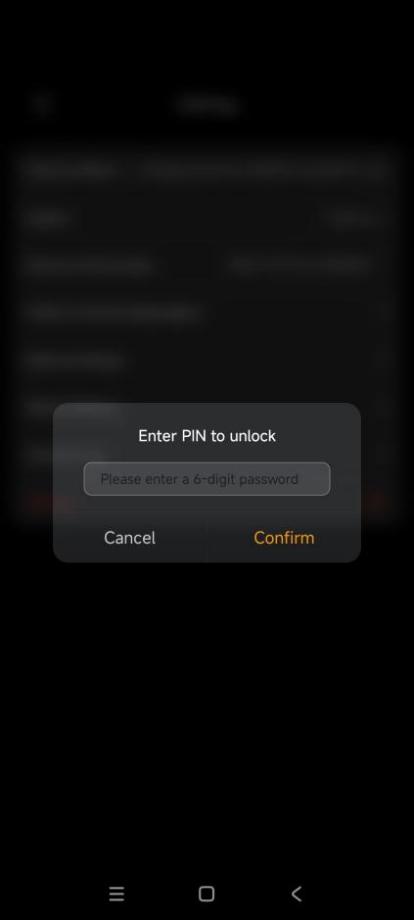
Once enabled, some setting changes including relay type modification and device deletion, will require the PIN.
Control Devices
One-Tap Control
Quickly control all devices of the same type in a specific room or across the entire home:
By Room
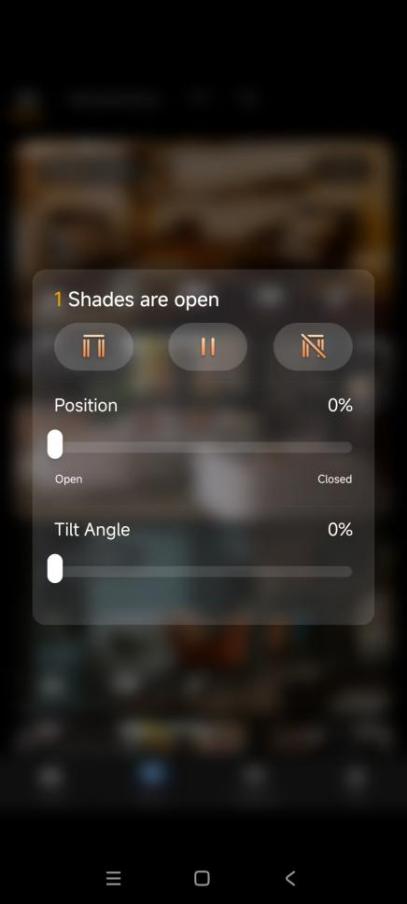
In the Room view, long press a device-type icon.
By Category
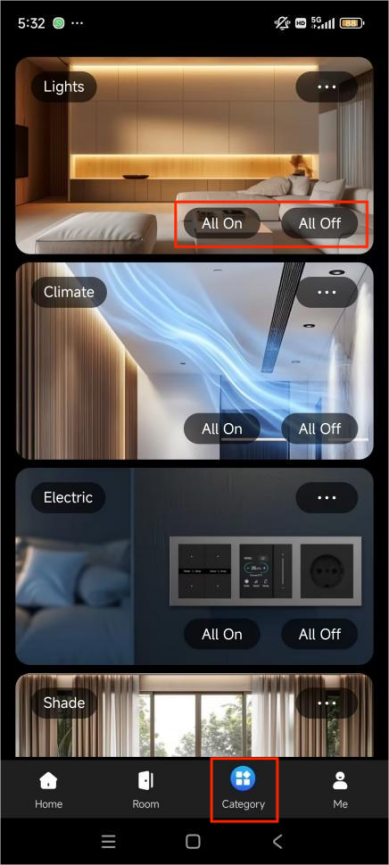
In the Category view, do the following:
Tap All On/All Off to control all devices of the selected type across all rooms.
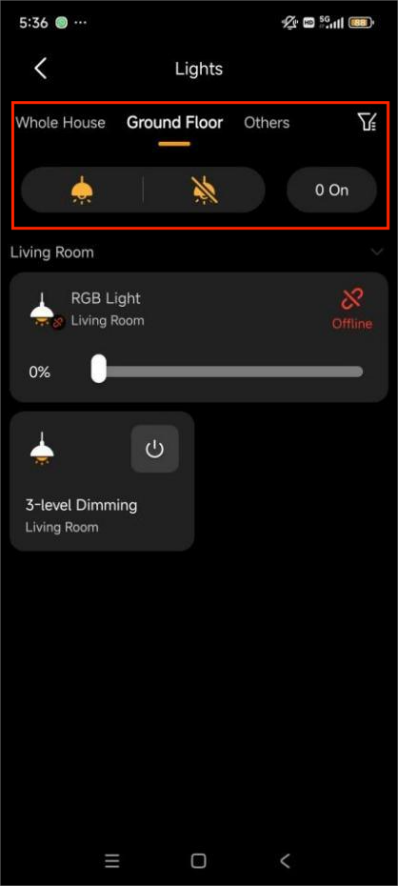
Tap a device type to open the details screen, select a room, and use the control button to turn devices on or off.
Group Control
You can group multiple lighting devices and switches to control them together.
NOTE:
Only shared features are available within a group. For example, grouping a switch light and a dimmable light will only show the switch function.
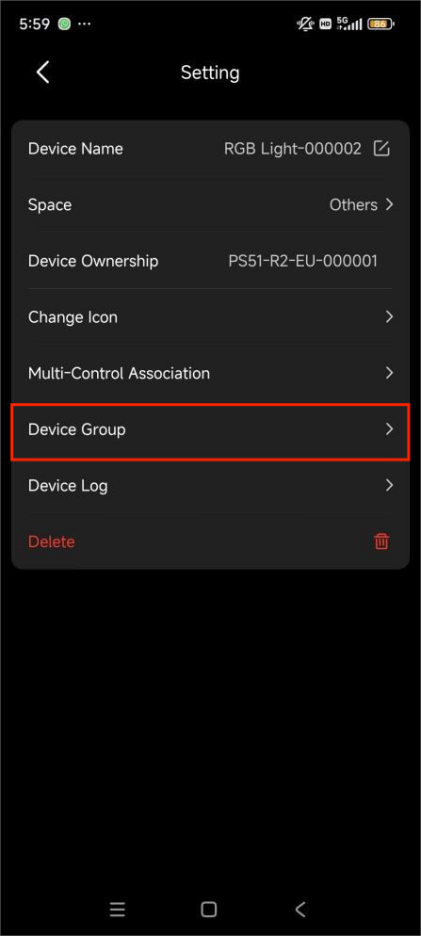
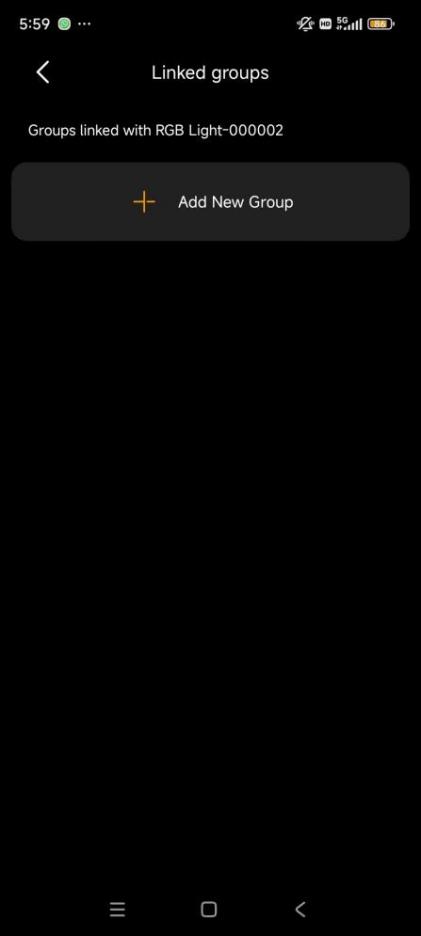
To customize a group and manage it:
Tap [specific device card] >
 > Device Group > Add New Group.
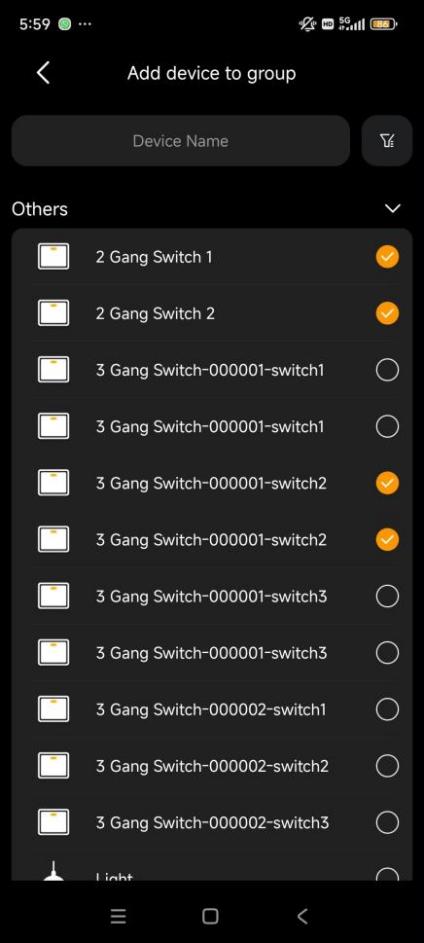
Tap Add device to include devices in the group. You can filter devices by name.
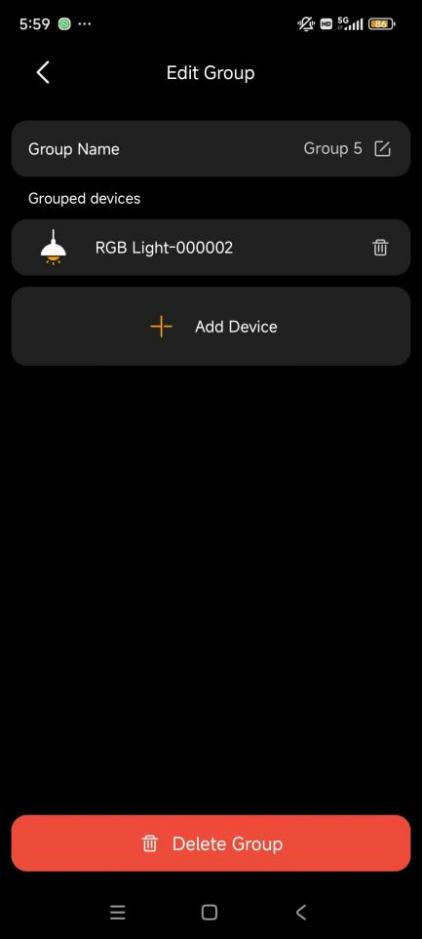
Name this group.
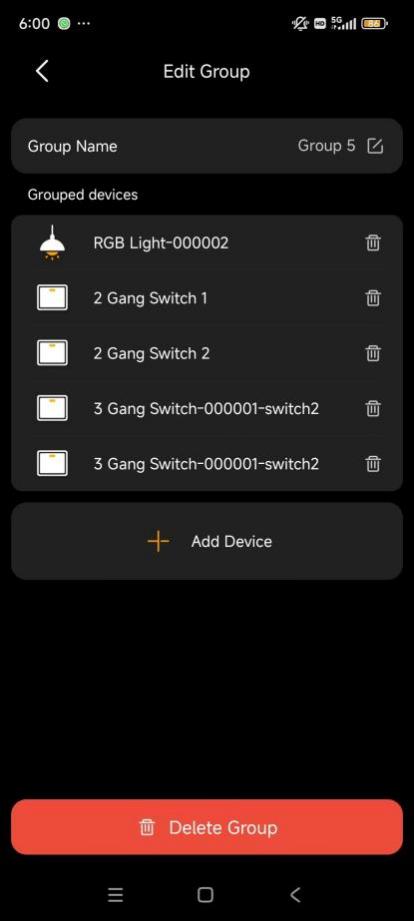
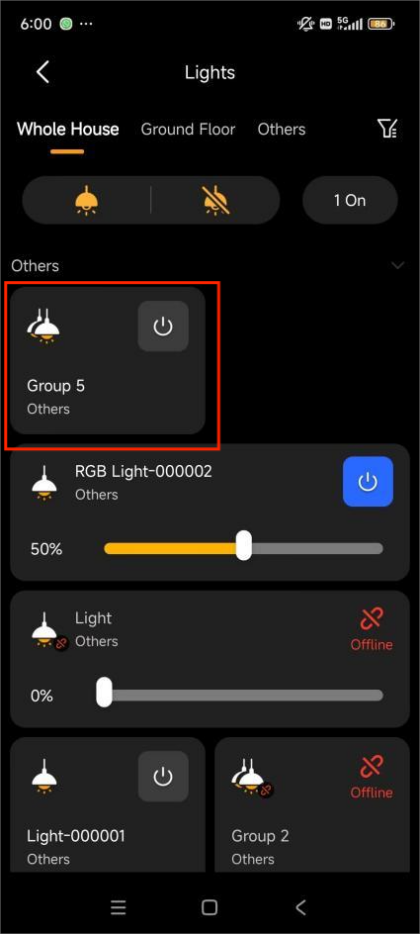
Once completed, the group will appear on the Room or corresponding Category screen.
Scheduled Control
NOTE:
Supported only when the home center is running firmware with version 4.0.1 or later.
This feature is available for switches, sockets, and thermostats.
Up to 30 timers are supported for a single device.
Select a device.
Tap the timer icon.
Set countdown time if needed.
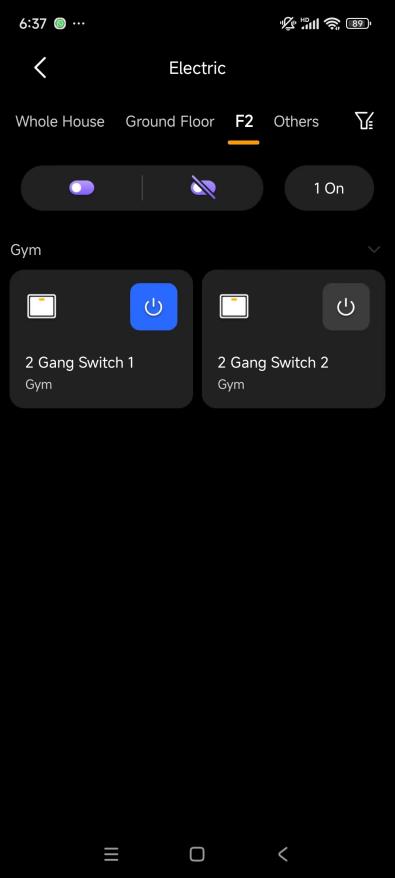
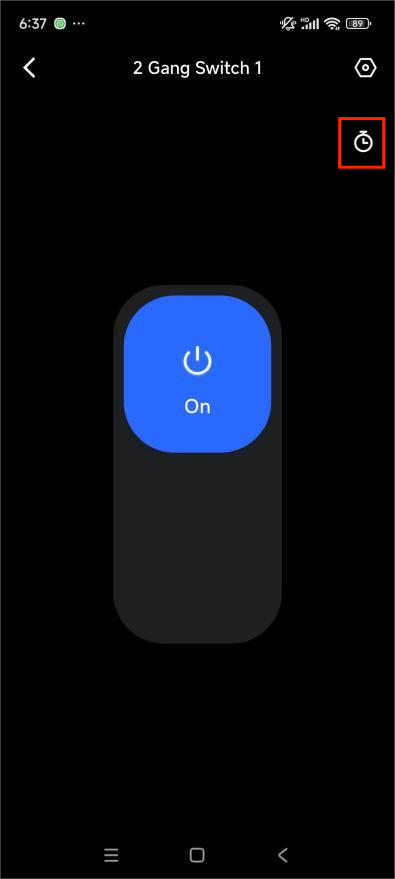
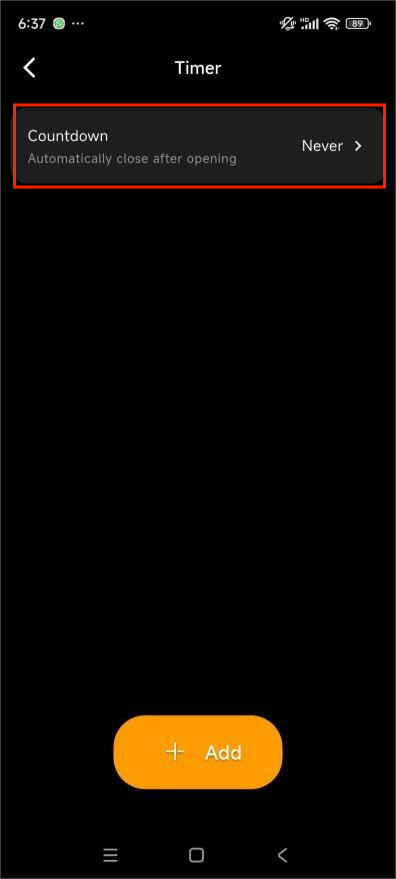
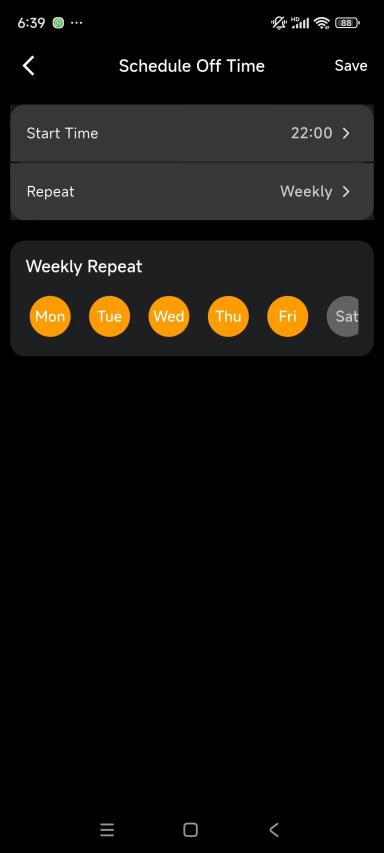
Tap Add, and select Schedule On Time or Schedule Off Time.
Set schedule and repeat.
Tap Save.
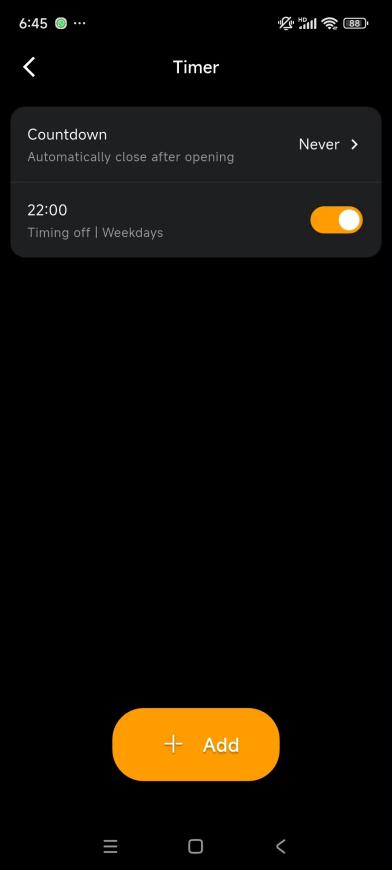
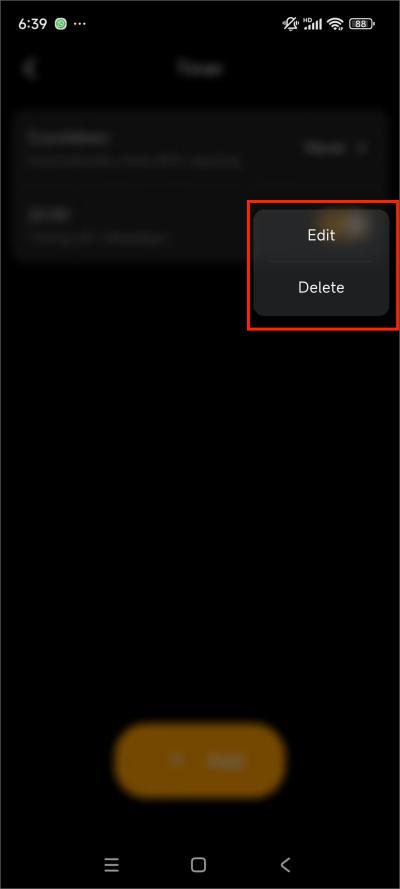
After adding:
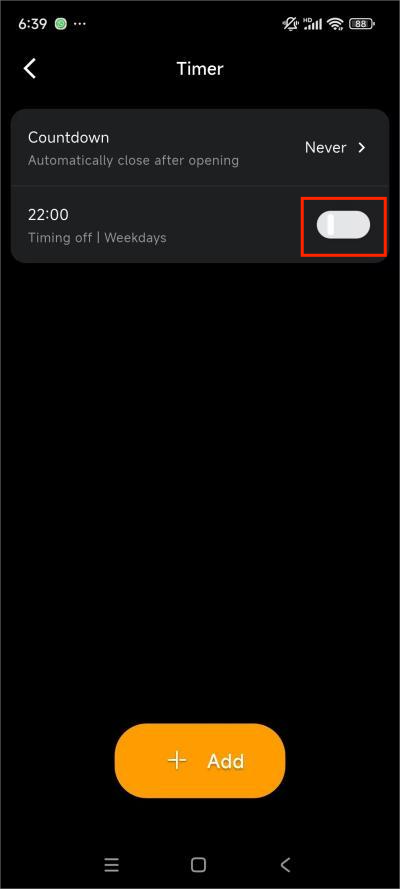
Toggle to enable/disable.
Long press to edit/delete.
Multi-Control Association
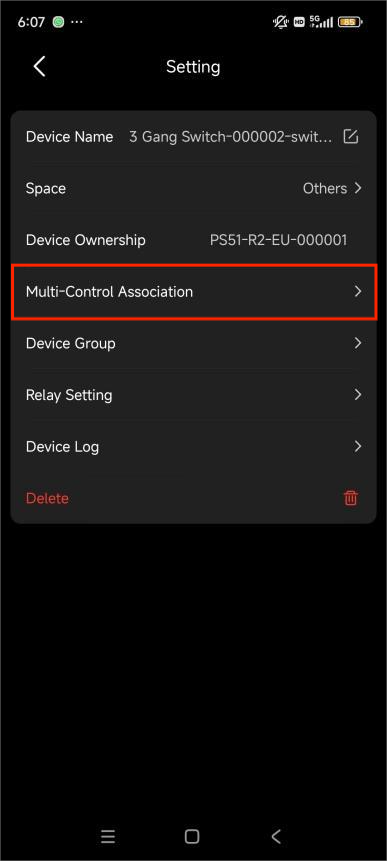
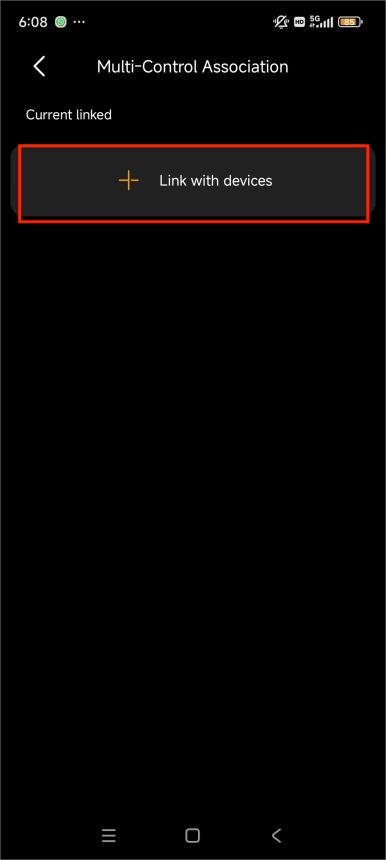
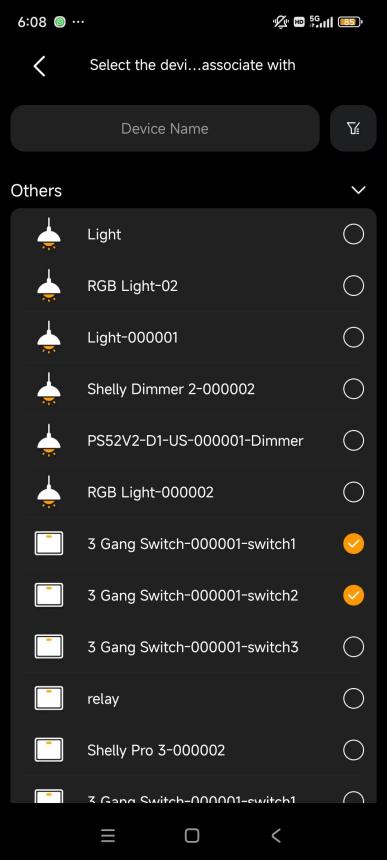
Link switches and lights to keep their on/off states synchronized. When one device's state changes, the associated devices will follow. For example, if multiple switches control the same light in a room, you can associate them so that their on/off states remain the same.
Go to [specific device card] >
 > Multi-Control Association.
Tap Link with devices to select devices. You can filter devices by name.
Control a Single Device
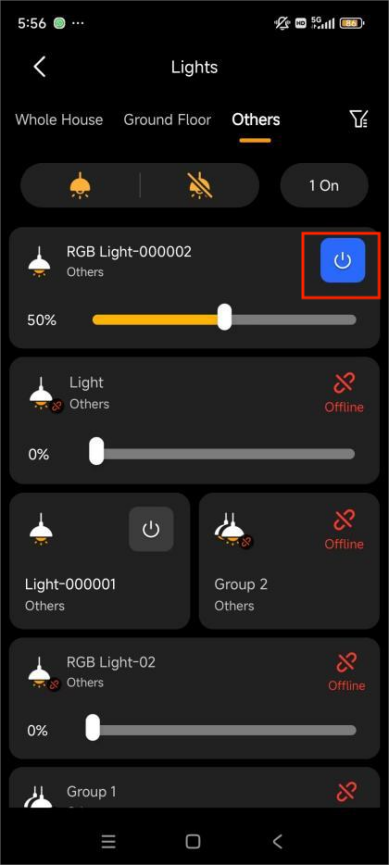
Tap the on/off button on the device card for quick control.
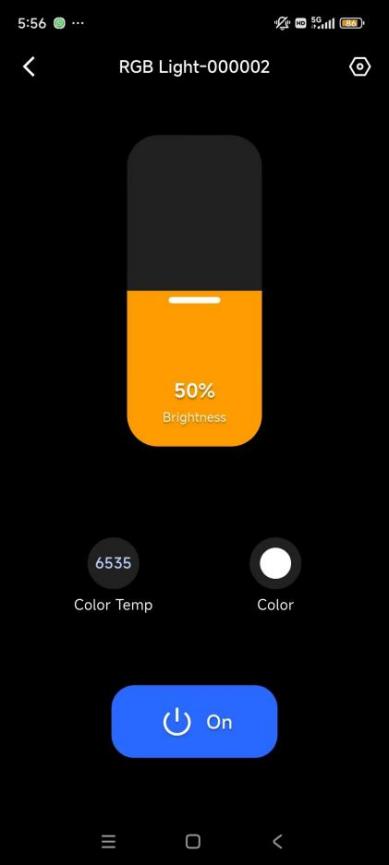
Tap the device card to access advanced controls (e.g., brightness, color).
Update Devices
Check and install firmware updates for akubela devices including panels and smart locks
NOTE:
Requires cloud connection to receive updates from the cloud server.
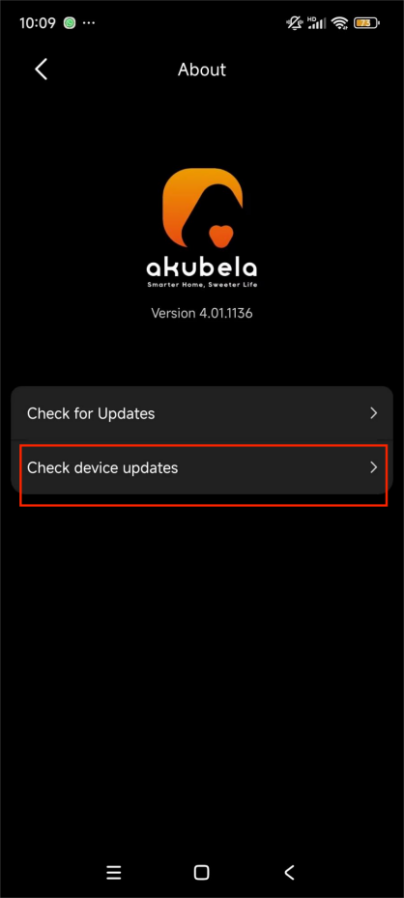
Go to Me > About > Check device updates.
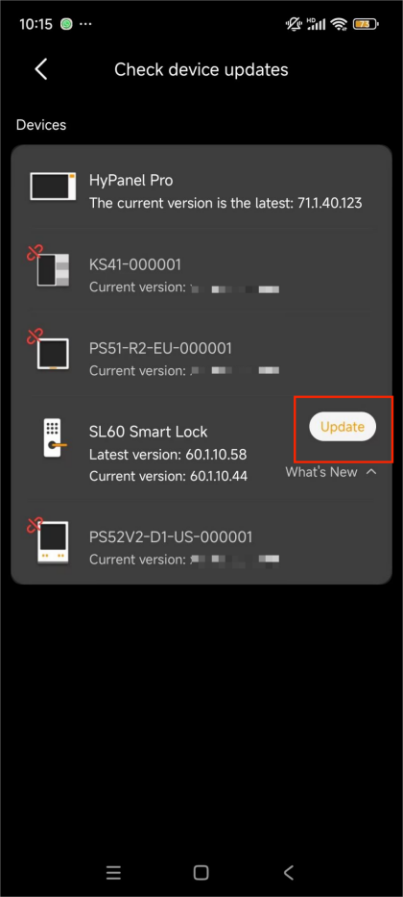
Tap Update to begin the download and installation if a new version is available.