Door Unlock Configuration
Akuvox door phone offers you two types of door access via PIN code and RF card. You can configure them on the device and web interface. Moreover, you can import or export the configured files to maximize your RF card configuration efficiency.
Configure Access Card Format
To integrate the RF card door access with the third-party intercom system, you need to match the RF card code format with the one used by the third-party system.
You can do this configuration on web Intercom > Card Setting interface.
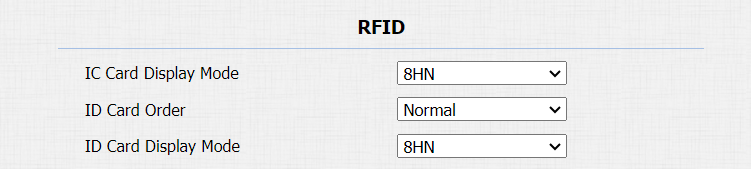
Parameters Set-up:
- IC Card Display Mode: select the card code format for the IC card for the door access among five format options: 8H10D; 6H3D5D(W26); 6H8D; 8HN; 8HR. The card code format is 8HN by default in the door phone.
- ID Card Order: select normal or reversed display of ID card.
- ID Card Display Mode: select the card format for the ID Card for the door access among five format options: 8H10D; 6H3D5D(W26); 6H8D; 8HN; 8HR. The card code format is 8HN by default in the door phone.
IC/ID Card Control
You can enable or disable the IC and ID card function if needed. You can navigate to Intercom > Card Setting.

Mifare Card Encryption
The device can read encrypted Mifare cards for greater security. When this feature is enabled, it reads the data in the cards’ designated sectors and blocks, not the UID.
Click here to view the details of encrypting and reading Mifare cards.
To do so, you can navigate to Intercom > Card setting > Mifare Card Encryption.
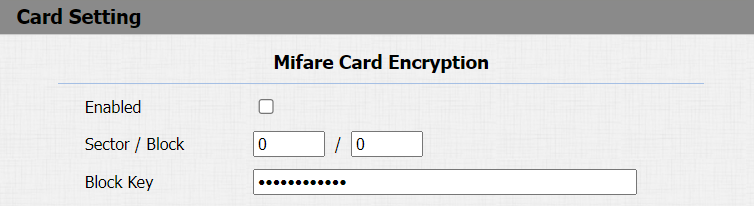
Parameter Set-up:
- Sector/Block: enter the sector and block in which the card number is located in the Mifare Card. For example, the card number can be in sector 3 and block 3 in the card.
- Block Key: enter the block password for access.
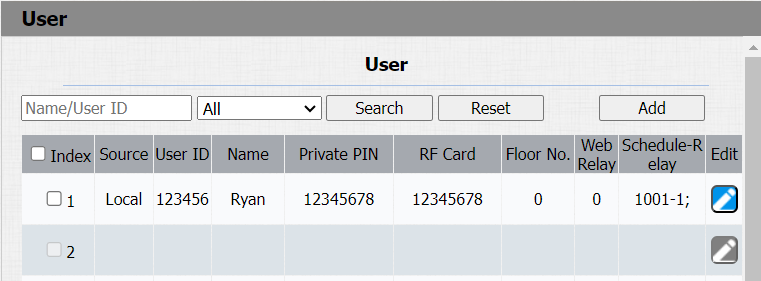
Configure RF Card for Door Unlock
You can tap the RF card on the reader and click obtain to add an RF card for the user. Path: Intercom > User.
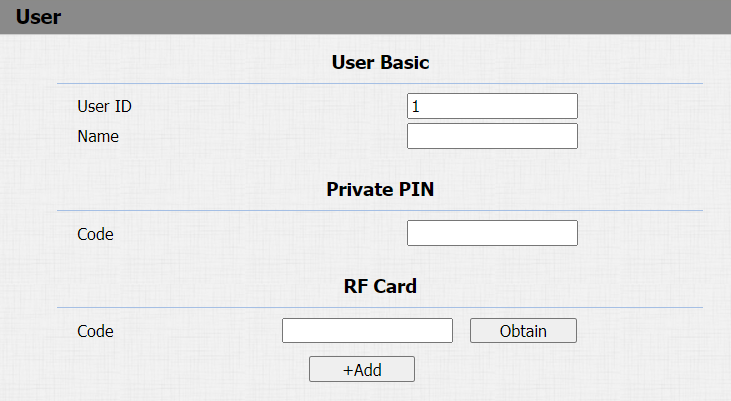
Parameter Set-up:
- User ID: enter the user ID. The user ID is 11 digits maximum in length and can not be reused for other users. The User ID can be generated automatically or manually.
- Code: place the card on the device card reader area and click Obtain.
- RF card with 13.56 MHz and 125 kHz can be applicable to the door phone for door access.
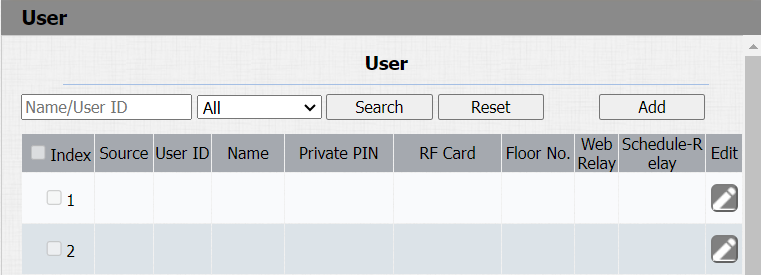
Edit the User-specific Door Access Data
You can search user(s)-specific door access and edit the door access data on the web Intercom > User interface.

- Users synchronized from the SmartPlus cannot be edited or deleted.
Import and Export User Data of Access Control
The door phone supports User Data of access control to be shared among Akuvox door phones through import and export while you can also export the facial data out of the door phone and then import it to a third-party device.
Click here to view how to import and export user data between Akuvox door phones.
To configure the configuration on the web Intercom > User > Import/Export User interface.

Parameter Set-up:
- AES Key For Import: enter the AES code before importing the AES-encrypted .tgz file to the door phone.
Configure Open Relay via HTTP for Door Unlock
You can unlock the door remotely without approaching the device physically for door entry by typing in the created HTTP command (URL) on the web browser to trigger the relay when you are not available by the door for door entry.
To configure it, go to Intercom > Relay > Open Relay Via HTTP.
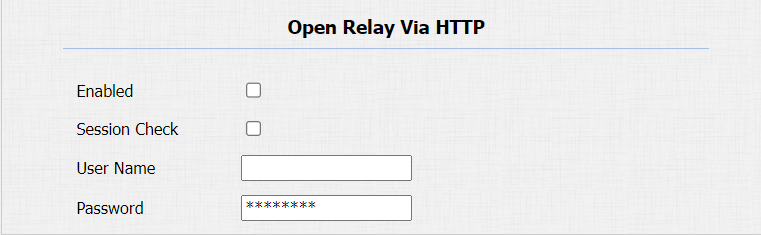
Parameter Set-up:
- Session Check: this feature is for some network security limitations, if you enable it, the door may not be unlocked in this way.
- User Name: enter the user name of the device's web interface, for example, admin.
- Password: enter the password for the HTTP command. For example, 12345.
Please refer to the following example:
http://192.168.35.127/fcgi/do? action=OpenDoor&UserName=admin&Password=12345&DoorNum=1
- DoorNum in the HTTP command above refers to the relay number #1 to be triggered for the door access.
Configure Exit Button for Door Unlock
When users need to open the door from inside by pressing the Exit button, you need to set up the Input terminal that matches the Exit button to activate the relay for the door access.
Click here to watch the instruction video.
Go to Intercom > Input interface.
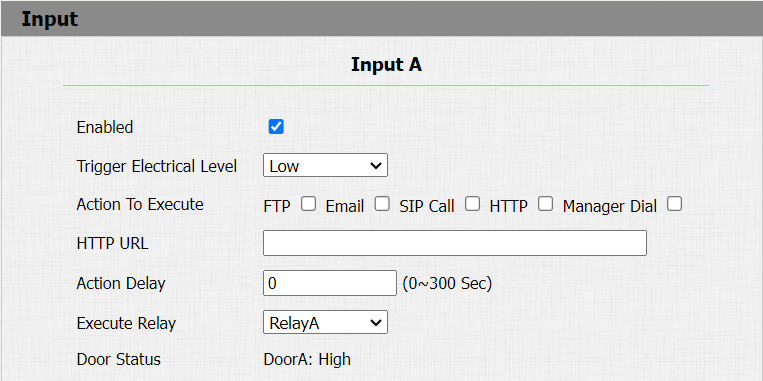
Parameter Set-up:
- Trigger Electrical Level: select the trigger electrical level options between High and Low according to the actual operation on the exit button.
- Action to Execute: select the method to carry out the action: FTP, Email, HTTP, TFTP, Manager Dial.
- HTTP URL: enter the URL if you select the HTTP to carry out the action.
- Action Delay: set up the delay time when the action is carried out. For example, if you set the action delay time at 5 seconds, then the corresponding actions will be carried out 5 seconds after you press the button.
- Execute Relay: set up relays to be triggered by the input.
- Door Status: display the status of the input signal.
Configure PIN Code for Door Unlock
There are two types of PIN codes for door access: public and private. A private PIN is unique to each user, while the public one is shared by residents in the same building or complex. You can create and modify both the public and private PIN codes.
Configure Public Code for Door Unlock
The device supports public pin codes for administrators or cleaners to open the door.
To do this configuration on the web Intercom > PIN Setting > Public PIN interface.

Parameter Set-up:
- PIN Code: customize 3-8 digit numbers for the public key value.
Configure Private PIN Code on the Web Interface
On the web interface, you can create the PIN code and customize additional settings, such as defining the door access schedule to determine when the code is valid and specifying which relay to open.
Path: Intercom > User.
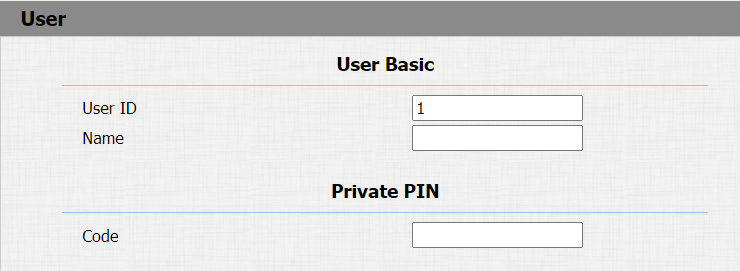
Parameter Set-up:
- Code: enter the user’s private PIN.
After user information and PIN code are entered, you can scroll down to Access Setting and configure private PIN code access control.
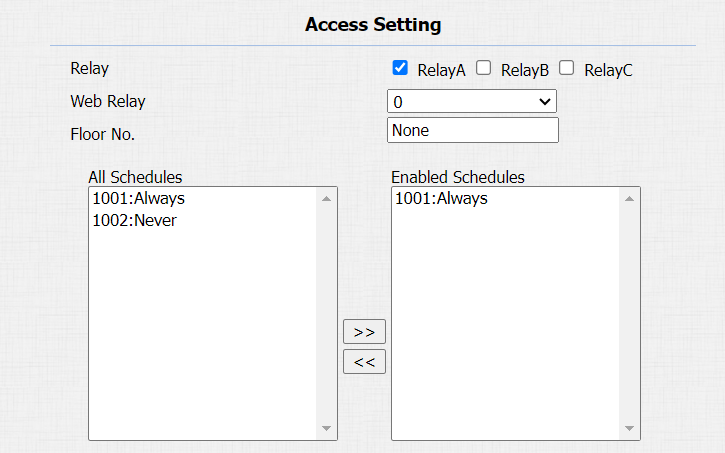
Parameter Set-up:
- Relay: select the relay(s) that you want to apply the private PIN code for the door unlock.
- Web Relay: select the specific number of web relay action commands you have set up on the web interface.
- Schedule: select from the created door access schedule on the left box and move the one to be applied to the user(s)-specific PIN code door access to the box on the right side.
You are required to enable the PIN code before you can get door access via private PIN code, you can navigate to Intercom > PIN setting > Private PIN.

Configure NFC for Unlock
NFC (Near Field Communication) is a popular way for door access. It uses radio waves for data transmission interaction. The device can be unlocked by NFC. You can keep the mobile phone closer to the device for door access.
To enable the NFC feature, go to Intercom > Card Setting > Contactless Smart Card.
