The S560-2 is a 2-wire indoor station designed for renovation and retrofit projects where existing 2-wire wiring needs to be reused. It provides a practical way to upgrade an existing intercom system without requiring a complete rewiring of the residence.
It can be easily integrated with Akuvox door phones for calling and door unlocking. This document explains how to configure S560-2 in on-premise projects without connecting to the SmartPlus Cloud or SDMC.
Wiring
Connect the S560-2 and the room door phone according to the installation requirements.
For the detailed wiring diagram and connection instructions, refer to the S560-2 Quick Guide.
In a typical deployment:
The S560-2 and the door phone are connected to the same NS-2 or NS-LP-2.
The NS-2 provides network connectivity and power to the connected devices.
The S560-2, room door phone, building entrance door phone, and community entrance door phone must be connected to the same local area network (LAN).
The S560-2 and door phone are assigned to the same residence by using the same room number.
Part 1: Configure S560-2’s Room Number
When the S560-2 is powered on for the first time, the red indicator flashes, and the device continuously plays a beep sound. This indicates that a room number must be configured before the device can be used.
Configure the room number in the following format:
*#aa*bb*cc#
Where:
aais the Building Number. Enter exactly two digits, for example,02.bbis the Floor Number. Enter exactly two digits, for example,02.ccis the Room Number. Enter exactly two digits, for example,03.
For example, to configure Building 02, Floor 02, and Room 03, enter:
*#02*02*03#
The supported number ranges:
Building Number: 01 to 09
Floor Number: 00 to 19
Room Number: 01 to 19
Note
The S560-2 checks each number as it is entered.
If the entered number does not follow the required format or is outside the supported range, the device plays an error tone.
If you press
*#, the device restarts the room-number input process.If no key is pressed for more than 10 seconds while entering the room number, the device automatically exits the configuration process.
Verify the Room Number
After the room number is configured, the device’s location information is automatically updated on the device’s Quick Start interface.
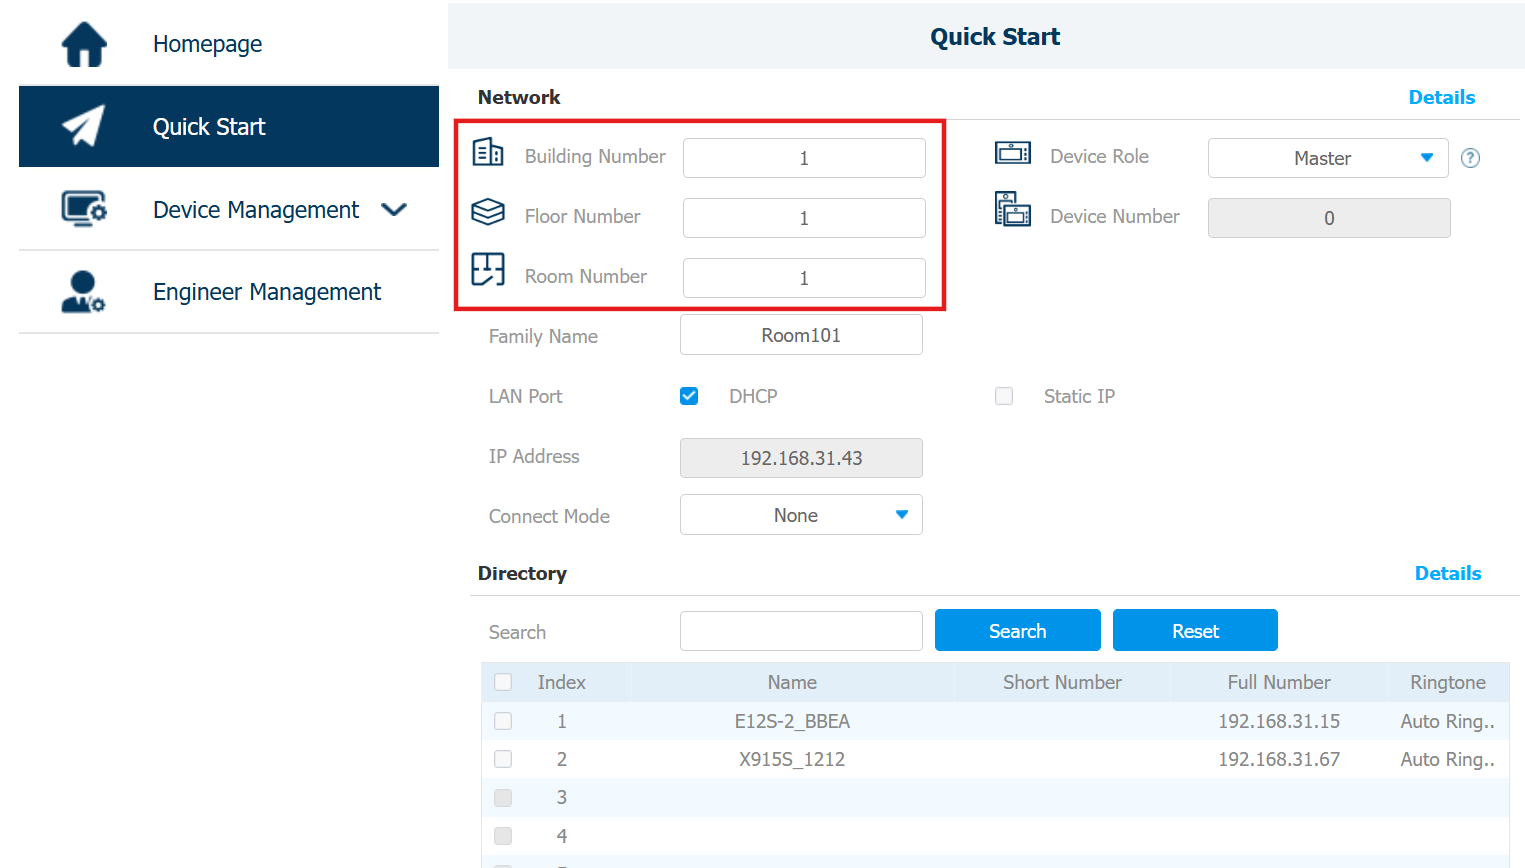
Check the Device Role
When multiple S560-2s use the same room number:
The first S560-2 that completes room-number configuration is automatically assigned as the Master indoor station.
Any subsequent S560-2 configured with the same room number is automatically assigned as a Slave indoor station.
Indoor stations with the same room number are automatically grouped into the same residence through the local network. No manual scanning or pairing is required between them.
You can check the device role on the device’s Quick Start interface.
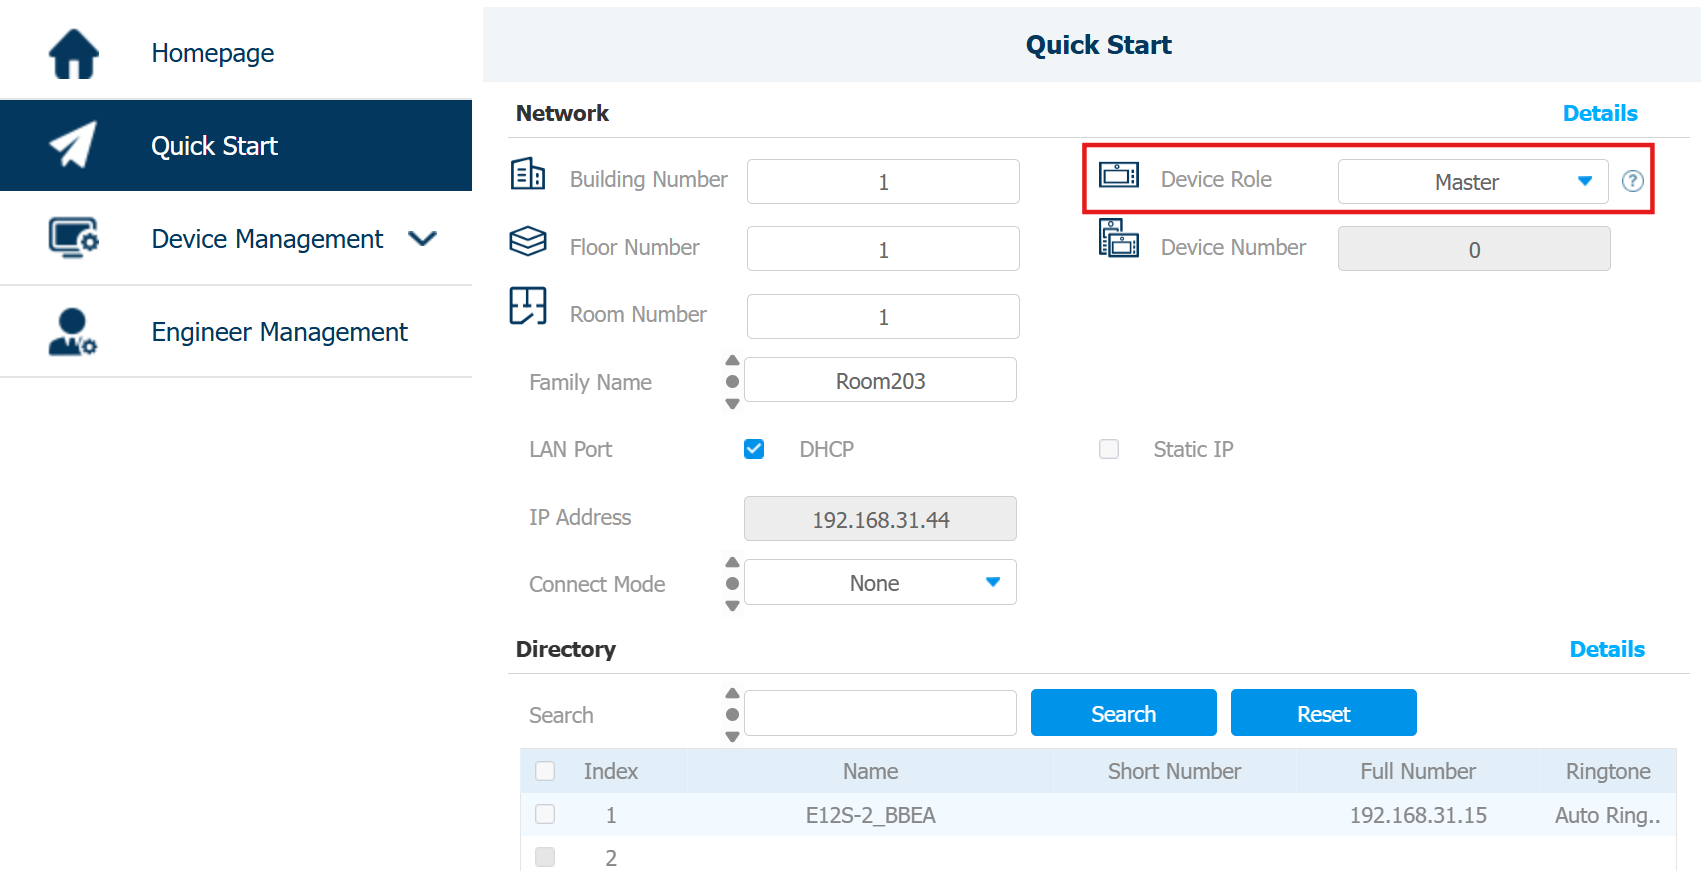
Note
The Master/Slave role is determined automatically according to the order in which the devices are configured. If you need to change the device arrangement, reset and reconfigure the devices as required.
Understand APIPA Address Assignment
The S560-2 supports automatic IP address assignment in an APIPA environment. When no DHCP server is available, devices automatically obtain an APIPA address to communicate with other devices on the same local network. No manual IP configuration is required.
The APIPA address follows this format:
169.254.abc.def
After the Building Number, Floor Number, Room Number, and device sequence information are configured, the indoor station and door phone automatically generate their APIPA addresses according to the configured room information.
The room-based APIPA address range is:
169.254.001.010 – 169.254.199.199
For indoor stations and door phones assigned to an apartment/room, the address is generated based on the following information:
IP Field | Corresponding Information | Supported Range |
|---|---|---|
| Floor Number | 0–19 |
| Building Number | 1–9 |
| Room Number | 1–19 |
The values correspond to the room information configured on the device:
Floor Number (
ab): Uses the configured Floor Number.Building Number (
c): Uses the configured Building Number.Room Number (
de): Uses the configured Room Number.
Part 2: Pair with a Door Phone in the Same Room
After configuring the room number, use the Master S560-2 to scan for and pair with the door phone.
Note
Only the Master S560-2 can initiate door phone scanning and pairing.
The Master S560-2 cannot initiate scanning and pairing when it is connected to the SmartPlus Cloud.
The S560-2 cannot pair when the total number of intercom devices detected exceeds 10.
On the Master S560-2, press and hold
*for approximately 5 seconds. The S560-2 starts scanning and pairing automatically. During the pairing process:
The device plays a short double-beep every second.
The scanning process lasts up to 5 minutes.
Press the pairing button on the door phone.
When successfully paired, the S560-2 plays a short beep.
If the pairing fails, the S560-2 plays three short, rapid beeps.
To exit the scanning and pairing process, press
#.If no device is paired within 5 minutes, the S560-2 automatically exits the scanning and pairing mode.
Part 3: Remove a Paired Device
The Master S560-2 cannot individually remove a paired device. To remove the pairing relationship, the corresponding device must be reset.
Then, remove the contact from the S560-2 ‘s Quick Start interface.
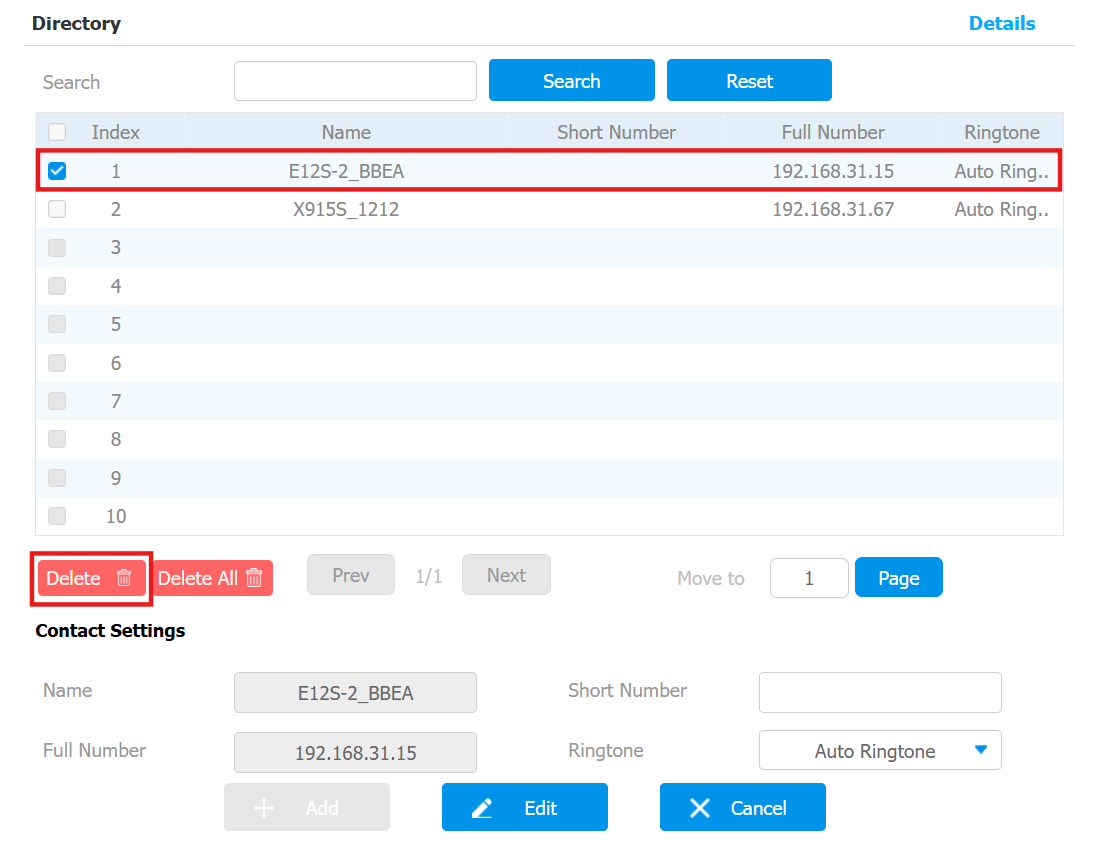
Part 4: Set the Door Phones in Public Areas
For door phones installed at building entrances or community entrances, refer to:
See the Set the Door Phones in Public Areas section in the Self-Organizing Network Solution for Community Projects guide.
Part 5: Test the Call Function
After the S560-2 and door phone are successfully paired, test the call function.
Initiate a Call from the Door Phone
Based on different models and their installation locations, the ways to call the S560-2 are different.
At the Apartment Door:
R20A-2/E12-2: Press the push button.
R20K-2: Enter the room number and press the Call button.
At the Building Gate:
R28/S532: Enter the [floor number+room number], e.g., 001, and press the Call button.
At the Community Entrance:
S532/X915: Enter the [building number#floor number+room number], e.g., 1#001, and press the Call button.
Verify the Door Phone Information
On the S560-2 web interface, go to Quick Start > Directory.
The paired door phone information should be displayed in the Directory.
Use this information to verify that the door phone has been successfully associated with the S560-2.
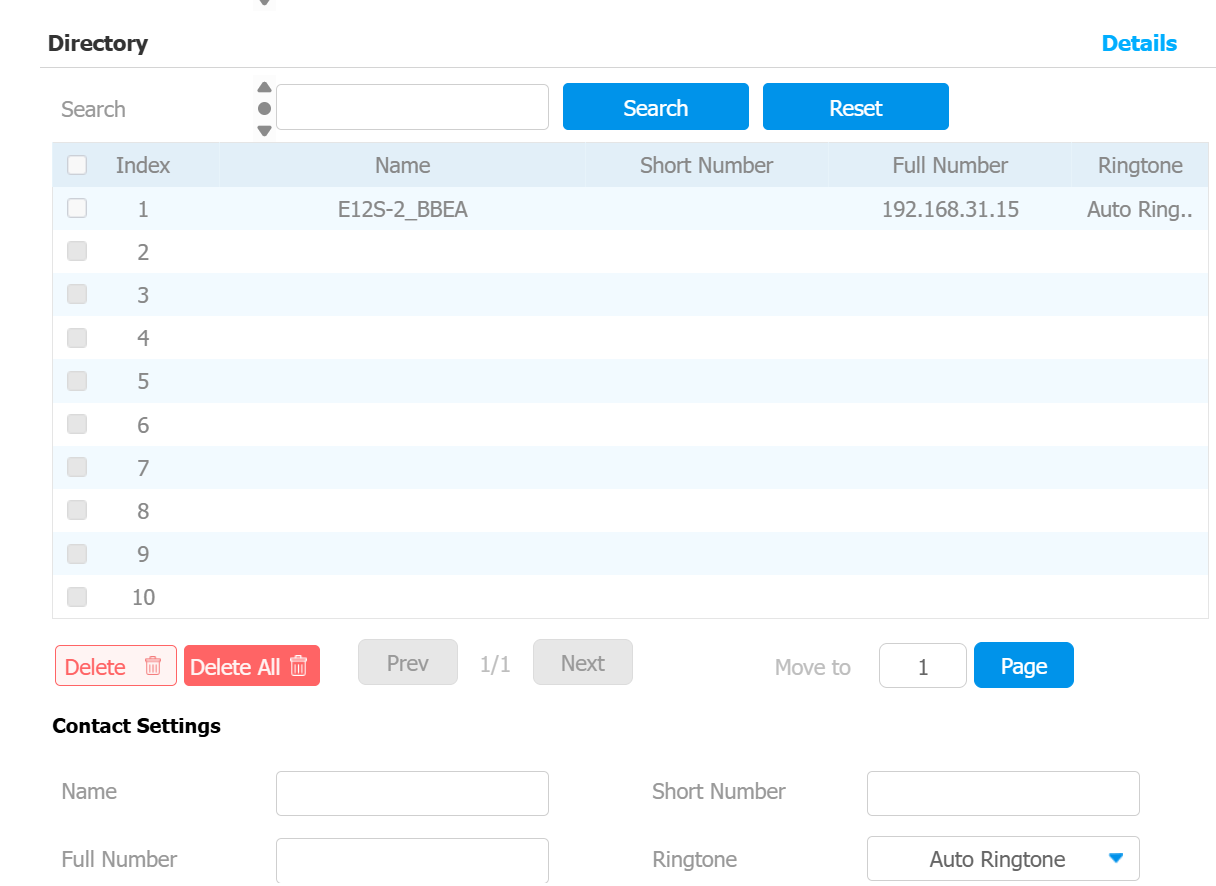
Part 6: Configure Door Unlocking
After confirming that calling works properly, configure the unlock keys on the S560-2 to unlock the door through the door phone.
Check the Door Phone Relay Information
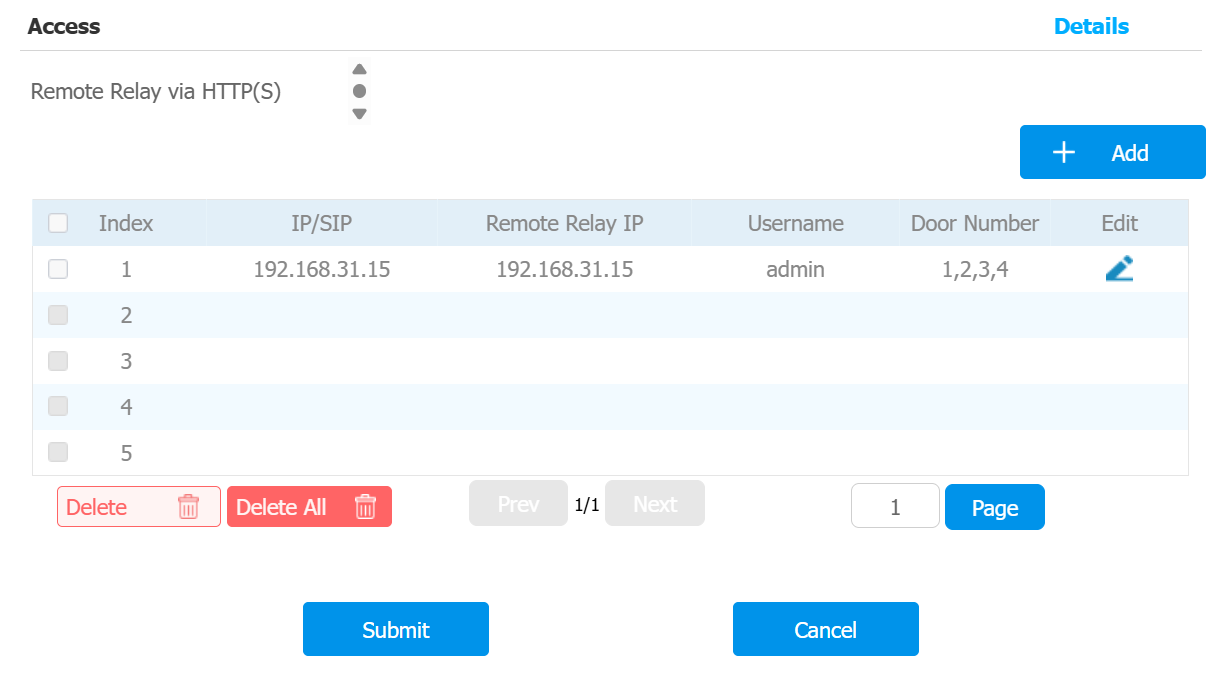
On the S560-2 web interface, go to Quick Start > Access.
Check the Remote Relay by HTTP information associated with the door phone.
Configure the Unlock Keys
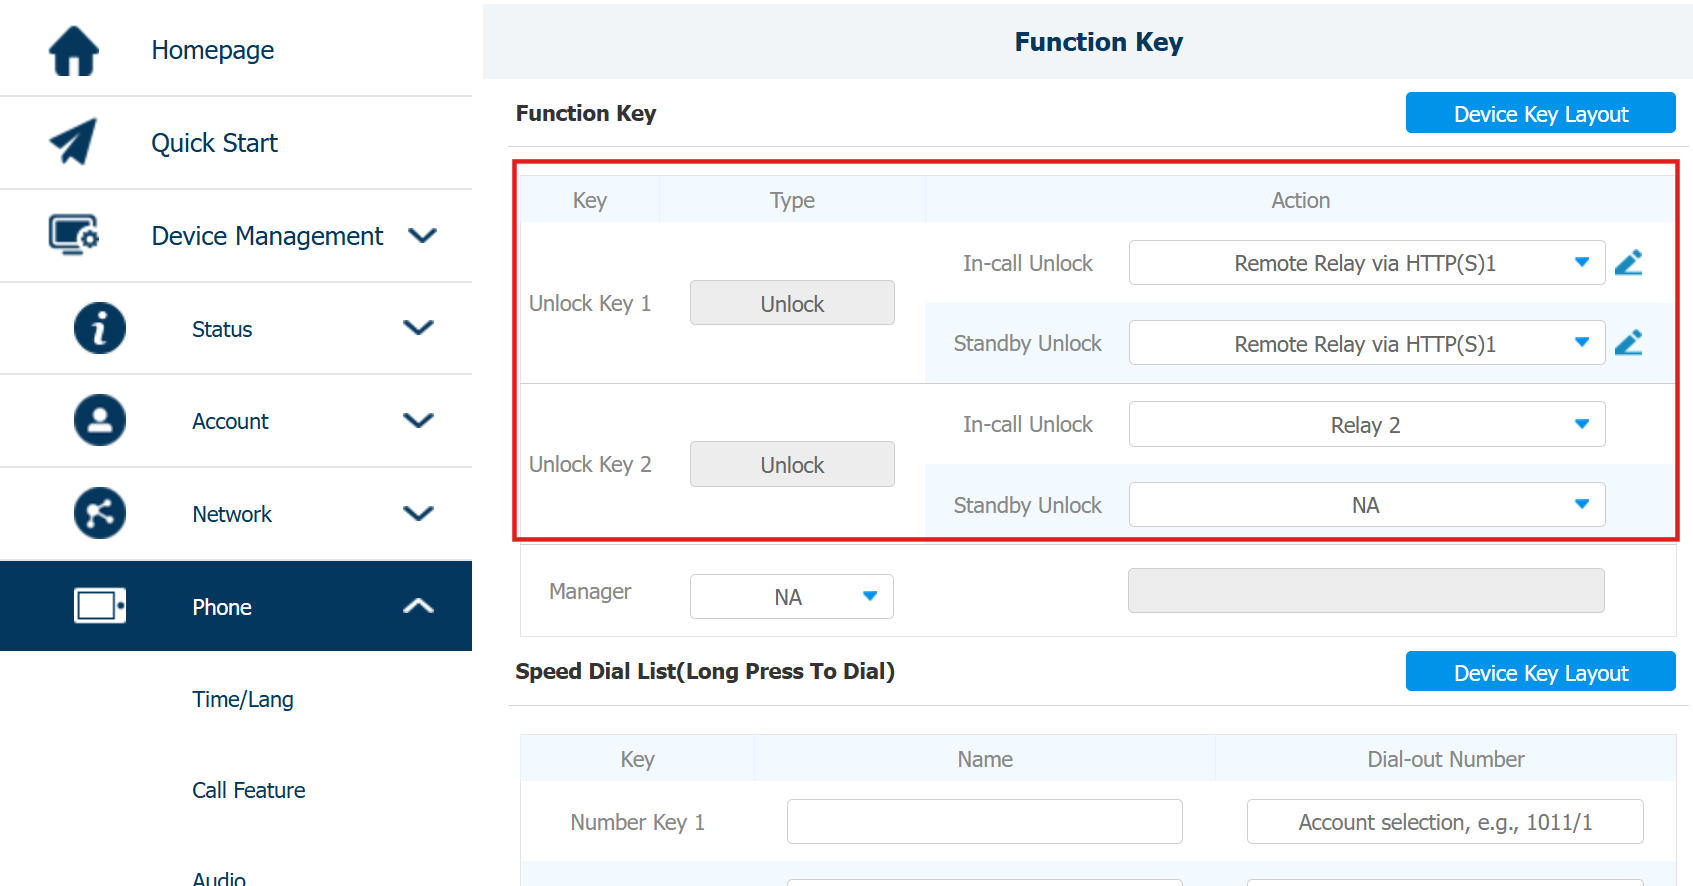
Go to Device Management > Phone > Function Key.
Configure the two unlock keys according to the required installation scenario.
Select the corresponding unlock key. Unlock Key 1: The unlock key located on the handset. Unlock Key 2: The unlock key located on the handset base.
Set its action to the door phone's Remote Relay via HTTP command for In-call Unlock/Standby Unlock.
Click Submit.
Test Door Unlocking
After the unlock keys are configured, test the unlocking function:
Initiate a call from the door phone, or leave the S560-2 in standby mode.
Press the configured unlock key on the S560-2.
Verify that the door phone activates its relay and unlocks the door.