IP Call & IP Call Configuration
Un appel IP est un appel direct entre deux interphones utilisant leurs adresses IP, sans serveur ni PBX. Les appels IP fonctionnent lorsque les appareils sont sur le même réseau.
To do this configuration on web Phone > Call Feature > Direct IP interface.

Parameters Set-up:
- Direct IP port: set up the IP direct call port, 5060 is the default port.
SIP Call &SIP Call Configuration
Le protocole d’initiation de session (SIP) est un protocole de transmission de signalisation utilisé pour initier, maintenir et terminer des appels.
Un appel SIP utilise SIP pour envoyer et recevoir des données entre appareils SIP, et peut utiliser Internet ou un réseau local pour offrir une communication de haute qualité et sécurisée. L’initiation d’un appel SIP nécessite un compte SIP, une adresse SIP pour chaque appareil, ainsi que la configuration des paramètres SIP sur les appareils.
SIP Account Registration
Chaque appareil a besoin d’un compte SIP pour effectuer et recevoir des appels SIP.
Les dispositifs d’interphone Akuvox prennent en charge la configuration de deux comptes SIP, qui peuvent être enregistrés sur deux serveurs indépendants.
Cliquez ici pour voir l’exemple d’enregistrement du compte SIP.
Configure SIP Account Configuration
To perform the SIP account setting on the Web Account > Basic > SIP Account Interface. Register Name, User Name, and Password are provided by the SIP account administrator.
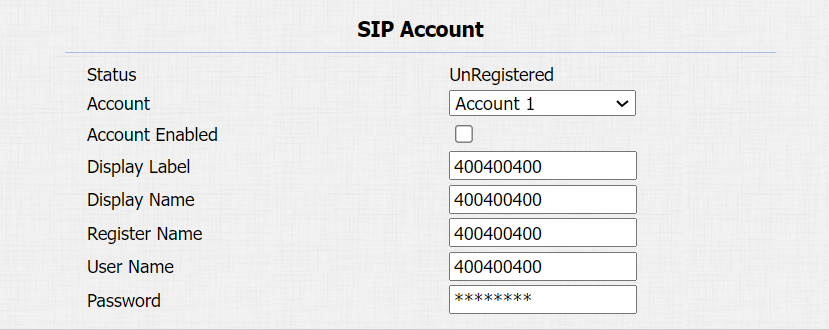
Parameter Set-up:
- Status: check to see if the SIP account is registered or not.
- Account: select the exact account (Account 1&2) to be configured.
- Display Name: configure the name, for example, the device’s name to be shown on the device being called to.
- Display Label: configure the device label to be shown on the device screen.
SIP Server Configuration
Les serveurs SIP permettent aux appareils d’établir et de gérer des sessions d’appel avec d’autres interphones en utilisant le protocole SIP. Ils peuvent être des serveurs tiers ou un PBX intégré dans un moniteur intérieur Akuvos.
To do this configuration on web Account > Basic > SIP Server interface.

Parameter Set-up:
- Server IP: enter the primary server IP address number or its URL.
- Server IP: enter the backup SIP server IP address or its URL.
- Port: set up SIP server port for data transmission.
- Registration Period: set up SIP account registration time pan. SIP re-registration will start automatically if the account registration fails during the registration time span. The default registration period is 1800, ranging from 30-65535s.
Configure Outbound Proxy Server
Un serveur proxy sortant est utilisé pour recevoir tous les messages de demande initiant et les acheminer vers le serveur SIP désigné afin d’établir une session d’appel via une transmission de données par port.
To set it up on the device web Account > Basic > Outbound Proxy Server Interface.
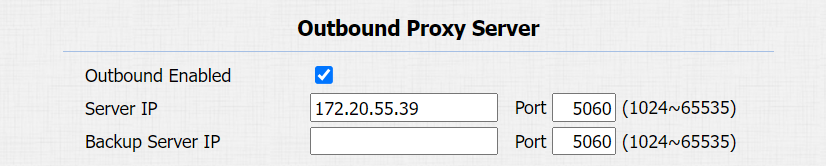
Parameter Set-up:
- Server IP: enter the SIP address of the primary outbound proxy server.
- Port: enter the Port number to establish a call session via the primary outbound proxy server.
- Backup Server IP: set up backup server IP for the backup outbound proxy server.
- Port: enter the port number for establishing call sessions via the backup outbound proxy server.
Configure Data Transmission Type
Les dispositifs d’interphone Akuvox prennent en charge quatre protocoles de transmission de données : le Protocole de Datagramme Utilisateur (UDP), le Protocole de Contrôle de la Transmission (TCP), la Sécurité de la Couche de Transport (TLS) et le DNS-SRV.
To do this configuration on web Account > Basic > Transport Type interface.

Parameter Set-up:
- UDP: select UDP for unreliable but very efficient transport layer protocol. UDP is the default transport protocol.
- TCP: select TCP for a reliable but less-efficient transport layer protocol.
- TLS: select TLS for secured and Reliable transport layer protocol.
- DNS-SRV: select DNS-SRV to obtain a DNS record for specifying the location of servers. And SRV not only records the server address but also the server port. Moreover, SRV can also be used to configure the priority and the weight of the server address.
Configure Calling Feature
DND
La fonction Do Not Disturb (DND) empêche les appels SIP entrants non désirés, assurant ainsi une mise au point ininterrompue. Cela permet aussi de définir un code à envoyer au serveur SIP lors du refus d’un appel.
Go to Phone > Call Feature > DND interface.

Parameter Set-up:
- Return Code When DND: select what code should be sent to the calling device via the SIP server. 404 for not found; 480 for temporary unavailable; 486 for busy here; 606 for decline.
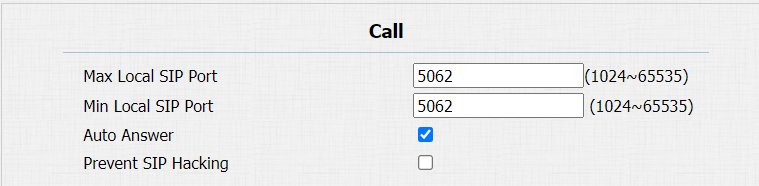
Enable Prevent SIP Hacking
L’écoute clandestine par téléphone Internet est une attaque réseau qui permet aux parties non autorisées d’intercepter et d’accéder au contenu des sessions de communication entre les utilisateurs de l’interphone. Cela peut exposer des informations sensibles et confidentielles aux attaquants. La protection contre le piratage SIP est une technique qui protège les appels SIP contre toute compromission sur Internet.
You can enable Prevent SIP Hacking if you only want to receive the calls made by the callers in your contact list. To enable it, go to Account > Advanced > Call.
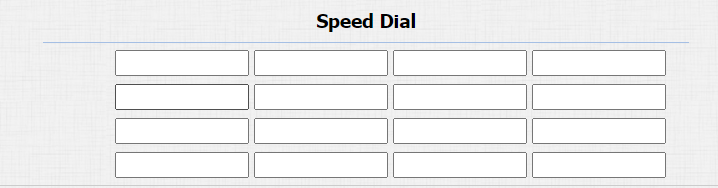
Speed Dial Call
Speed Dial is used to quickly initiate the pre-configured numbers by pressing the Dial key. You can create up to 16-speed dial numbers. To do the configuration on the web Intercom > Basic > Speed Dial interface.
Group Call
You can make calls to a group of numbers by pressing the on the device dial pad. To set the group call, go to Intercom > Basic > Manager Dial.
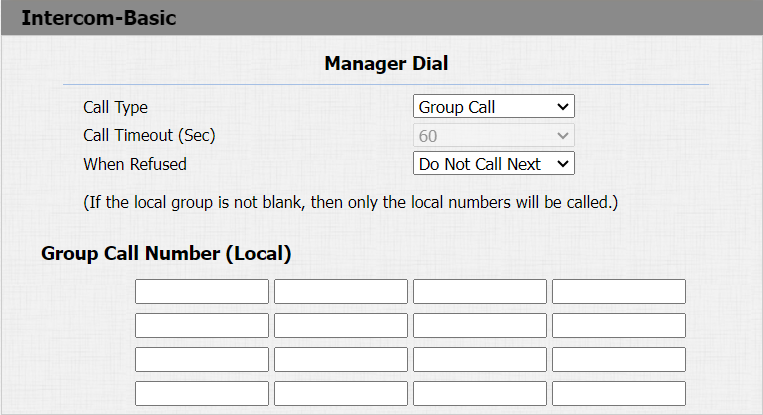
Parameter Set-up:
- Call type: select Group Call.
- Group Call Number (Local): enter the group call number. If you fill in the local group call number, then the local group number will be called instead of the SmartPlus group call number.
Sequence Call
L’appel de séquence est une fonctionnalité qui vous permet de composer un groupe de numéros dans un ordre prédéfini jusqu’à ce que l’un d’eux réponde. Cette fonctionnalité est prise en charge par Akuvox SmartPlus, qui fournit un ensemble de numéros d’appel de séquence pour l’application. Veuillez cliquer
pour la configuration détaillée.
To do the configuration on the web Intercom > Basic > Manager Dial interface.
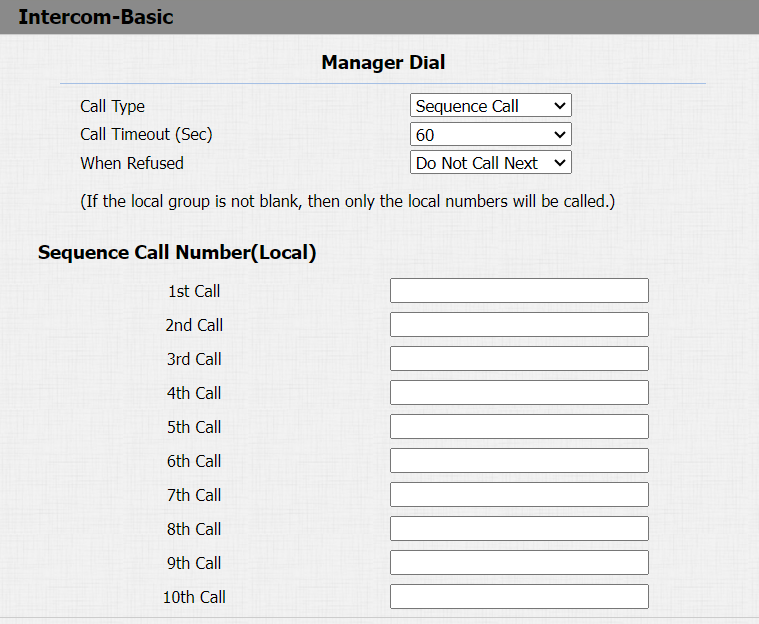
Parameters Set-up:
- Call Type: select Sequence Call.
- Call Timeout (Sec): set the call timeout before calling the next called party when the first called party does not receive the call within the timeout.
- When Refused: if you select Do Not Call Next, then the sequence call will be terminated if the call is rejected by the called party. If you select Call Next, then the sequence call will be continued to the next called party if it is rejected by the first called party.
Web Call
La fonction d’appel web permet de passer des appels via l’interface web de l’appareil, couramment utilisée pour les tests d’appels à distance.
To do the configuration on the web Intercom > Basic > Web Call interface.

Parameters Set-up:
- Auto/Account1/Account2: to choose a suitable SIP account to make a web call. If you call using an IP address, account selection is not needed here.
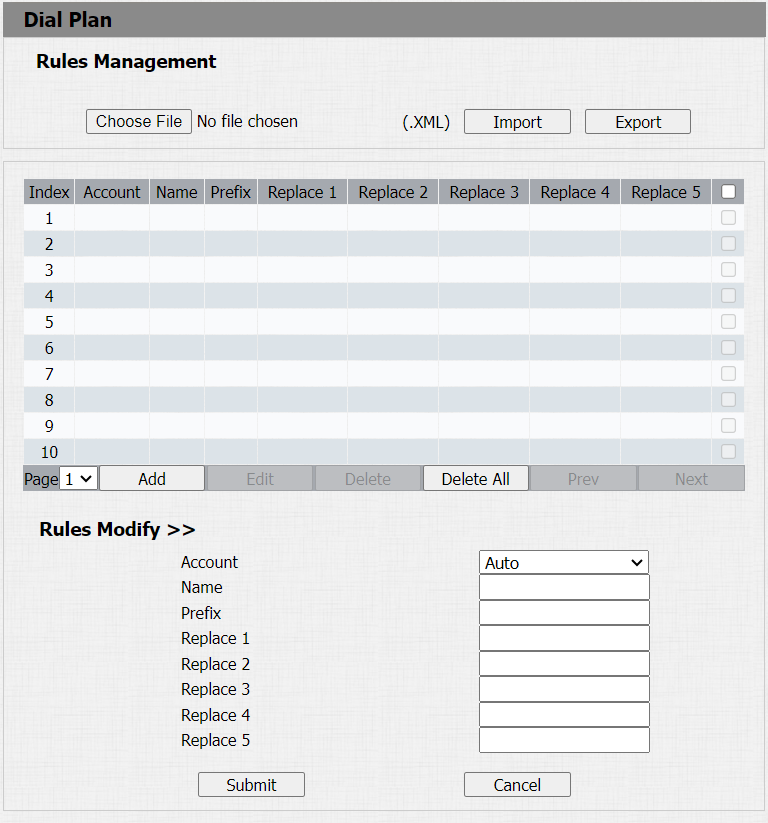
Dial Plan
La fonction de remplacement des numéros de composition simplifie les numéros longs et complexes de l’appareil, offrant des alternatives plus courtes et plus conviviales pour passer des appels. Il permet de remplacer plusieurs numéros de numéro, tels que les adresses IP ou les numéros SIP, par un seul chiffre simplifié.
To configure the number replacement on the device, navigate to Phone > Dial Plan, then click Add. To replace the number in batch, you can import the .xml file to the door phone. And the file from the door phone can be exported out before importing them to other door phones.
Auto Answer
La fonction de réponse automatique permet à l’appareil de répondre automatiquement aux appels entrants sans intervention manuelle. Vous pouvez également personnaliser cette fonctionnalité en réglant la durée de la réponse automatique et en choisissant le mode de communication entre audio et vidéo.
To enable this feature on web Account > Advanced > Call interface, you can set up the related parameters on web Phone > Call Feature> Auto Answer.


Parameters Set-up:
- Auto Answer Delay: set up the delay time (from 0-5 sec.) before the call can be answered automatically. For example, if you set the delay time as 1 second, then the call will be answered in 1 second automatically.
- Mode: set up the video or audio mode you preferred for answering the call automatically.
Multicast
La fonction Multicast permet la diffusion un-à-plusieurs pour différentes finalités. Par exemple, il permet au moniteur intérieur d’annoncer des messages de la cuisine vers d’autres pièces ou de diffuser des notifications du bureau de gestion vers plusieurs endroits. Dans ces situations, les moniteurs d’intérieur peuvent écouter ou envoyer des émissions audio.
Cliquez ici pour regarder la vidéo de démonstration.
To do the configuration on the web Phone > Multicast interface.
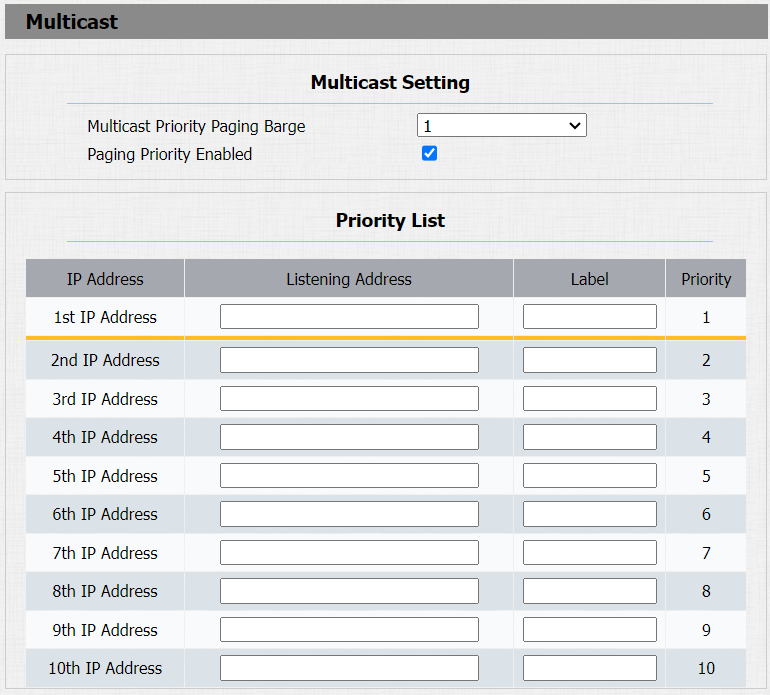
Parameters Set-up:
- Multicast Priority Paging Barge: multicast or how many multicast calls are higher priority than SIP calls, if you disable paging priority, SIP calls will have high priority.
- Paging Priority Enabled: multicast calls are called in order of priority or not.
- Listening Address: enter the multicast IP address you want to listen to. The multicast IP address needs to be the same as the listened part and the multicast port cannot be the same for each IP address. Multicast IP address is from 224.0.0.0 to 239.255.255.255.
Configure Maximum Call Duration
Le téléphone de porte permet de définir la durée de l’appel pour recevoir l’appel depuis l’appareil appelant, car le côté appelant pourrait oublier de raccrocher l’interphone. Lorsque la durée de l’appel est atteinte, le téléphone porte met fin automatiquement à l’appel.
To do this configuration on the web Intercom > Basic > Max Call Time interface.

Parameters Set-up:
- Max Call Time: enter the call time duration according to your need (ranging from 0-120 min). The default call time duration is 5 min.
- Max call time of the device is also related to the max call time of the SIP If using a SIP account to make a call, please pay attention to the max call time of the SIP server. If the max call time of the SIP server is shorter than the max call time of the device, the shorter one is available.
Maximum Dial Duration
La durée maximale de numérotation est la limite de temps pour les appels entrants et/ou sortants sur le téléphone de porte. Si configuré, le téléphone porte terminera automatiquement l’appel si personne ne répond dans l’heure prédéfinie, qu’il soit entrant ou sortant.
To do this configuration, go to Intercom > Basic > Max Dial Time interface.

Parameters Set-up:
- Dial in Time: enter the dial-in time duration for your door phone (ranging from 5-120 sec). For example, if you set the dial-in time duration as 60 seconds on your door phone, then the door phone will hang up the incoming call automatically if the call is not answered by the door phone in 60 seconds. 60 seconds is the dial-in time duration by default.
- Dial out Time: enter the dial-in time duration for your door phone (ranging from 5-120 sec). For example, if you set the dial-out time duration as 60 seconds on your door phone, then the door phone will hang out the call it dialed out automatically if the call is not answered by the device being called.
- Max dial time of device is also related with max dial time of SIP server. If using SIP account to make a call, please pay attention to the max dial time of SIP server. If the max dial time of SIP server is shorter than the max dial time of device, the shorter one is available.
Hang Up After Open Door
Cette fonction met automatiquement fin à l’appel une fois la porte ouverte, permettant une réception fluide des appels suivants.
To do this configuration on the web Intercom > Basic> Hang Up After Open Door.

Parameter Set-up:
- Type: select the open door type. The door can be unlocked via the DTMF, HTTP, DTMF or HTTP, and Input, DTMF, or HTTP.
- Timeout: set up from 1 second to 15 seconds. 5 seconds is the default. If you set it 5 seconds, then the call will be hung up 5 seconds after the door is opened. If you want to disable the feature, set the timeout as 0.