Akuvox indoor monitors can be integrated with the Hikvision, Uniview, and IVSEC NVR via the HDMI port or API. The device can automatically obtain the list of the NVR video surveillance and supports NVR playback at specific times.
Compatible Models and Minimum Firmware Versions by NVR Brand
Hikvision NVR
X937: 937.30.13.122
S567: 567.30.13.804
S567G: 567.29.14.905
Uniview NVR
X937: 937.30.14.209
S567: 567.30.114.303
S567G: 567.29.14.905
IVSEC NVR
X937: 937.30.14.804
S567: 567.30.114.903
S567G: 567.29.14.905
ONLY X937 supports connecting the NVR via the HDMI port.
This article takes X937 as an example.
Before You Start
Make sure:
X937 and the NVR are on the same local network(LAN).
X937 and the NVR are connected properly via HDMI if the HDMI is used.
The NVR is properly configured and accessible.
The third-party camera(s) are connected to the NVR.
Add the NVR
You can add the NVR automatically or manually.
Method 1: Add via Auto Scan
Tap Settings > Advance > NVR on the device screen. The default password is 123456 to access the advanced settings.
Tap
 to scan the NVR automatically.
After scanning:
The detected NVR devices will be displayed.
Select the target NVR.
Enter the username and password.
If no device is found:
Ensure both devices are in the same network.
Check that the NVR is powered on and reachable.
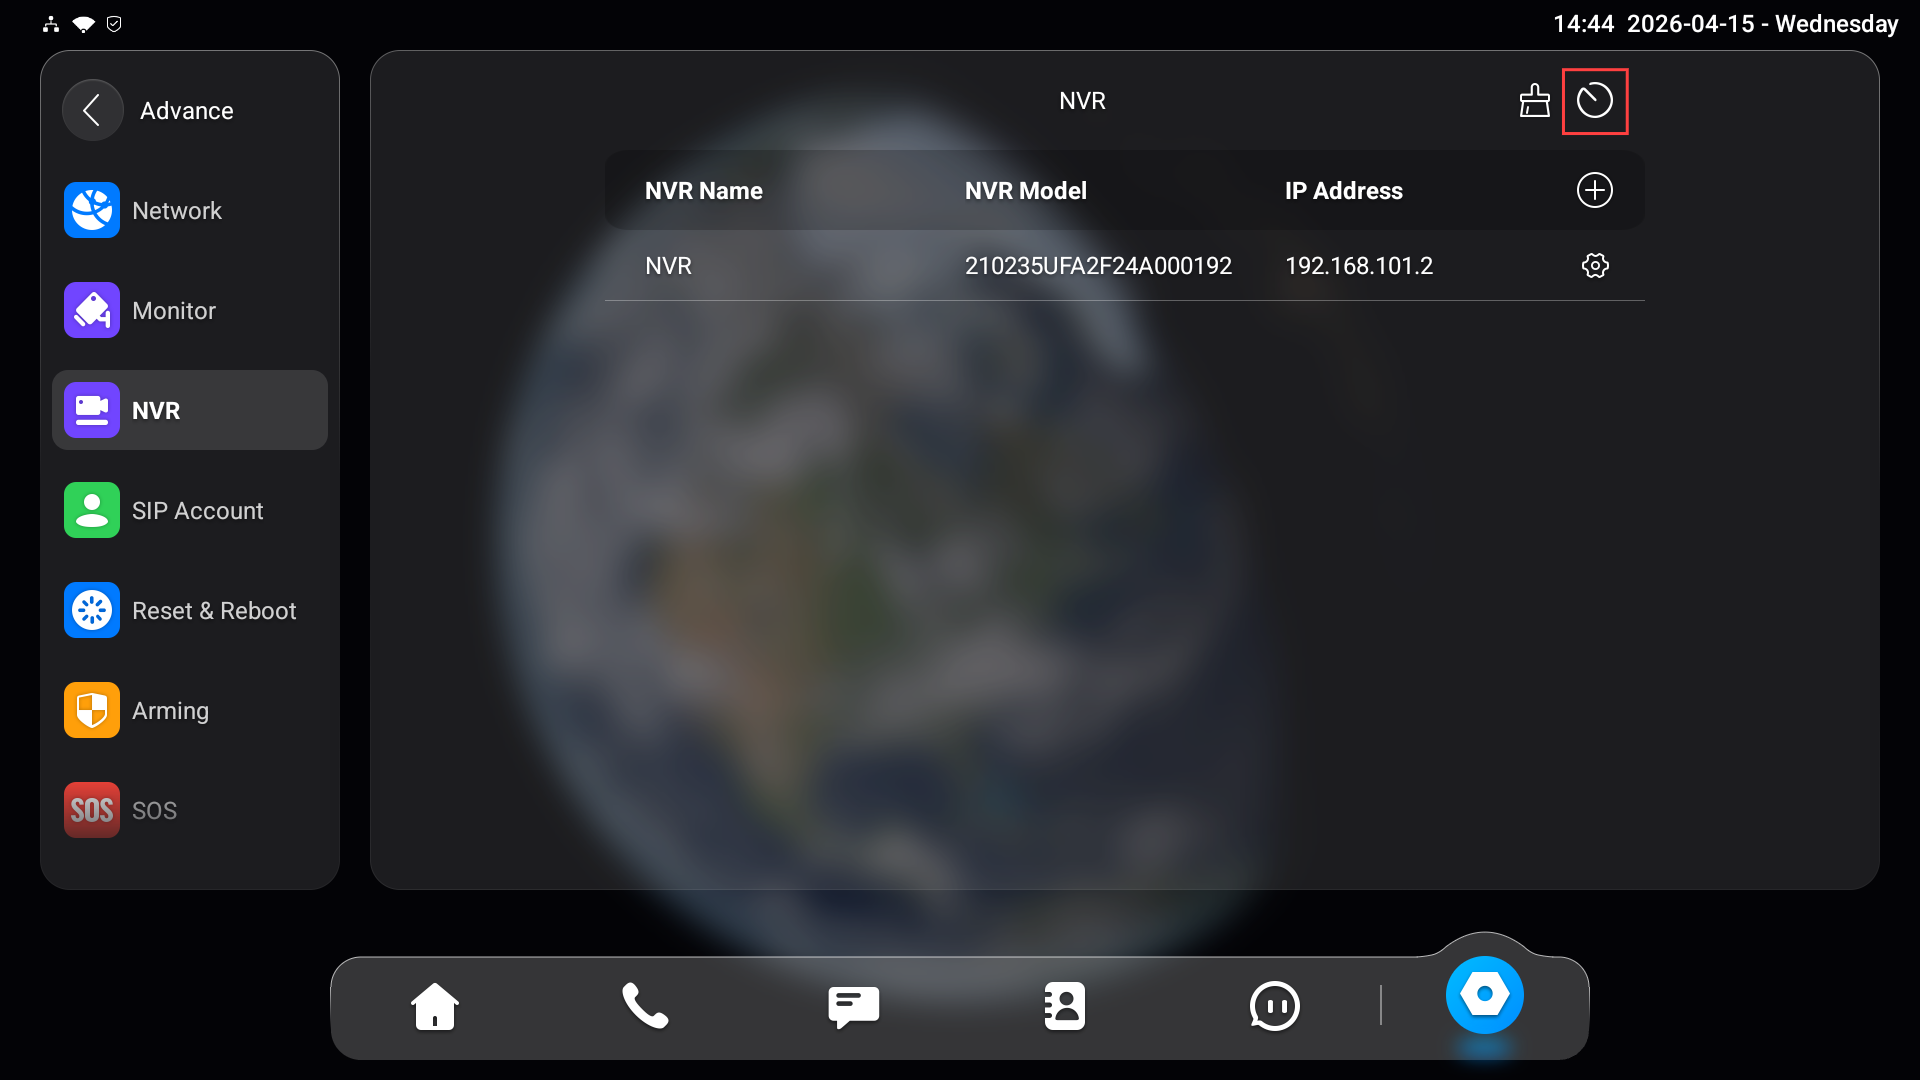
Method 2: Add Manually
Tap Settings > Advance > NVR on the device screen. The default password is 123456 to access the advanced settings.
Tap
 .
. Enter the NVR’s name, IP address, username, and password. Please check this information on the NVR’s backend.
.png)
Tap Save.
Manage the Added NVR
After adding the NVR, you can modify its settings or adjust the IPC parameters.
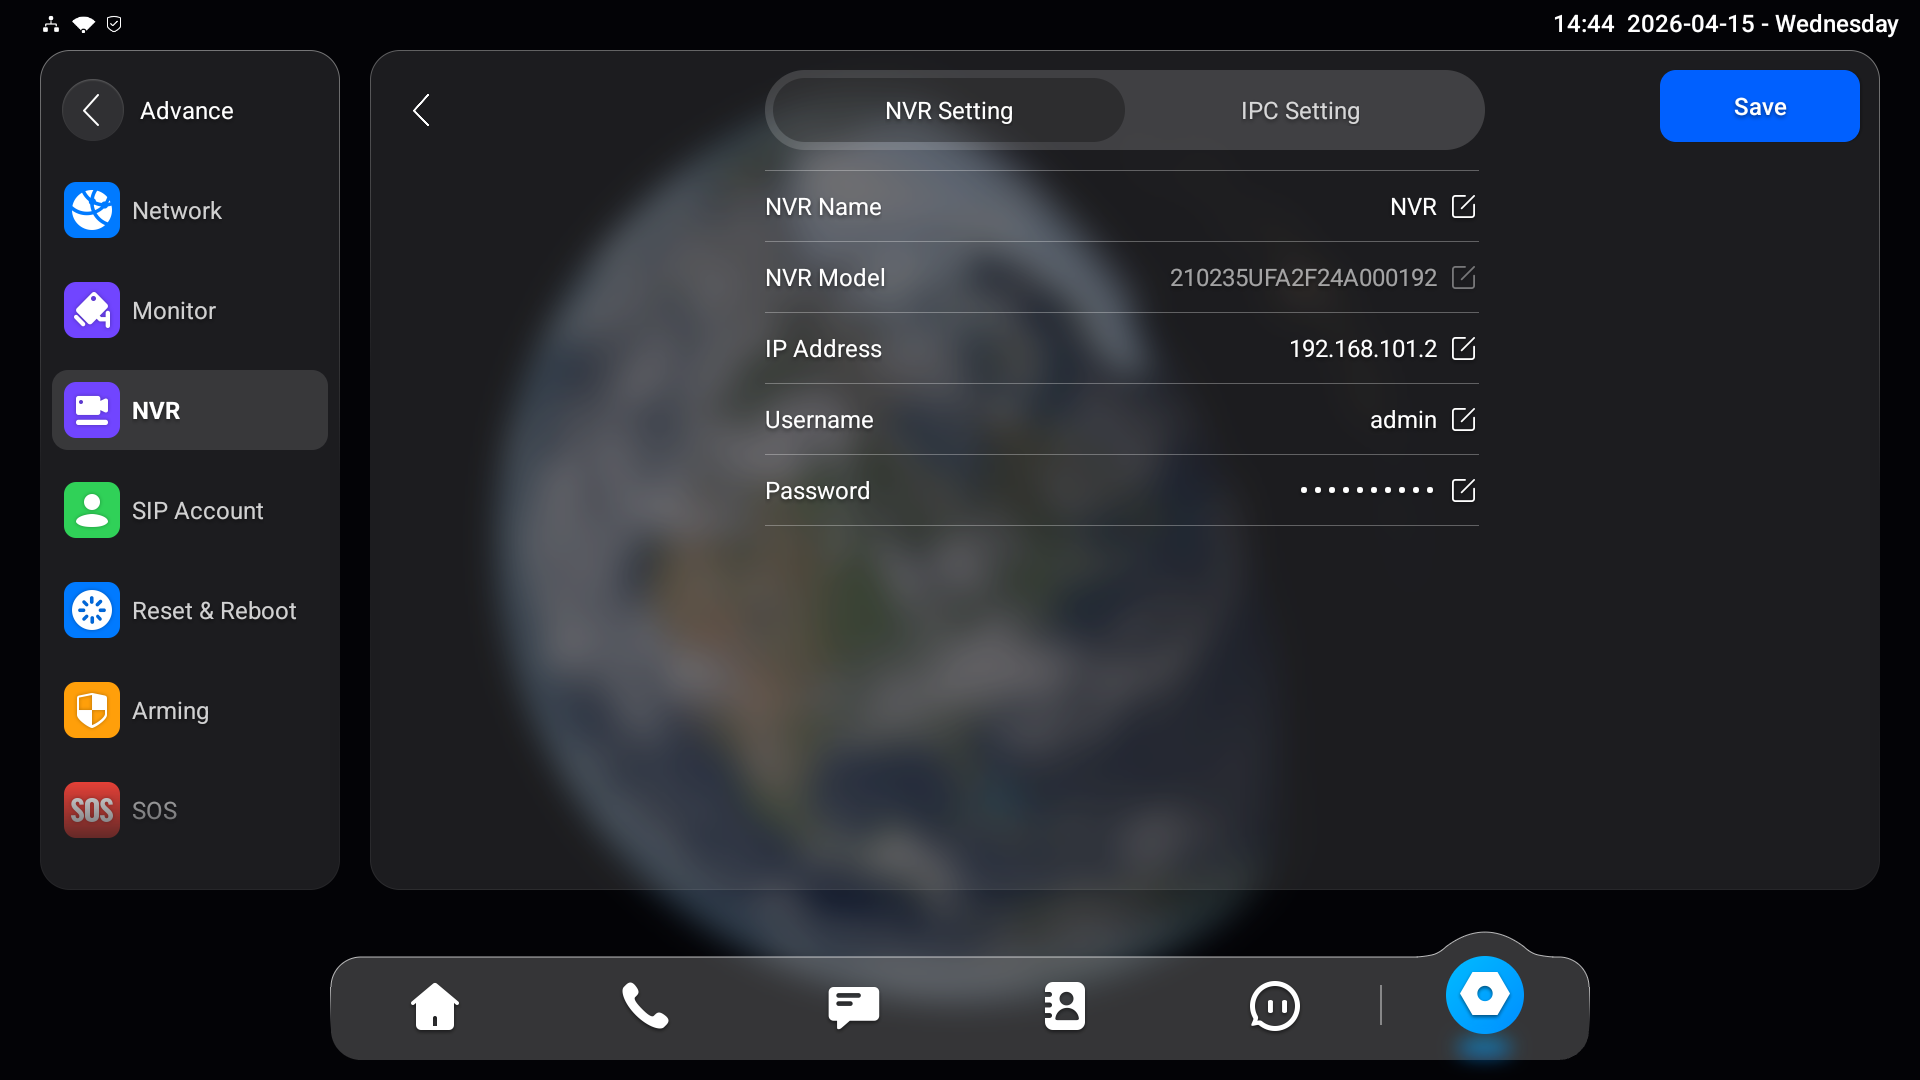
Edit NVR Information
Tap
 of the target NVR.

You can update its name, IP address, username, and password.
Changes will take effect after saving. Make sure the updated information matches the NVR configuration.
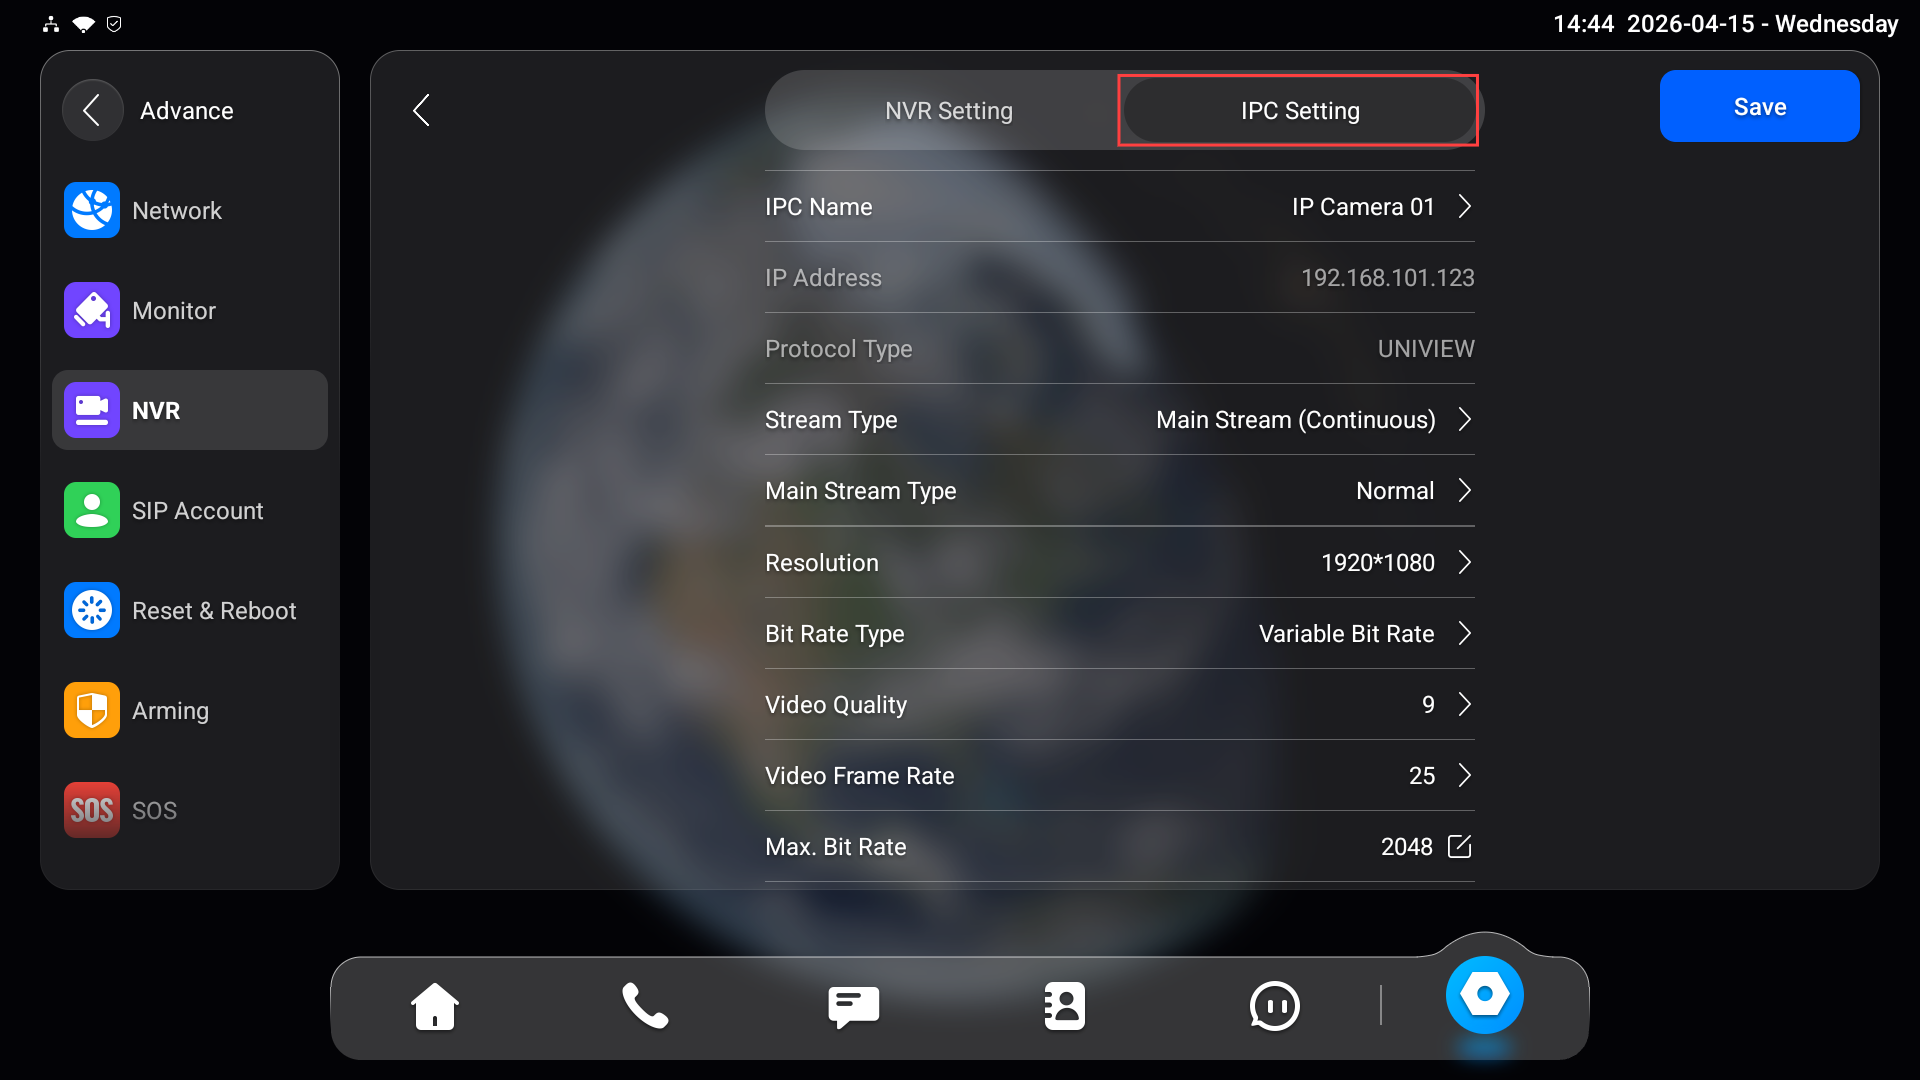
Configure IPC Parameters
After the NVR is added successfully, the indoor monitor will obtain the camera list from the NVR.
You can:
View the list of connected cameras.
Modify camera-related parameters (if supported), such as:
Channel name
Stream settings
Other configurable attributes provided by the NVR
Tap
of the target NVR.
Tap IPC Setting.
View Live Video
After adding the NVR, you can view real-time video streams from connected cameras.
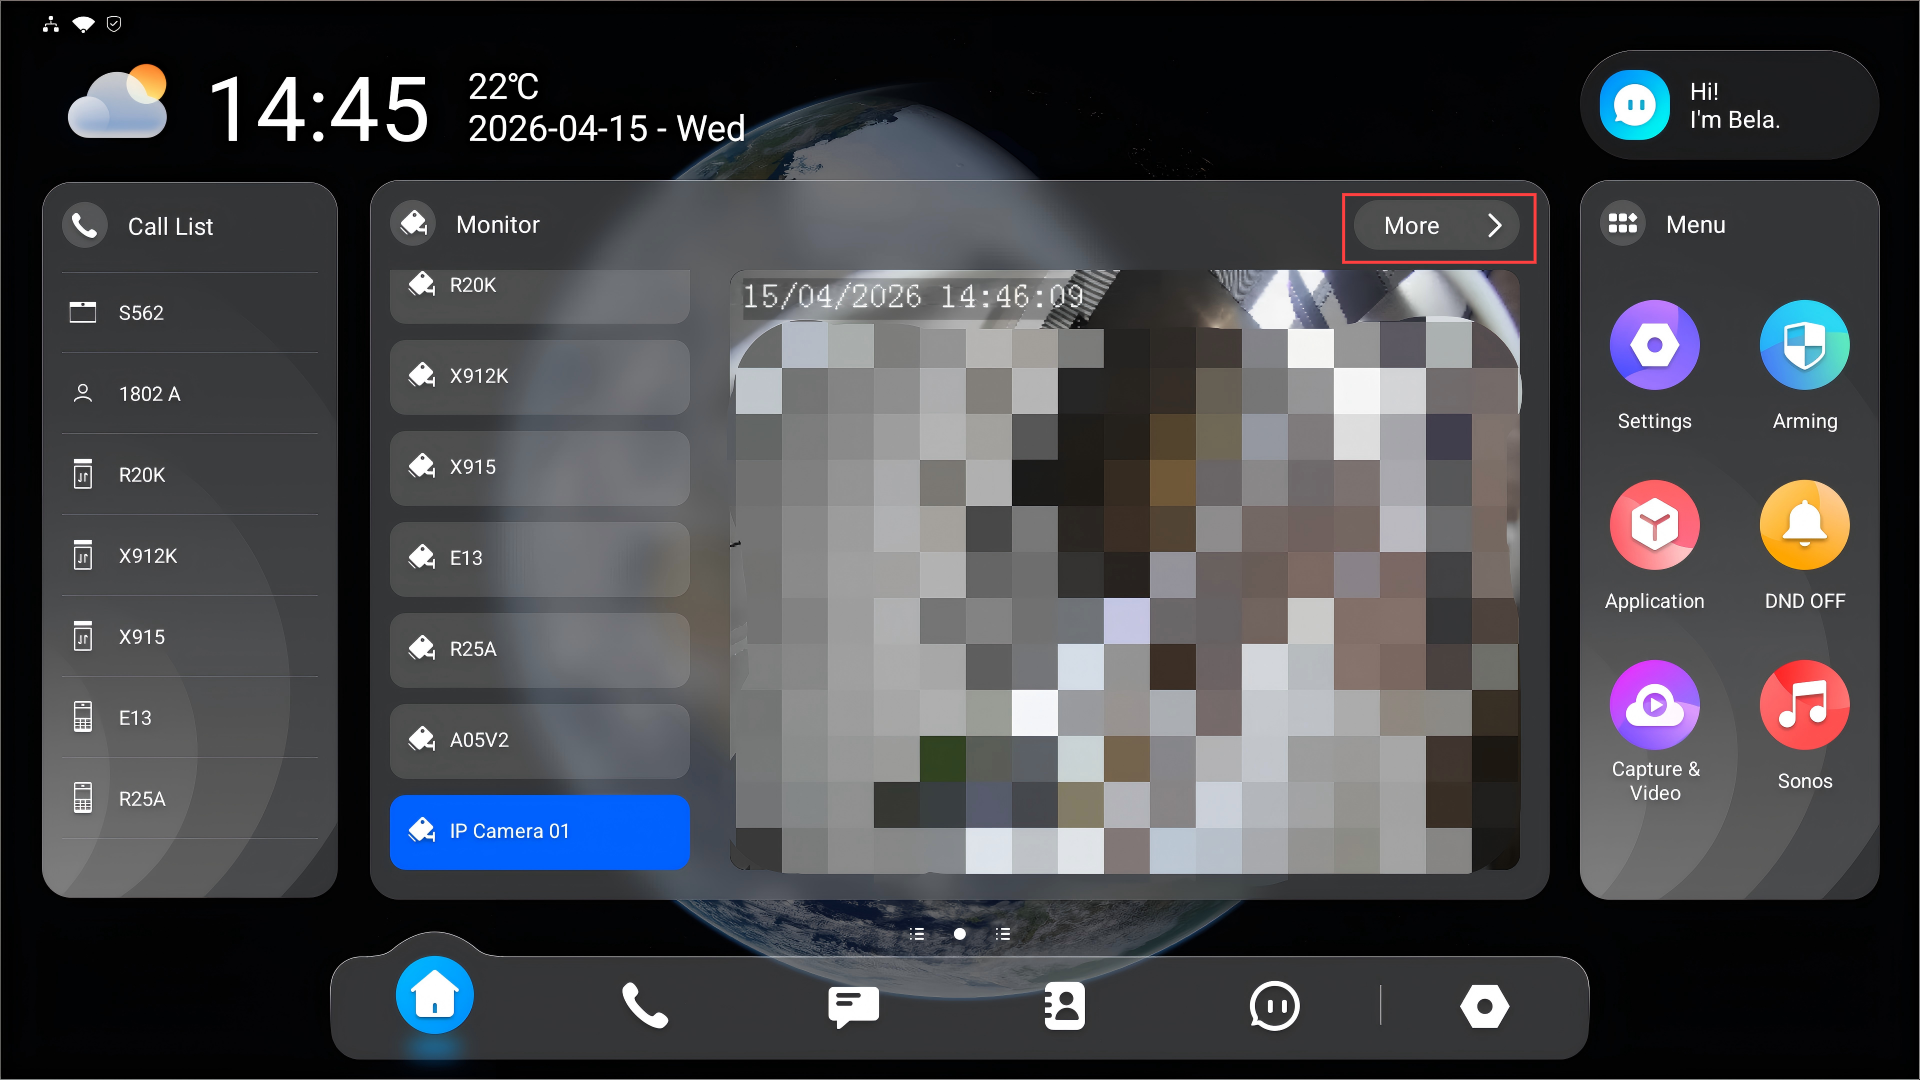
Tap More on the home screen to enter the monitoring screen.
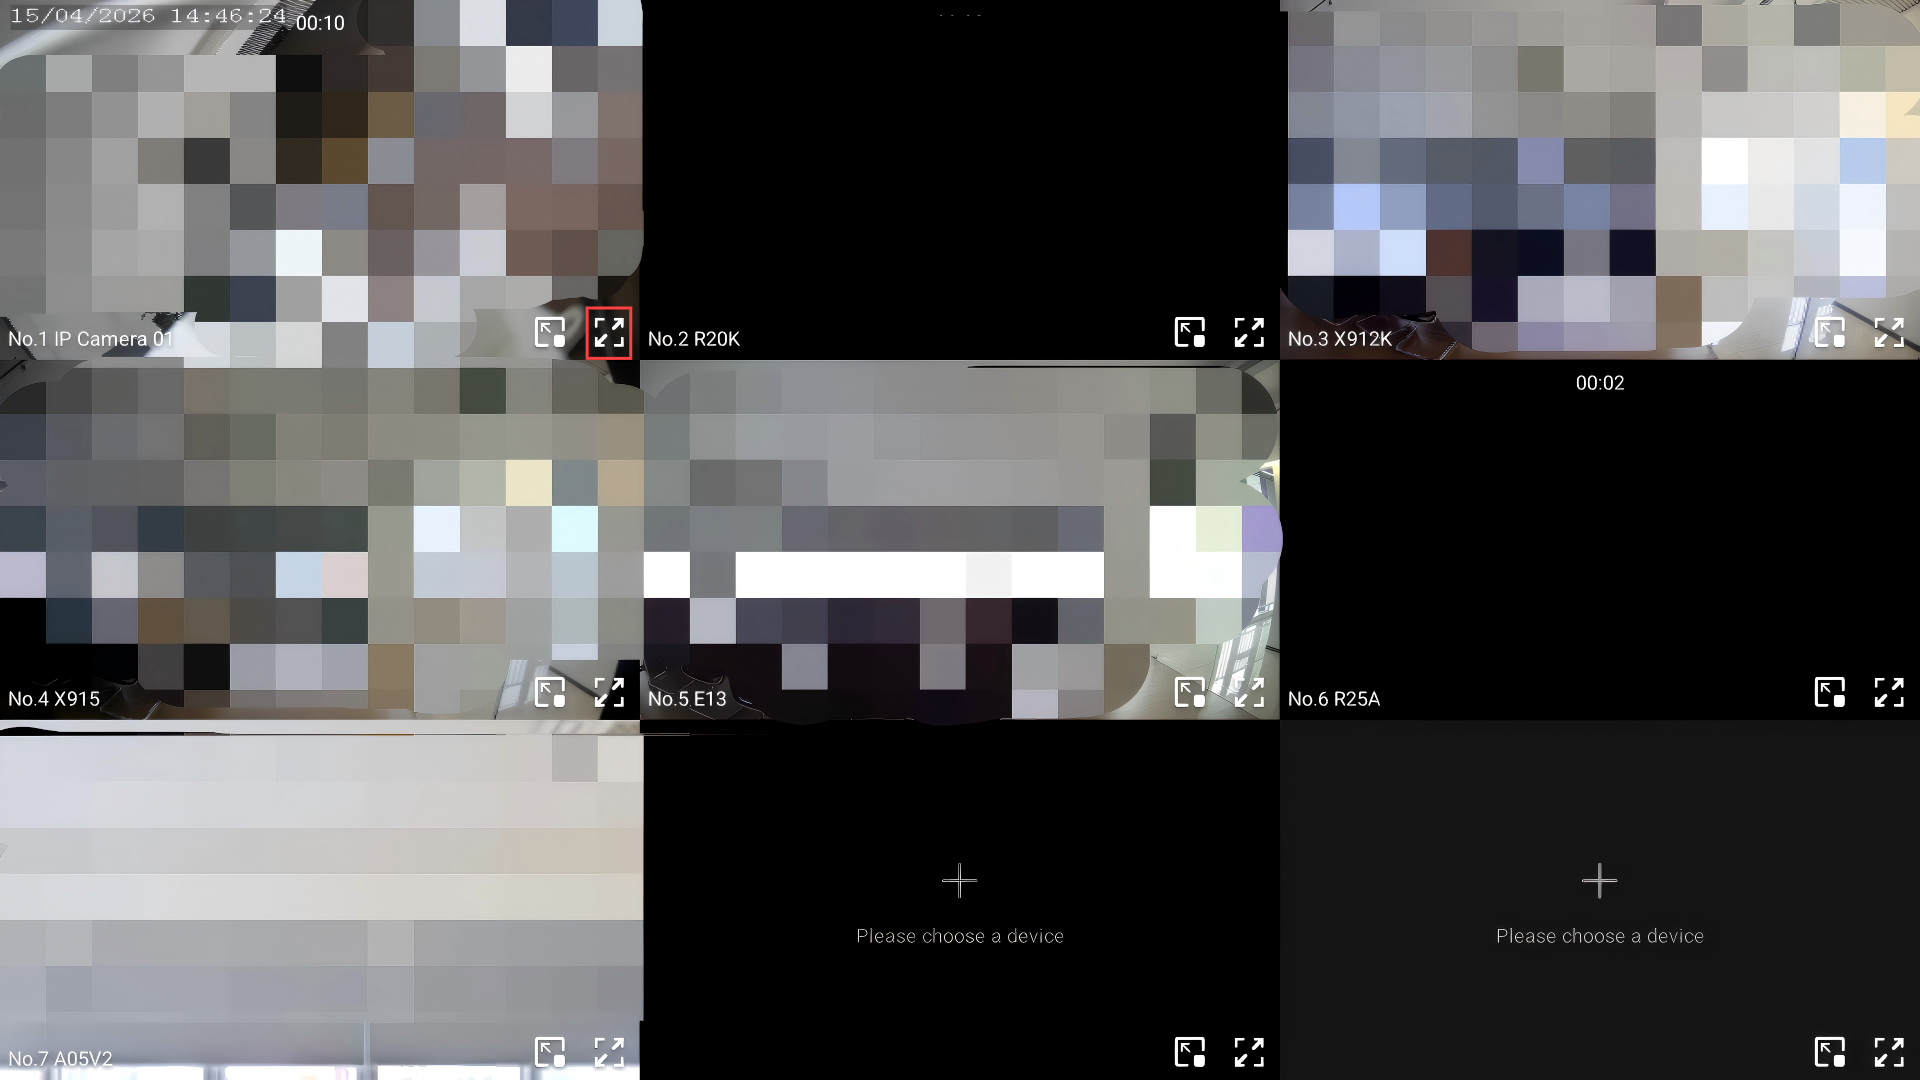
Select the IPC channel by tapping
 .
.
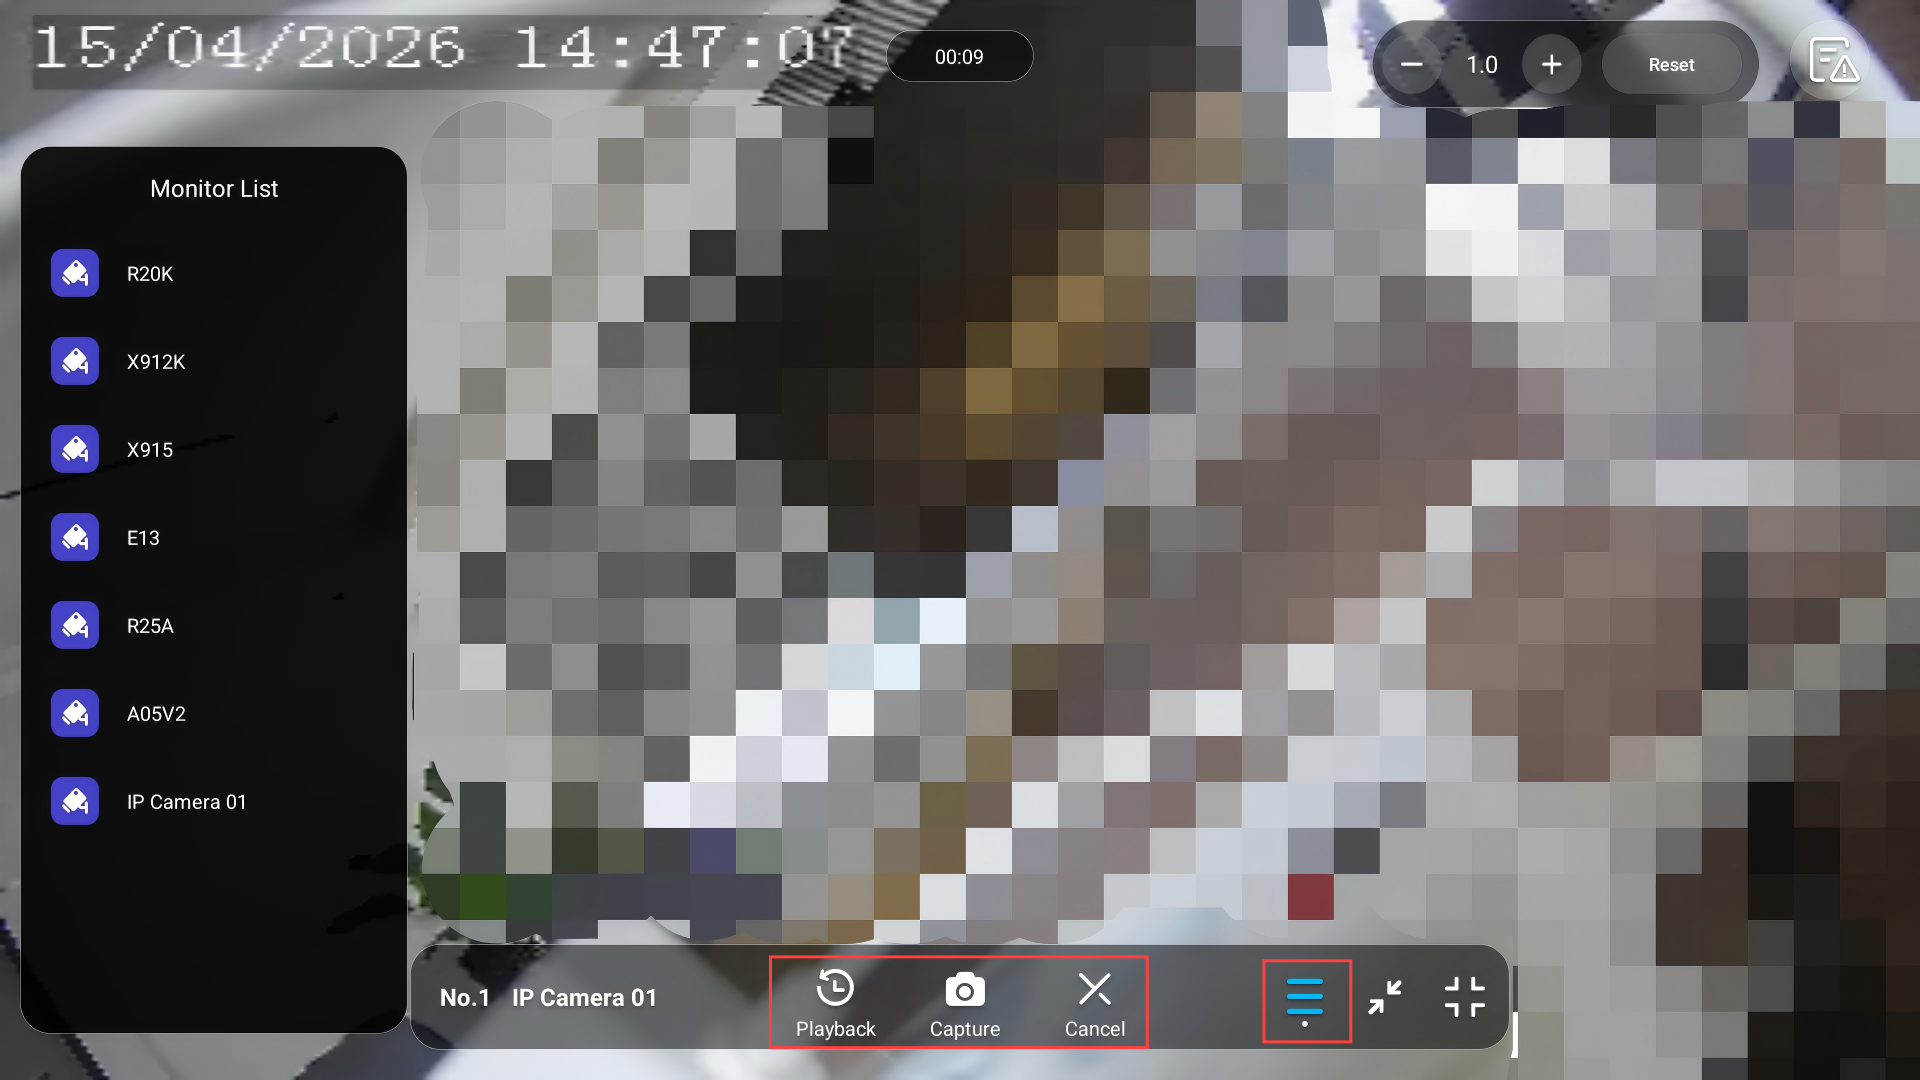
While monitoring, you can:
Tap
 to switch between monitoring channels.
Tap Playback to watch the playback.
Tap Capture to take a screenshot.
Tap Cancel to exit the monitoring.
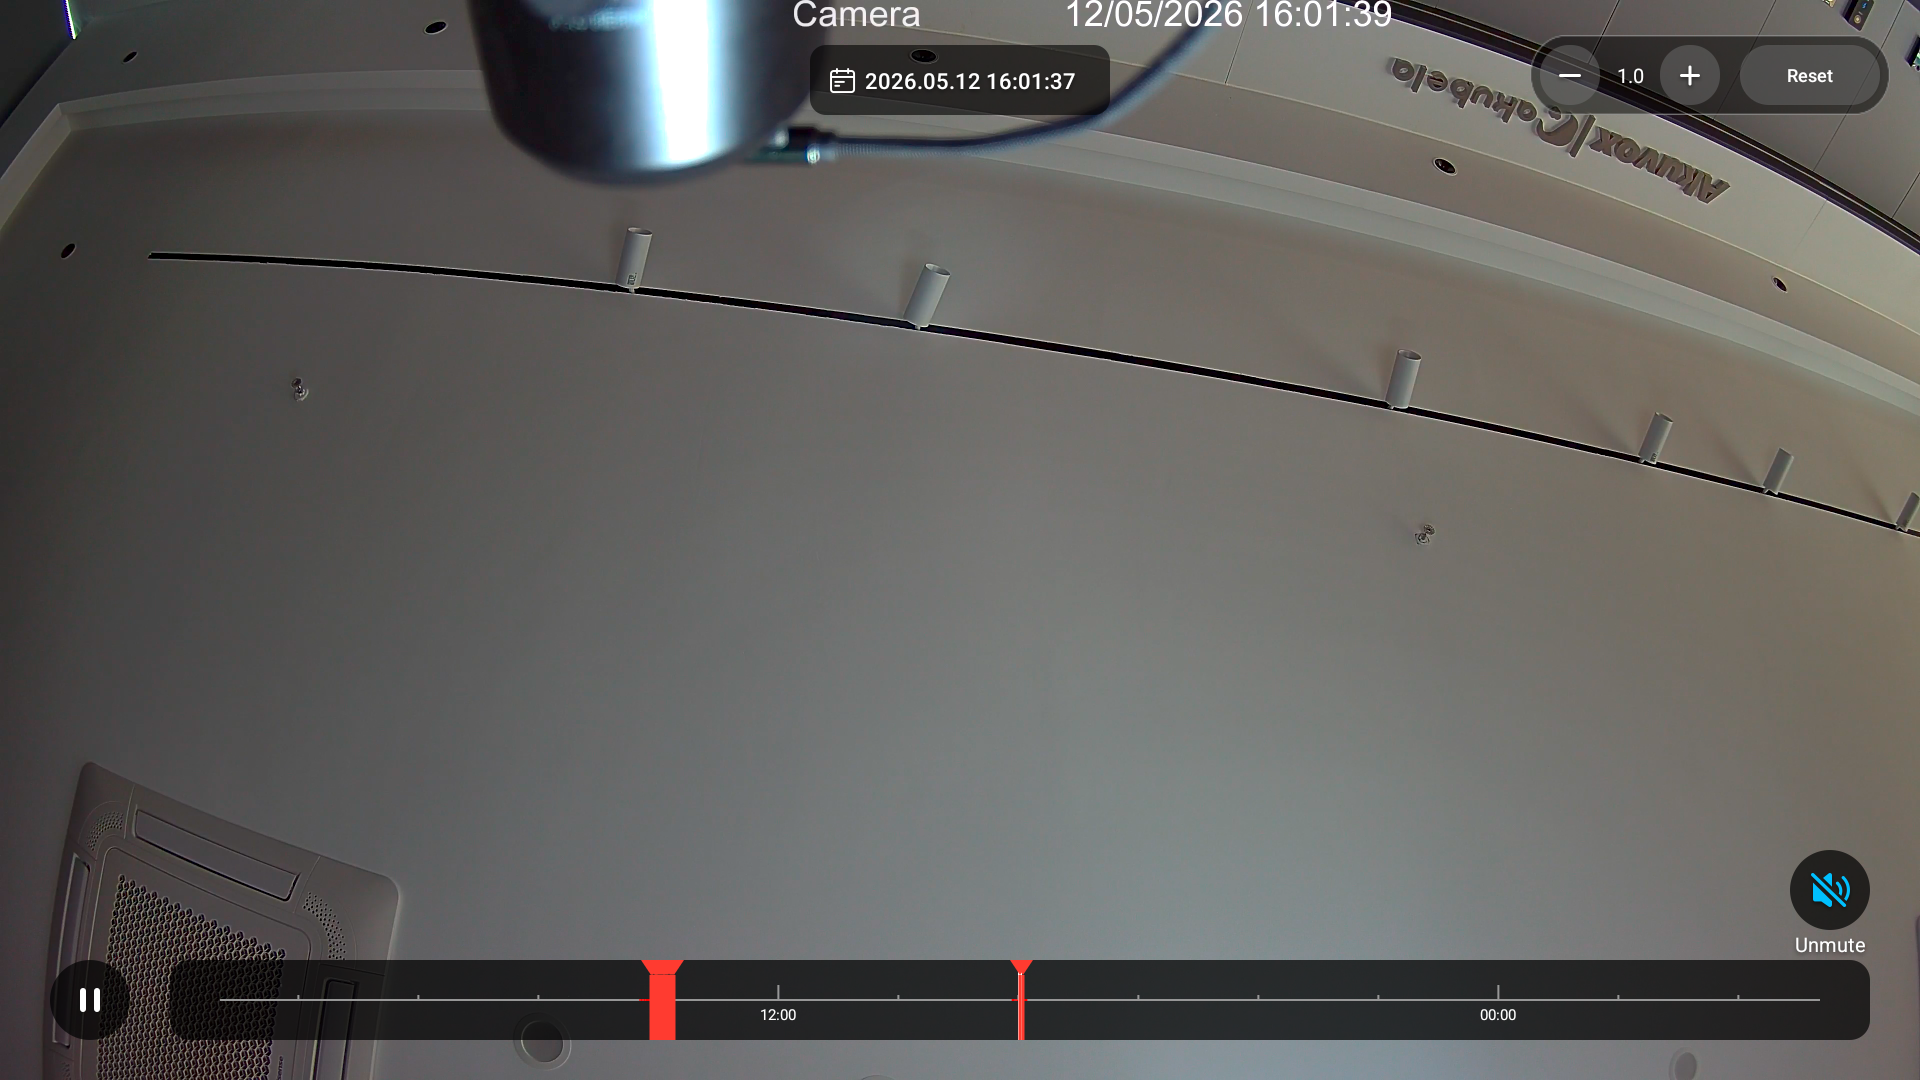
Check Synced Alarm Logs
The alarm from the third-party NVR can be synced to the indoor monitor.
Tap ![]() in the upper-right corner and tap a log to view the playback.
in the upper-right corner and tap a log to view the playback.
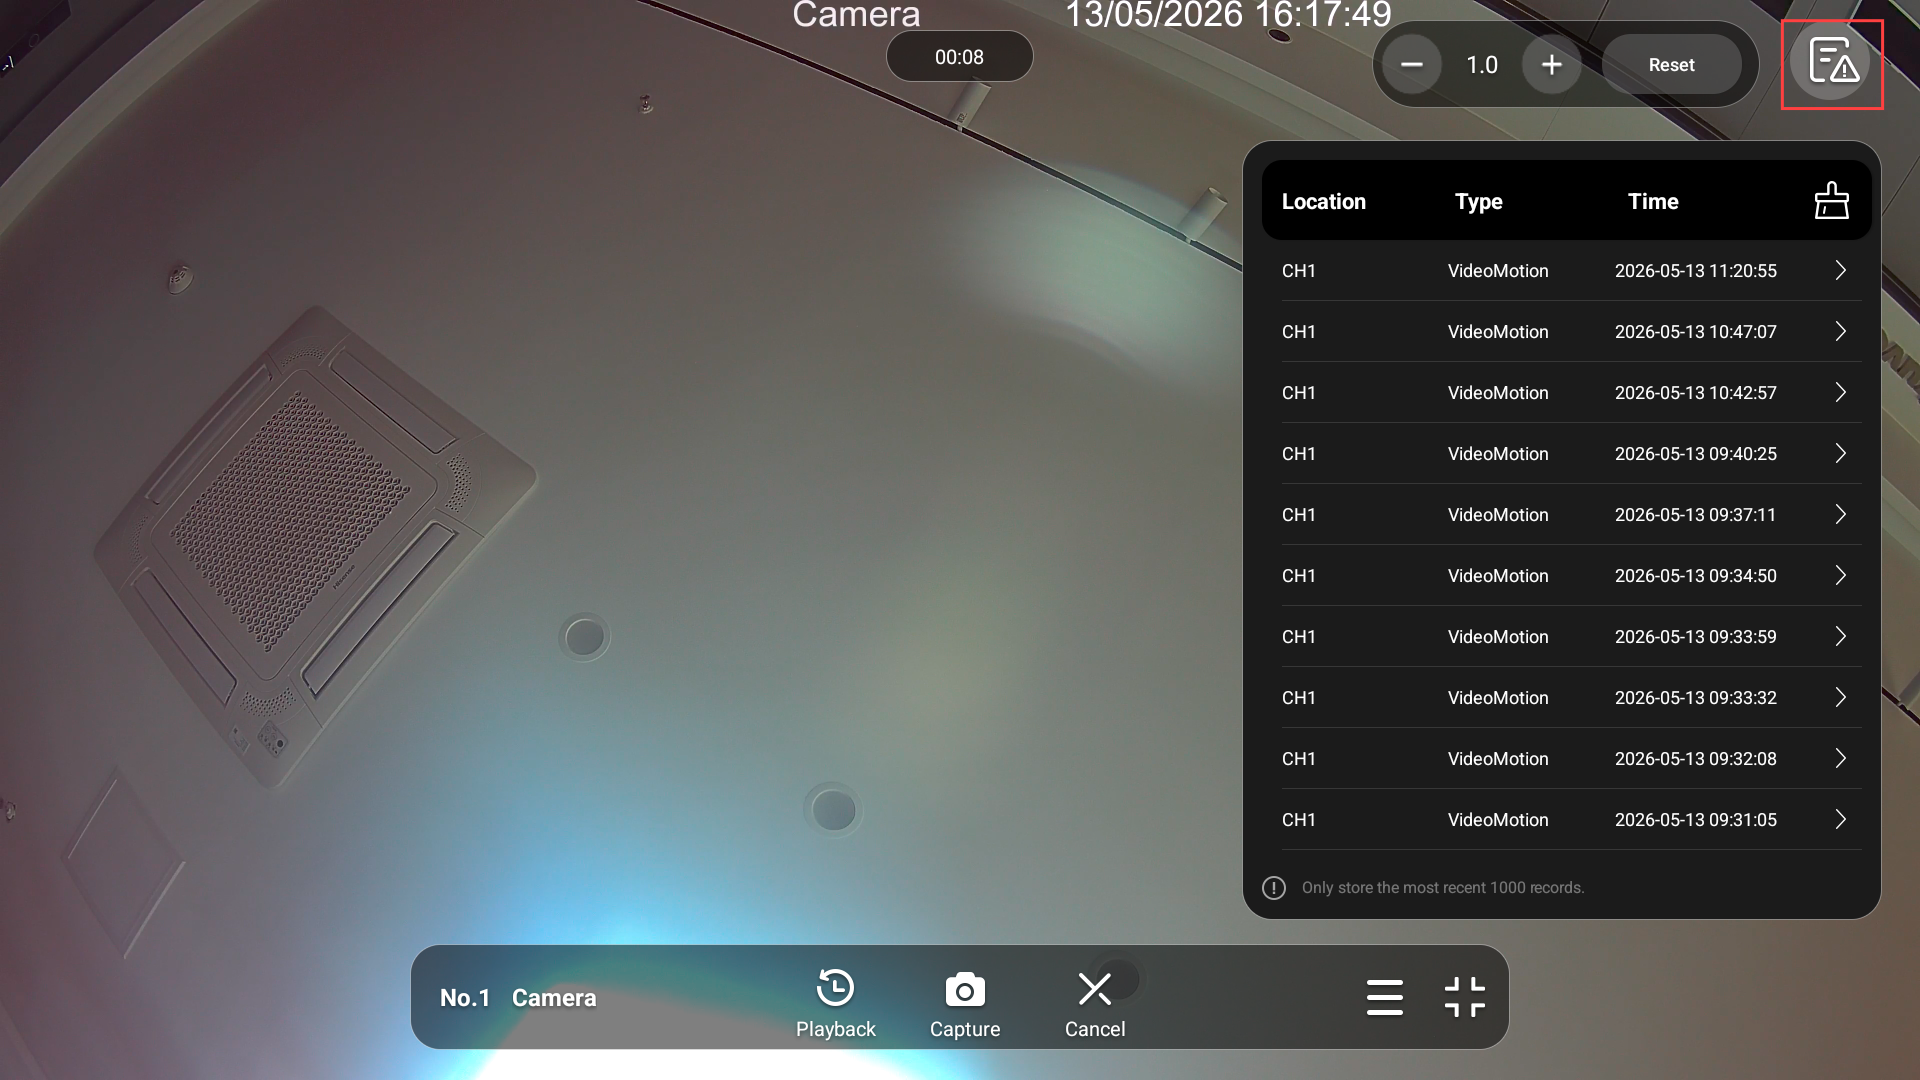
On the playback timeline, tap any red segment to jump to the corresponding alarm-triggered moment.
HDMI Mode (X937 Only)
If the device is connected via HDMI, you can display the HDMI icon on the device’s home screen for quick access.
Note
ONLY X937 with the firmware version 937.30.13.903 or higher supports this feature.
Tap Settings > Advance > Custom Homepage.
Select the desired area to display the HDMI Input icon.
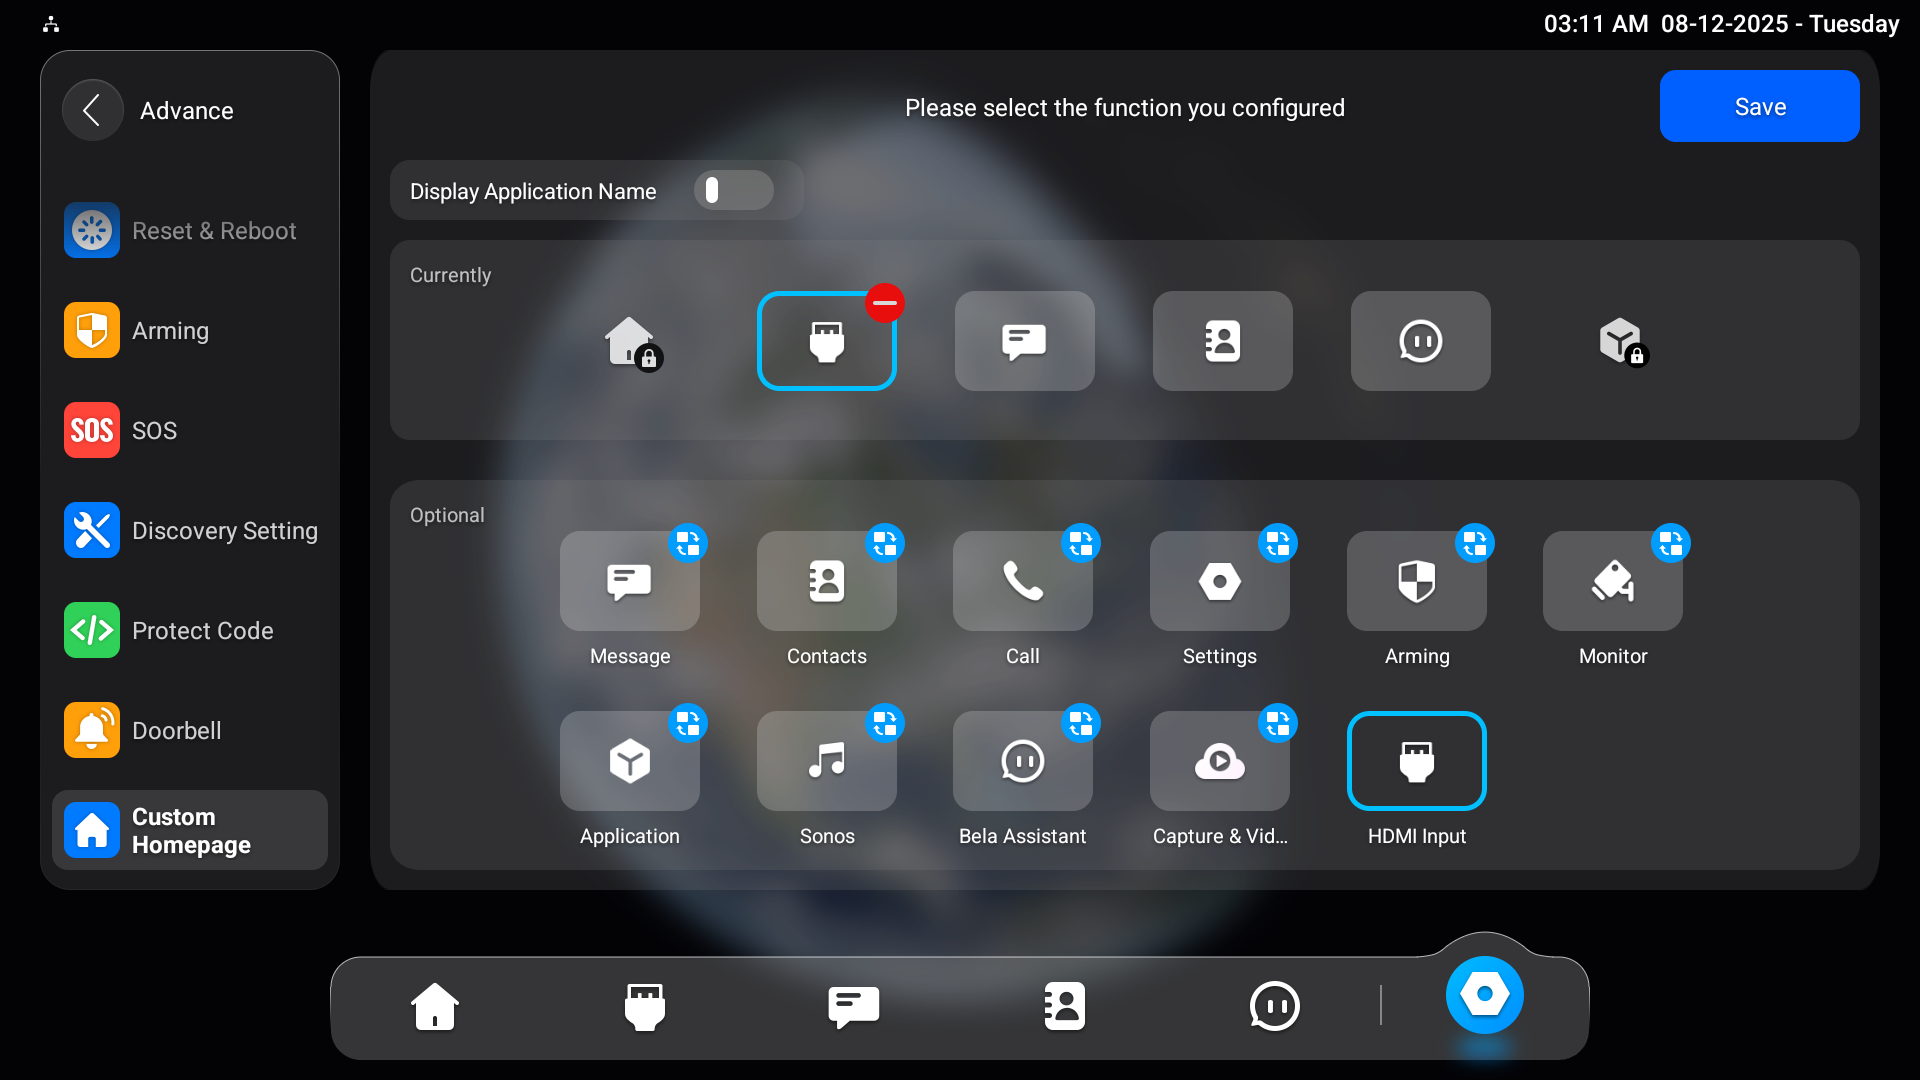
Tap Save.
View the Live Video
Tap the HDMI Input icon on the home screen.
If the X937 is connected to the NVR via HDMI, tap Switch to HDMI to project the NVR display onto the indoor monitor.
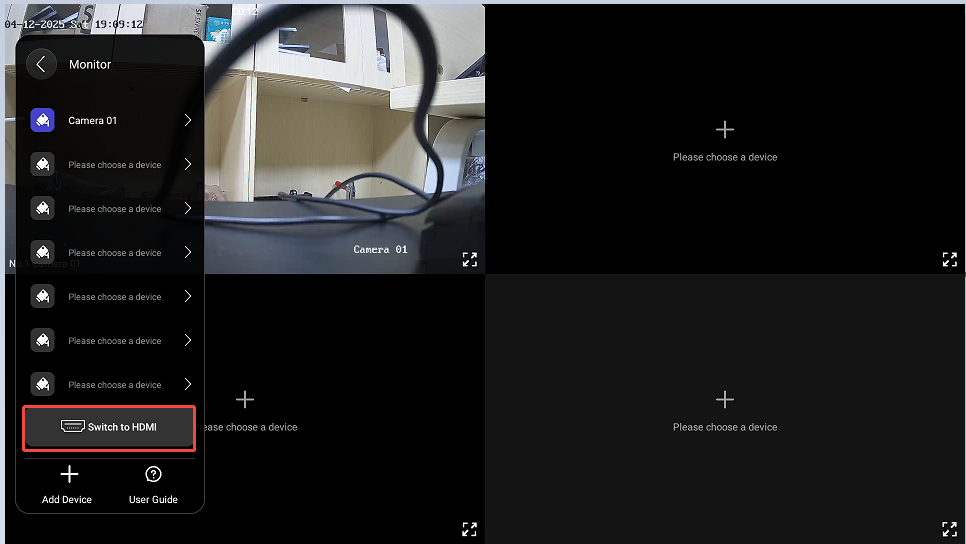
Then, you can tap a specific camera to enlarge the live stream.
While viewing the stream, you can:
Tap Playback to watch the video recorded by the camera.
Tap Capture to take a screenshot.
Tap Cancel to exit the monitoring.
Tap
to select other monitoring channels.
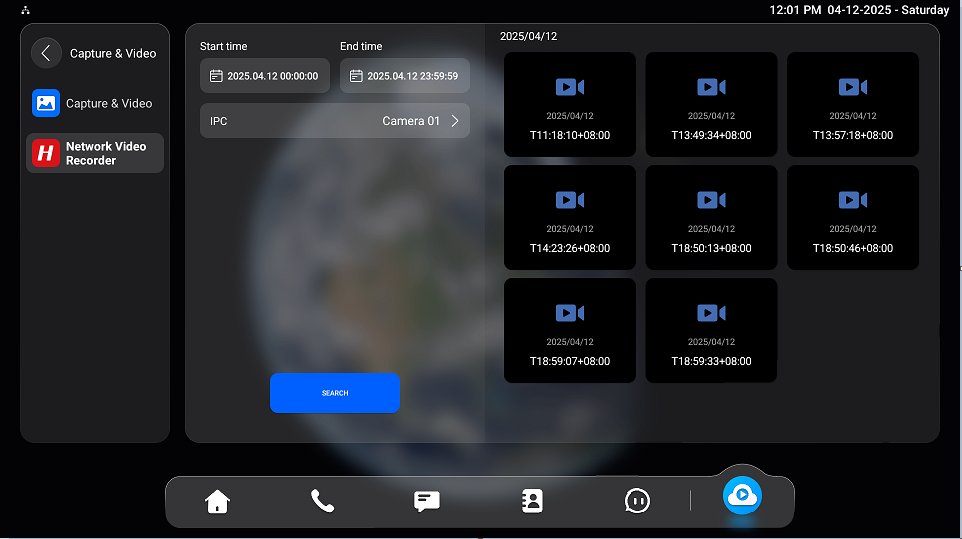
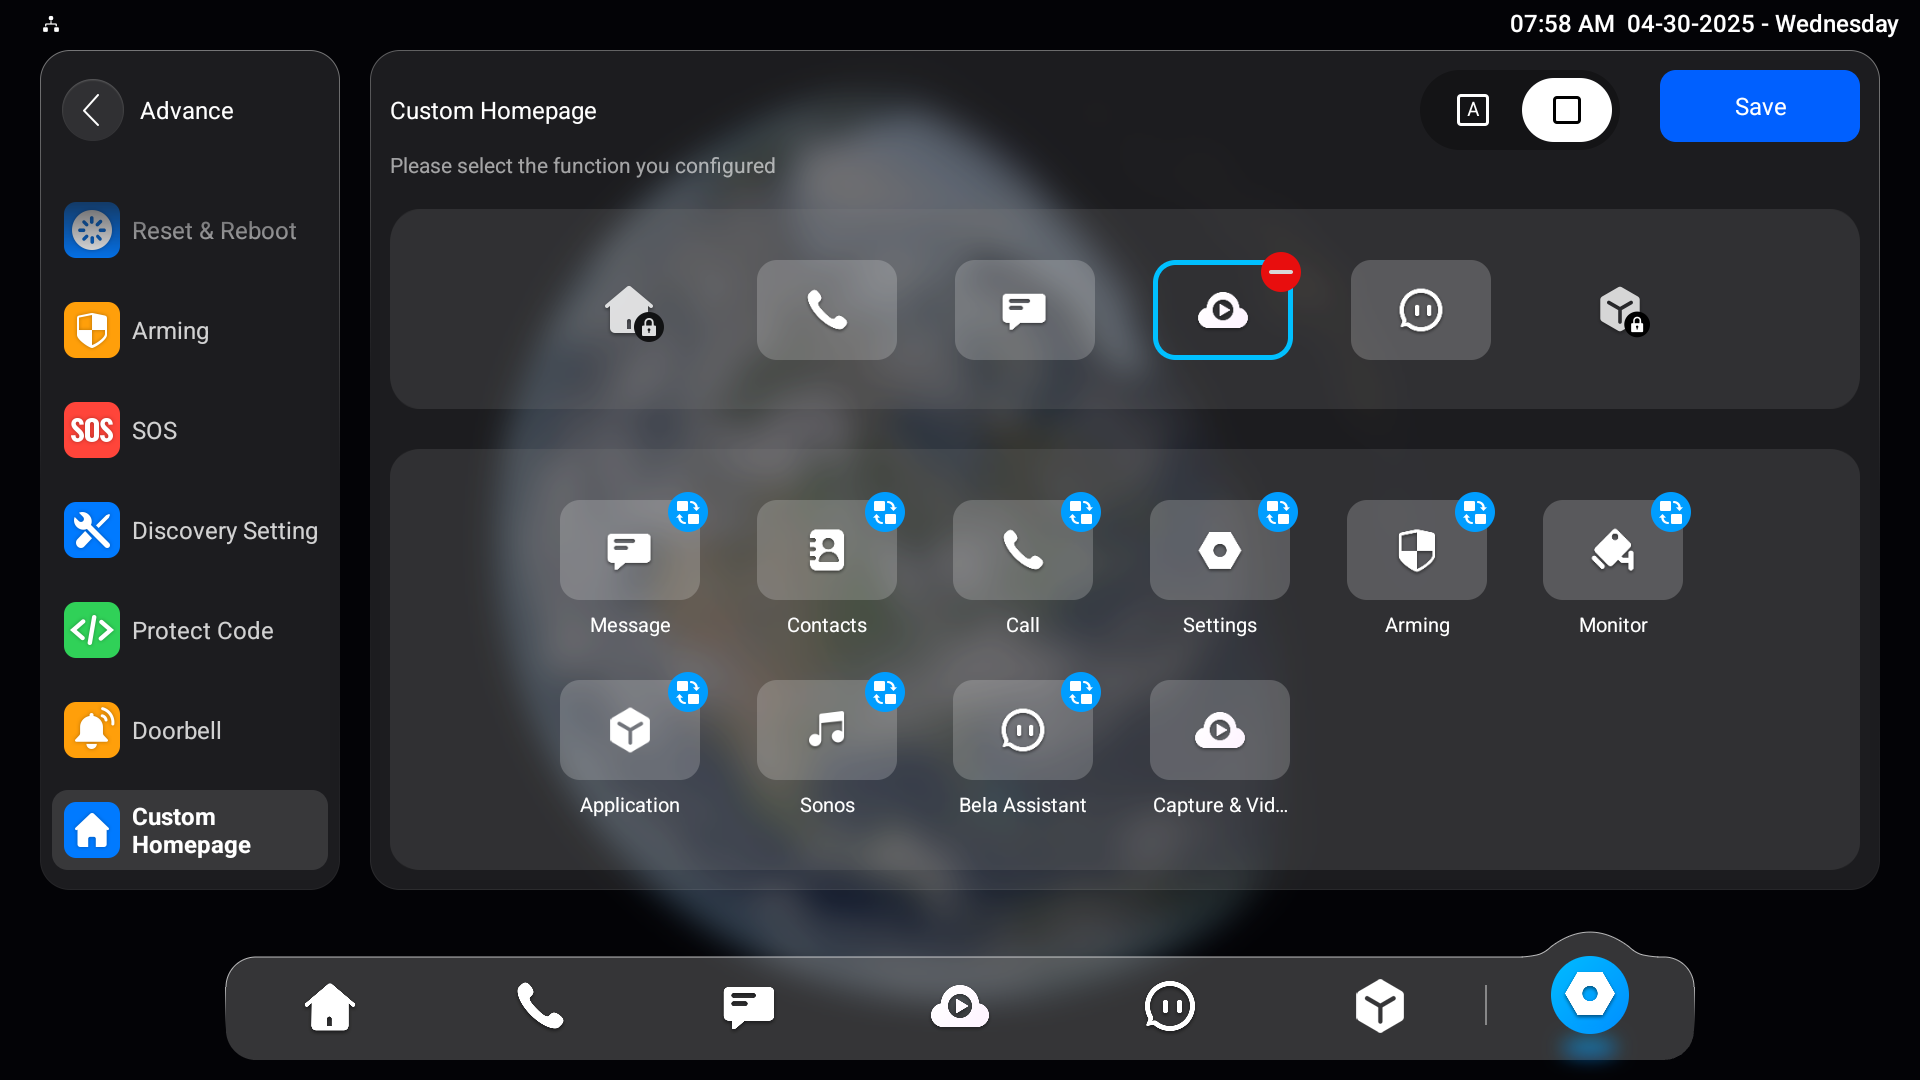
View the Recorded Videos
You can check videos recorded by IP cameras.
Tap Settings > Advance > Custom Homepage.
Select the desired area to display the Capture & Video tab.
Tap Capture & Videos on the home screen.

You can search for videos by entering the time and selecting the camera.
Tap a specific video to watch it.