IP Call Configuration
An IP call is a direct call between two intercom devices using their IP addresses, without a server or a PBX. IP calls work when the devices are on the same network.
IP Call Setup
Enable IP call on the Intercom > Basic > Direct IP interface.

Port: set the port for direct IP calls. The default is 5060, with a range from 1024-65535. If you enter a value within this range other than 5060, ensure consistency with the corresponding device for data transmission.
Make IP Calls
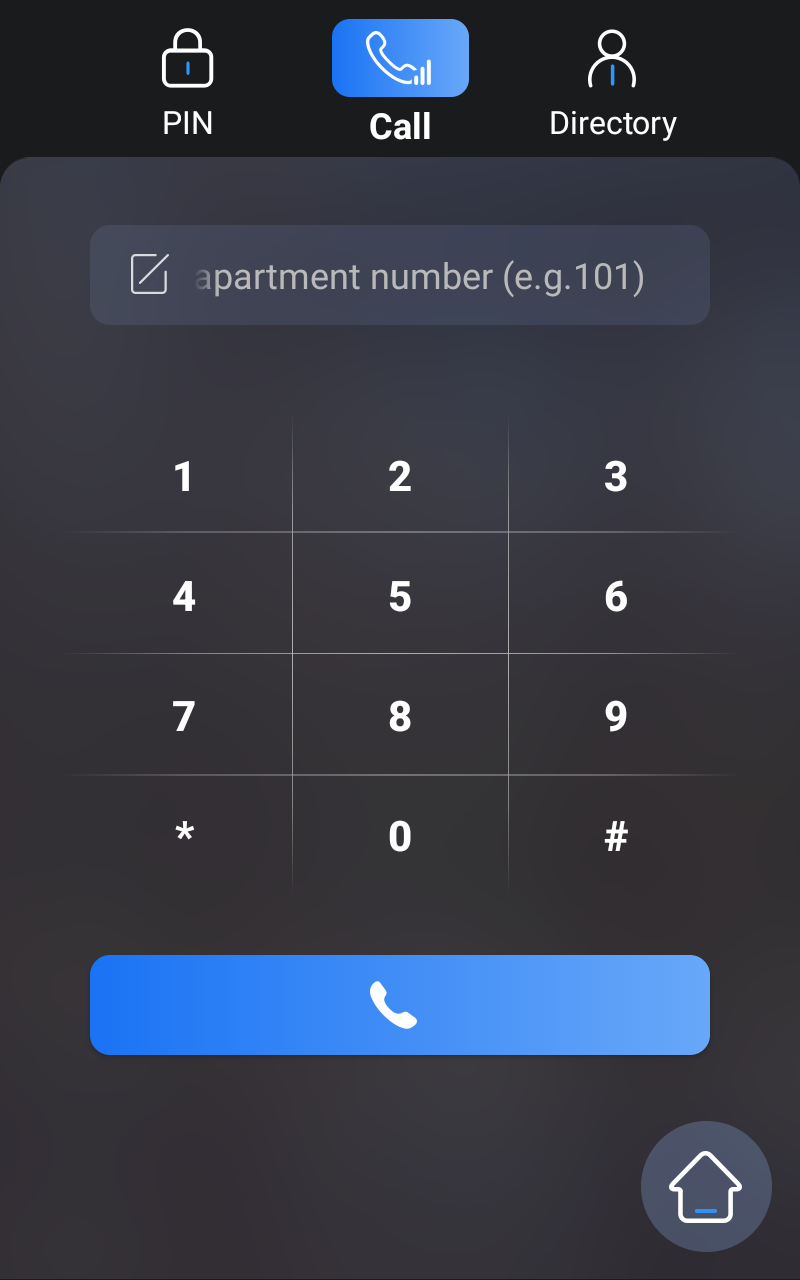
Make IP calls by pressing the Dial key on the home screen, entering the IP number such as “192✳168✳35✳123”, and pressing the Call button.
SIP Call Configuration
Session Initiation Protocol(SIP) is a signaling transmission protocol used for initiating, maintaining, and terminating calls.
A SIP call uses SIP to send and receive data between SIP devices, and can use the internet or a local network to offer high-quality and secure communication. Initiating a SIP call requires a SIP account, a SIP address for each device, and configuring SIP settings on the devices.
SIP Account Registration
Each device needs a SIP account to make and receive SIP calls.
Akuvox intercom devices support the configuration of two SIP accounts, which can be registered under two independent servers.
Click here to view the SIP account registration example.
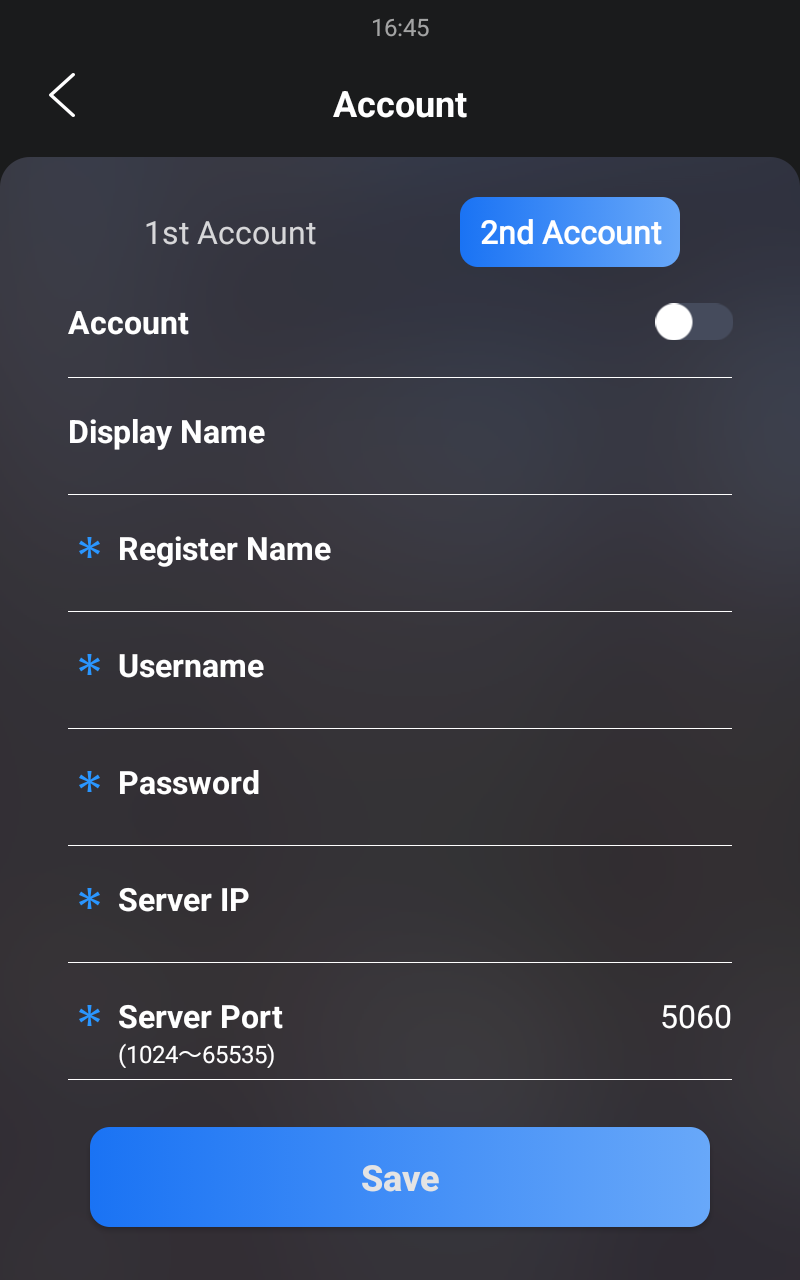
Register SIP accounts on the web Account > Basic > SIP Account interface. You can also register SIP accounts on the Setting > Account screen.

Account 1/Account 2: The door phone supports 2 SIP accounts.
- Account 1 is the default account for call processing. Also, it will be utilized when the Akuvox SmartPlus cloud service is activated.
- The system switches to Account 2 if Account 1 is not registered.
- To designate the account to be used for outgoing calls, select the account number for contacts or dial plan prefixes in their settings.
Tip
For configuring contact call and dial plan, see here.
When the device is connected to the SmartPlus Cloud, the display label, register name, and username will show its SIP number.
Display Label: The label of the device.
Display Name: The designation for Account 1 or 2 to be shown on the device itself on the calling screen.
Register Name: Same as the username from the PBX server.
User Name: Same as the username from the PBX server for authentication.
Password: Same as the password from the PBX server for authentication.
SIP Server Configuration
SIP servers enable devices to establish and manage call sessions with other intercom devices using the SIP protocol. They can be third-party servers or built-in PBX in Akuvox indoor monitor.
Set it up on the web Account > Basic > Preferred SIP Server interface.

Server IP: Enter the server’s IP address or its domain name.
Port: Specify the SIP server port for data transmission.
Registration Period: Define the time limit for SIP account registration. Automatic re-registration will initiate if the account registration fails within this specified period.
You can also register SIP accounts on the Setting > Account screen.
SIP Call DND & Return Code Configuration
The Do Not Disturb(DND) feature prevents unwanted incoming SIP calls, ensuring uninterrupted focus. It also allows you to set a code to be sent to the SIP server when rejecting a call.
Set it up on the web Intercom > Call Feature > DND interface.

Account: Select the account(s) that adopt the DND feature.
Return Code When DND: Specify the code sent to the caller via the SIP server when rejecting an incoming call in DND mode
DND On Code: The code used to turn on DND in the SIP server.
DND Off Code: The code used to turn off DND in the SIP server.
Outbound Proxy Server
An outbound proxy server is used to receive all initiating request messages and route them to the designated SIP server in order to establish a call session via port-based data transmission.
Set it up on the web Account > Basic > Outbound Proxy Server interface.

Preferred Server IP: Enter the SIP proxy IP address.
Port: Set the port for establishing a call session via the outbound proxy server.
Alternate Server IP: Enter the SIP proxy IP address to be used when the main proxy malfunctions.
Port: Set the proxy port for establishing a call session via the backup outbound proxy server.
Data Transmission Type
SIP messages can be transmitted in three data transmission protocols: UDP (User Datagram Protocol), TCP (Transmission Control Protocol), and TLS (Transport Layer Security). In the meantime, you can also identify the server from which the data comes.
Set up the data transmission type on the web Account > Basic > Transport Type interface.

UDP: An unreliable but very efficient transport layer protocol. It is the default transport protocol.
TCP: A less efficient but reliable transport layer protocol.
TLS: An encrypted and secure transport layer protocol. Select this option if you wish to encrypt the SIP messages for enhanced security or if the other party’s server uses TLS. To use it, you need to upload certificates for authentication.
SIP Hacking Protection
Internet phone eavesdropping is a network attack that allows unauthorized parties to intercept and access the content of the communication sessions between intercom users. This can expose sensitive and confidential information to the attackers. SIP hacking protection is a technique that secures SIP calls from being compromised on the Internet.
Set it up on the Account > Advanced > Call interface.

Prevent SIP Hacking: Activate this feature to only receive calls from contacts in the whitelist. This protects users’ private and secret information from potential hackers during SIP calls.
Voice Message
When the device is connected to the SmartPlus Cloud, users can leave voice messages on the Directory screen or when the Cloud contacts do not respond to or hang up their calls from the device.
Enable/disable the voice message feature on the Intercom > Basic > Voice Message interface.

Active Sending Enabled: When enabled, users can proactively leave messages to a specific contact. When disabled, the message icon on the Directory screen will be hidden.