Press Button to Make a Call
You can quickly make a call with the preset numbers by pressing the physical push button on E20S. When press the button, all the numbers added from the web interface are called simultaneously. Once any of the numbers receives the call and answers it, the system will automatically terminate the call to the other numbers.
To set up the feature, go to Intercom > Basic > Push Button.

Parameters Set-up:
- Number 1-3: The SIP number or IP address of devices. One box for one number.
- Number 4/5: You can type in 2 numbers in this box and you have to separate them with a semicolon “;”.
- You are allowed to add up to 5 SIP/IP numbers.
- The numbers are regarded as the whitelist numbers.
Emergency Call Mode
You can let the door phone to be used for emergency calls. In this case, when the door phone initials a call, it ONLY ends when the other party picks up or hangs up the call.
To enable the feature, go to Phone > Call Feature > Emergency Call.

Parameters Set-up:
- Emergency Call Mode: If enabled, any calls made by the door phone will only stop when the other party responds by picking up or hanging up the call.
Call Forwarding
Call Forward is a feature that allows for transferring incoming calls to another number. Users can set up call forwarding according to different situations, such as always forwarding calls, forwarding calls when the indoor monitor is busy, or when it doesn’t pick up the call.
To set up call forwarding, go to Phone > Call Feature > Forward Transfer.
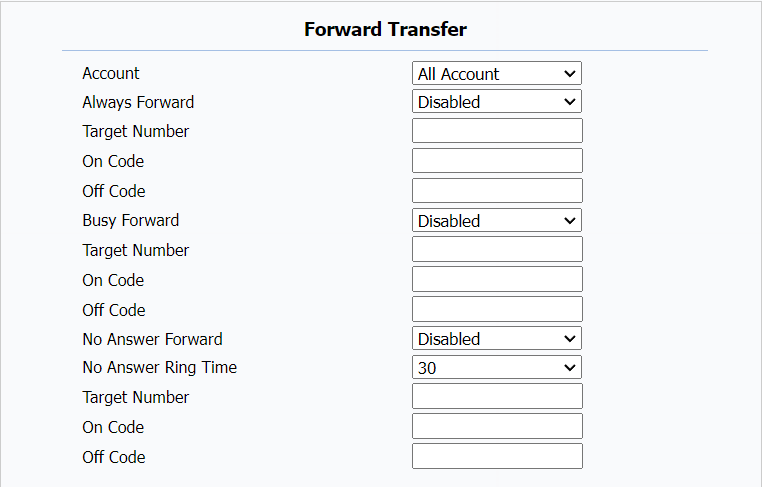
Parameters Set-up:
- Account: To select the account you want to apply this feature to. The options include All Account, Account 1(SIP account), and Direct IP.
- Always Forward: Always to redirect all incoming calls to the designated number.
- Target Number: Set up the forwarded-to number when the call forwarding is enabled.
- On Code: A feature code used to activate the call forwarding function on the server. This feature code can remotely enable call forwarding without changing the phone's settings.
- Off Code: A feature code used to turn off the call forwarding function on the server. It can remotely disable call forwarding without changing the phone's settings.
- Busy Forward: To redirect incoming calls to the designated number when the door phone is busy.
- No Answer Forward: To redirect incoming calls to the preset number when the phone is not answered within a set ringing time. The default time is 30 seconds.
- No Answer Ring Time: To set how long the door phone rings before the incoming call is forwarded to the preset number.
- In terms of priority, Always Forward takes precedence over Busy Forward, and Busy Forward over No Answer Forward.
DND
The Do Not Disturb(DND) feature prevents unwanted incoming SIP calls, ensuring uninterrupted focus. It also allows you to set a code to be sent to the SIP server when rejecting a call.
To set up DND, go to Phone > Call Feature > DND.
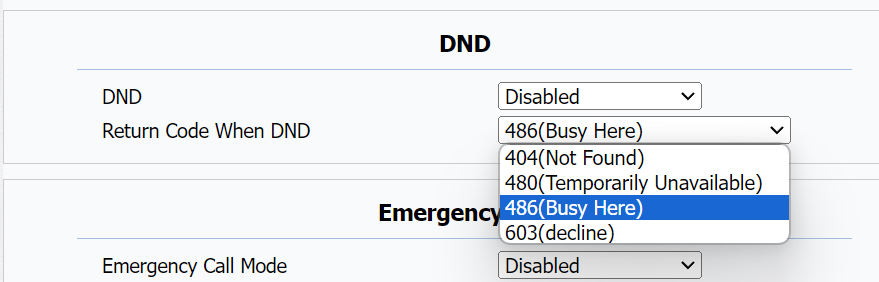
Parameters Set-up:
- Return Code When DND: To select the code to be sent to the caller side via SIP server when the incoming call is rejected. 404 for Not Found; 480 for Temporary Unavailable; 486 for Busy Here; 603 for Decline.
Auto Answer
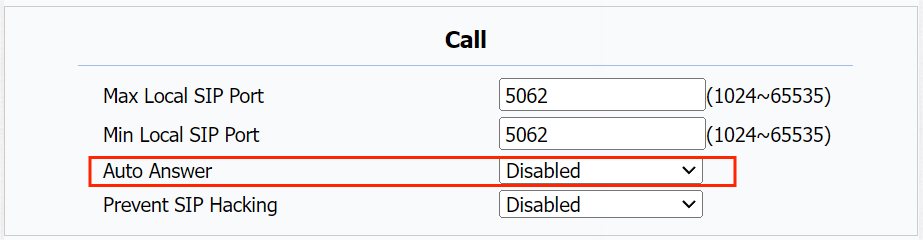
You can define how quickly the door phone should respond by answering the incoming SIP/IP call automatically by setting up the time-related parameters.
To enable auto answer feature for SIP calls, go to Account > Advanced > Call > Auto Answer.
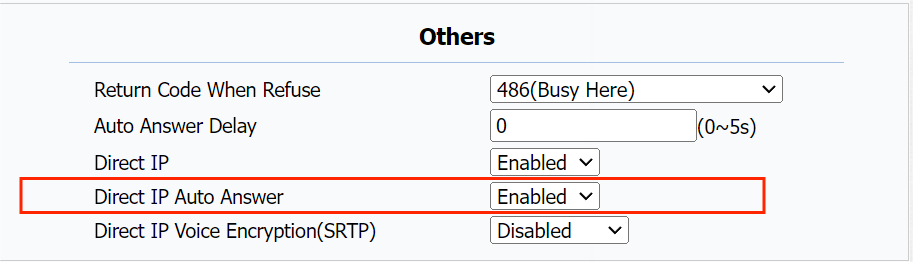
To enable auto answer feature for IP calls, go to Phone > Call Feature > Others > Direct IP Auto Answer.
If you want to set how long the door phone will wait before it automatically answer a call, go to Phone > Call Feature > Others > Auto Answer Delay.

Multicast
The Multicast function allows one-to-many broadcasting for different purposes. For example, it enables the indoor monitor to announce messages from the kitchen to other rooms or to broadcast notifications from the management office to multiple locations. In these scenarios, indoor monitors can listen to or send audio broadcasts.
Click here to watch the demonstration video.
Navigate to Phone > Multicast interface.
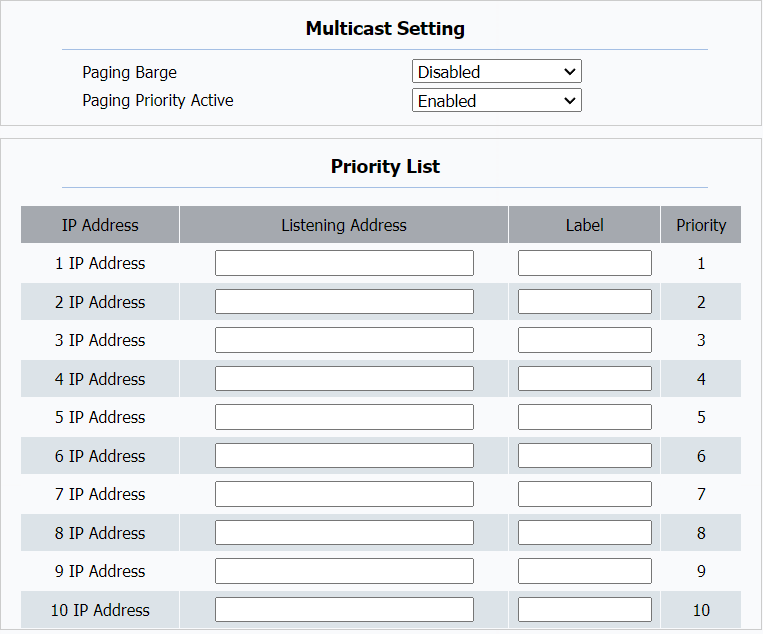
Parameters Set-up:
- Paging Barge: Multicast or how many multicast calls are higher priority than SIP call, if you disable Paging Priority Active, SIP call will have high priority.
- Paging Priority Active: Multicast calls are called in order of priority or not.
- Listening Address: Enter the multicast IP address you want to listen. The multicast IP address needs to be the same as the listened part and the multicast port can not be the same for each IP address. Multicast IP address is from 224.0.0.0 to 239.255.255.255.
- Label: Enter the label for each listening address.
Return Code
The door phone allows you to select the return code when you reject a call. The default code is 486(Busy Here).
To change the code, go to Phone > Call Feature > Others.

Parameters Set-up:
- Return Code When Refuse: To select the return code when you reject a call. The 4 options are 404(Not Found), 480(Temporarily Unavailable), 486(Busy Here), and 603(Decline).
Call Log
If you want to check on the calls inclusive of the dial-out calls, received calls, and missed calls in a certain period, you can check and search the call log on the device web interface and export the call log from the device if needed.
Navigate to Intercom > Call Log interface.
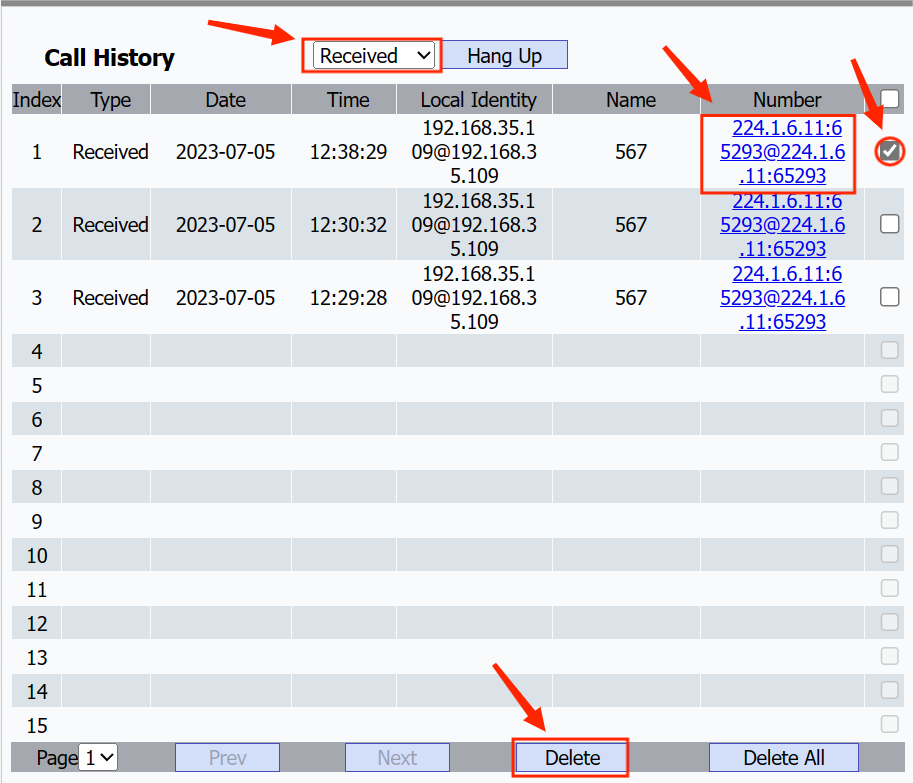
On this page, do any of the following:
- To filter the call logs based on All, Dialed, Received, Missed, and Forwarded types.
- To delete any or all logs, check off the box(es) in the last column, and click Delete at the bottom. Before deleting, tick the box of the desired log.
- To call any of the number from the web interface, click the number in the Number column.