LED Fill Light
LED fill light is mainly designed to reinforce the light at night or in a dark environment.
Set it up on the web Device > Light > LED Fill Light interface.

Mode:
Auto: Turn on the LED light automatically based on the minimum and maximum photoresistor value.
Always On: Enable the LED light.
Always Off: Disable the LED light.
Schedule: Turn on the LED light based on the schedule.
Min/Max Photoresistor: Set the minimum and maximum photoresistor value to automatically control the ON-OFF of the LED light. If the photoresistor value is less than the minimum threshold, turn off the LED. If the photoresistor value is greater than the maximum threshold, turn on the LED.
LED Display Status
LED display adjustment is used to indicate the light changes of the call button in 5 statuses: normal (idle), offline, calling, talking, and receiving a call. The LED status allows users to verify the current mode of the device.
Set it up on the web Device > Light > LED Status interface.

Device Status: There are five statuses: Normal, Offline, Calling, Talking, and Receiving.
LED Color: Three LED colors are available for each option: Blue, Red, and Green.
LED Display Mode: Select the desired LED blinking frequency.
LED Wakeup Mode
You can set the LED to be controlled by infrared detection.
To set it up, go to the Device > Light > LED Control interface.

Wake Mode:
Auto: When the infrared detection is triggered, the LED will be on.
Manual: The LED will not be controlled by infrared detection. You need to manually set up the LED-enabled time.
Control LED Display by HTTP URL
You can enter an HTTP URL in a browser to manage the LED color and frequency.
To set it up, go to the Device > Light > LED Control interface.

The HTTP URL format is http://device IP/fcgi/do?action=LedAction&State=1&Color=1&Mode=2500.
Replace the number in the format to change the LED to the desired status.
State: 1=Normal ;2=OffLine ;3=Calling;4=Talking;5=Receiving;
Color: 0=Red;1=Green;2=Blue;
Mode: 0=Always On;1=Always Off;500/1000/1500/2000/2500/3000=Corresponding blinking frequency.
Card Reader LED Control
You can enable or disable the LED lighting on the card reader area. You can also set a specific time to turn on the light.
To set it up, go to the Device > Light > LED Control interface.

Card LED Enabled: When enabled, specify the period when the light is on.
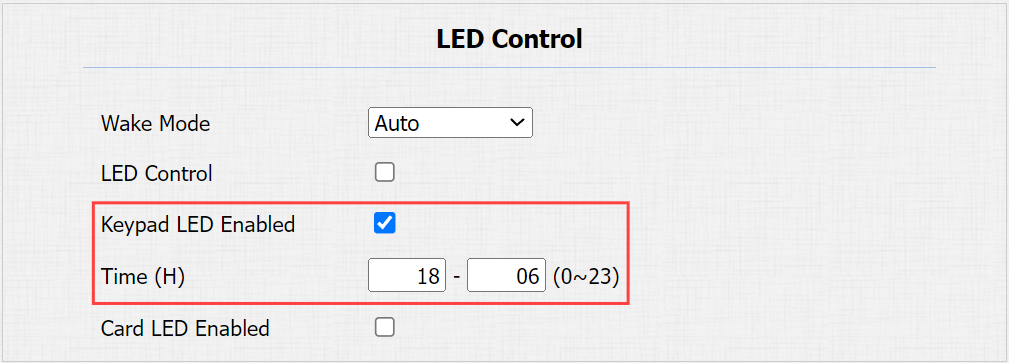
Keypad LED Control
For R20B, you can enable or disable the LED lighting for buttons. You can also set a specific time to turn on the light.
To set it up, go to the Device > LED Setting > LED Control interface.