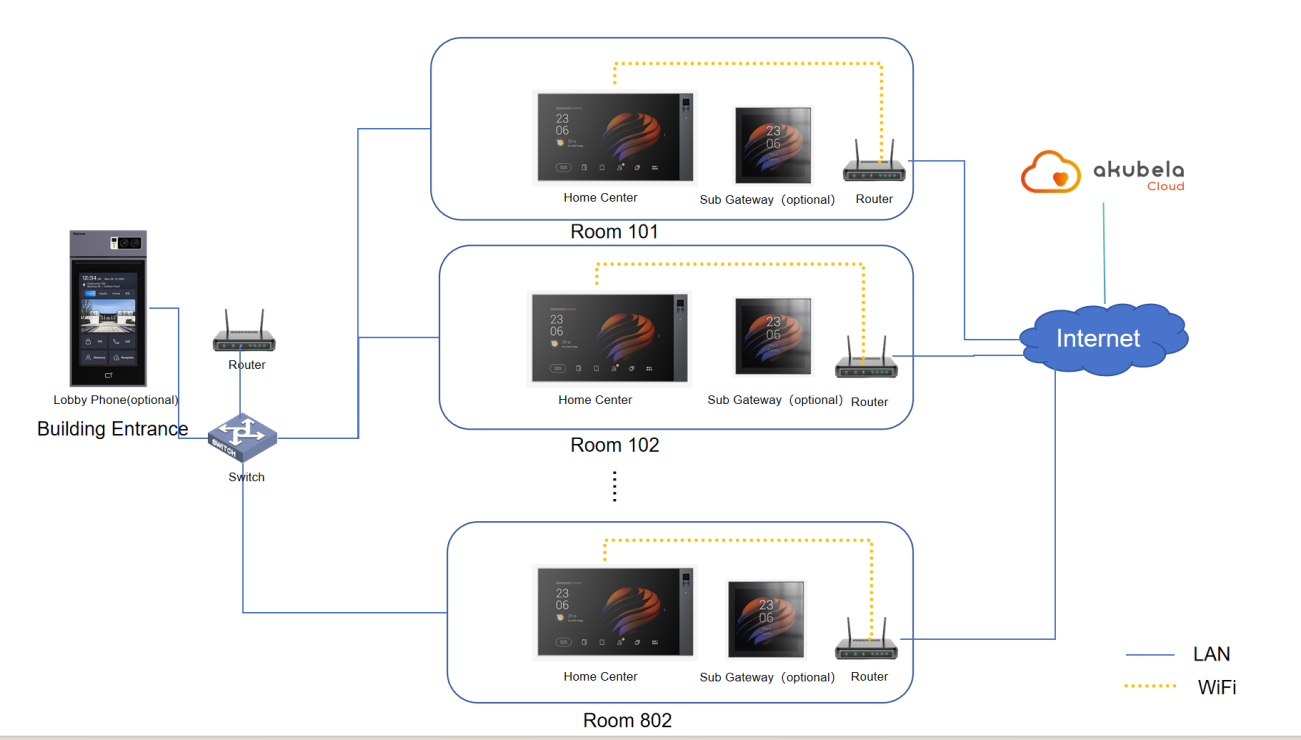
Applicable Scenario
This solution applies when both the community and individual units are initially connected via a local area network, and later only the units have internet access.
Topology
Before Getting Started
Collect devices details.
Use the table below to record device information, including static IP addresses, room numbers or public area locations, and other relevant details.
MAC | IP Address | Location |
Add intercom devices’ MAC addresses to the distributor’s MAC library in the Akuvox SmartPlus platform.
Upgrade devices to required firmware versions.
Akuvox intercom devices: All versions are supported.
akubela smart home panels:
HyPanel: 51.1.36.314 and later
HyPanel(V2): 251.1.36.306 and later
HyPanel Lite: 41.1.36.40 and later
HyPanel Plus: 52.1.36.307 and later
HyPanel KeyPlus: 53.1.36.307 and later
HyPanel Pro: 71.1.38.338 and later
HyPanel Ultra: 281.1.38.317 and later
HyPanel Supreme: 1001.1.38.313 and later
SmartPanel: 933.1.38.313 and later
SmartPanel Pro: 119.1.38.311 and later
Setup Workflow

Configuration
1. Door Phone Settings
1.1. Cloud Setup
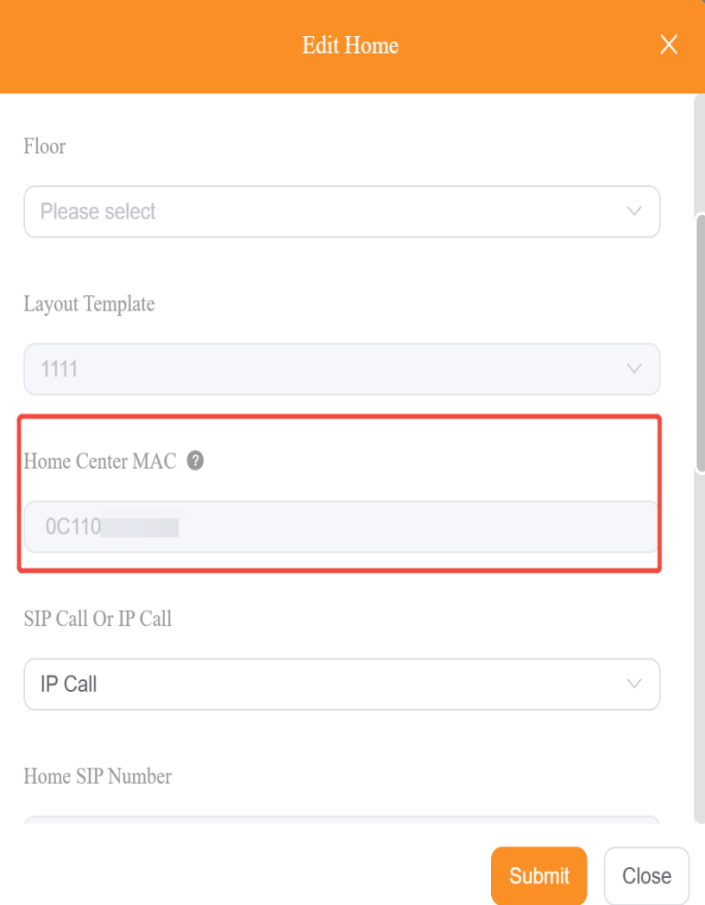
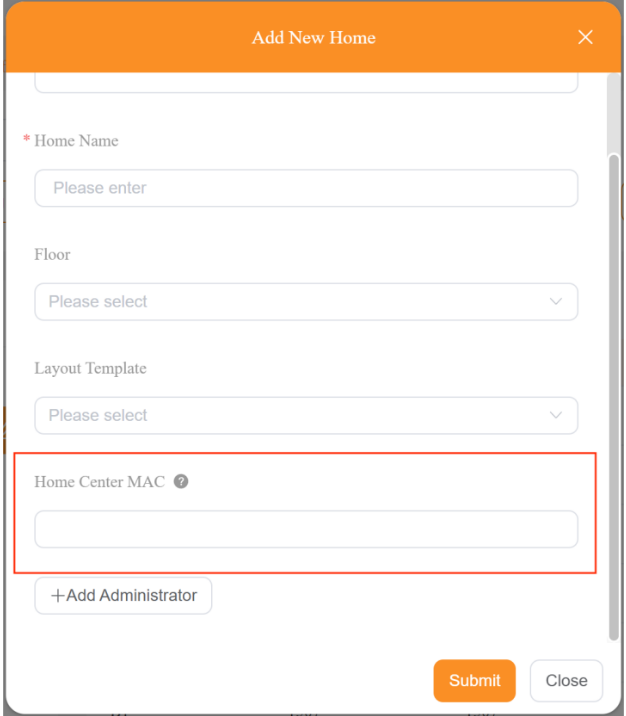
(1) Log in to akubela Cloud with the installer account, and add each home center’ MAC to its home.
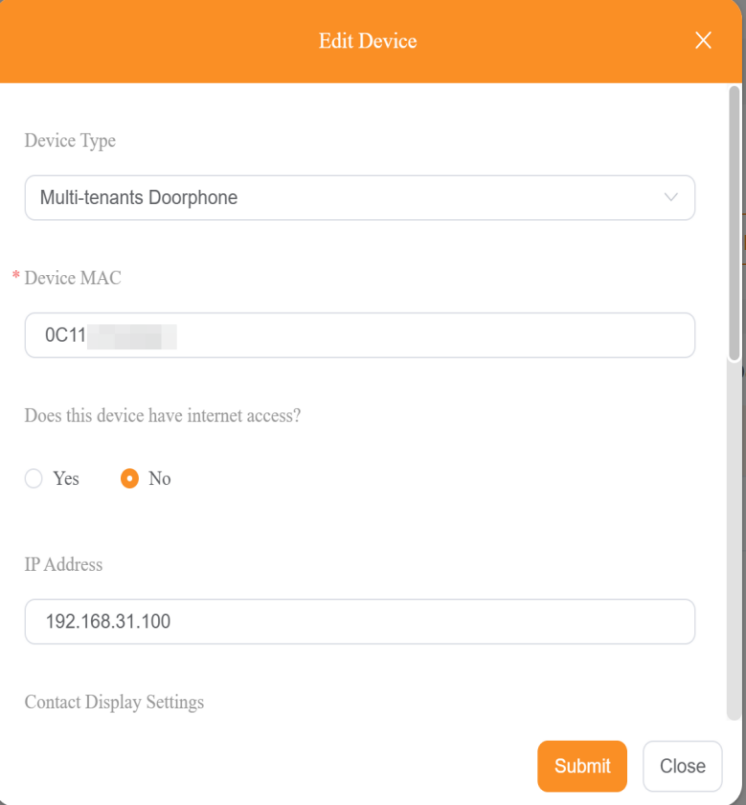
(2) Add public intercom devices to public areas, enter their preset IP addresses, set DTMF to 0, select No for “Does this device have internet access” option, and configure other required settings.
1.2. Security Mode Settings
Log in to the door phone’s device web portal, go to Security > Basic > High Security Mode, and disable it.
TIP:
Door phone setting paths may vary slightly; consult the respective admin guide if needed.
NOTE:
You can skip this step if the panel’s firmware is newer than the versions below. However, to ensure proper functionality, we recommend disabling High Security Mode for the best experience.
HyPanel: 51.1.39.23
HyPanel(V2): 251.1.39.7
HyPanel Plus: 52.1.39.11
HyPanel KeyPlus: before 53.1.39.10
HyPanel Pro: before 71.1.39.37
HyPanel Ultra: before 281.1.39.22
HyPanel Supreme: before 1001.1.39.24

1.3. Calling Settings
It is recommended to set the home center’s LAN IP address as the local contact on the door phones.
For multiple devices, you can bulk import contacts using a template.
For door phones without a touchscreen or with only physical keypads, configure dial plans or speed-dial buttons. See Contacts Configuration for detailed instructions.
1.4. Unlock Settings
It is recommended to complete this setting before device installation.
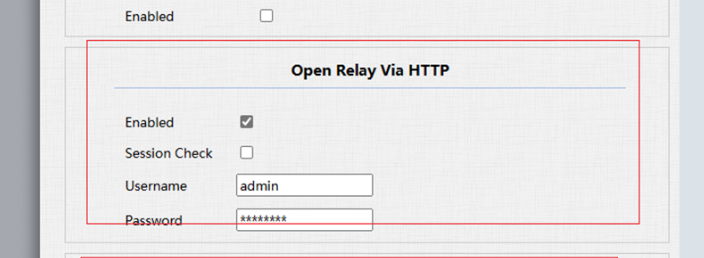
(1) Log in to the door phone’s device web portal.
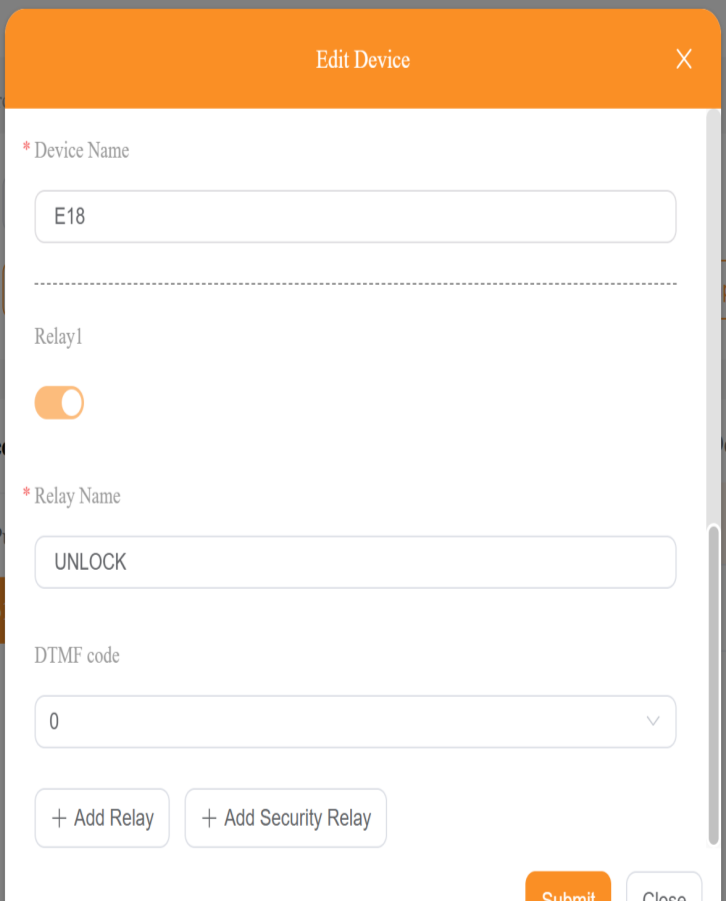
(2) In the Open Relay Via DTMF field, set Assigned The Authority to All Numbers.
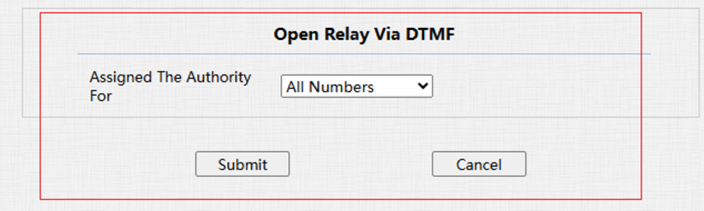
(3) Enable Open Relay via HTTP, and configure username and password.
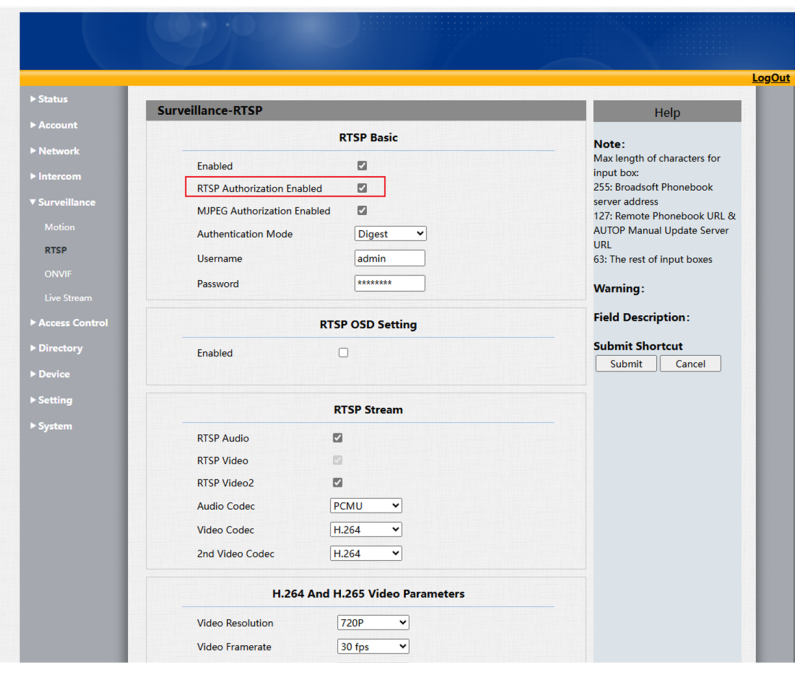
1.5. Monitoring Settings
Disable monitoring authentication and authorization on the door phone to enable normal monitoring functionality.
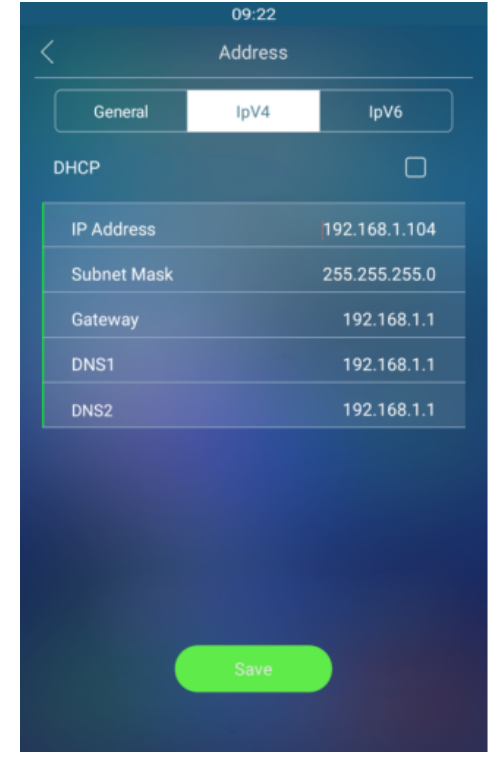
1.6. LAN Settings
During onsite installation, connect the door phone to LAN and power as per the quick guide.
Verify that the device IP address matches the preset IP.
For detailed instructions, see this guide.
2. akubela Panel Settings
2.1. Cloud Setup
Log in to the akubela Cloud with the installer account, create projects, and add homes. Make sure to add each home center’s MAC address to its corresponding home.
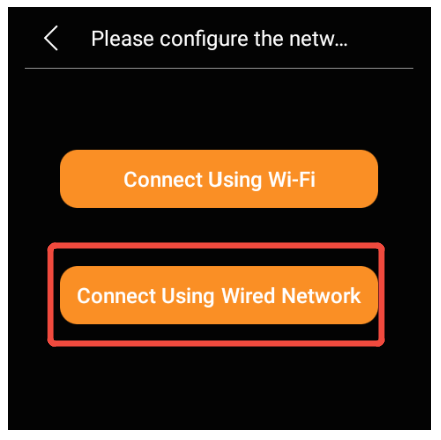
2.2. LAN Settings
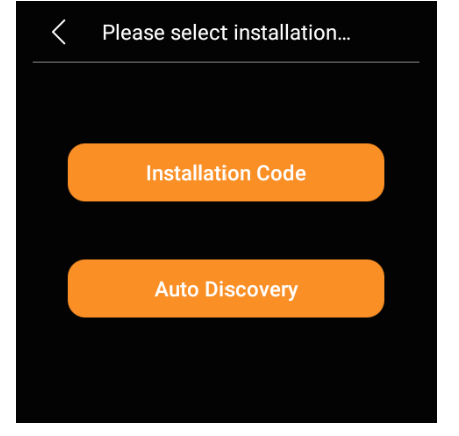
Power on the home center, complete the initial setup, assign a static IP address, and select Local Installation (or Auto Discovery in some firmware versions).
2.3. Add Door Phones
Option 1 (Recommended)
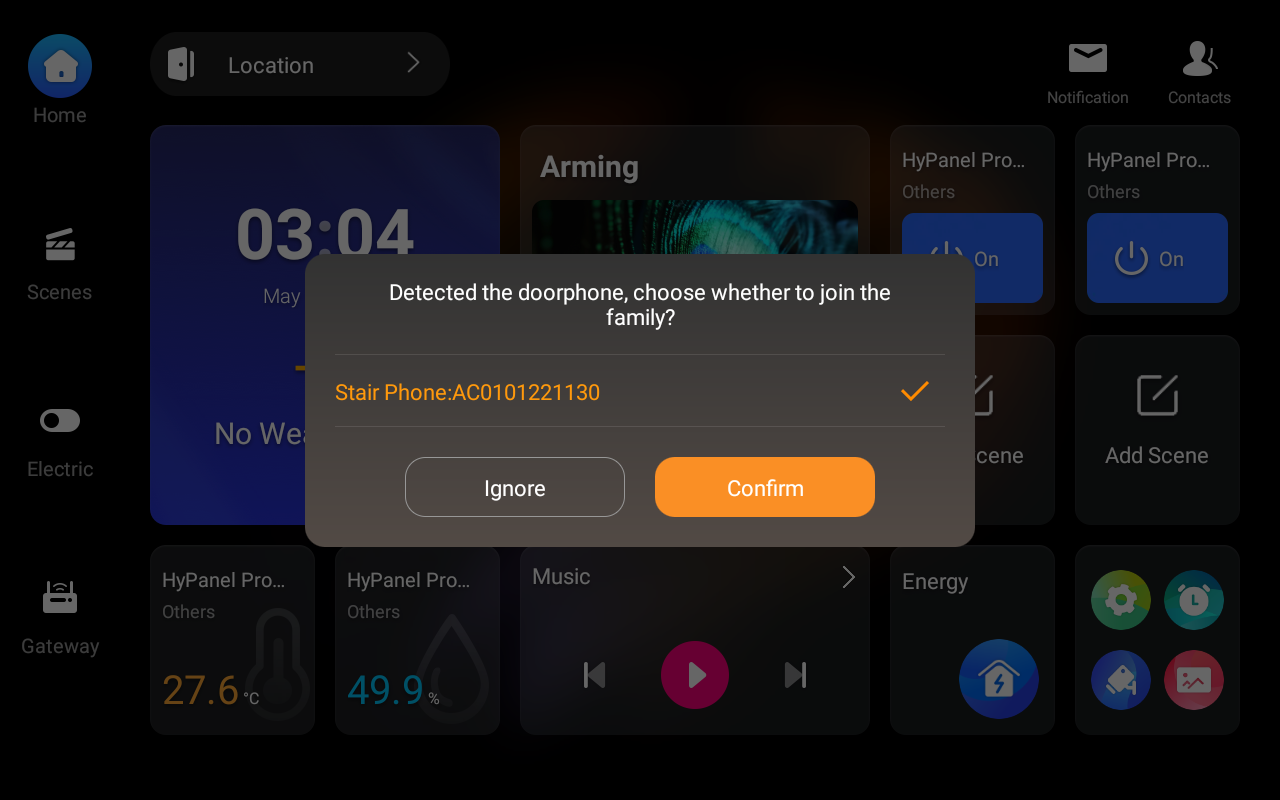
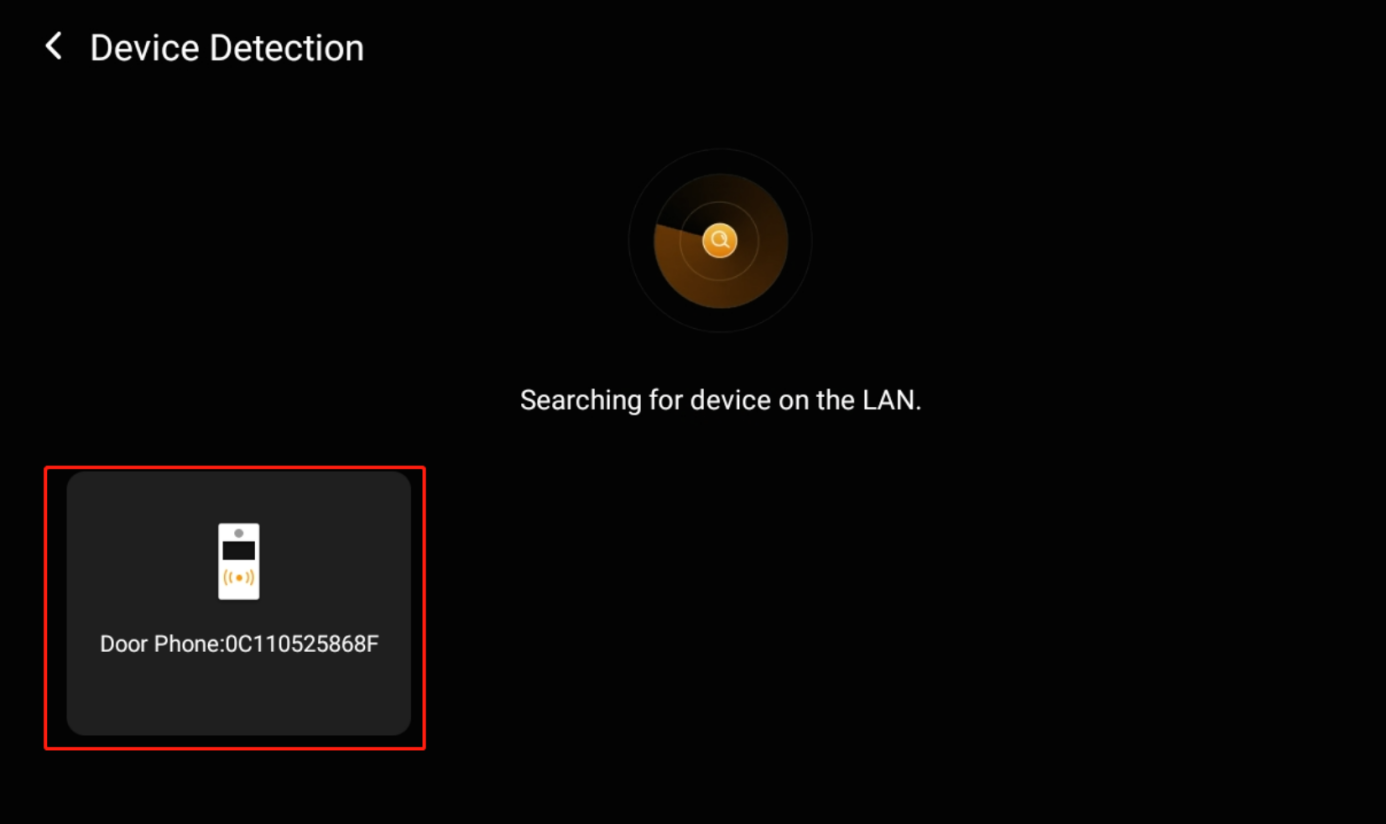
After startup, the home center automatically scans for door phones on the same LAN. Tap the detected device to add it.
Option 2
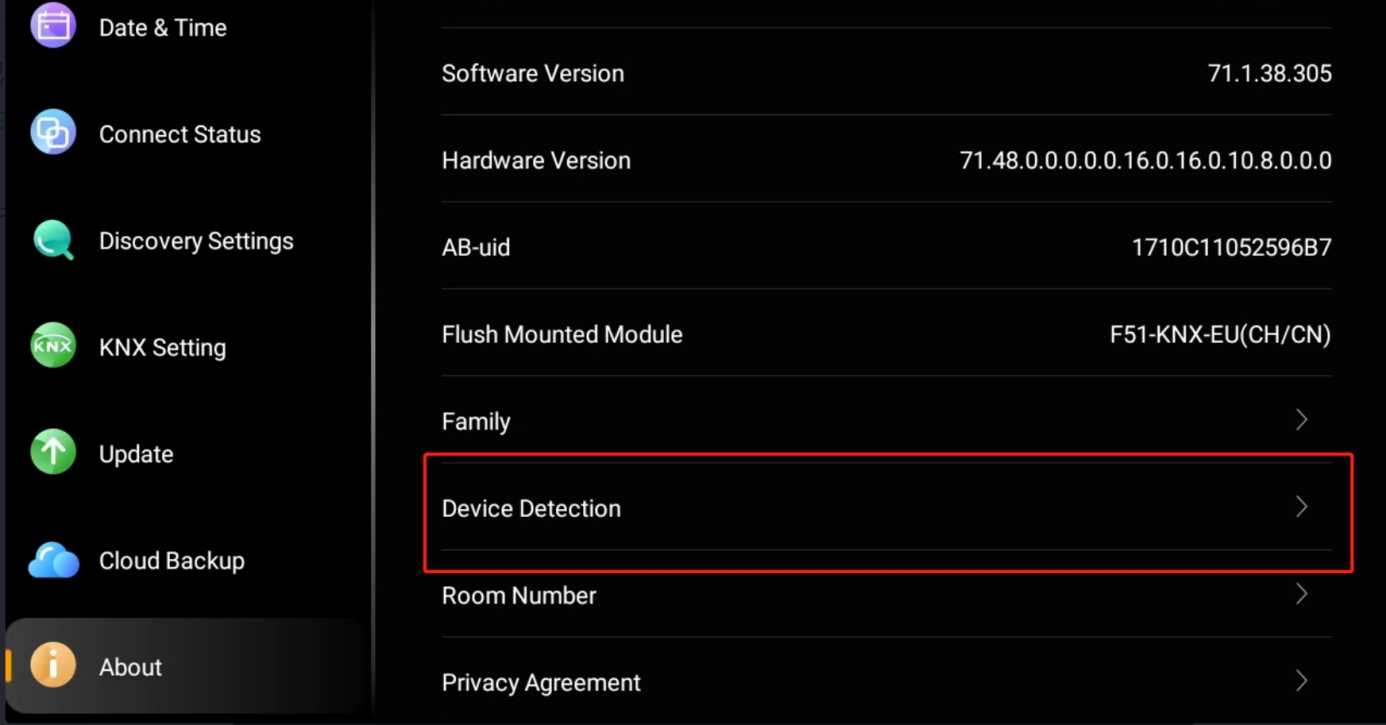
On the panel, go to Settings > System Settings > About > Device Detection.
2.4. Internet Connection
Go to Settings > Wi-Fi on the panel, and connect it to a network with internet access.
The device will connect to the cloud within a few minutes, or you can reboot it to speed up the process.
2.5. Unlock Settings
After the home center connects to the Internet, log in to its web portal using the default credentials (admin/admin) and enable Cloud Contacts. Ensure the panel and door phone use the same HTTP username and password (matching door phone settings).
This enables unlocking from preview, call, and monitoring interfaces.
