MJPEG and RTSP are the primary monitoring stream types discussed in this chapter.
MJPEG, or Motion JPEG, is a video compression format that uses JPEG images for each video frame. Akuvox devices display live streams on the web interface and capture monitoring screenshots in MJPEG format. Settings related to MJPEG determine video quality and the on/off status of the live stream function.
RTSP stands for Real Time Streaming Protocol. It can be used to stream video and audio from the third-party cameras to the device. You can add a camera’s stream by adding its URL. The URL format of Akuvox devices is rtsp://Device’s IP/live/ch00_0
ONVIF is an Open Network Video Interface Forum. It enables the device to scan and discover cameras or intercom devices with activated ONVIF functions. Live streams obtained through ONVIF are essentially in RTSP format.
RTSP Stream Monitoring
The RTSP feature allows Akuvox indoor monitors, or third-party devices, to obtain the live stream from the door phone.
You can set up the RTSP authentication credentials and video parameters.
RTSP Basic Setting
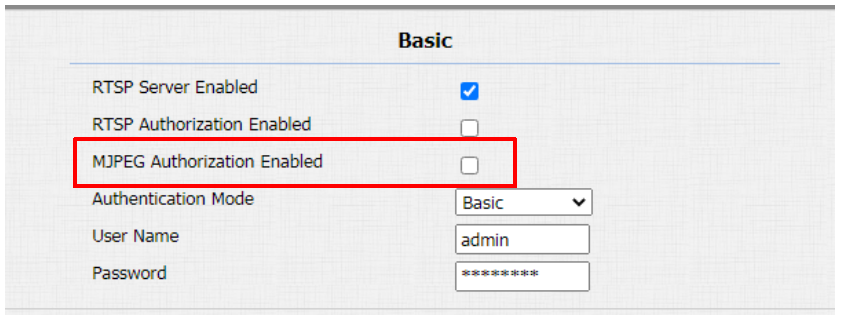
You are required to set up RTSP function on device web Surveillance > RTSP > RTSP Basic interface in terms of RTSP Authorization, authentication and password etc before you are able to use the function.
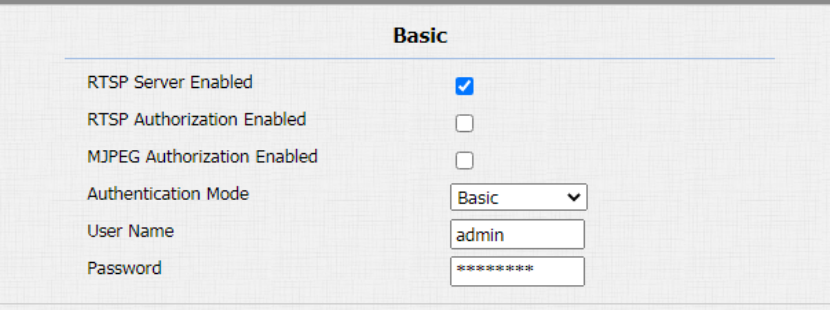
Parameters Set-up:
-
RTSP Authorization Enabled: click on Enable and Disable in RTSP Authorization field to enable or disable the RTSP authorization. If you enable the RTSP Authorization, you are required to enter RTSP Authentication Type, RTSP Username, RTSP Password on the intercom device such as indoor monitor for authorization.
-
RTSP Authentication Type: select RTSP authentication type between “Basic” and “Digest”. “Basic" is the default authentication type.
RTSP Stream Setting
The RTSP stream can use either H.264 or Mjpeg as the video codec. If you choose H.264, you can also adjust the video resolution, bitrate, and other settings.
Navigate to Surveillance > RTSP > RTSP Stream interface.
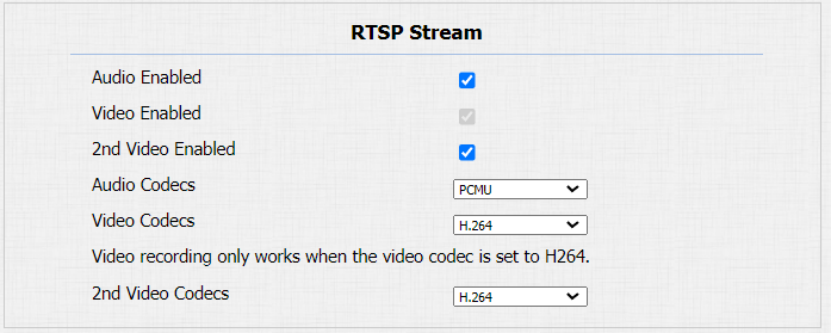
Parameters Set-up:
-
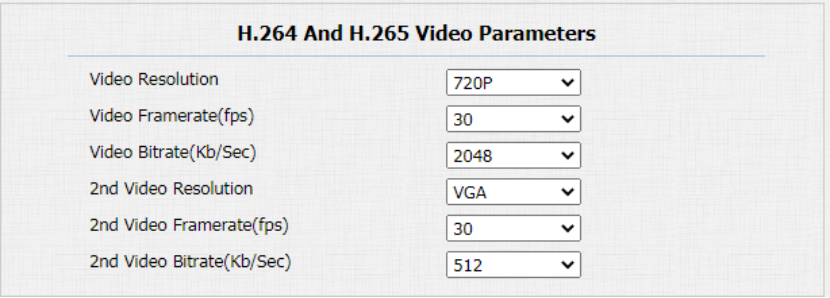
Video Resolution: select video resolutions among five options: “CIF”, ”VGA”, ”4CIF”, ”720P”, and “1080P”. The default video resolution is “720P”. and the video from the door bell might not be able to be shown in the indoor monitor if the resolution is set higher than “4CIF”.
-
Video Framerate: “30fps” is the video frame rate by default.
-
Video Bitrate: select video bit-rate among six options: “64 kbps”, “128 kbps”, “256kbps”, “512 kbps”, “1024 kbps”, “2048 kbps” according to your network environment. The default video bit-rate is “ 2048 kpbs”.
-
2nd Video Resolution: select video resolution for the second video stream channel. While the default video solution is “VGA”.
-
2nd Video Framerate: select the video framerate for the second video stream channel. “25fps” is the video frame rate by default for the second video stream channel.
-
2nd Video Bitrate: select video bitrate among the six options for the second video stream channel. While the second video stream channel is “512 kpbs” by default.
NACK
Negative Acknowledgment(NACK)indicates a failure or error in data transmission or processing. It is used to request retransmission or signal the failure to the sender for ensuring data integrity.
To enable NACK, navigate to Intercom > Call Feature > Others.

Parameters Set-up:
- NACK Enabled: enable the NACK. It can be used to prevent losing data packet in the weak network environment when discontinued and mosaic video image occurs.
MJPEG Image Capturing
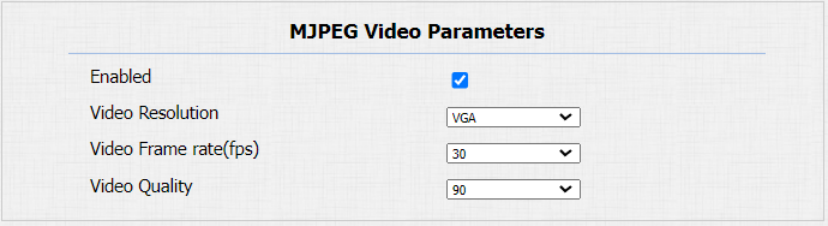
You can take a monitoring image in Mjpeg format with the device. To do this, you need to turn on the Mjpeg function and choose the image quality.
You can enable the Mjpeg function on Surveillance > RTSP > RTSP Basic and set the image quality on the web Surveillance > RTSP > MJPEG Video Parameters interface.
Parameters Set-up:
-
MJPEG Authorization Enabled: tick it to access device video or real-time screenshots through a browser (http address such as: http://device IP:8080/video.cgi (dynamic video), http://device IP:8080/jpeg.cgi (static screenshot) )
-
Video Resolution: select video resolutions among five options: “CIF”,“VGA”,“4CIF”,“720P”, and “1080P”. The default video resolution is “VGA”. and the video from the door bell might not be able to be shown in the indoor monitor if the resolution is set higher than “4CIF”.
-
Video Framerate: “30fps” is the video frame rate by default.
-
Video Quality: the video bitrate, from 50 to 90.
ONVIF
You can access the real-time video from the device's camera using the Akuvox indoor monitor or other third-party devices like Network Video Recorder(NVR). Enabling and setting up the ONVIF function on the device will allow its video to be visible on other devices.
Click here to view an example of using the ONVIF feature: the integration with Uniview NVR System.
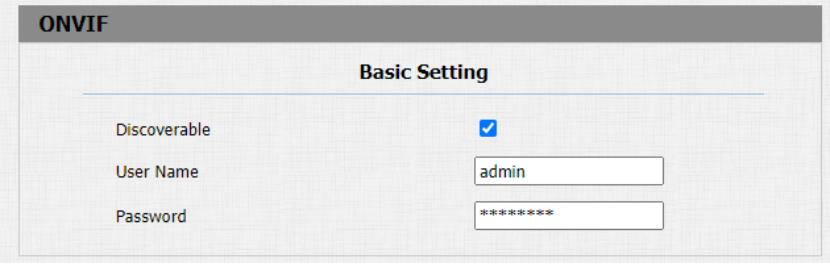
Go to Surveillance > ONVIF interface.
Parameters Set-up:
-
Discoverable: tick the check box to enable the Discoverable ONVIF mode. If you select “Discoverable”, then the video from the door bell camera can be searched by other devices.
-
User Name: enter the user name. The user name is “admin” by default.
-
Password: enter the password. The password is “admin” by default.
After the setting is complete, you can enter the ONVIF URL on the third party device to view the video stream.
For example: http://IP address:80/onvif/device_service
- Fill in the specific IP address of the door bell in the URL.
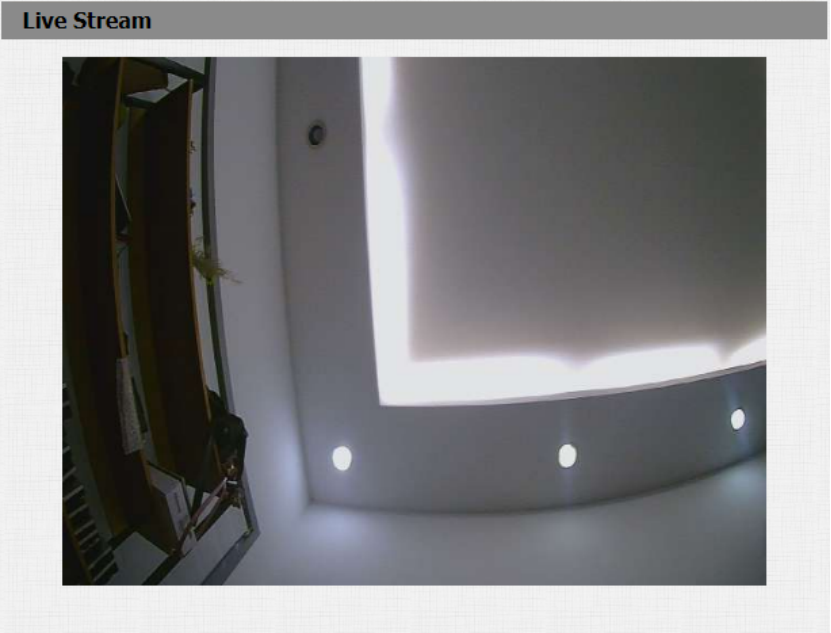
Live Stream
There are two ways to check the real-time video from the device. One is to go to the device web interface and view the video there. The other is to enter the correct URL on the web browser and access the video directly.
Navigate to Surveillance > Live Stream interface.
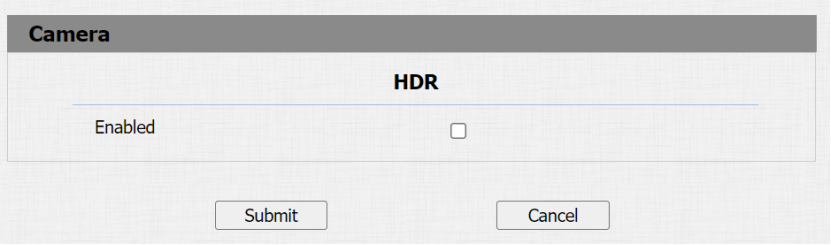
Camera Setting
HDR function can be turned on in low-light or back-lit scenarios for capturing better images. It is disabled by default. To configure on Device > Camera interface.