The Project interface allows you to manage all your projects, including viewing project details, creating projects, adding devices, and managing layout templates.
View Projects and Details
Select Community or Single-tenant to view a list of all projects of that type along with key summary data.
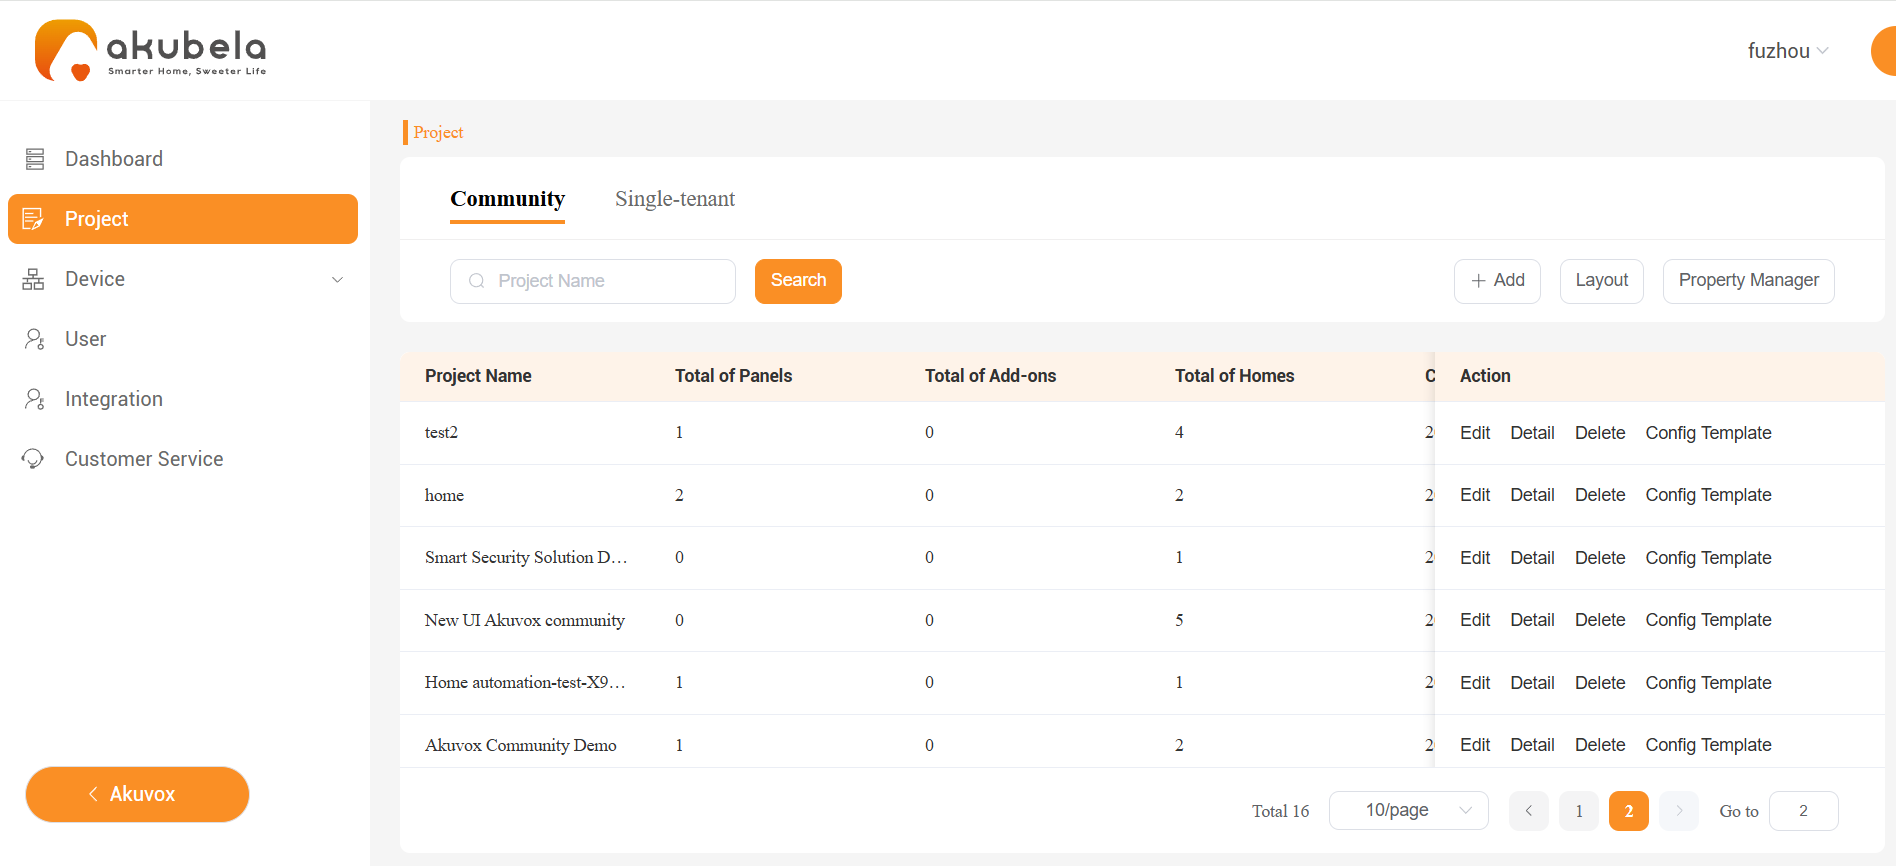
To view comprehensive information such as home units, linked devices, and associated end users, click the Detail button.
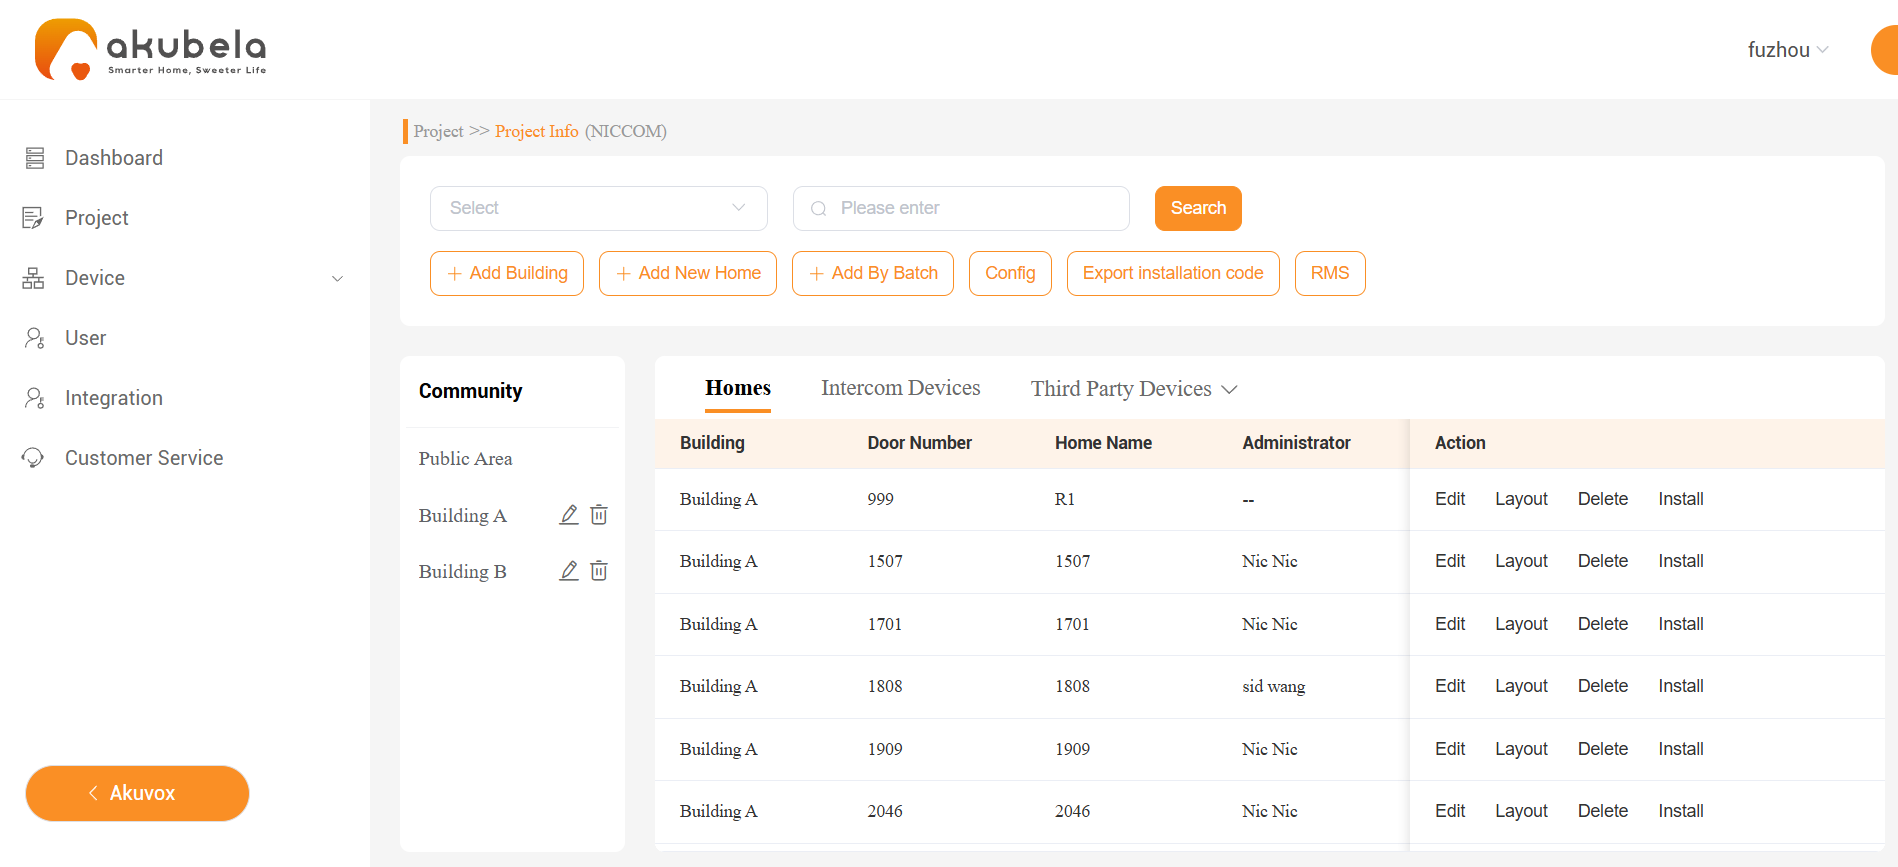
Layout: Click to view a home’s floor plan, devices, and configuration settings.
Install: Click to export installation codes required for cloud connection.
Create Community Projects
You can create projects individually or in batches to streamline deployment.
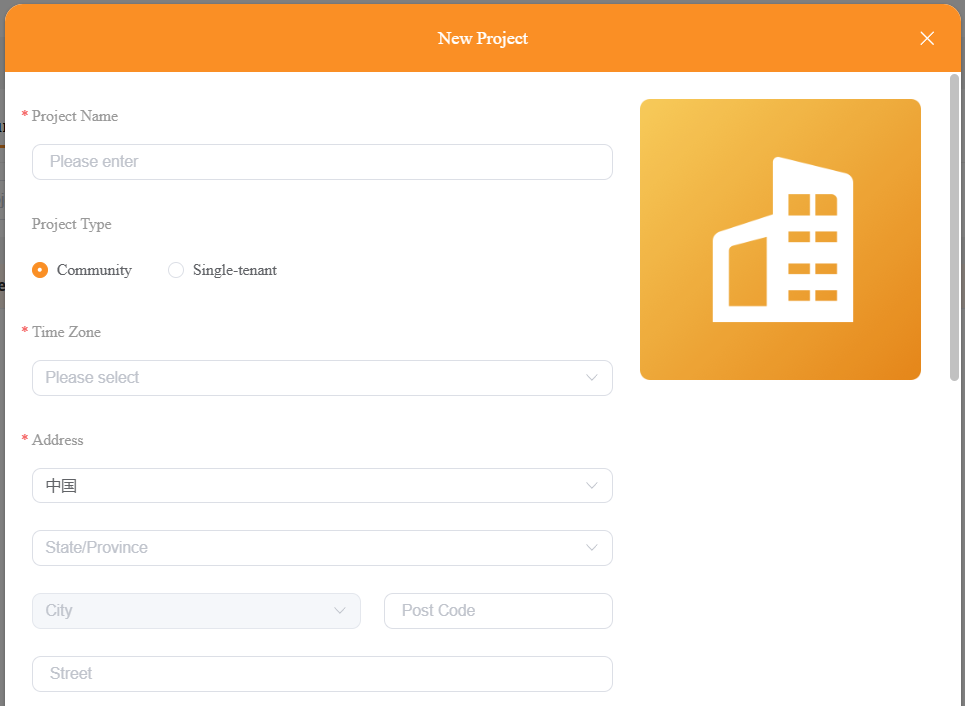
Select Project > Community > Add > New project > Submit.
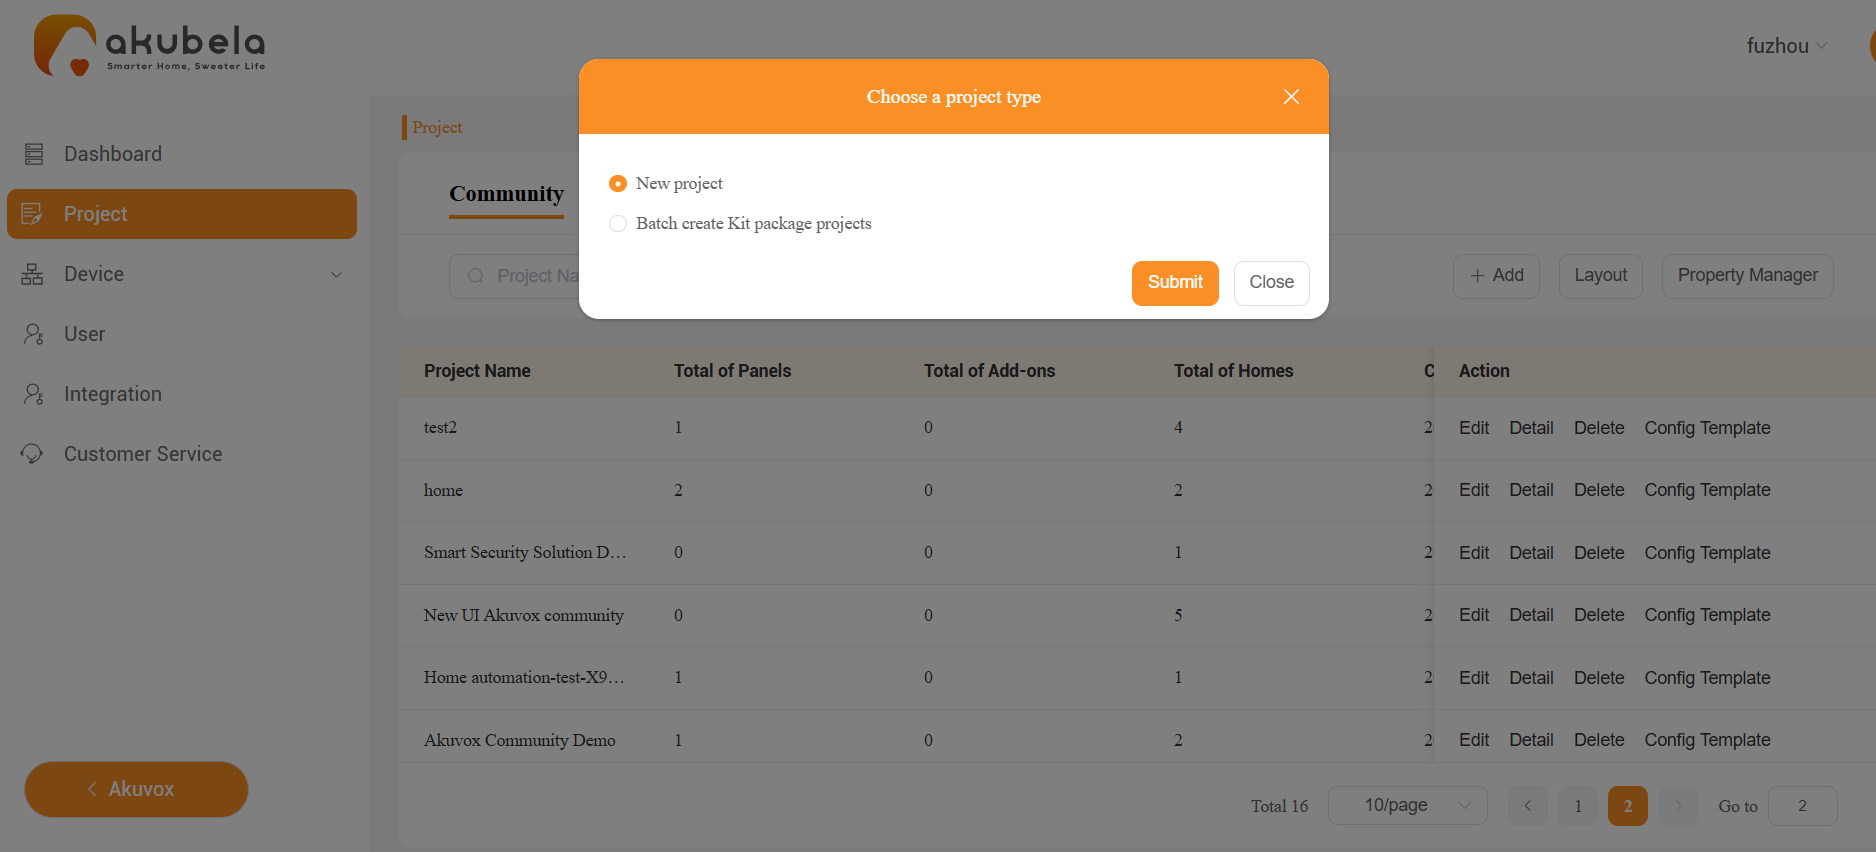
Enter the required information. Ensure the address is correct to provide devices with correct localized weather data.
Configuration | Description |
Project Name | Enter the name of the project. |
Project Type | Select whether the project is a Community or Single-Tenant installation. |
Time Zone | Select the local time zone to ensure panels display the correct time. |
Address | Provide a precise address to enable accurate weather information for the project location. |
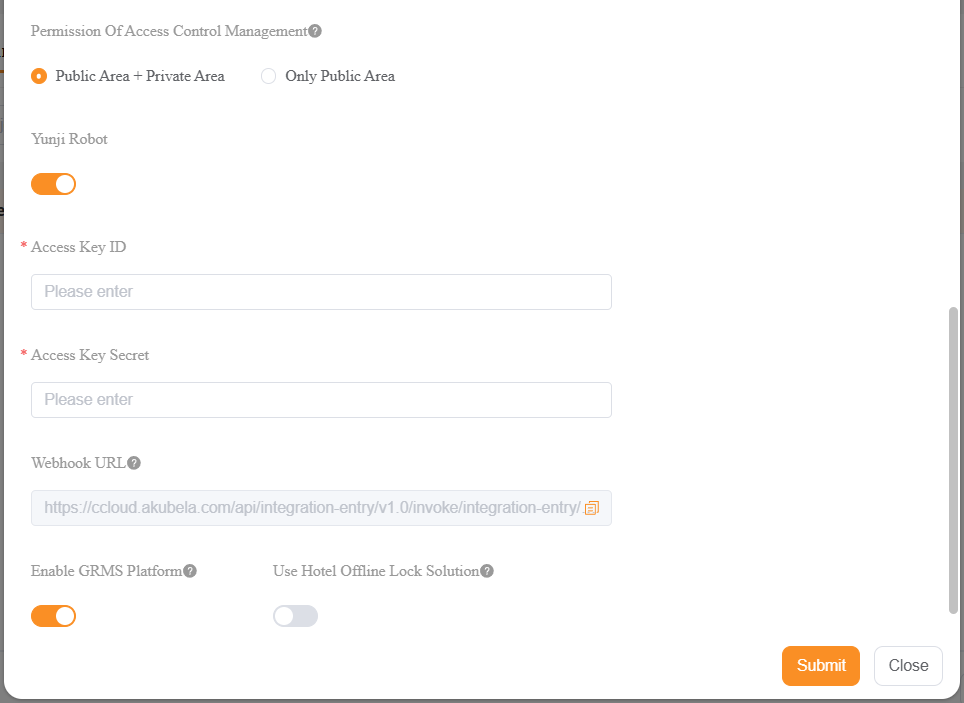
Permission of Access Control Management | Set the access scope.
|
Yunji Robot | Enable this to support Yunji robot delivery and pickup services. Once enabled, a Robot Send card will appear on large-screen panels within the project.
|
- Access Key ID | Enter the robot access credential ID. |
- Access Key Secret | Enter the robot access credential secret. |
- Webhook URL | Copy this URL and paste it into the robot developer platform. |
Enable GRMS Platform | Enable the GRMS functions.
|
- Use Hotel Offline Solution | Enable this if the hotel project utilizes offline locks.
|
Click Submit. The newly-created project will be displayed in the project list.
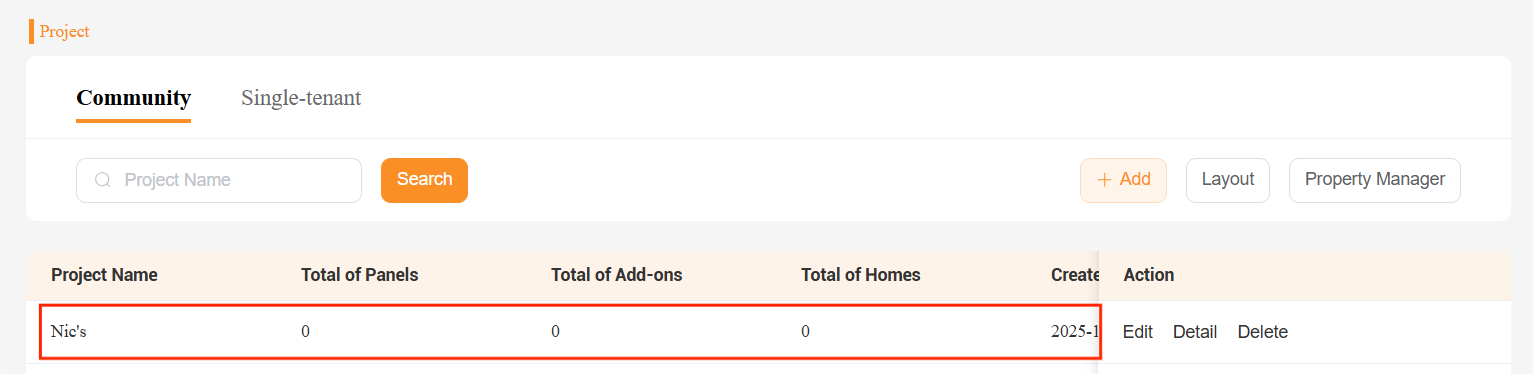
Click the Detail button of the project.
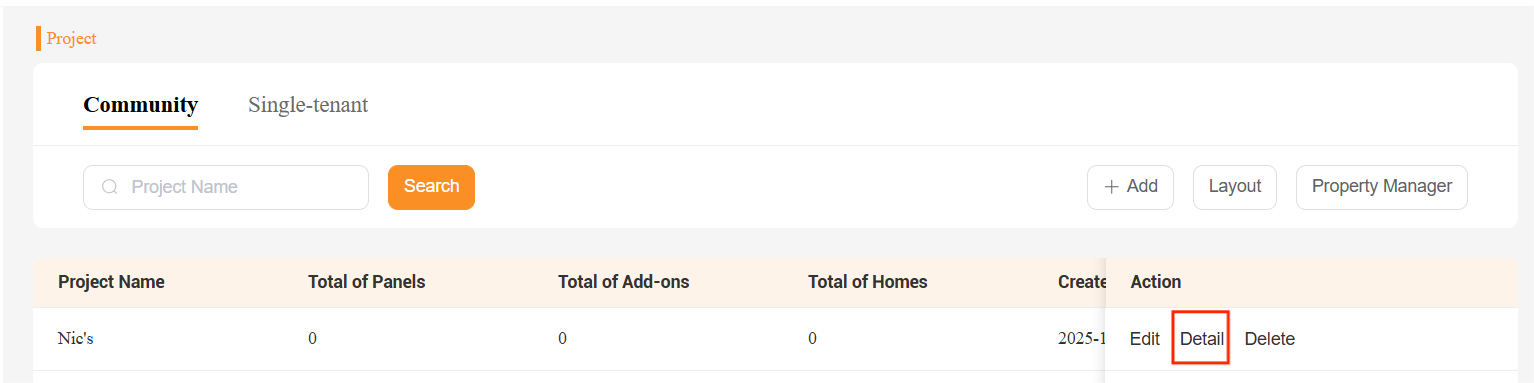
Click
 and name the building.
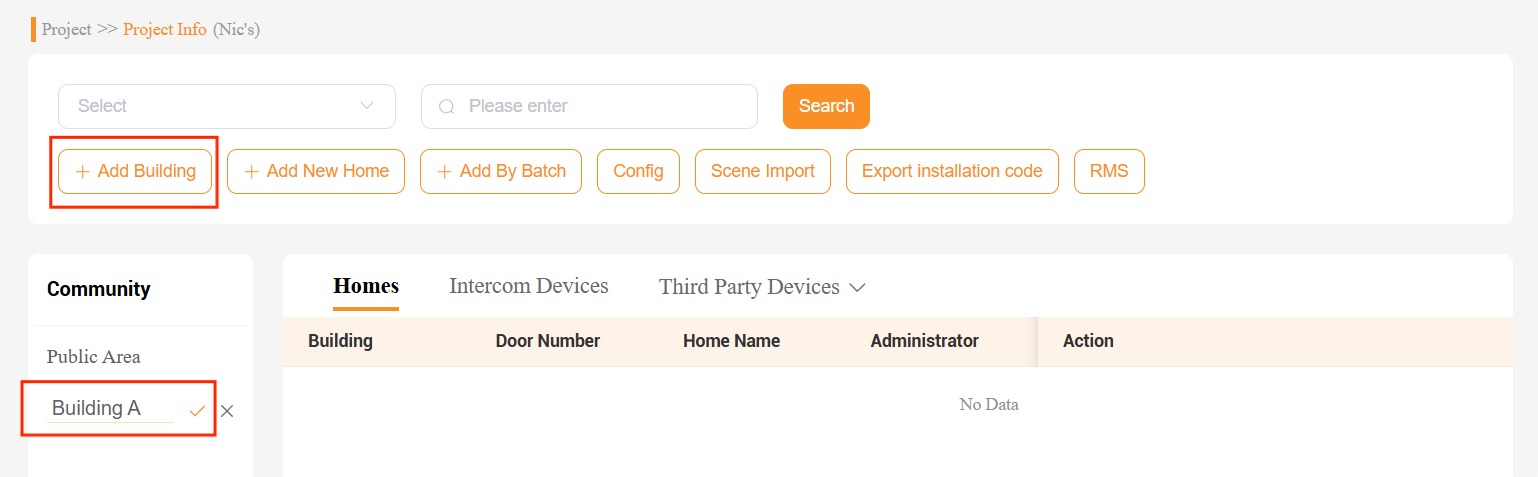
Select the building and add homes. You can either add them one by one, or create in batch.
To add homes individually: Click
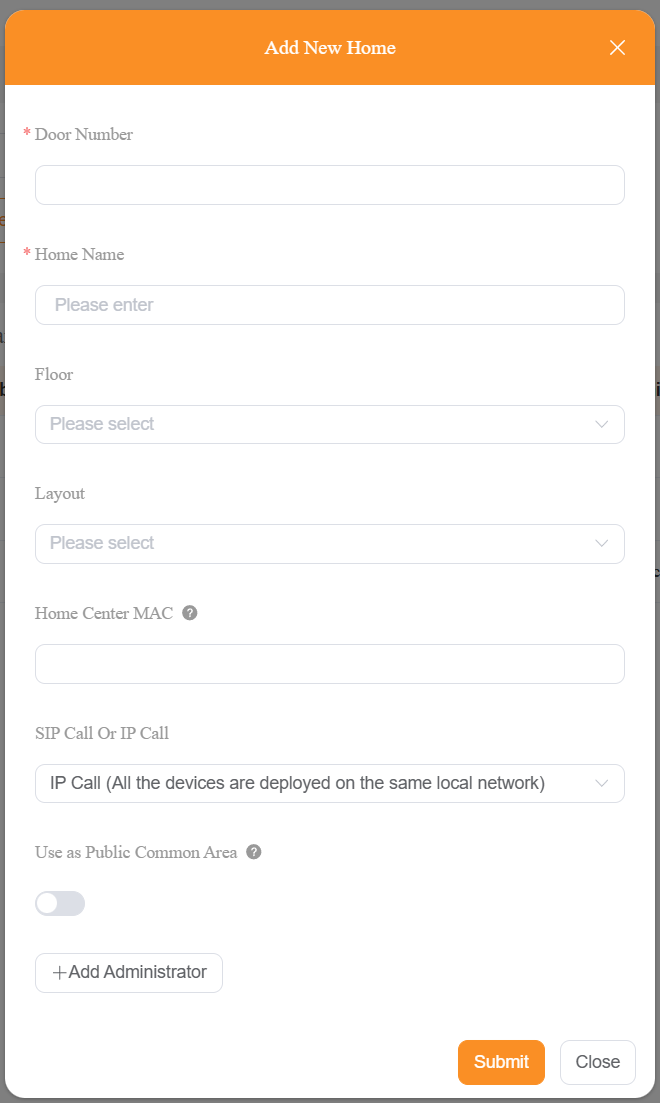
 , then enter the required details based on your chosen installation mode.
Configuration | Description |
Door Number | Enter the door number |
Home Name | Name the home |
Layout Template | Optional. Apply a pre-defined template or customize the layout manually later. |
Floor | Enter the floor number. This is used for floor-based access control via intercom devices.
|
Home Center MAC |
|
SIP Call or IP Call | Optional. Select the communication protocol between the HyPanel and door phones:
|
Use as Public Common Area | Designates this room as the management center for public emergency alarms when a HyPanel Elite 7 (PG42) serves as the Home Center.
|
Add Administrator | Add the family’s administrator account.
|
To add homes in batch:
Click
 > Standard Project > Download The Template to download the Excel template.
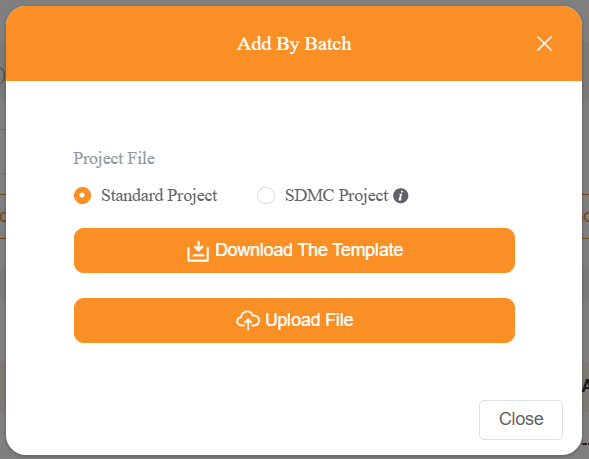
Complete all required fields (marked with an asterisk) and save the file.

Click Add Homes By Batch to upload the template file.
To import homes from SDMC in batch:
TIP:
This method is intended for scenarios where public intercom devices lack internet access and akubela panels require a cloud connection for home control. In this configuration, public intercom streams are routed through the home center.
Create and export project from Akuvox SDMC (SIP Device Management Center). Refer to this guide for details.
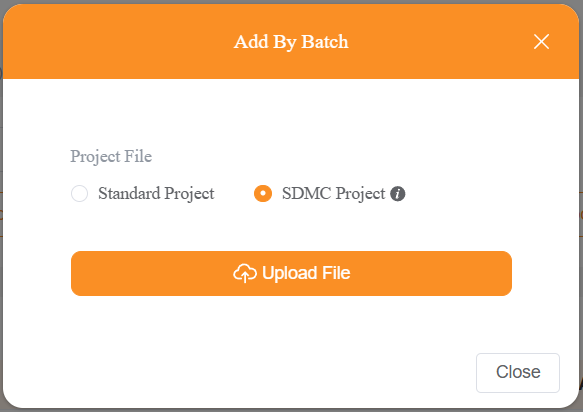
Click
 > SDMC Project > Upload File to import the project file.
Create Single-Tenant Projects
You can create single-tenant projects either individually or in batches.
Create an Individual Project
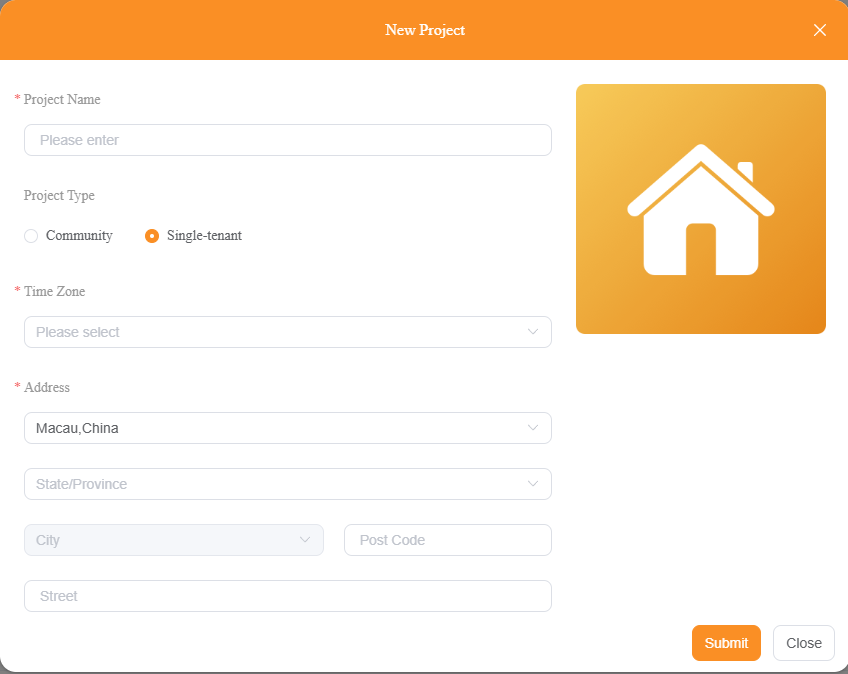
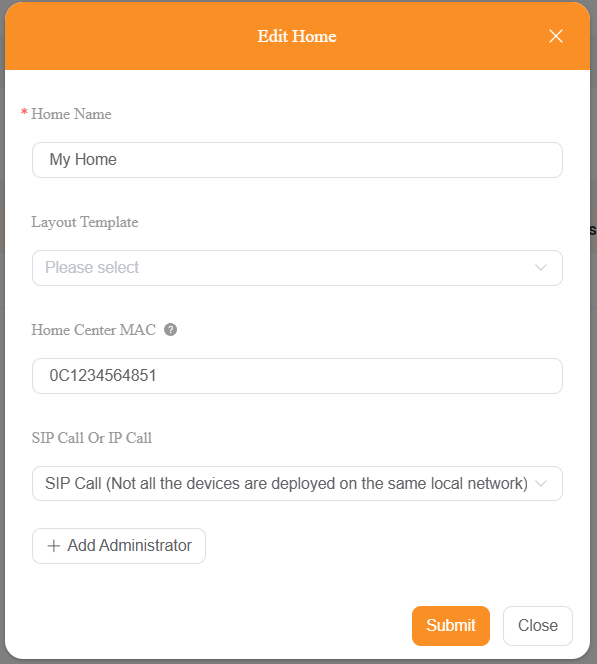
Go to Project > Single-tenant > Add > New Projects > Submit.
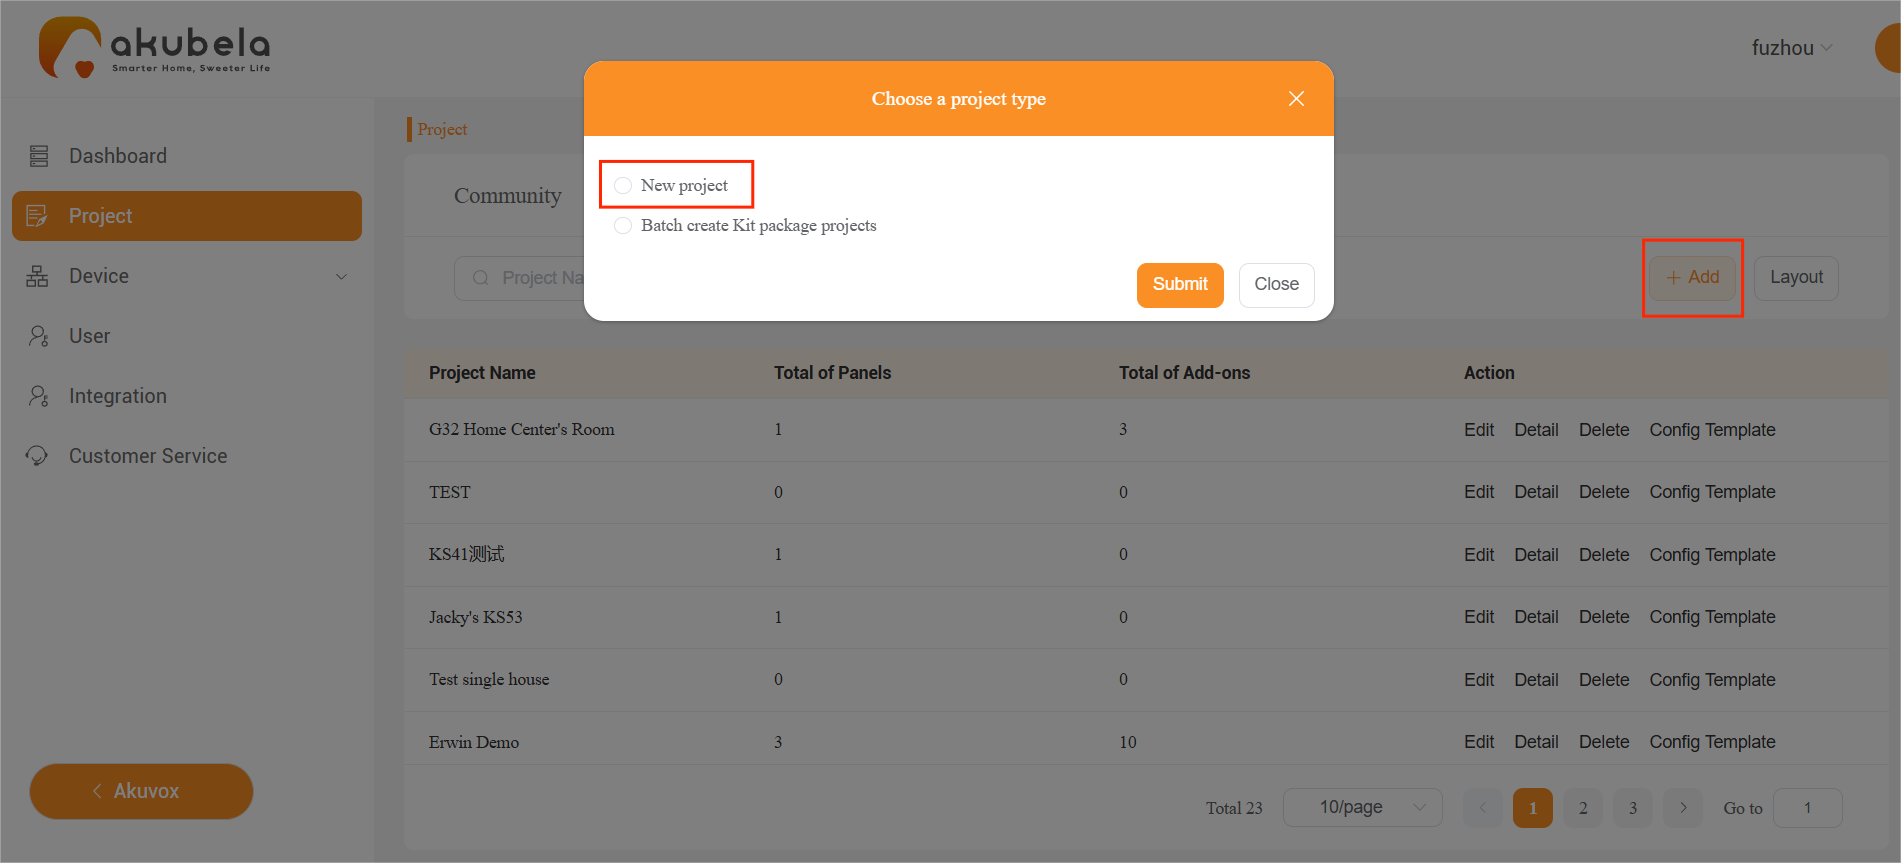
Enter the required information. Ensure the address is correct to provide devices with correct localized weather data.
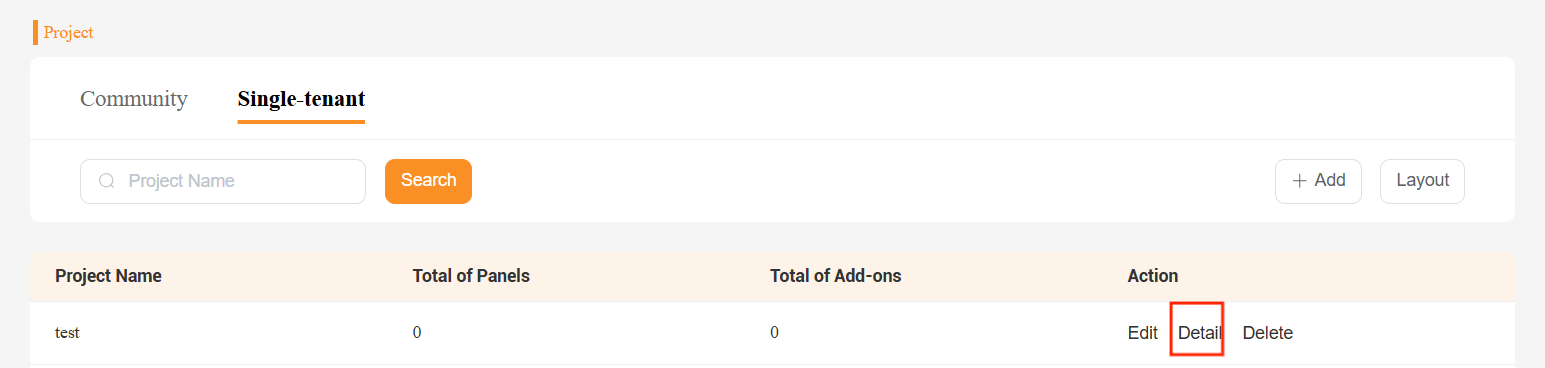
Click Detail > Add New Home to add a home to the project.
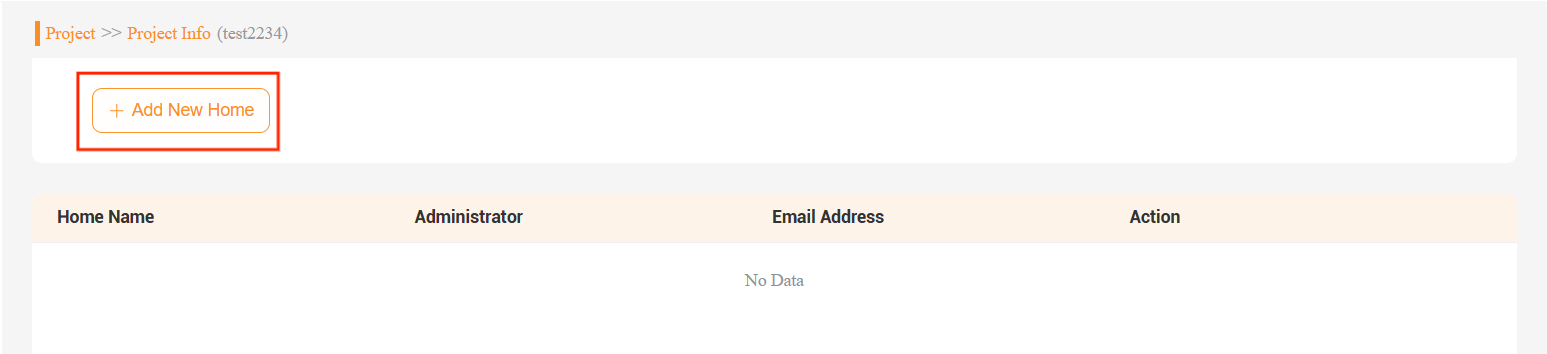
Enter the home details and configure the settings as needed. Click Submit.
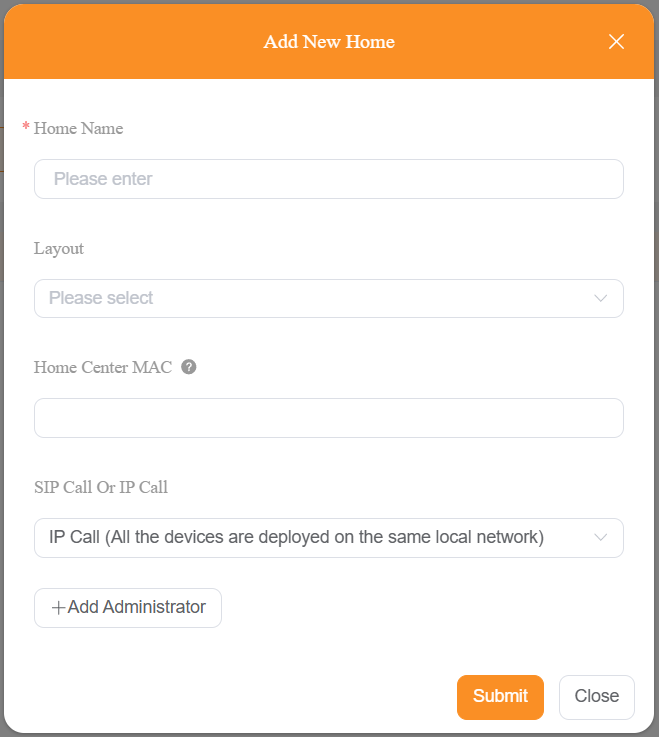
Configuration | Description |
Home Name | Name the home. |
Layout Template | Optional. Apply a template or customize the layout later. |
Home Center MAC |
|
SIP Call or IP Call | Optional. Call method between HyPanel and door phones:
|
Add Administrator | Add the family’s administrator account.
|
Create Multiple Projects in Batch
This feature is mainly used for Kit packages but also supports fast creation of non-Kit projects.
Go to Project > Single-tenant > Add > Batch create Kit package projects.
Click Download the Template. Fill in the MAC addresses of the Home Center devices for each Kit package and save the file.
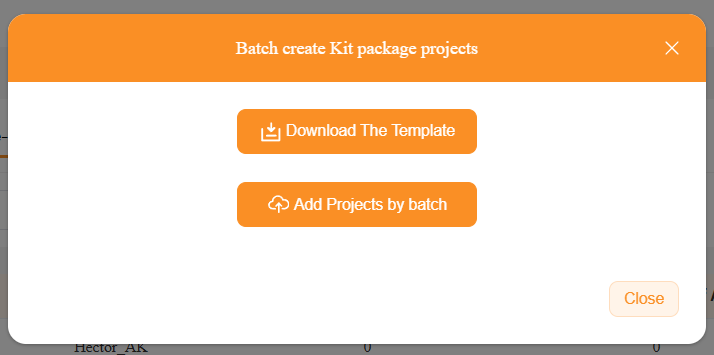
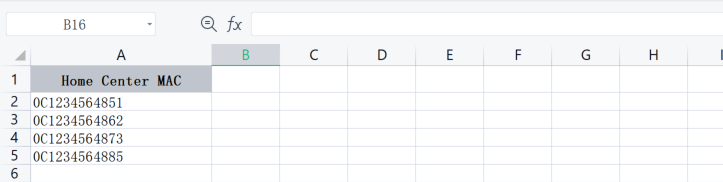
Click Add Projects by batch to upload the completed template.
Projects will be created automatically and listed under Single-tenant.
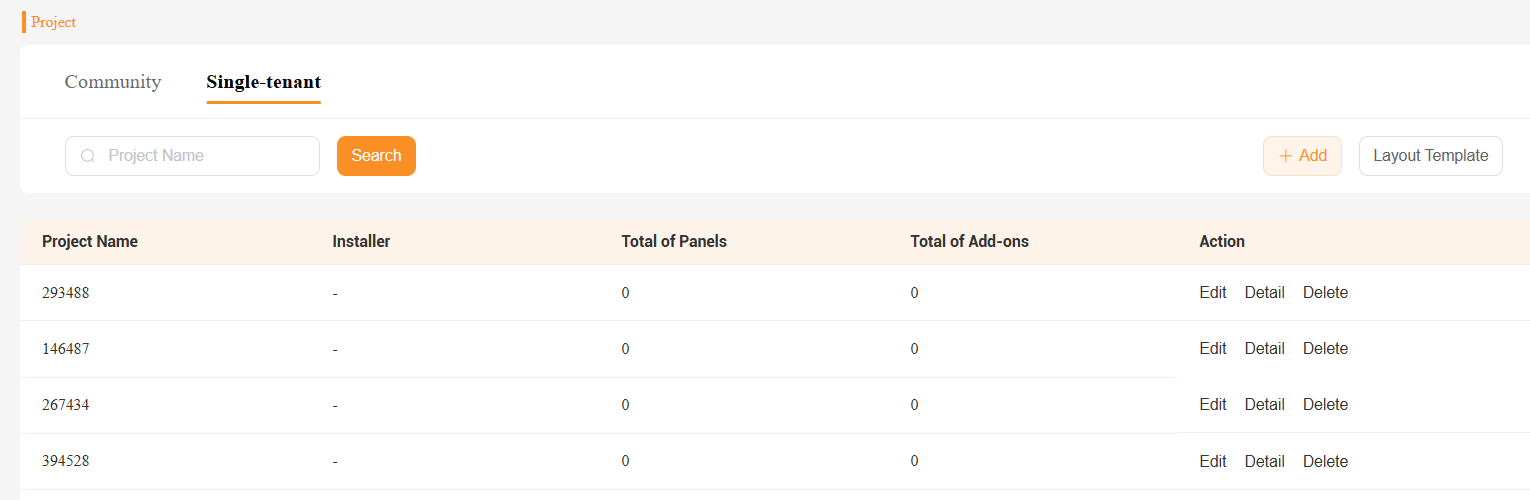
A home will be automatically added to each project.
TIP:
Each home’s MAC address is already registered in the cloud. Once devices connect to the Internet, they will automatically connect to the cloud.

Delete Your Projects
You can only delete projects that you created.
To delete a project:
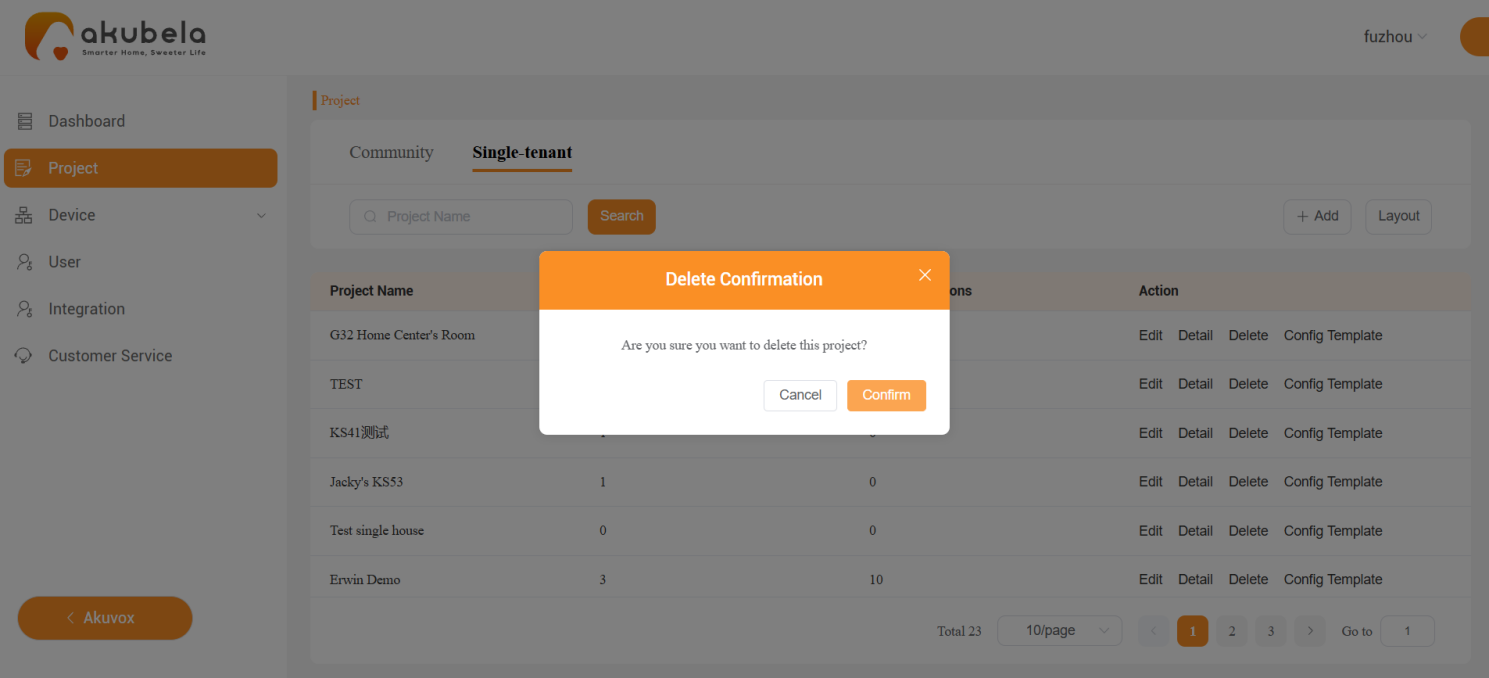
After deletion, all akubela panels in the project will be removed from the cloud and restored to factory settings.
NOTE:
If the deleted project includes intercom devices, remember to remove their MAC addresses from your MAC library on the SmartPlus Cloud.
Manage Layout Templates
A layout template includes floor plan, devices, SOS settings and zone settings. It can be applied to multiple homes in both community and single-tenant projects to streamline setup.
Create a Layout Template
You can create a layout exclusive to a specific home, and universal templates for homes with the same floor plan and devices
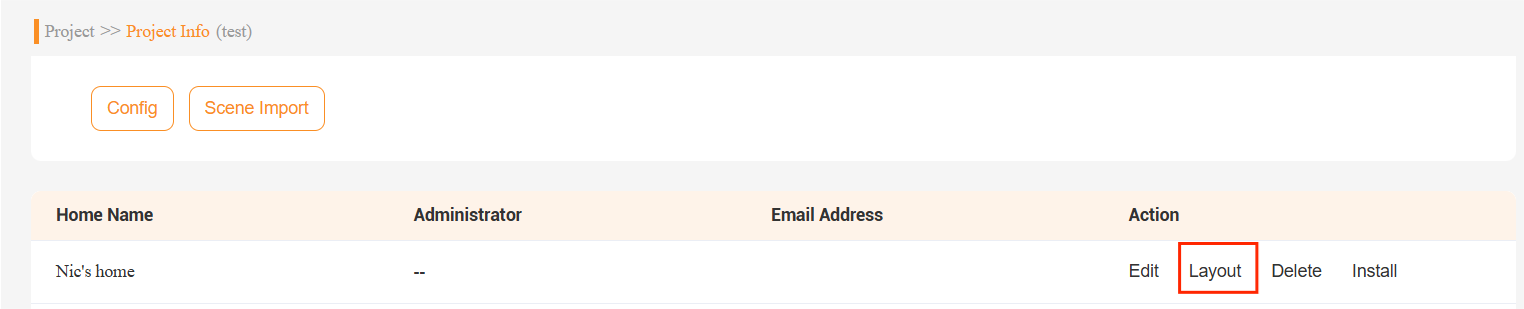
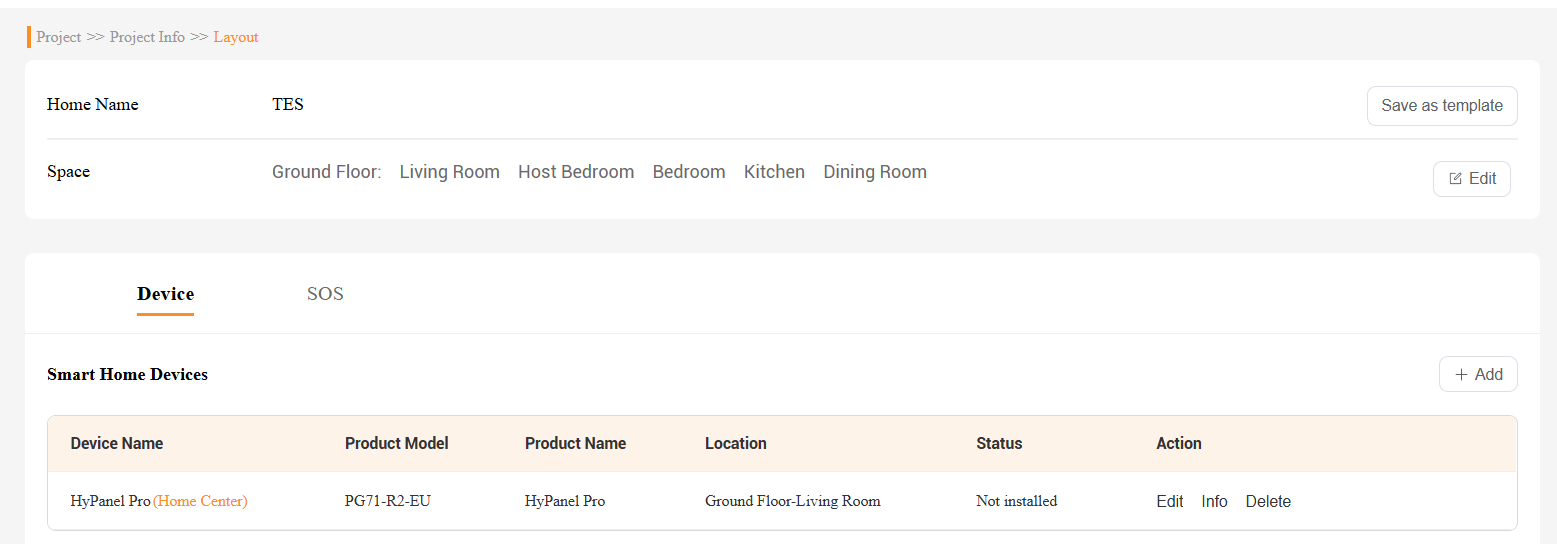
For a specific home: Go to Project > Community/Single-tenant > Detail > Layout.
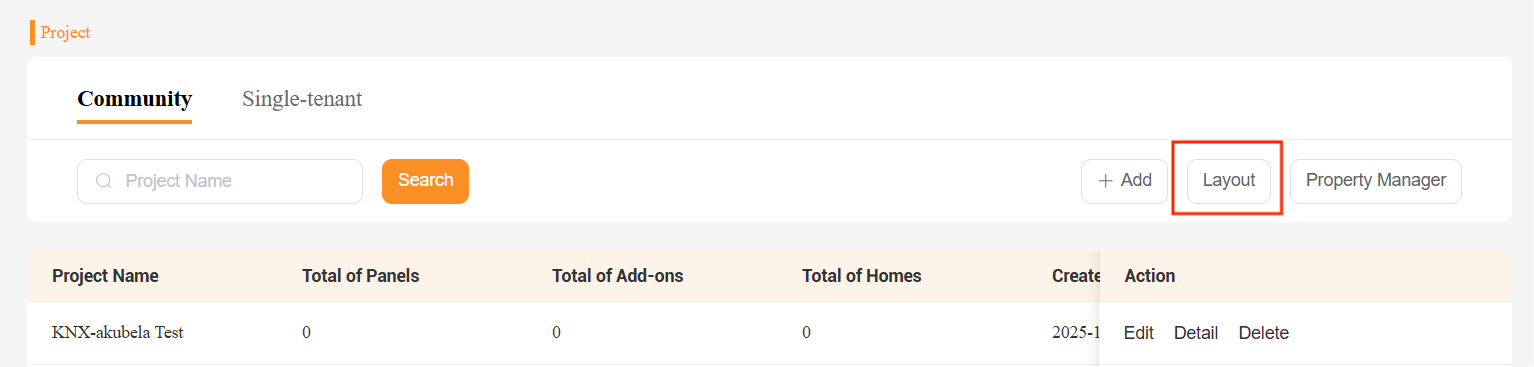
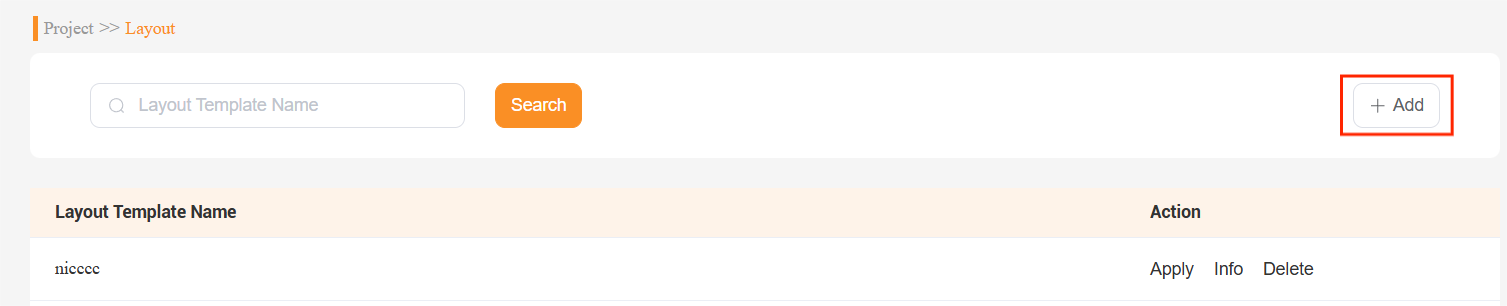
For a universal template: Go to Project > Layout > Add.
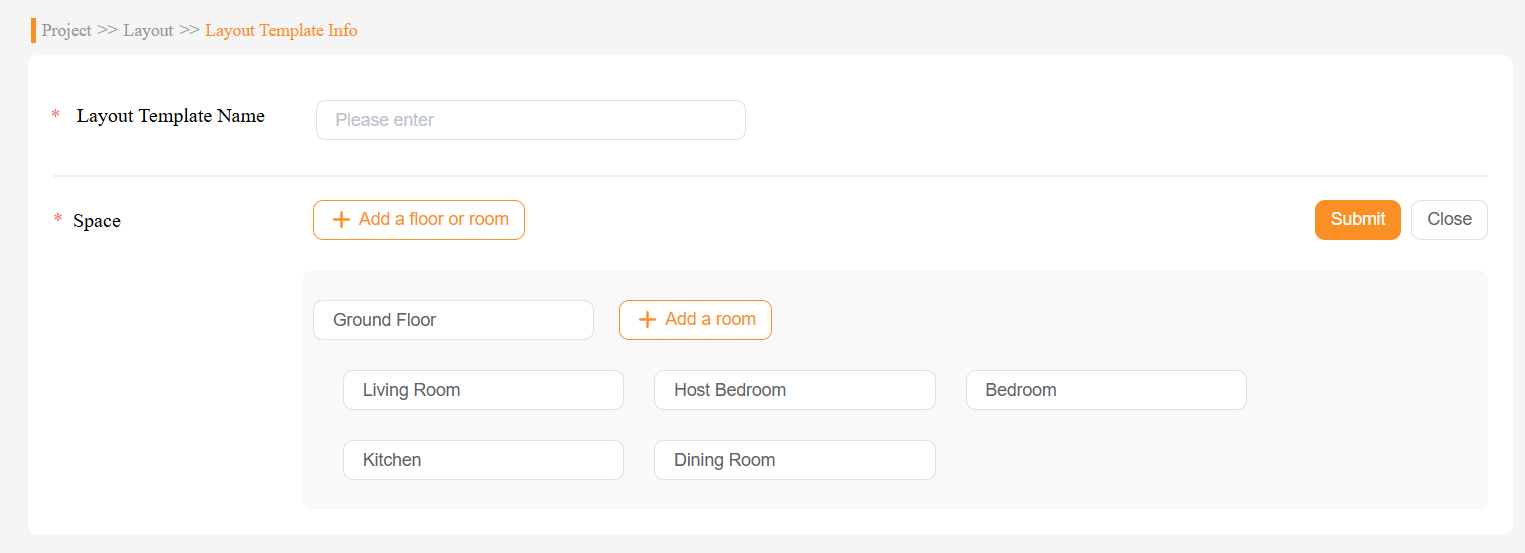
Configure the Layout Template
Edit or add rooms/floors, then click Submit.
Stay on the same page and add akubela panels. For detailed instructions, see here.
NOTE:
Door phones cannot be added to universal templates. To add door phones to a project, see here.
NOTE:
This section applies to wired sensor settings and is available only on specific panel models included in the current layout.
Go to Projects > Community/Single-tenant > Detail > Layout > Zone > Edit.
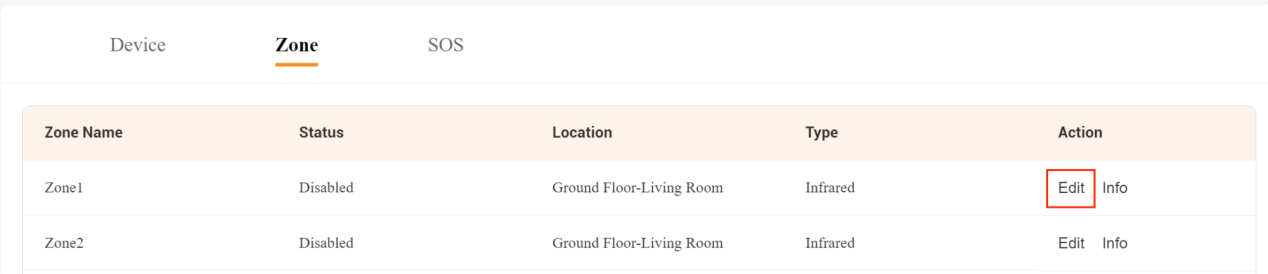
Configure the following settings:
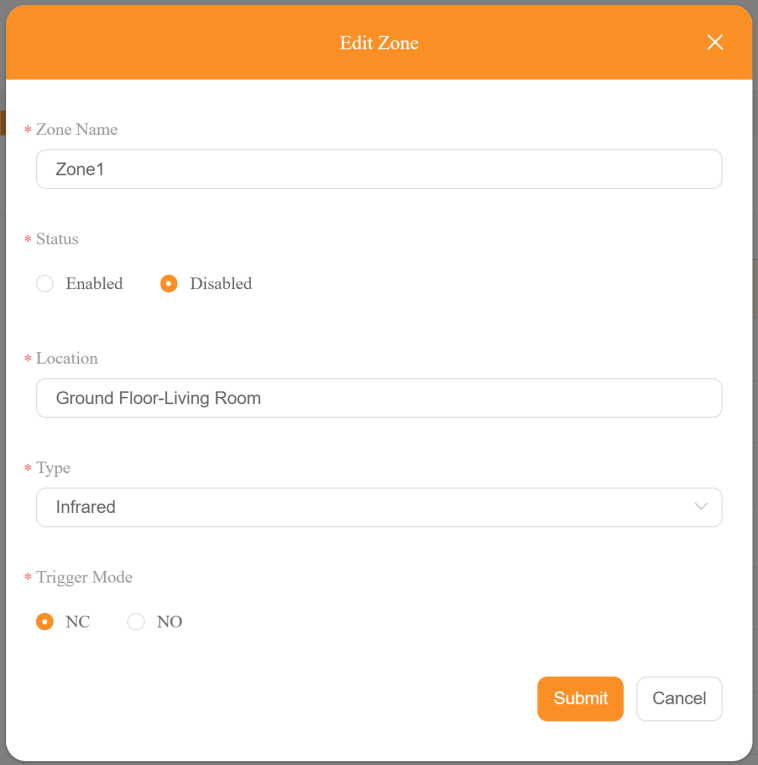
Configuration | Description |
Zone Name | Name the zone. |
Status | Enable/Disable the zone function. |
Location | Specify the sensor’s location. |
Type | Select the sensor type. |
Trigger Mode | Select the sensor contact state when voltage is off:
|
Add SOS Numbers.
NOTE:
SOS settings can also be configured via the user web portal.
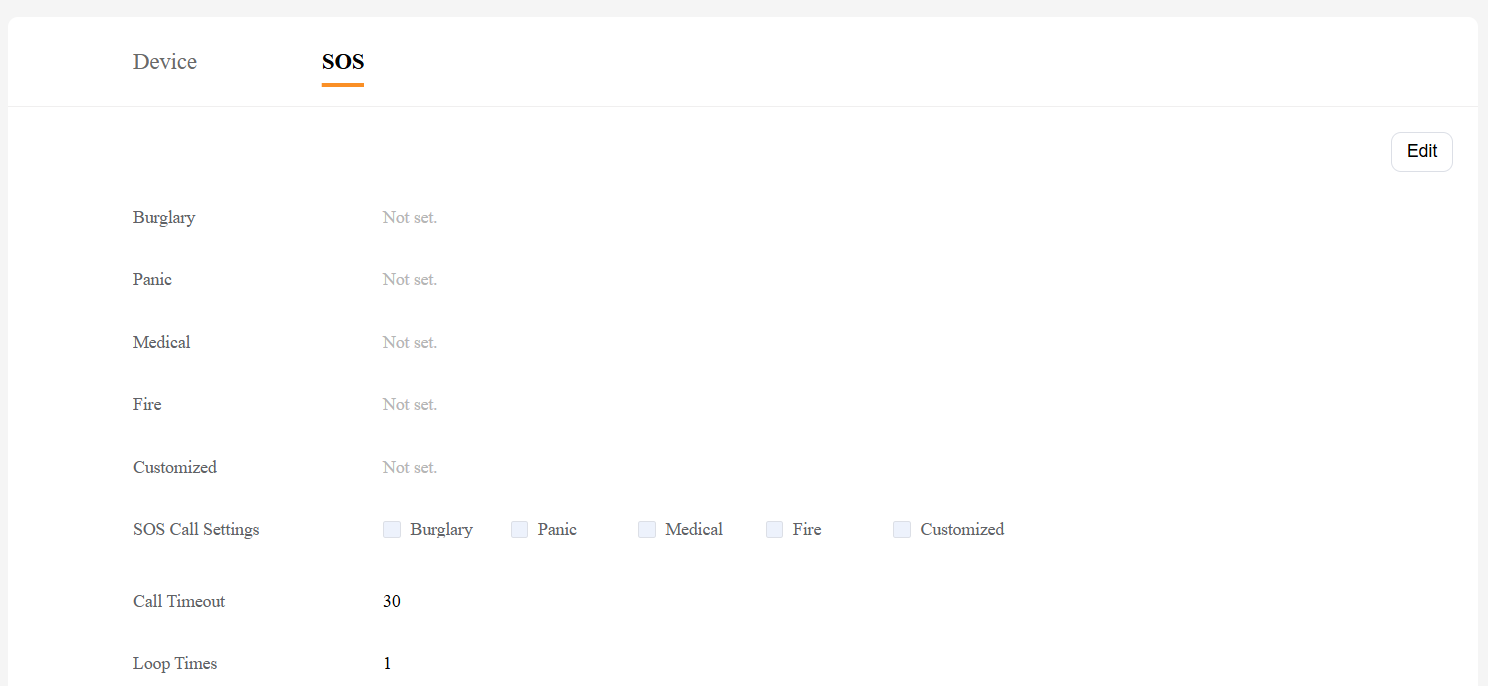
Go to Projects > Community/Single-tenant > Detail > Layout > SOS > Edit.
Click
 in the desired number type field, and enter the SIP number.
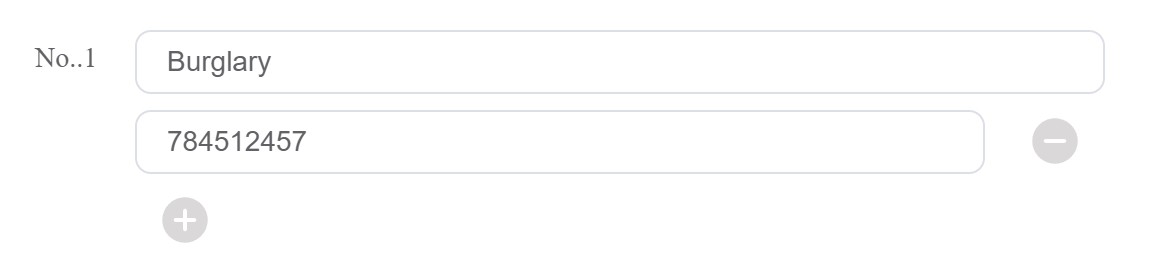
Tick the checkbox(es) for the desired number types in the SOS Call Settings field. The selected numbers will be sent to the devices.

Specify the number of call attempts for the selected SOS contacts.

Select the outgoing call account:

Account 1: Typically the cloud account; available once cloud-connected. The SIP number is displayed on the panel’s Connect Status and About screens.
Account 2: Used for third-party SIP accounts configured via the device web interface. The account number will only appear on the device’s About screen.
Auto: The system automatically selects the optimal available account.
Configure Security Alarms.
NOTE:
This setting is available only when all of the following conditions are met:
The project is a community project.
HyPanel Lite 7 is set as the home center.
Use as Public Common Area feature is enabled when the project is created.
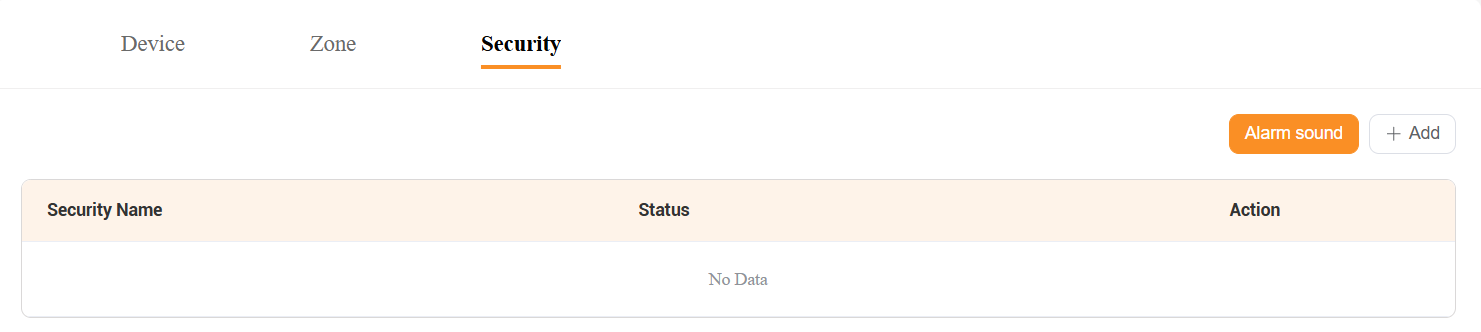
Go to Projects > Community > Detail > Layout > Security.
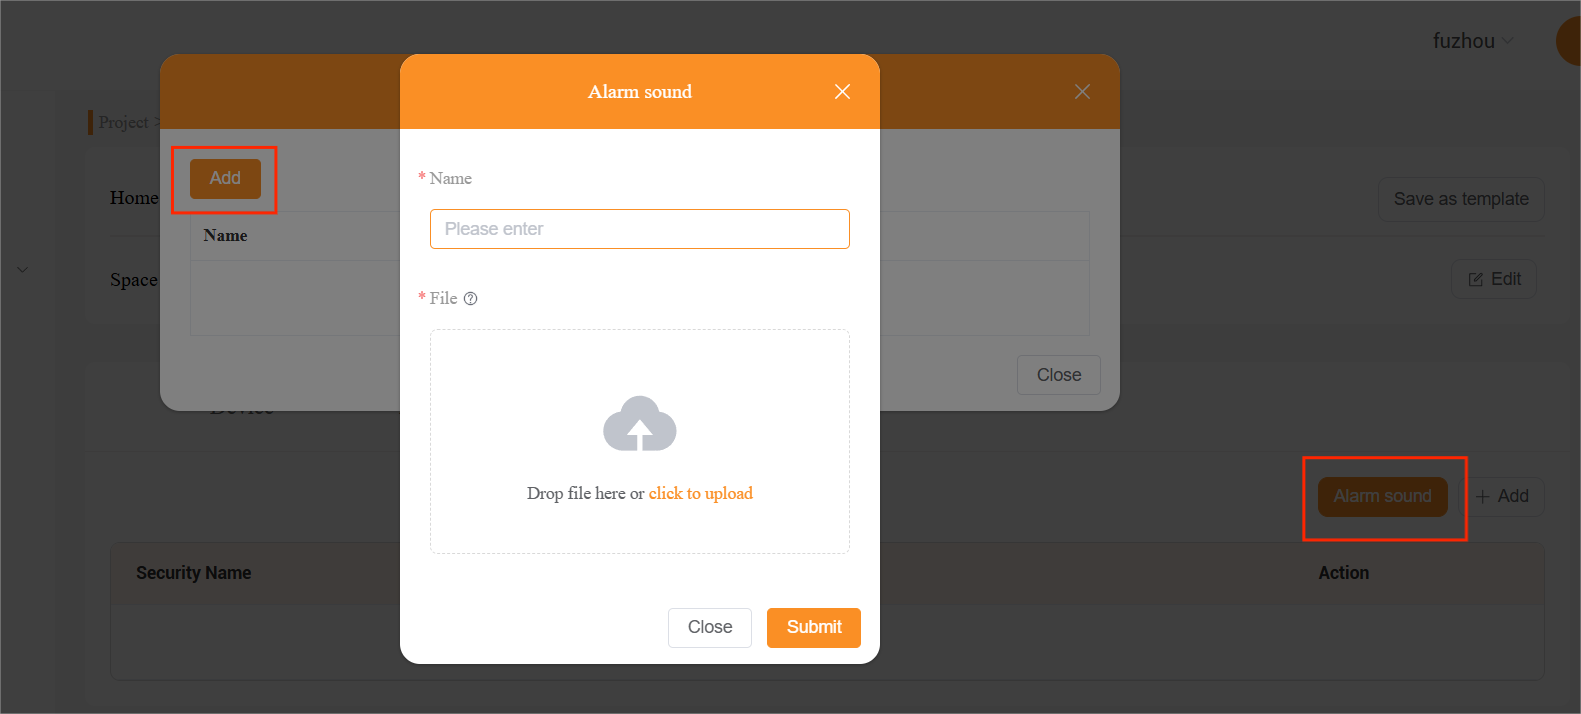
(Optional) Click Alarm Sound > Add to upload a custom alarm sound.
NOTE:
The sound file must be a WAV file under 100 KB.
Click Add to create a security alarm, configure the required parameters, then click Submit.
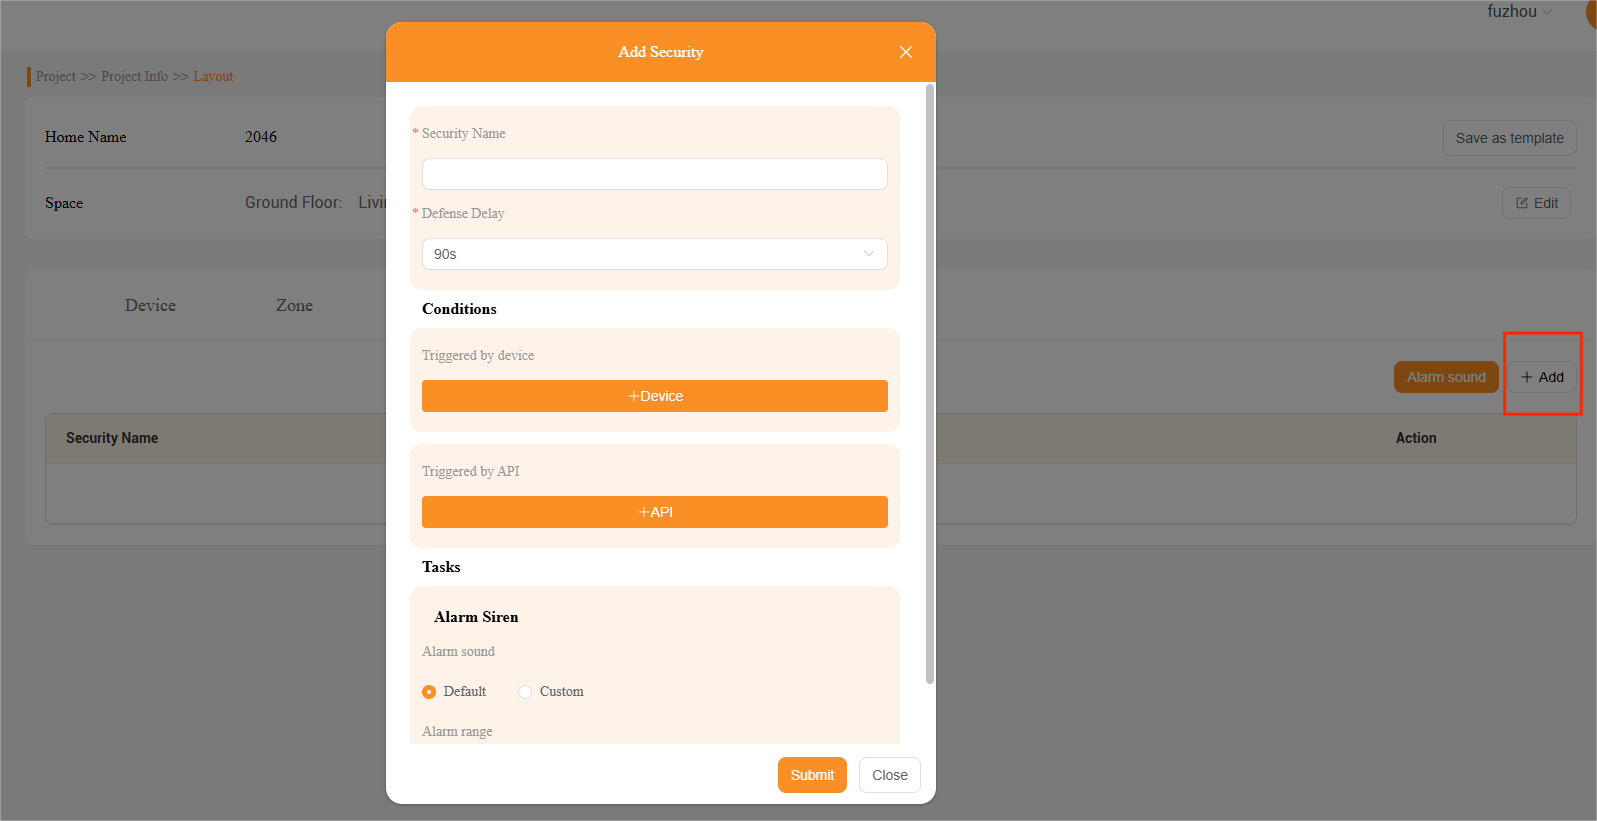
Configuration | Description |
Security Name | Name the alarm. |
Defense Delay | Delay time before the alarm is triggered. |
Device | Alarm trigger device(s). If multiple devices are selected, triggering any one of them will activate the alarm. |
API | Add a third-party system as an alarm trigger via API, without connecting with a physical sensor. |
Alarm Sound | Select the default sound or a custom sound. |
Alarm Range | Define which building(s) can receive the alarm. |
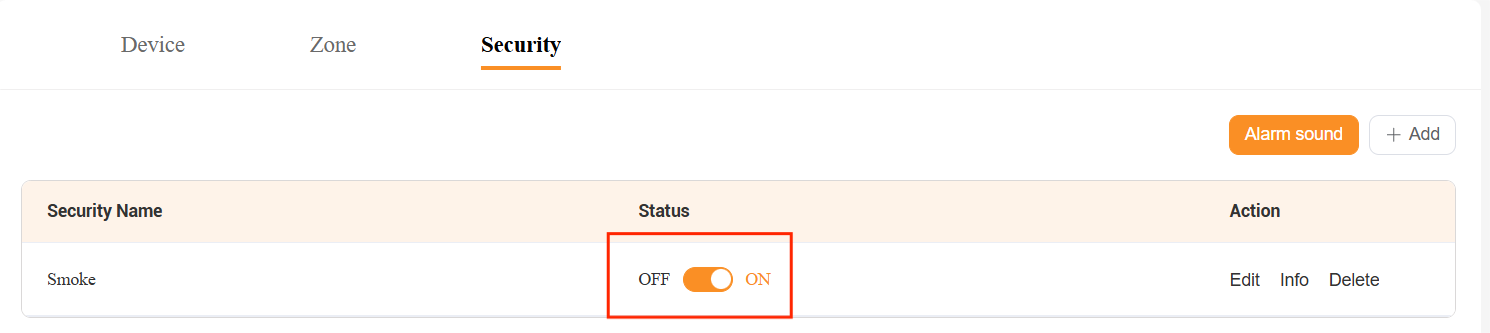
Toggle the Status switch to enable the alarm.
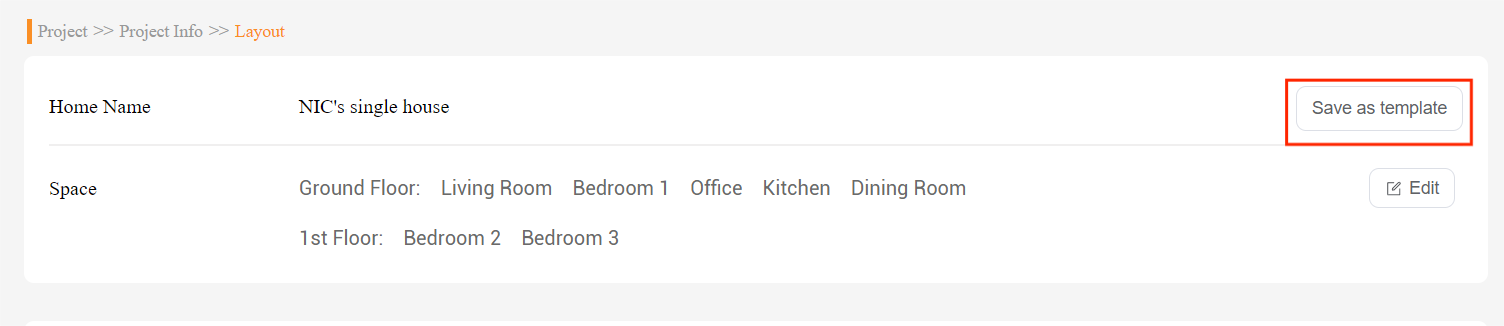
Save as Layout Template
If you have completed the home and device settings for a specific home without applying a template, you can save its layout as a template for future use.
To save it:
Apply Layout Template to Projects
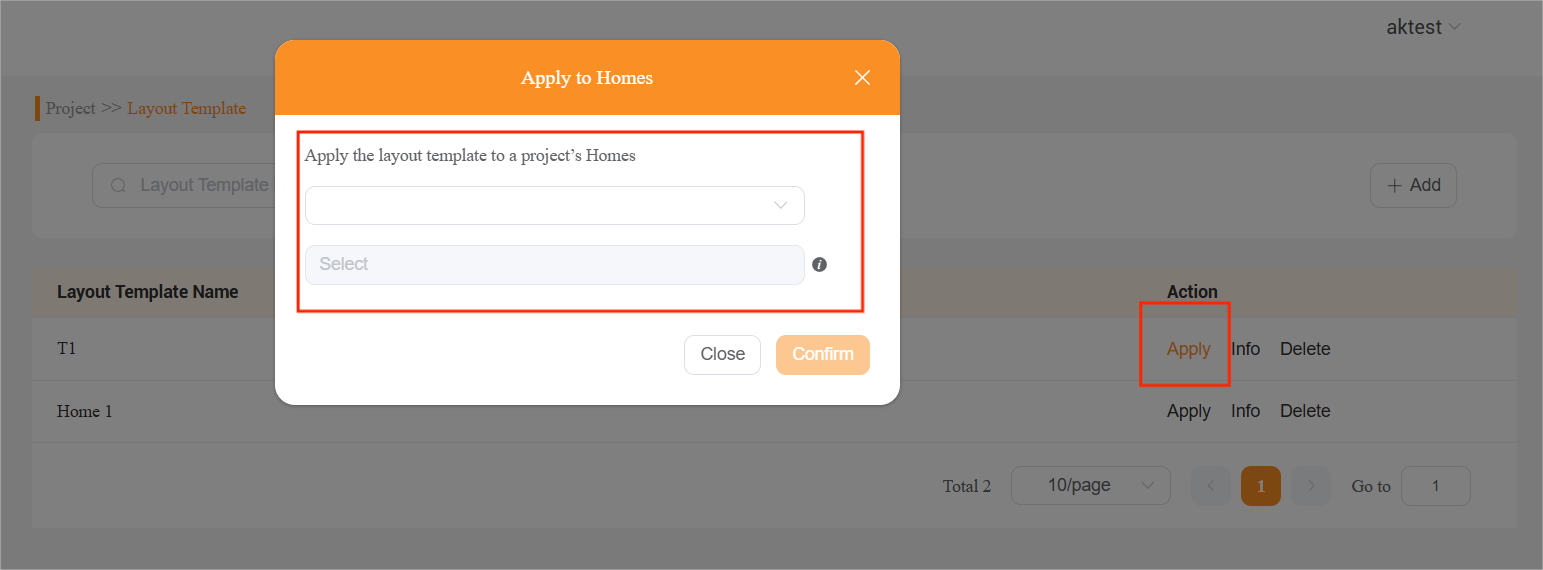
Community project: Go to Projects > Layout Template > Apply, then select the desired project and the homes.
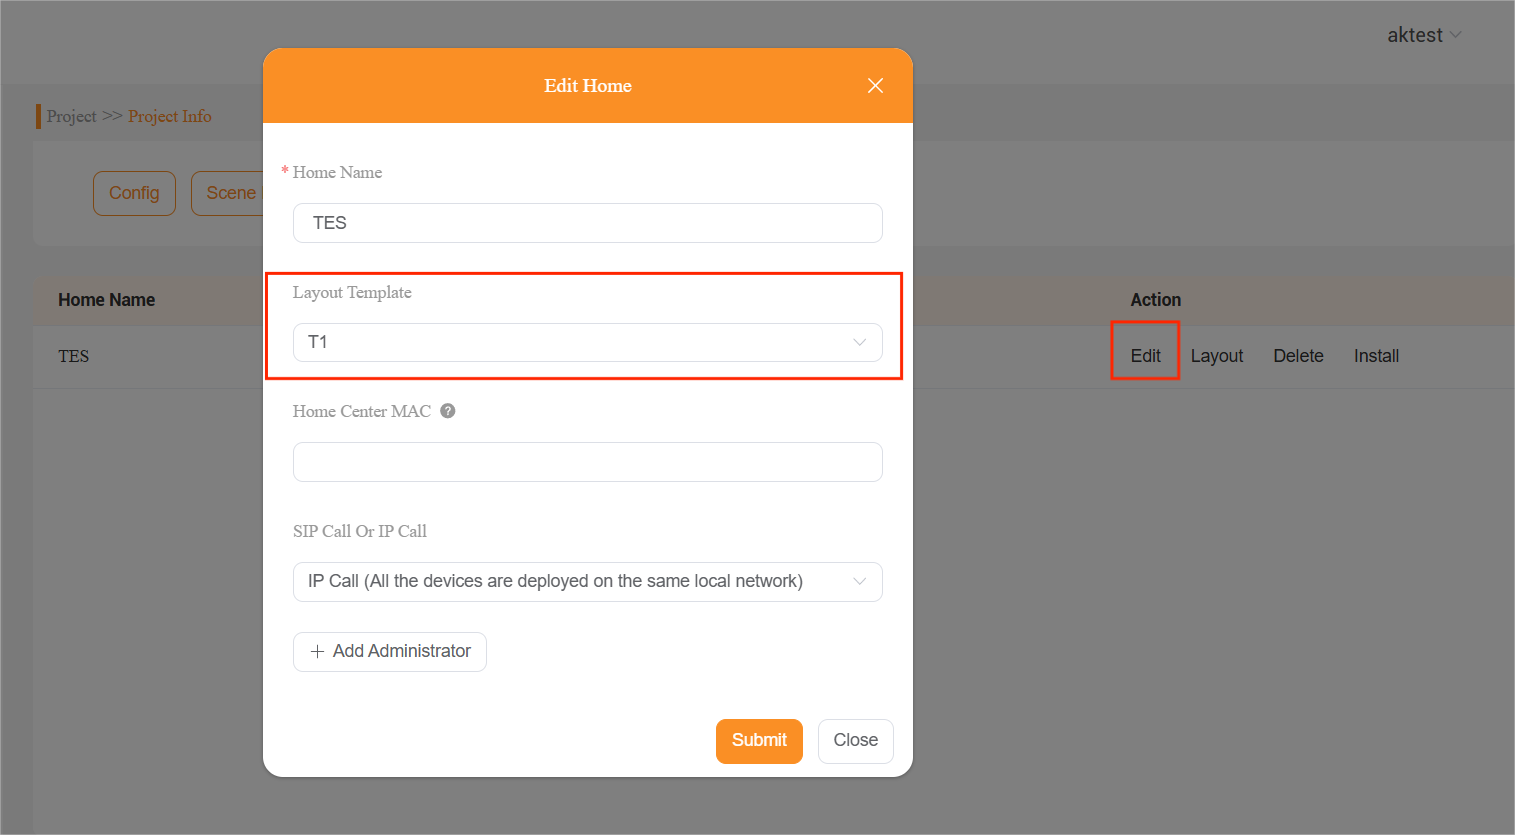
Single-tenant project: Go to Projects > Single-tenant > Detail > Edit > Layout Template.
Delete or Edit Layout Templates
Modifying a layout template applied in a project will not change the original template. And changes to a template apply only to homes where installation is not completed.
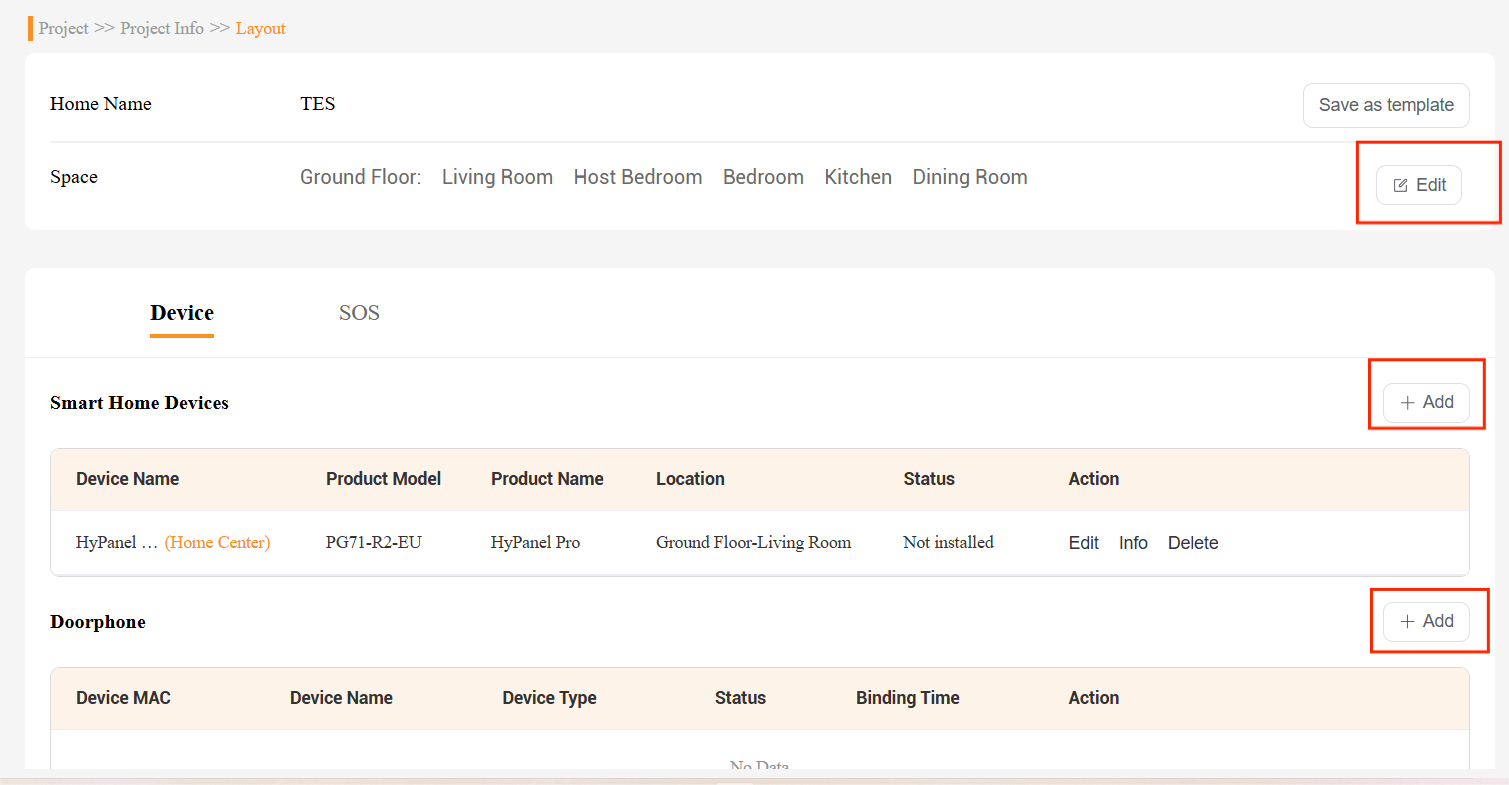
For a specific home: Go to Projects > Community/Single-tenant > Detail > Layout.
NOTE:
After installation, the home’s template can only be modified via the BelaHome app (Go to Me > Family Management > Space Management) or via HyPanel devices(Pro/Ultra/Supreme).
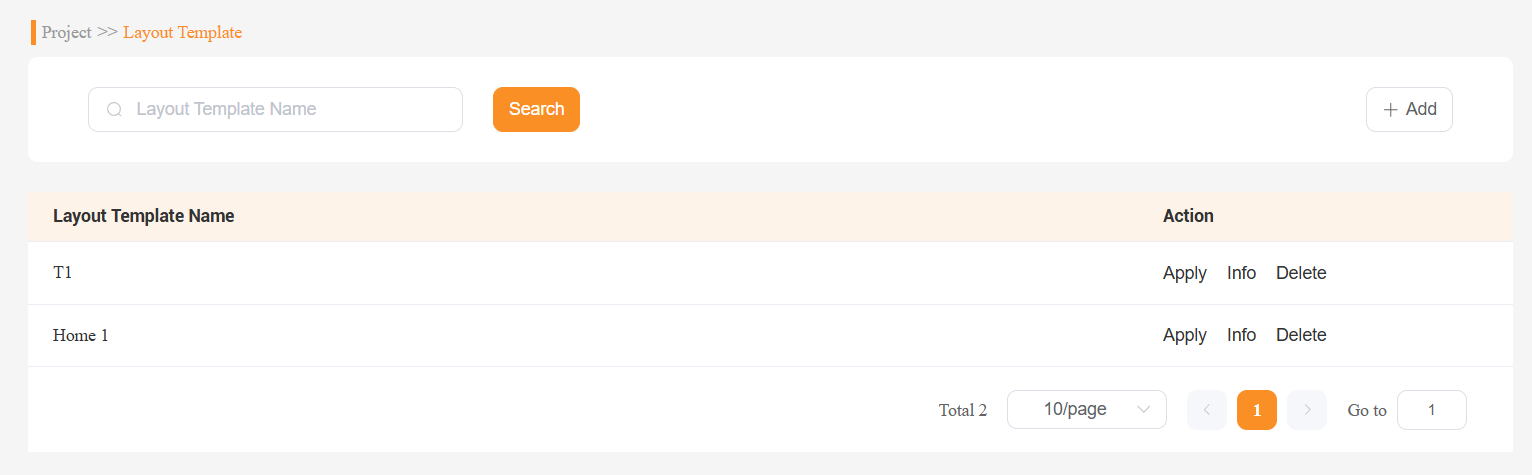
For a universal template: Go to Projects > Layout Template, then click Info to edit it, or click Delete to remove it.
Batch Reuse of Home Configurations
You can save a specific home’s full configuration as a reusable template to accelerate large-scale deployments. Applying a configuration template automatically synchronizes:
Room structures and device names
UI layouts and system settings
Scenes and device associations
NOTE:
Applying a template replaces the existing room structure. Rooms not present in the template will be removed, and their associated devices will be moved to the Others section.
Any existing scenes not included in the template will be deleted upon import.
The system attempts to match devices automatically. Successfully matched devices will show a Correct status; mismatched devices require manual confirmation and re-association.
To reuse a configuration across homes:
Go to Project > Community/Single-tenant > [select project] > Cofig Template.
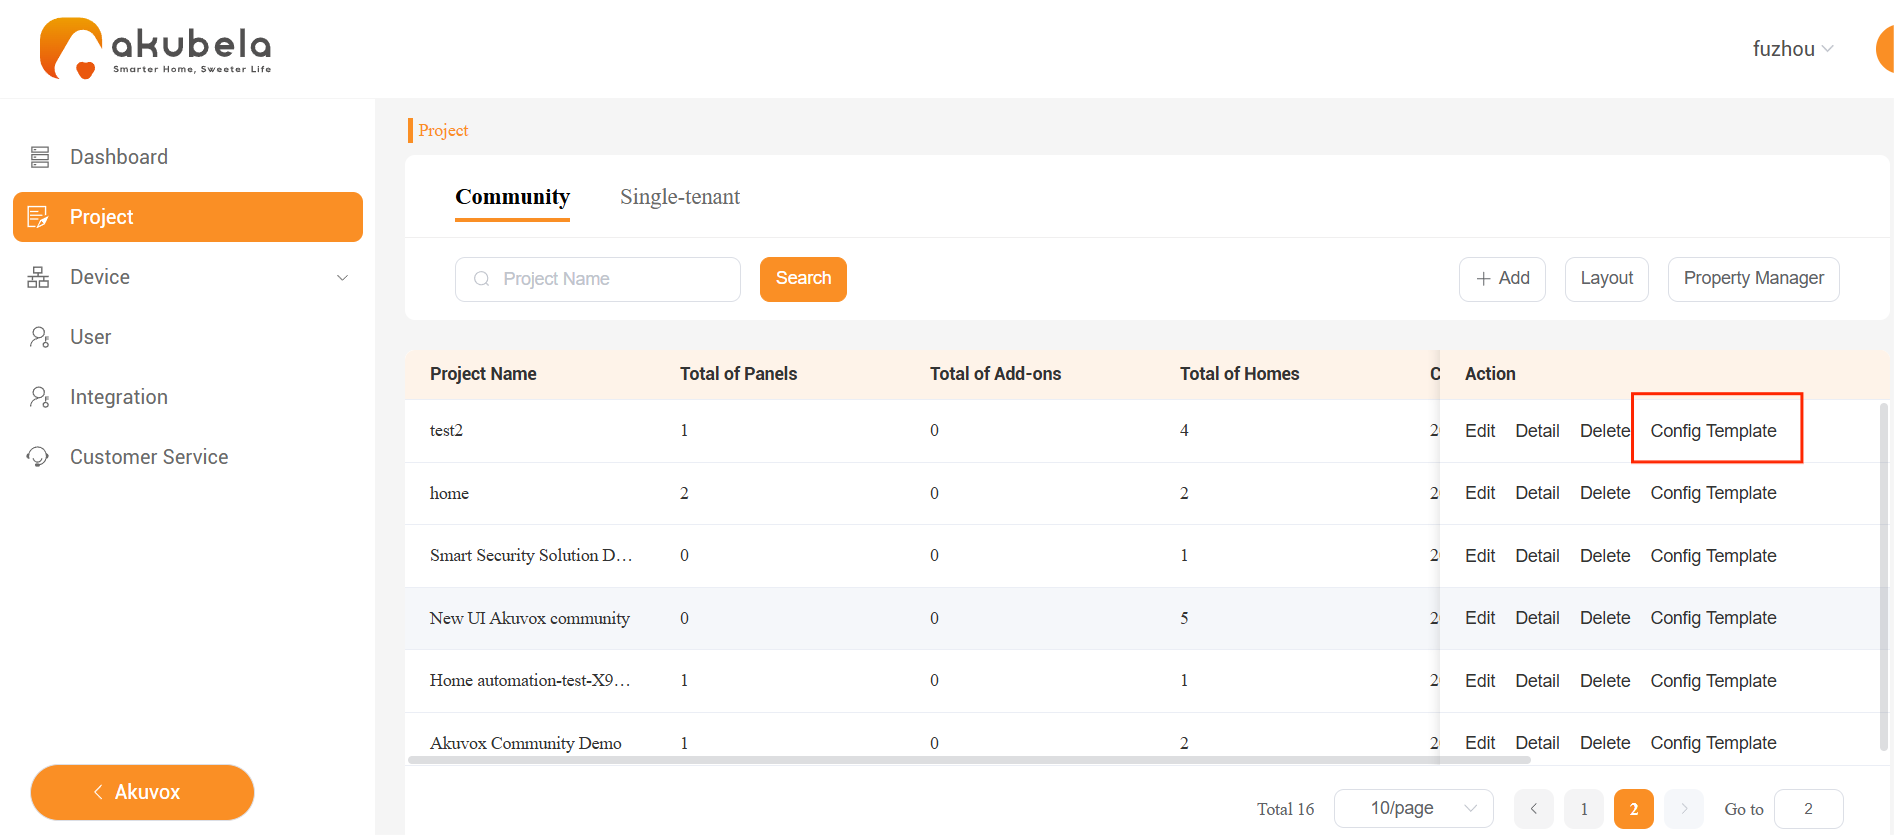
Select the desired configuration template file.
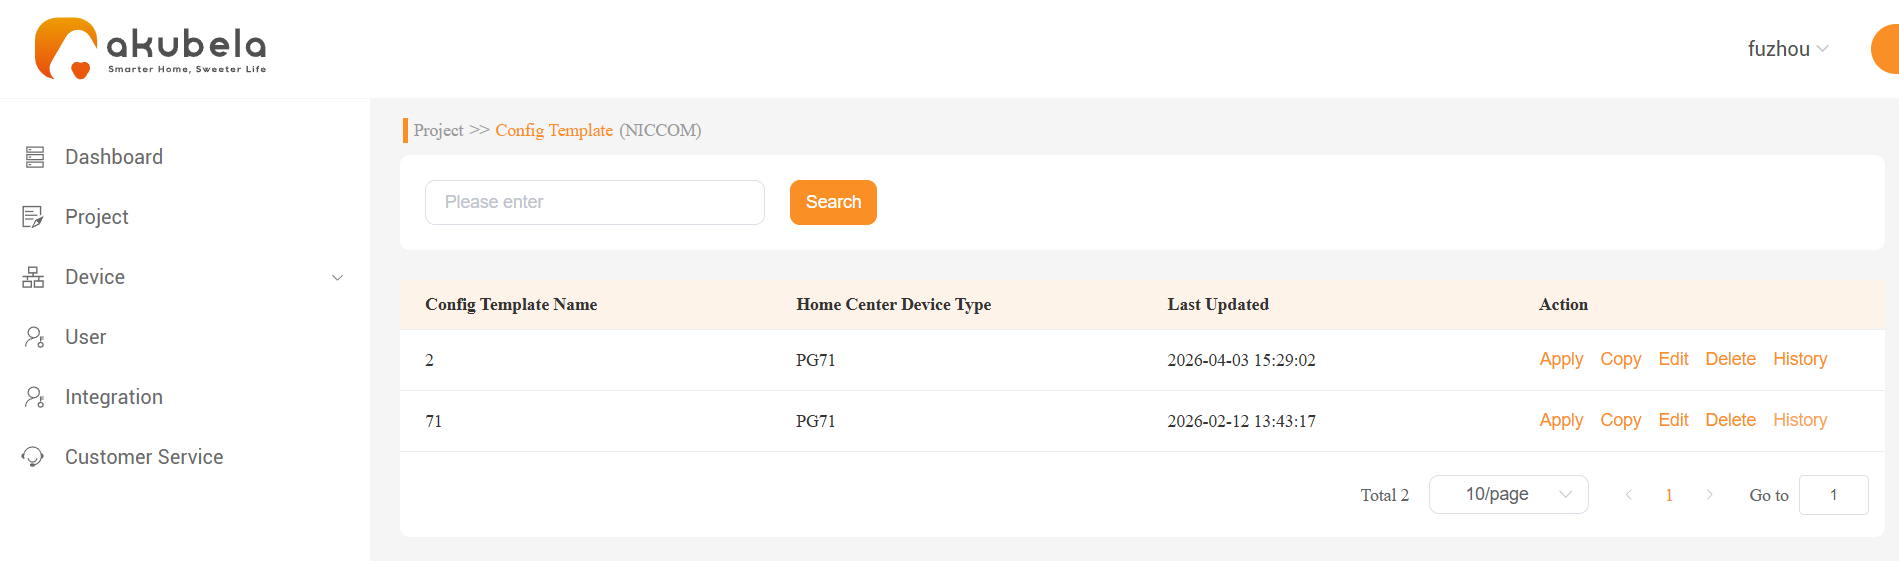
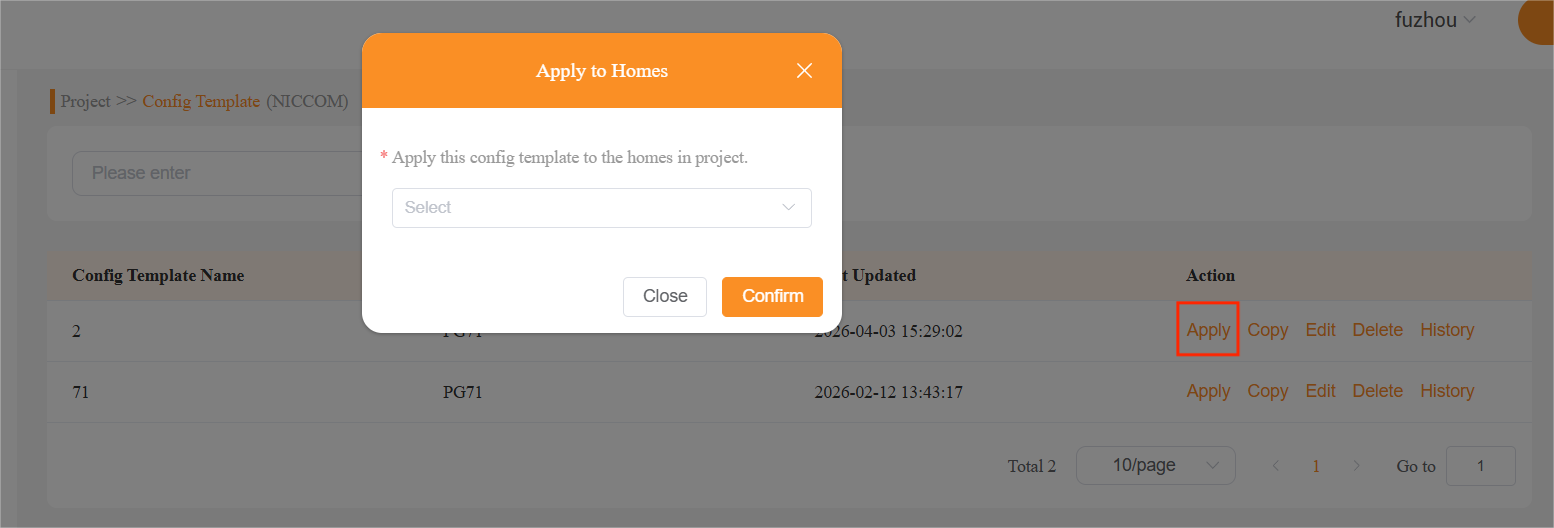
Do any of the following:
Apply: Reuse the configuration for homes within the current project.
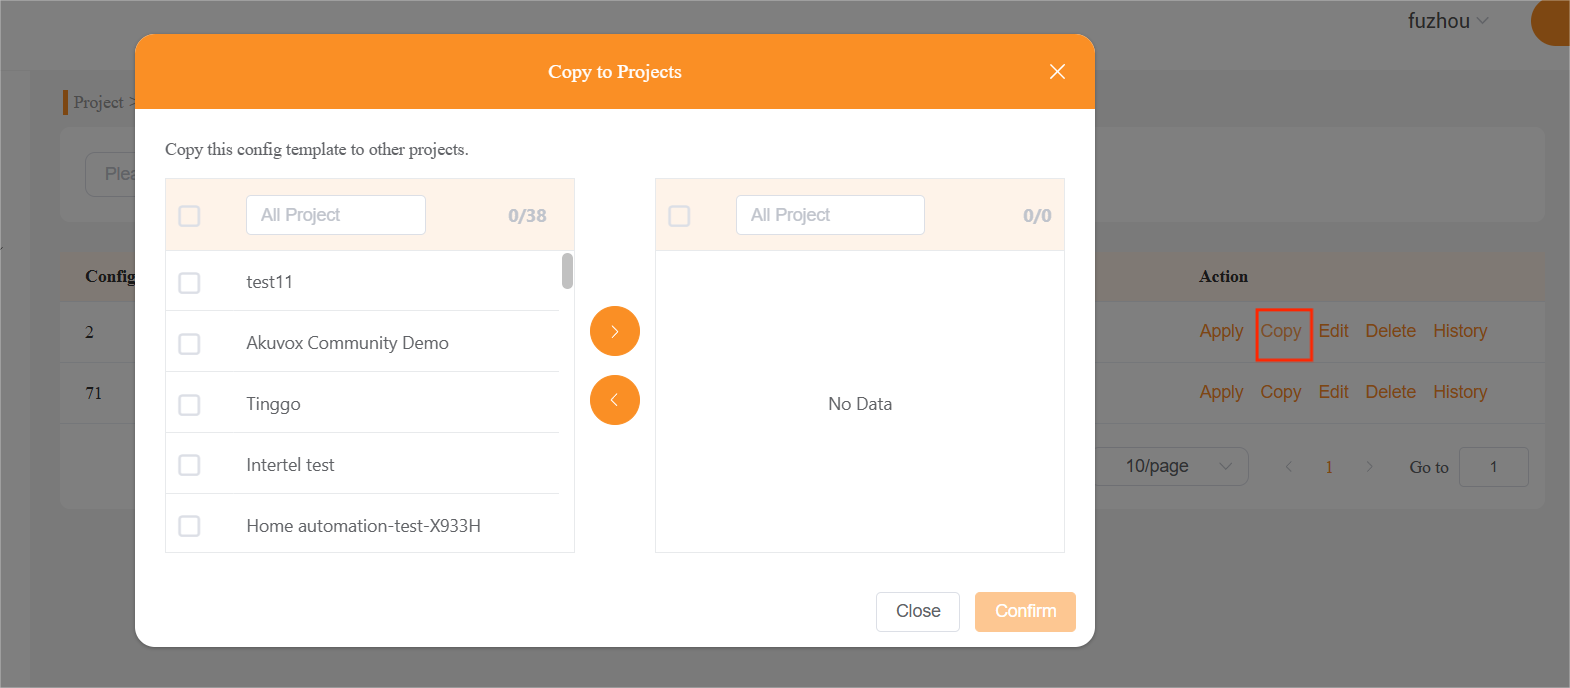
Copy: Duplicate the template to other projects. Once copied, navigate to the target project’s Config Template interface to apply it to its homes.
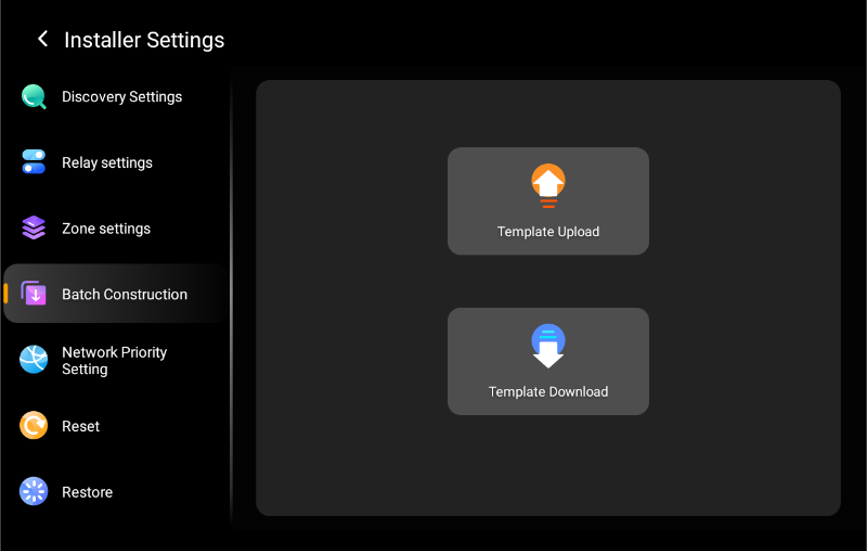
On the target home center panels, go to Settings > Installer Settings > Batch Construction to download and deploy the configuration file.