Home Screen Display
The device supports the Default and Multi-factor Authentication modes. To change the mode, go to Device Setting > LCD > Theme interface.
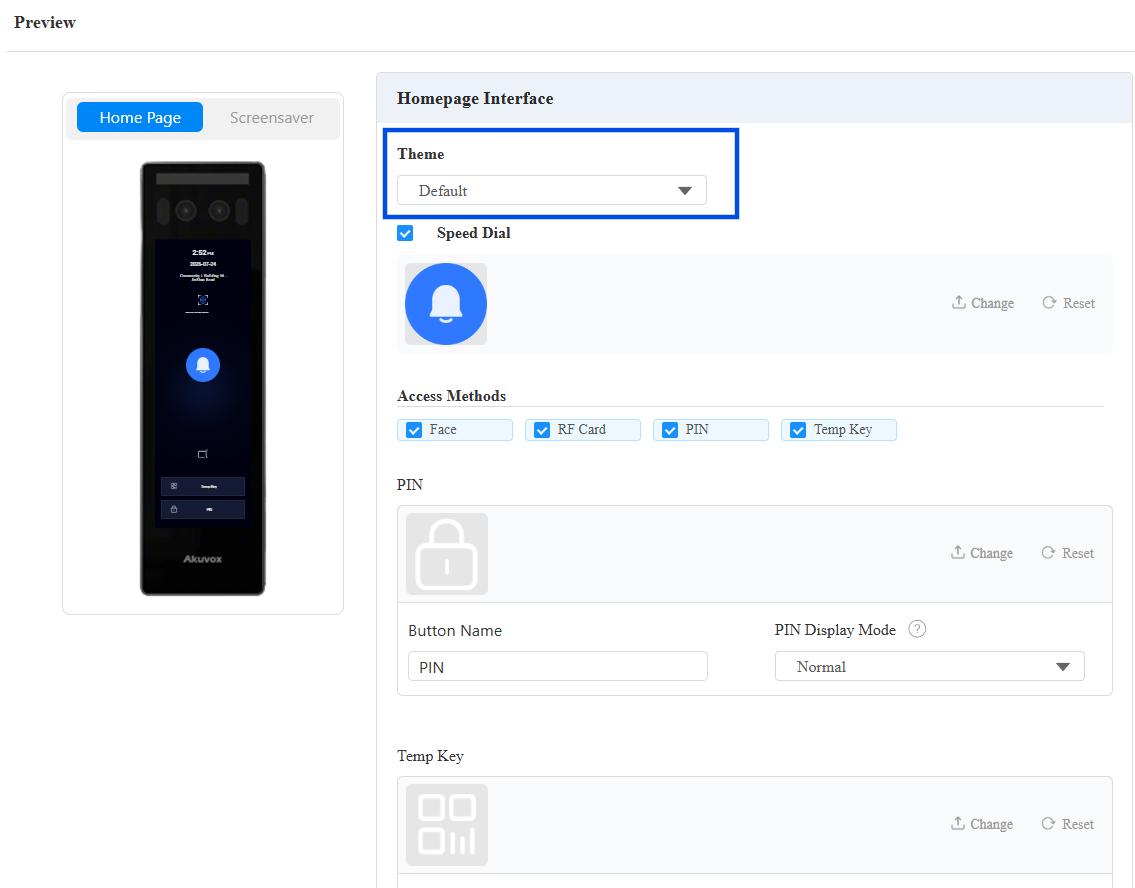
In Default Theme
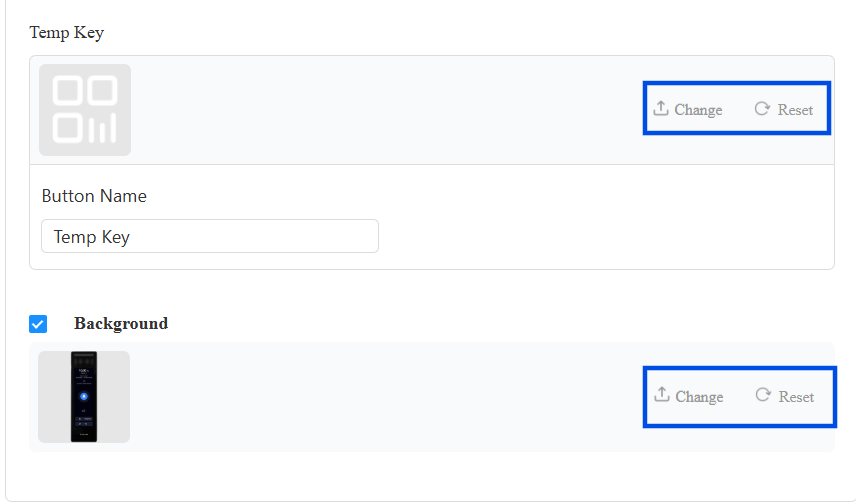
You can upload custom icon images or restore the default icons for Speed Dial, Temp Key, and PIN at any time.
Click Change to upload and click Reset to restore.
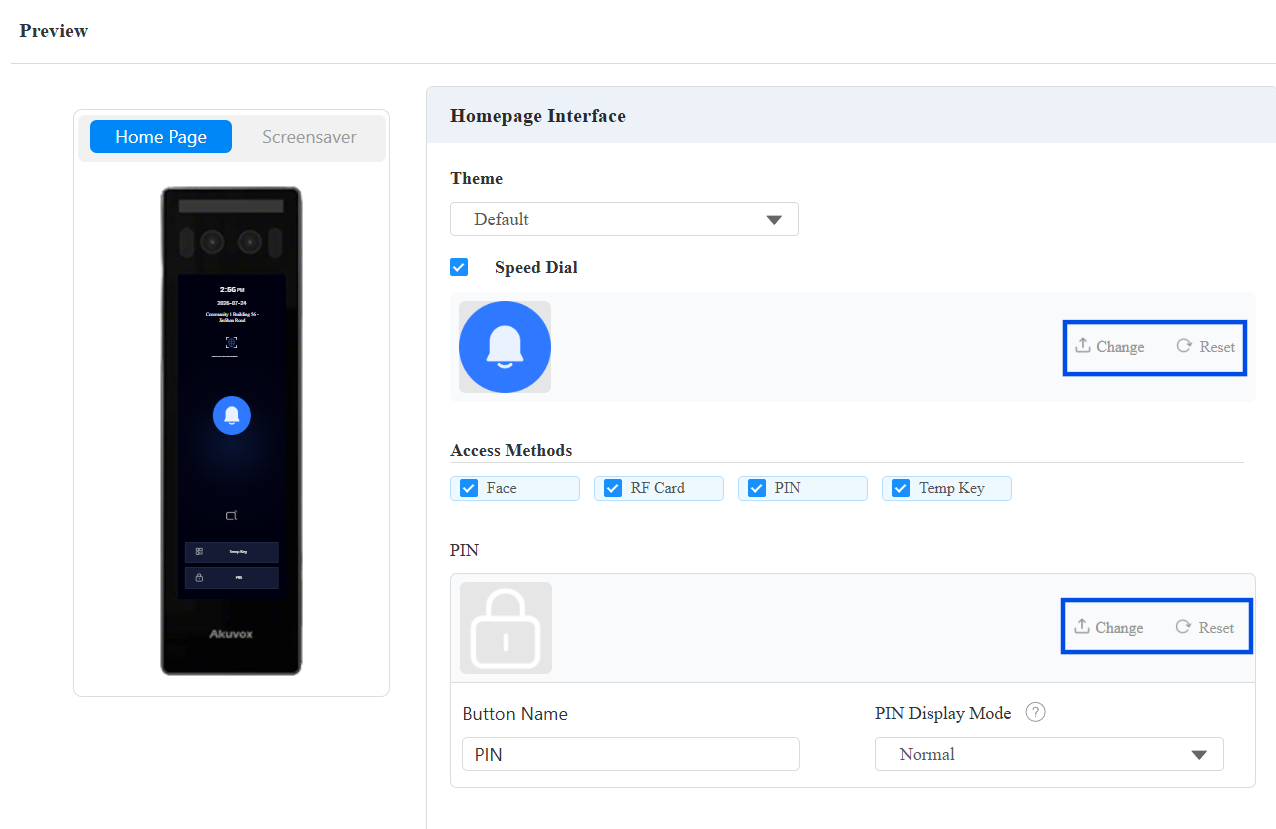
Icon Change: Max file size: 200KB; Format: .jpg,.png,.bmp,.jpeg; Recommended resolution for Speed Dial icon: 120x120; for other icons: 80×80.
Speed Dial: Enable/disable the Speed Dial icon on the home screen for making calls. See the Call Settings chapter for the speed dial number configuration.
Access Methods: Specify which access methods are available on the home screen. When an access method is disabled, its icon is hidden, and the corresponding authentication method becomes unavailable.
PIN:
Button Name: Customize the button name if needed. The name does not change the button attribute.
PIN Display Mode: Available when the PIN access method is enabled.
Normal: Digits are displayed in standard order.
Disorder: Digits are displayed in a random order.
Temp Key:
Button Name: Customize the button name if needed. The name does not change the button attribute.
Background: Customize the home screen background. The background image is visible when Face authentication is disabled on the home screen.
Max size: 200KB; Format: .jpg,.png,.bmp,.jpeg; Recommended resolution: 320x960.
In Multi-factor Authentication Mode
In this mode, only the selected authentication methods are displayed on the home screen. Authentication options and related settings are automatically adjusted according to the selected mode.
For Speed Dial and Temp Key tabs, you can upload custom icon images or restore the default icons at any time.
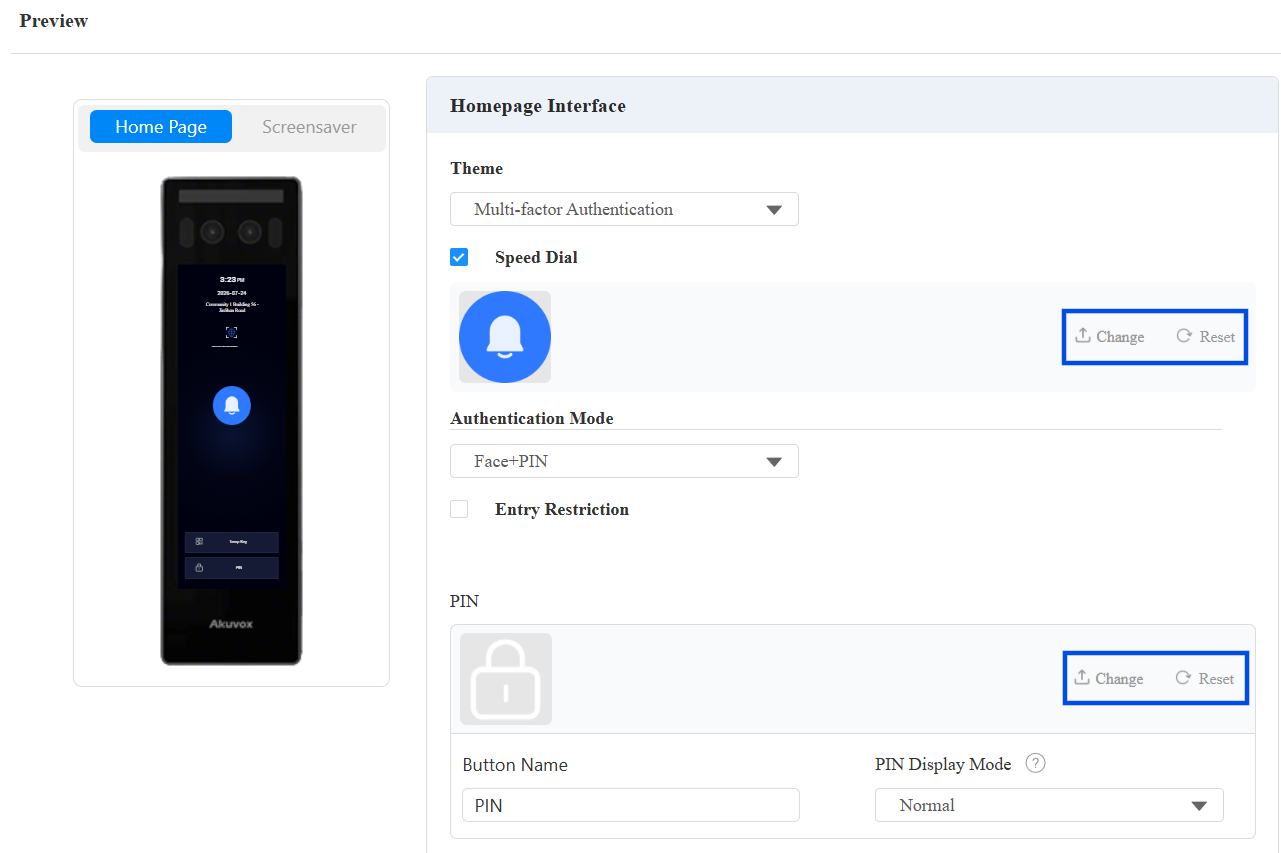
Icon Change: Max file size: 200KB; Format: .jpg,.png,.bmp,.jpeg; Recommended resolution for Speed Dial icon: 120x120; for other icons: 80×80.
Speed Dial: Enable/disable the Speed Dial icon on the home screen for making calls. See the Call Settings chapter for the speed dial number configuration.
Authentication Mode: Select the two-factor authentication method: Face + PIN, Face + RF Card, or RF Card + PIN.
The first authentication method must be completed successfully before proceeding to the second one.
Entry Restriction: Enable or disable repeated access restrictions for the same user.
When enabled, a user must wait for the configured restriction period before unlocking the door again. This restriction applies only to the same user. Other authorized users can still unlock the door normally.
PIN:
Button Name: Customize the button name if needed. The name does not change the button attribute.
PIN Display Mode: Available when the PIN access method is enabled.
Normal: Digits are displayed in standard order.
Disorder: Digits are displayed in a random order.
Temp Key:
Button Name: Customize the button name if needed. The name does not change the button attribute.
Background: Customize the home screen background. The background image is visible when Face authentication is disabled on the home screen.
Max size: 200KB; Format: .jpg,.png,.bmp,.jpeg; Recommended resolution: 320x960.
Configure Screensaver
You can set the screen saver duration as well as the timing for the screen to be turned off for both screen protection and power reduction.
To set it up, go to the Device Setting > LCD interface.
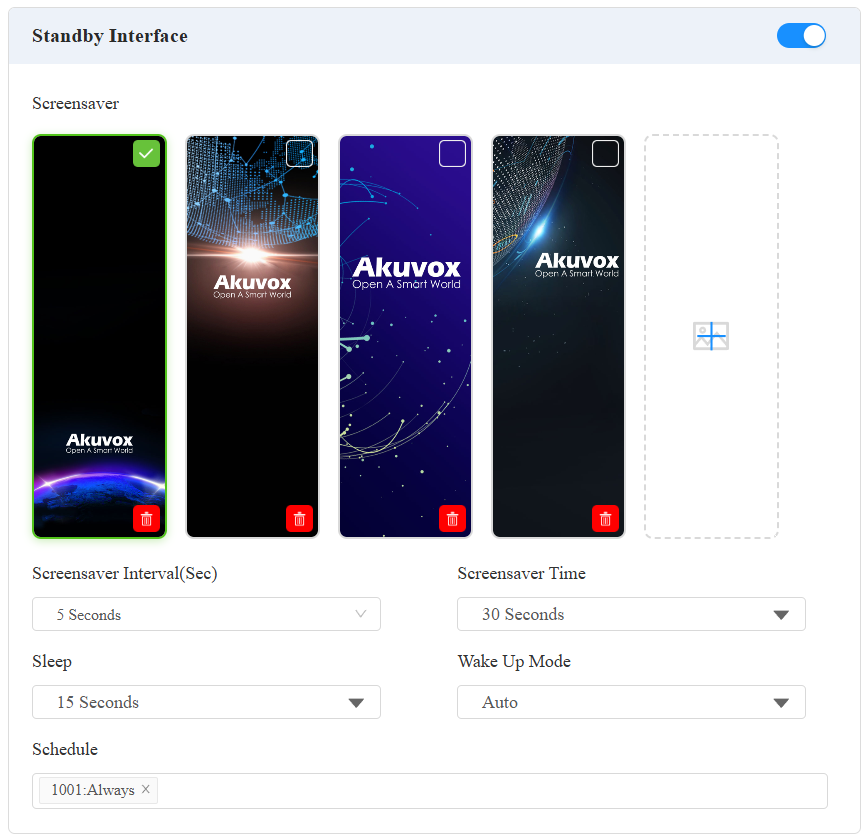
Standby Interface: Set whether to enable the screensaver.
Screensaver Interval(Sec): The interval of switching between screensavers(1 to 120 seconds). The default is 5 seconds.
Screensaver Time: Set the screensaver duration time(5 seconds to 30 minutes, or Forever).
Sleep: The time to start the screensaver mode(5 seconds to 30 minutes). The default is 15 seconds. For example, if it is set to 15 seconds, the device will go into screensaver mode when it detects no operation or no approaching object for 15 consecutive seconds. When screensaver mode is disabled, the device screen will be turned off directly in 15 seconds.
Wake Up Mode:
Auto: The screen will be woken up when someone approaches without it being touched.
Schedule: Select the schedule when the screen can be woken up automatically. Outside the time, it needs to be woken up manually. Configure the schedule on the Directory > Schedule interface.
Manual: Users need to touch and wake up the screen.
Upload Screensaver
You can upload screen-saver images to the device via the web interface, enhancing the visual experience or serving publicity purposes.
Set it up on the web Device > LCD interface. Click the add icon +.
Note
Uploaded images should be in JPG format with no more than 2M pixels.
The recommended resolution is 320×960.
If the uploaded image duplicates an existing image ID, the existing image will be overwritten.
Open Door Text Prompt Display
You can enable the text prompt for door opening and closing.
To set it up, navigate to the Access Control > Relay > Open Door Text Prompt interface.
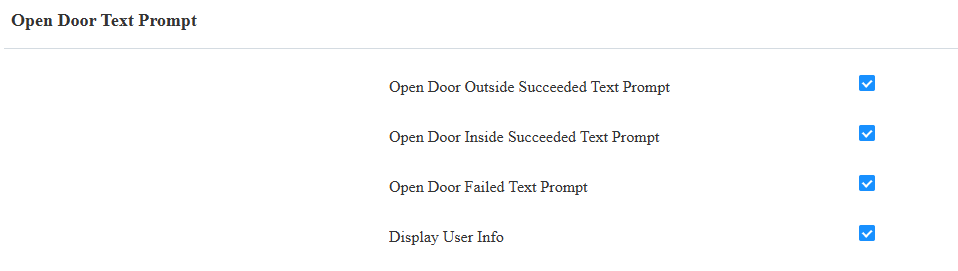
Open Door Outside Succeeded Text Prompt: Display a text prompt after the door is opened by the device-supported access methods except for the exit button. The default prompt is “Access Granted”. You can customize the prompt with a maximum of 63 characters.
Open Door Inside Succeeded Text Prompt: Display a text prompt after the door is opened by pressing an exit button(the input is triggered). The default prompt is “Access Granted”. You can customize the prompt with a maximum of 63 characters.
Open Door Failed Text Prompt: Display a text prompt after opening the door fails. The default prompt is “Access Denied”. You can customize the prompt with a maximum of 63 characters.
Display User Info: Display the user information after facial recognition or RF card swiping. For example, if facial recognition succeeds, the text prompt “Access Granted” with the user ID and name will pop up on the device screen. If it fails, the text prompt “Access Denied” will be displayed.
Unlock Options Display
Users can select the door to be opened when the device is connected to more than one door lock.
Click here to view the feature details.
To display the unlock options, go to Access Control > Relay > Unlock Options interface.
