This manual guides you in using the software ACRM, the configuration tool of the Akuvox desktop HID card issuer ACR-CID11. It is based on the software version 3.0.0.9.
Product Overview
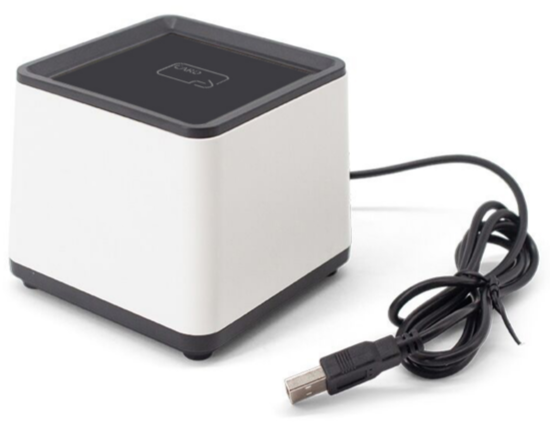
The ACR-CID11 is a multifunctional card issuer that features high-performance firmware and a USB communication interface.
It enables flexible and efficient card issuing and reading for various RFID technologies.
It supports industry-standard protocols like ISO14443A/B, ISO15693, and ISO18092, ensuring compatibility with a wide range of smart cards and tags, including HID iCLASS, MIFARE, and NFC.
This compact and versatile reader is commonly used in access control, time attendance, and other security systems.
Before You Start
Make sure:
You have acquired and installed the latest version of the ACRM HID.
ACR-CID11 is connected to your computer through USB. During the startup process, the device will flash a green light.
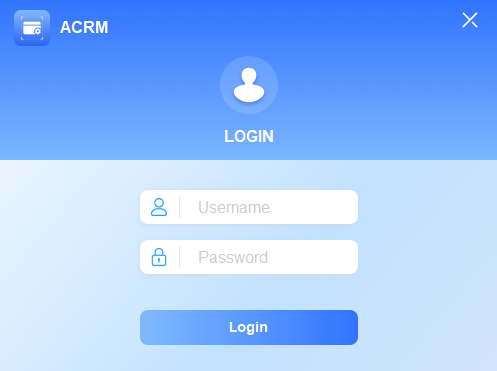
Login
Log in with the default username and password, admin.
ACR-CID11 Setup Overview
The ACR-CID11 setup interface consists of four modules.
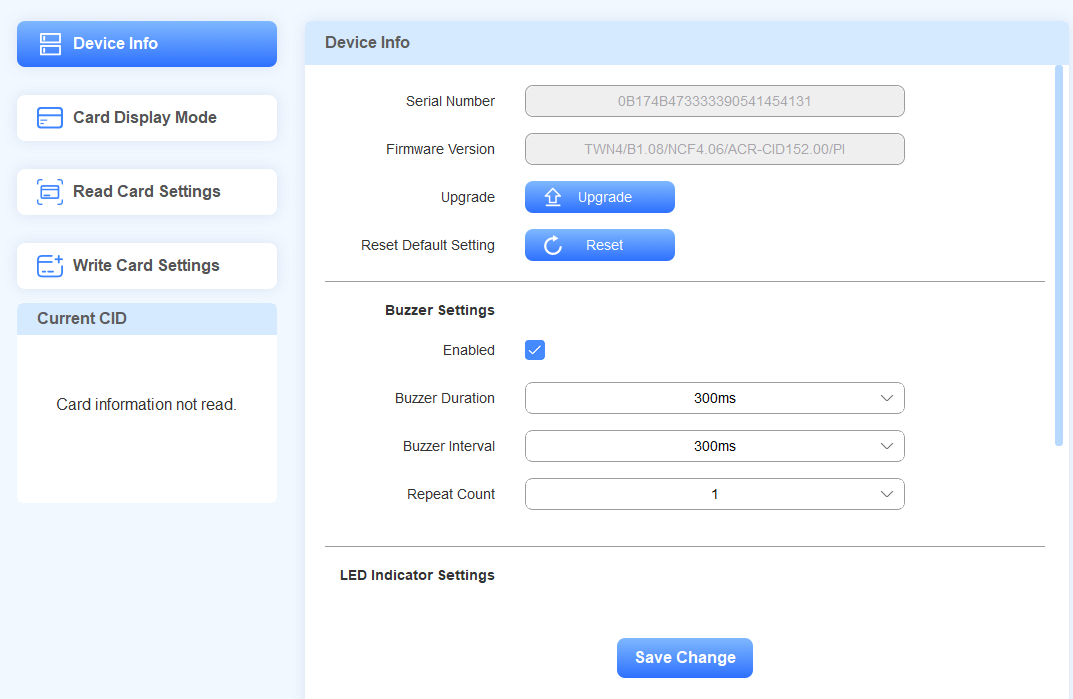
Device Info: Display the device information. You can upgrade the device, reset it to the factory settings, enable/disable the buzzer, and set up the indicator light.
Card Display Mode: Set the IC/ID card display mode.
Read Card Setting: Select a specific card type for reading.
Write Card Setting: Write data for Mifare Classic, Mifare Plus, Desfire, HID iClass, or HID iClass Seos cards.
Basic Setup
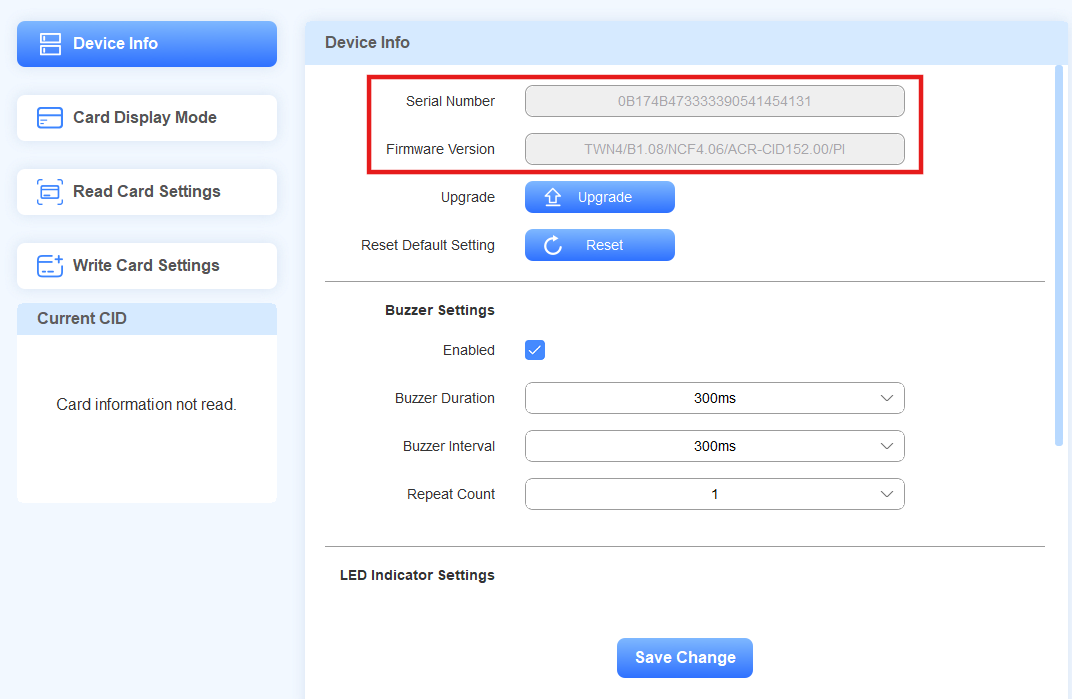
Check the Device’s Information
You can see the device’s serial number and the firmware version on the Device Info interface.
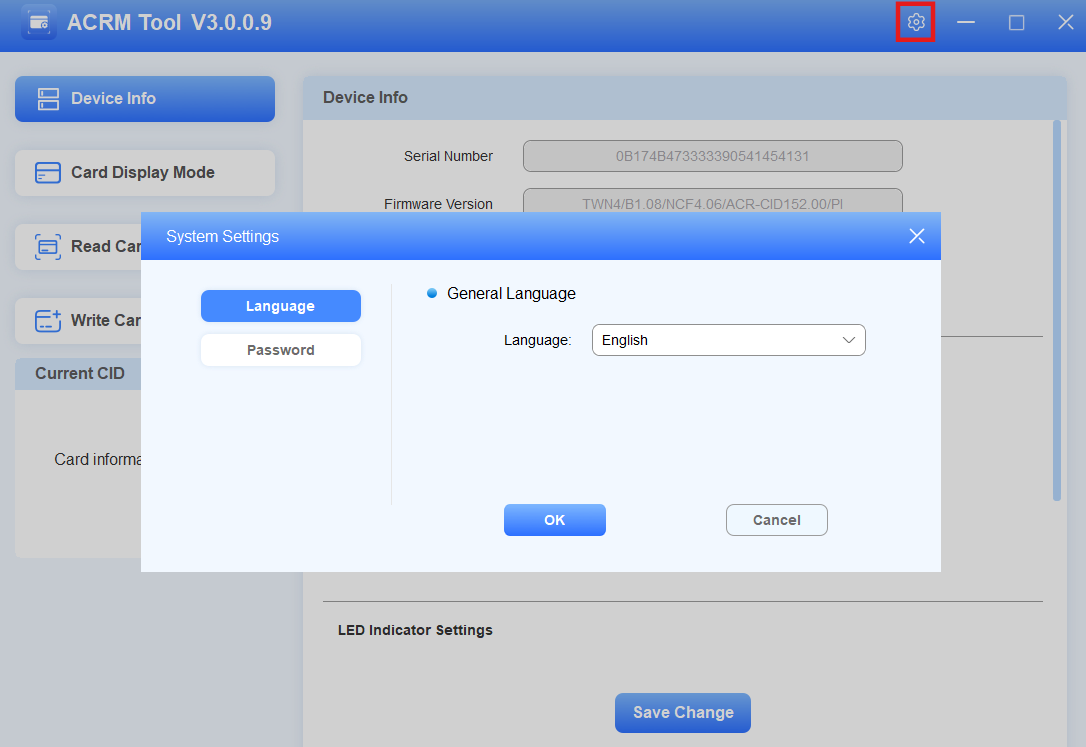
Switch Language
You can change the tool language to English or Simplified Chinese.
Click
 in the upper-right corner.
Select the desired language and click OK.
Change Password
You can change the tool login password.
Click
in the upper-right corner and click Password.Enter the current password and set the new password with a maximum of 63 characters.
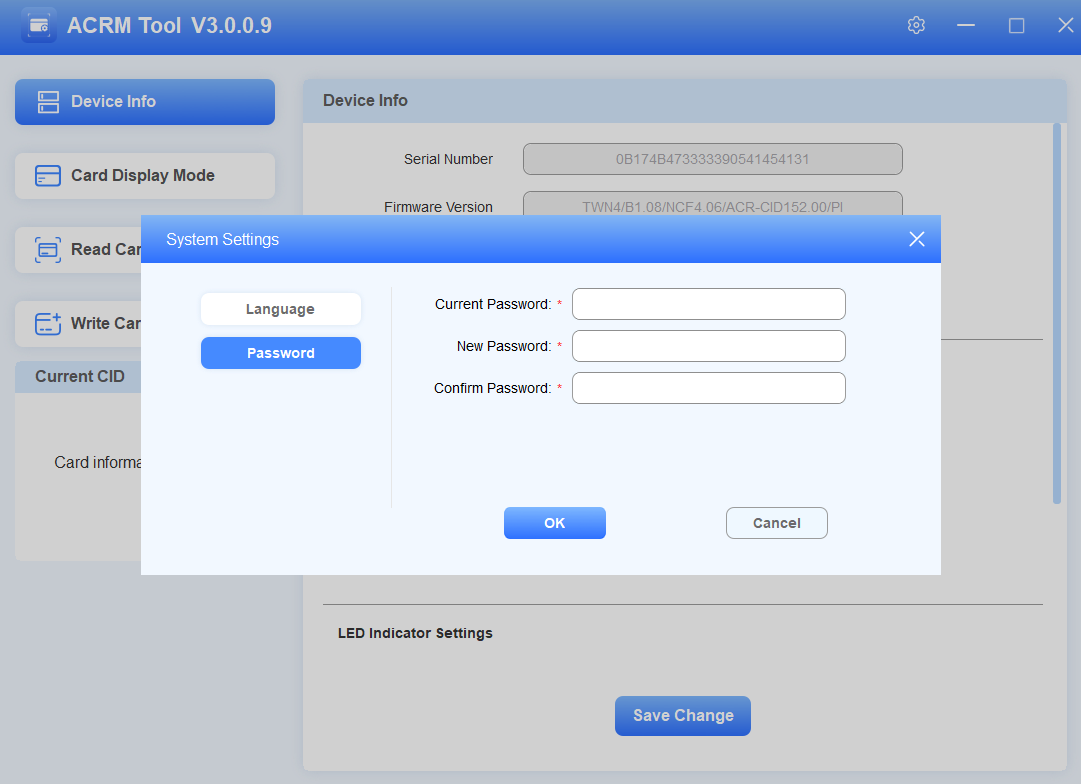
Click OK. “Modify Password Success” will pop up.
Upgrade the Device
You can upgrade the ACR-CID11 to the latest version.
Click Upgrade on the Device Info interface.
Select the .rom file from your local driver.
Click Install. You will be asked whether to restart to complete the upgrade.
Confirm the upgrade and restart the device.
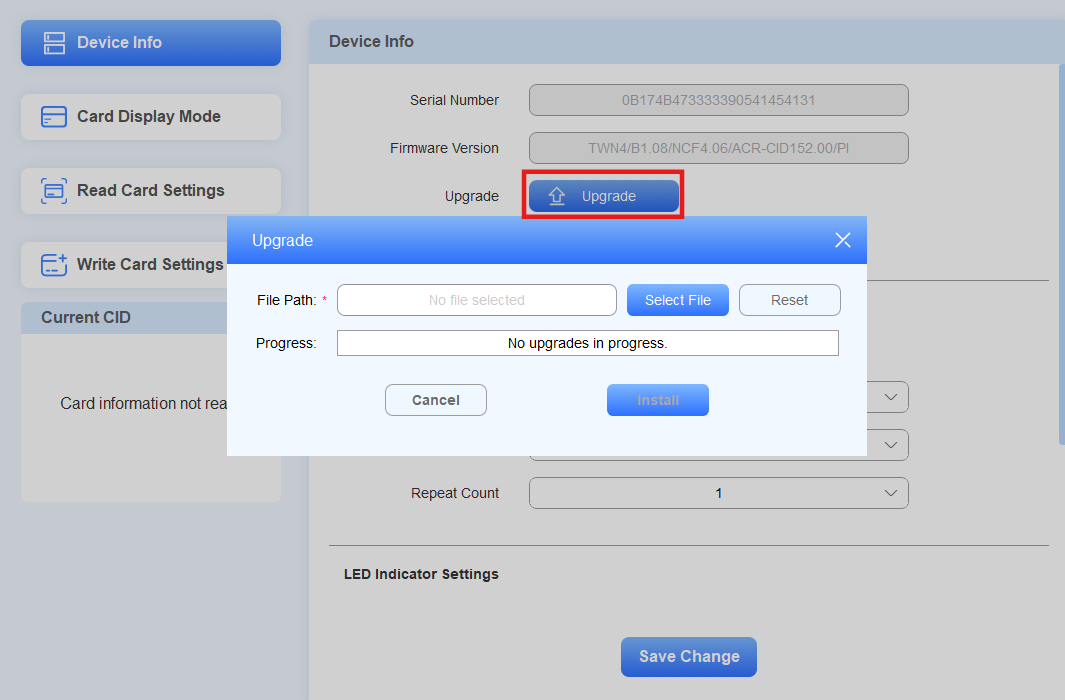
When the progress bar reaches 100%, a pop-up will inform you whether the upgrade is successful.
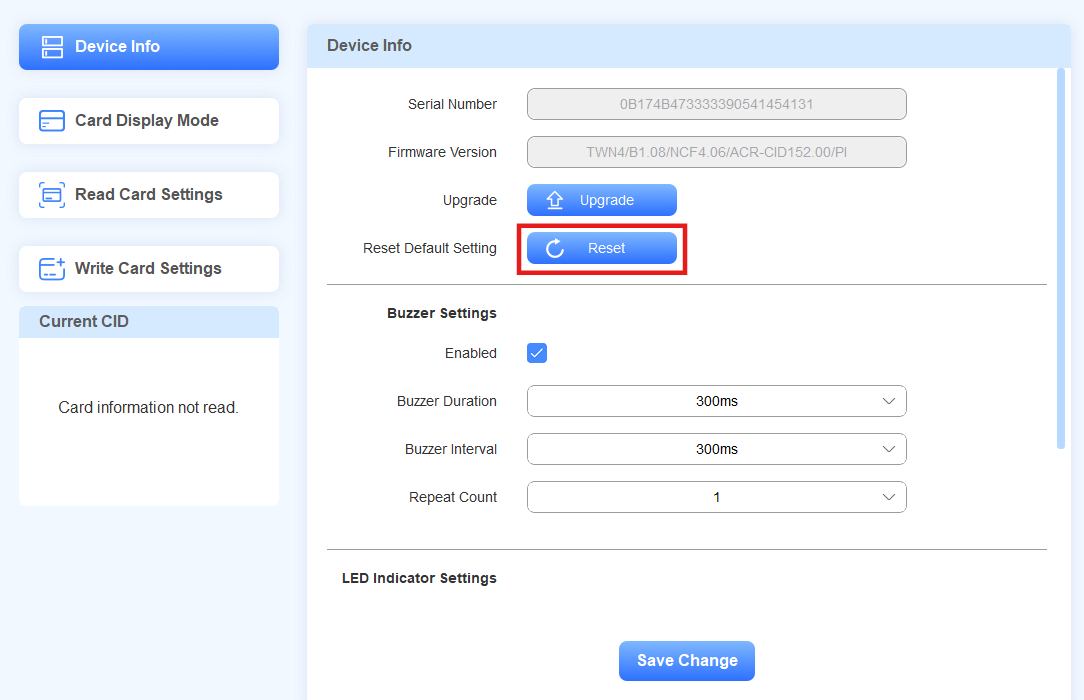
Reset the Device to Factory Settings
You can reset the settings to factory defaults.
Click Reset on the Device Info interface.
Click OK to confirm. “Reset Default Setting Success!” will pop up. The login password, card reading, and writing setup will not be reset.
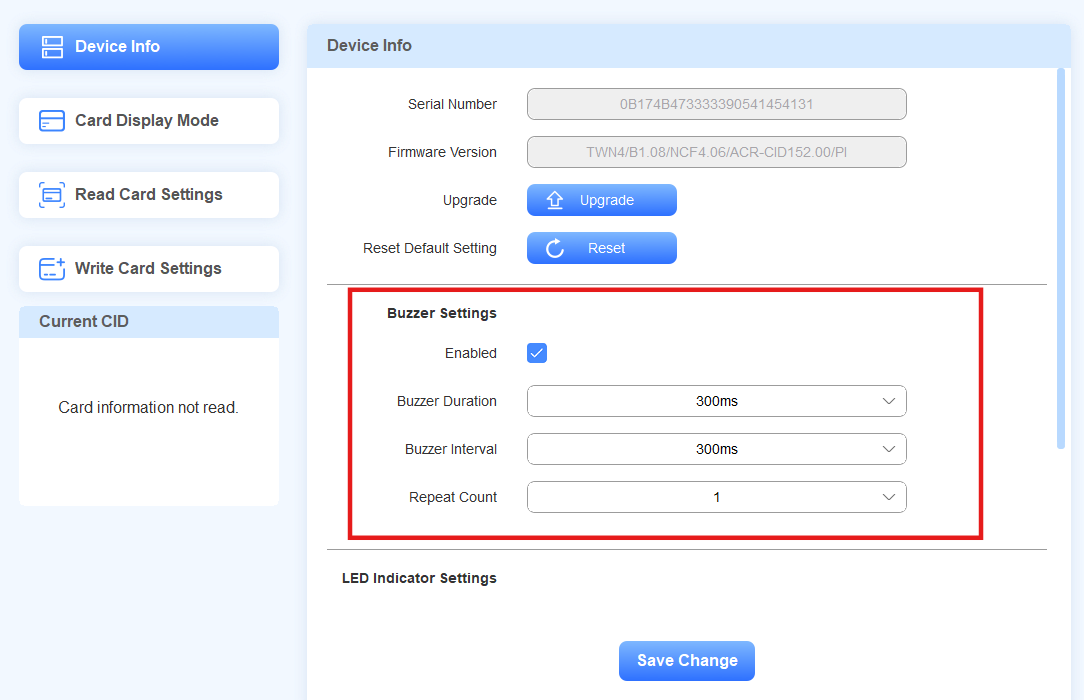
Set the Buzzer
You can set up the buzzer for swiping cards on the Device Info interface.
Enabled: Turn on/off the buzzer. Enabled by default.
Buzzer Duration: The duration of each beep sound. Value ranges from 100~1000ms. The default is 300ms.
Buzzer Interval: The interval between two beep sounds. Value ranges from 100 to 1000ms. The default is 300ms.
Repetition Count: Set how many times the buzzer will beep, from 1 to 10 times. The default is 1.
After configuration, click Save Change.
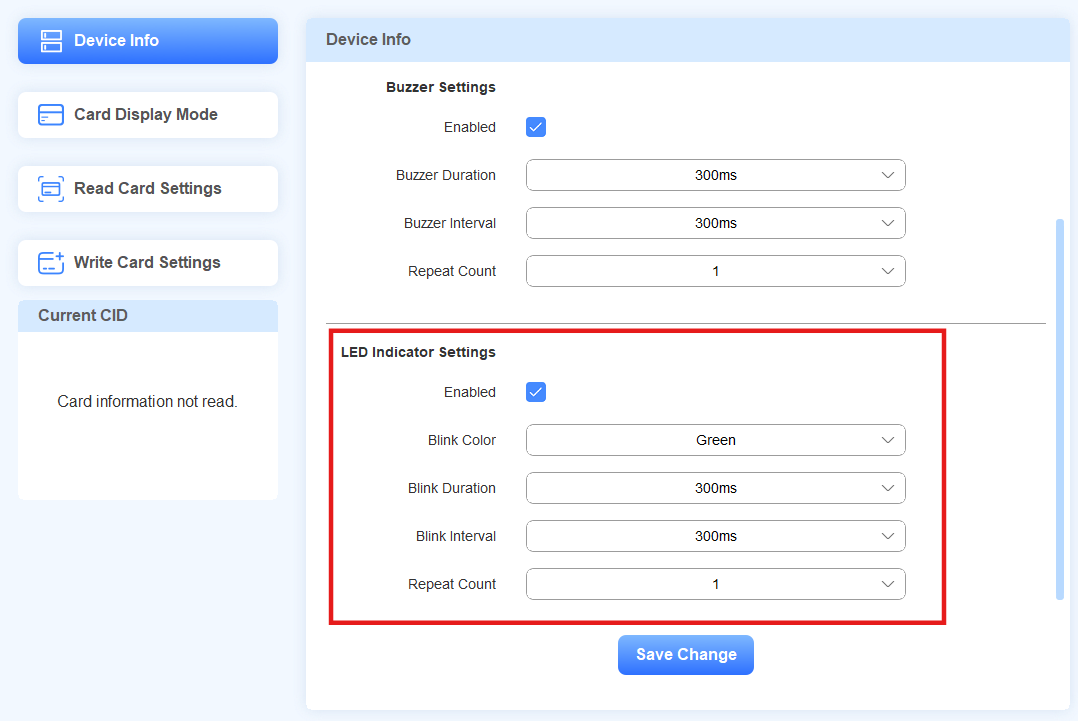
Set the Light
You can set up the indicator light on the Device Info interface.
Enabled: Turn on/off the indicator light. Enabled by default.
Blink Color: Select the blink light color: Green, White, or Blue. The default is green.
Blink Duration: The duration of each blink. Value ranges from 100~1000ms. The default is 300ms.
Blink Interval: The interval between two blinks. Value ranges from 100~1000ms. The default is 300ms.
Repeat Count: Set how many times the light will blink. The maximum value is dynamically calculated based on the Blink Duration and Blink Interval settings. The default is 1.
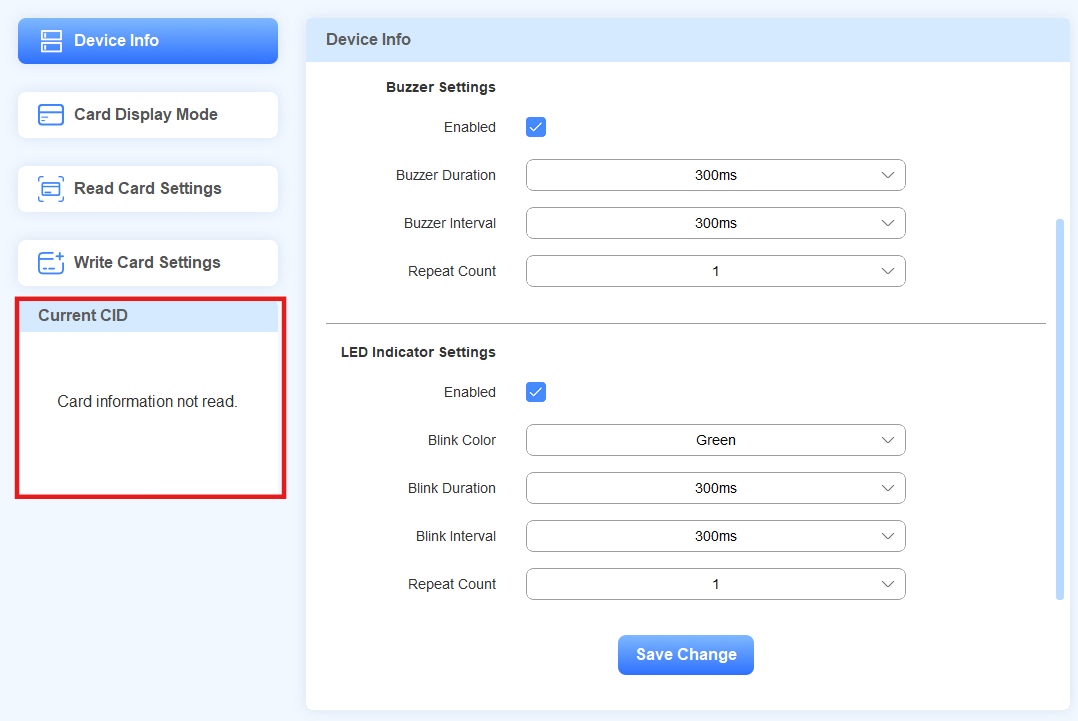
Read Current CID
After setting the correct card type in Read Card Settings, play the card on the ACR-CID11 to display its CID on the Current CID module.
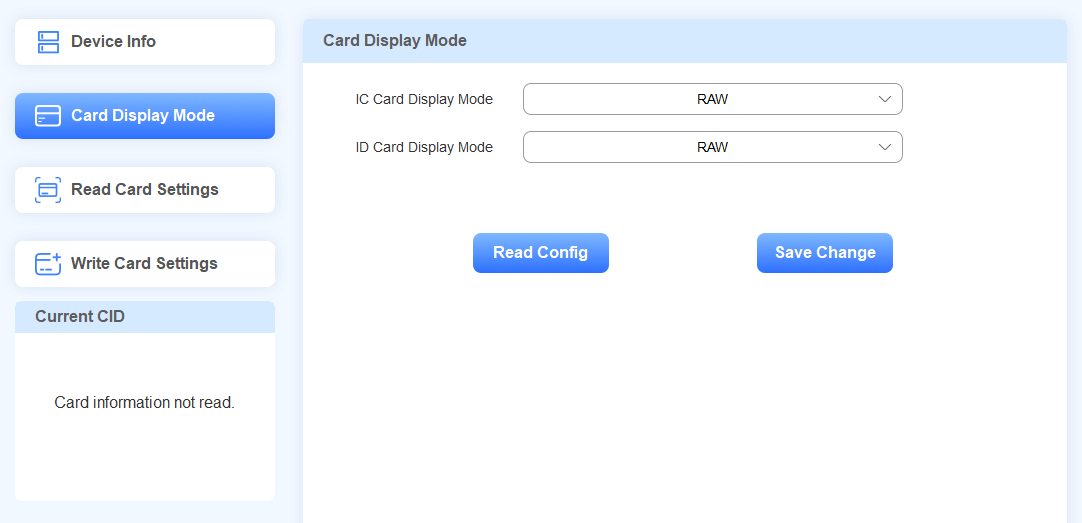
Card Display Mode Selection
You can select the IC/ID card display mode on the Card Display Mode interface.
Click Save Change after selecting modes.
Card Writing
Mifare Classic, Mifare Plus, Desfire cards, HID iClass, and HID iClass Seos are encryption-featured cards.
If the cards are new cards not configured, you need to write the card data before using them.
If the cards are encrypted by the third-party service provider, please confirm the encryption information with the provider before using the ACR-CID11 to read the cards.
You can write cards on the Write Card Setting interface.
Mifare Classic
Concepts
A Mifare card’s memory is divided into 16 sectors (from sectors 0 to 15), and each sector is divided into 4 blocks (from blocks 0 to 3).
The Sector/Block is where you write the card data.
Every block stores 16 bytes. The first 6 bytes are Key A, and the last 6 are Key B. They are used to protect each sector.
Block Key A is where you write the authentication password(key).

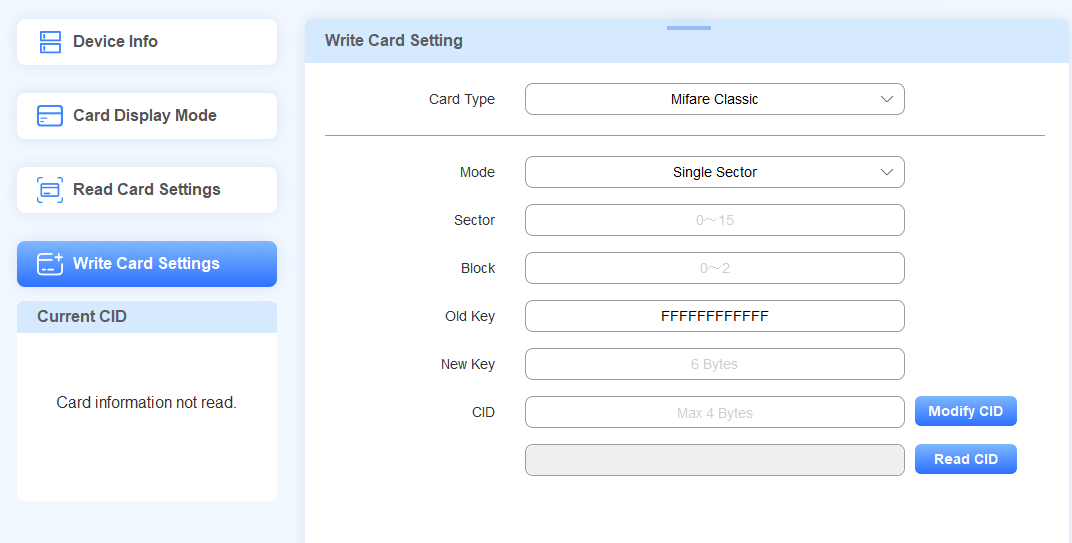
Place the card on the ACR-CID11 while setting the card.
Set the Card Type to Mifare Classic.
Select Single Sector or Multiple Sector.
In Single Sector Mode
Enter the sector number(0 to 15) that stores the card data.
Enter the block number(0 to 2).
Enter the old block key. If it is a new card, the key is “FFFFFFFFFFFF”(case insensitive) by default. If not, please confirm it with the service provider.
Enter the 6-byte new key.
Set the CID(the output card code) with a maximum of 4 bytes.
Click Modify CID. “Successfully write card” will pop up.
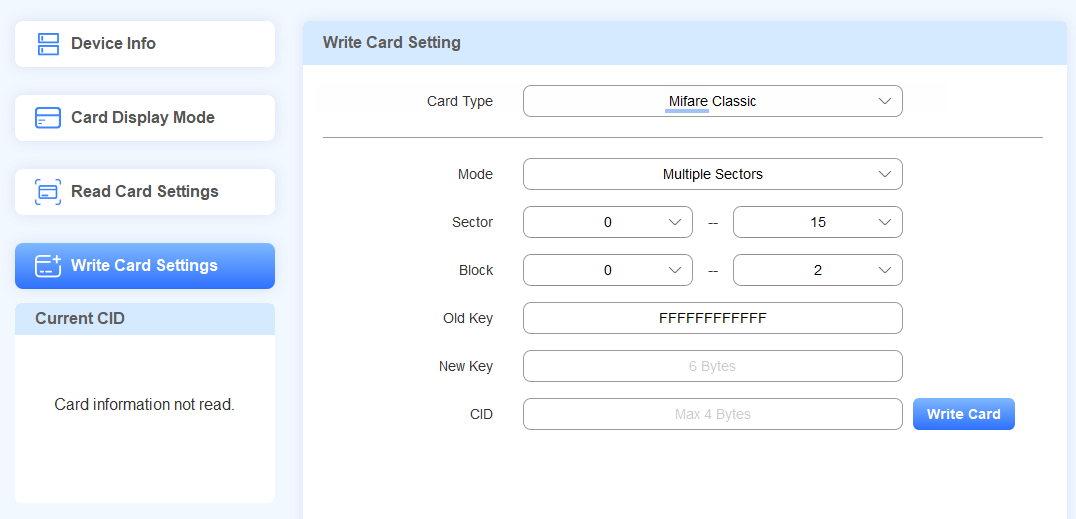
In Multiple Sector Mode
Select the start and end sectors.
Select the start and end blocks.
Enter the old block key. If it is a new card, the key is “FFFFFFFFFFFF”(case insensitive) by default. If not, please confirm it with the service provider.
Enter the 6-byte new key.
Set the CID(the output card code) with a maximum of 4 bytes.
Click Write Card. “Successfully write card” will pop up.
Mifare Plus
Concepts
The Mifare Plus cards support one pre-personalized level and three security levels(SL), operating at a single security level at any given time, and can only be switched to a higher level.
SL0: Store the pre-configured keys for setup, including level switching keys and AES keys for memory access.
SL1: Cards are fully compatible with MIFARE Classic 1K/4K cards, allowing them to work seamlessly within existing MIFARE Classic systems.
SL2: Require AES authentication and use MIFARE Classic CRYPTO1 for data security.
SL3: Require AES for authentication, ensure secure communication, and maintain data integrity.
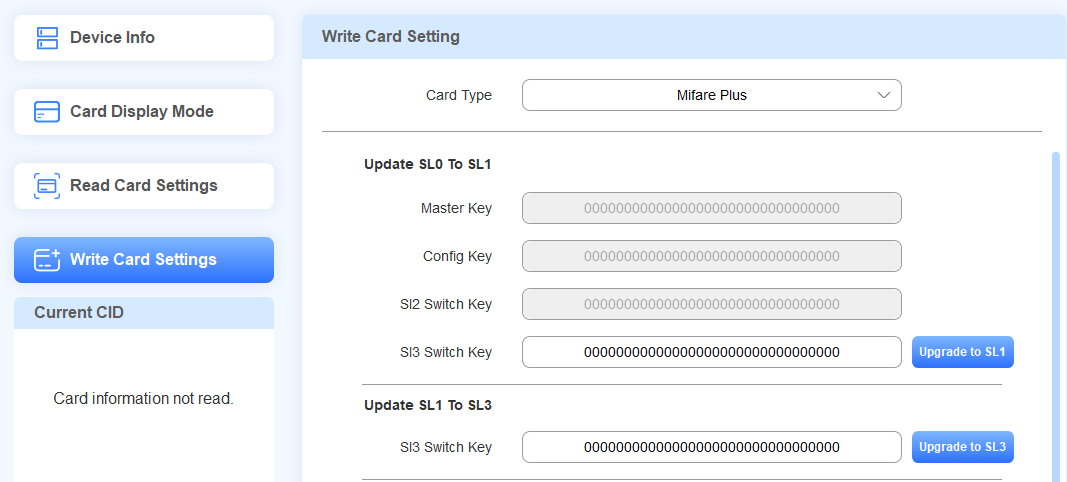
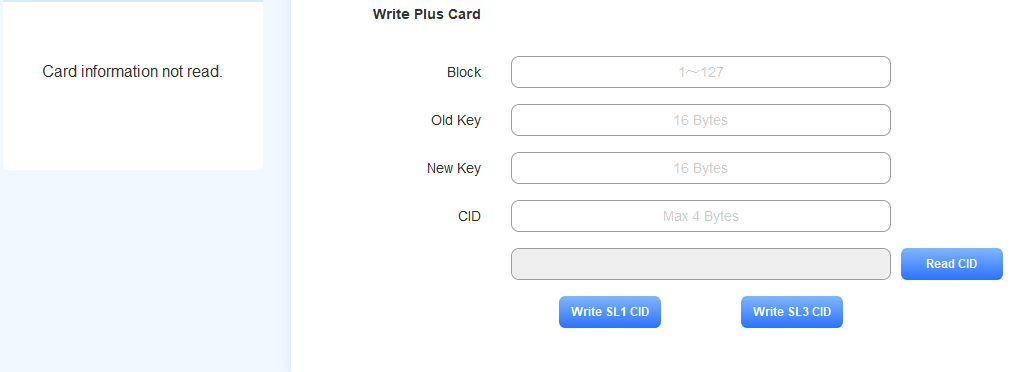
Place the card on the ACR-CID11 while setting the card.
Set the Card Type to Mifare Plus. The Master Key, Config Key, and SL2 Switch Key cannot be changed.
Upgrade the card. If it is a new card, it must at least be upgraded to SL1 for usage.
To upgrade the card from SL0 to SL1, customize the SL3 Switch Key with a maximum of 16 bytes. Then, click Upgrade to SL1.
To upgrade the card from SL1 to SL3, enter the SL3 Switch Key you set. Then, click Upgrade to SL3.
The card cannot be upgraded from SL0 to SL3.
Enter the block number(1 to 128). Do not enter these numbers: “3, 7, 11, 15, 19, 23, 27, 31, 35, 39, 43, 47, 51, 55, 59, 63, 67, 71, 75, 79, 83, 87, 91, 95, 99, 103, 107, 111, 115, 119, 123, 127”.
Note
A Mifare card’s memory is divided into multiple sectors, and each sector is divided into 4 blocks (from blocks 0 to 3). The Sector/Block is where you write the card data.
Block 3(The fourth block) is used to store the key. Therefore, avoid entering the number of the fourth block in each sector.
Enter the old key. It is 32-bit F(case insensitive) by default for new cards. If not, please confirm it with the service provider.
Customize the new 16-byte key and click Write Card.
Write SL1 CID: Write the key into the SL1 card.
Write SL3 CID: Write the key into the SL3 card.
Tip
If writing the card fails, remove the card, put it back on the ACR-CID11, and try again.
You can click Read CID to check the card code.
Desfire
Concepts
DES(Data Encryption Standard) Fire cards support advanced encryption algorithms, including AES, providing a high level of security for data transactions.
Each card has applications, and each application can store files and 14 keys. These are essential parts for reading the Desfire cards.
Place the card on the ACR-CID11 while setting the card.
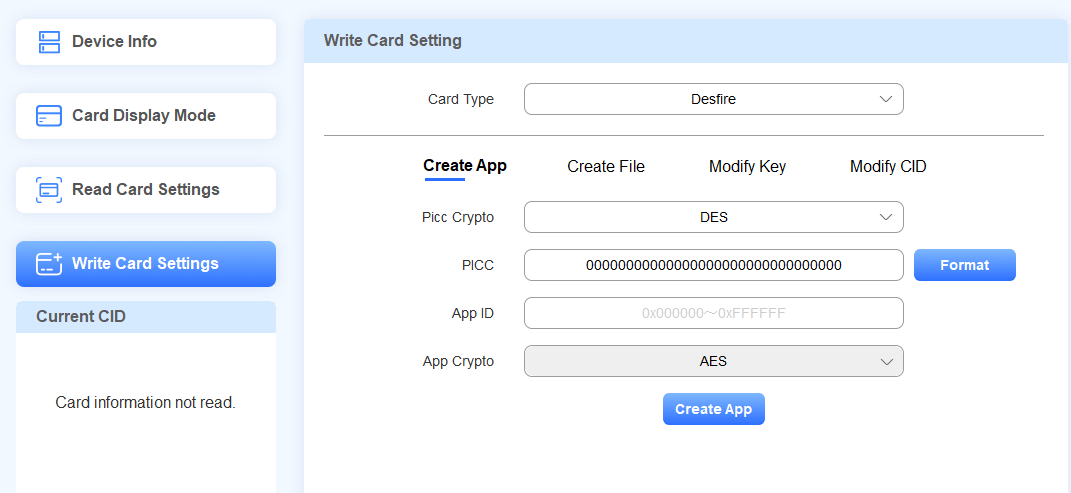
Create App
Set the Card Type to Desfire. Select the PICC Crypto type from AES and DES. For Akuvox Desfire cards, it is DES. If it is a third-party card, please confirm it with the service provider.
If you need to format the card, enter the PICC and click Format. The default is 32-bit 0 for Akuvox Desfire cards.
Customize the App ID from 1 to 16,777,215. It is suggested to enter a 6-digit hexadecimal if you want to use the device with Akuvox door phones or access control terminals.
Click Create App. “Successfully Create App” will pop up.
Create File
Enter the App ID you set on the Create App interface.
Enter the App Key.
If it is an Akuvox Desfire card, it is 32-bit 0 by default.
If it is a third-party card, please confirm it with the service provider.
Enter the Key ID. By default, there are 14 keys. The first Key ID is 0, the second is 1, and so on.
Customize the File ID from 0 to 31.
Set key permissions. You can grant permissions to specific keys.
Enter the corresponding key ID when you need to read and/or write the card CID. Please note that the Change Key function is currently unavailable.
Click Create File. “Successfully Created File” will pop up.

After creating the App and the file, the encryption of the card is done. If you want to change the App Key and card code, further navigate to the Modify Key and Modify CID sections.
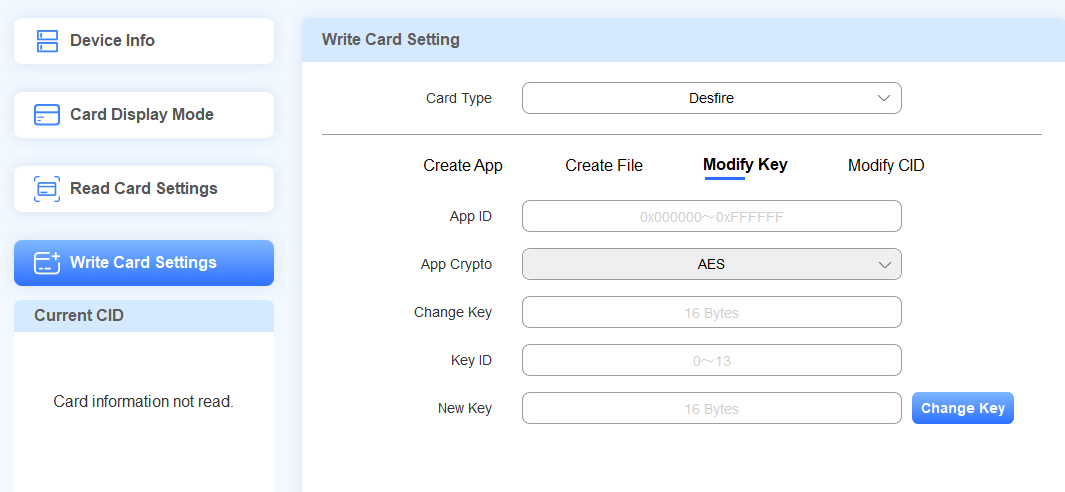
Modify Key
You can modify the App Key of specific keys. Then, assign different keys to personnel with different permissions to set cards.
Enter the App ID and the Change Key.
Enter the desired Key ID.
Enter the New Key and click Modify Key.
Tip
If writing the card fails, remove the card, put it back on the ACR-CID11 and try again.
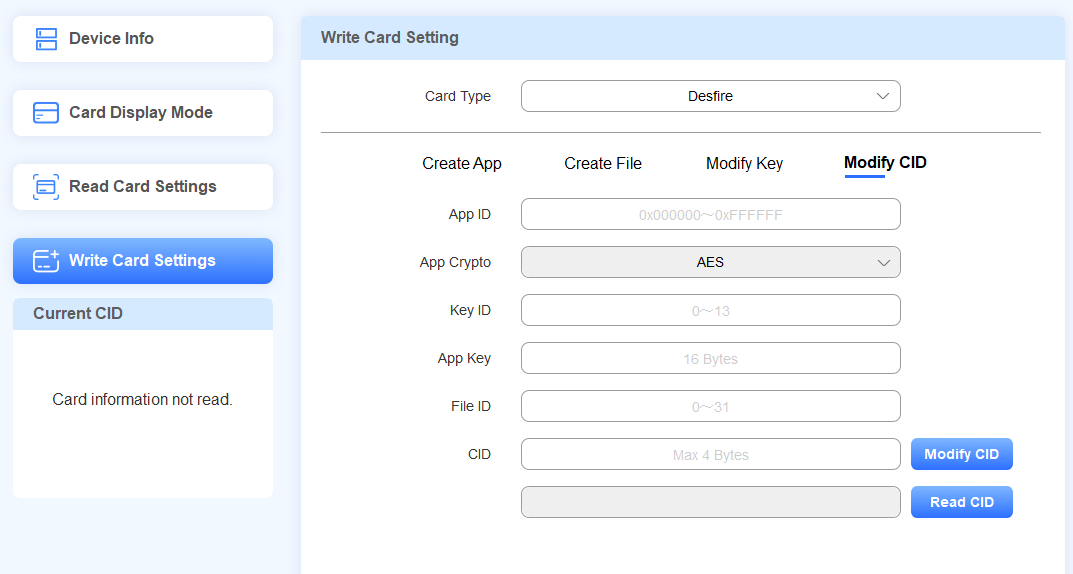
Modify CID
Enter the App ID and Key ID. Please note that this Key should be granted permission to write and read the CID on the Create File interface.
Enter the App Key and File ID.
Enter the new CID with 4 bytes at most and click Modify CID.
You can click Read CID to check the card code.
Tip
If writing the card fails, remove the card, put it back on the ACR-CID11, and try again.
HID iClass
Concepts
HID iClass is a contactless smart card technology developed by HID Global. It is a widely used access control and identification system that provides secure access to buildings, computers, and other restricted areas.
HID iClass cards store data on multiple secure sectors or "blocks" on the card's chip, allowing for flexible data storage and access control.
HID iClass cards typically have 16 blocks, numbered from 1 to 16. Each block can store up to 8 bytes of data.
Blocks 1-13 are typically used for the application area, where access control data and other information can be stored.
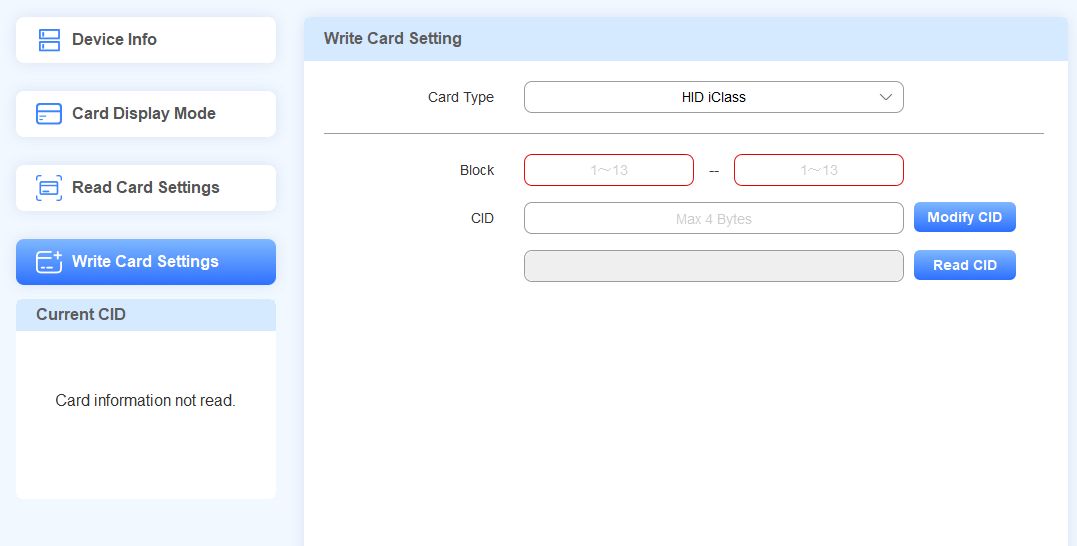
Specify the start and end block range (e.g., 1-13) where you want to write data.
Place the card on the ACR-CID11 while setting the card.
Set the Card Type to HID iClass.
Set the start and end blocks(1~13).
Enter the CID with a maximum of 4 bytes.
Click Modify CID.
You can click Read CID to check the card code.
Tip
If writing the card fails, remove the card, put it back on the ACR-CID11, and try again.
HID iClass Seos
Concepts
HID iClass Seos is an advanced contactless smart card technology developed by HID Global. It is an evolution of the original HID iClass platform, offering enhanced security features and increased flexibility.
Application Directory File(ADF): In HID iCLASS SEOS technology, an ADF is where a specific application's data is stored. An ADF has its own set of keys (encryption and MAC keys) that establish a secure messaging channel between the reader and the card to protect the data in transit.
Message Authentication Code (MAC) Key: This key is used to generate a unique signature for the data being transferred.
Encryption (ENC) Key: This key is used to encrypt the data transferred between the credential and the reader.
Authentication (AUTH) Key: This key is used in a mutual authentication between the card and the reader.
Place the card on the ACR-CID11 while setting the card.
Modify Key
Set the Card Type to HID iClass Seos.
Select the desired Directory ID(ADF0~2) to write the data.
Enter the old MAC, ENC, and Auth keys with a maximum of 16 bytes. If it is a new card that has not been set up, leave these fields blank.
Enter the new MAC, ENC, and Auth keys with a maximum of 16 bytes.
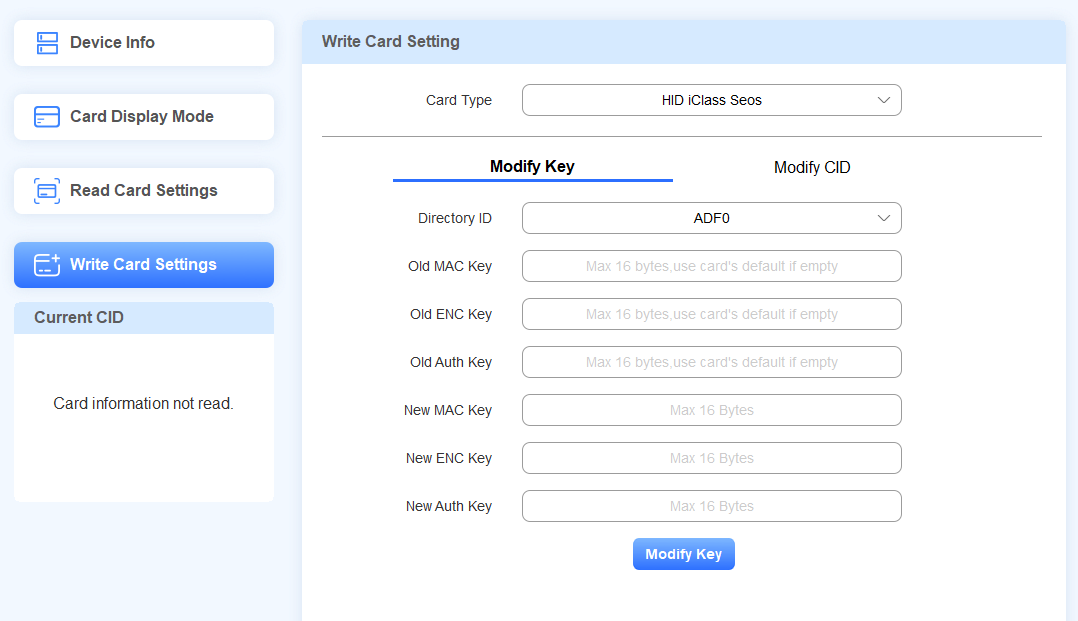
Click Modify Key.
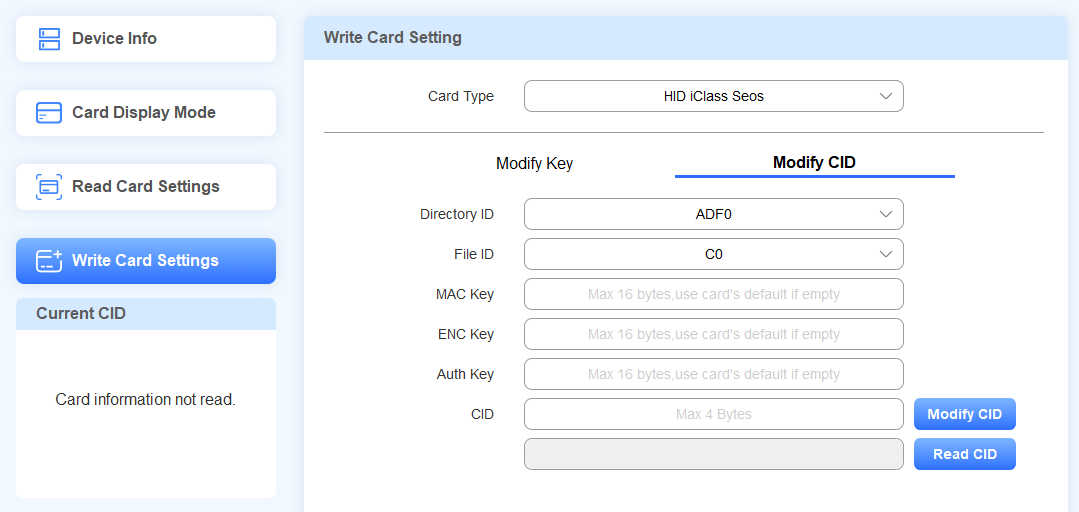
Modify CID
Select Modify CID.
Choose the desired Directory ID and File ID to write the data. Each file can write one card code.
The file options for different directories are:
ADF0: C0
ADF1: C0
ADF2: C0/C1/C2/C3/C4/C5/C6/C7
Enter the MAC, ENC, and Auth Keys.
Enter the CID with a maximum of 4 bytes.
Click Modify CID.
You can click Read CID to check the card code.
Card Reading
The ACR-CID011 supports reading unencrypted IC/ID cards, Mifare Classic, Mifare Plus, Desfire, HID iClass, and HID iClass Seos cards. Before reading cards, make sure you select the right card type.
Note
For unencrypted cards, you can output card codes by directly placing the card on the device.
For encryption-featured cards, you need to first encrypt them.
If the card is encrypted and provided by the third-party service provider, please confirm the encryption information with the provider.
If the card is not encrypted, you can use the ACR-CID11 to encrypt it. Please refer to the Card Writing section.
Select the card type on the Read Card Setting interface.
Unencrypted Cards
Set the Card Type to Unencrypted, which is the default option.
Click Save Change.
Move your mouse cursor to the desired box and place the card on the device.
The card code will display automatically.


Mifare Classic
Set the Card Type to Mifare Classic.
Enter the sector and block numbers that store the card data.
Enter the block key.

Click Save Change.
Move your mouse cursor to the desired box and place the card on the device. The card code will display automatically.
Mifare Plus
Set the Card Type to Mifare Plus. You can set up three choices. This means you can use three types of Mifare Plus cards. When swiping a card, as long as one of the choices matches the card’s SL1 or 3 key, the card code in the block you specified will be output.
Specify the block(s) to be read in the choice(s).
Enter the SL1 or SL3 key(s).
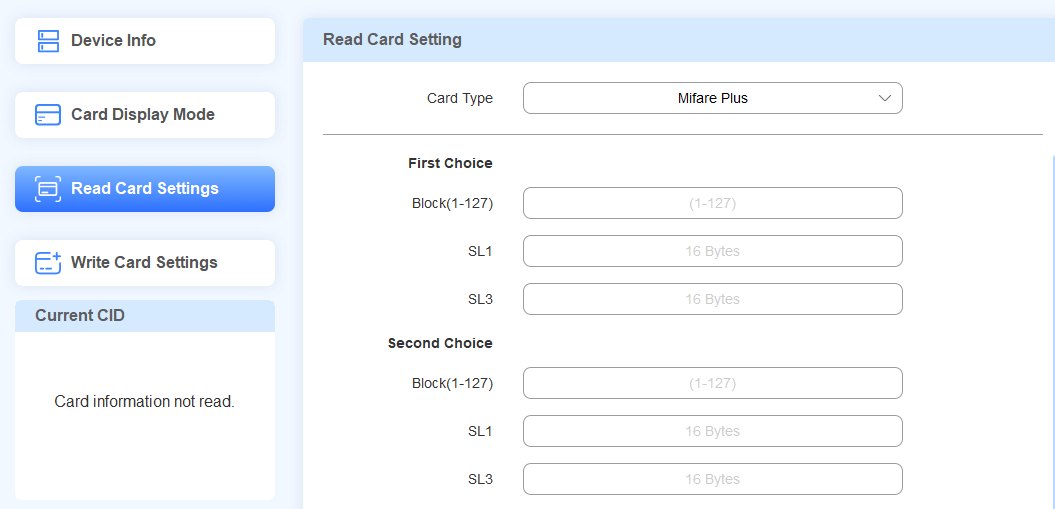

Click Save Change.
Move your mouse cursor to the desired box and place the card on the device. The card code will display automatically.
Desfire
Set the Card Type to Desfire.
Enter the App ID, File ID, Key ID, and App Key.
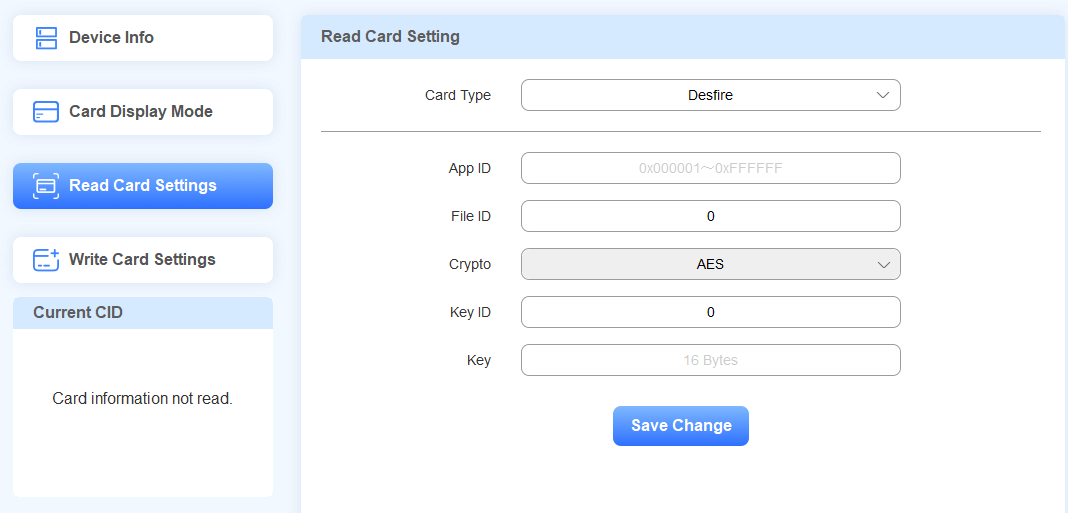
Click Save Change.
Move your mouse cursor to the desired box and place the card on the device. The card code will display automatically.
HID iClass
Set the Card Type to HID iClass.
Enter the block number.
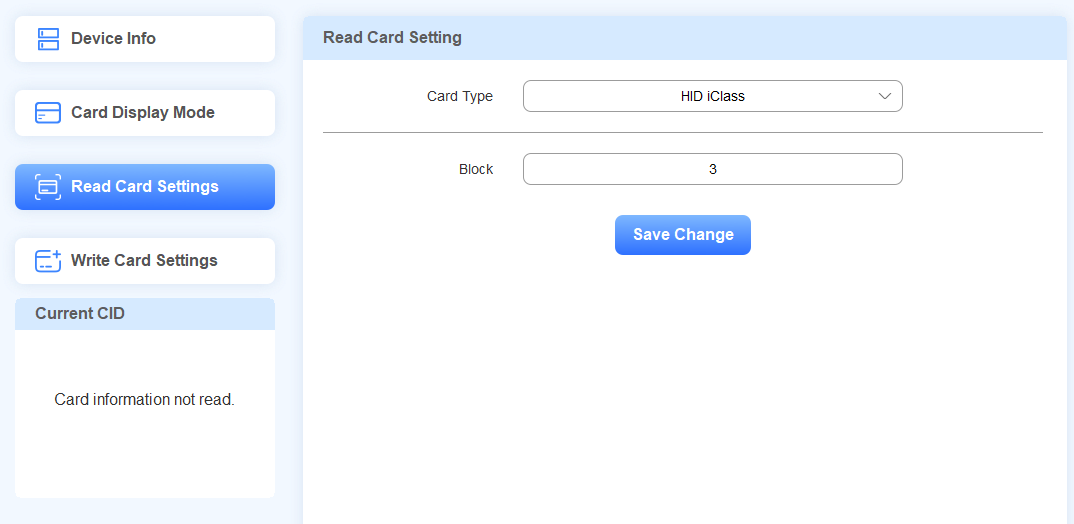
Click Save Change.
Move your mouse cursor to the desired box and place the card on the device. The card code will display automatically.
HID iClass Seos
Choose the Directory ID and File ID.
Enter the ENC, MAC, and Auth Keys.
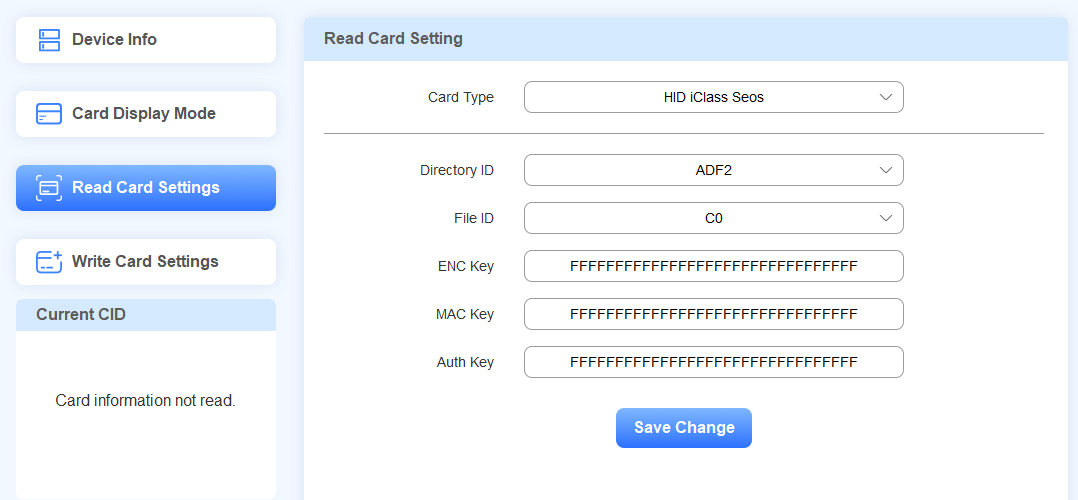
Click Save Change.
Move your mouse cursor to the desired box and place the card on the device. The card code will display automatically.
Read HID Cards on Door Phones/Access Control Terminals
Specific Akuvox door phones and access control terminals support reading HID iClass and iClass Seos cards for door opening.
Before reading, you need to set up the device.
Compatible Models and Versions(or higher):
X915 V2 HID iClass: 2915.30.10.524.
A08 HID iClass: 108.30.11.41.
Take X915 as an example.
Encrypt HID Cards
HID cards need to be encrypted before reading.
Refer to the HID iClass and HID iClass Seos sections for encrypting cards with ACR-CID11.
Read HID iClass Cards for Door Opening
Use the device’s IP(scanned by IP Scanner) to log in to its web interface. The initial username and password are admin.
Go to Device Management > Access Control > Card Setting interface.
Set HID iClass Card Encryption Type to iClass.
Enter the block number, which is within the range that is configured when you encrypt the card.

Click Submit.
Assign the Card to a User
Then, assign the card to a user.
Go to Directory > User interface.
Click +Add to add a new user; click
 to modify an existing one.
Scroll to the RF Card & BKey section.
Place the card on the door phone’s card reader and click Obtain.
The card code will display automatically.

Click Submit after finishing other settings.
The user can open the door by swiping the card on the door phone.
Read HID iClass Seos Cards for Door Opening
Use the device’s IP(scanned by IP Scanner) to log in to its web interface. The initial username and password are admin.
Go to Device Management > Access Control > Card Setting interface.
Set HID iClass Card Encryption Type to iClass Seos.
Select the Directory and File IDs, which are the same as what is configured on ACR-CID11.
Enter the ENC, MAC, and Auth Keys, which are the same as what is configured on ACR-CID11.
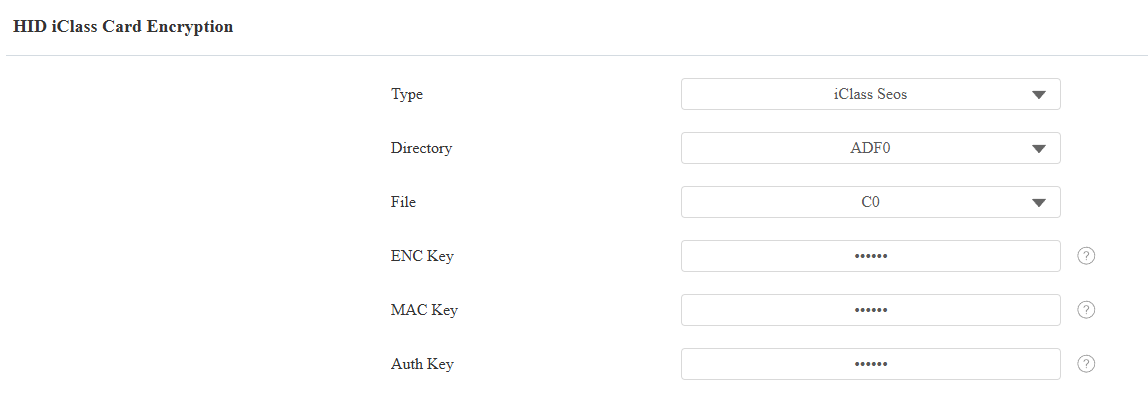
Click Submit.
Assign the Card to a User
Then, assign the card to a user. The user can open the door by swiping the card on the door phone.