Do Not Disturb
The Do Not Disturb(DND) feature prevents unwanted incoming SIP calls, ensuring uninterrupted focus. It also allows you to set a code to be sent to the SIP server when rejecting a call.
To set it up, go to the Intercom > Call Feature > DND interface.

Call Auto-answer
Auto-answer feature allows the device to automatically pick up incoming calls without any manual intervention. You can also customize this feature by setting the time duration for auto-answering and choosing the communication mode between audio and video.
To enable the call auto-answer feature, go to the Account > Advanced > Call interface.

Auto Answer: This option only applies to the SIP calls.
The auto-answer feature for IP calls is enabled by default. You can further set it up on the Intercom > Call Feature > Auto Answer interface. The settings here only apply to IP calls.

Auto Answer Delay: Set the time interval for the call to be automatically picked up after ringing. For example, if you set the delay time to 5 seconds, the door phone will answer the call automatically after 5 seconds.
Mode: Determine whether to auto-answer the call as a video or audio call.
Group Call
This feature allows users to call a group of contacts by a single press. The device supports local and SmartPlus-featured group calls. To learn about the detailed configuration, please click here.
To set it up, go to the Intercom > Basic interface.

Call Type: Select Group Call.
Group Call Number(Local): Enter the target numbers.
When Refused:
End All Calls: The device will stop calling.
End This Call Only: The device will continue to call the next number.
Sequence Call
Sequence Call is a feature that allows you to dial a group of numbers in a predefined order until one of them answers. This feature is supported by Akuvox SmartPlus, which provides a set of sequence call numbers for the application. Please click here for the detailed configuration.
You can also set up the local sequence call numbers on the Intercom > Basic interface.

Call Type: Select Sequence Call.
Call Timeout(Sec): Determine the duration before calling the next number when the previous call is not answered.
Sequence Call Number(Local): Enter the target numbers.
Call Hang up by Pressing the Push Button
You can enable or disable pressing the push button to hang up a call on the Intercom > Basic > Push to Hang Up interface.

Multicast
Multicast is a one-to-many communication within a range. The door phone can act as a listener and receive audio from the broadcasting source.
To set it up, go to the Intercom > Multicast interface.
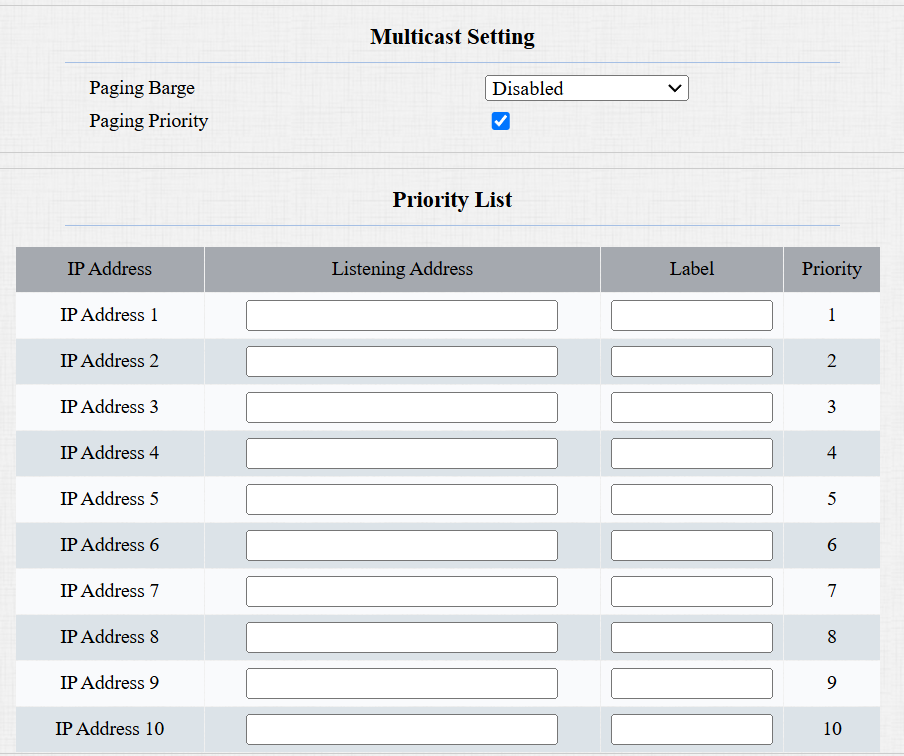
Paging Barge: Determine how many multicast groups have higher priority than SIP calls. If disabled, SIP calls will have higher priority.
Paging Priority: Decide whether to make multicast in order of priority.
Listening Address: Enter the IP address. The listen address should be the same as the multicast address. The listening port and the multicast port cannot be the same for each IP address. Multicast IP address is from 224.0.0.0 to 239.255.255.255.
Note
Please contact Akuvox tech team for a valid multicast address.
Label: Name the multicast group.
Maximum Dial Duration
Maximum Dial Duration is the time limit for incoming- and/or outgoing calls on the door phone. If configured, the door phone will automatically terminate the call if no one answers the call within the preset time, whether it is incoming or outgoing.
To set it up, go to the Intercom > Call Feature > Max Dial Time interface.

Max SIP/IP Dial In Time: Specify the maximum duration of an incoming call. The door phone will automatically end the incoming call if it is not answered within the preset time.
Max SIP/IP Dial Out Time: Specify the maximum duration of an outgoing call. The door phone will automatically end the call it dialed out if there is no answer from the recipient within the preset time.
Note
The max dial time is affected by the SIP server’s max dial time when users make SIP calls. The max call time should not exceed the dial duration of SIP server.
Maximum Call Duration
The door phone allows you to set up the call time duration in receiving the call from the calling device as the caller side might forget to hang up the intercom device. When the call time duration is reached, the door phone will terminate the call automatically.
To set it up, go to the Intercom > Call Feature > Max Call Time interface.

Note
The max call time is affected by the SIP server’s max call time when users make SIP calls. The max call time should not exceed the call duration of SIP server.
Hang up After Opening Doors
This feature automatically ends the call once the door is released, allowing for the seamless reception of subsequent calls.
To set it up, go to the Intercom > Call Feature > Hang Up After Opening Door interface.

Type: Specify the door-opening method. If this specific method is used to release the door during a call, the door phone will end the call when the preset hang-up time is reached.
Time Out: Specify the hang-up time limit. The door phone will automatically terminate the call when the specific time is reached after the door is opened.
Actions Triggered by Calling
You can set up actions triggered when the device is making a call on the Intercom > Basic > Call Event interface.

Action To Execute:
FTP: Send a screenshot to the preconfigured FTP server.
Email: Send a screenshot to the preconfigured Email address.
HTTP: When triggered, the HTTP message can be captured and displayed in the corresponding packets. To utilize this feature, enable the HTTP server and enter the message content in the designated box below.
HTTP URL: Enter the HTTP message if selecting HTTP as the action to execute. The format is http://HTTP server’s IP/Message content.
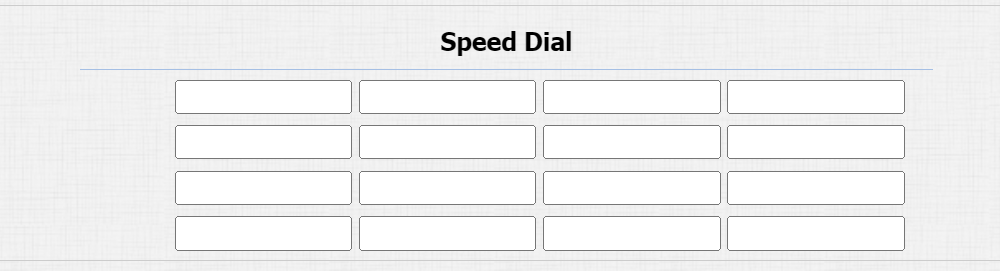
Speed Dial
Speed dial is a function that allows you to make speedy calls by pressing the dial key on the keypad.
Set it up on the web Intercom > Basic > Speed Dial interface. Enter one SIP/IP number in one field.
After the manager dial or speed dial is set up, you can set up relays to be triggered by pressing the manager dial key or the dial key.
Scroll down to the Trigger Relay By Speed Dial or Manager Dial section.

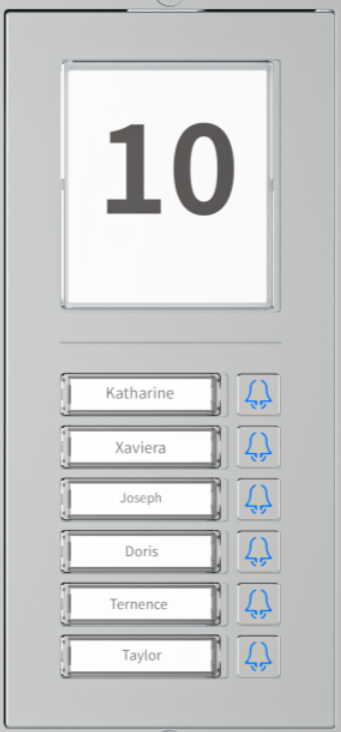
Speed Dial on Expansion Module
The device supports connecting with an extension unit, allowing you to set up more speed dial numbers. Users can press the key on the unit to call.
Set it up on the Device > Extension Unit interface.
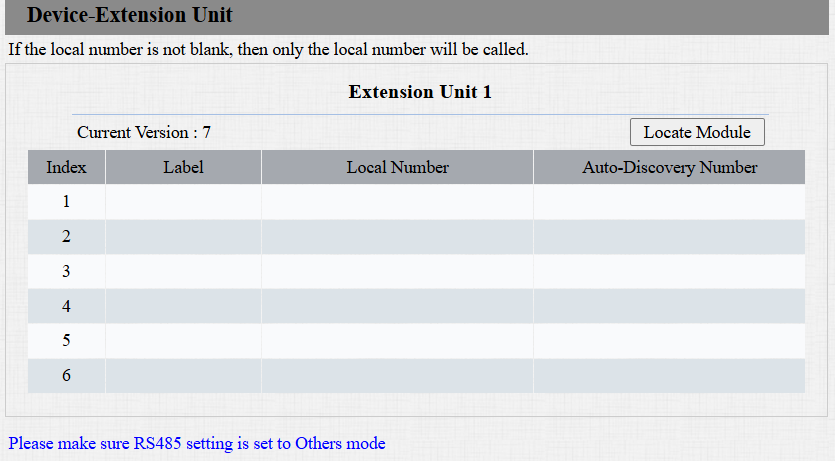
Locate Module: When clicking it, the key light will flash three times at 500 ms intervals.
Label: The key name, usually the callee's name.
Local Number: The called device's IP/SIP number.
Auto-Discovery Number: When the device is used in the Self-Organizing Network Solution, the number of other intercom devices in the solution will be displayed.
Note
ONLY the device with firmware version 320.30.10.116 or higher support this feature.
When R20K’s version is 320.30.11.208 or higher, the expansion module’s LED setting follows R20K’s LED wakeup mode and keypad LED settings.
Quick Dial by Number Replacement
The dial number replacement feature simplifies long and complex dial numbers of the device, providing shorter and more user-friendly alternatives for making calls. It allows the substitution of multiple dial numbers, such as IP addresses or SIP numbers, with a single, simplified number.
Set it up on the Intercom > Dial Plan interface. Click Add. You can add up to 500 rules.
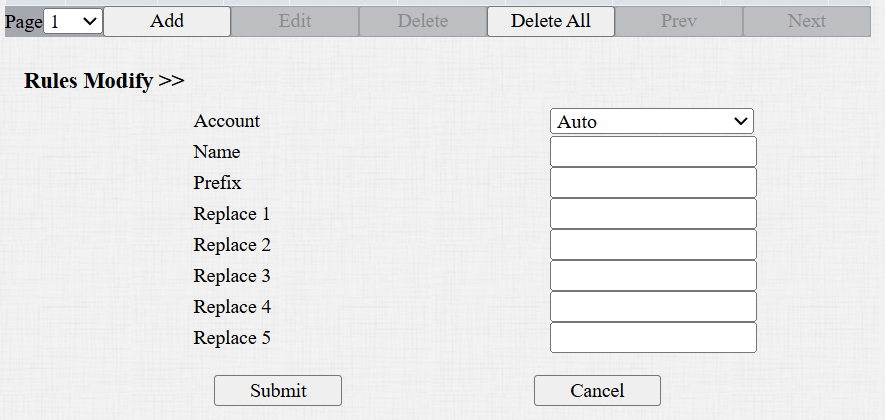
Account: Select the dial-out account.
Auto: Dial-out using the registered account for SIP calls. When there are 2 registered accounts, Account 1 is the default.
Account 1/2: Dial out using the chosen account.
Prefix: Specify a short number to replace the specified dialed numbers.
Replace 1/2/3/4/5: Specify up to 5 numbers, which can be SIP numbers or IP addresses, to be replaced by the prefix. All these numbers will be called simultaneously when the caller dials the prefix.