The tamper-proof feature prevents anyone from removing the devices without permission.
The supported tamper-proof method varies by model. There are two types:
Gravity Detection: Trigger an alarm when the door phone detects a change in gravity.
Button Status Detection: Trigger an alarm when the status of the button changes.
Gravity Detection | Button Status Detection |
|---|---|
X916 | S539 |
R29 | S532 |
R28V2 | X915V2 |
R27 | X912 |
R20 Series | E18 |
R25 Series | E16V2 |
A01/A02/A03 | E12V2 |
A08 | E13 |
DB01 | |
A05V2 | |
A094 | |
X910 | |
S538 |
This article takes X915 and R20A as examples.
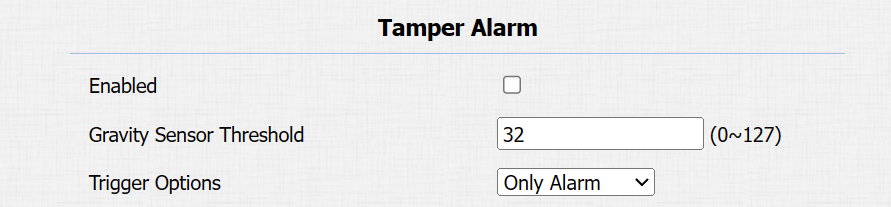
Gravity Detection
Use the device IP to log in to its web interface. The initial username and password are both admin.
Click System > Security and find the Tamper Alarm part.
Enable the feature and set the Gravity Sensor Threshold.
The threshold is for adjusting the gravity sensor sensitivity. The lower the value is, the easier the tamper alarm will be triggered by some small movements. It is 32 by default.
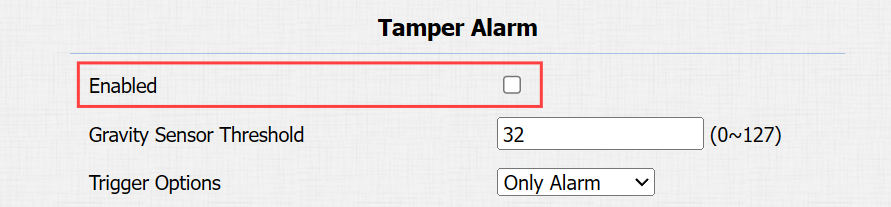
Button Status Detection
Use the device IP to log in to its web interface. The initial username and password are both admin.
Click System > Security and find the Tamper Alarm part.
Enable the feature.

When the device is installed properly, the button on the back of the device should be pressed against wall.
When someone removes the device, the button will be released and trigger an alarm.
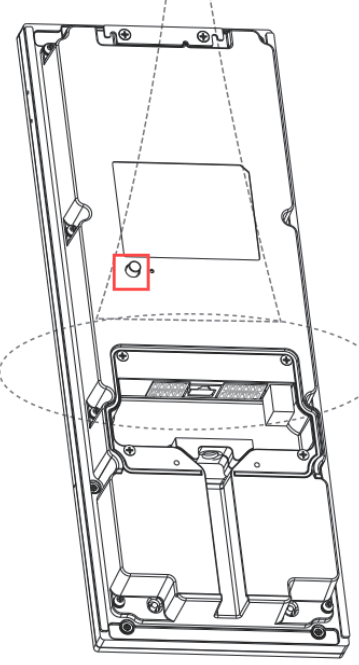
The back of X915V2
Disarm Settings
The following models support disarming by disabling the tamper alarm feature or clicking Disarm on the web interface.
X916, X912, R28V2, R27, R20 Series, R25A, E18, E16V2, E12, E13, A01/02/03, A08 and A094.

S539, S538, S532, and X915V2 also support setting the disarm code.
Click System > Security and find the Disarm Settings part.
Enable the feature and customize the disarm code within 4 to 8 digits.

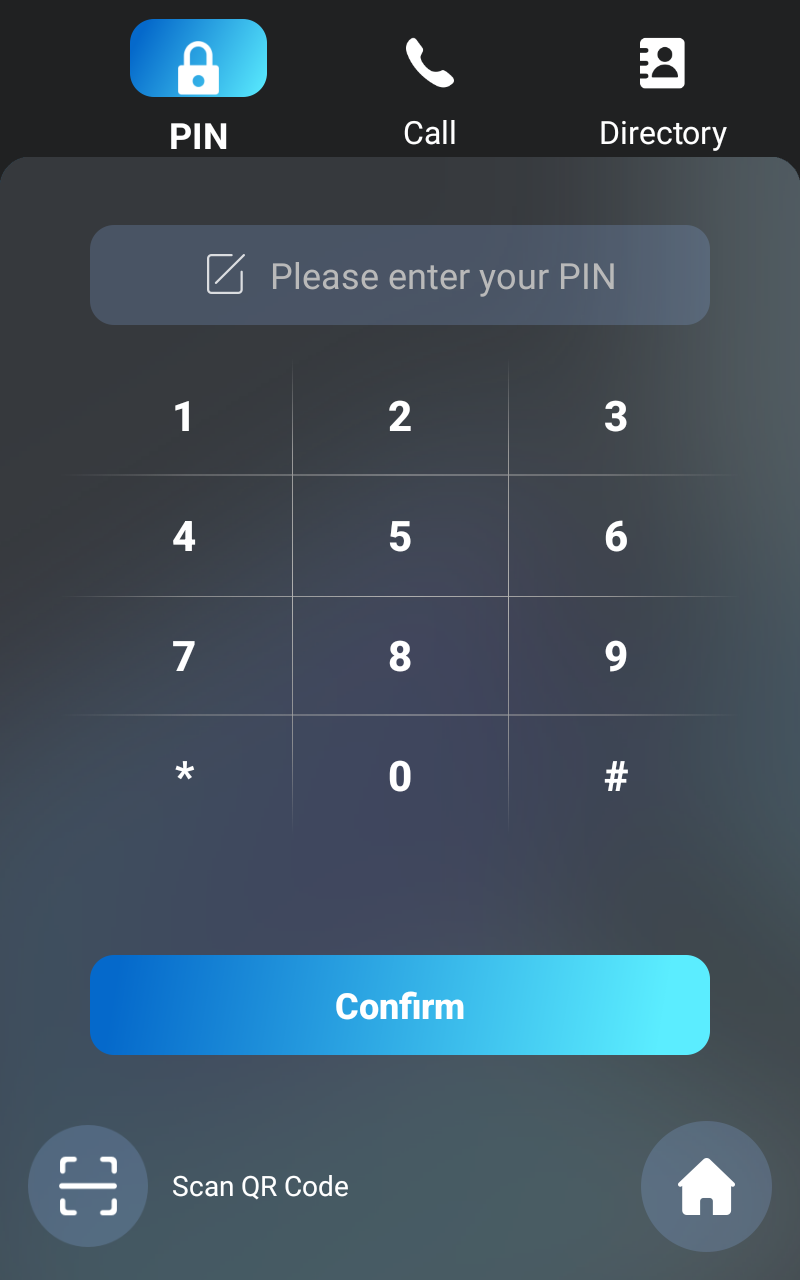
When the alarm is triggered, disarm the device by entering *#+Disarm code, for example, *#1234 on its PIN screen and tapping Confirm.
Note
Devices will be disarmed after reboot.