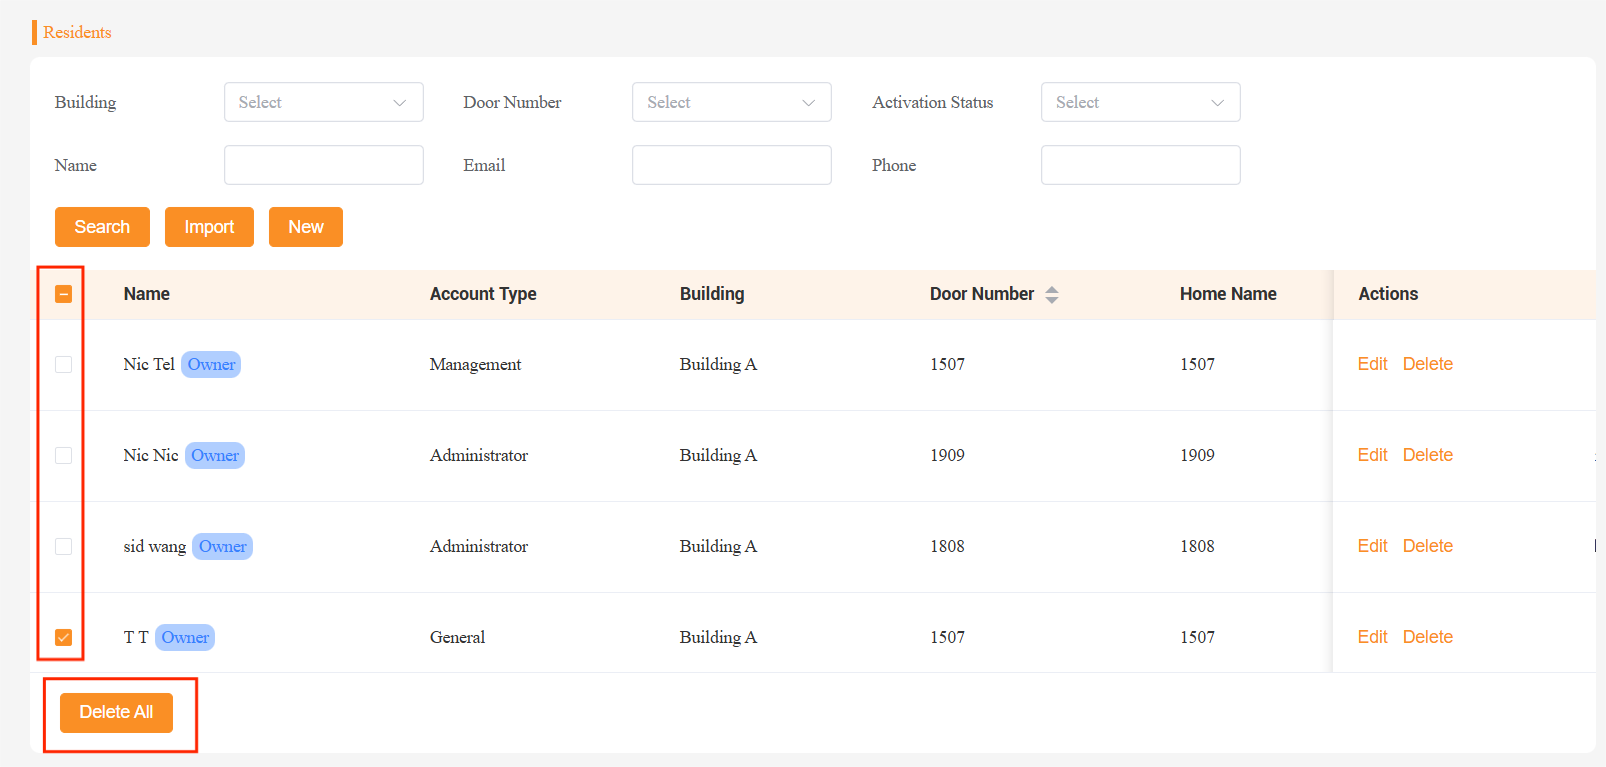
You can add new residents to existing homes, configure their access methods, and grant them the necessary access permissions.
TIP:
For projects with the Tenancy Management feature enabled, the Residents section also shows each user’s role (Owner or Tenant) next to their name.
Add New Residents
Go to Residents > New.
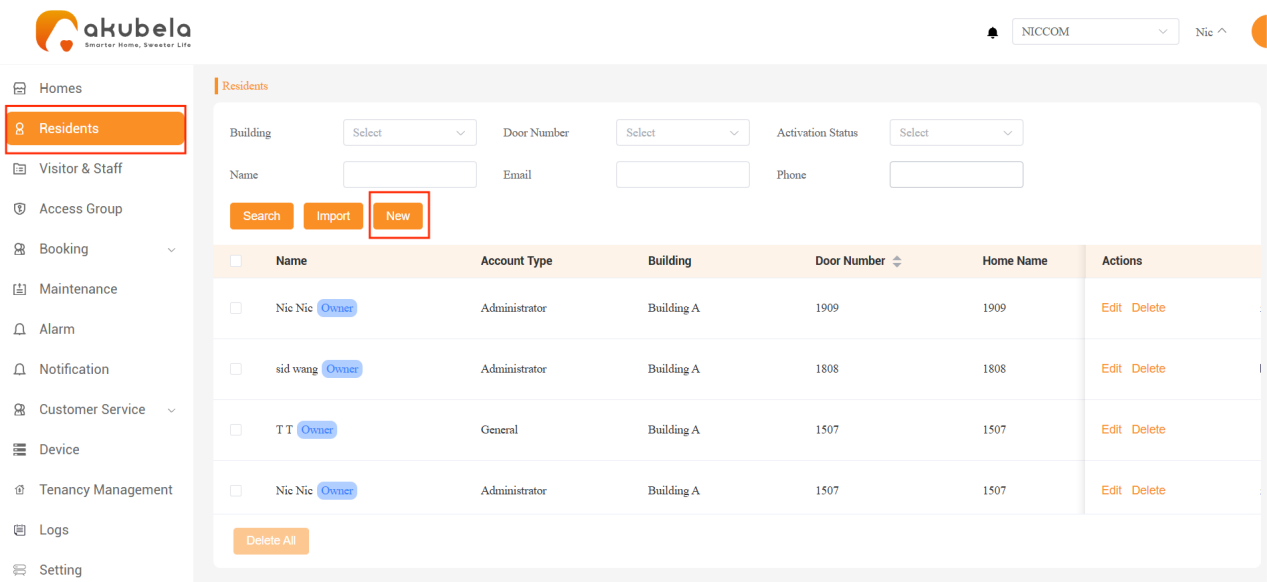
Enter the resident’s information:
Select the building and home.
Enter the resident’s name.
Choose the account type.
If the home does not yet have an administrator account: Only Administrator can be selected.
If an administrator account already exists: Select Management or General.
If no selection is made, the system will default to Management.
Enter the resident’s email address and/or phone number to register their account and enable login.
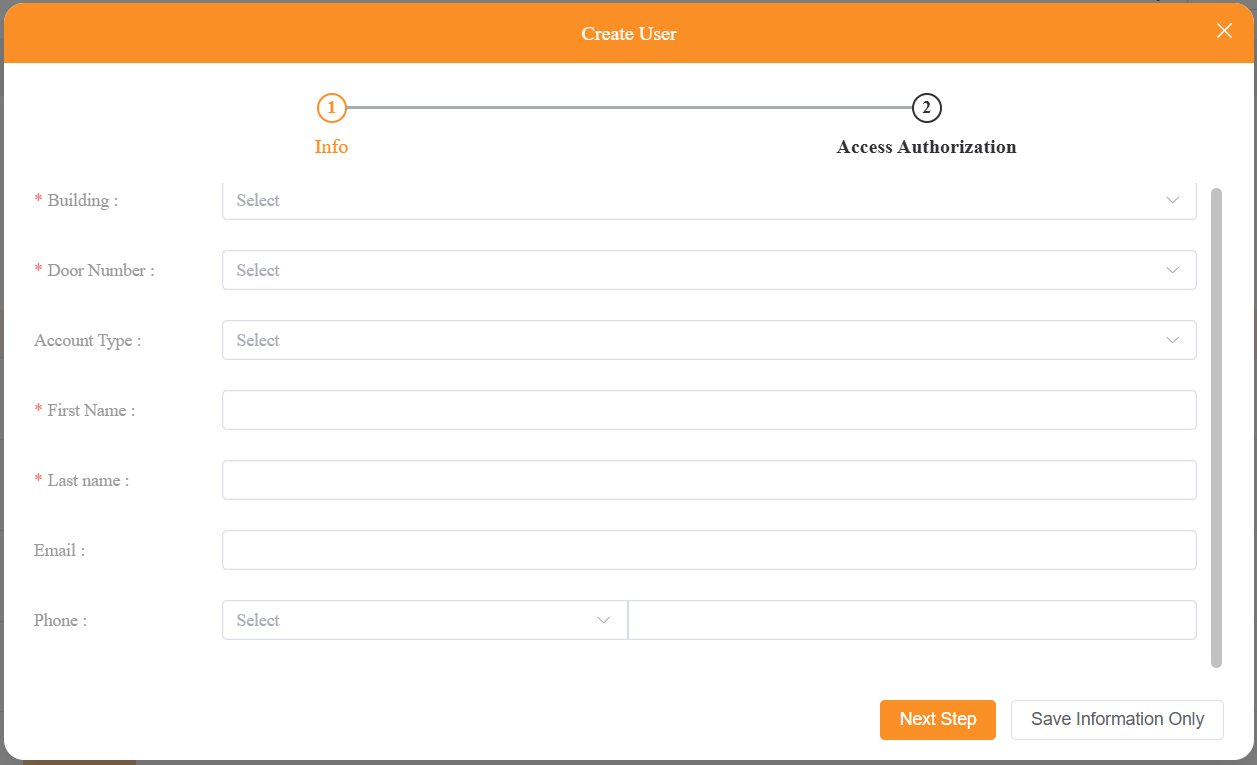
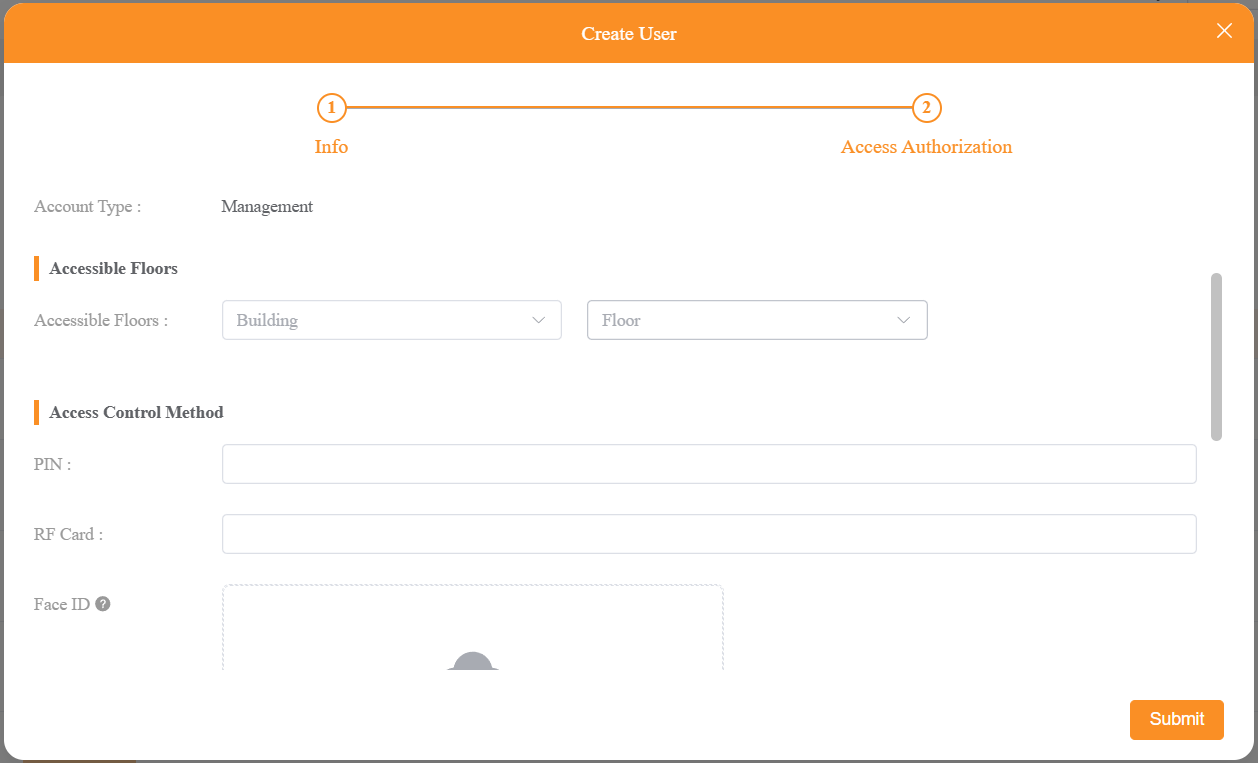
Do any of the following based on your need:
To add the resident without setting up access methods or permissions, click Save Information Only.
To configure access authorization immediately, click Next Step, add the access methods, and then click Submit.
NOTE:
For Face ID, ensure the uploaded photo meets the following requirements:
Format: JPG, BMP, or PNG.
File size: Less than 10 MB.
Resolution: At least 250 x 250 pixels.
Once added, residents receive their account details via email or SMS, depending on the information provided.
Configure Access Methods for Existing Residents
NOTE:
Access credentials added here do not apply to smart lock access.
Add access methods for individual residents
To add or update access permissions for a single resident:
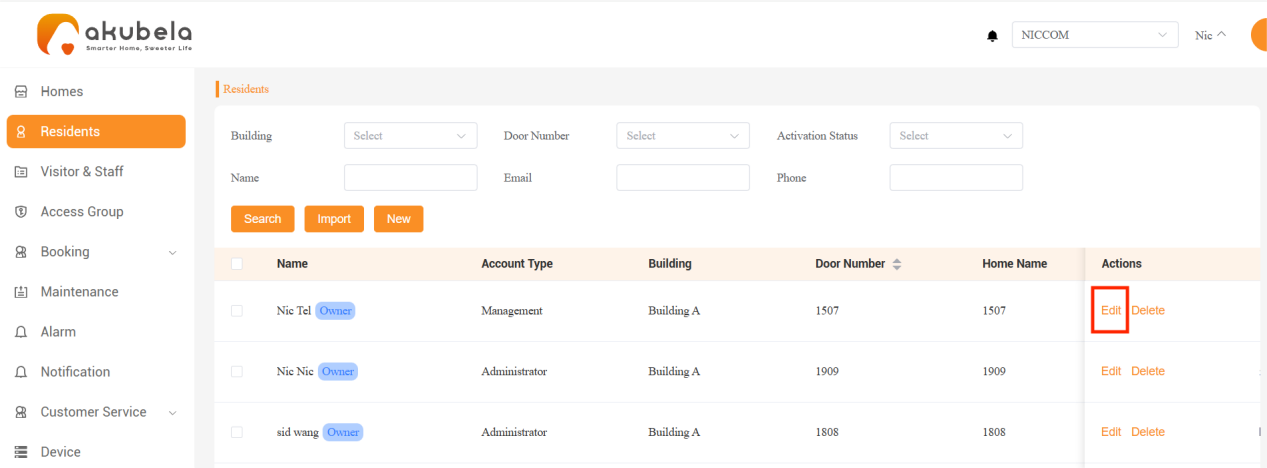
Navigate to the desired resident.
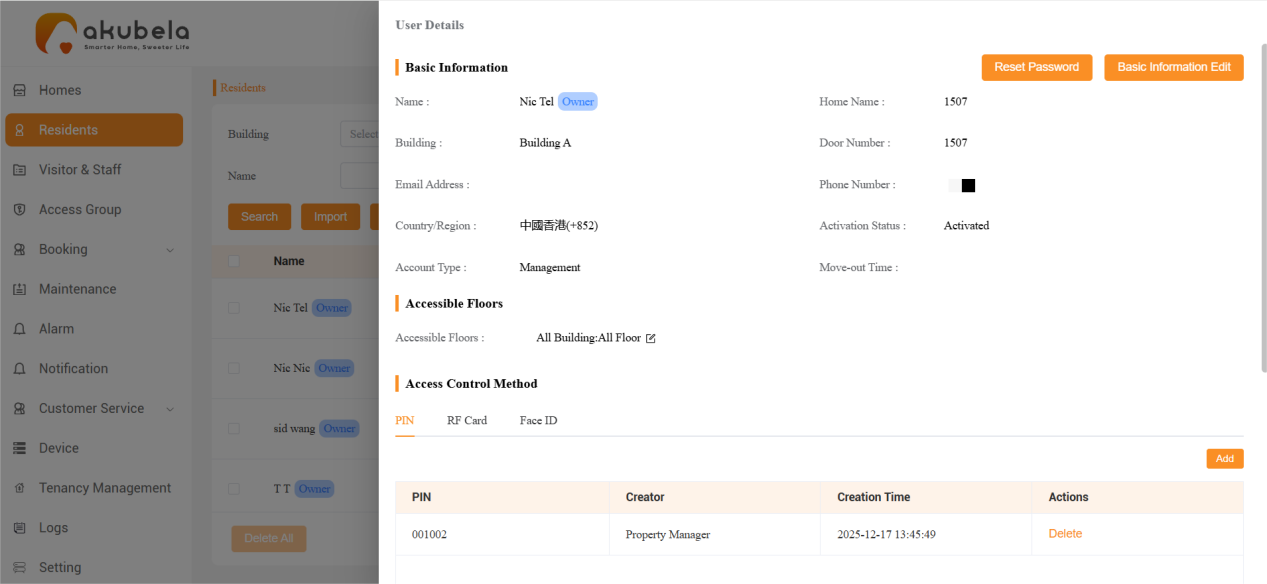
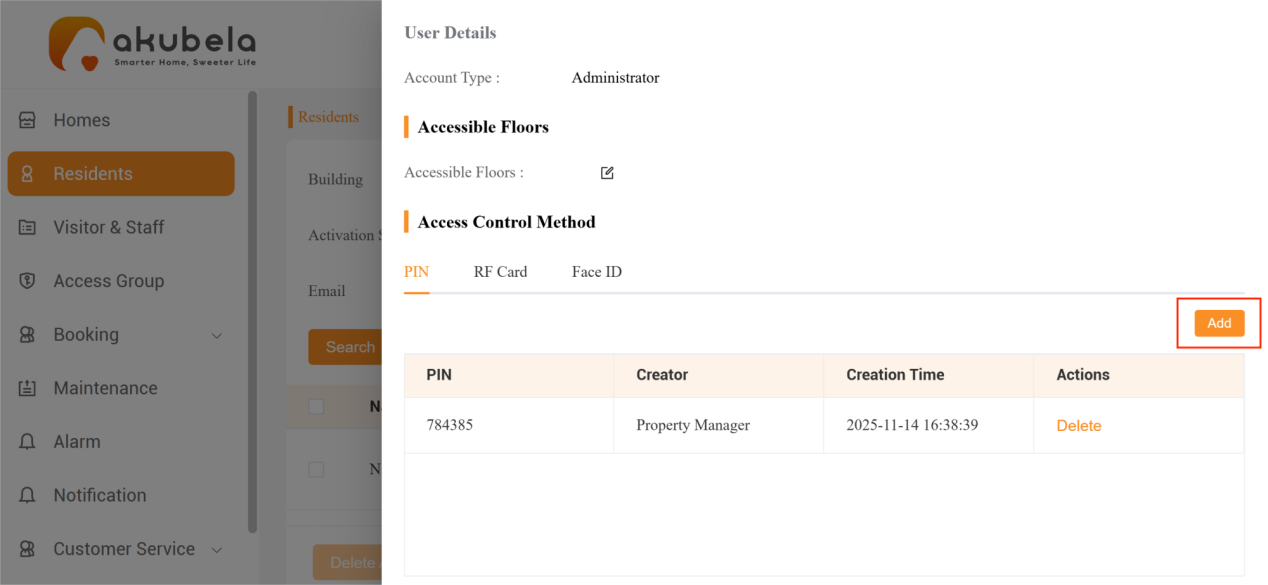
Click Edit to update access permissions, including the access methods and access group.
Add Access Methods in Batch
To batch configure access settings for multiple residents:
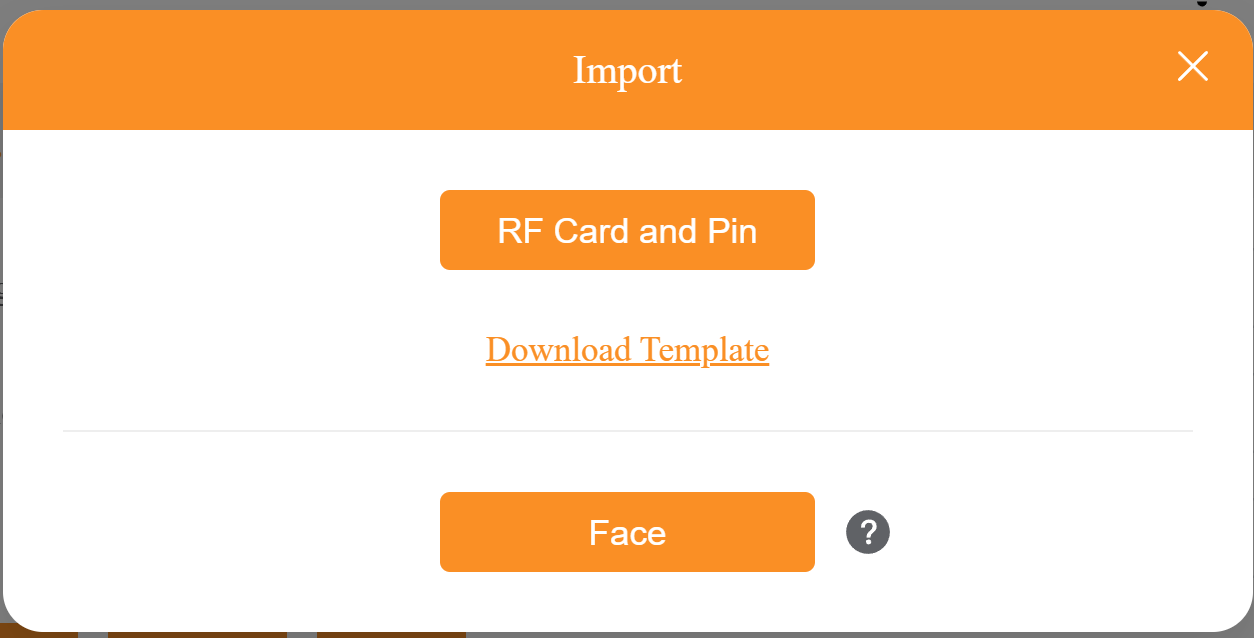
Go to Residents > Import.
Select the access method and follow the appropriate steps:
Add Card or PIN
Download the template.
Fill in the information (hover over column titles for detailed requirements).
Click RF Card and Pin to upload the completed template.

Add Face ID
Click
 to view the detailed requirements.
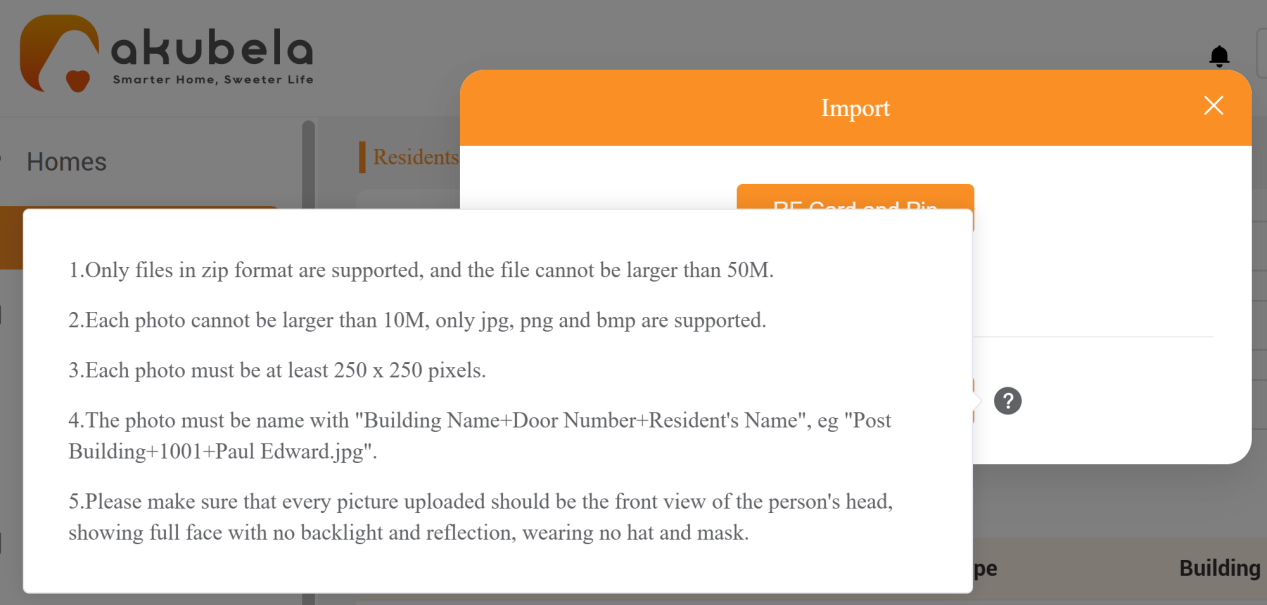
Ensure all the requirements are met.
Click Face to upload a ZIP file containing all front-face photos.
After importing, view or edit a resident’s access details by selecting Edit > Access Control Method.
Manage Resident Records
Search for Residents
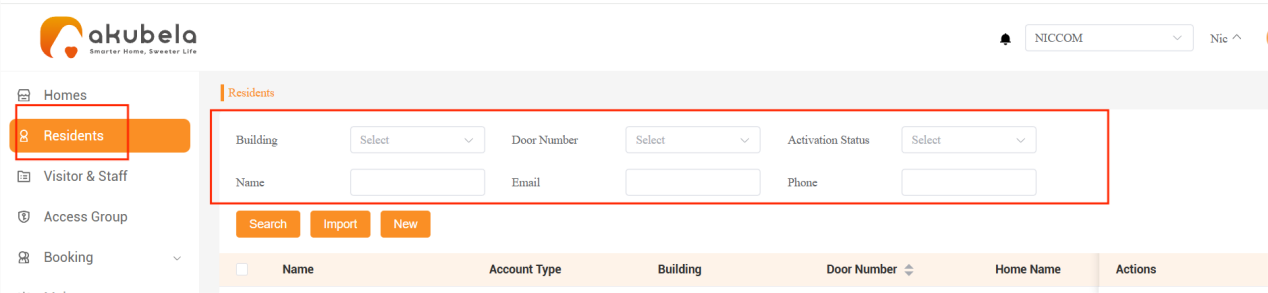
Go to Residents, and use the filter options to narrow your search.
Click Search.
Edit Resident Information
Click Residents.
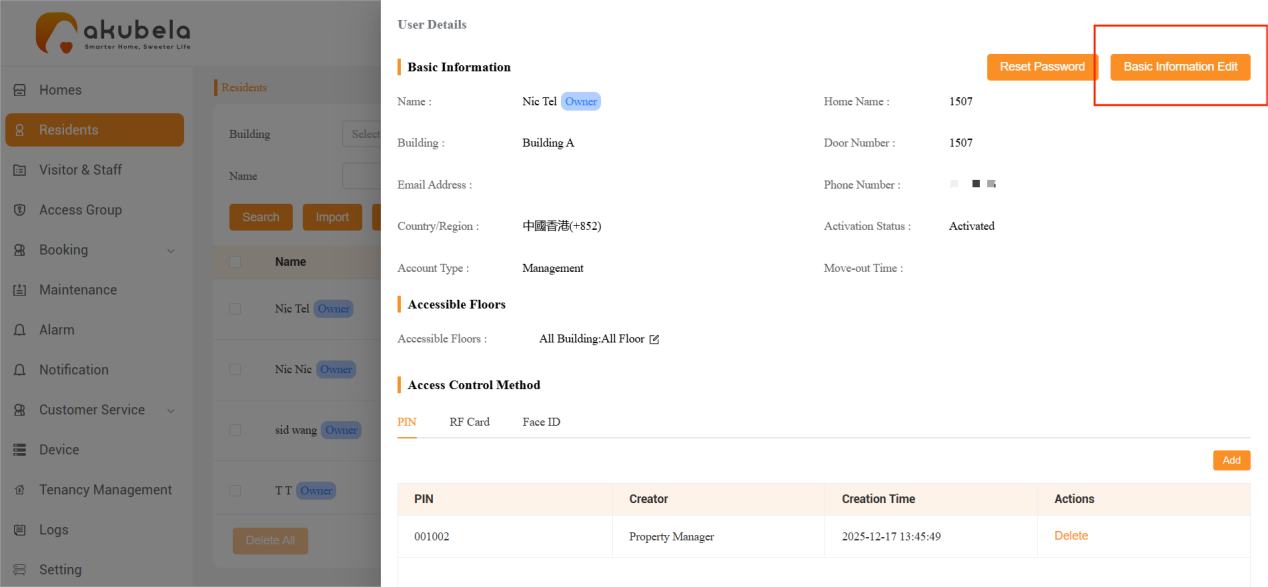
Find the specific resident, and click Edit > Basic Information Edit.
Reset Resident Account Password
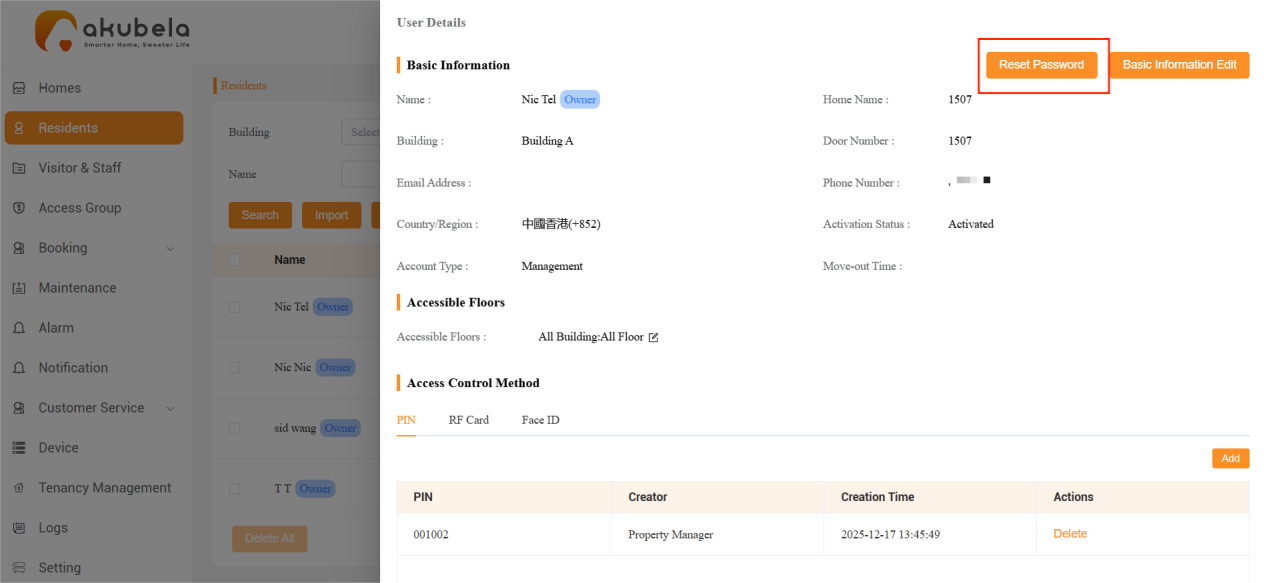
If residents forget their account passwords, you can reset for them by going to Residents > Edit > Reset Password.
Delete Residents
NOTE:
For rental units, deleting the administrator account or the last remaining account in a unit will also terminate and cancel the rental order.
Go to Residents.
Tick the checkbox next to a specific resident, or tick the checkbox at the top to select all residents.
Click Delete All.