Login
Open a browser and enter the device’s IP address to log into the device’s web interface. The default username and password are admin.
Note
The routes to obtain the IP address vary by model, you may refer to https://knowledge.akuvox.com/docs/before-entering-device-web-interface.
Also, you can use IP scanner to scan IP address(es) of all devices within the same LAN.
Google Chrome browser is strongly recommended.
Preparation
After you upgrade the door phone from a version not support C4 to a supported one, you need to
Disable the Discovery mode.
Disable the High-security mode.
Activate the integration feature using the auto-provisioning command.
For the following door phones with specific versions or higher, simply turning on a switch on the device’s web interface will complete the preparation.
X916: 916.30.10.330
X915V2: 2915.30.10.510
R29: 29.30.10.425
S539:539.30.10.403
S538: 538.30.10.705
On X916’s web, go to the Intercom > Control4 interface and check the box.
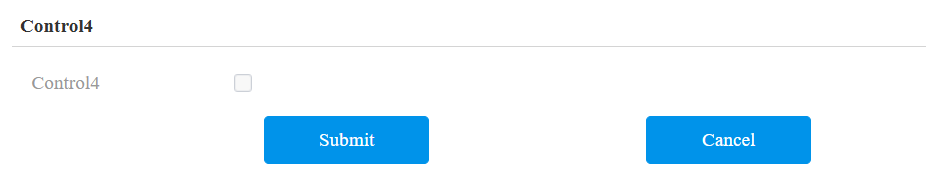
On S539/S538/X915V2/R29’s web, go to the Device > Control4 interface and check the box.
.png)
For other models, please refer to the following steps.
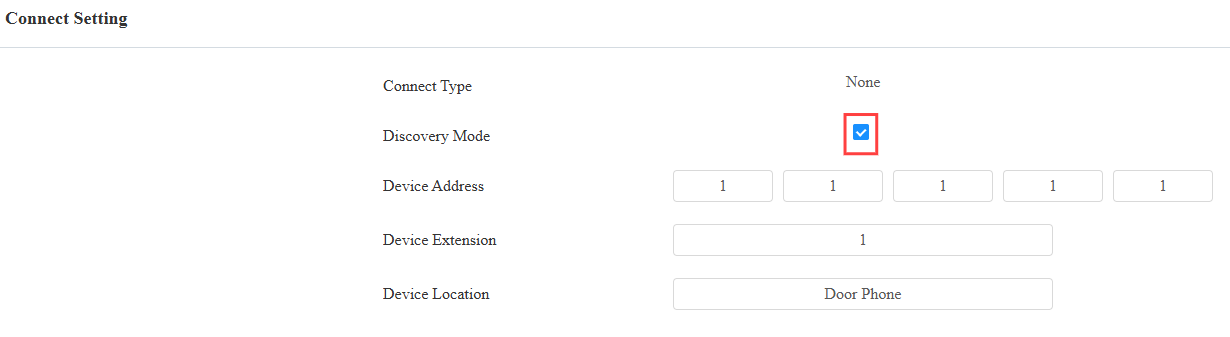
Disable the Discovery Mode
Go to the Network > Advanced interface. Find the Connect Setting part.
Disable Discovery Mode.
Disable the High-Security Mode
Go to the System > Security > High Security Mode interface.
Disable the high security mode.

Turn on C4 Integration
Go to the System > Auto Provisioning > Automatic Autop interface.
Click Export Autop Template.
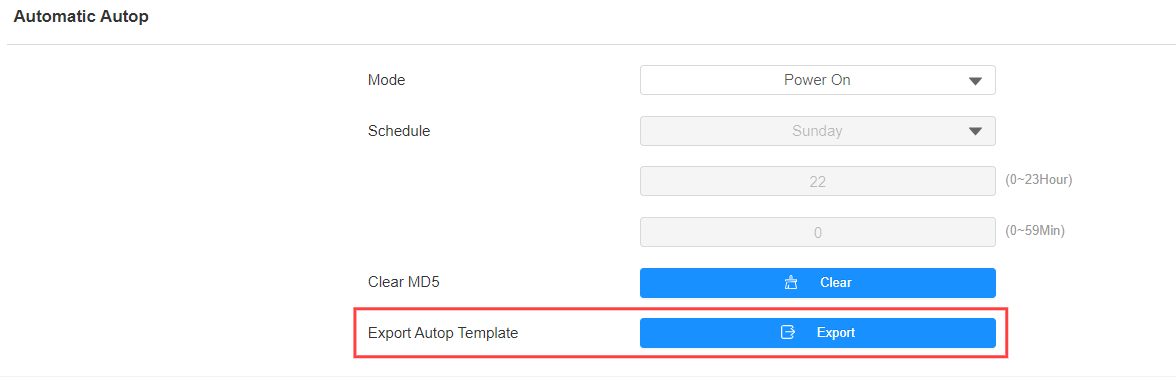
In the file, set the value to “1” and save it.
For S535/S532/X912/X910/R28/R25/R20/E12: Config.DoorSetting.Control4.Control4Enable = 1
For E16/E18: Config.DoorSetting.CONTROL4.Enable = 1
For S539/X915/X916/R29: Config.DoorSetting.GENERAL.Control4Enable = 1
Click System > Maintenance. Scroll to the Others section.
Click Import, select the file, and upload it.

The device will reboot after the configuration succeeds.
Features Configuration
Add C4 Panel as a Contact
Users can make a call from the door phone to the C4 panel via its SIP number.
Take E16V2 as an example.
Go to the Directory > User interface.
Click Add to add a new user. Or, click
 to modify an existing one.
Enter the username and scroll to the Contact Details section.
Enter the C4 panel’s SIP number.
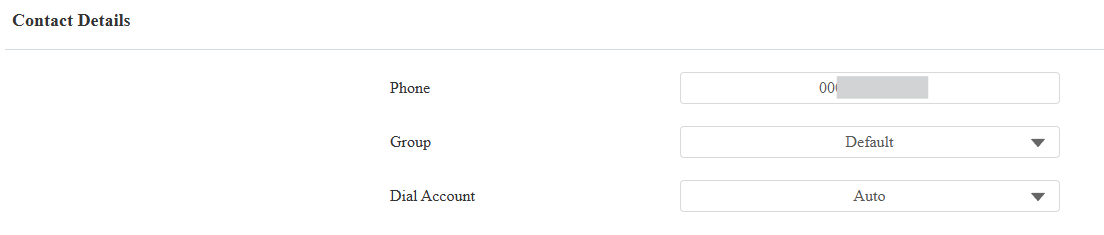
Click Submit.
The contact will display in the contact list. Users can tap it to call the panel.
Call Preview
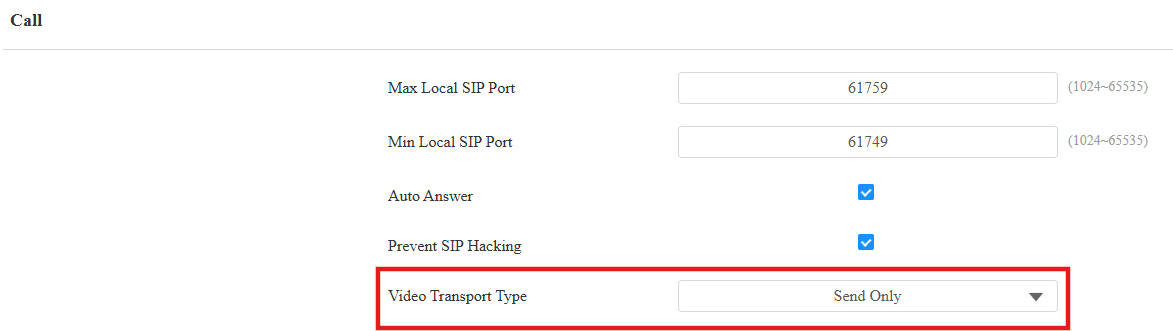
To receive the live stream from the door phone for call previewing, you need to set up the Video Transport Type.
Go to the Account > Advanced interface.
In general, Account 2 is used for C4 integration. Switch to Account 2 before choosing the Video Transport Type.

Set the Video Transport Type to Send Only or Send and Receive.
Monitor
You can configure the RTSP feature to receive the video stream from the door phone.
You may refer to the video for detailed steps.
Unlock Settings
HTTP command enables users to open doors remotely by tapping unlock buttons on the indoor monitors.
Please refer to the article Open the Door via HTTP Command or watch the video [Video]Open the Door via HTTP Command for detailed steps.
Trigger C4 Events by Unlocking
X916, X915V2, X912, R29, R25A, R20V5 series, E12, S532, S535, S538, S539 and A08 support triggering C4 events when users use their credentials to open doors.
Take X915V2 as an example.
Go to the Directory > User interface.
Click Add to add a new user. Or, click
to modify an existing one.Enter the username and set up the desired access methods.
Scroll to the Access Setting section.
Check the relay to be opened. It should be the same relay configured in the C4 composer.
Select the C4 event ID. It should be the same ID selected in the C4 composer.
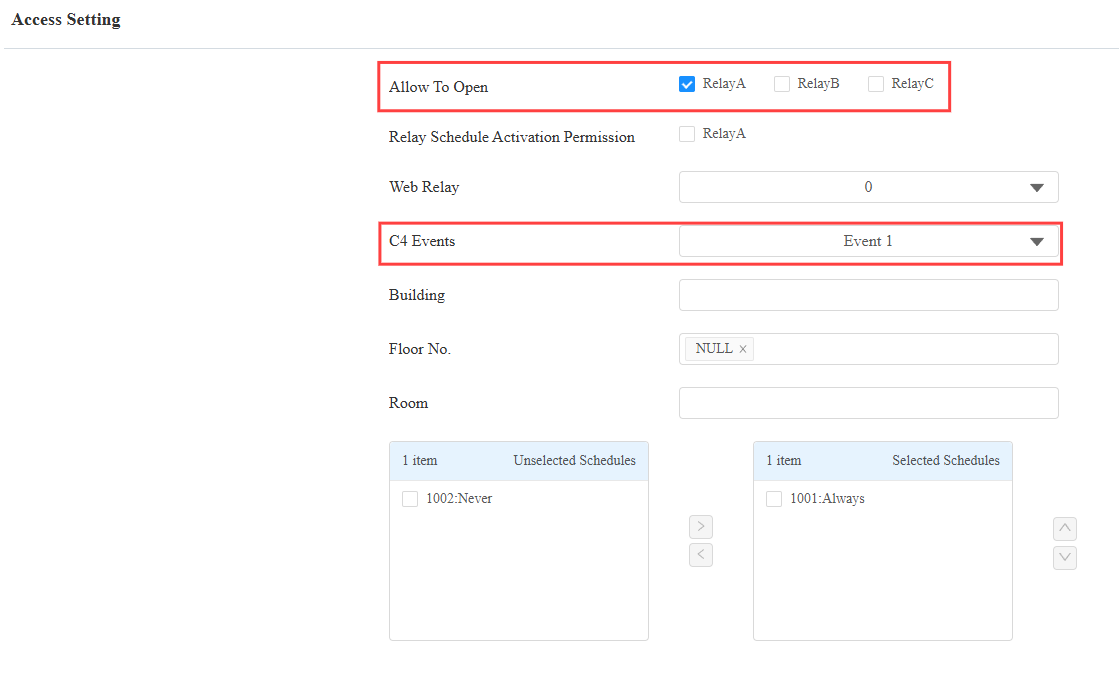
Click Submit to save the settings.