Local Relay
Un relé local es una unidad externa que está físicamente cerca y directamente conectada al dispositivo de intercomunicación. Permite al sistema de interfono activar acciones, como abrir una puerta, según la entrada o autorización del usuario.
You can configure the relay switch and DTMF for the door access on the web Access Control > Relay interface.
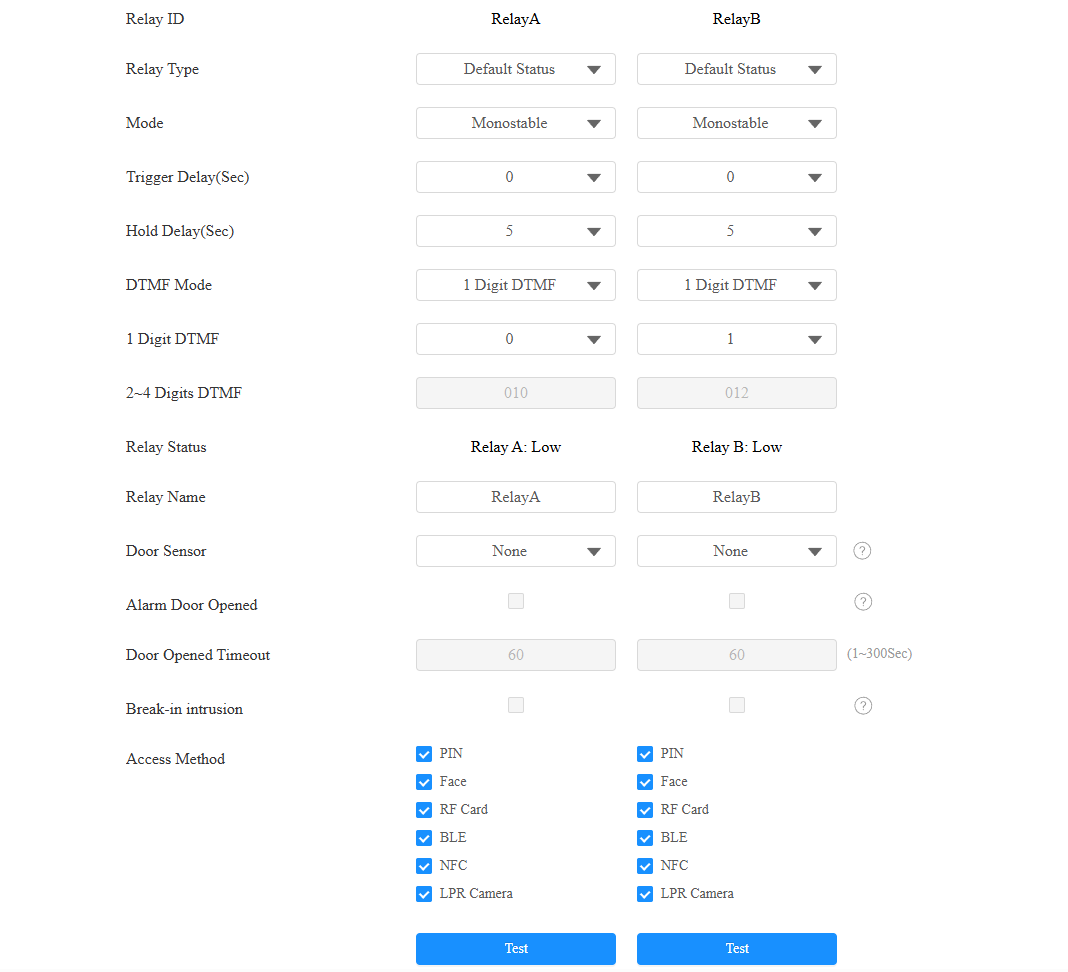
Relay Type: Determine the interpretation of the Relay Status regarding the state of the door:
Default Status: A “Low” status in the Relay Status field indicates that the door is closed, while “High” indicates that it is open.
Invert Status: A “Low” status in the Relay Status field indicates an opened door, while “High” indicates a closed one.
Mode: Specify the conditions for automatically resetting the relay status.
Monostable: The relay status resets automatically within the relay delay time after activation.
Bistable: The relay status resets upon triggering the relay again.
Trigger Delay (Sec): Set the delay time before the relay triggers. For example, if set to 5 seconds, the relay activates 5 seconds after pressing the Unlock button.
Hold Delay (Sec): Determine how long the relay stays activated. For example, if set to 5 seconds, the relay remains open for 5 seconds before closing.
DTMF Mode: Set the digits of the DTMF code.
1 Digit DTMF: Define the 1-digit DTMF code within the range(0-9 and *,#) when the DTMF Mode is set to 1-digit.
2~4 Digits DTMF: Set the DTMF code based on the number of digits selected in the DTMF Mode.
Relay Status: Indicate the states of the relay, which are normally open and closed. By default, it shows low for normally closed(NC) and high for Normally Open(NO).
Relay Name: Assign a distinct name for identification purposes.
Door Sensor: Specify which input interface is connected to a door sensor.
Alarm Door Opened: If enabled, when the door-opening time exceeds a limit, an alarm will be triggered.
Door Opened Timeout: The door-opening time limit.
Break-in Intrusion: Activate an alarm when the door is forcibly or illegally opened. Click here to learn more about this feature.
Access Method: Check the method(s) to trigger the relay.
Test: Click Test to trigger the relay manually.
Security Relay
El Relé de Seguridad, conocido como Akuvox SR01, es un producto diseñado para reforzar la seguridad de acceso evitando intentos de entrada forzada no autorizados. Instalado dentro de la puerta, regula directamente el mecanismo de apertura de la puerta, asegurando que la puerta permanezca segura incluso en caso de daño en el dispositivo.
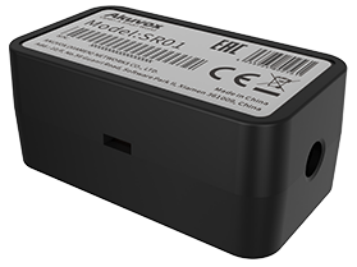
Haz clic aquí para ver cómo configurar el relé de seguridad.
To set up the security relay, go to Access Control > Relay > Security Relay interface.
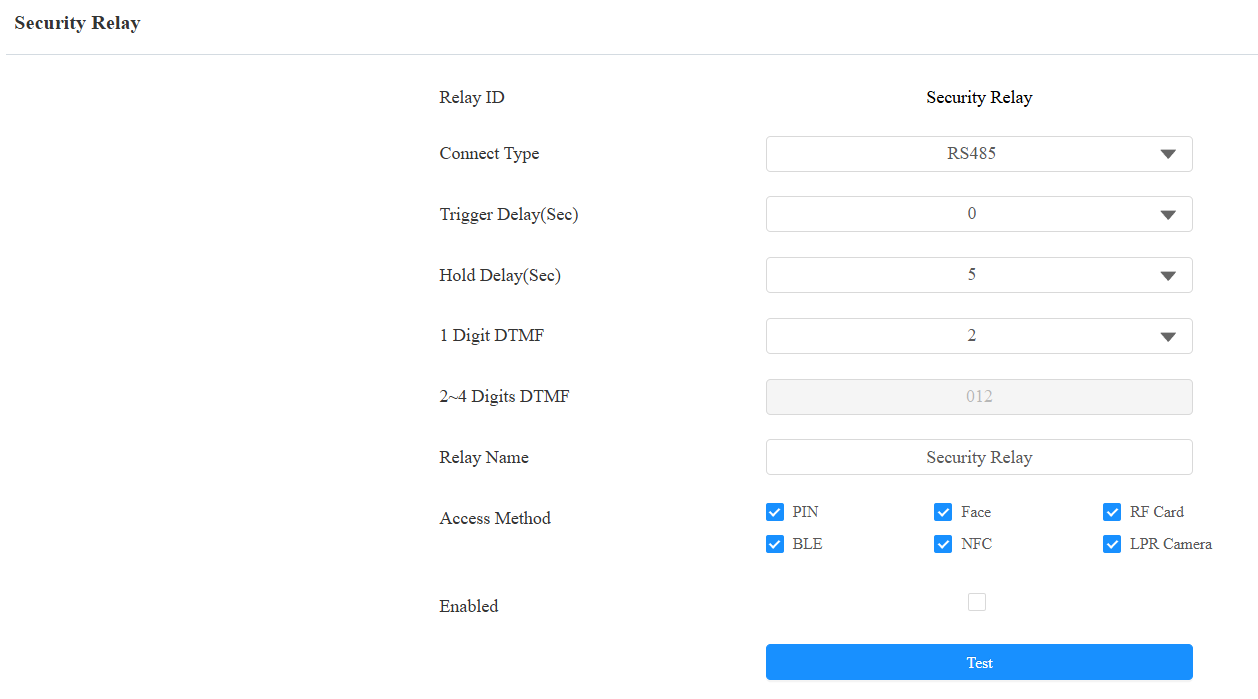
Connect Type: The connection type is RS485 by default. To use SR01, the RS485 mode should be set to Security Relay on the Access Control > RS485 interface.
Trigger Delay(Sec): Set the delay time before the relay triggers. For example, if set to 5 seconds, the relay activates 5 seconds after pressing the Unlock button.
Hold Delay(Sec): Determine how long the relay stays activated. For example, if set to 5 seconds, the relay remains open for 5 seconds before closing.
1 Digit DTMF: Define the 1-digit DTMF code within the range(0-9 and *,#) when the DTMF Mode in the Relay section above is set to 1-Digit.
2~4 Digits DTMF: Set the DTMF code based on the number of digits selected in the DTMF Mode.
Relay Name: Name the security relay. The name can be displayed in the door-opening logs. When connecting to the SmartPlus Cloud, the Cloud server will automatically assign the relay name.
Access Method: Check the access method that can trigger the security relay.
Test: Click to send the signal to the SR01. When the device and SR01 are pairing, click Test to finish the matching.
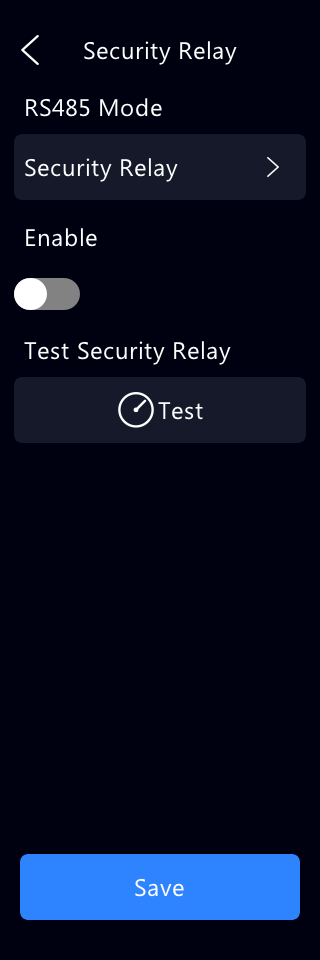
You can also enable the security relay on the Setting > Security > Security Relay screen.
Web Relay
Un relé web tiene un servidor web integrado y puede ser controlado a través de Internet o de una red local. El dispositivo puede usar un relé web para controlar un relé local o un relé remoto en otro lugar de la red.
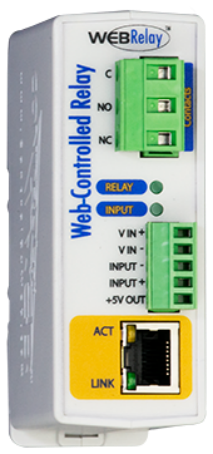
Haz clic aquí para ver cómo configurar un relé web.
To set it up, go to Access Control > Web Relay interface.
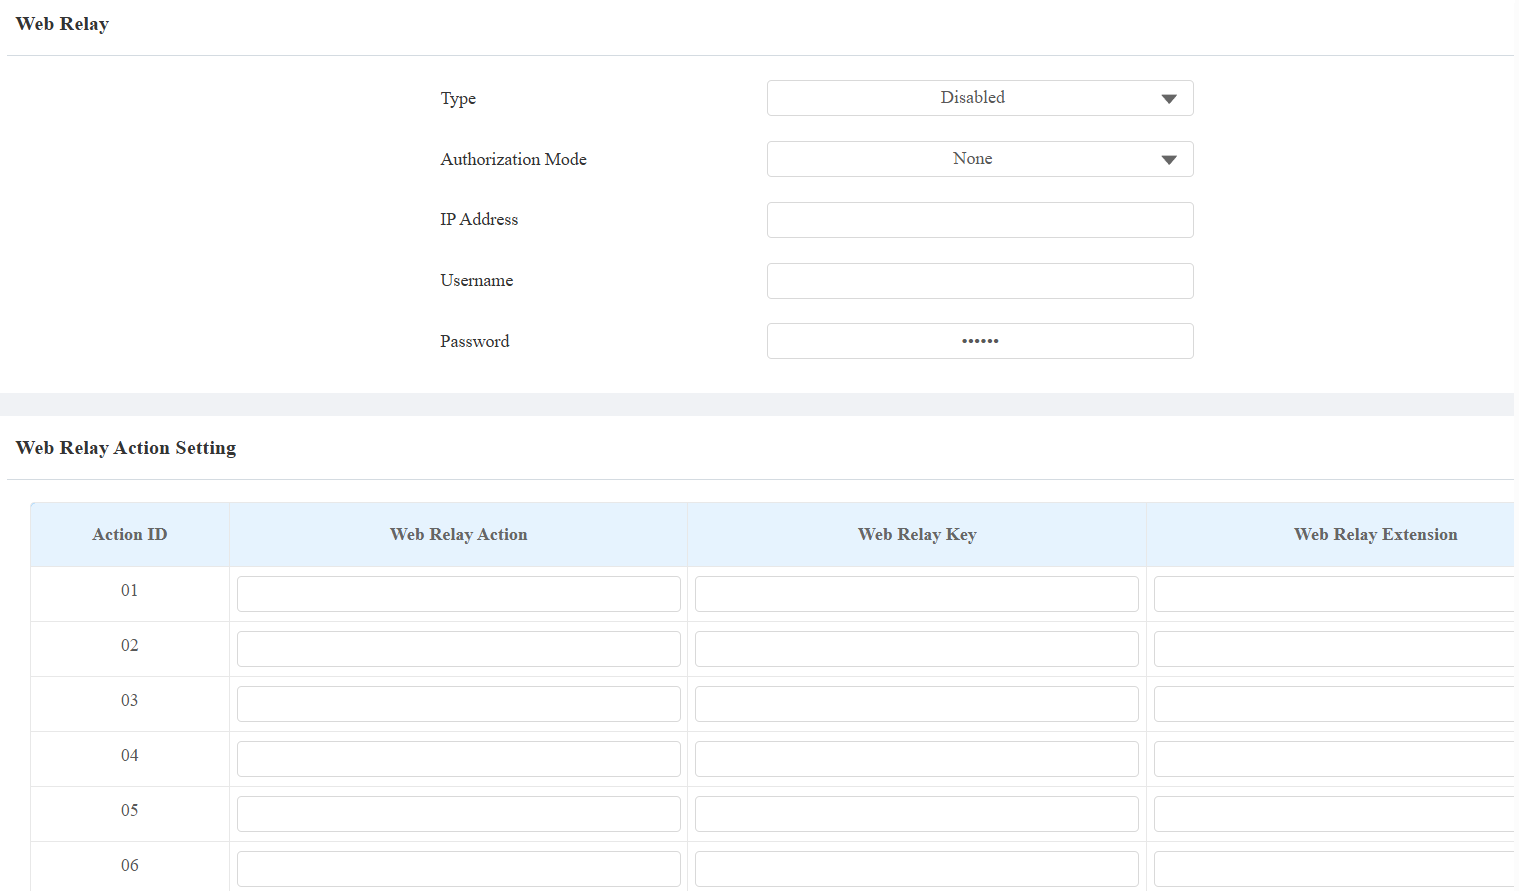
Type: Determine the type of relay activated when employing door access methods for entry.
Disabled: Only activate the local relay.
Only Web Relay: Only activate the web relay.
Both Local Relay and Web Relay: Activate both the local relay and web relay. Typically, the local relay is triggered first, followed by the web relay.
IP Address: The web relay IP address provided by the web relay manufacturer.
Username: The username provided by the web relay manufacturer.
Password: The manufacturer-provided authentication key for the web relay. Authentication occurs via HTTP. Leaving the Password field blank indicates non-use of HTTP authentication. You can define the password using HTTP GET in the Web Relay Action field.
Web Relay Action: Configure the actions to be performed by the web relay upon triggering. Enter the manufacturer-provided URLs for various actions, with up to 50 commands.
NOTE
If the URL includes full HTTP content (e.g., http://admin:admin@192.168.1.2/state.xml?relayState=2), it doesn't rely on the IP address that you entered above. However, if the URL is simpler (e.g., state.xml?relayState=2), the relay uses the entered IP address.
Web Relay Key: Determine the methods to activate the web relay based on whether the DTMF code is filled.
- Filling with the configured DTMF code restricts activation to card swiping and DTMF.
- Leaving it blank enables all door-opening methods.
Web Relay Extension: Specify the intercom device and the methods it can use to activate the web relay during calls.
- When an intercom device’s IP/SIP is specified, only that device can trigger the web relay (except via card swiping or DTMF) during calls.
- If left blank, all devices can trigger the relay during calls.