MJPEG and RTSP are the primary monitoring stream types discussed in this chapter.
MJPEG, or Motion JPEG, is a video compression format that uses JPEG images for each video frame. Akuvox devices display live streams on the web interface and capture monitoring screenshots in MJPEG format. Settings related to MJPEG determine video quality and the on/off status of the live stream function.
RTSP stands for Real Time Streaming Protocol. It can be used to stream video and audio from the third-party cameras to the device. You can add a camera’s stream by adding its URL. The URL format of Akuvox devices is rtsp://Device’s IP/live/ch00_0
ONVIF is an Open Network Video Interface Forum. It enables the device to scan and discover cameras or intercom devices with activated ONVIF functions. Live streams obtained through ONVIF are essentially in RTSP format.
MJPEG Authorization
The MJPEG authorization is enabled by default to limit access to the MJPEG images and videos.
To set it up, go to the Surveillance > RTSP > RTSP Basic interface.
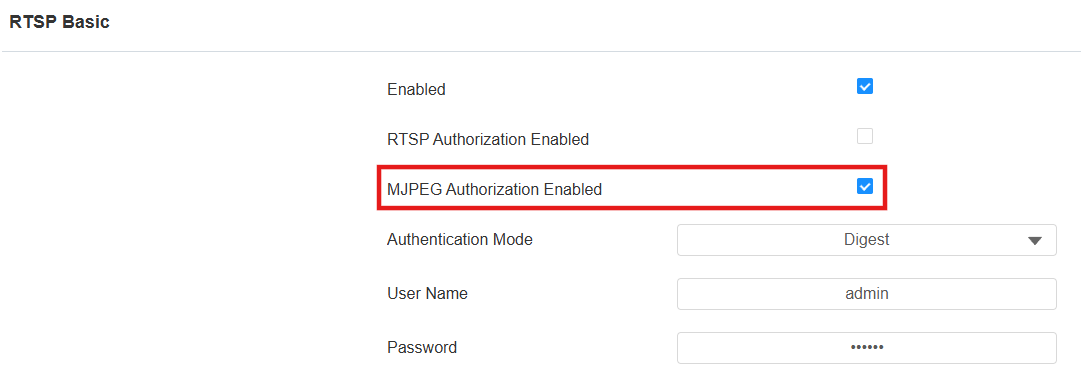
MJPEG Authorization Enabled: It is enabled by default. Accessing the door phone’s real-time image or video by entering the URL into the browser requires verification of the Authentication Mode, Username, and Password.
Tip
To view a dynamic stream, use the URL http://device_IP:8080/video.cgi.
For capturing a screenshot, use the following URLs, with the image formats varying accordingly:
http://device_IP:8080/picture.cgi
http://device_IP:8080/picture.jpg
http://device_IP:8080/jpeg.cgi
For example, if you want to capture the jpg format image of the door phone with the IP address 192.168.1.104, you can enter http://192.168.1.104:8080/picture.jpg on the web browser.
MJPEG Video Stream
You can take a monitoring image and view video streams in MJPEG format with the device.
To set it up, go to the Surveillance > RTSP > MJPEG Video Parameters interface.
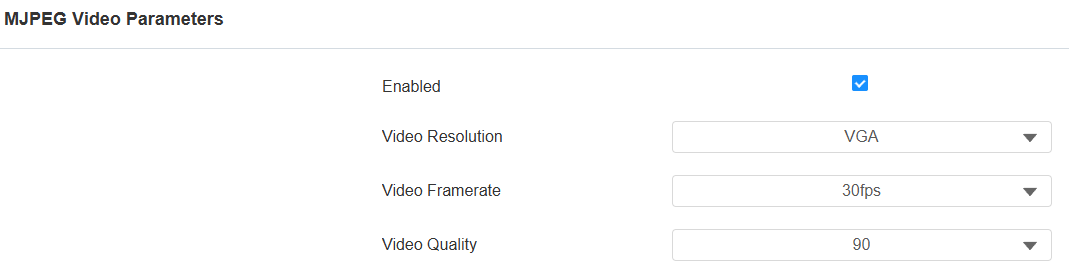
Video Resolution: Specify the video resolution from the lowest QCIF(176×144 pixels) to the highest 1080P(640×480 pixels).
Video Framerate: It is 30 fps by default.
Video Quality: It is 90 by default.
RTSP Stream Monitoring
The RTSP feature allows Akuvox indoor monitors or third-party devices to obtain the live stream from the device.
You can set up the RTSP authentication credentials and video parameters.
RTSP Basic Setting
You are required to set up the RTSP function on the web Surveillance > RTSP > RTSP Basic interface in terms of RTSP Authorization, authentication, password, etc., before you are able to use the function.
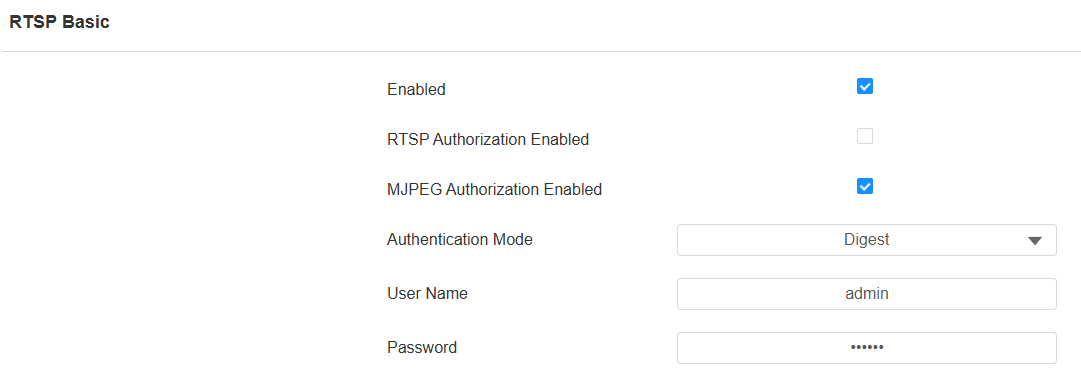
RTSP Authorization Enabled: Once enabled, configure RTSP Authentication Mode, RTSP Username, and RTSP Password. These credentials are required for accessing the door phone's RTSP stream from other intercom devices like indoor monitors.
Authentication Mode: Select between Basic and Digest. It is Digest by default that uses hashing instead of the easily reversible Base64 encoding. A token is used for verification.
User Name: Set the username for authorization.
Password: Set the password for authorization.
RTSP Stream Setting
The RTSP stream can use H.264 as the video codec. You can adjust the video resolution, bitrate, and other settings on the web Surveillance > RTSP > H.264 Video Parameters interface.
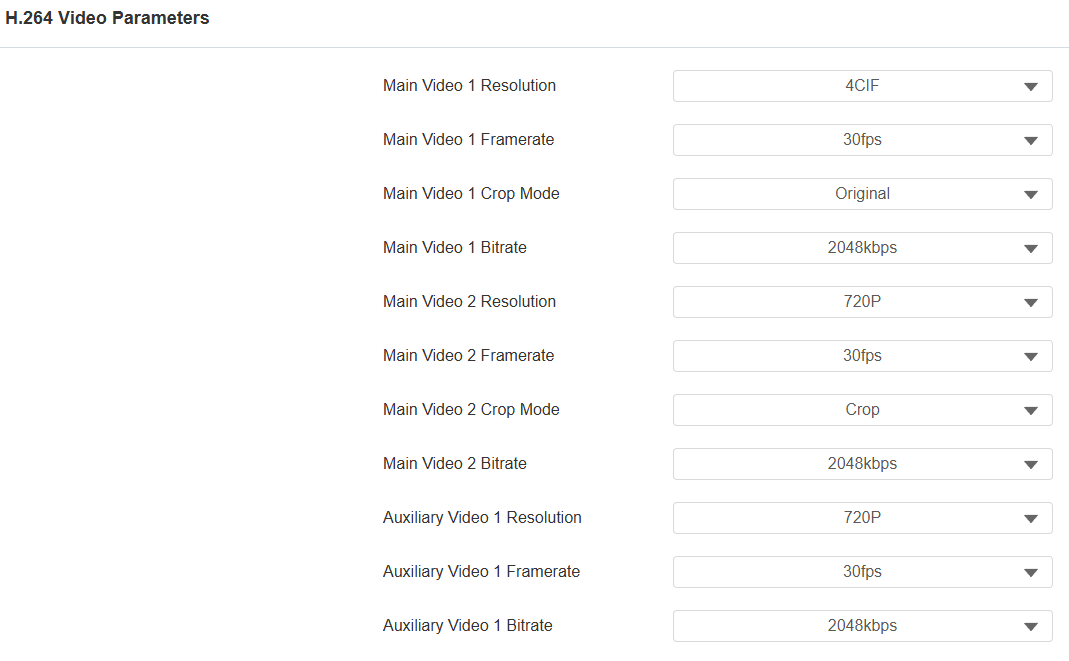
Main Video 1 Resolution: Specify the image resolution for the first video stream channel of the main camera, varying from the lowest QCIF(176×144 pixels) to the highest 2K(2560×1440 pixels). The default is 4CIF.
Main Video 2 Resolution: Specify the image resolution for the second video stream channel of the main camera, varying from the lowest QCIF(176×144 pixels) to the highest 1080P(1920x1080 pixels). The default is 720P.
Main Video 1/2 Framerate: Frames per second refers to how many frames are displayed in one second of video. The default frame rate is 30fps.
Main Video 1/2 Crop Mode:
Crop: The transmitted video frame is cropped to eliminate vignettes.
Original: The original video frame is transmitted without cropping.
Main Video Video 1/2 Bitrate: The amount of video data transferred in a specific duration of time. A higher video bitrate means a higher possible quality, but also higher file sizes and more bandwidth. The default is 2048 kbps.
Auxiliary Video 1 Resolution: Specify the image resolution for the first and second video stream channels of the auxiliary camera at the bottom of the device, varying from the lowest QCIF(176×144 pixels) to the highest 1080P(1920x1080 pixels). The default is 720P.
Auxiliary Video 1 Framerate: Frames per second refers to how many frames are displayed in one second of video. The default frame rate is 30fps.
Auxiliary Video 1 Bitrate: The amount of video data transferred in a specific duration of time. A higher video bitrate means a higher possible quality, but also higher file sizes and more bandwidth. The default is 2048 kbps.
Tip
To view the audio and video stream using RTSP:
First channel: rtsp://Device’s IP/live/ch00_0
Second channel: rtsp://Device’s IP/live/ch00_1
The auxiliary camera at the device bottom: rtsp://Device’s IP/live/ch00_2
RTSP OSD Setting
This feature is used to add a watermark to the RTSP video or picture.
Set it up on the web Surveillance > RTSP > RTSP OSD Setting interface. It is disabled by default.
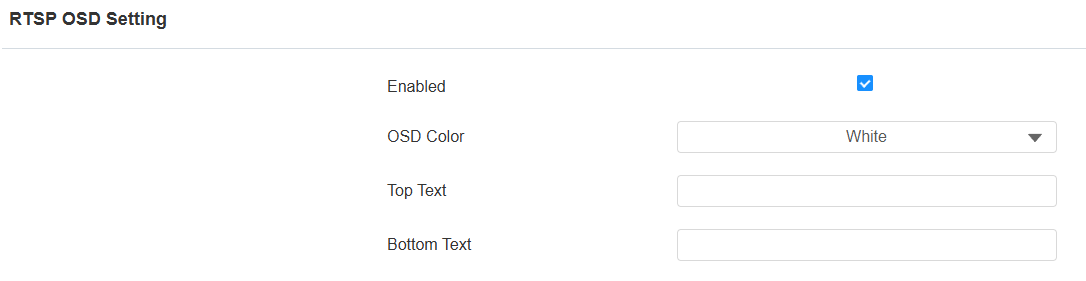
OSD Color: There are five color options, White, Black, Red, Green, and Blue, for RTSP watermark text.
Top Text: Customize the watermark text displayed at the top.
Bottom Text: Customize the watermark text displayed at the bottom.
ONVIF
You can access the real-time video from the device's camera using the Akuvox indoor monitor or other third-party devices like Network Video Recorder(NVR). Enabling and setting up the ONVIF function on the device will allow its video to be visible on other devices.
Click here to view an example of using the ONVIF feature: the integration with Uniview NVR System.
To set it up, go to the web Surveillance> ONVIF interface.

Discoverable: When enabled, the video from the door phone camera is searchable by other devices.
Username: Set the username required for accessing the door phone's video stream on other devices. It is admin by default.
Password: Set the password required for accessing the door phone's video stream on other devices. It is admin by default.
Tip
Once the settings are configured, to access the video stream on the third-party device, simply enter the ONVIF URL: http://Device’s IP:80/onvif/device_service.
Some NVRs can send door-opening requests to the device and control door opening. You can enable or disable the function by turning on or off a switch on the same interface as the ONVIF feature.

Video Record
The video record feature enables the device to record videos automatically when specific events happen.
Except for package detection, the X910 only uses the main camera to record videos.
Set it up on the Surveillance > Video Record interface.
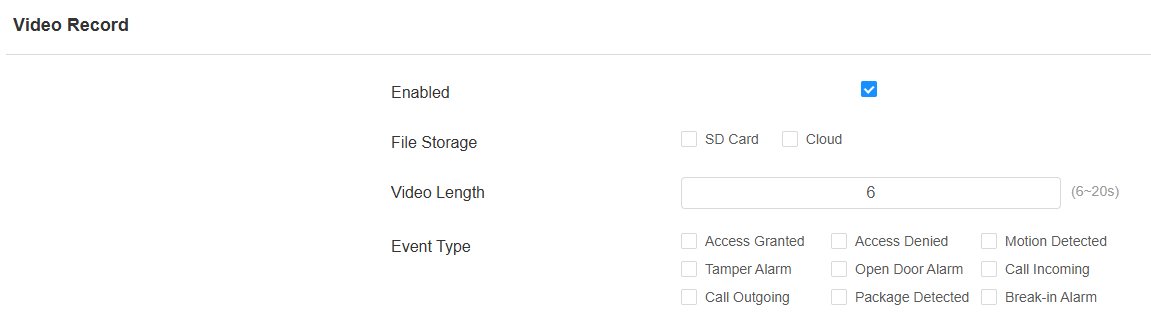
File Storage: Store the videos in the SD Card or the SmartPlus Cloud. Only when the device has an SD card inserted or is connected to the SmartPlus Cloud will these two options display.
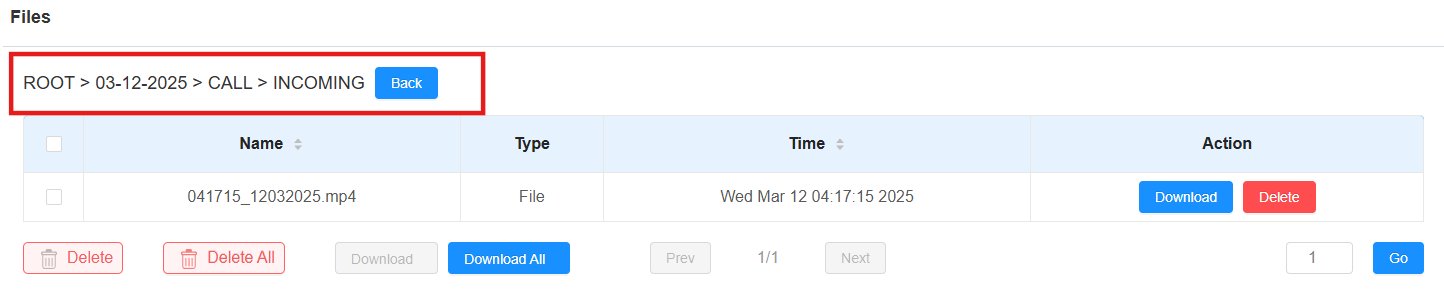
When videos are stored in the SD card, the storage path is date/event/event details.
Video Length: The video recording length.
Event Type: Specify the event that will trigger video recording.
Note
When the videos are stored in the SD card, all event types are supported.
When the videos are stored on the SmartPlus Cloud, specific event types(Access Granted/Denied; Motion Detected; Call Incoming/Outgoing) are supported.
Click here to view how to set up the feature on the SmartPlus Cloud.
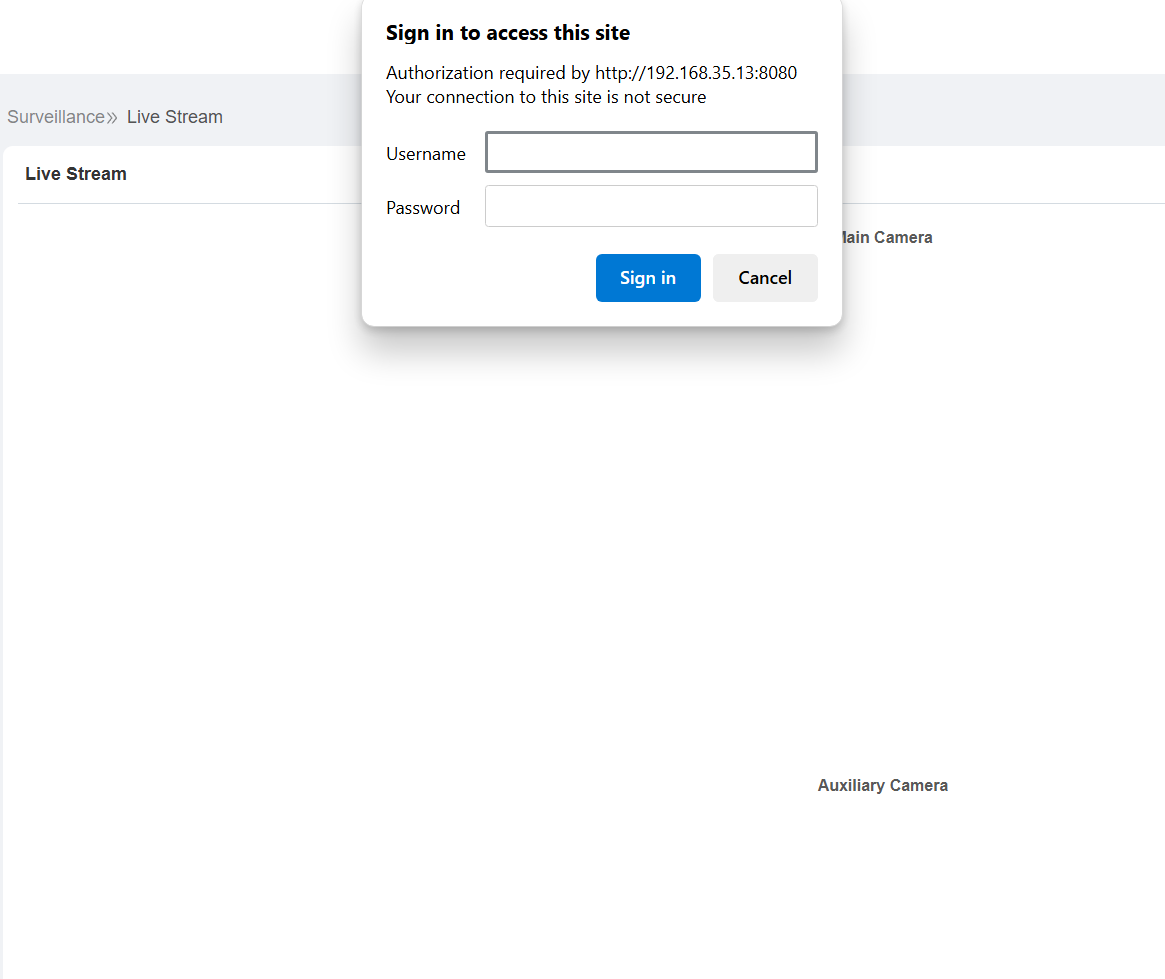
Live Stream
There are two ways to check the real-time video from the device. One is to go to the device web interface and view the video there. The other is to enter the correct URL on the web browser and access the video directly.
View the video stream on the Surveillance > Live Stream interface. If you have enabled MJPEG authorization, you need to enter the user name and password set in the RTSP Basic section for viewing the stream.
NACK
Negative Acknowledgment(NACK)indicates a failure or error in data transmission or processing. It is used to request retransmission or signal the failure to the sender for ensuring data integrity.
To enable NACK, navigate to the web Intercom > Call Feature > Others interface.
Data Transmission Type for Third-party Camera
You can select the data transmission type between the device and a third-party camera when it is connected to the SmartPlus Cloud.
To set it up, go to the Surveillance > RTSP > Third Party Camera interface.

UDP: An unreliable but very efficient transport layer protocol.
TCP: A less efficient but reliable transport layer protocol. It is the default transport protocol.
SD Card for Storing Videos
The device can be inserted into an SD card to store motion and call videos.
To check the videos, go to Device > SD Card interface. When there is not enough space in the SD card to record the next video, the system automatically deletes the oldest video.
You can backup the door phone’s configuration data to the SD card and restore it from the SD card.

Camera Mode
High Dynamic Range (HDR) is a technology used in photography, videography, and display devices to enhance image quality by capturing a wider range of brightness and color.
Linear refers to a straightforward representation of brightness in images. Linear images are commonly used in controlled lighting environments, such as indoor scenes, where consistent brightness is present.
You can set the camera mode between HDR and Linear on the Device > Camera interface. It is HDR by default.
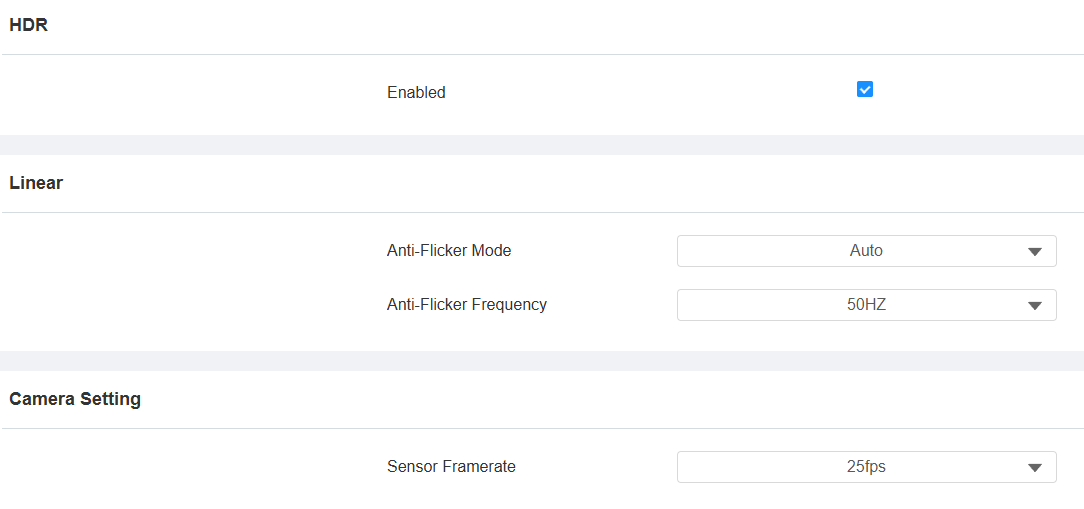
Anti-Flicker Mode: The anti-flicker feature reduces or eliminates flickering in images or videos caused by varying light sources.
Auto: The device will switch automatically between 50Hz and 60Hz anti-flicker frequency.
Manual: Select the anti-flicker frequency manually.
Off: Disable the anti-flicker function.
Anti-Flicker Frequency: Select the anti-flicker frequency between 50Hz and 60Hz.
Sensor Framerate: Adjust the camera frame rate.
30fps: Better for applications needing higher smoothness.
25fps: Suitable for standard video recording and playback, especially under a 50Hz power frequency to minimize flicker.