The Akuvox SmartPlus App can receive calls from Akuvox door phones when the devices are connected to the Akuvox SmartPlus Cloud. However, in some old communities, the internet may not be available.
To ensure the SmartPlus App can still receive calls and open doors when the door phone is offline, Akuvox rolled out a call transfer feature.
With this feature set up, the SmartPlus App can receive calls from Akuvox door phones through Akuvox indoor monitors, even when the door phone is offline.
Note
Compatible models and versions(or higher):
All door phones
C313W V2: 213.30.10.60
C313W V2-2: 212.30.13.25
C313W V3: 313.30.12.6
C313W-LP-2: 311.30.15.221
S562W: 562.30.10.160
S563W: 563.30.13.404
S565W:565.30.15.208
S567W(Android 14): 567.30.114.503
The indoor monitor and door phone should be in the same local network.
The indoor monitor should be connected to Akuvox Cloud via Wi-Fi.
In this article, R29 and S562W are taken as examples.
Network Configuration
The door phone and indoor monitor should both be set in static IP mode, and the indoor monitor should be added as a contact of the door phone.
Door Phone
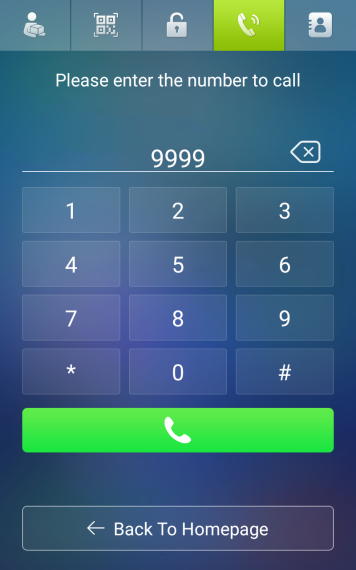
1. Press the Dial icon and enter 9999, then 3888 to enter the system setting screen.

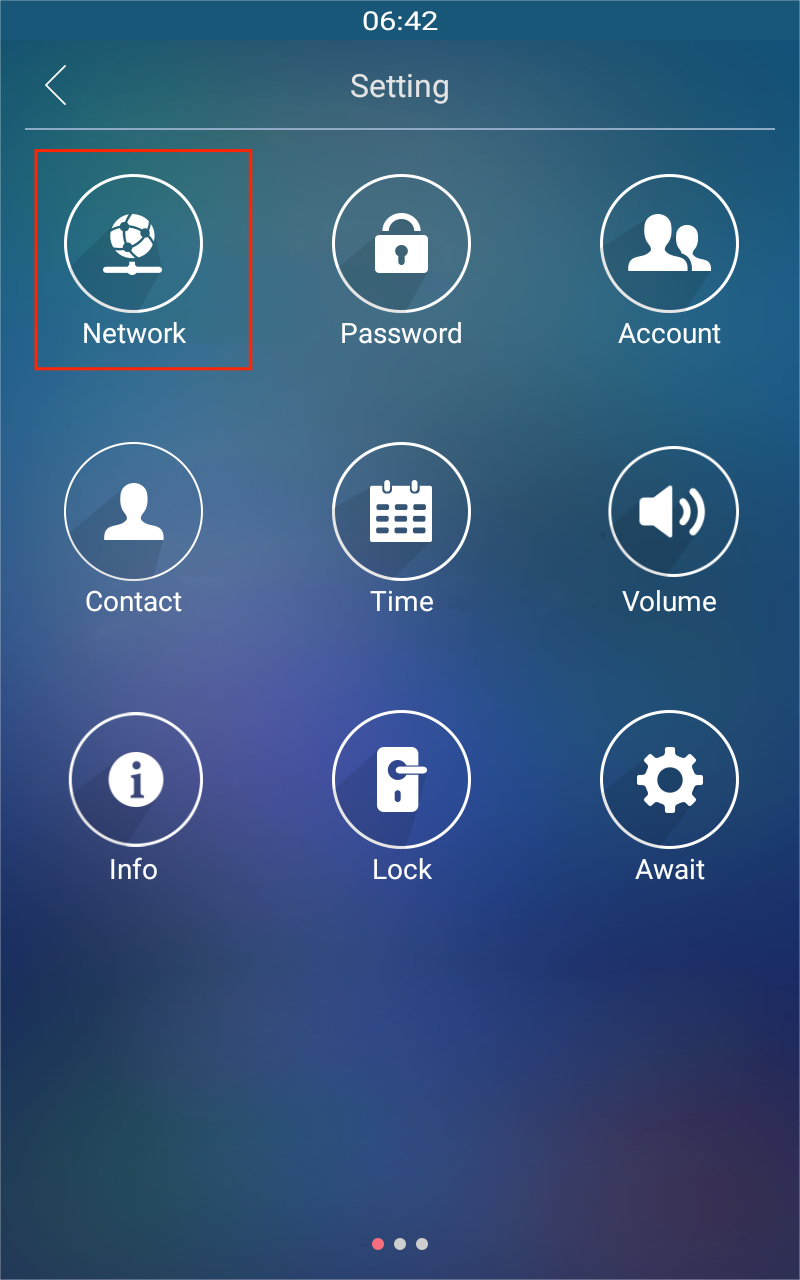
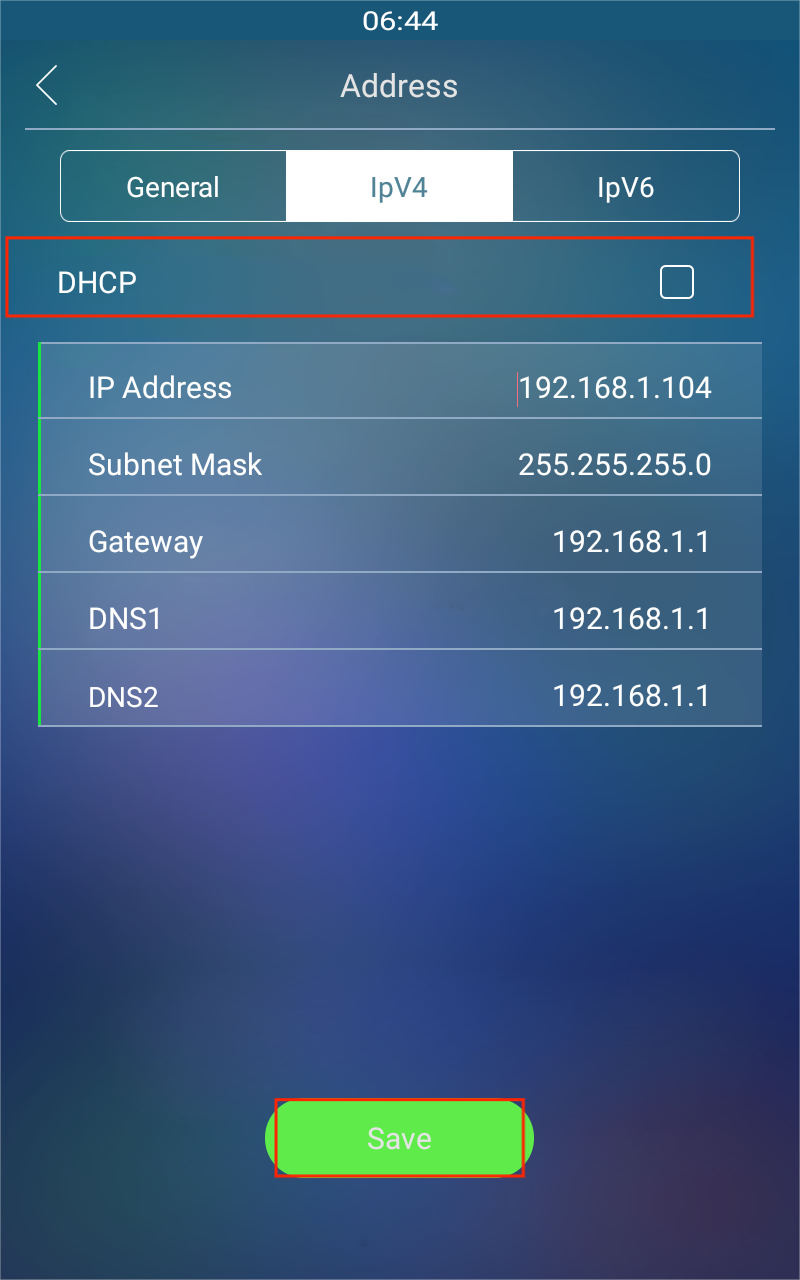
2. Press Network and un-tick the DHCP box of IPv4 to set the device in static IP mode. Press Save to save the configuration.
Indoor Monitor
Press More > Setting > Advance Settings to access advanced settings. The default password is 123456.
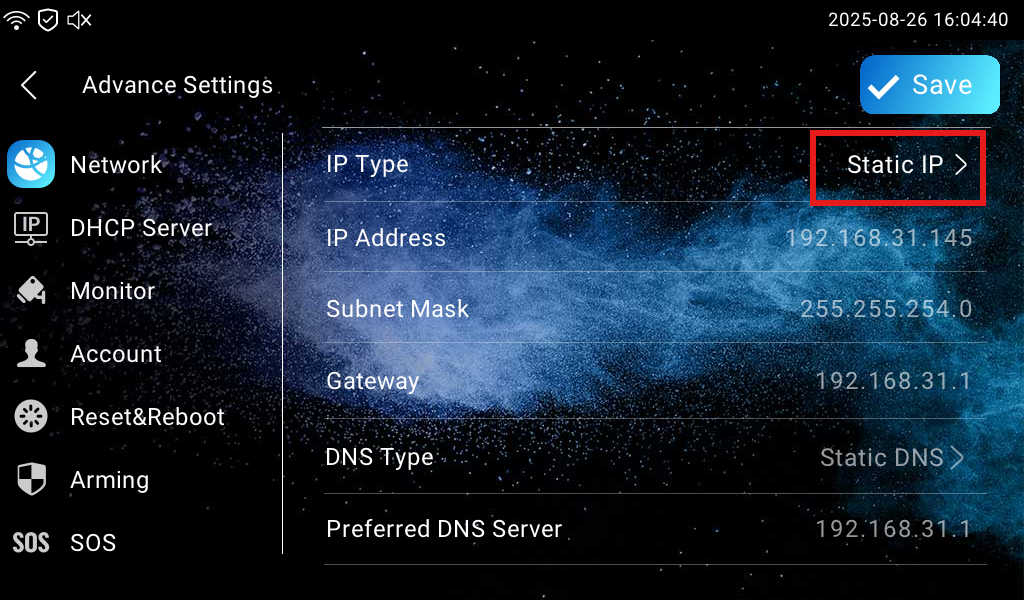
Press Network and set IP Type to Static IP.
On the Settings screen, tap Wi-Fi.
Connect to the desired Wi-Fi by entering the correct password.
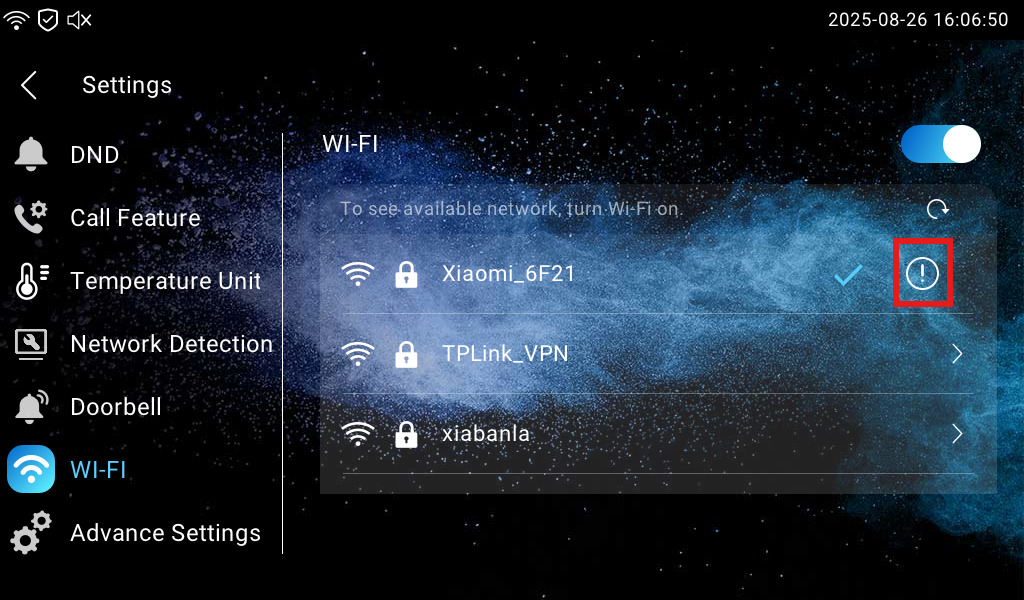
Tap
 to set up the Wi-Fi details.
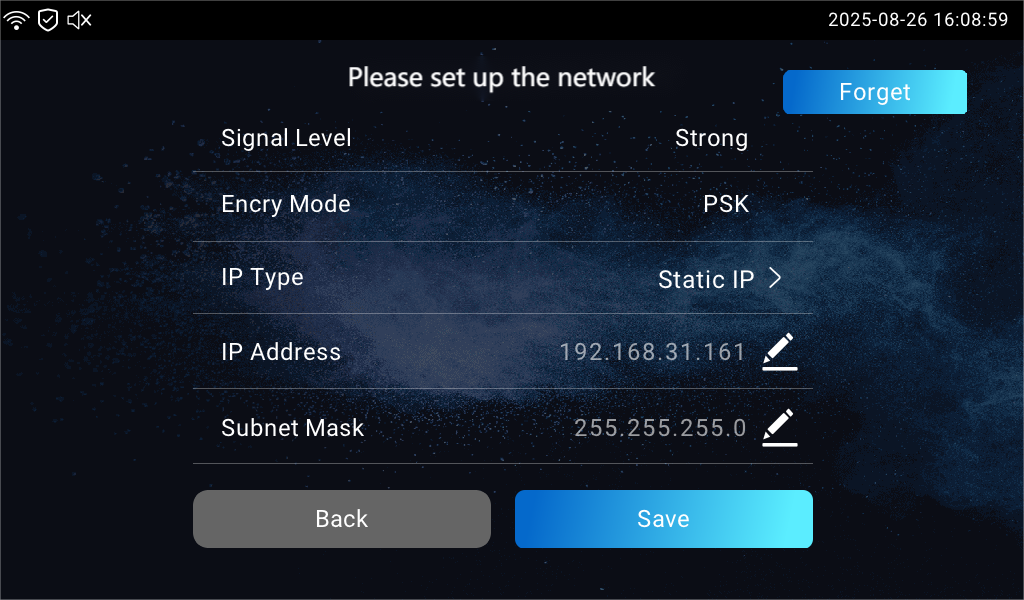
Set its IP Type to Static IP.
Contacts Configuration
To enable the indoor monitor to receive calls from the door phone, the indoor monitor should be set as a contact of the door phone.
Log in to the door phone's web interface with the static IP address. The default username and password are admin.
Navigate to Directory > Directory Setting interface to add the indoor monitor as a contact. Enter the static IP of the indoor monitor in the Phone field.
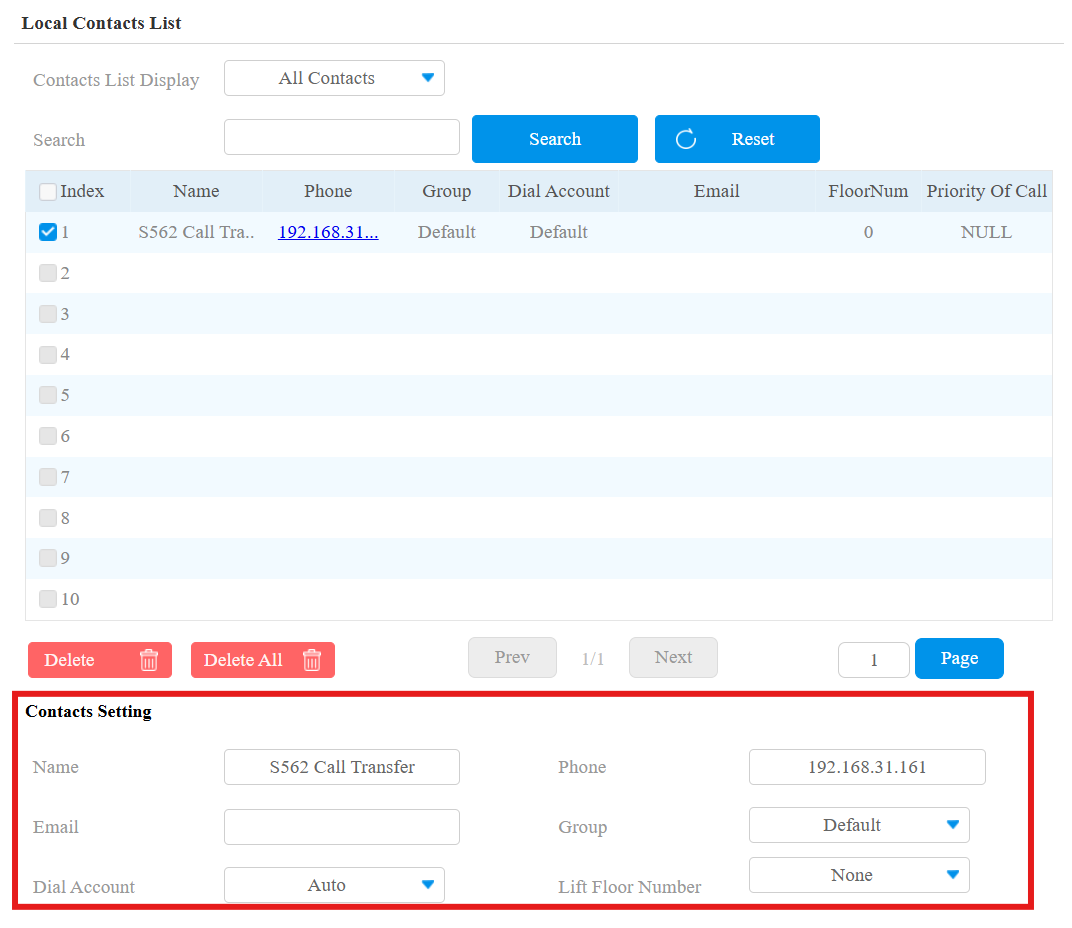
3. Click Add.
Access Method Configuration
To open doors on the SmartPlus App, access methods need to be configured on both the door phone and the indoor monitor's web interface. You can choose to unlock the door via DTMF code or HTTP command.
Unlock via DTMF Code
To open the door via the DTMF code, the DTMF code of the indoor monitor and the door phone should be the same.
Door Phone
1. Navigate to Access Control > Relay interface to configure the DTMF code. Select the DTMF code from 0-9, #, and *.

2. Scroll down to DTMF, and select All Numbers.
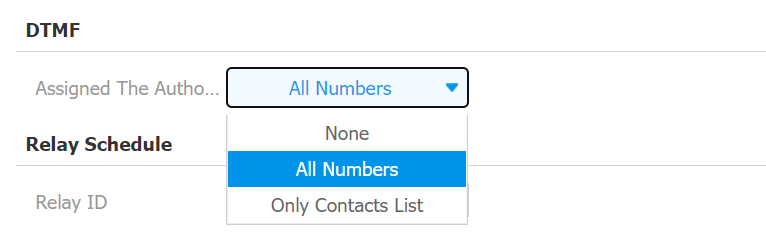
3. Click Submit to save the configuration.
Indoor Monitor
1. Log in to the indoor monitor's web interface with the static IP address. The default username and password are admin.
2. Navigate to Device > Relay interface to configure the DTMF code, which should be the same as the DTMF code configured in the door phone.
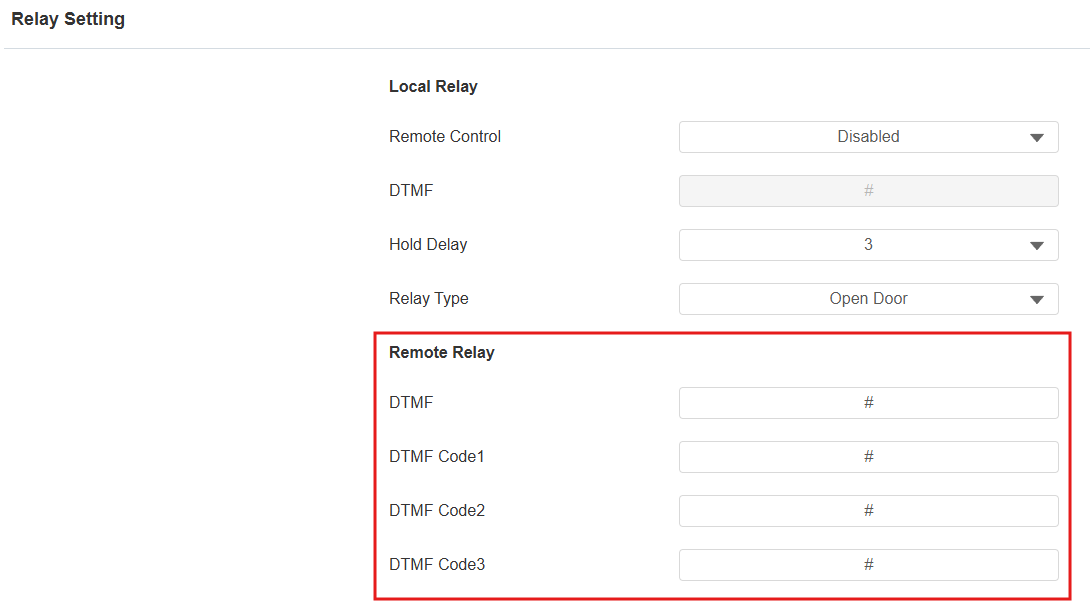
3. Scroll down to Softkey In Talking Page, enable the desired key(s), and select Remote Relay by DTMF that you have set on the Relay interface of the door phone and indoor monitor, as it is shown above.
For example, if you select Remote Relay by DTMF in the Key 1 field, when users press Key 1, Relay A will be opened.

Unlock via HTTP Command
The HTTP command needs to be configured on the door phone and indoor monitor before opening the door via the HTTP command.
Door Phone
Navigate to Access Control > Relay > Open Relay Via HTTP to configure the HTTP command.
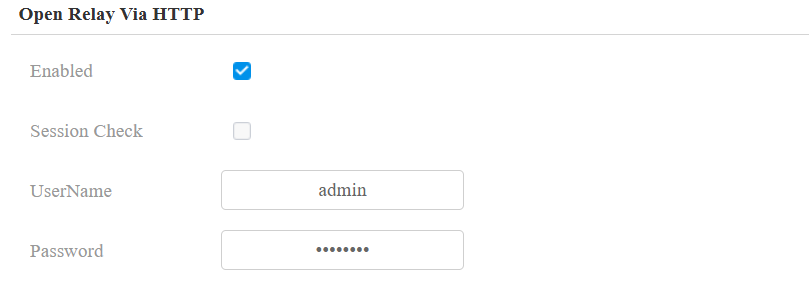
Enable the feature.
Set up the username and password for the HTTP command.
Click Submit to save the configuration.
Indoor Monitor
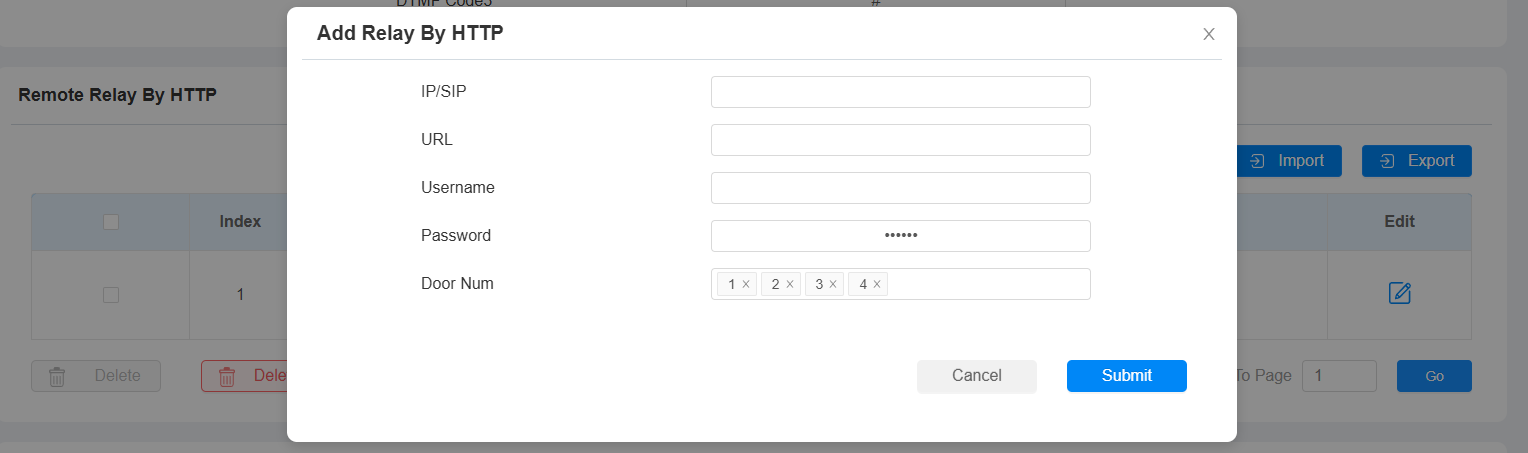
Navigate to Device > Relay > Remote Relay By HTTP interface to configure the HTTP command.
Click +Add.
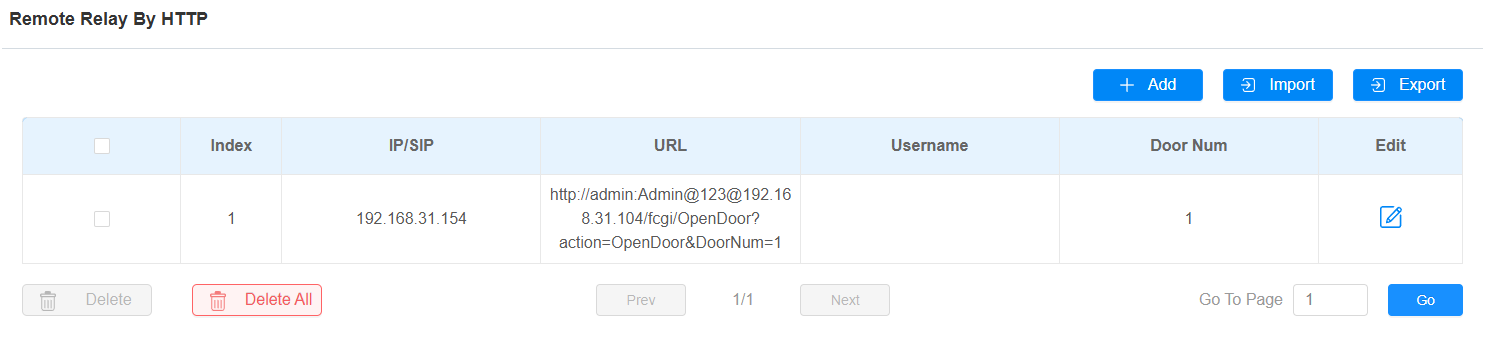
Fill in the following parameters.
IP/SIP: Enter the static IP of the door phone.
URL: Enter the http command. Click here to view how to specify the HTTP format.
Username and Password: Enter the username and password that have been configured on the door phone's Relay interface.
Scroll down to Softkey Setting, enable the desired key, and select Remote Relay by HTTP for it.

Click Submit to save the configuration.
Configuration on SmartPlus Cloud
Note
Single-tenant and community projects support the call transfer feature.
Before using the call transfer feature, the super manager should enable the Doorphone Offline Solution for your distributor.
Log in to the Cloud platform with an installer account.
For Installers: On Single-Family House View
Add Door Phone
1. On the Single-family Sites, click ![]() of the desired user.
of the desired user.

Click New to add a device.

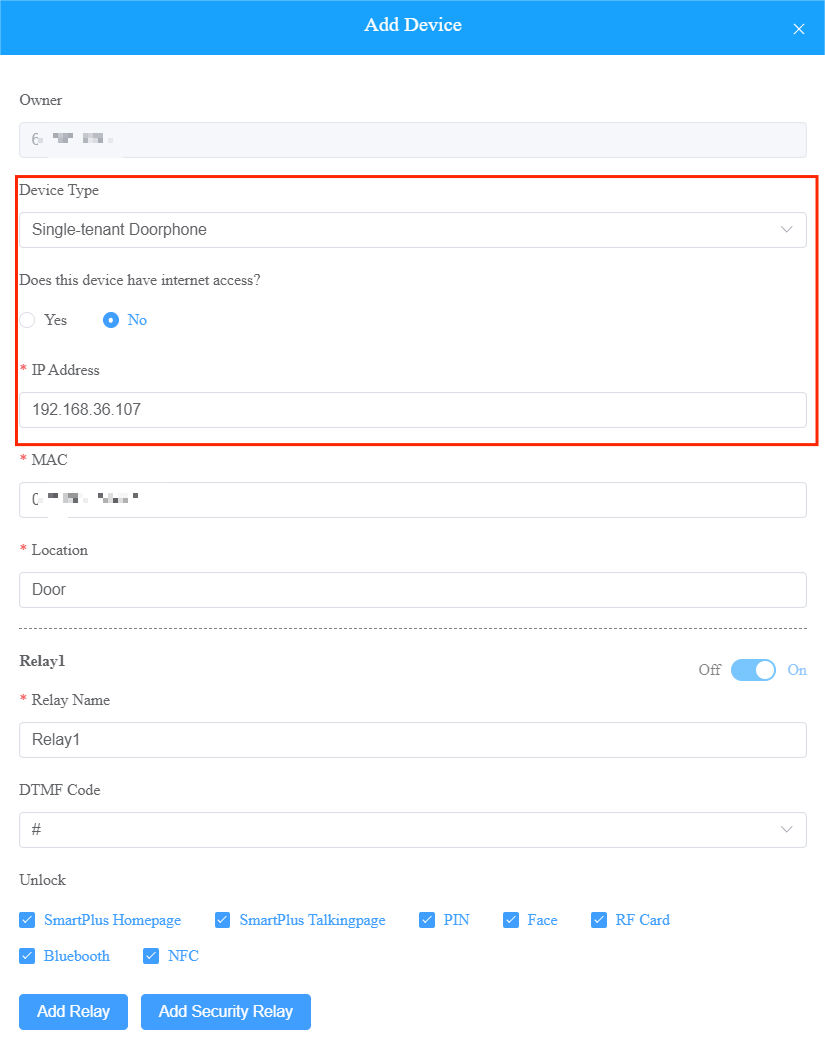
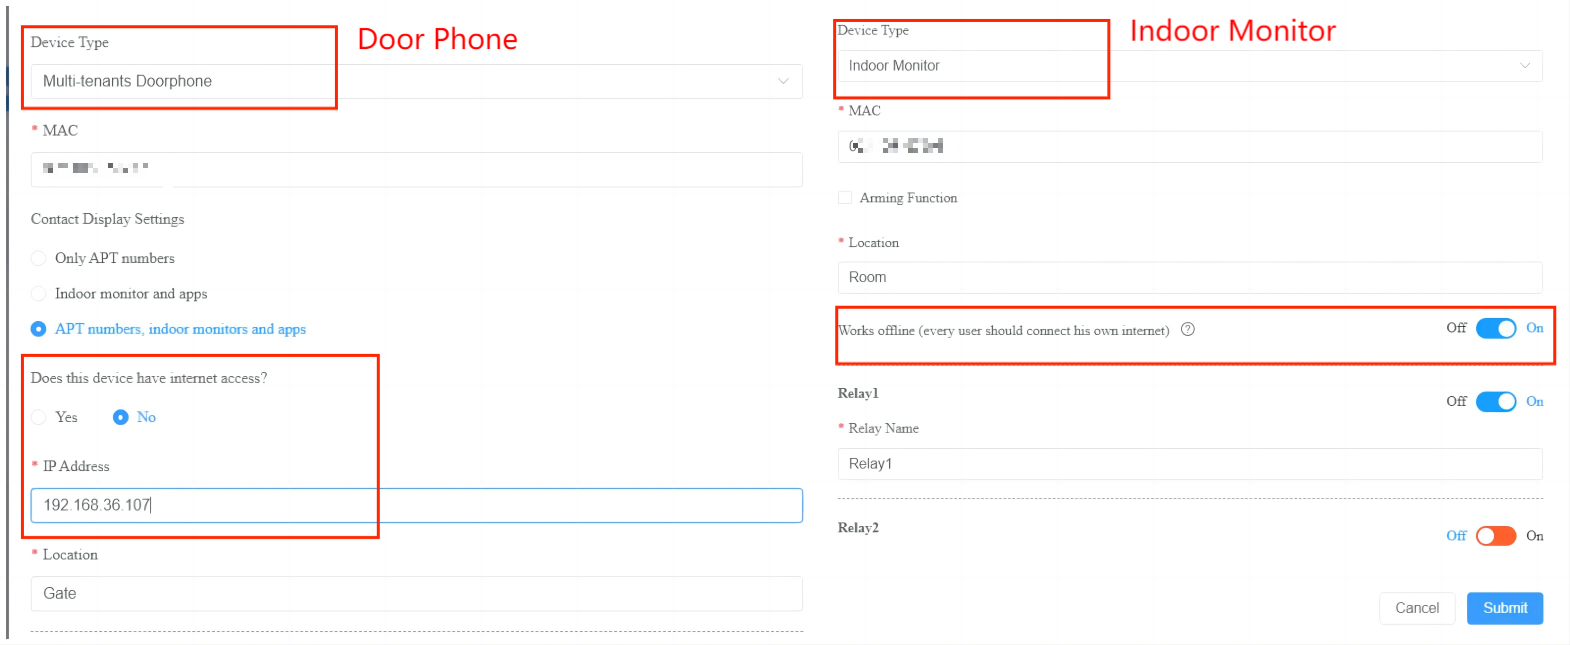
In Device Type, select the door phone type.
To enable the call transfer feature, select No in Does this device have internet access:
If the door phone is not connected to the Internet, select No so that calls can be transferred to the SmartPlus App through the indoor monitor.
If the device is connected to the Internet, select Yes, and it can make calls normally.
Note
When No is selected, the cloud configuration will not synchronize to the door phone.
When No is selected, enter the static IP of the door phone.
Enter the device's MAC address and location name to distinguish the device from others.
Click Submit.
Add Indoor Monitor
1. Click ![]() of the desired user and then New to add the device.
of the desired user and then New to add the device.
2. In Device Type, select Indoor Monitor.
3. Enable Works offline if you want the device to transfer calls from the offline door phone.
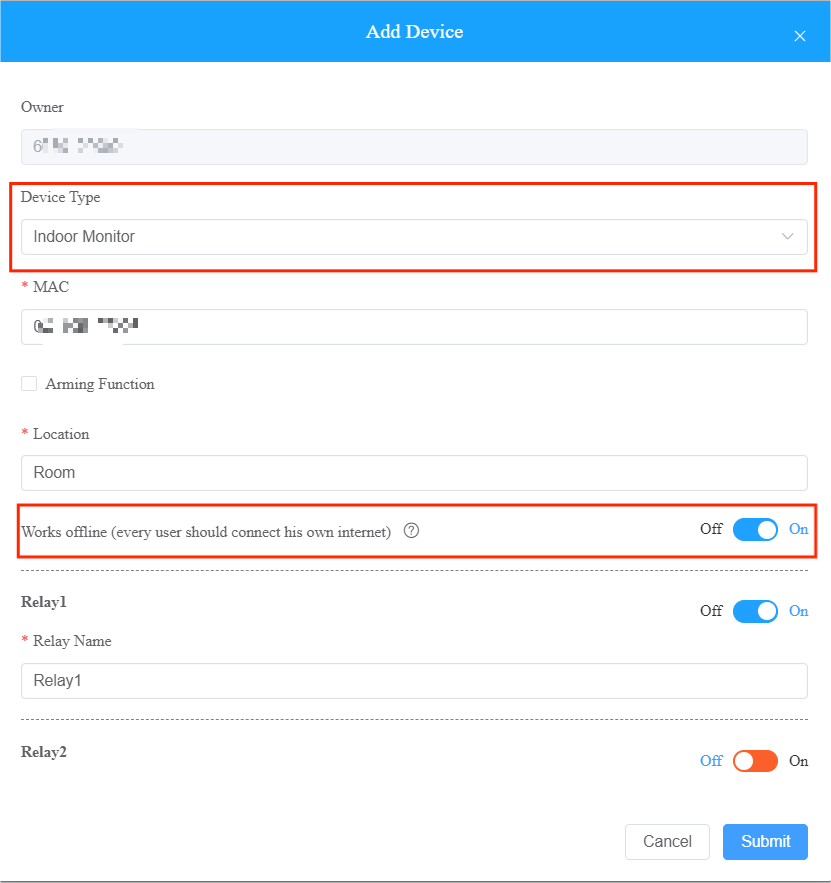
4. Click Submit.
For Installers: On Community View
Go to the target community by clicking its
 .
.Click the area where the device is installed and then Intercom Devices.
Click New to add the device.

To add the user’s private device, click and find the Intercom Devices section. Then, click New.

The following steps are the same as adding devices to the single-family house project.
Note
In one apartment, only one indoor monitor can transfer calls.
If the indoor monitor is offline, it cannot transfer calls.
In the call transfer solution, the cloud configuration will NOT synchronize with the door phone.
For Property Managers: Update Users to Devices
The door phone can download the users’ access method data(PIN, card code, Bkey, NFC, and fingerprint) via the indoor monitor. In this case, users can use their credentials to open doors.
Compatible models and versions(or higher)
S562W: 562.30.15.402
S565W:565.30.15.208
R28V2: 228.30.10.241
R29: 29.30.10.507
X915V2: 2915.30.10.619
S539: 539.30.10.507
1. Log in to the SmartPlus cloud with your account.
2. Click  at the top of the interface. This icon is available after the call transfer feature is properly configured.
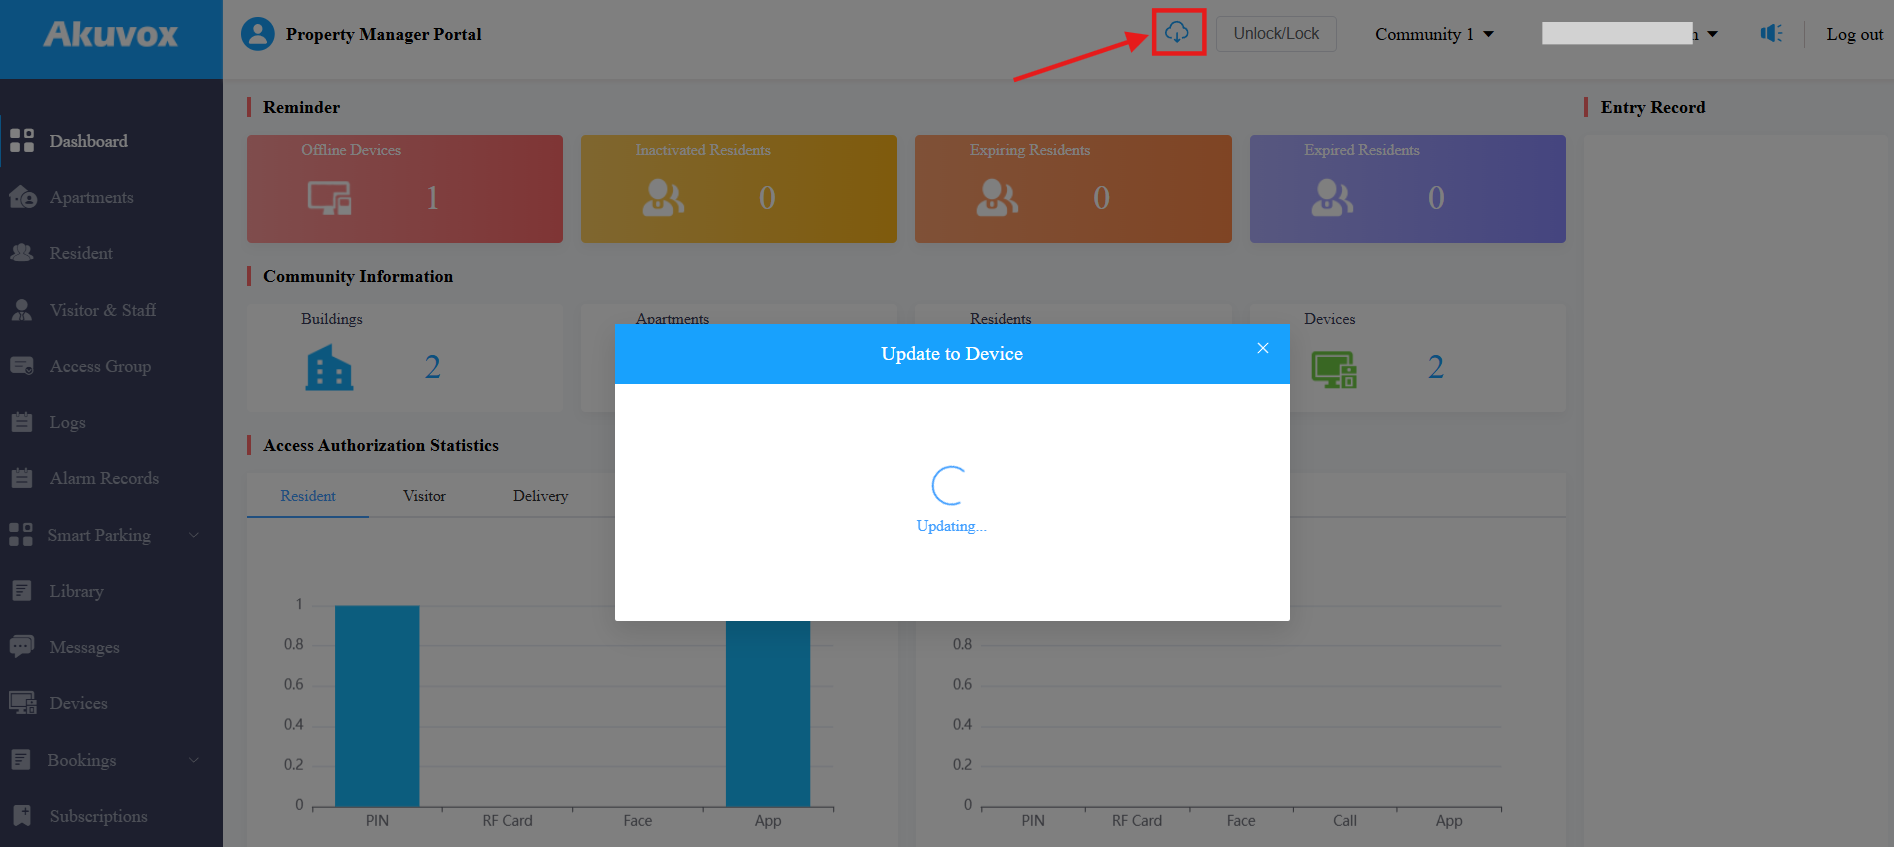
The window displays “Access method update in progress. Please check the device in a few minutes.”
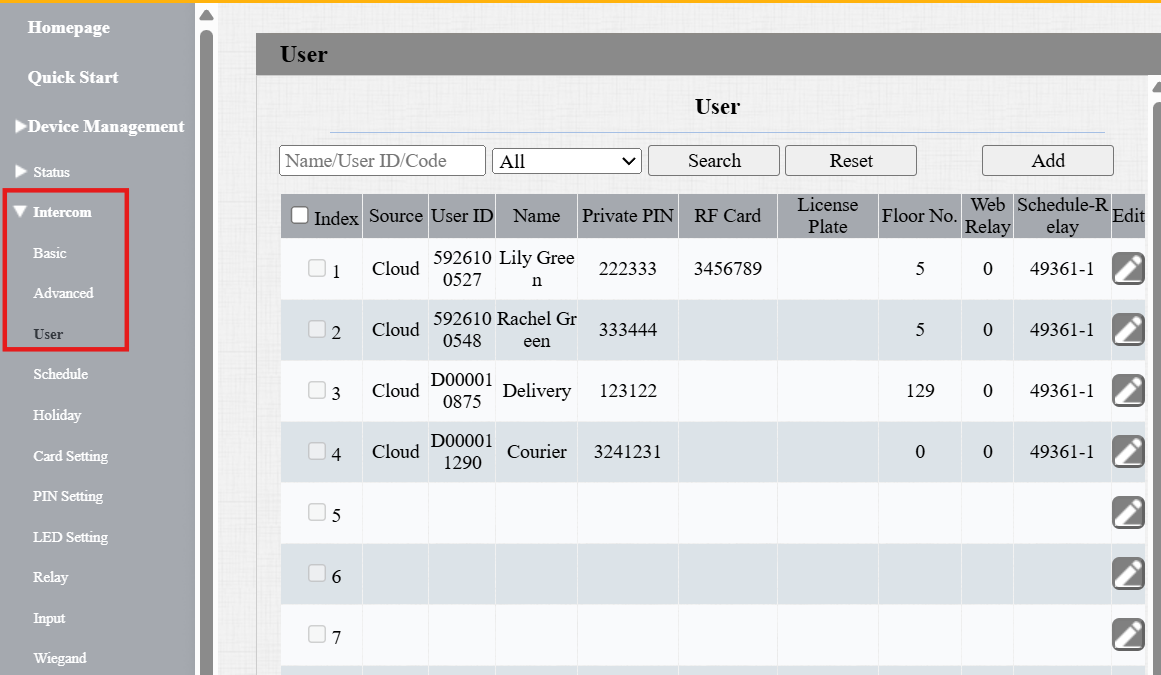
Check whether the users are updated on the door phone’s web portal.
3. Enter the door phone’s static IP in a browser and log in.
4. Go to Intercom/Directory > User to check the update.
On SmartPlus App
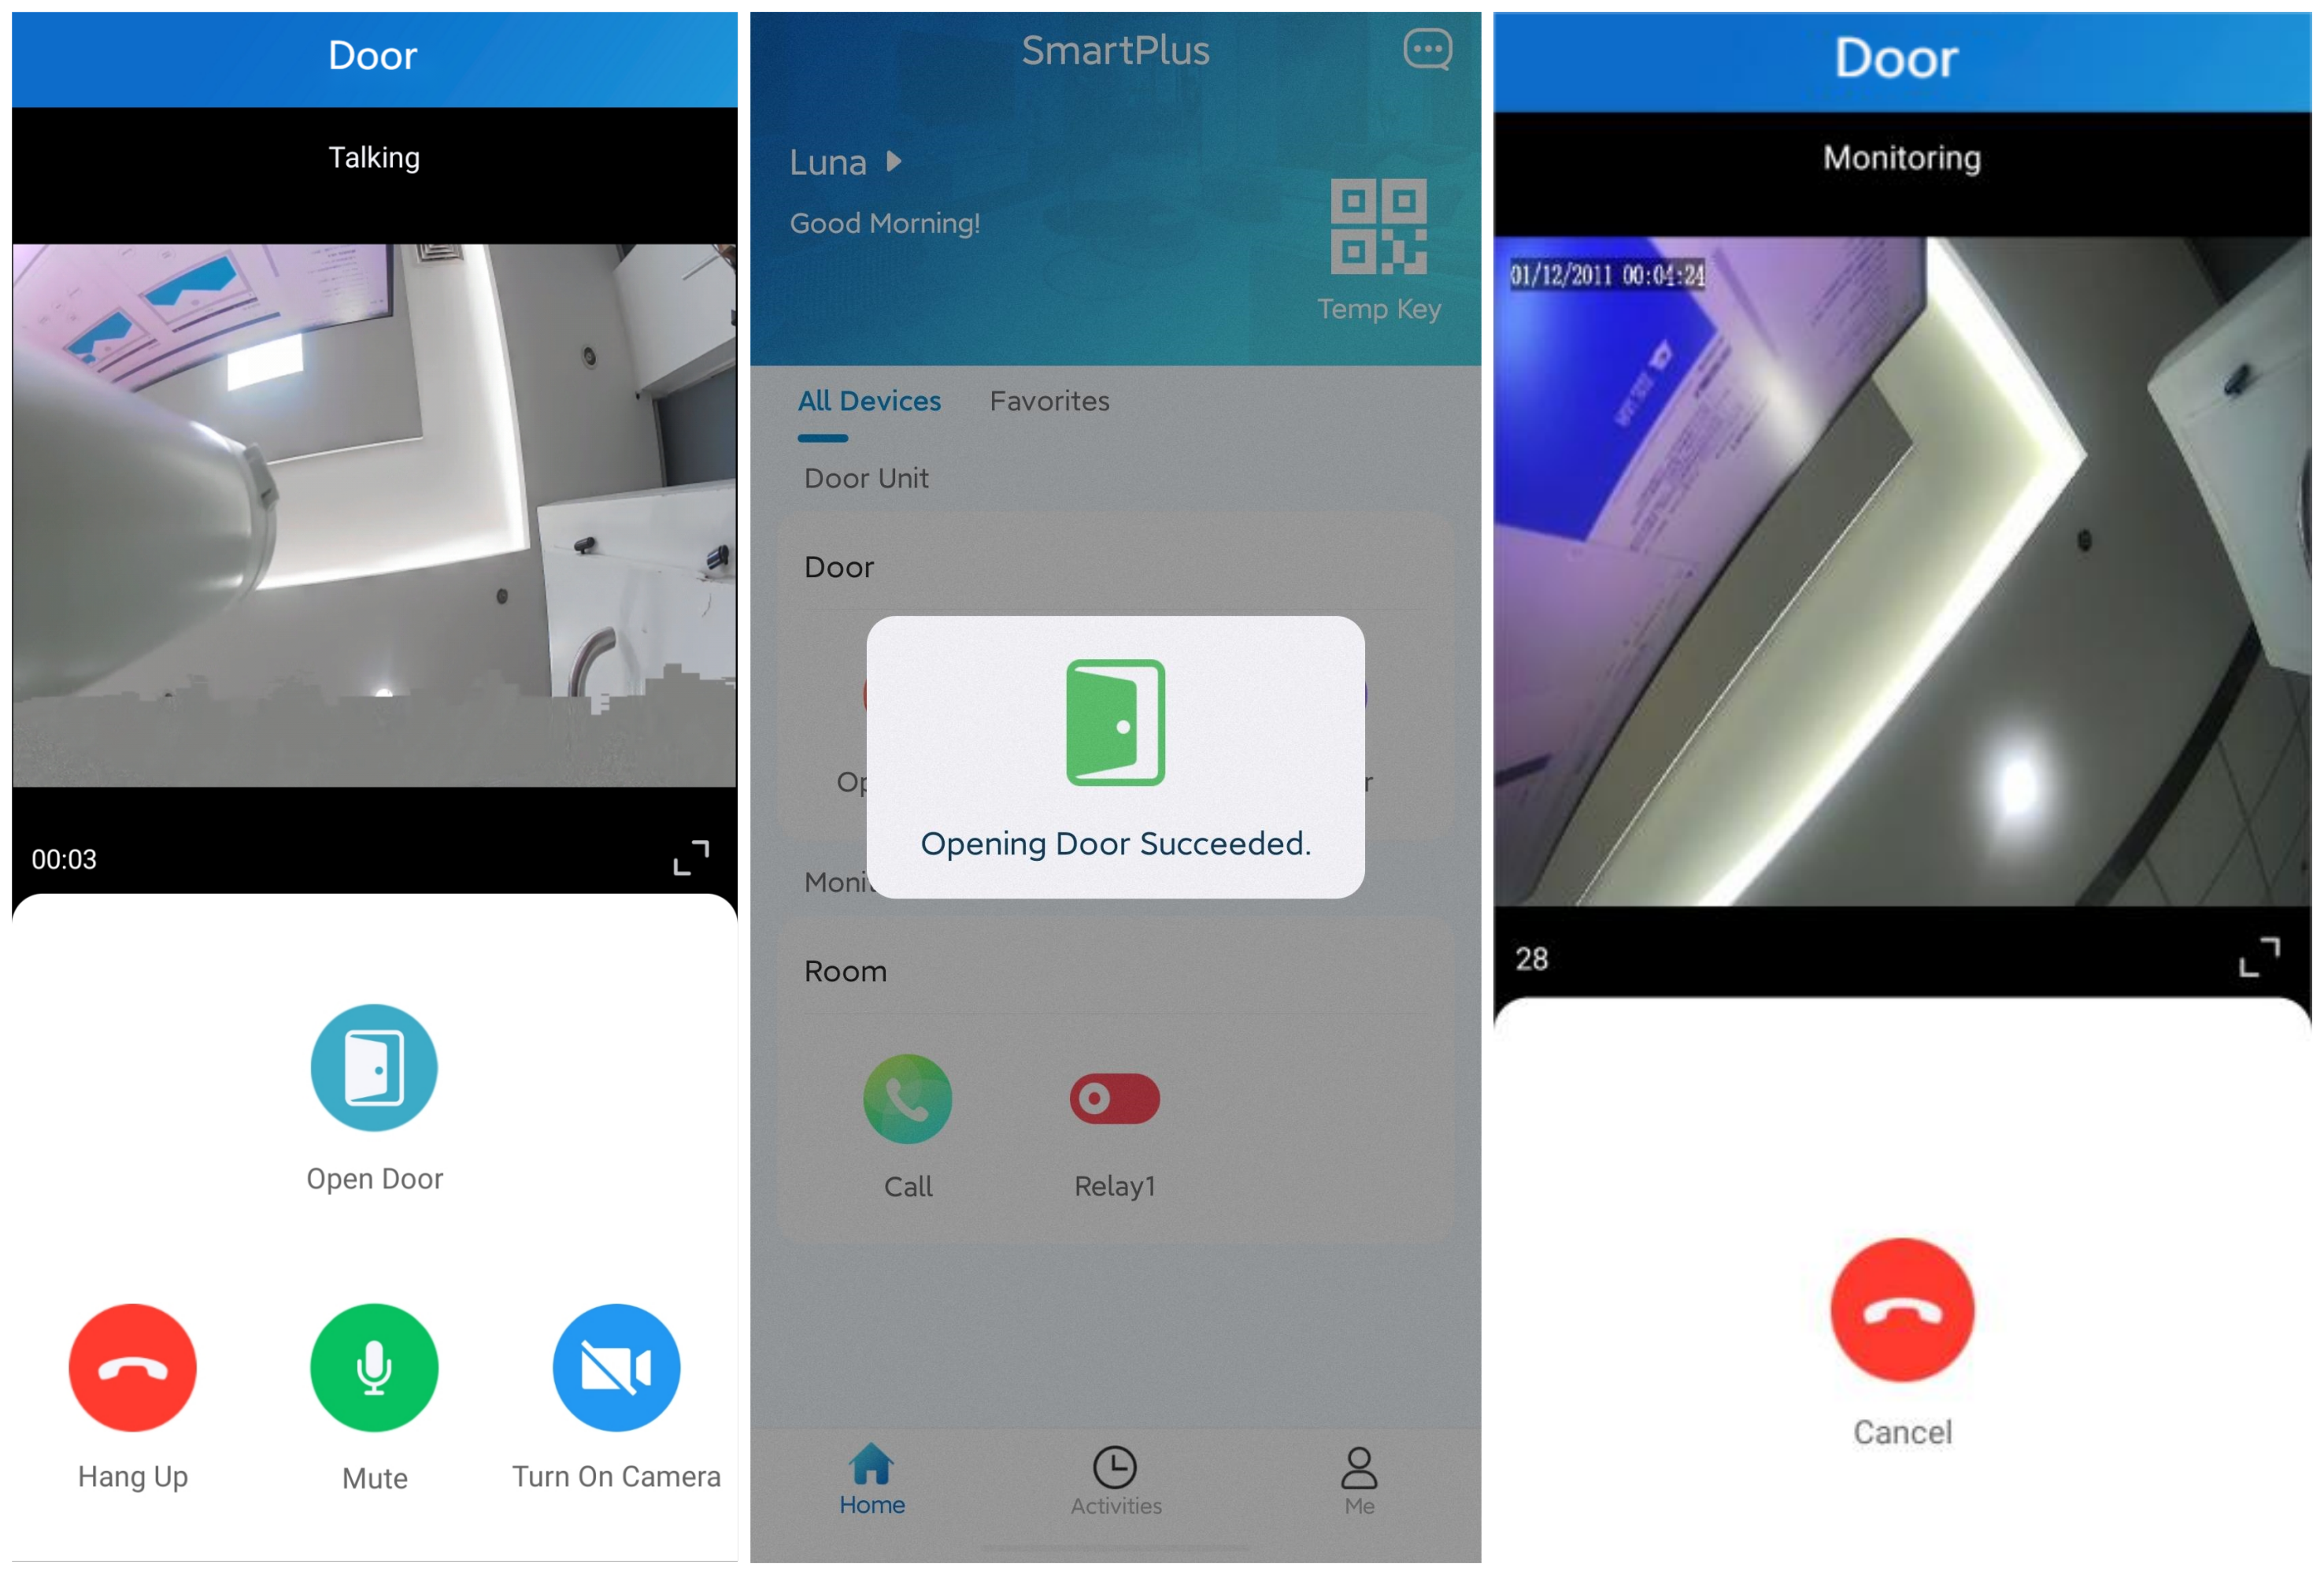
After the configuration is done, the doorphone will be displayed online, and end users can perform the following actions on the SmartPlus App.
Receive calls from the door phone.
Open the door on the app home page or during a call, an intercom preview, and a monitor screen.
Monitor the door phone.