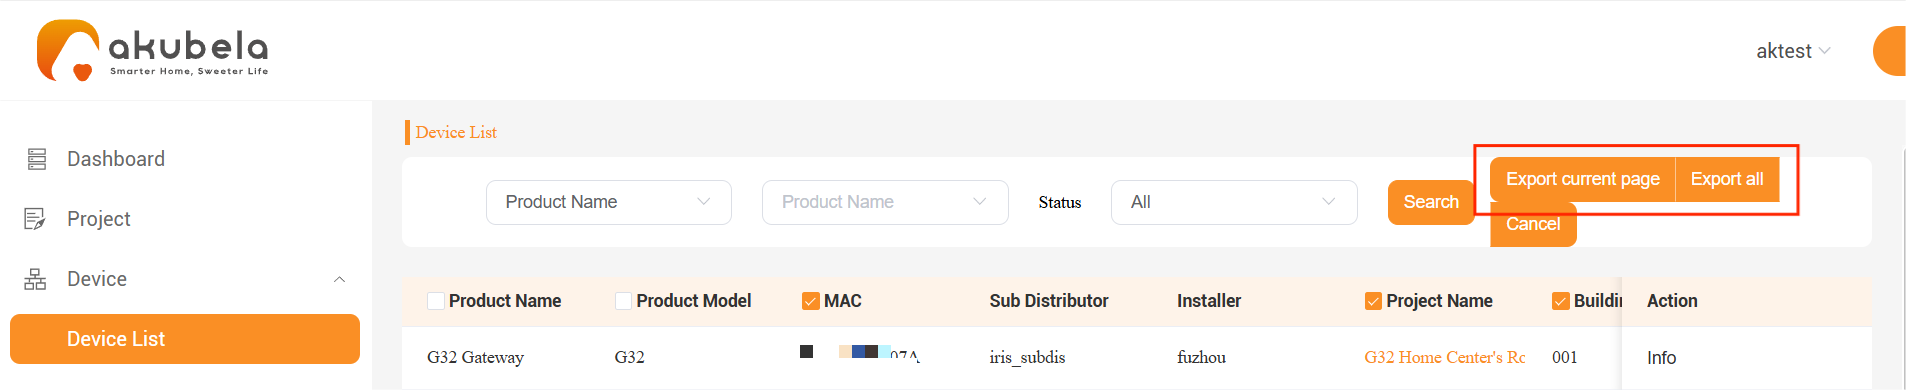
You can manage all devices in projects under your and your installers’ accounts. This includes adding, replacing, and deleting devices for projects you’ve created, adding MAC addresses, downloading device list and more.
Manage Your MAC Library
The MAC Library on the akubela Cloud contains all smart home device MAC addresses associated with your and your installer accounts.
To view MAC addresses of Akuvox intercom devices, go to the SmartPlus Cloud or access the related projects.
MAC Registration Methods
There are two methods for managing MAC address entries:
Method A (Default): MAC address registration is not required. Installers can add or remove devices directly.
Method B: If MAC Control is enabled for your account by the akubela support team, all device MAC addresses must be registered in the MAC Library in advance. Installers can only add devices that are registered under your account.
NOTE:
Under Method B, smart home devices must be registered via the akubela Cloud, not the Akuvox SmartPlus Cloud.
Add MAC Addresses
If Method B is enabled, you must register device MAC addresses in advance.
Go to MAC Library interface.
Do any of the following.
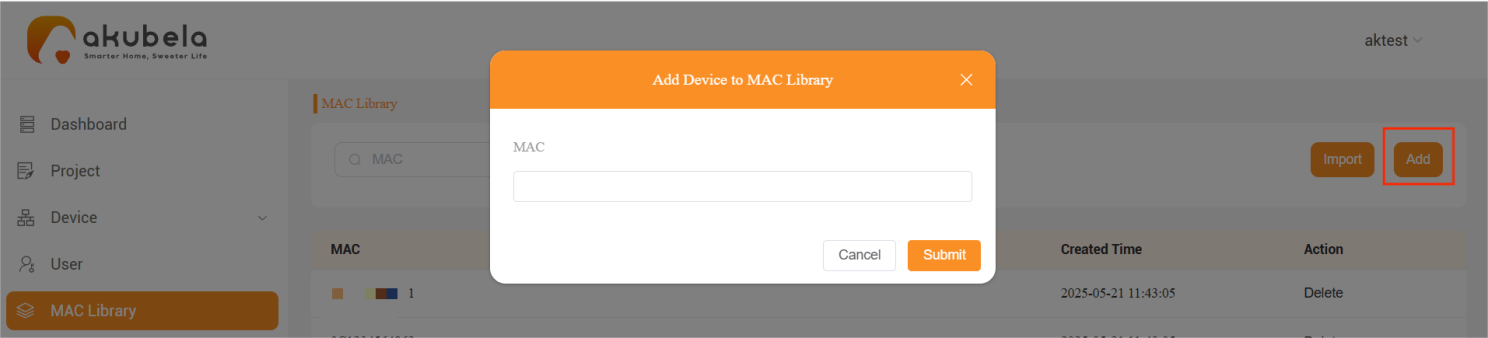
To add individually: Click Add, and enter the MAC address.
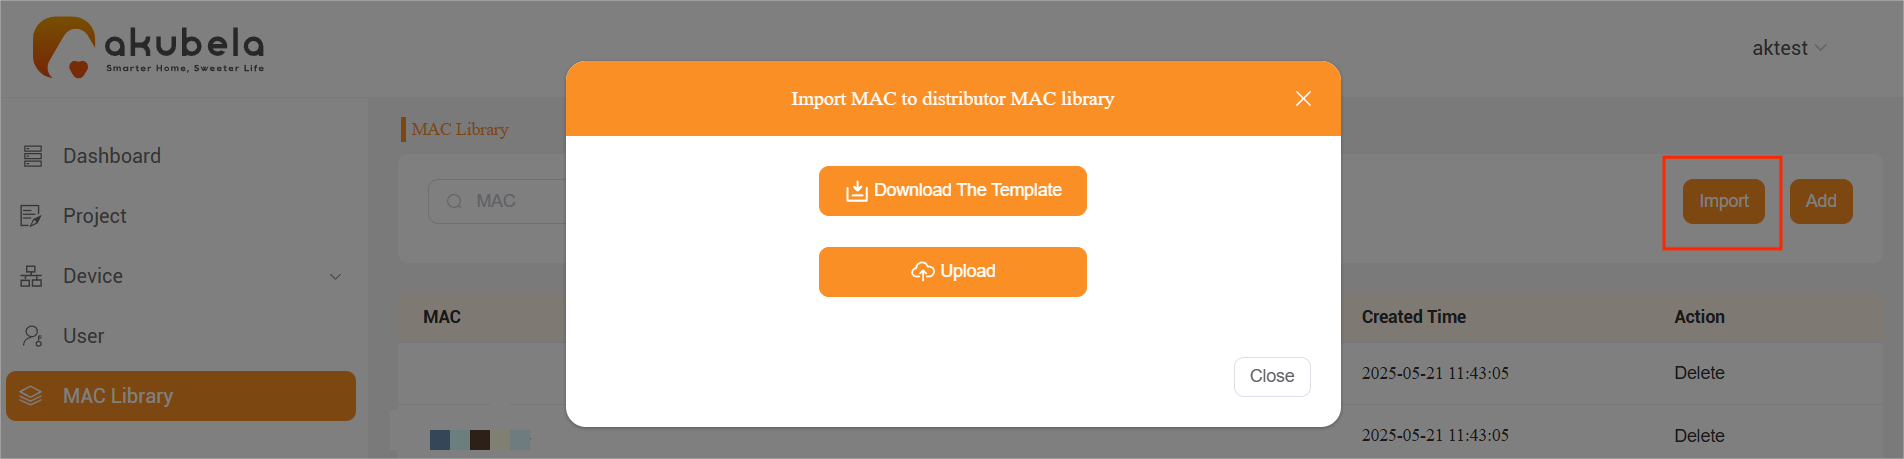
To import in bulk:
Click Import.
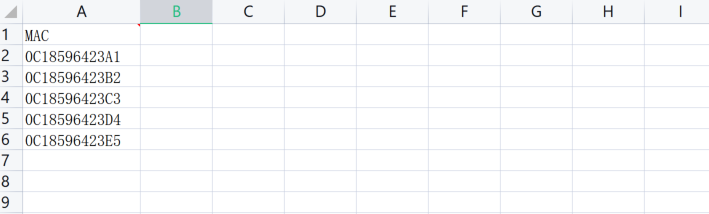
Download the Template and fill in all MACs.
Click Upload to import the completed template file.
Delete MAC Addresses
To remove a MAC address:
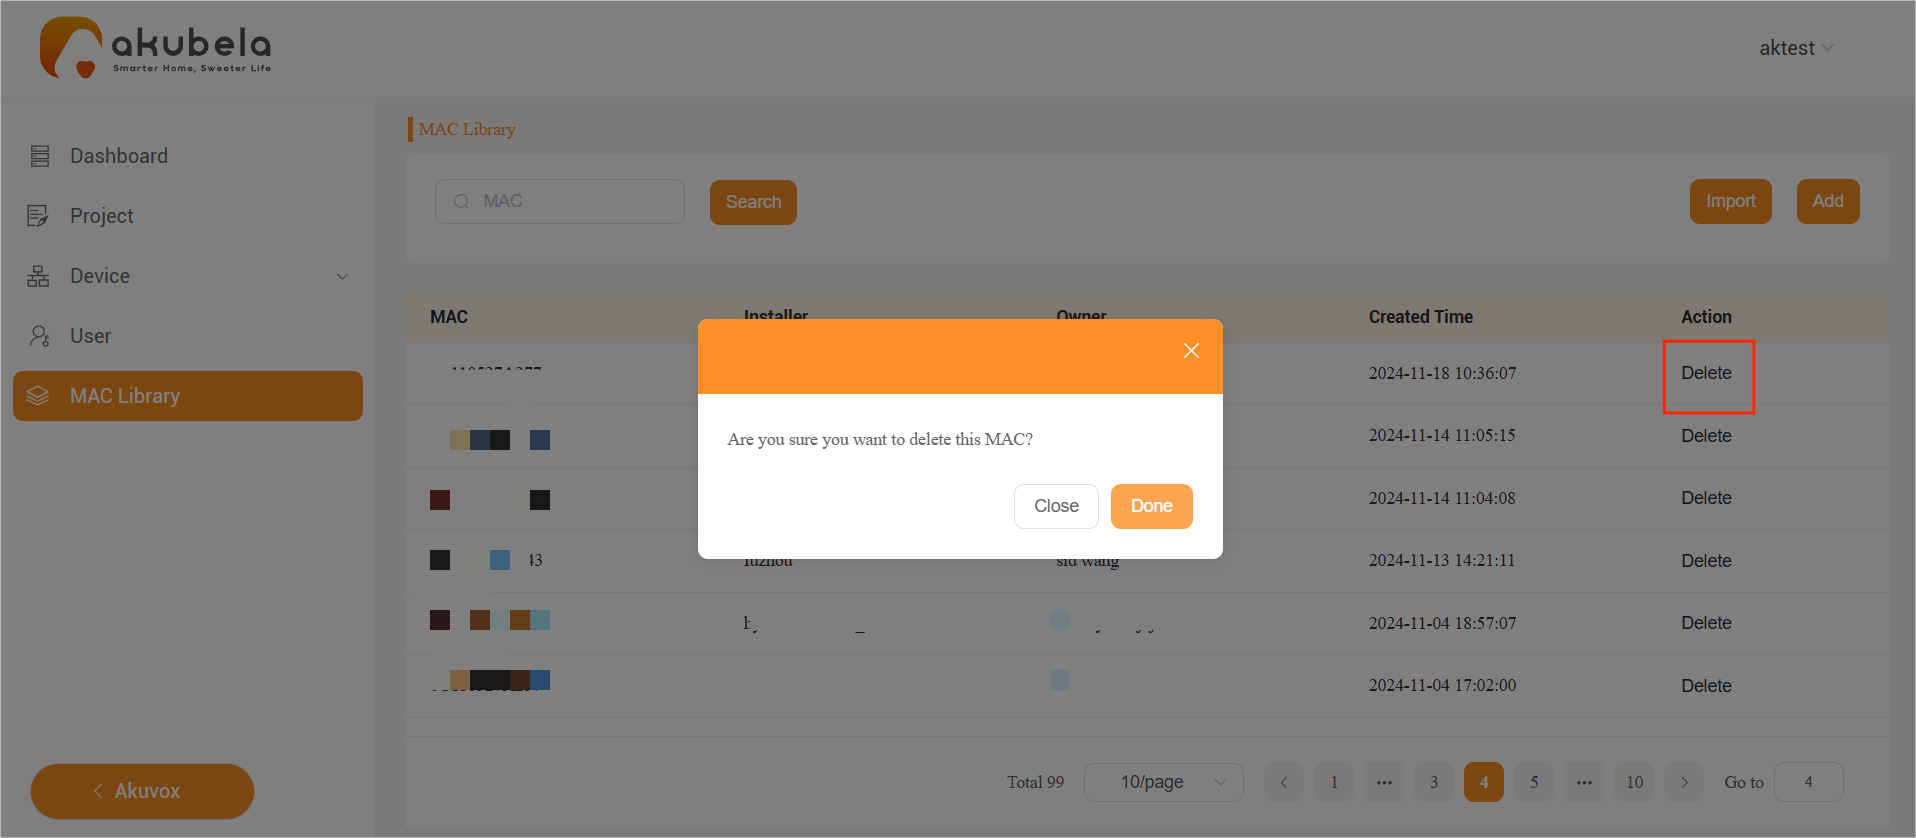
Go to the MAC Library, locate the address, and click Delete.
Add Devices in Single-Tenant Projects
You can add akubela panels and door phones when creating or editing your single-tenant projects.
Add akubela Panels
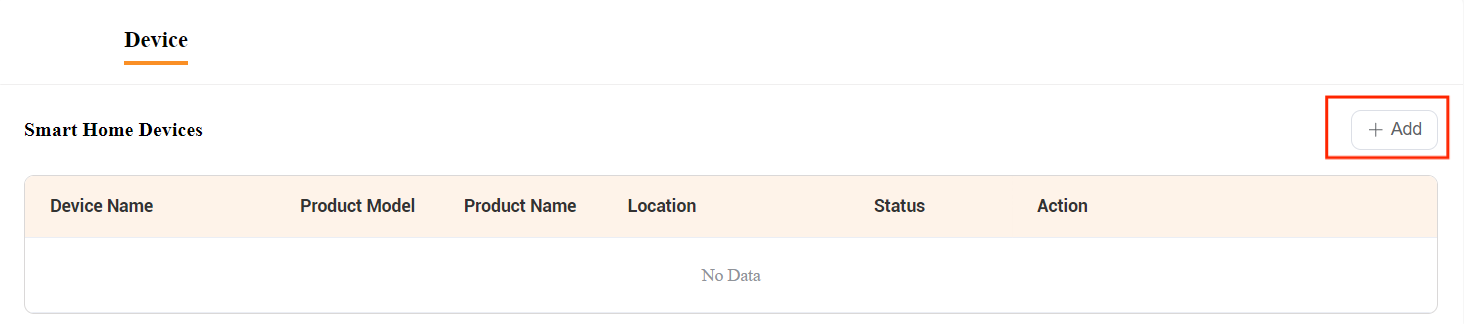
Go to Projects > Single-tenant > Detail > Layout, then click Device > Smart Home Devices > Add.
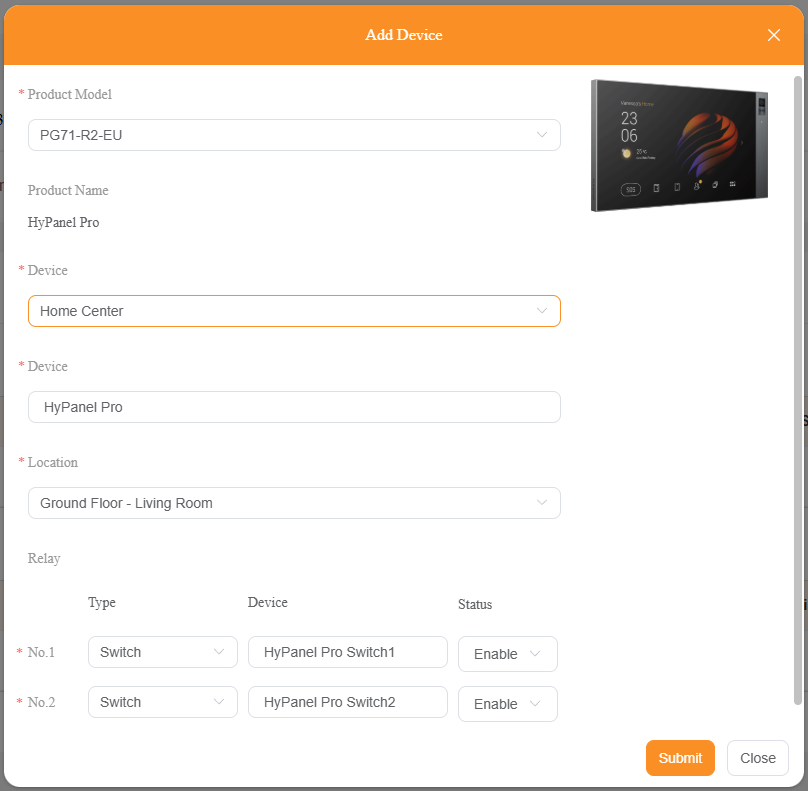
Configure the device as follows:
Configuration | Description |
Product Model | Must match the panel’s actual flush-mounted module, or it won’t connect to the cloud. |
Product Name | Populated automatically. |
Device | - Home Center: Only one per home. Central hub for all automation. - Sub-Gateway: Supports ZigBee devices (except CT61-PoE). |
Device | Enter a device name. |
Location | Specify where the device is installed. |
Relay | Select if applicable (not all models support this). |
Add Door Phones
Go to MAC Library > New to add door phone MAC addresses.
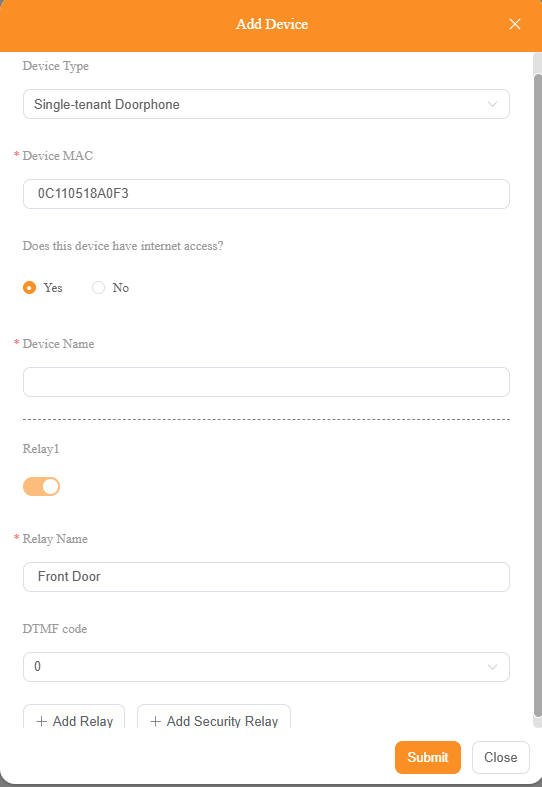
Go to Projects > Single-tenant > Detail > Layout > Doorphone, then click Add.

Configuration | Description |
Device Type | Choose single-tenant or multi-tenant. |
Device MAC | Must exist in the SmartPlus Cloud MAC library. |
Does this device have Internet access | If connected to LAN, enter IP address. |
Device Name | Enter a device name. |
Relay Toggle | Enable/disable relay control. |
Relay Name | Name the relay controlled by the door phone. |
DTMF Code | Set a DTMF code for door unlocking. |
Add Relay/Security Relay | Add additional relays if needed. |
Add Cameras
Go to Projects > Community/Single-tenant > Detail > Layout, then click Device > Camera > Add.
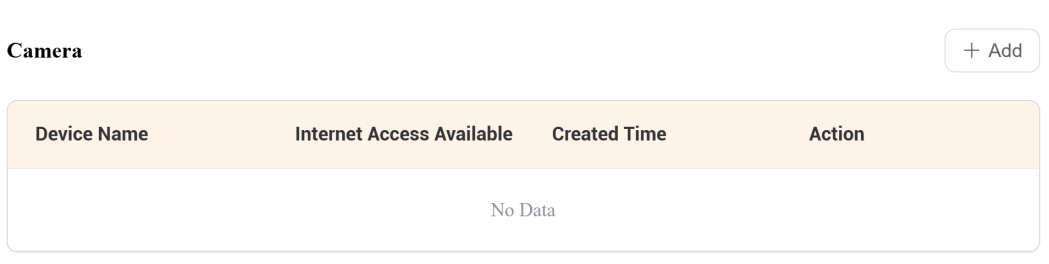
Configure the camera:
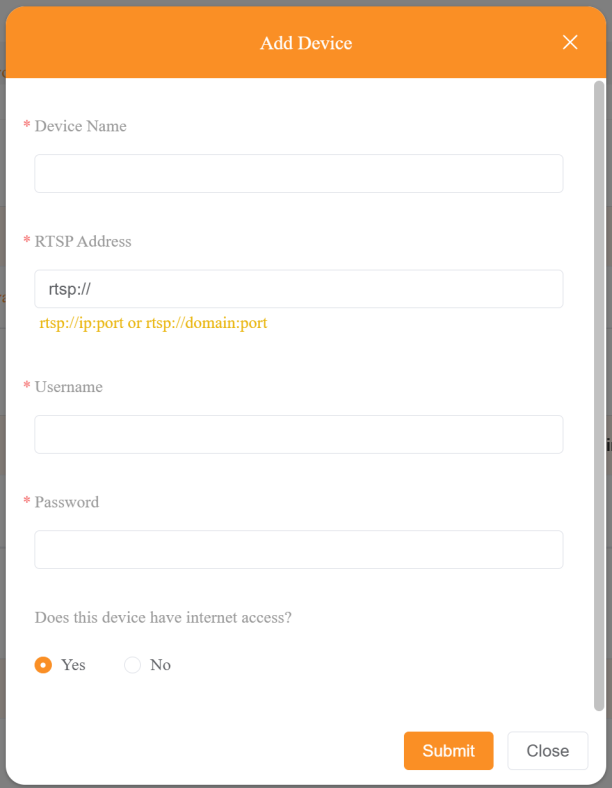
Configuration | Description | Remark |
Device Name | Name the camera. | |
RTSP Address | Enter the RTSP URL for the live video stream. | Follow the formats under the input field. |
Username | Enter the camera’s username. | |
Password | Enter the camera’s password. | |
Does this device have internet access | Select whether the camera is connected to the internet.
| When the camera does not have internet access, it must be on the same LAN as the home center. |
Replace Devices
NOTE:
If you have not backed up the data, replacing a device will erase all data stored on it.
TIP:
For detailed instructions on replacing devices,
Replace akubela Panels
If the panel is not yet installed:
Delete the old device from Project > Single-tenant > Detail > Layout> Device, and add the new one.
If installed but in Local Mode: Not supported.
If installed and connected to akubela Cloud:
Replacing home center device
NOTE:
The new device must be brand-new or factory reset and removed from the cloud.
For the same product model:
Disconnect and power off the old panel; Ensure it’s offline.
Enter the existing installation code on the new device.
Remove the old MAC from the your MAC library.
For a different (or same) product model:
Disconnect and power off the old panel; Ensure it’s offline.
Go to Project > Single-tenant > Detail > Layout > Device > Smart Home Devices > Replace, and enter the new device’s MAC.
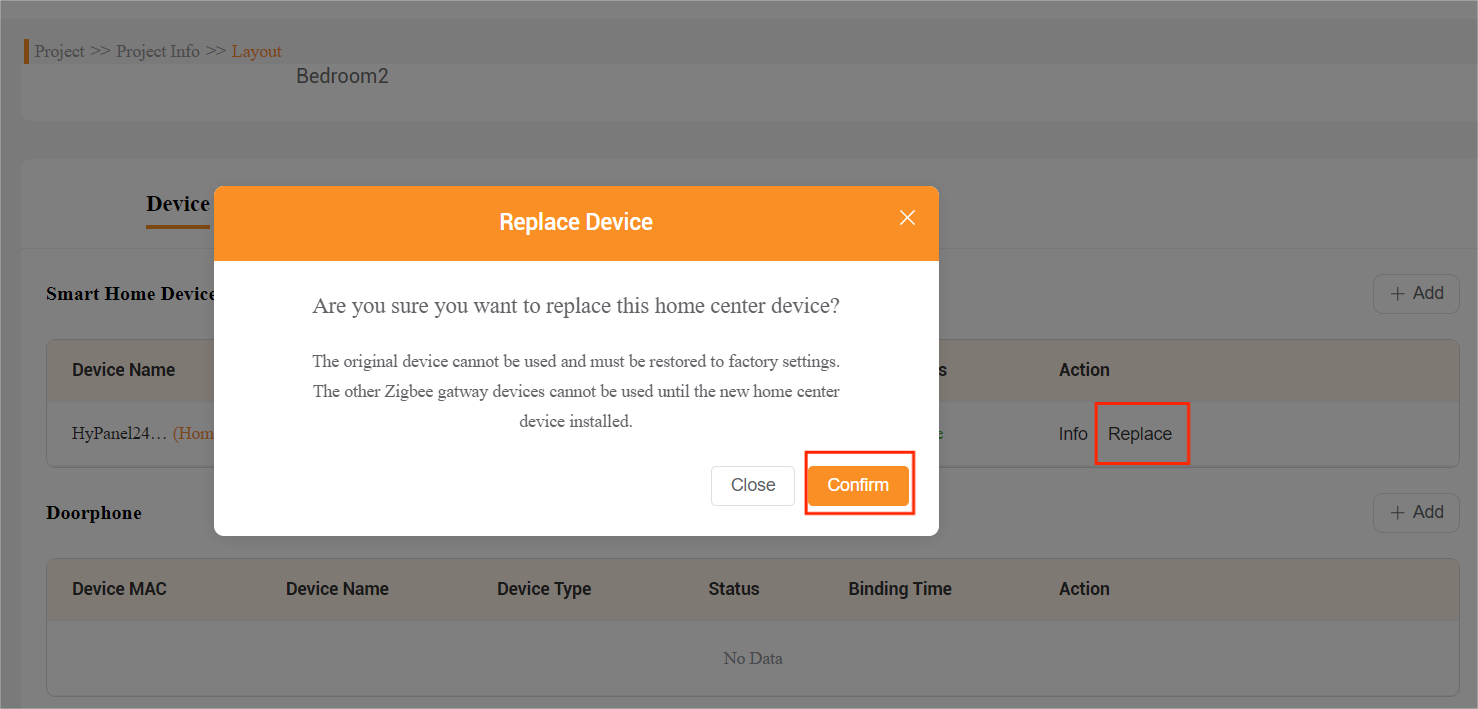
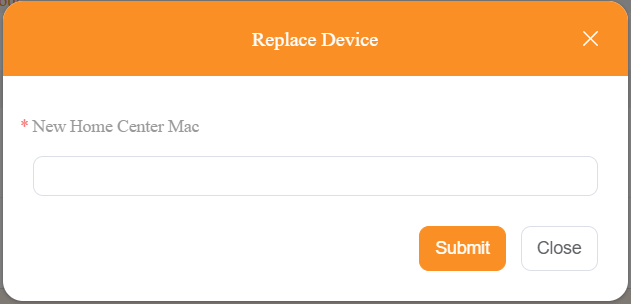
Connect the new home center to the Internet, and complete initial setup in Local Mode.
Remove the old MAC from your MAC library.
Replacing a gateway device
Enter the existing installation code on the new (same-model) device.
Remove the old MAC from your MAC library.
Replace Door Phones
On the SmartPlus Cloud, add the new door phone’s MAC address to your MAC library, and remove the old one’s.
On the akubela Cloud, go to Project > Single-tenant > Detail > Layout > Device > Doorphones, and click Edit.
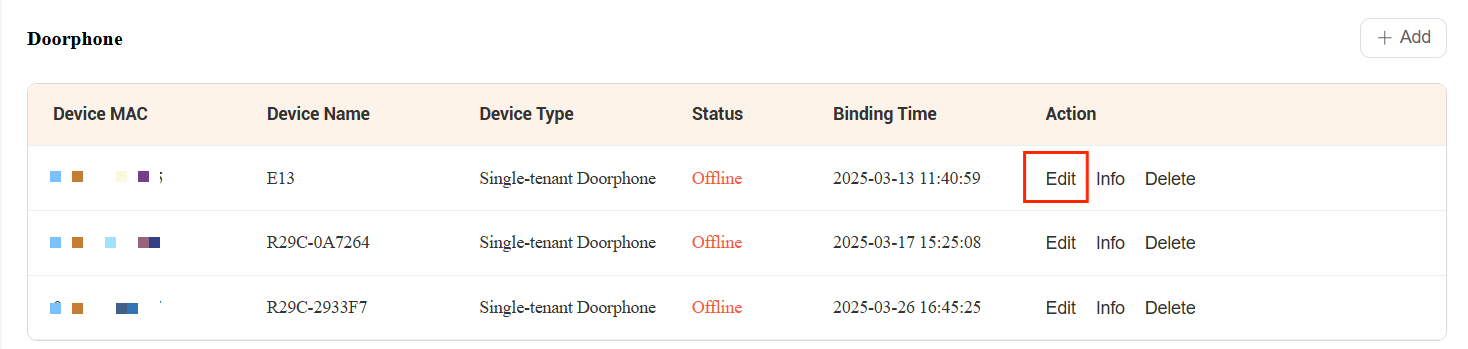
Modify the MAC and other settings.
Replace Cameras
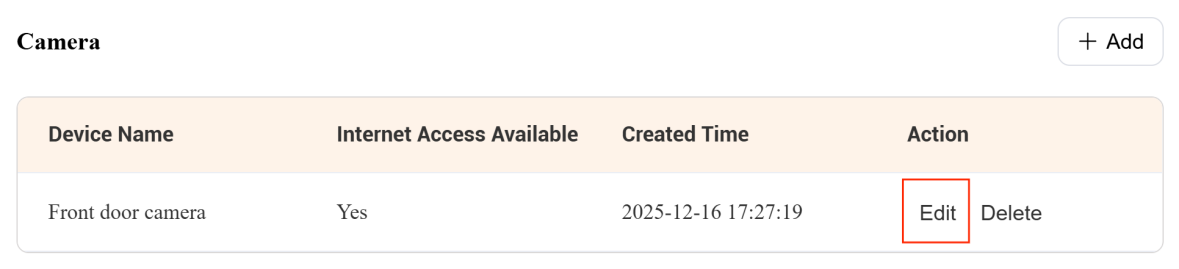
Go to Project > Single-tenant > Detail > Layout > Camera > Edit, and change the settings.
Delete Devices
Delete akubela Panels
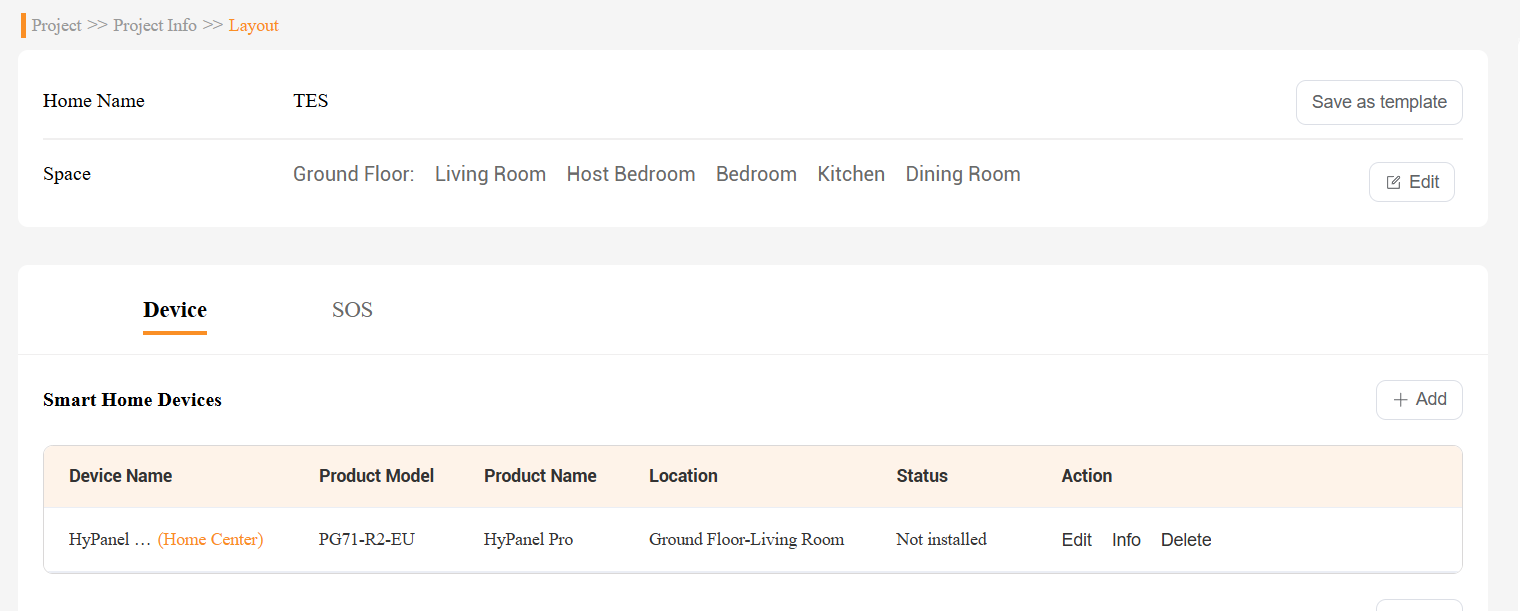
If panels are not installed
Go to Project > Single-tenant > Detail > Layout > Device, and click Delete.
If installed but in Local Mode
Home center: Cannot be deleted.
Gateways: Via BelaHome app, the device portal, or the user portal.
If installed and connected to akubela Cloud
Home center: Cannot be deleted.
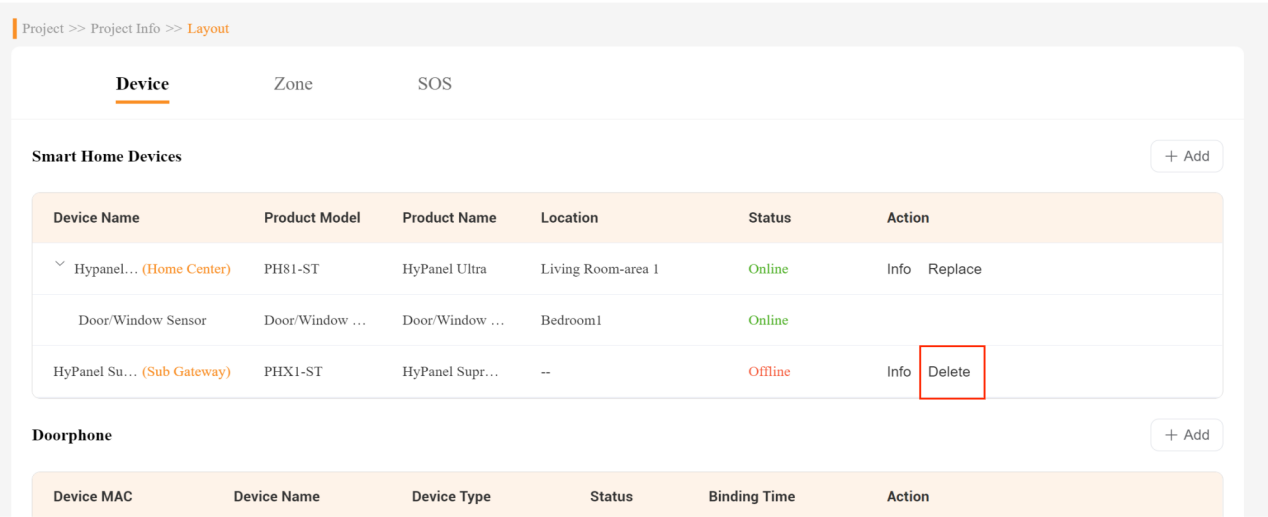
Gateways:
Go to Project > Single-tenant > Detail > Layout> Device, find the desired gateway device, and click Delete.
Remove its MAC from your MAC library.
Delete Door Phones

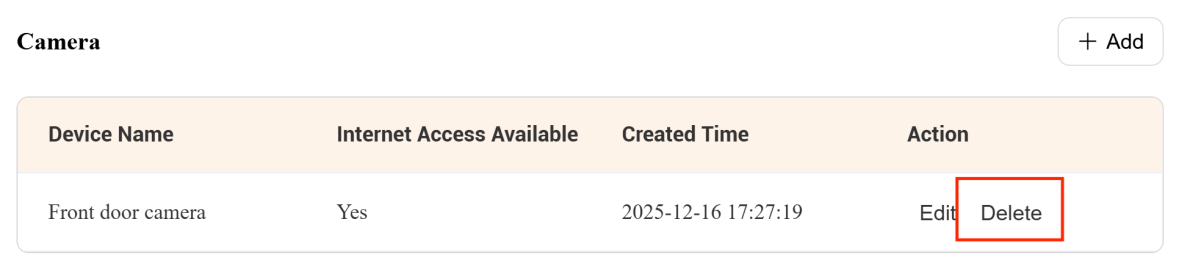
Delete Cameras
Go to Project > Single-tenant > Detail > Layout > Camera > Delete.
Obtain Installation Codes
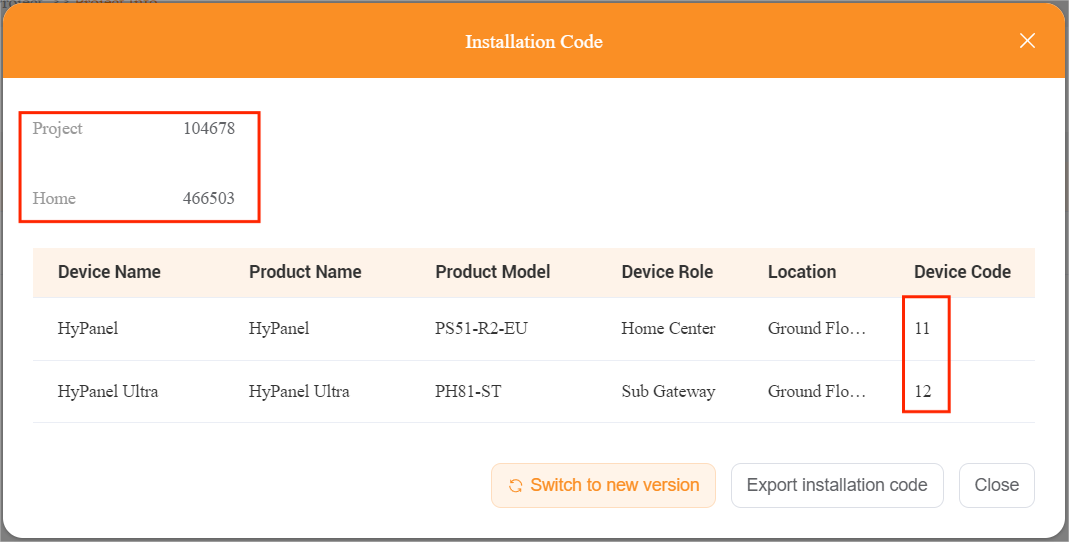
If you plan to connect akubela panels to the cloud during initial setup using Cloud Installation mode, you’ll need each panel’s unique installation code.
NOTE:
Installation codes are available only after a home center device is added to the home layout. If the layout contains only sub-devices, installation codes will not be shown.
Community Projects
You can view and export installation codes for individual homes within a community project.
To obtain installation codes for a specific home:
Go to Project > Community> Detail > Install.
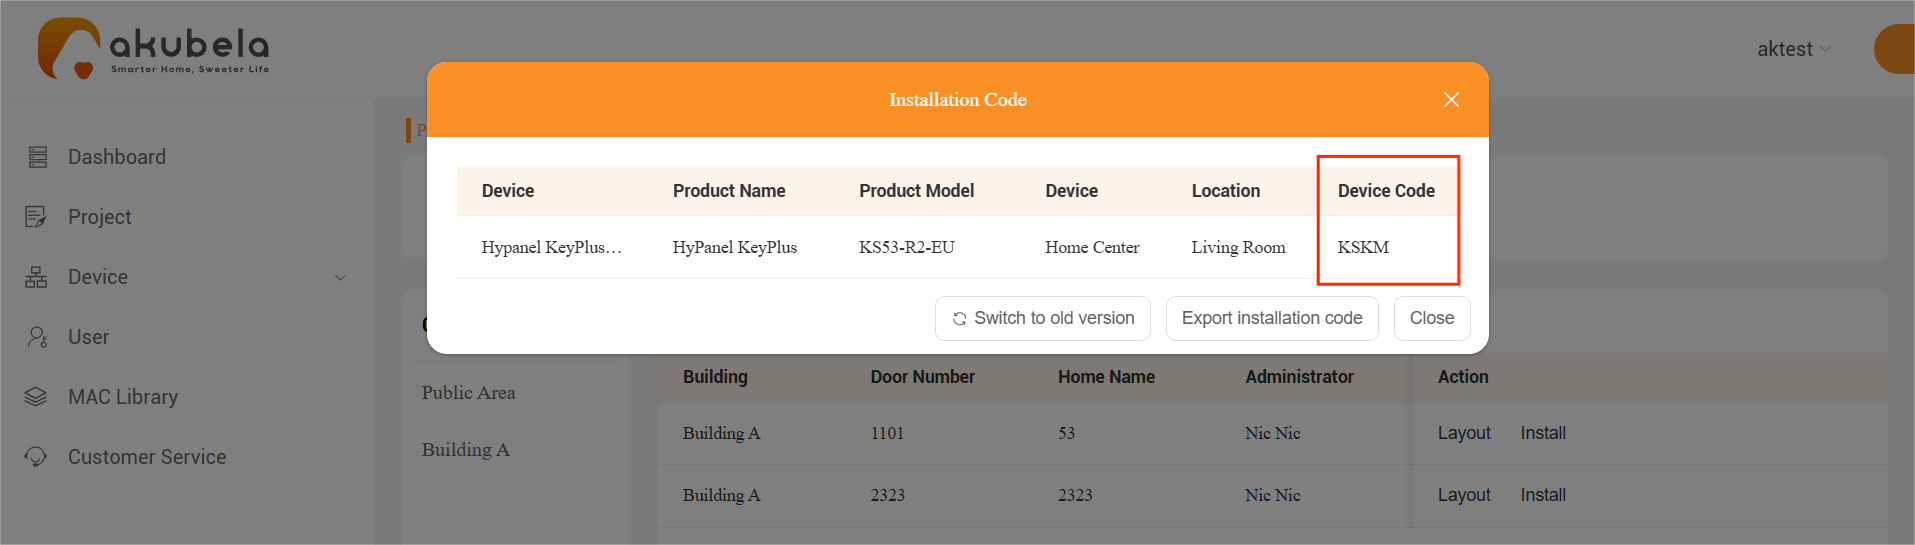
You can also:
Click
 to revert to the previous codes compatible with older firmware versions.
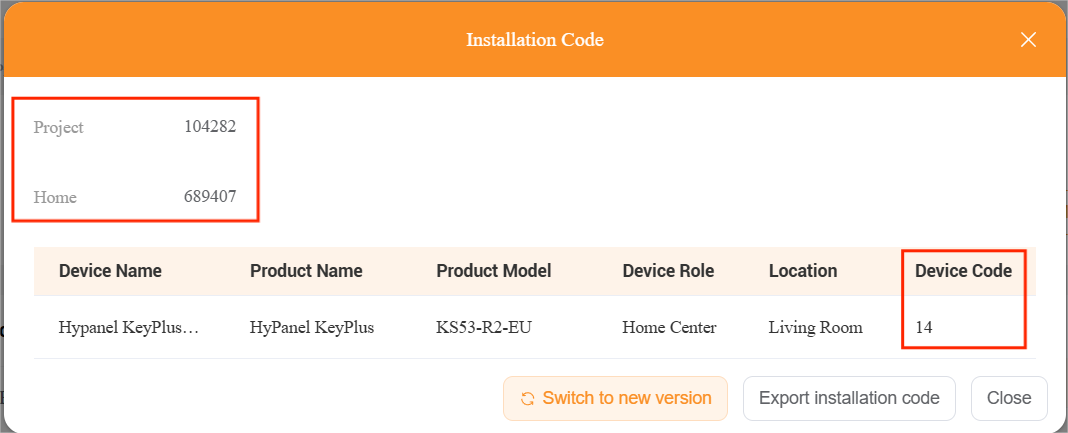
Click
 to download an EXCEL file containing this home’s installation codes.

Single-Tenant Projects
To obtain the installation code:
Go to Project > Single-tenant > Detail > Install.
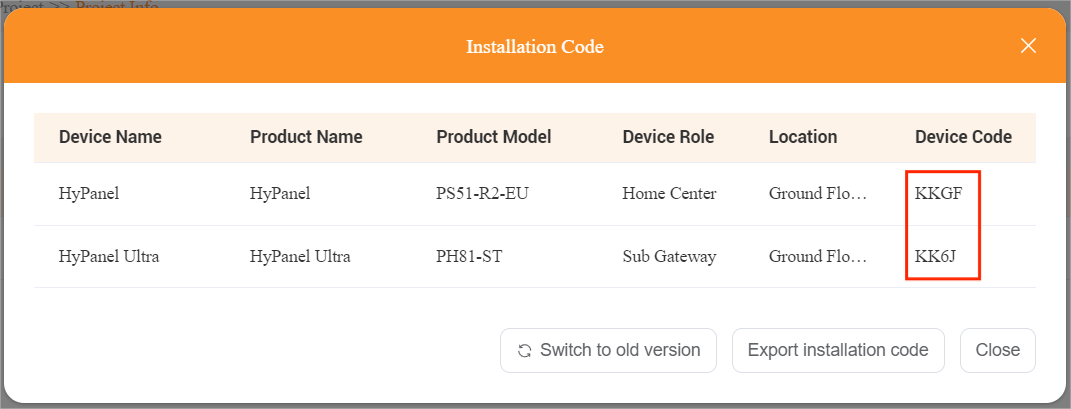
You can also:
Click
 to download an EXCEL file containing installation codes.

Click
 to revert to the previous codes compatible with older firmware versions.
Batch Configure Devices via AutoP
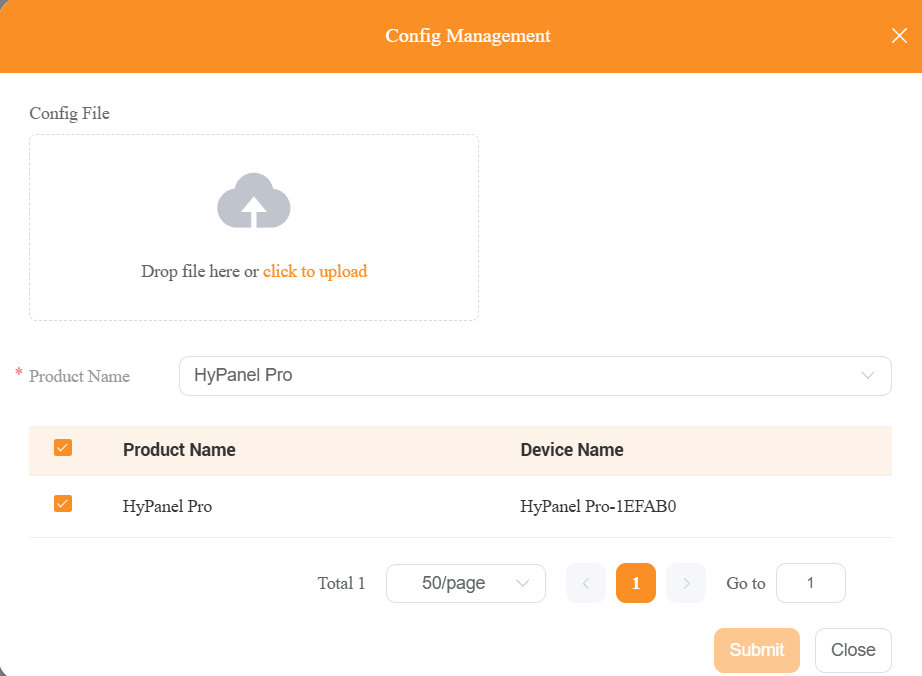
Auto-Provisioning(AutoP) allows you to remotely apply batch configuration settings to cloud-connected devices within projects you have created. This is useful for unified adjustments such as enabling Do Not Disturb (DND) mode or hiding relay configuration options.
TIP:
To use this feature, please contact the akubela technical support team to obtain the appropriate configuration file.
Go to the Detail interface of the desired project, and click Config.

Upload the config. file provided by the akubela tech support.
Choose the devices to which the configuration should be applied.
View Device List
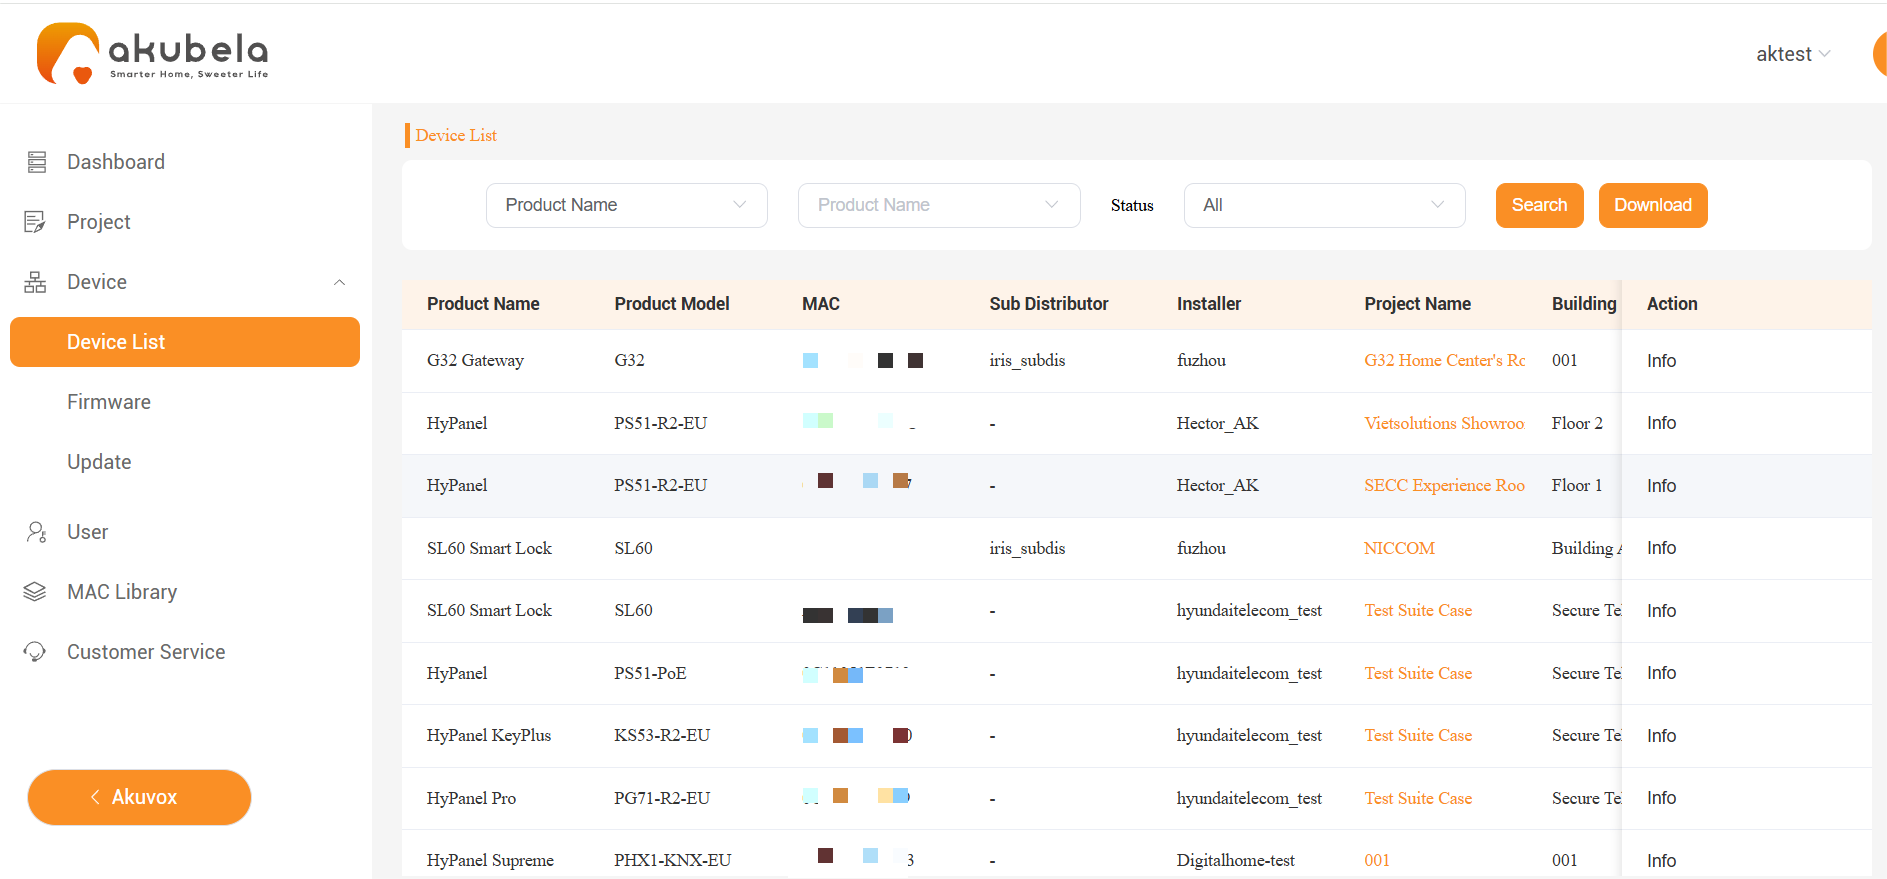
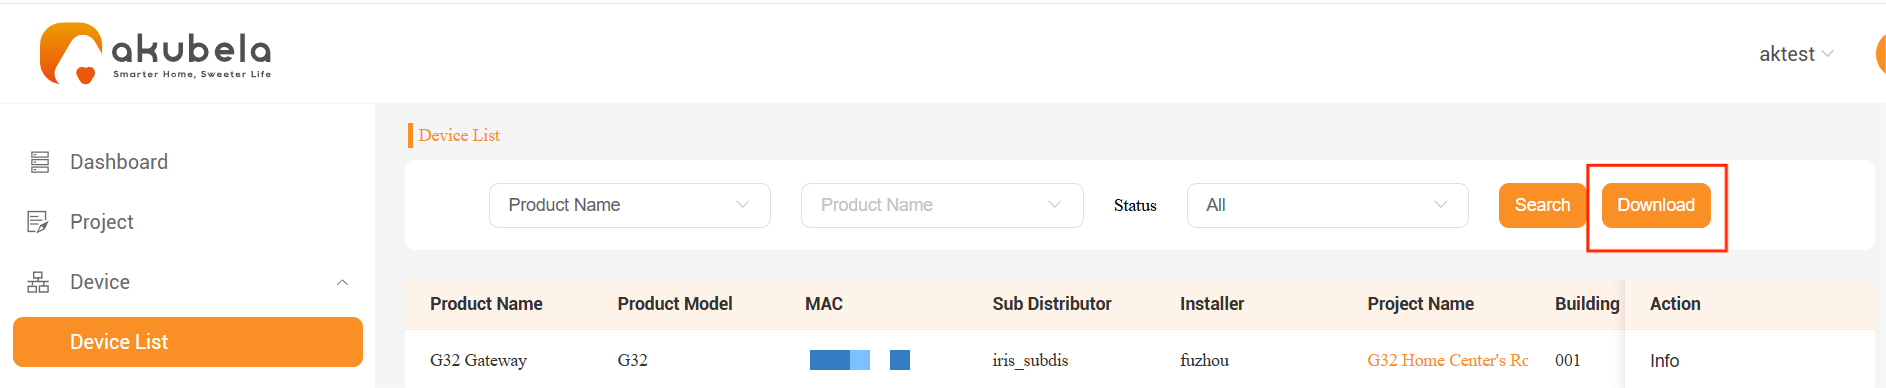
Go to Devices > Device List to view all akubela devices under your and your installers’ accounts.
You can use filters to locate specific devices.
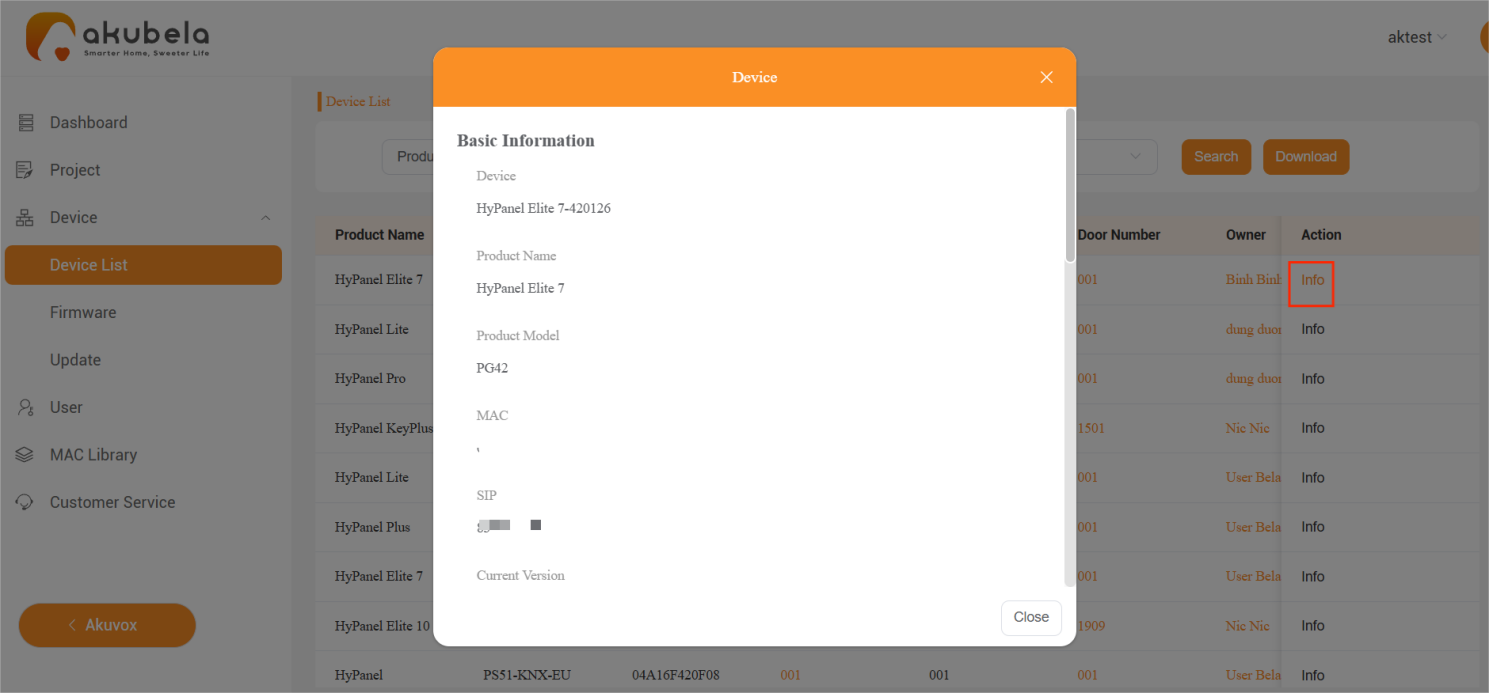
To see a device’s details including MAC address, SIP number, firmware version, belonged project, network information, and more, click Info.
Download Device List
You can download a customized list of devices:
Go to Device > Device List, then click Download.
Select the information you want.
Choose to download only the current page or the entire list.