Solution Overview
1. Background
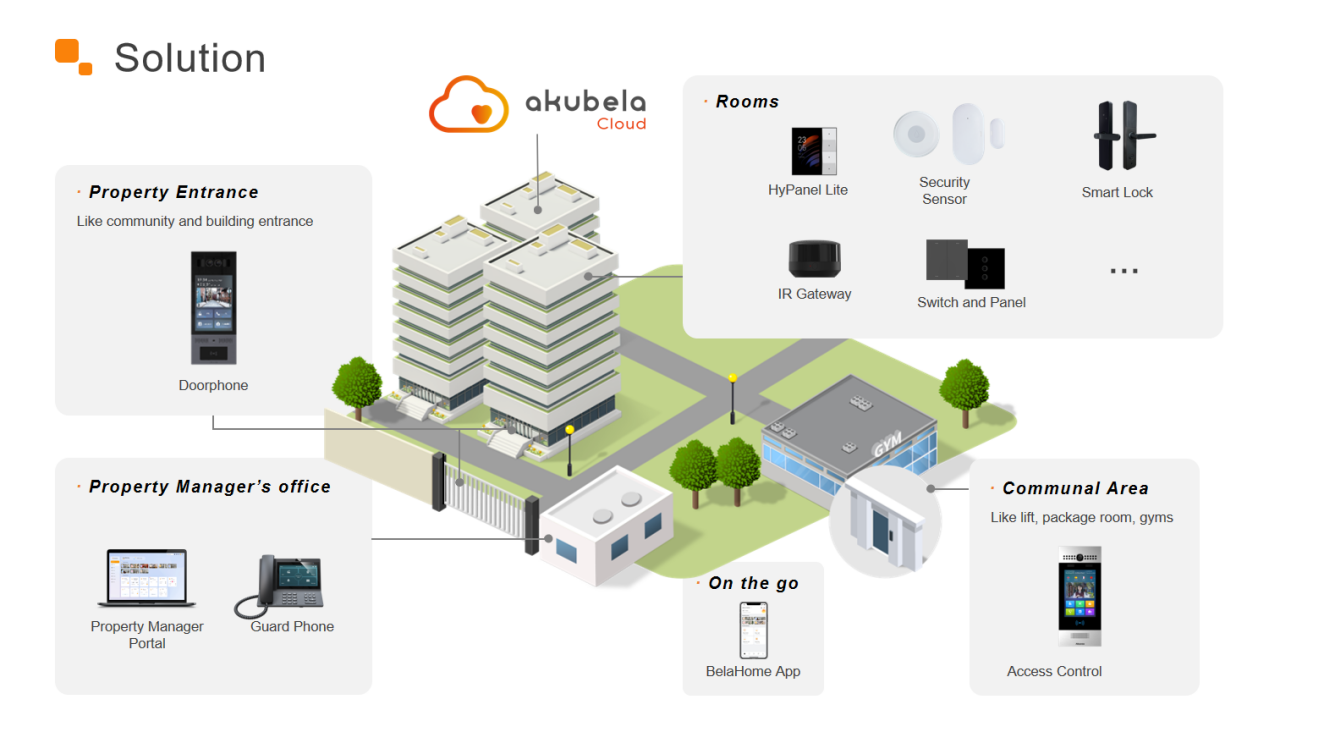
This solution is ideal for cost-sensitive, small-apartment community projects with basic smart home requirements. By combining an affordable control panel with a few Zigbee sub-devices and door phones, it provides a compact and efficient smart home and intercom system, enhancing the overall value of the property.
2. System Topology
Community Device Topology
Home Device Topology
Network Topology

3. Features
Feature | KS41 Home Center Solution |
Security | Not supported |
Energy | Not supported |
SOS | Not supported |
User Web Portal | Not supported |
Infrared Control | Supported (requires cloud connection) |
Third-Party Integration | IKEA Curtain & Yale Lock only |
BelaHome App | Supported (requires cloud connection) |
Intercom | Supported |
Zigbee Devices | See Supported List |
Local-to-Cloud Transfer | Supported |
NOTE:
When HyPanel Lite (KS41) is used as the home center, only KS41 or G31 devices can serve as sub-gateways; other models are not supported.
It is recommended to connect KS41 to the cloud when used as a home center. In local mode, the user web portal and app are unavailable, and the device functions only as a Zigbee gateway panel supporting LAN-based intercom calls. Due to these limitations, local mode is not advised.
4. Example Project
In a 200-unit apartment community (100 m², three-bedroom layouts), door phones are installed in public areas but without external internet access. A local-to-cloud transfer solution bridges them to the mobile app, enabling communication. Each unit features a HyPanel Lite (KS41) in the living room, paired with Zigbee switches and curtain panels for lightweight smart control. Residents can use the app for remote device management and door phone access.
Before Getting Started
Firmware Version Confirmation
This guide applies to HyPanel Lite running firmware 41.1.36.64 or later.
If door phones are included in the project, ensure they are also upgraded to the latest version.
Network Setup
Connect HyPanel Lite to a wired network or to 2.4 GHz Wi-Fi.
Installer Account
Prepare an akubela Cloud installer account. If you don’t have one, please contact your distributor.
Project Requirements Checklist
(1) Confirm the installation plan by completing a device layout table, for example:
Living Room | Kitchen | Bedroom | Entrance | ... | |
Control Panel | |||||
Switch | |||||
Light | |||||
Curtain | |||||
Thermostat | |||||
Sensor | |||||
Door Phone | |||||
... |
(2) List functional requirements in a table, for example:
Whole House | Living Room | Bedroom | Hallway | ... | |
Scene | |||||
... |
Wiring and Installation
Refer to here to complete the installation and wiring of the HyPanel Lite and its sub-devices.
Configuration
1. Project Configuration
1.1. Create a Community Project
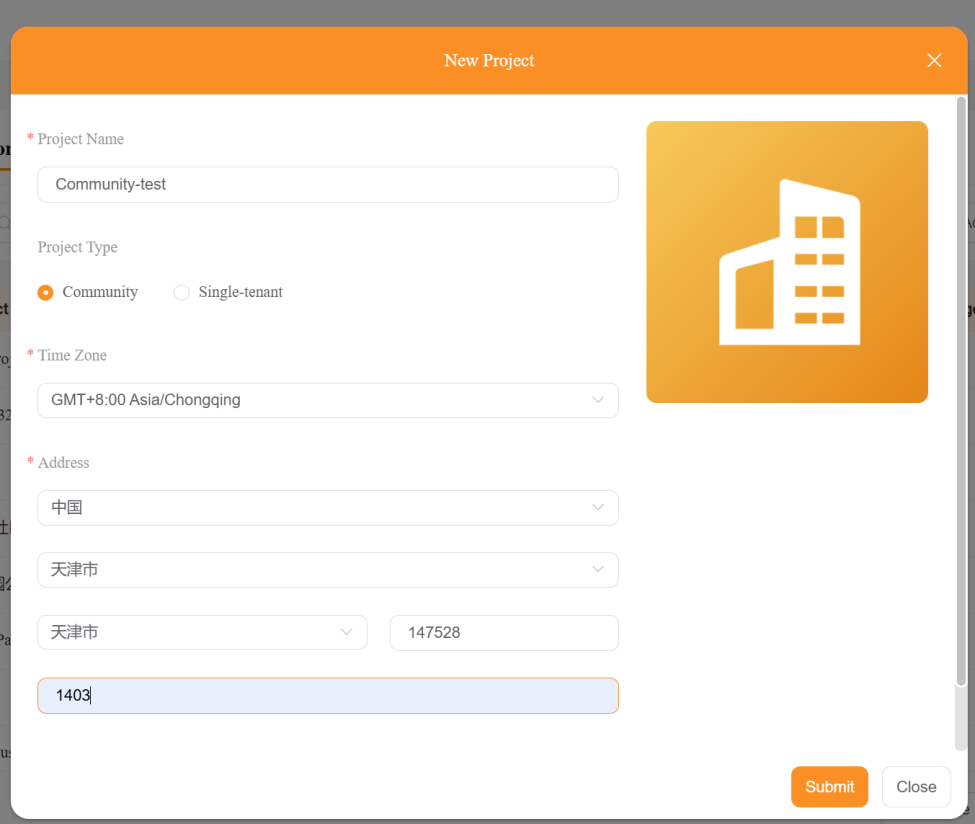
(1) Log in to the akubela Cloud using the installer account.
(2) Go to Project > Community > Add > New Project.
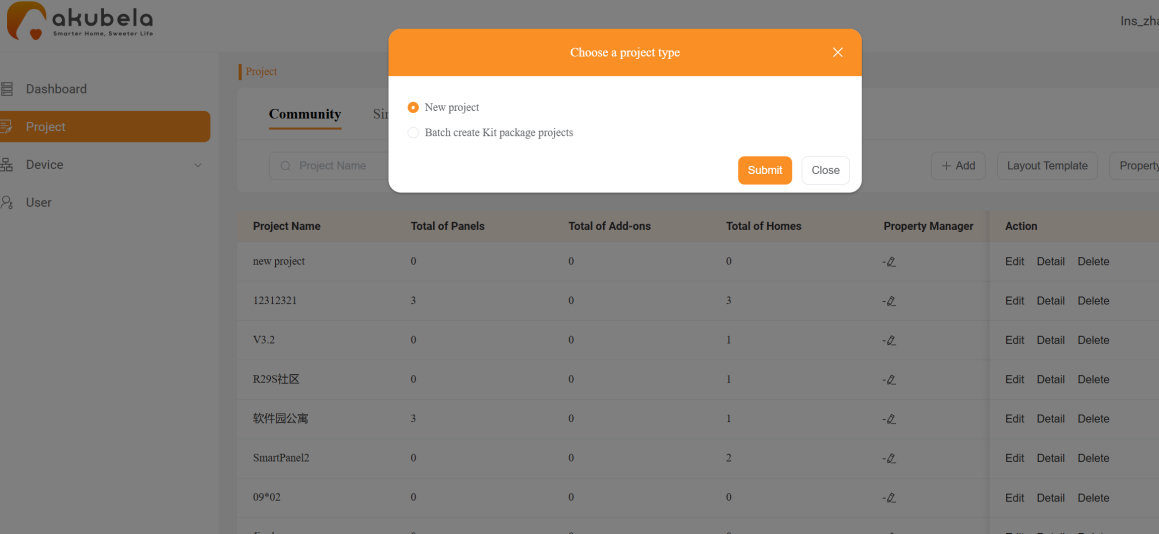
(3) Fill in project details.
NOTE:
Ensure the address and time zone are correct for accurate weather data.
(4) Click Submit. The new project will appear in the project list.
1.2. Setup Homes
When used as a home center, HyPanel Lite supports both installation code and local auto-discovery modes. The cloud configuration varies by the selected mode.
Using Installation Codes
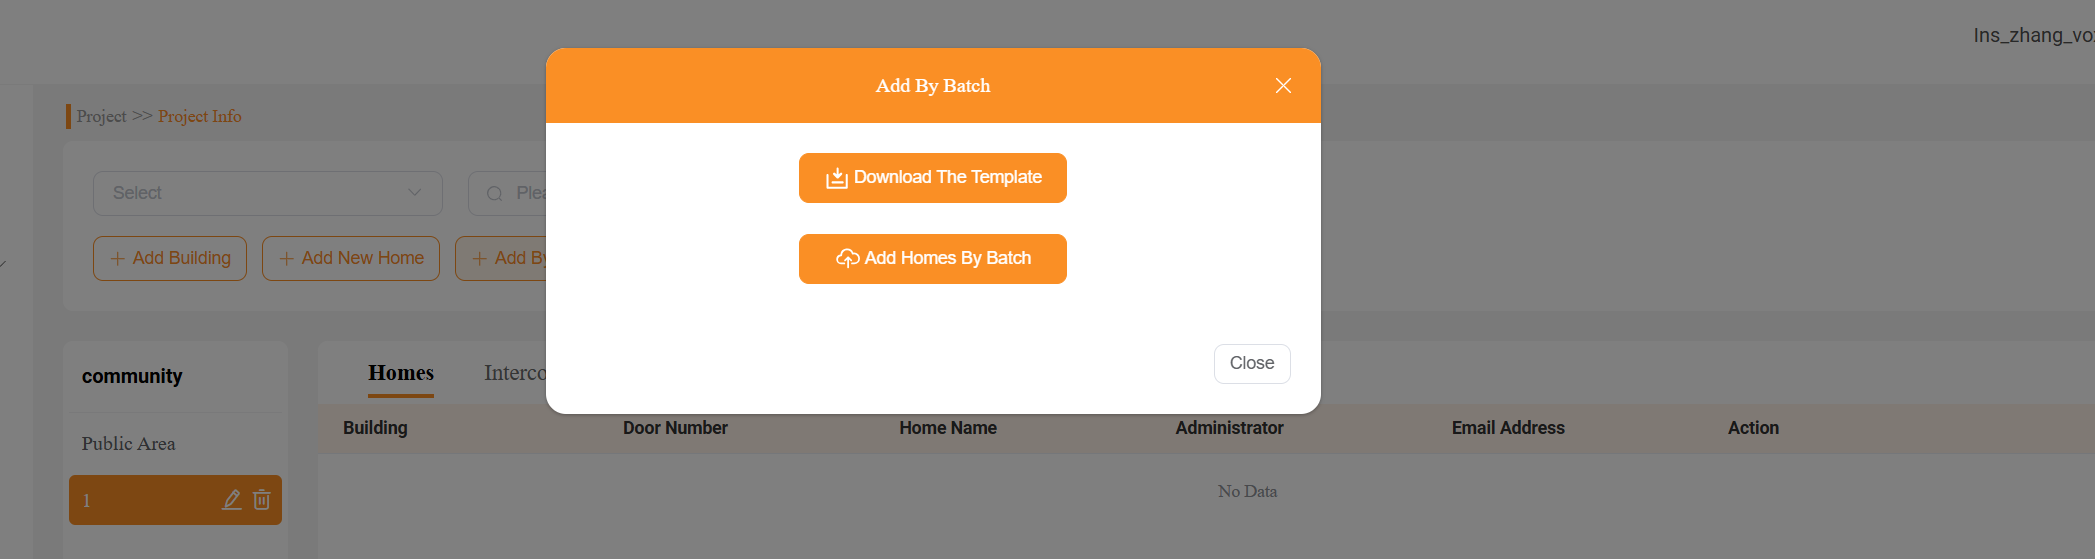
(1) Go to Project > Detail > Add Batch > Download The Template.

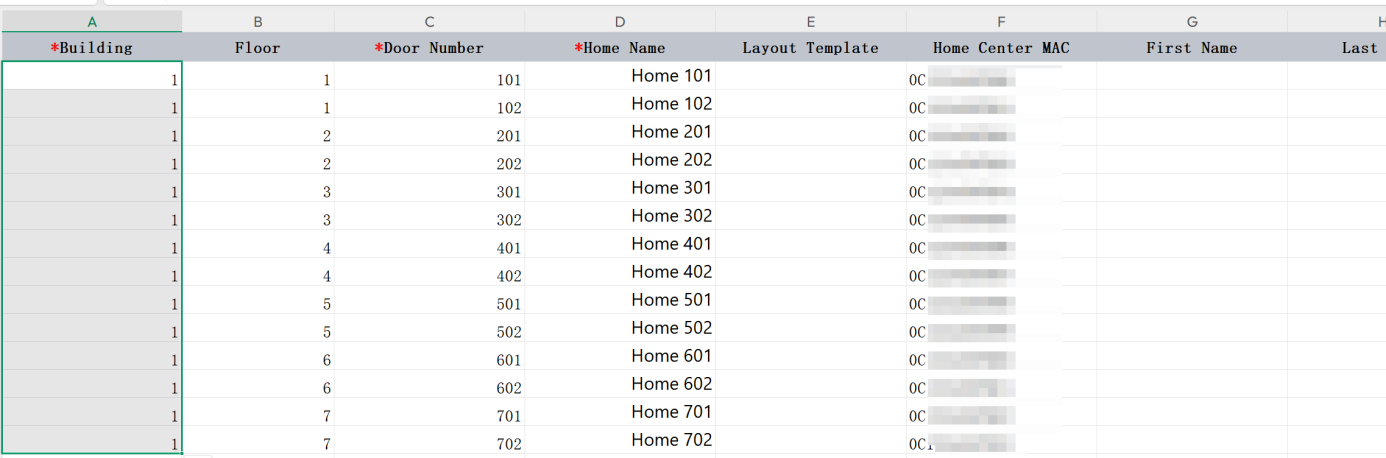
(2) Fill in building, floor, door number and home name.
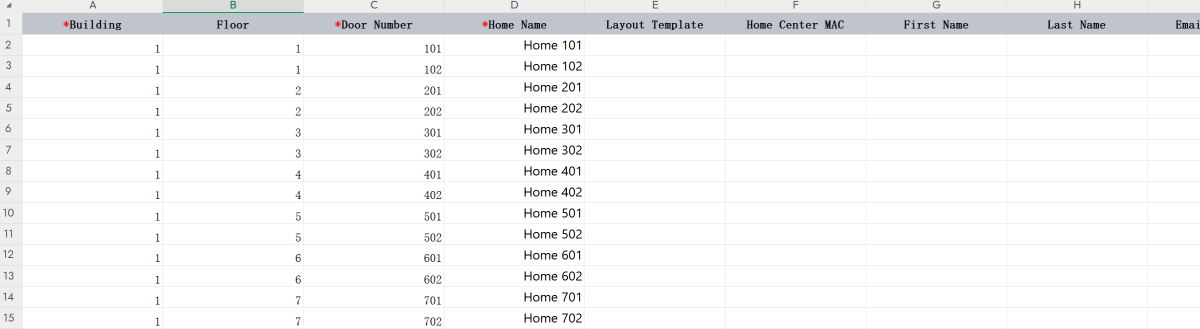
(3) Click Add By Batch > Add Home By Batch to generate the home list.
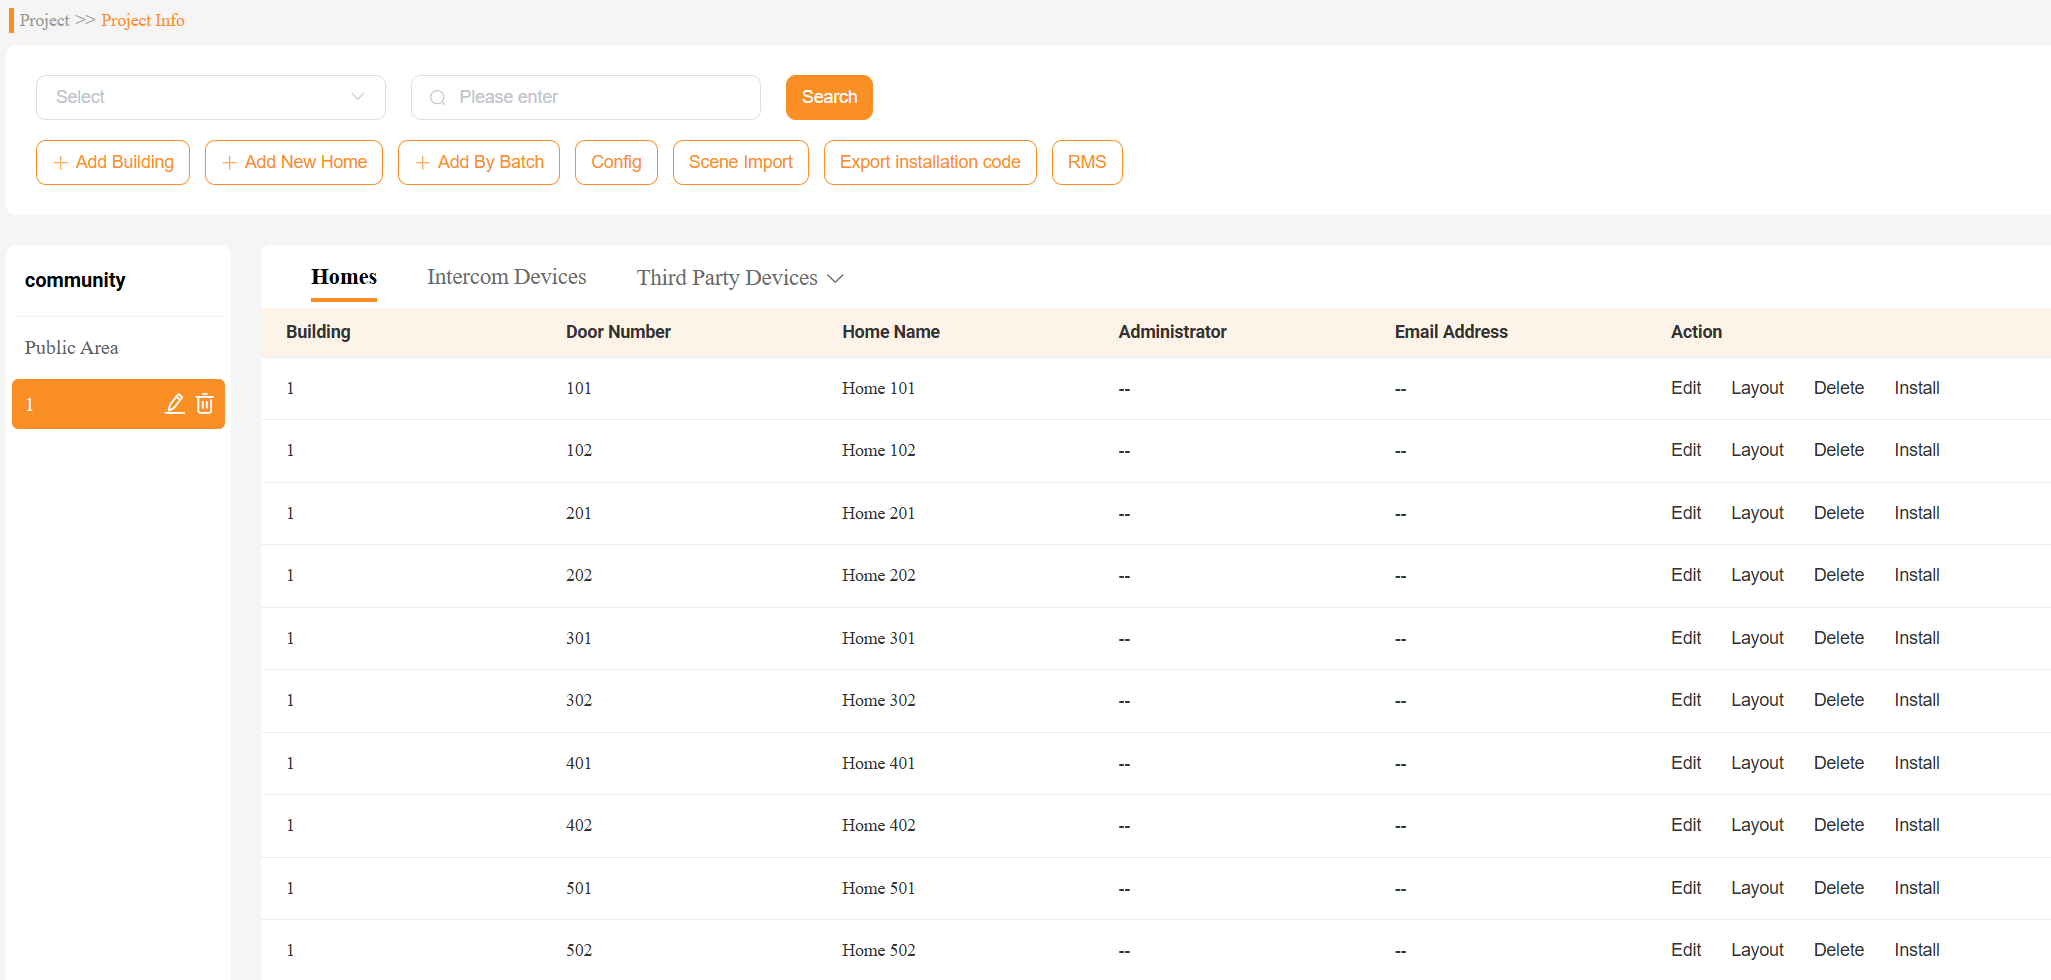
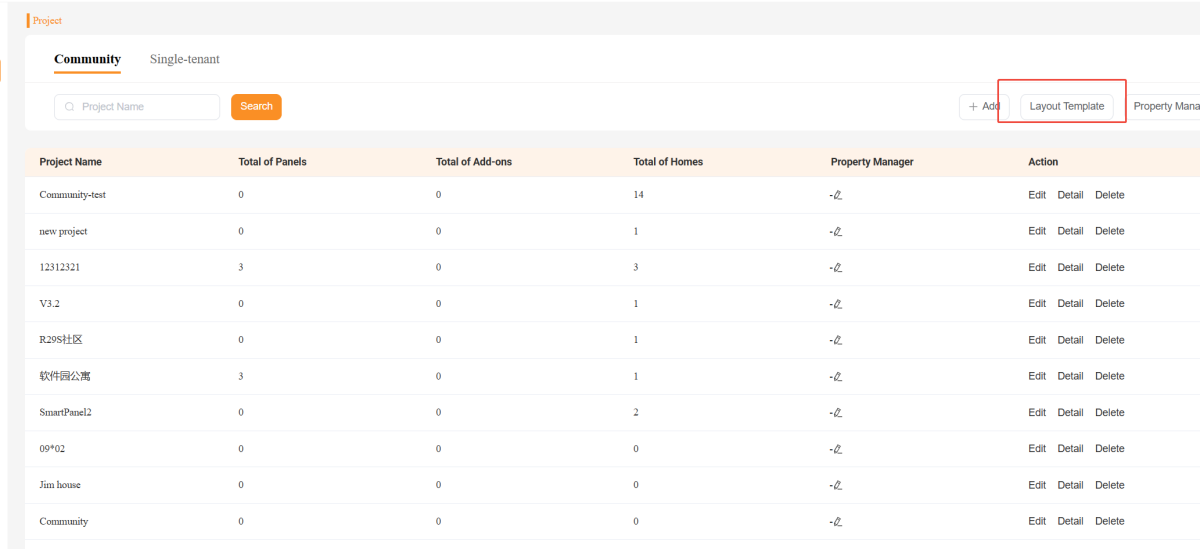
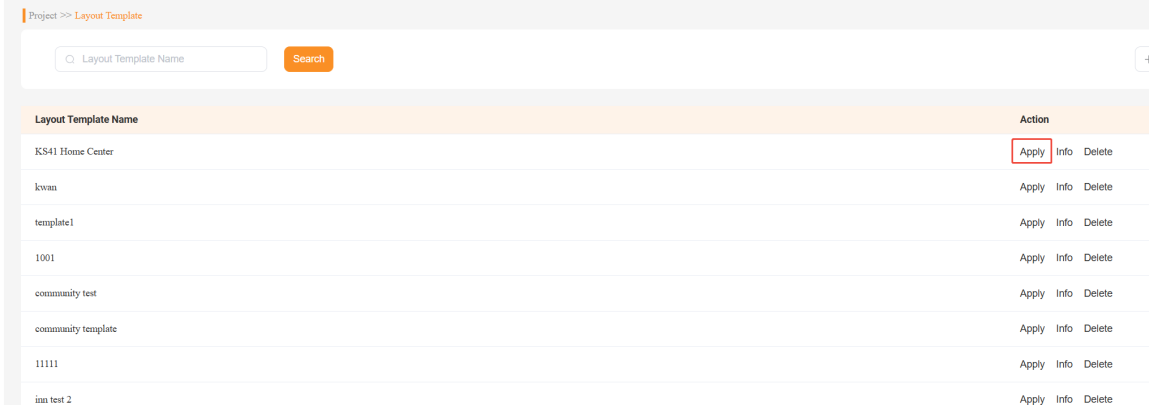
(4) Go to Project > Layout Template.
(5) Create a layout template with one HyPanel Lite installed in the living room and the other in the bedroom.
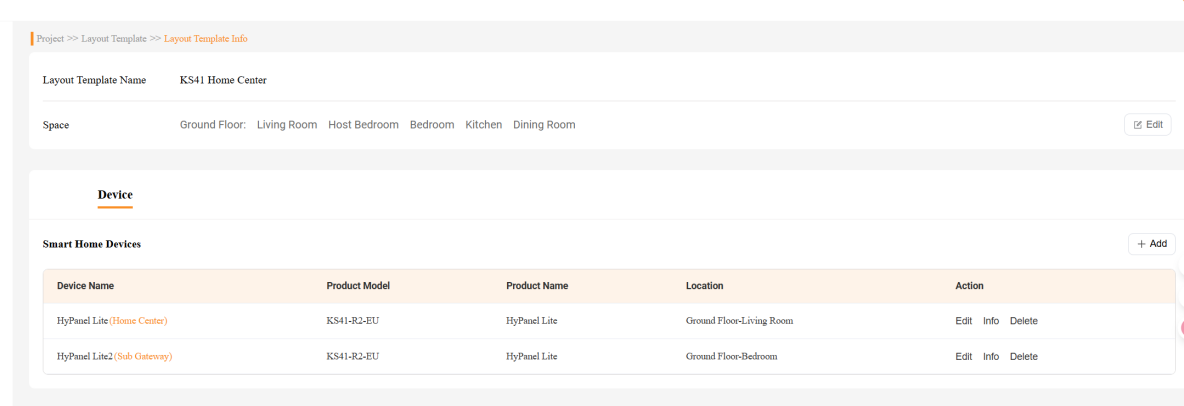
(6) Return to Project > Layout Template and apply the layout template to all homes.

(7) In Details interface, click Install to obtain the installation codes for each home.
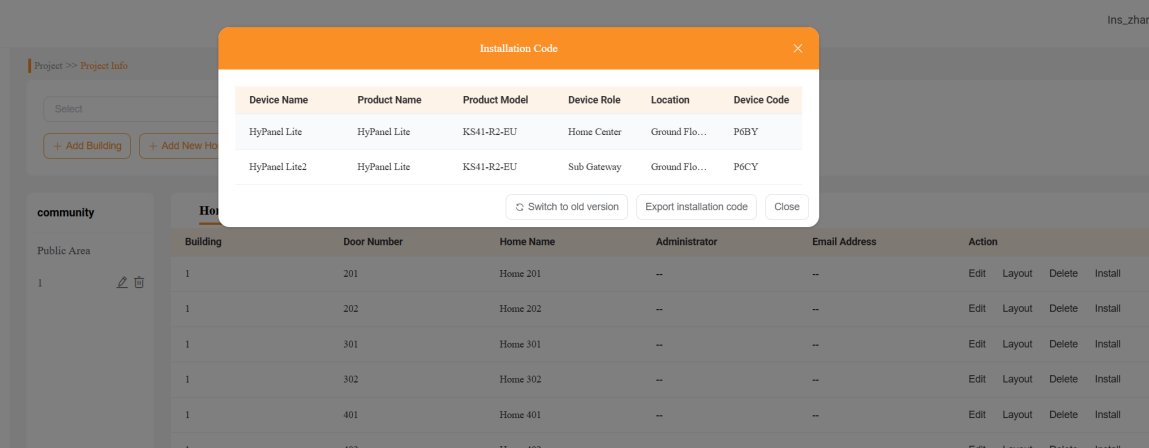
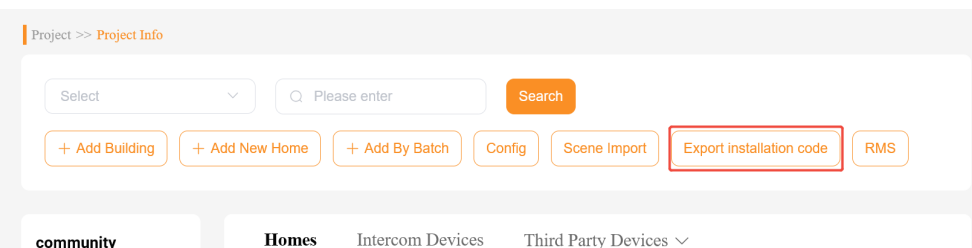
(8) Click Export Installation Code to export all homes’ installation codes.
In practice, use this file to enter the corresponding installation codes for each home in sequence.
Through Local Auto-Discovery
(1) Go to Project > Detail > Add by Batch > Download The Template.
(2) Fill in building, floor, door number, home name and home center MAC.
NOTE:
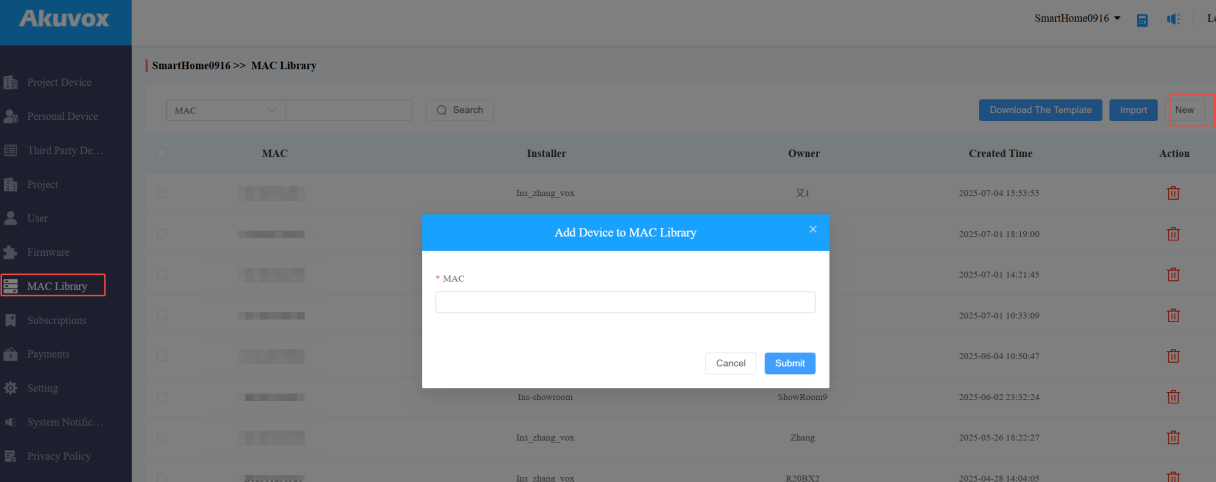
Enter the MAC address of the HyPanel Lite that acts as the home center in the Home Center MAC field.
(3) Click Add Batch > Add Home By Batch to generate the home list.

1.3. (Optional) Add Door Phones
(1) Ensure your distributor have registered the MAC address of public door phones under their MAC Library on Akuvox SmartPlus Platform.
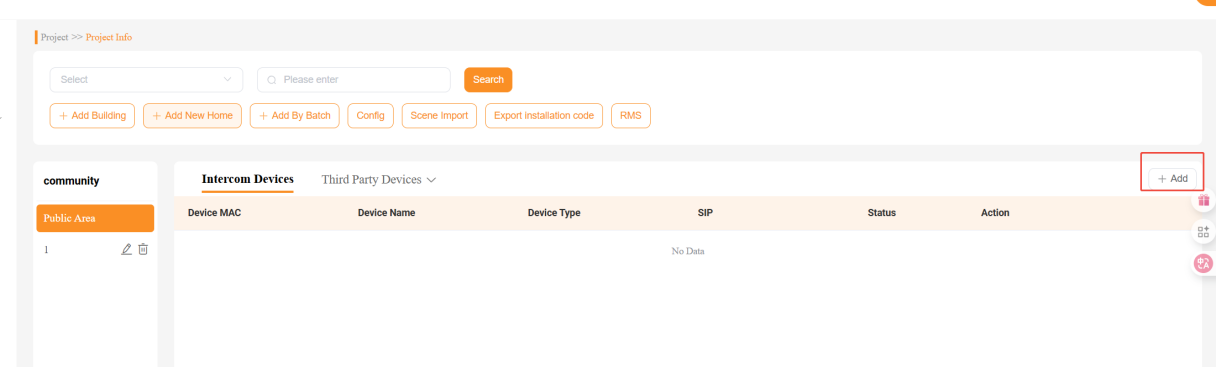
(2) Go to Project > Detail > Public Area > Add.
TIP:
Cloud setup varies depending on whether the door phone has Internet access or is LAN-only:
Door Phone with Internet
Enter the door phone information and select Yes for Does this device have internet access.
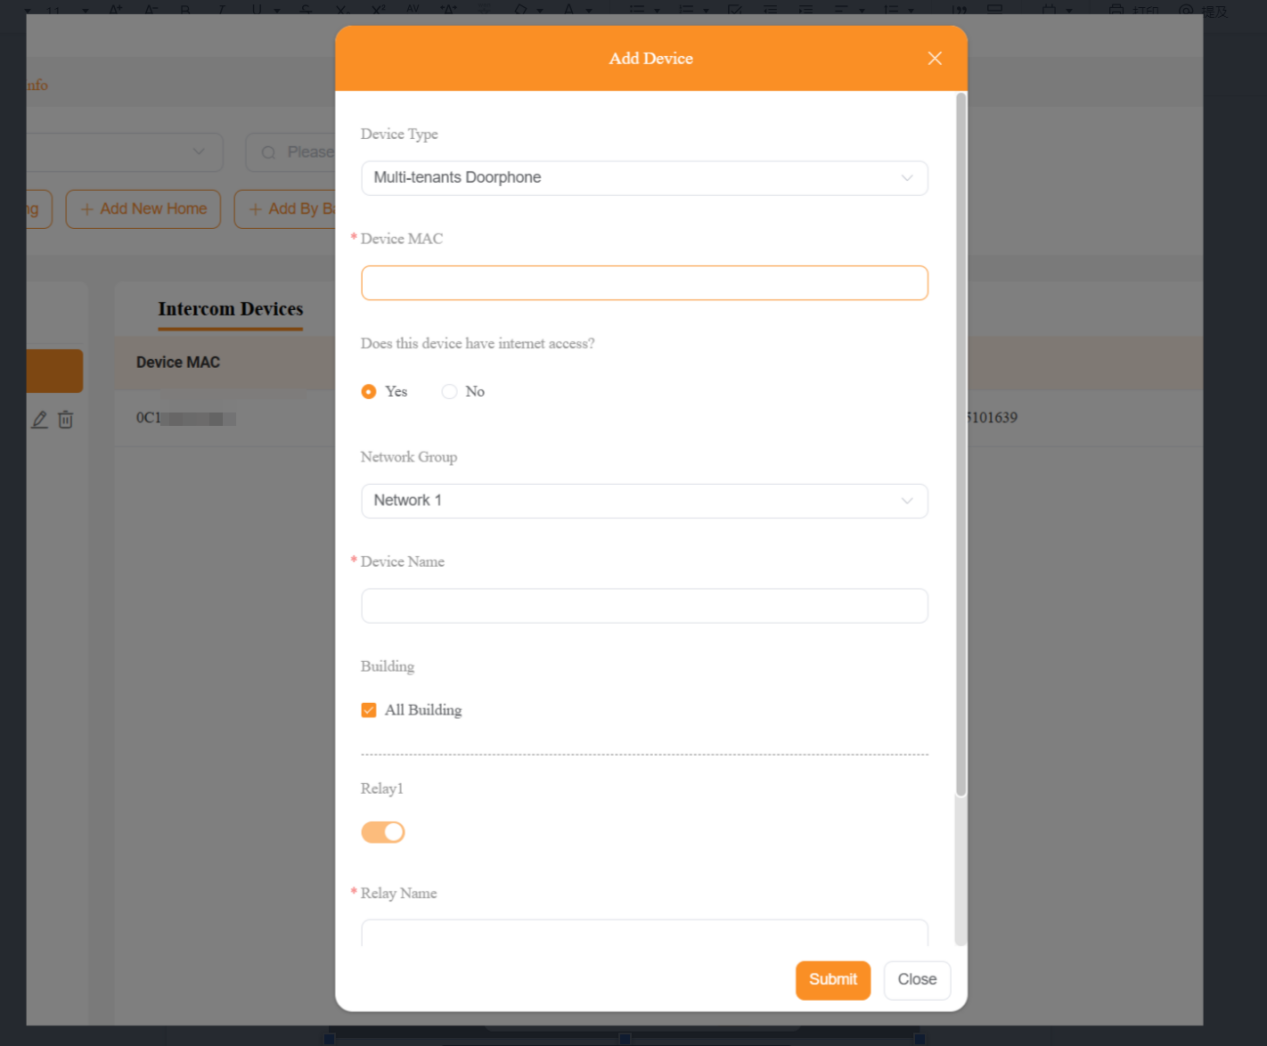
Door Phone without Internet
Relay through the home center cloud to BelaHome app.
A. Enter the door phone information, including its preset IP, select No for Does this device have internet access, and set the DTMF value to 0.
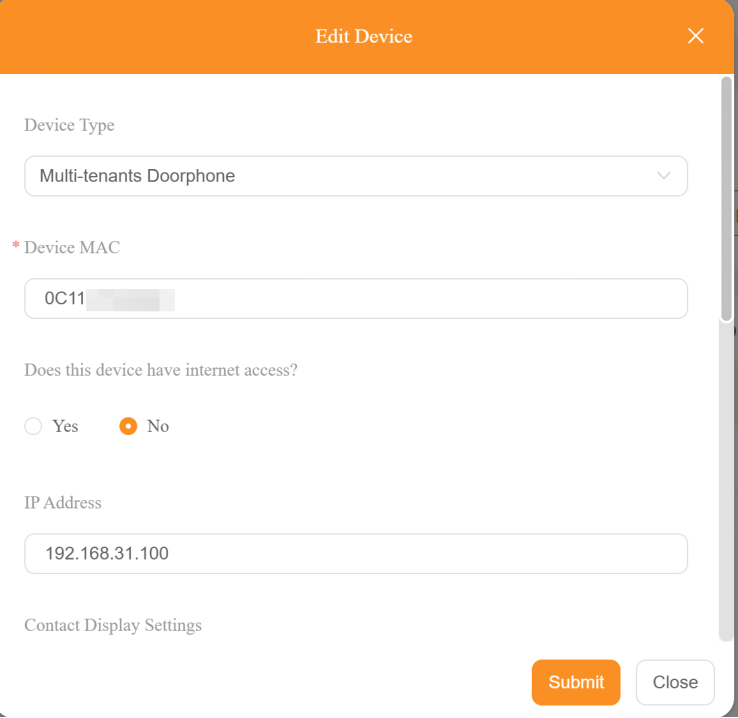

B. Follow this guide to complete the local-to-cloud data transfer settings.
NOTE:
It is recommended to complete cloud configuration before starting the initial setups of panels and door phones.
2. Device Initial Setup
When used as a home center, HyPanel Lite supports both installation code and local auto-discovery modes. The initial setup process varies by the selected mode.
2.1. Via Installation Codes
Recommended when internet is available and you want to batch retrieve cloud templates.
(1) Select a system language and connect to the network with Internet access.
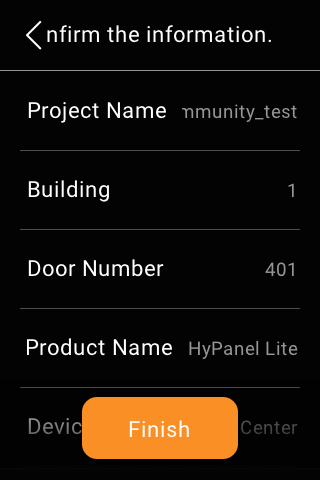
(2) Choose Installation Code, then input 4-digit code.
.png)
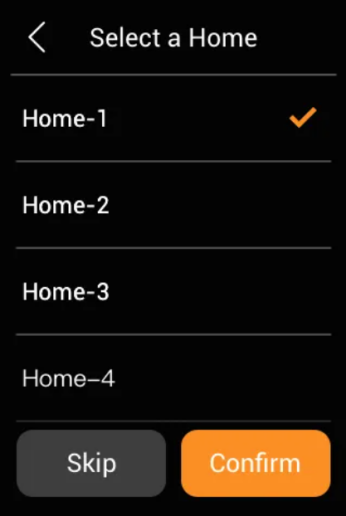
(3) Review and confirm the home details, then click Finish.
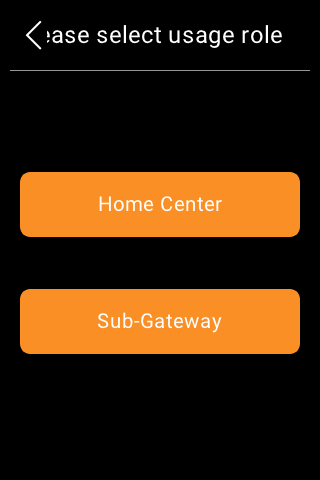
2.2. Via Local Auto-Discovery
Recommended when no internet is available and group devices within the same LAN automatically.
(1) Select a system language and connect to the network.
(2) Select Auto Discovery, and assign one HyPanel Lite as the home center, others as sub-gateways.
(3) Sub-gateways scan and join the home center within the same LAN.
(4) Set panel names and assign spaces.
NOTE:
After initial setup, devices may need time to connect to the cloud or require a manual reboot.
3. Function Configuration
3.1.1 Add Sub-Devices
3.1.1. Zigbee Devices
(1) Put Zigbee devices into pairing mode
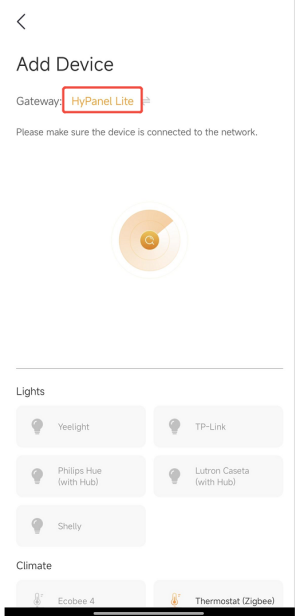
Verify the list of Zigbee devices supported when HyPanel Lite is used as a home center.
Follow this guide to put Zigbee devices into pairing mode.
(2) Add Zigbee devices
Via HyPanel Lite
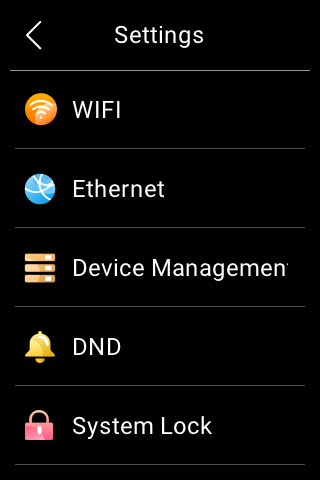
Go to Settings > Device Management. Once the device is detected, follow the onscreen prompts to assign its location and name.
.png)
Via BelaHome App
NOTE:
When HyPanel Lite acts as the home center, you must register a family administrator account and bind the family before using the BelaHome app.
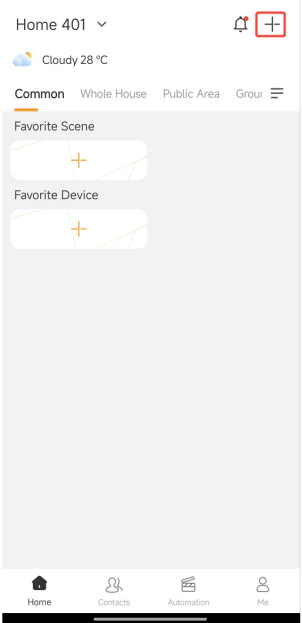
Tap +, select the gateway to the device to. Once the device is detected, follow the onscreen prompts to assign its location and name.
TIP:
We recommend using the BelaHome app to enter device names in non-English languages, as HyPanel Lite supports only English input.
3.1.2 Third-party Devices
When HyPanel Lite is used as the home center, only IKEA curtains and Yale locks can be added. See details at:
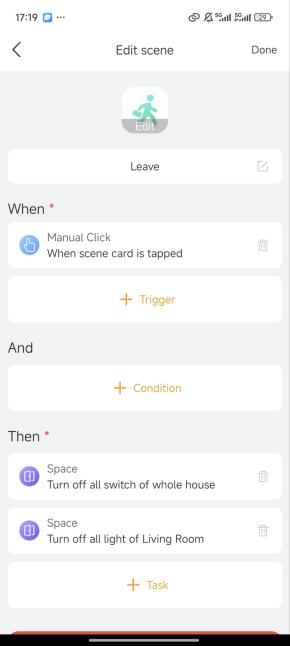
3.2. Create Scenes
NOTE:
When HyPanel Lite acts as the home center, you must register a family administrator account and bind the family before using the BelaHome app. The administrator role can later be transferred to other members.
Log in to the BelaHome App, go to Automation > +, and create scenes. For detailed instructions, see SScene Creationeation.
.png)
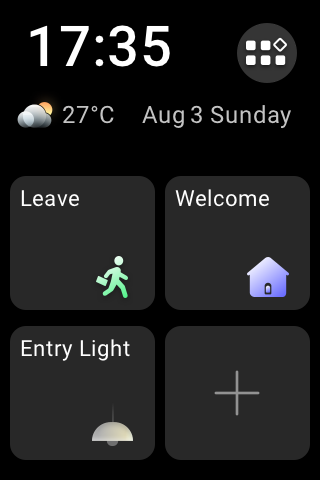
3.3. Home Screen and Button Configuration
Configure the home screen and buttons on each HyPanel Lite to quickly access frequently used devices and scenes.
3.3.1. Home Screen Settings
Tap ![]() in the home screen to assign a function to the buttons.
in the home screen to assign a function to the buttons.
Example:
Configure the HyPanel Lite in the hallway to control the entrance lights, and the Leave and Welcome scenes, as shown below.
NOTE:
To modify button functions later, go to Settings > System Settings > HomePage Settings.
3.2.2 Physical Button Configuration
Press any physical button to access the configuration screen.
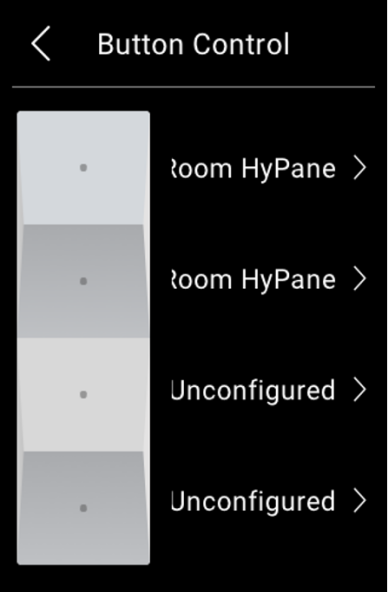
Example:
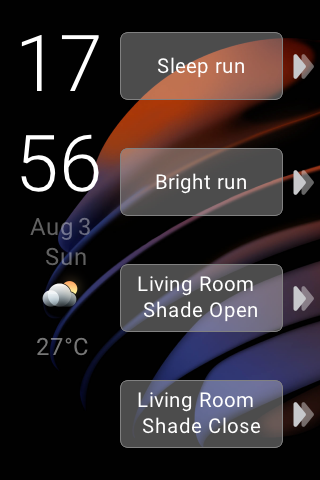
Use the physical buttons on the bedside HyPanel Lite to control the bedroom curtains, as well as the Sleep and Brightness scenes, as shown below.
NOTE:
To physical button function later, go to Settings > System Settings > Button Control.
4. Account Registration and Family Binding
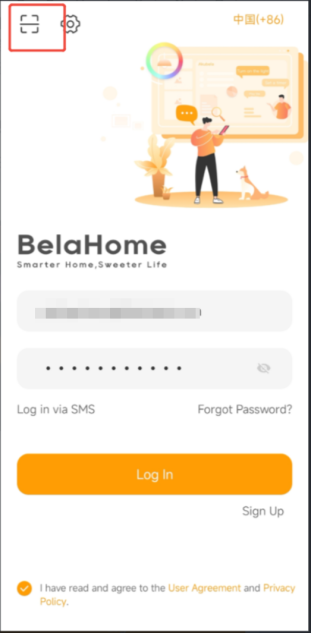
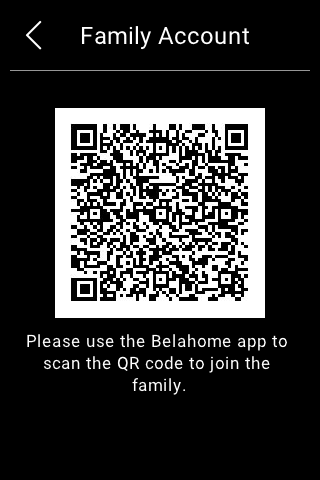
Download the BelaHome App, scan the QR code on the HyPanel Lite, and follow the on-screen instructions to register family administrator account and bind the home.

5. Replace Devices
When a HyPanel Lite malfunctions, it can be replaced without resetting all home devices.
Replace Home Center Device
In the cloud, the installer clicks Replace, enters the new home center’s MAC address, powers off the faulty device, and replaces it using either the installation code or local auto-discovery method.
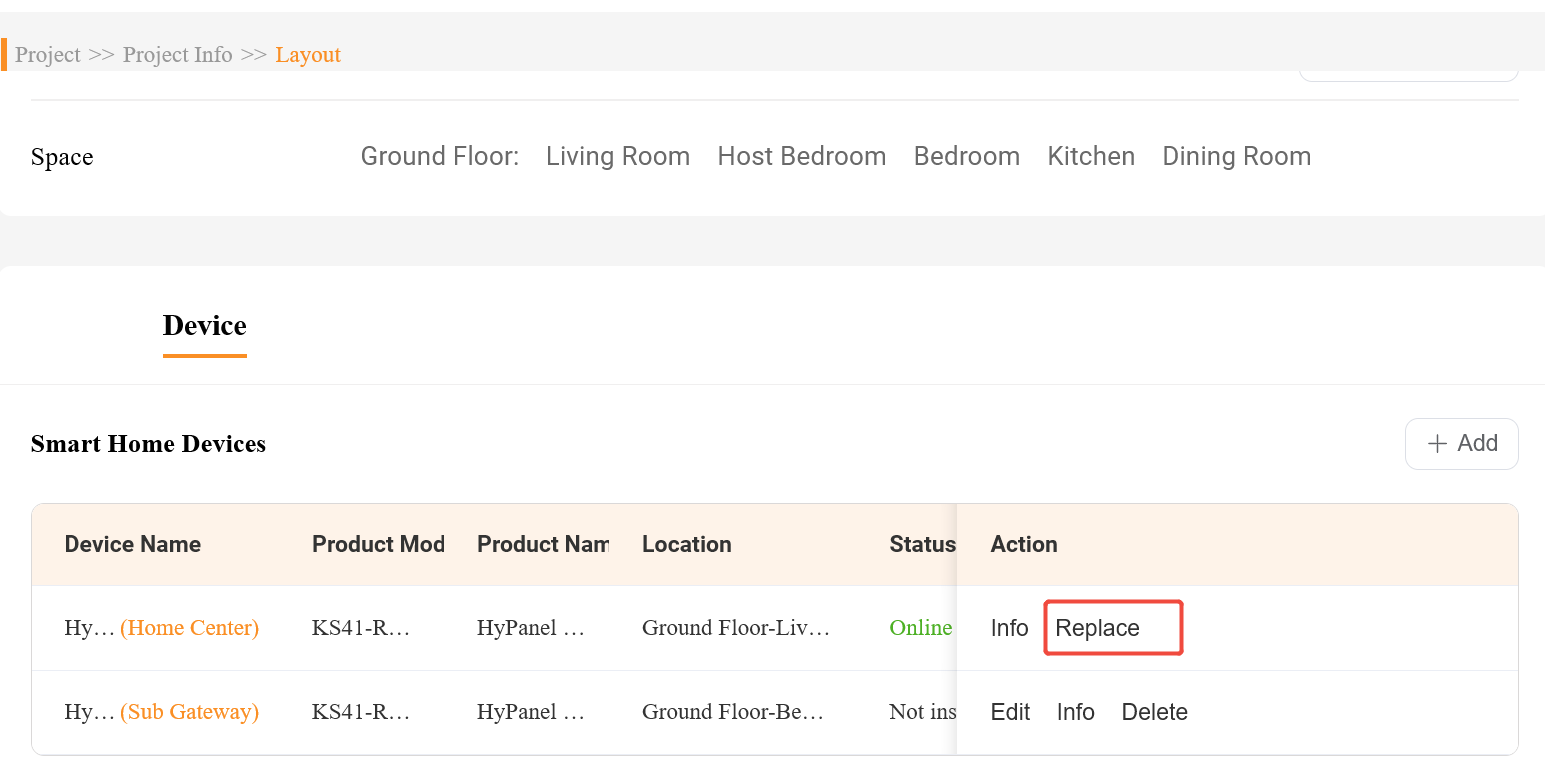
Replace Sub-Gateways
After powering off the faulty sub-gateway, enter the old device’s installation code on the new device to replace it.
TIP:
For detailed instructions on replacing devices, see Further Helpful Notes > Replace devices in this guide.
6. Related Guides
BelaHome User Guide: BelaHome App User Guide
KS41 User Guide: HyPanel Lite User Guide