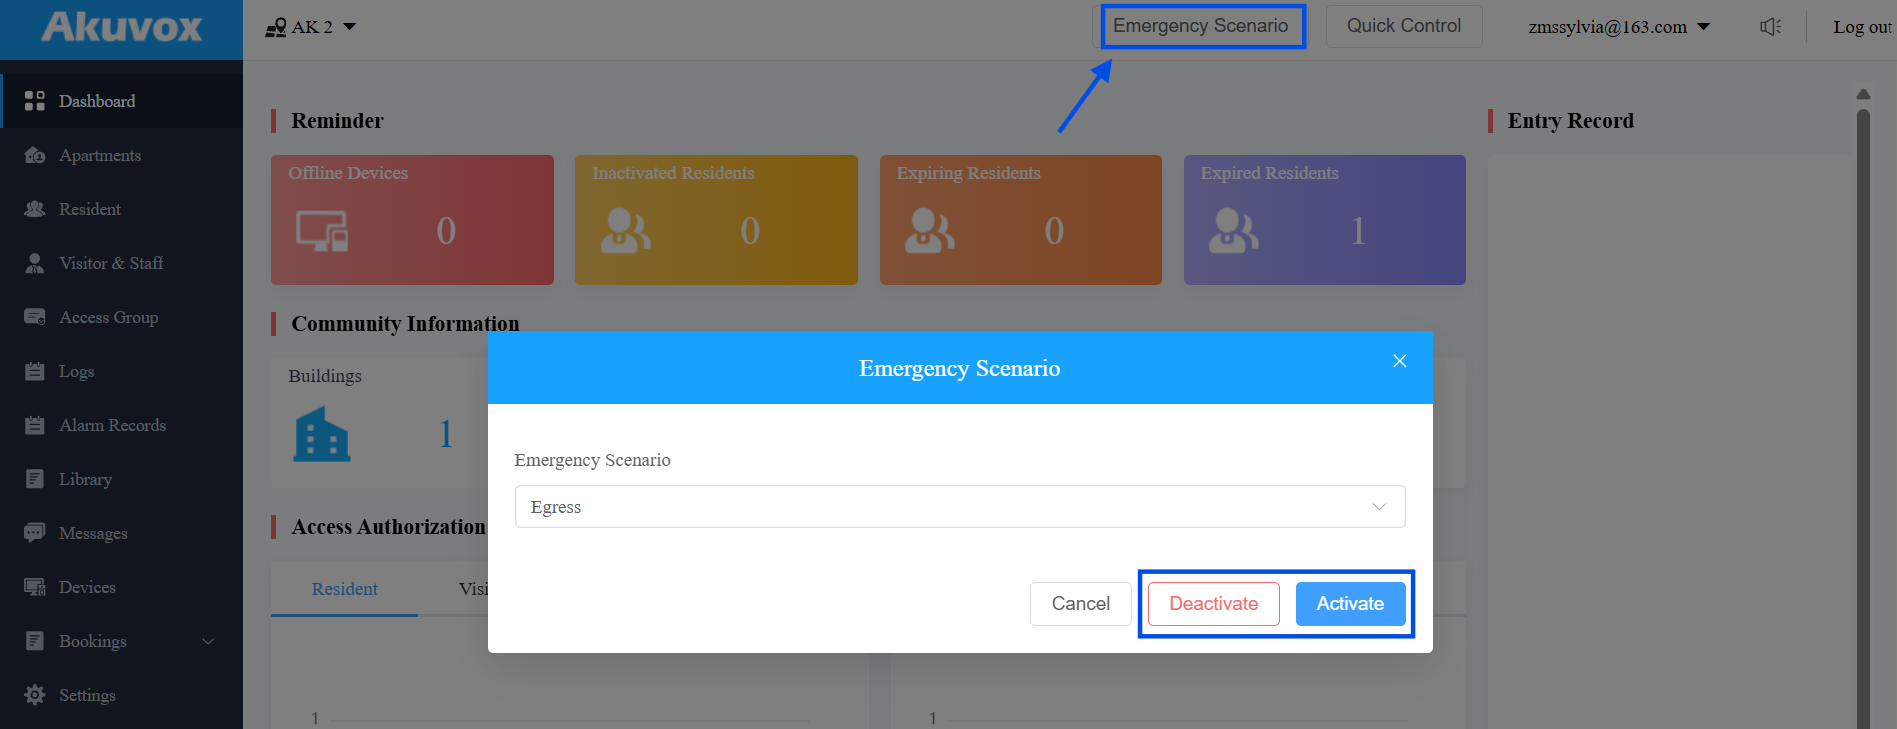
The Emergency Scenario feature allows property managers/project managers to configure automatic actions when an emergency event is triggered.
An Emergency Scenario consists of a trigger source and one or more actions. When the trigger condition is met, the configured actions are executed automatically to improve emergency response efficiency.
Emergency Scenarios support:
Egress: Automatically unlock configured doors for evacuation.
Lockdown: Automatically lock configured doors to restrict access.
Emergency notifications to users.
EC33 elevator floor release (if configured).
Multiple emergency scenarios for different areas.
You can create multiple scenarios, each with its own door group and trigger source — for example, a separate Egress scenario for each building on a site, or a Lockdown scenario that only covers a restricted wing.
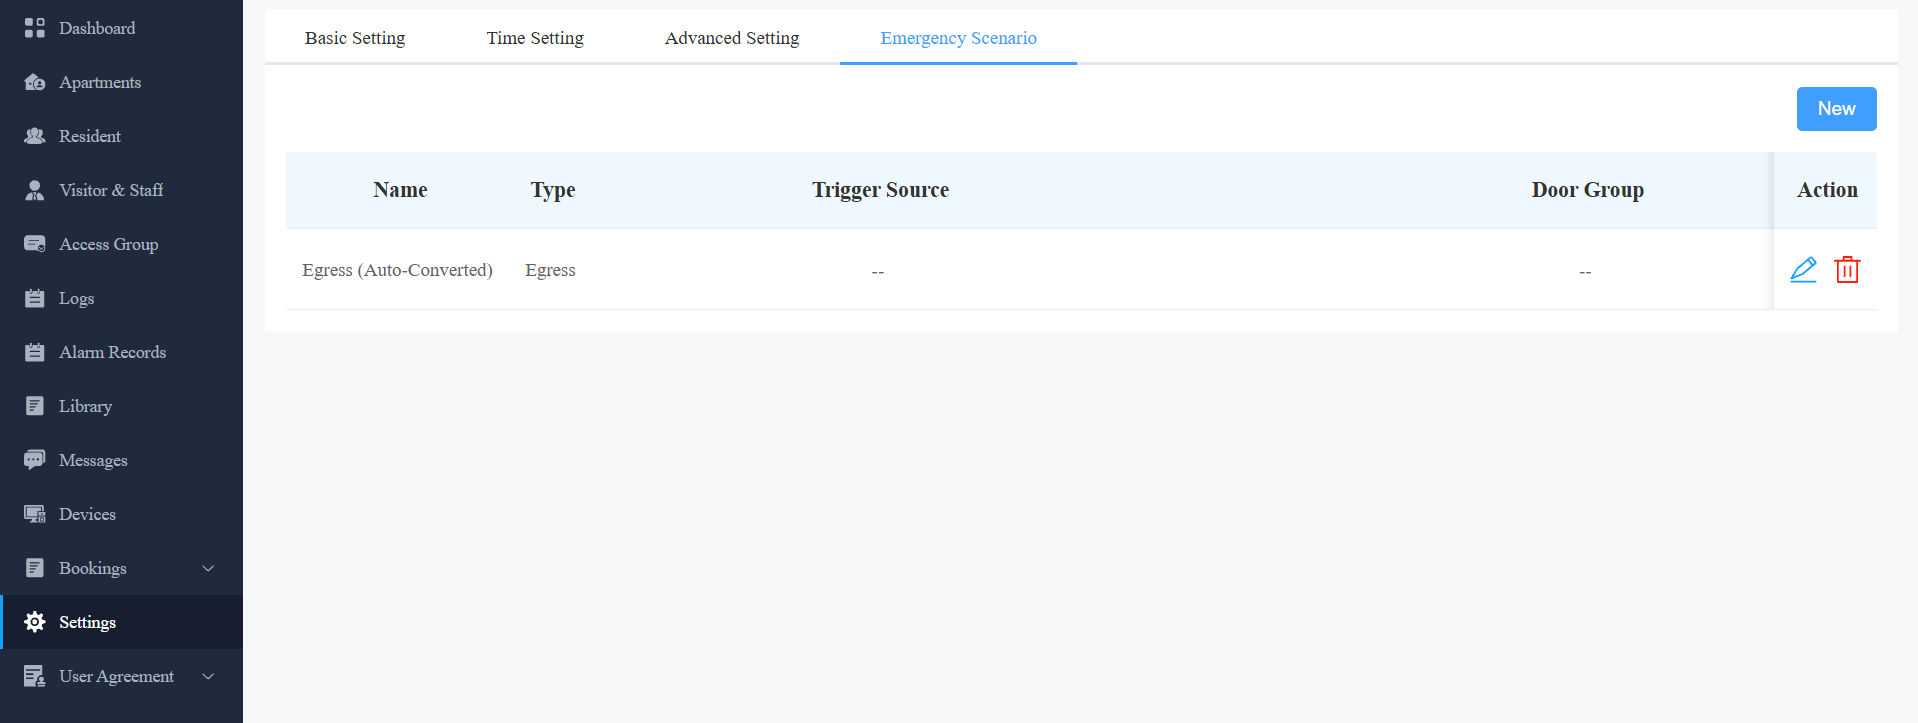
Auto-Converted Emergency Scenario
An Auto-Converted scenario is automatically created for each project to ensure compatibility between the Emergency Scenario feature and devices with different firmware versions.
This scenario maintains the functionality of the previous Emergency Alarm feature, allowing devices that do not support reporting specific trigger inputs to continue working with the new Emergency Scenario feature.
You can review the Auto-Converted scenario on the Emergency Scenario page and configure other available settings if needed.
Note
The scenario type and input settings of an Auto-Converted scenario are fixed and cannot be modified.
For devices that cannot report the triggered input, alarms will be handled by the Auto-Converted scenario automatically.
Supported Scenarios
This feature applies to:
Community Projects
Commercial Projects
Configuration logic is the same. Differences are limited to:
Compatible models & firmware
Account role (Property Manager / Project Manager)
Compatible Models and Minimum Versions
Door Phones & Access Control Devices
Firmware requirements now come in two tiers, since older firmware can still trigger a scenario but can't report which input caused it:
Alarm-Only (legacy firmware) — device can trigger a scenario, but only reports that an alarm occurred, not the specific input. Not usable as a distinct Trigger Source when a project has multiple scenarios.
Full Trigger Source Support — device reports which input was triggered, enabling multiple scenarios each bound to a different input.
Full Trigger Source Support
Model | Minimum Version | Model | Minimum Version |
|---|---|---|---|
X915V2 | 2915.30.10.811 | A095 | 95.30.11.104 |
R20V5 | 320.30.12.103 | A01/A02 | 101.30.11.204 |
A03 | 103.30.11.204 | A08 | 108.30.12.6 |
S535 | 535.30.11.32 | A05V2 | 205.30.11.127 |
E16V3 | 416.30.12.104 | X916 | 916.30.10.604 |
R28V2 | 228.30.11.108 | E18 | 18.30.11.202 |
X912 | 912.30.13.3 | R29 | 29.30.10.743 |
S532 | 532.30.10.404 | E16V2 | 216.30.12.103 |
X910 | 2910.30.11.111 | R25 | 25.30.11.3 |
S539 | 539.30.10.710 |
Offline Trigger Support
Devices running the minimum firmware versions listed under Full Trigger Source Support can trigger an Emergency Scenario even when the device is temporarily disconnected from the cloud.
The Emergency Scenario must be configured while the device is connected to the cloud before it can be triggered offline.
Alarm-Only
Model | Community Min Version | Commercial Min Version |
|---|---|---|
S539 | 539.30.1.105 | 539.30.10.226 |
S538 | 538.30.10.705 | 538.30.10.705 |
S535 | 535.30.10.233 | 535.30.10.233 |
S532 | 532.30.10.117 | 532.30.10.211 |
X915 V2 | 2915.30.10.8 | 2915.30.10.211 |
X916 | 916.30.10.116 | 916.30.10.222 |
X912 | 912.30.10.108 | 912.30.11.49 |
X910 | 2910.30.11.28 | 2910.30.10.240 |
R29 | 29.30.3.214 | 29.30.10.314 |
R28 V2 | 228.30.10.135 | 228.30.10.218 |
R25 | 25.30.10.117 | 25.30.10.117 |
R20 V5.0 | 320.30.10.125 | 320.30.10.125 |
E18 | 18.30.10.236 | 18.30.10.236 |
E16 V2 | 216.30.0.67 | 216.30.10.208 |
E16 V3 | 416.30.11.206 | 416.30.11.206 |
E12 | 312.30.2.105 | 312.30.11.18 |
EC33 | 33.30.1.2 | 33.30.1.107 |
A01/A02 | 101.30.10.108 | 101.30.10.108 |
A03 | 103.30.10.111 | 103.30.10.111 |
A05V2 | 205.30.10.119 | 205.30.10.119 |
A08 | 108.30.10.108 | 108.30.10.108 |
A094 | 92.30.10.17 | 92.30.10.17 |
A095 | 95.30.10.110 | 95.30.10.110 |
E13 | 13.30.10.16 | |
WR01 | 1401.30.11.221 | 1401.30.11.221 |
Indoor Monitors
Model | Minimum Version |
|---|---|
C313 V2.0: 212.30.13.25 | S563: 563.30.13.404 |
C313 V3.0: 313.30.14.9 | S565: 565.30.10.210 |
C316: 316.30.13.302 | S567: 567.30.13.305 |
C319: 119.30.13.602 | X937: 937.30.14.209 |
S562: 562.30.14.204 | X933: 933.30.14.403 |
IT88: 88.30.14.603 | S562-2: 5622.30.15.18 |
C313V2-2: 212.30.13.25 |
SmartPlus App
System | Minimum Version |
|---|---|
Android | 7.50.0003 |
iOS | 7.50.3 |
Step 1: Create an Emergency Scenario
Log in to the cloud platform with your PM account.
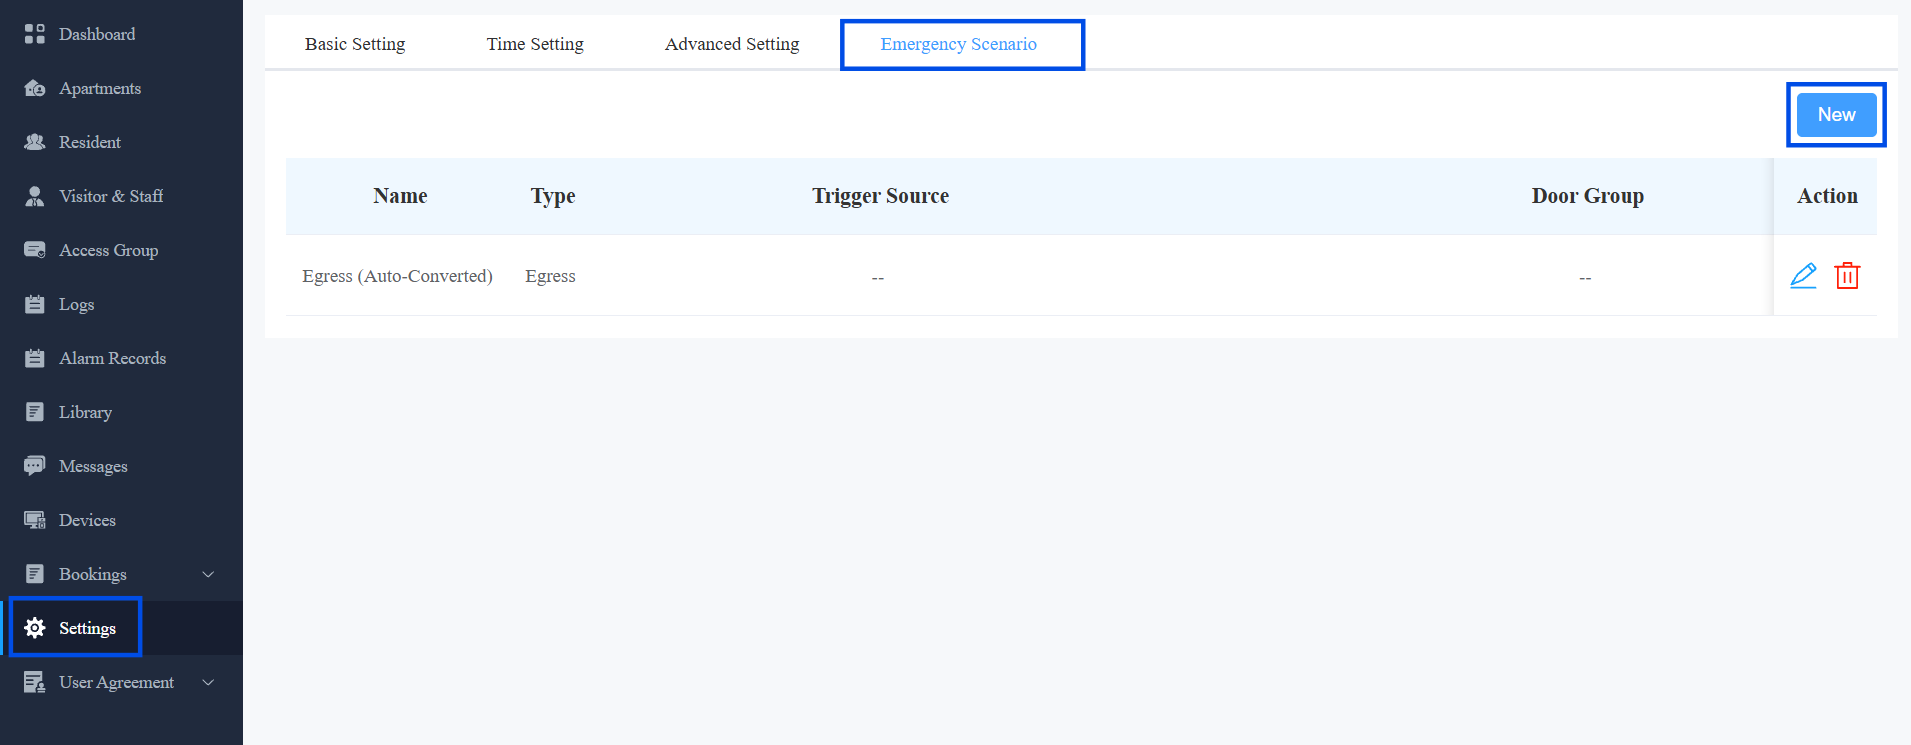
Click Settings > Emergency Scenario > New.
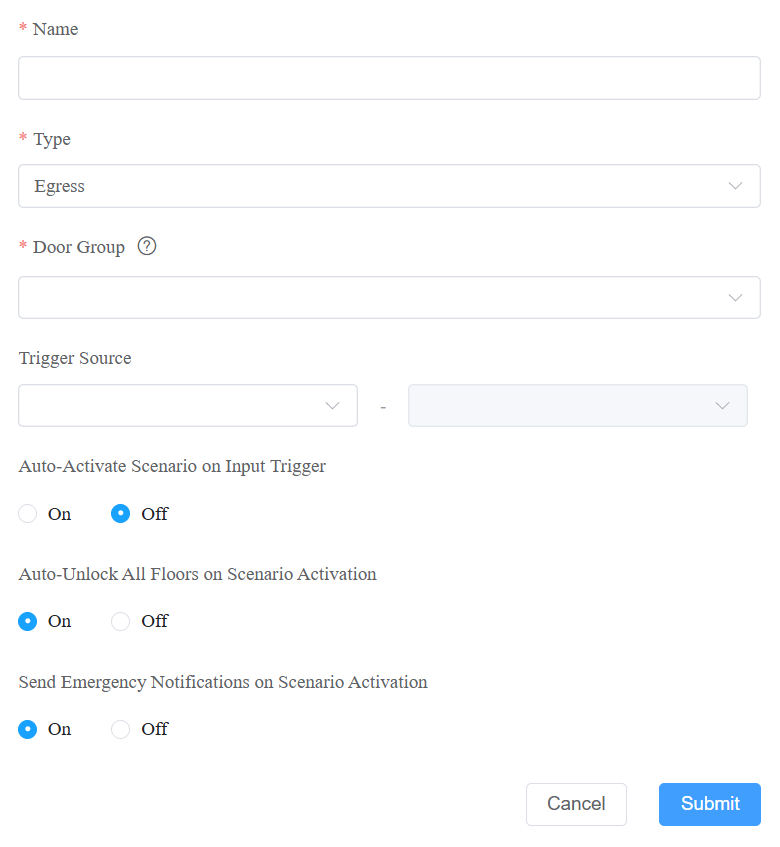
Define the scenario name.
Select the scenario type: Egress or Lockdown. Currently, only commercial projects support the Lockdown type.
Select the Door Group this scenario controls.
Select a Trigger Source — the device and input that will automatically activate this scenario.
Configure the remaining options for the selected type (see table below). To automatically activate the scenario when the trigger input is reported, enable Auto-Activate Scenario on Input Trigger.
Field | Egress | Lockdown |
|---|---|---|
Auto-Activate Scenario on Input Trigger | On: Open all configured doors automatically when the scenario is triggered. Off: Click Emergency Scenario near the top of any interface to activate or deactivate a scenario manually. | |
Auto Unlock All Floors When Scenario Activated | It works with EC33 elevator control. If turned on, all floors controlled by EC33 will be released upon the scenario trigger. | Not available |
Send Emergency Notifications on Scenario Activation | If turned on, users’ SmartPlus Apps and indoor monitors will receive a notification. | Not available |
Auto-Clear | Available when Auto-Activate Scenario on Input Trigger is turned on. When it is enabled, the emergency scenario is automatically cleared once the trigger input signal is restored. Affected doors and floors return to their regular schedules. | |
Click Submit.
Step 2: Enable the Input (Non-Upgraded Devices Only)
This step is only required if the device you selected as the Trigger Source in Step 1 has not been updated to support Emergency Scenario.
Updated devices are fully configured by Step 1 — skip this step for those.
Navigate to the device IP in a browser. Log in with the username and password(admin/admin by default).
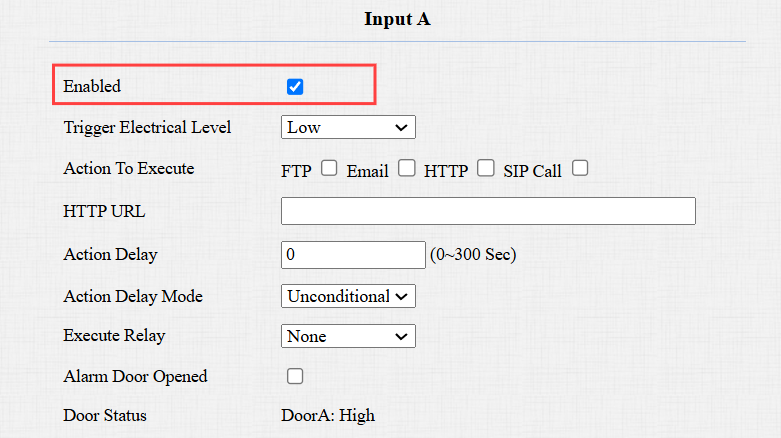
Go to System > Security. Check the input(s) that are connected to the alarm sensor.

Click Submit.
Make sure the input is enabled on the Access Control > Input interface.
Step 3: Verification
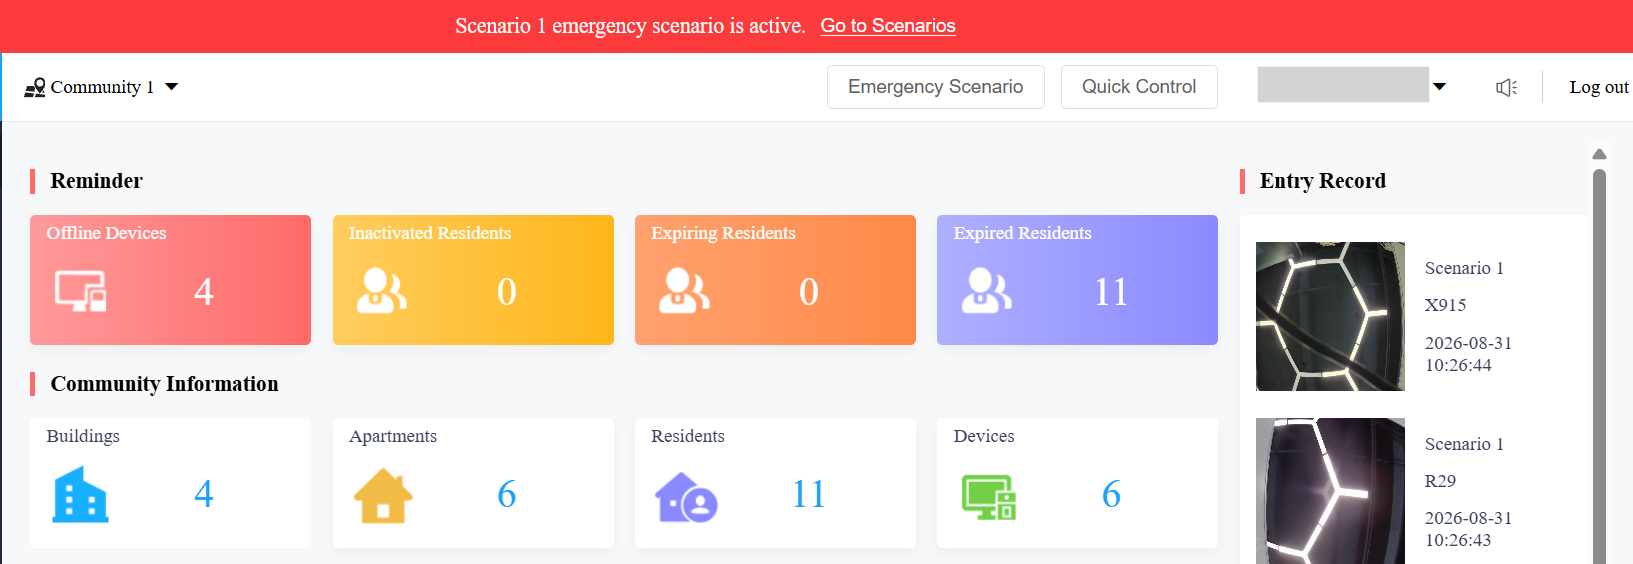
While one or more scenarios are active, a red banner appears at the top of the platform listing the active scenarios.
The indoor monitor will display a prompt and sound an alarm for 30 seconds.
(1).png)
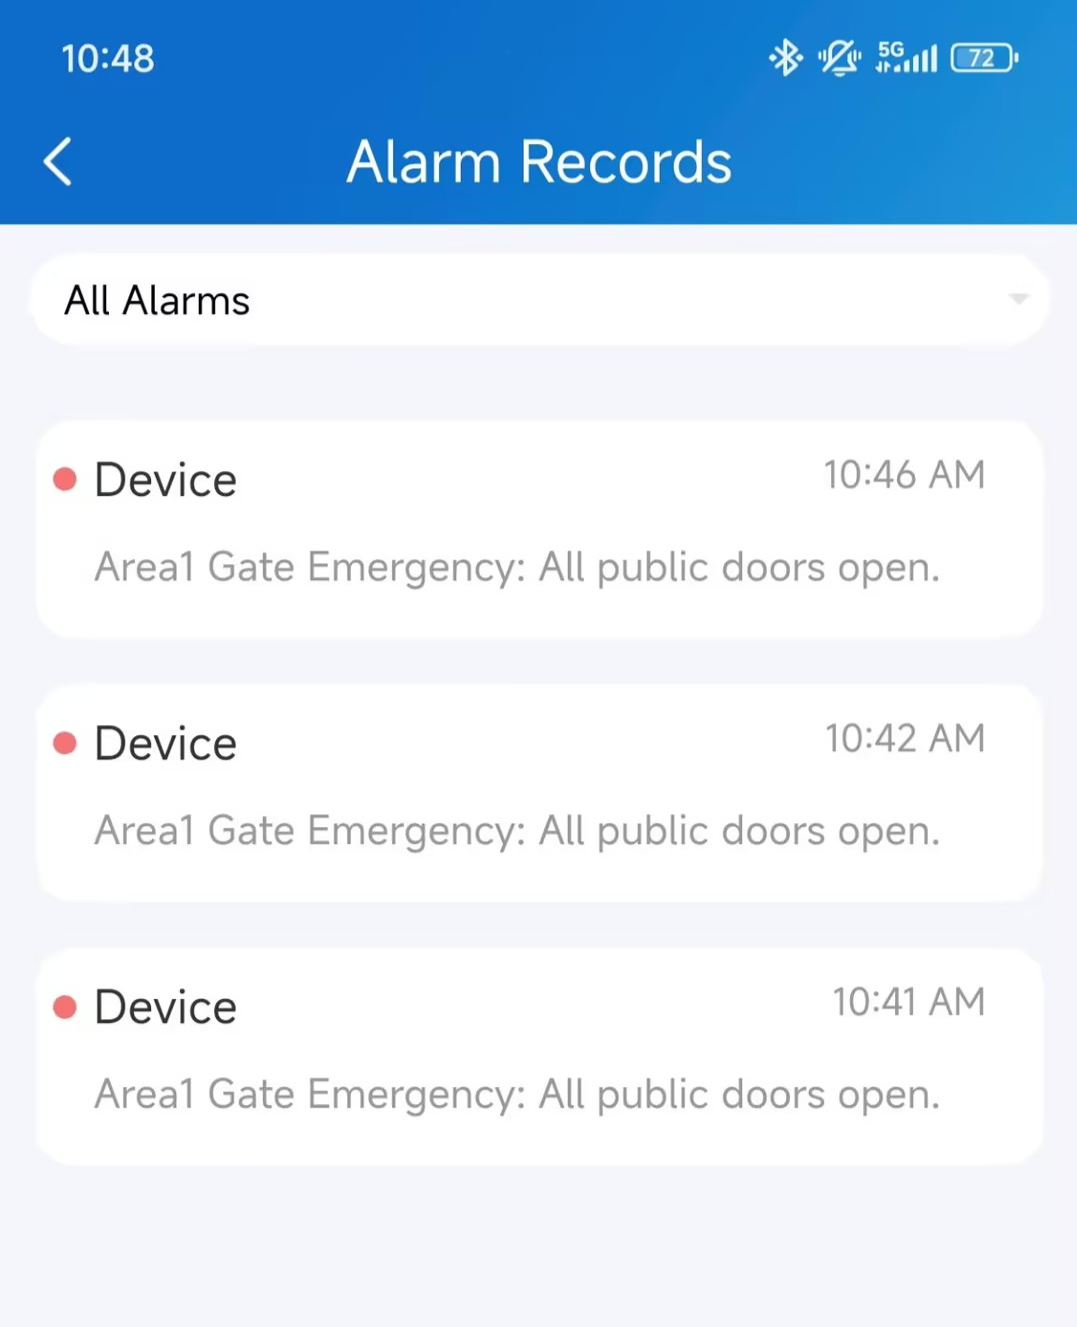
The SmartPlus App will receive the notification.
Manual Control
You can also activate or deactivate a scenario manually from the Emergency Scenario page, without waiting for the trigger source.