Tamper Alarm Setting
La fonction d’alarme de manipulation empêche quiconque de retirer l’appareil sans permission. Les dispositifs Akuvox prennent en charge deux types de systèmes inviolables : la détection de gravité et la détection de l’état des boutons.
Cliquez ici pour voir quel type est pris en charge par l’appareil et découvrir les détails de la fonction.
To do this configuration on the web Security > Basic > Tamper Alarm.
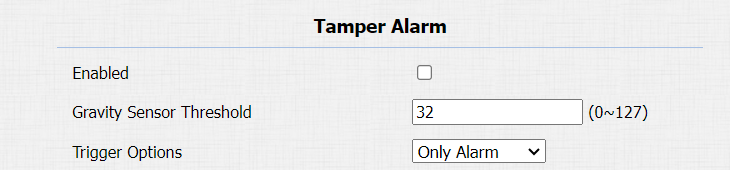
Parameter Set-up:
- Gravity Sensor Threshold: set the threshold for the gravity sensory sensitivity. The lower the value is, the higher the value will be. The gravity sensor value is 32 by default.
- Trigger Options: select what can be triggered when the gravity sensor is triggered.
Client Certificate Setting
Les certificats garantissent l’intégrité de la communication et la confidentialité. Pour utiliser le protocole SSL, vous devez télécharger les bons certificats pour la vérification.
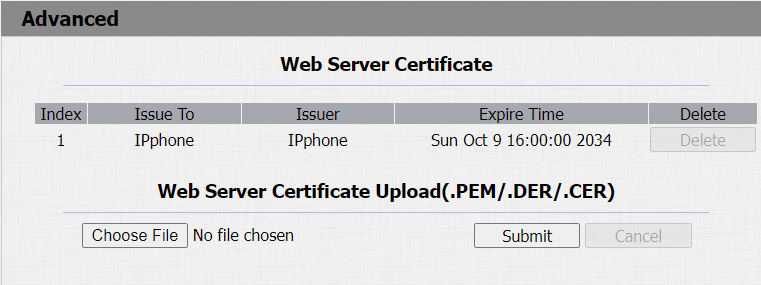
Web Server Certificate
C’est un certificat envoyé au client pour authentification lorsque celui-ci demande une connexion SSL avec le téléphone porte Akubox. Veuillez télécharger les certificats dans les formats acceptés.
To upload Web Server certificate on the device web interface Security > Advanced > Web Server Certificate.
Client Certificate
Ce certificat vérifie le serveur sur le téléphone porte Akuvox lorsqu’ils souhaitent se connecter via SSL. Le téléphone de porte vérifie le certificat du serveur par rapport à sa liste de certificats clients.
To upload and configure client certificates on the same page.
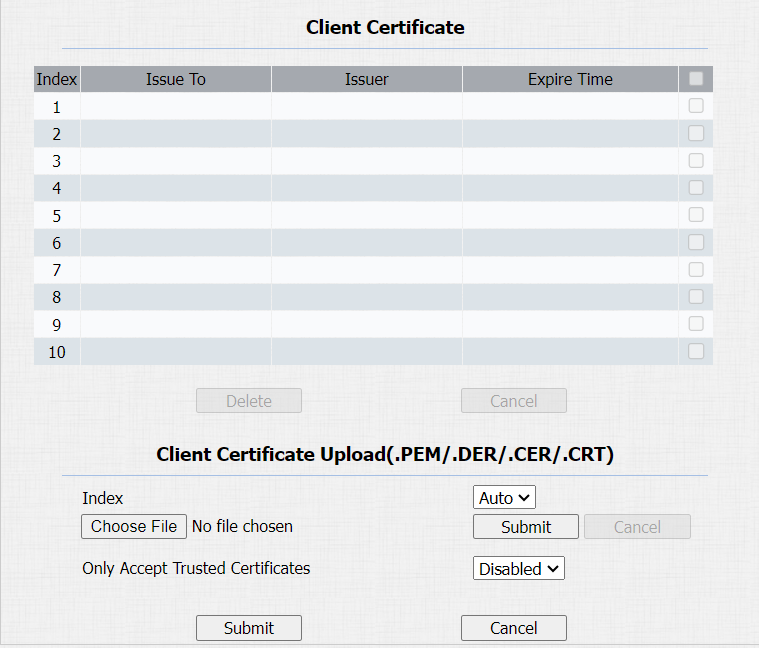
Parameter Set-up:
- Index: select the desired value from the drop-down list of Index. If you select Auto value, the uploaded certificate will be displayed in numeric order. If you select values from 1 to 10, the uploaded certificate will be displayed according to the value that the user selected.
- Select File: click Choose File browse the local drive, and locate the desired certificate (*.pem only).
- Only Accept Trusted certificates: if you select Enabled, as long as the authentication success, the phone will verify the server certificate based on the client certificate list. If you select Disabled, the phone will not verify the server certificate no matter whether the certificate is valid or not.
Upload TLS Certificate for SIP Account Registration
Avant de demander un compte SIP depuis un SIP ou un serveur DNS utilisant le protocole TLS, vous devrez télécharger un certificat. Ce certificat est essentiel pour l’authentification des serveurs.
To upload the TLS certificate, go to Security > Advanced > SIP Server Certificate.
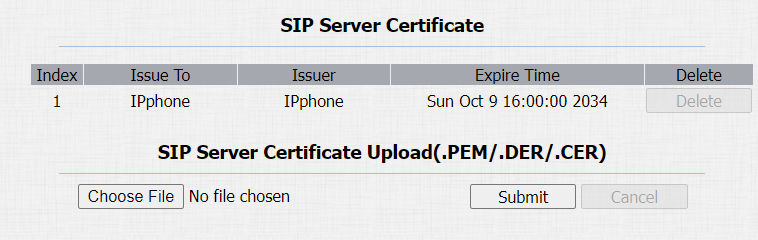
Parameter Set-up:
- Choose file: upload the certificate file. You can only upload the certificate file in .PEM, .DER, and CER format.
Motion Detection
La détection de mouvement est une fonctionnalité qui permet la surveillance vidéo sans surveillance et les alarmes automatiques. Il détecte tout changement dans l’image capturé par la caméra, comme un passage ou un déplacement de l’objectif, et active le système pour effectuer l’action appropriée.
Configure Motion Detection
You can turn on the motion detection and set up the motion detection interval on the web Intercom > Motion interface.
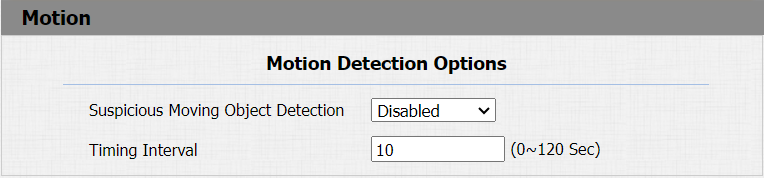
Parameter Set-up:
- Suspicious Moving Object Detection: select Disable to disable the motion detection. Select IR Detection to enable the IR sensor-based motion detection for suspicious moving objects. And select Video Detection to enable the video-based motion detection during the monitoring of the suspicious moving object.
- Timing Interval: the absolute triggering interval is 3 seconds. If you select a number greater than 3 seconds, then it requires a second triggering interval to trigger the alarm. For example, if you select 3 seconds, then the alarm will be triggered when a moving object is detected one time from 0 to 3 seconds (triggered any time from 0 to 3 seconds). However, for example, if you select 5 seconds (greater than 3 ), then the alarm will not be triggered until a moving object is detected for the second time from 3 to 5 seconds (triggered any time from 3 to 5 seconds). The default interval is 10 seconds.
Security Notification Setting
Email Notification Setting
Configurez des notifications par e-mail pour recevoir des captures d’écran de mouvements inhabituels provenant de l’appareil.
Cliquez ici pour voir comment configurer cette fonctionnalité.
Go to Intercom > Action > Email Notification interface.
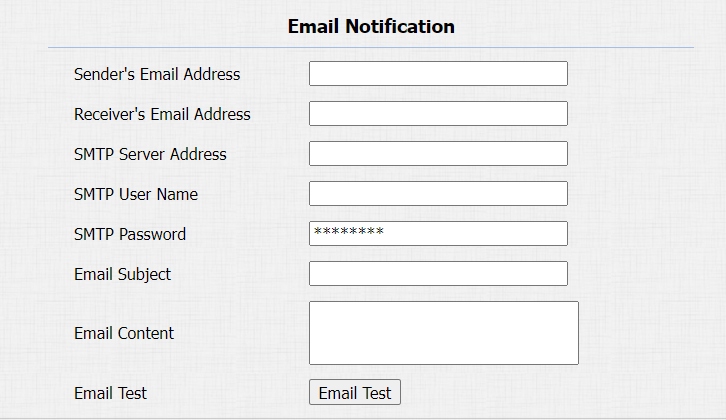
Parameter Set-up:
- SMTP Server Address: enter the SMTP server address of the sender.
- SMTP User Name: enter the SMTP user name, which is usually the same as the sender’s email address.
- SMTP Password: configure the password of the SMTP service, which is the same as the sender’s email address.
- Email Test: click to test if the email can be sent and received.
FTP Notification Setting
Pour recevoir des notifications via le serveur FTP, il faut configurer les paramètres FTP. Le téléphone téléverra une capture d’écran dans le dossier FTP spécifié s’il détecte un mouvement inhabituel.
Cliquez ici pour voir les étapes de configuration.
Go to web Intercom > Action > FTP Notification interface.
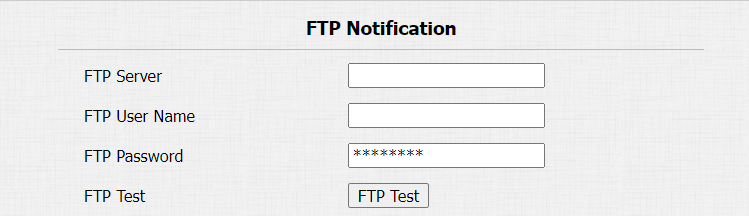
Parameter Set-up:
- FTP Server: enter the address (URL) of the FTP server for the FTP notification.
- FTP Test: click FTP Test, then a triggered event snapshot will be sent to the FTP server for testing purposes.
SIP Call Notification Setting
In addition to FTP and Email notification, the door phone can also make a SIP call when some feature action is triggered. To configure a SIP call notification on web Intercom > Action > SIP Call Notification interface.

Call Event Notification
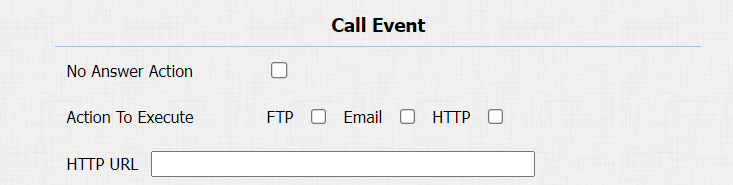
Enable this feature if you want to be notified when any outgoing calls from the door phone are not answered. The notification is made via FTP, Email, and HTTP. On the web, navigate to Intercom > Basic > Call Event.
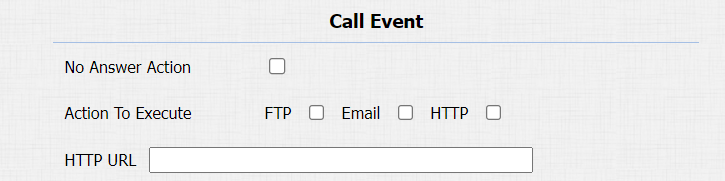
Parameter Set-up:
- Action To Execute: select FTP, Email or HTTP method for the notification. If FTP is selected, a screenshot of the caller will be sent via as notification. If Email is selected, the Emails containing a screenshot of the caller will be sent. If HTTP is selected, you can add the event message to the HTTP URL before sending.
- HTTP URL: enter the HTTP URL that will be sent to the Http server. For example:http//192.168.31.6/door phone#1. HTTP URL format: http://http server IP address/any information
Security Action Configuration
Configure Action of Input
When the Input interface is working, it can also trigger an action. You can do this configuration on web Intercom > Input interface.

Parameter Set-up:
- Action To Execute: to choose which action to execute after triggering.
Configure Action of Call
When pressing the push button, the door phone will trigger the pre-configured action type, the notification can be sent out by Email, FTP notification, or SIP call. To do this configuration on web Intercom > Basic interface.
Parameter Set-up:
- No Answer Action: if the call will not be answered, it still triggers the action event after enabling this feature.
- Action to execute: to choose which action to be executed after triggering.
Configure Action of Motion
When the Motion Detection feature is working, you can make it trigger an action. To do this configuration on web Intercom > Motion interface.

Parameter Set-up:
- Action to execute: to choose which action to be executed after triggering.
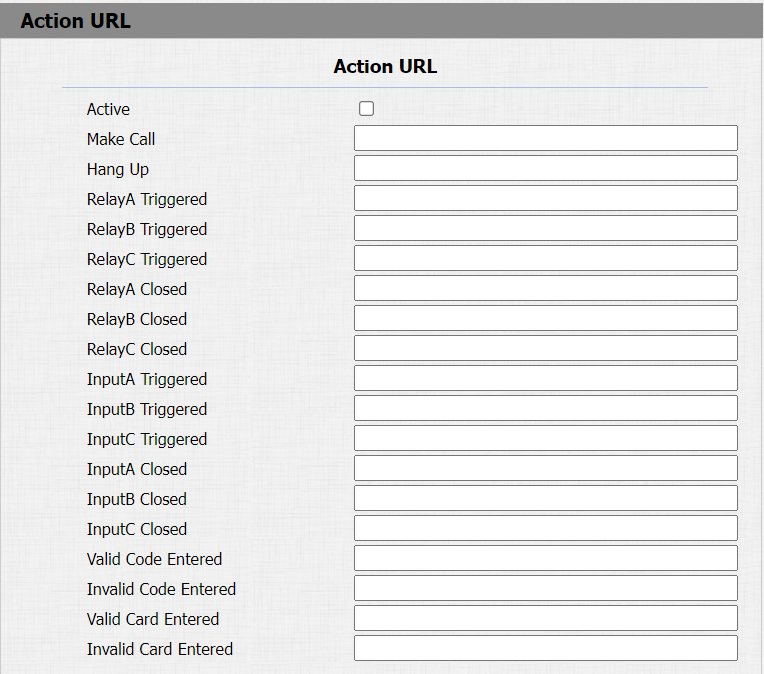
Action URL
Vous pouvez utiliser l’appareil pour envoyer des commandes URL HTTP spécifiques au serveur HTTP pour certaines actions. Ces actions seront déclenchées lorsque l’état du relais, l’état de l’entrée, le code PIN ou l’accès à la carte RF change.
URL d’action Akuvox :
Non | Événement | Format des paramètres | Exemple |
1 | Passe un appel | $remote | Http://server IP/ Numéro d’appel=$remote |
deux | Un instant | $remote | Http://server IP/ Numéro d’appel=$remote |
3 | Relais déclenché | $relay 1 statut | Http://server ip/ relaytrigger=$relay 1status |
4 | Relais fermé | $relay 1 statut | Http://server IP/ relayclose=$relay 1status |
5 | Entrée déclenchée | $input 1 statut | Http://server IP/ inputtrigger=$input 1status |
6 | Entrée fermée | $input 1 statut | Http://server IP/ inputclose=$input 1status |
7 | Code valide saisi | $code | Http://server IP/ validcode=$code |
8 | Code invalide saisi | $code | Http://server IP/ invalidcode=$code |
9 | Carte valide saisie | $card_sn | Http://server IP/ validcard=$card_sn |
10 | Carte invalide saisie | $card_sn | Http://server IP/ invalidcard=$card_sn |
11 | Alarme de manipulation déclenchée | $alarm statut | Http://server ip/tampertrigger=statut $alarm |
Par exemple : http://192.168.16.118/help.xml ? mac=$mac :ip=$ip :model=$model :firmware=$firmware :card_sn=$card_SN
Path: Phone > Action URL.
Voice Encryption
Le protocole de transport en temps réel sécurisé (SRTP) est un protocole dérivé du protocole de transport en temps réel (RTP). Il renforce la sécurité de la transmission des données en fournissant le chiffrement, l’authentification des messages, l’assurance de l’intégrité et la protection contre la rediffusion.
To configure this feature on web Account > Advanced > Encryption interface.

Parameter Set-up:
- Voice Encryption(SRTP): choose Disabled, Optional or Compulsory for SRTP. If it is Optional or Compulsory, the voice during the call is encrypted, and you can grab the RTP packet to view.
User Agent
L’agent utilisateur est utilisé à des fins d’identification lorsque vous analysez le paquet de données SIP.
To do this configuration on the web Account > Advanced > User Agent interface.

Parameter Set-up:
- User Agent: support to enter another specific value, it is Akuvox by default.
High Security Mode
Le mode haute sécurité est conçu pour renforcer la sécurité. Il utilise le chiffrement à travers divers aspects, notamment le processus de communication, les commandes d’ouverture de porte, les méthodes de stockage des mots de passe, et plus encore.
To configure this feature on the web: Security > Basic > High Security Mode.

Notes importantes
1. Le mode Haute Sécurité est désactivé par défaut lorsque vous mettez à jour l’appareil d’une version sans ce mode vers une version qui l’inclut. Mais si vous réinitialisez l’appareil à ses paramètres d’usine, le mode est activé par défaut.
2. Ce mode rend les anciens outils incompatibles. Il faut les mettre à niveau vers les versions suivantes ou supérieures pour pouvoir les utiliser.
· Gestionnaire PC : 1.2.0.0
· Scanner IP : 2.2.0.0
· Outil de mise à jour : 4.1.0.0
· SDMC : 6.0.0.34
3. Le format HTTP pris en charge pour le déclenchement par relais varie selon que le mode hautement sécurisé est activé ou désactivé.
Si le mode est activé, l’appareil n’accepte que les nouveaux formats HTTP ci-dessous pour l’ouverture de porte.
l http ://username :password@deviceIP/fcgi/OpenDoor ?action=OpenDoor&DoorNum=1
Je http://deviceIP/fcgi/OpenDoor?action=OpenDoor&DoorNum=1
Si le mode est désactivé, l’appareil peut utiliser à la fois les nouveaux formats ci-dessus et l’ancien format ci-dessous :
Je http://deviceIP/fcgi/do?action=OpenDoor&UserName=username&Password=password&DoorNum=1
4. Il n’est pas permis d’importer/exporter des fichiers de configuration dans tgz. Formatez entre un appareil avec le mode haute sécurité et un autre sans. Pour obtenir de l’aide au transfert de fichiers, veuillez contacter le support technique d’Akubox.