Tamper Alarm
The tamper alarm function prevents anyone from removing the device without permission. Akuvox devices support two types of tamper proof: gravity detection and button status detection.
Click here to view which type is supported by the device and learn the function details.
Set it up on the System > Security > Tamper Alarm interface. Click Disarm to clear the alarm.

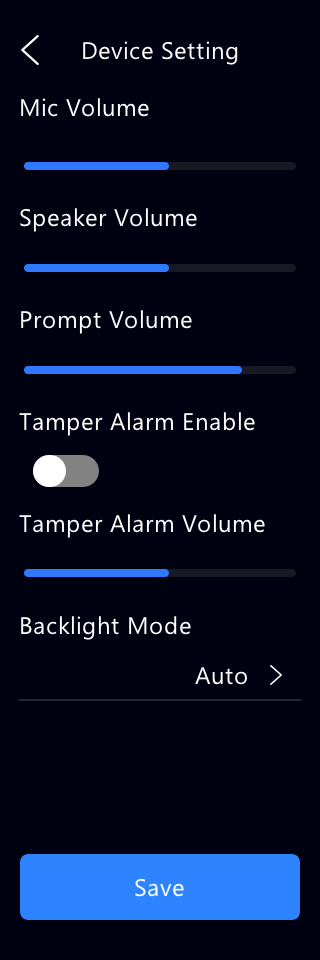
You can also enable/disable Tamper Alarm on the Setting > Device Setting screen.
Disarm Setting
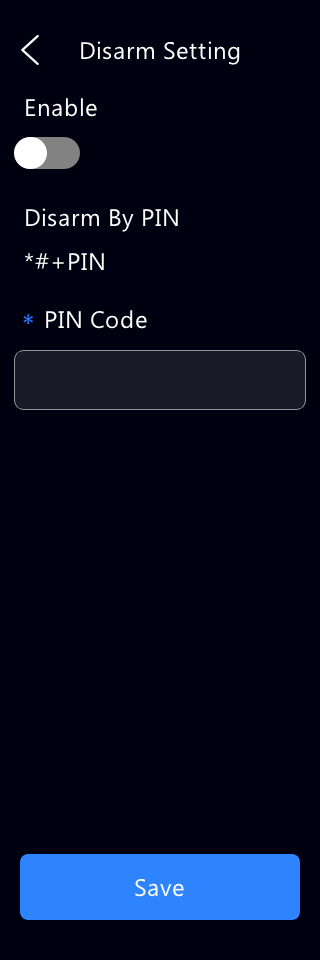
You can set the disarm code on the web System > Security > Disarm Setting interface.

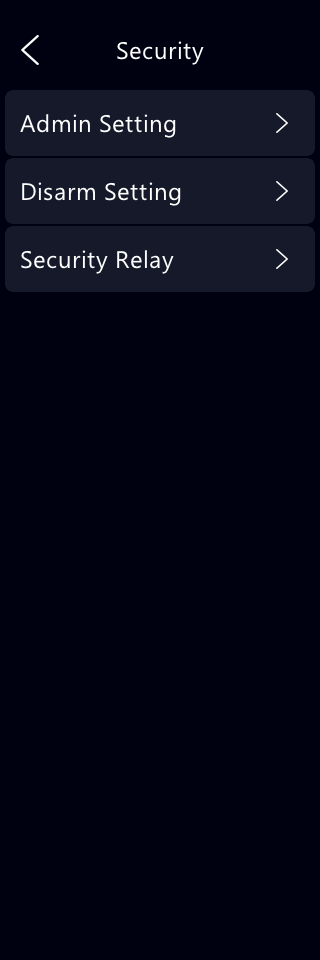
You can also set up the code on the Setting > Security > Disarm Setting screen.
Account Management
You can add user accounts to access the device's web interface and assign different access permissions to control the settings available to each account.
To set it up, go to the System > Security > Account Management interface. The default admin account cannot be deleted.
Click +Add to create a new account.

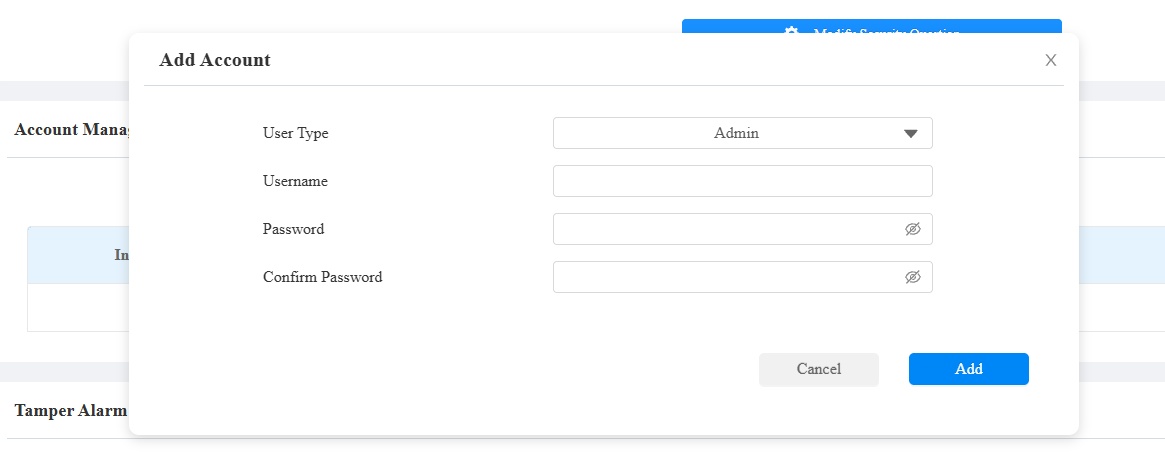
User Type: The account type.
Admin: The Admin account has full access to the device’s web settings.
User: The user account can only access the settings that are selected when the account is created.
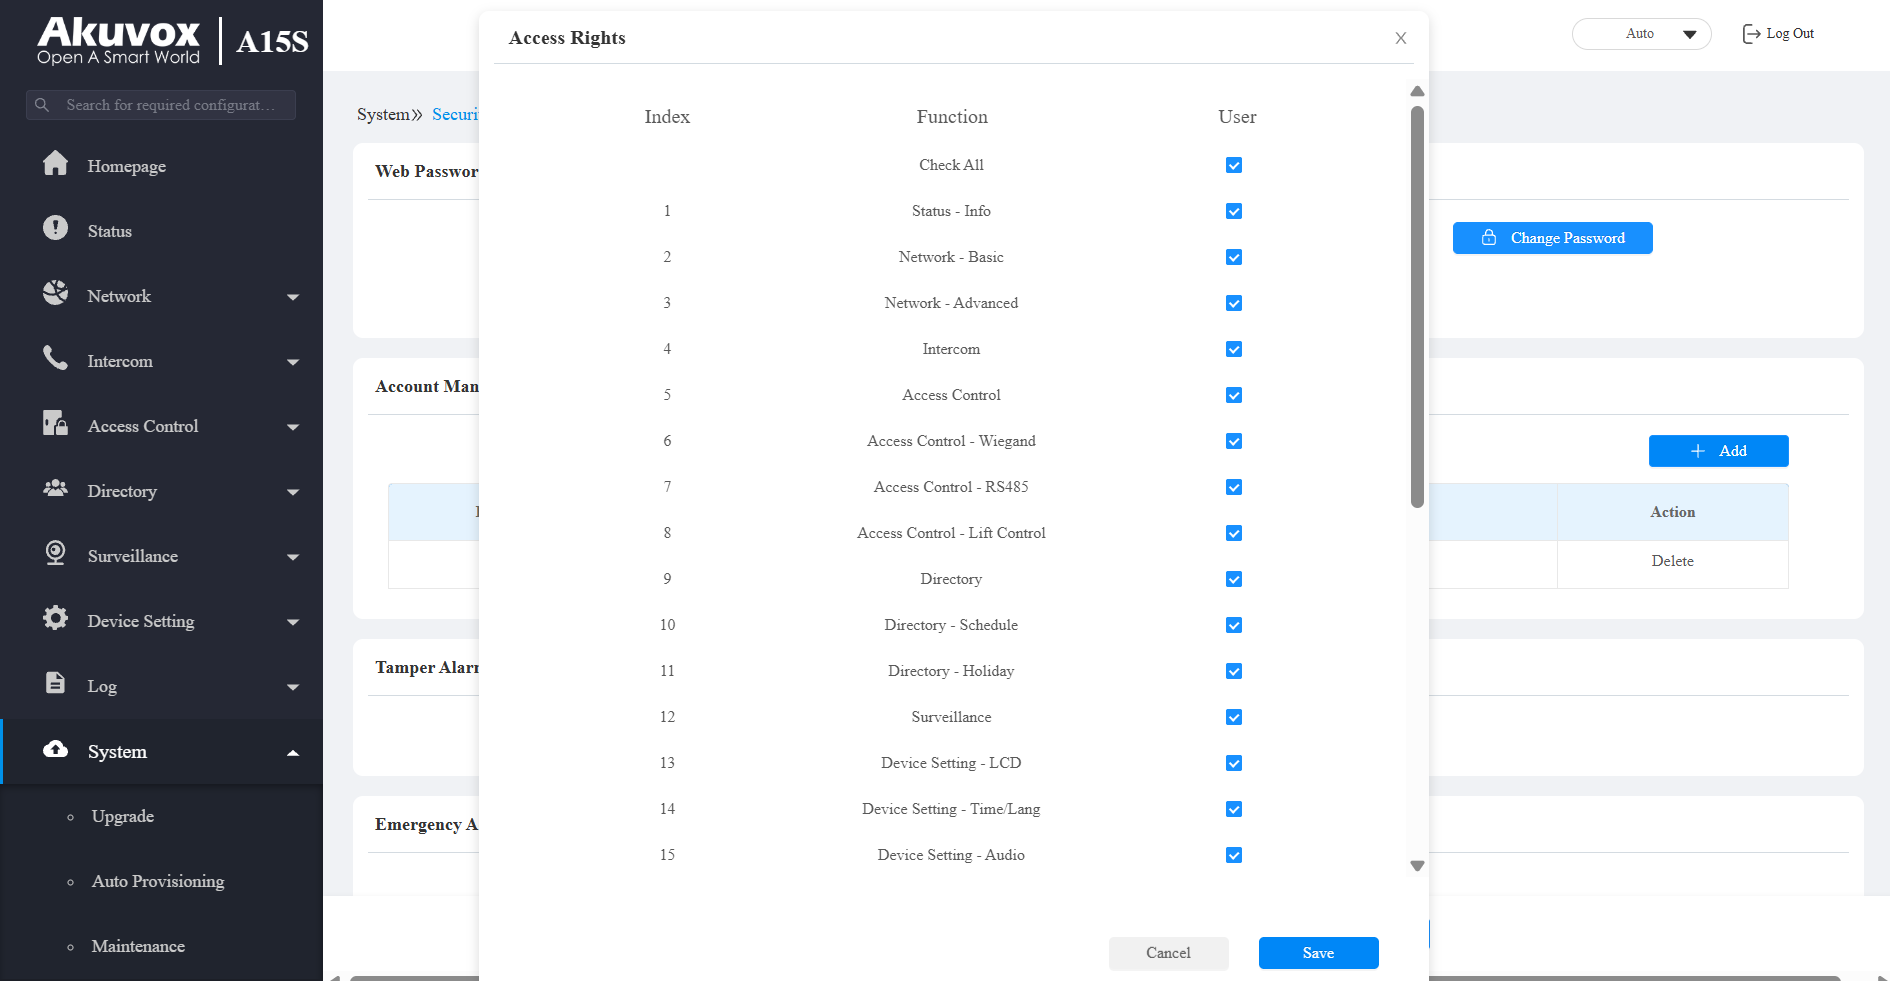
Username: The username used to log in to the device's web interface.
Password: The password used to log in to the device's web interface.
Client Certificate Setting
Certificates ensure communication integrity and privacy. To use the SSL protocol, you need to upload the right certificates for verification.
Web Server Certificate
It is a certificate sent to the client for authentication when the client requests an SSL connection with the Akuvox device. Please upload the certificates in accepted formats.
Upload the certificate on the System > Certificate interface.

Client Certificate
Configure the TLS settings and certificates used for secure SIP communication. You can specify the TLS version, configure server certificate verification, and manage the certificates required for SIP TLS connections.
Upload the certificate on the web System > Certificate interface.
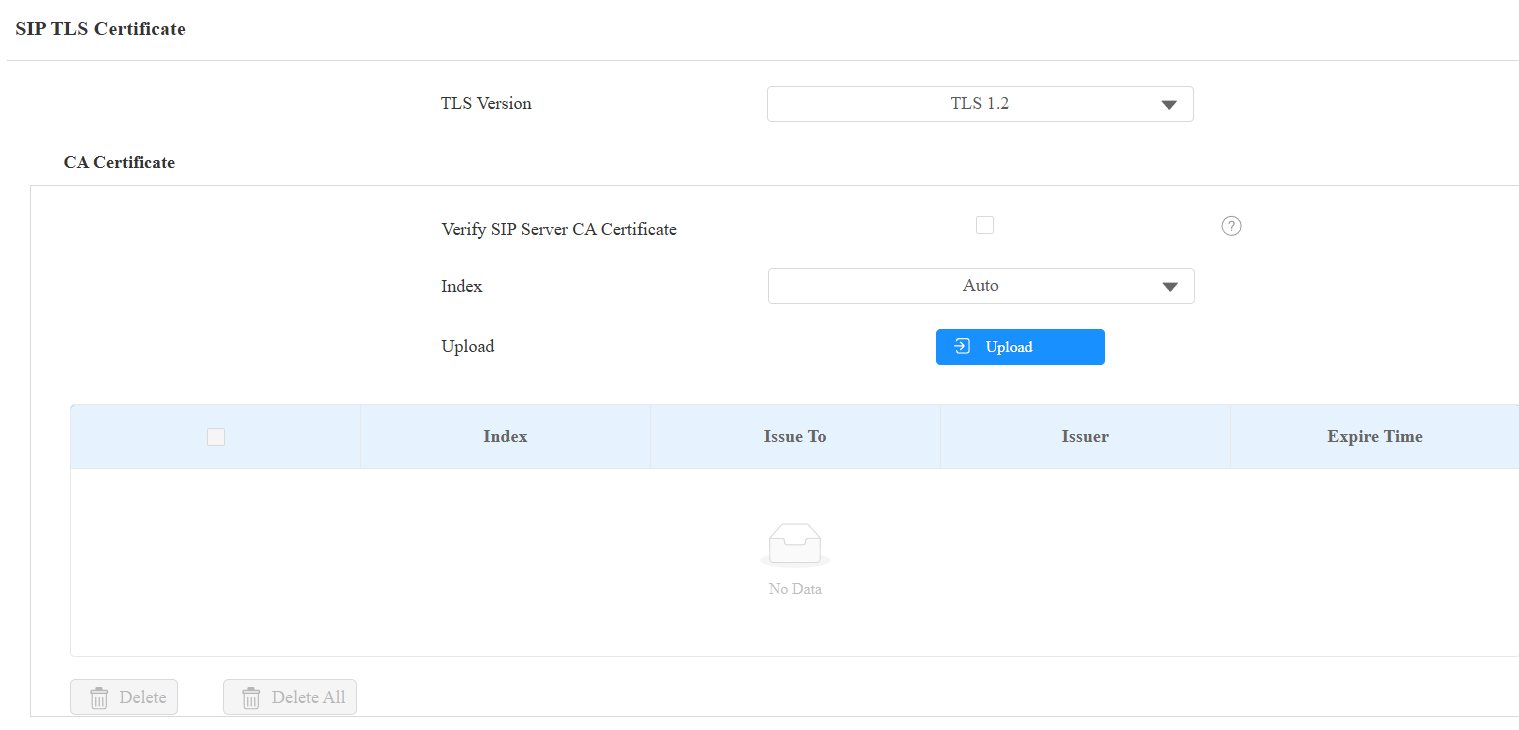

TLS Version: TLS 1.2 provides stronger security with modern encryption algorithms and is recommended for secure communication. TLS 1.0 is an outdated protocol with known vulnerabilities and should be avoided unless required for legacy compatibility.
Verify SIP Server CA Certificate: When enabled, the device verifies the SIP server certificate using the uploaded CA certificate before establishing a TLS connection. The connection will be rejected if the certificate is not trusted.
Index: Select the desired value from the drop-down list of Index. If you select Auto, the uploaded certificate will be displayed in numeric order. If you select a value from 1 to 10, the uploaded certificate will be displayed according to the number.
CA Certificate Upload: Supported formats: .pem, .der, .cer, .crt.
Client Certificate Upload: Supported formats: .pem, .cer, .crt.
Motion Detection
Motion Detection is a feature that allows unattended video surveillance and automatic alarms. It detects any changes in the image captured by the camera, such as someone walking by or the lens being moved, and activates the system to perform the appropriate action.
Set up motion detection on the Surveillance > Motion interface.
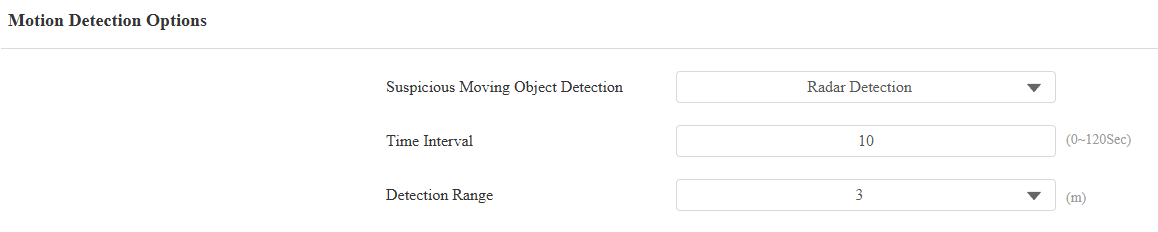
Suspicious Moving Object Detection: The feature uses the main camera for detection.
Disabled: Turn off the feature.
Video Detection: When the video camera detects moving objects, preset actions will be triggered. Focus on analyzing visual information captured through cameras.
Radar Detection: When the radar detects moving objects, preset actions will be triggered. It offers longer range and better detection in poor visibility conditions.
Video + Radar: Detect motion with the combination of the video camera and radar.
Time Interval: Determine how to delay and trigger motion detection.
Timing Interval between 1–3 seconds: Only need 1 detection during this interval to trigger actions.
Timing Interval > 3 seconds (e.g., 10 seconds): To perform actions, require a second detection within the final 3 seconds of the interval (e.g., between 7–10 seconds for a 10-second interval) after the first detection.
The default interval is 10 seconds.
Detection Accuracy: Not available for radar detection. The detection sensitivity. The higher the value, the greater the sensitivity. The default detection accuracy value is 3.
Detection Range: Set the distance within which radar detection is triggered. The range includes 1, 2, and 3 meters.
Detection Area: Click and hold the mouse button to select up to three detection areas. When motion is detected within these areas, preset actions will be carried out.
Action To Execute: Set the desired actions that occur when suspicious movement is detected.
FTP: Send a screenshot to the preconfigured FTP server.
Email: Send a screenshot to the preconfigured Email address.
SIP Call: Call the preset number upon the trigger.
HTTP: When triggered, the HTTP message can be captured and displayed in the corresponding packets. To utilize this feature, enable the HTTP server and enter the message content in the designated box below.
HTTP URL: Enter the HTTP message if selecting HTTP as the action to execute. The format is http://HTTP server’s IP/Message content.
Execute Relay: A relay can be unlocked with motion detection.
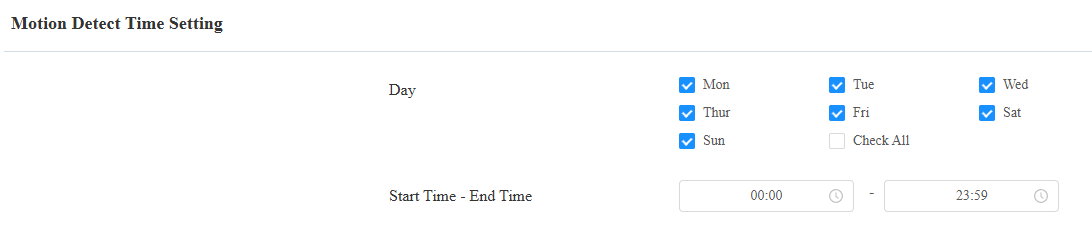
Scroll down, and you can set the motion detection schedule.
Security Notification
A security notification informs users or security personnel of any breach or threat that the device detects. For example, if the device detects something unusual, the system sends a notification to users or security through email, phone calls, or other methods.
To set up security notifications, go to Device Setting > Action interface.
Email Notification
Set up email notifications to receive screenshots of unusual motion from the device.
Click here to view how to set this feature up.
Set it up in the Email Notification section.
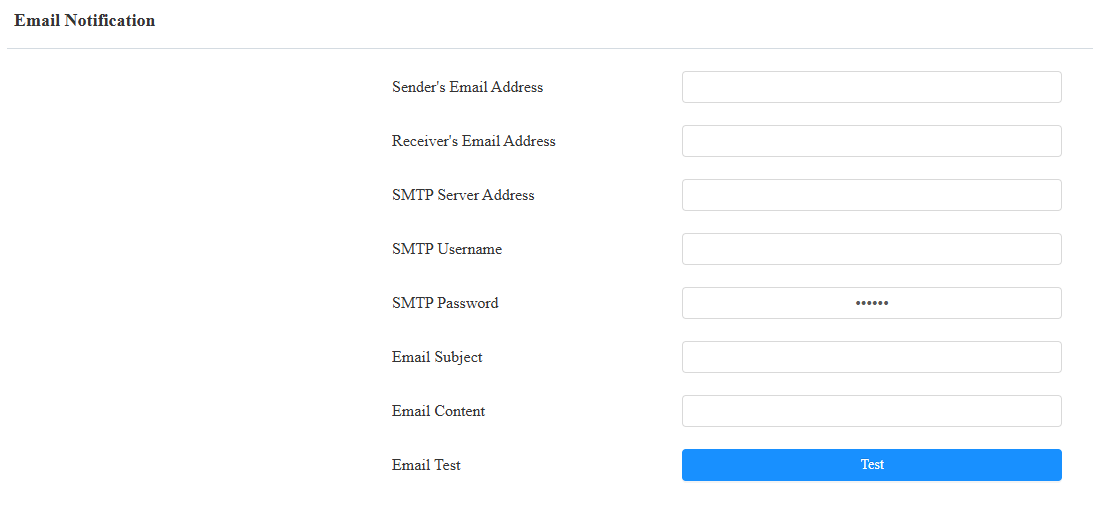
SMTP Server Address: The SMTP server address of the sender.
SMTP Username: The SMTP username is usually the same as the sender's email address.
SMTP Password: The password of the SMTP service is the same as the sender's email address.
FTP Notification
To get notifications through the FTP server, you need to set up the FTP settings. The device will upload a screenshot to the specified FTP folder if it detects any unusual motion.
Click here to view the configuration steps.
Set it up in the FTP Notification section.
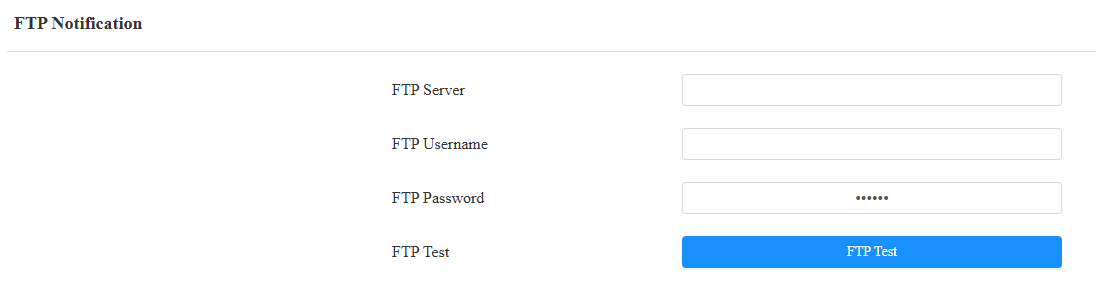
FTP Server: Set the address (URL) of the FTP server.
FTP Username: Enter the user name to access the FTP server.
FTP Password: Enter the password to access the FTP server.
SIP Call Notification
In addition to FTP and Email notification, the device can also make a SIP call when some feature action is triggered.
Set it up in the SIP Call Notification section.

Display Name: The name of the device displayed in the notification.
Action URL
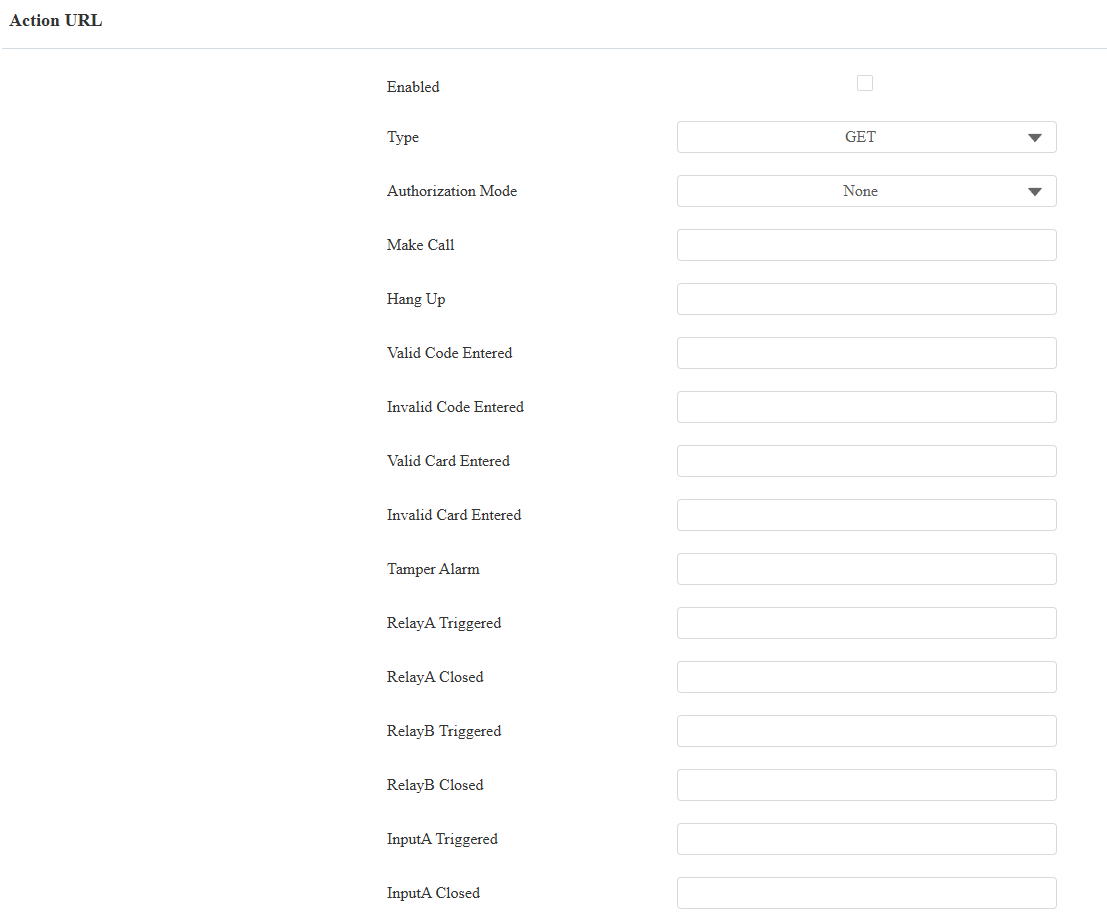
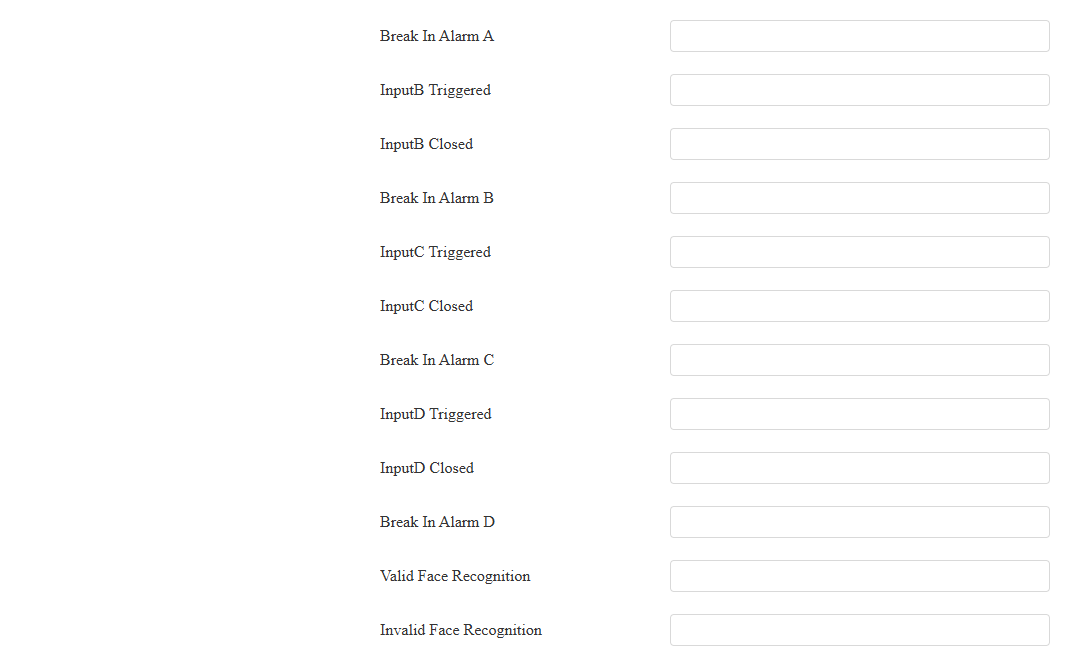
You can use the device to send specific HTTP URL commands to the HTTP server for certain actions. These actions will be triggered when the relay status, input status, PIN code, or RF card access changes.
Akuvox Action URL:
Event | Parameter format | Example |
Make Call | $remote | Http://server ip/Callnumber=$remote |
Hang Up | $remote | Http://server ip/Callnumber=$remote |
Valid Code Entered | $code | Http://server ip/validcode=$code |
Invalid Code Entered | $code | Http://server ip/invalidcode=$code |
Valid Card Entered | $card_sn | Http://server ip/validcard=$card_sn |
Invalid Card Entered | $card_sn | Http://server ip/invalidcard=$card_sn |
Tamper Alarm | $alarmstatus | Http://server ip/tampertri=$alarmstatus |
Relay Triggered | $relay1status | Http://server ip/ relaytrigger=$relay1status |
Relay Closed | $relay1status | Http://server ip/relayclose=$relay1status |
Input Triggered | $input1status | Http://server ip/inputtrigger=$input1status |
Input Closed | $input1status | Http://server ip/inputclose=$input1status |
Break-in Alarm | $input1status | Http://server ip/inputtrigger=$input1status |
Facial Recognition | $unlocktype | Http://serverip/unlocktype=$unlocktype |
For example: http://192.168.16.118/help.xml? mac=$mac:ip=$ip:model=$model:firmware=$firmware:card_sn=$card_sn
To set it up, go to the Device Setting > Action URL interface.
Voice Encryption
Secure Real-time Transport Protocol (SRTP) is a protocol derived from the Real-time Transport Protocol (RTP). It enhances the security of data transmission by providing encryption, message authentication, integrity assurance, and replay protection.
Set it up on the web Intercom > Account interface.

Voice Encryption(SRTP): Choose Disabled, Optional, or Compulsory for SRTP. If Optional or Compulsory is selected, the voice during the call is encrypted, and you can grab the RTP packet to view it.
User Agent
User agent is used for identification purpose when you are analyzing the SIP data packet.
To set it up, navigate to the Intercom > Account > User Agent interface.

User Agent: Akuvox is by default.
Real-Time Monitoring
This feature displays the door status when the device is connected to the SmartPlus Cloud. Property managers and end users can check the door status, respectively, on the SmartPlus Property Manager platform and SmartPlus App. You need to specify the relay(s) or input(s) that apply this feature.
Click here to see the detailed configuration.
To set it up, go to System > Security > Real-Time Monitoring interface.

Apply Setting To:
None: Not display door status.
Input: The door is opened by triggering input.
Relay: The door is opened by triggering the relay.
Emergency Action
This feature works with Akuvox SmartPlus Cloud. It keeps the door open when an emergency happens. You need to specify the Input that applies the feature.
Click here to view the detailed configuration of this feature.
To set it up, go to System > Security > Emergency Action interface. Select the Input(s) to be triggered.

Web Interface Automatic Log-out
You can set up the web interface's automatic log-out timing, requiring re-login by entering the user name and the passwords for security purposes or for the convenience of operation.
To set it up, go to System > Security > Session Time Out interface.

High Security Mode
High security mode is designed to enhance the security. It employs encryption across various facets, including the communication process, door opening commands, password storage methods, and more.
Enable it on the System > Security > High Security Mode interface.

Important Notes
1. The High Security mode is off by default when you upgrade the device from a version without the mode to one with it. But if you reset the device to its factory settings, the mode is on by default.
2. This mode makes the old version tools incompatible. You need to upgrade them to the following versions or higher to use them.
PC Manager: 1.2.0.0
IP Scanner: 2.2.0.0
Upgrade Tool: 4.1.0.0
SDMC: 6.0.0.34
3. The supported HTTP format for relay triggering varies depending on whether high secure mode is enabled or disabled.
If the mode is on, the device only accepts the new HTTP formats below for door opening.
http://username:password@deviceIP/fcgi/OpenDoor?action=OpenDoor&DoorNum=1
http://deviceIP/fcgi/OpenDoor?action=OpenDoor&DoorNum=1
If the mode is off, the device can use both the new formats above and the old format below:
http://deviceIP/fcgi/do?action=OpenDoor&UserName=username&Password=password&DoorNum=1
4. It is not allowed to import/export configuration files in tgz. format between a device with the high security mode and another one without it. For assistance with file transfer, please contact Akuvox technical support.