Tamper Alarm
La fonction d’alarme de manipulation empêche quiconque de retirer l’appareil sans permission. Les dispositifs Akuvox prennent en charge deux types de systèmes inviolables : la détection de gravité et la détection de l’état des boutons.
Cliquez ici pour voir quel type est pris en charge par l’appareil et découvrir les détails de la fonction.
Set it up on the Intercom > Advanced > Tamper Alarm interface.
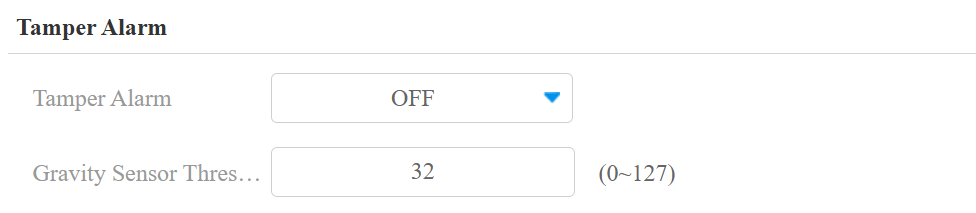
Gravity Sensor Threshold: Set the threshold for gravity sensory sensitivity. The lower the value is, the higher the sensitivity will be. The gravity sensor value is 32 by default.
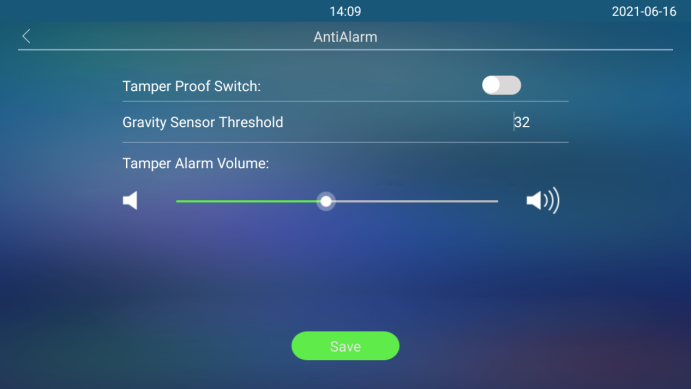
You can also set this feature on the Setting > Anti-Alarm screen.
Disarm Setting
When the tamper alarm is triggered, you can enter the disarm code to clear the alarm.
Set it up on the Security > Basic > Disarm Setting interface.

Lock Security
Le téléphone porte peut fonctionner avec d’autres serrures et capteurs pour maintenir la serrure sécurisée. Il déclenchera l’alarme pour alerter les utilisateurs si le capteur de porte détecte la porte ouverte ou non complètement fermée.
Set it up on the Setting > Lock screen.
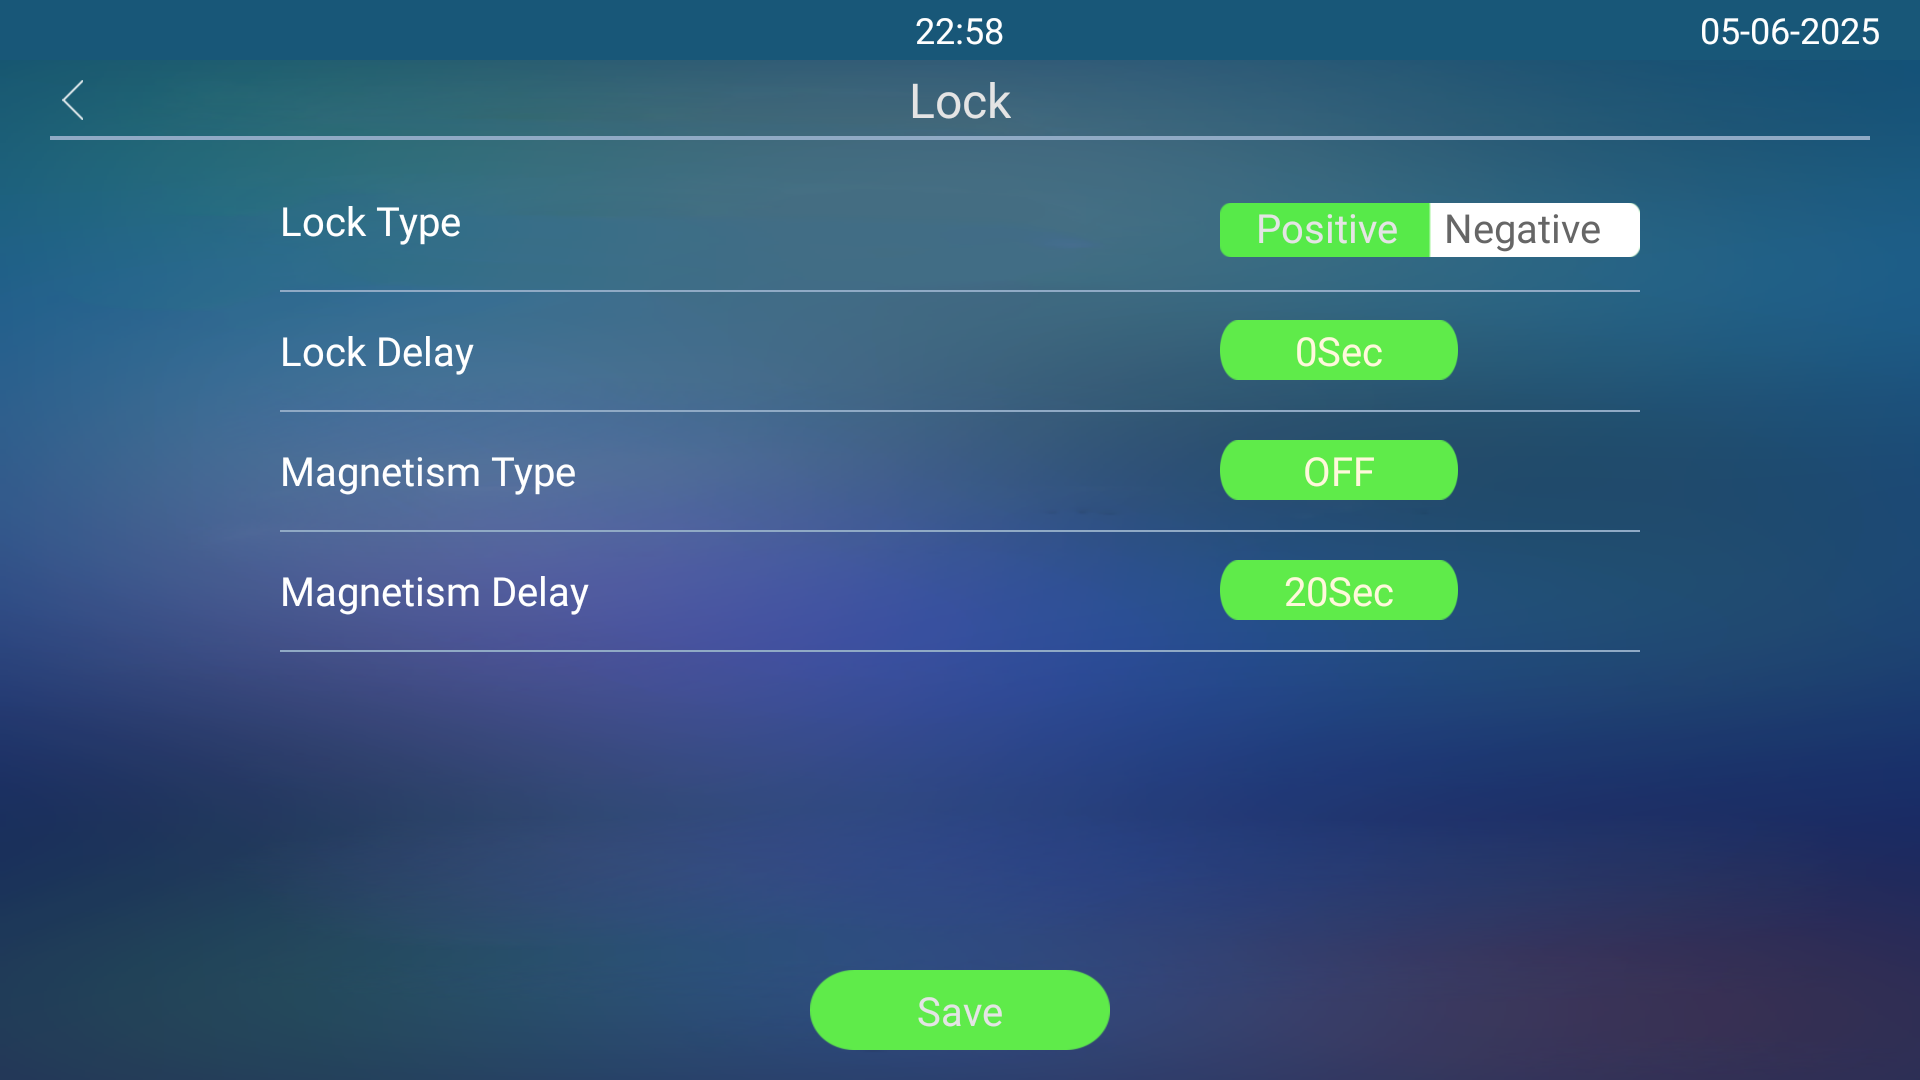
Lock Type:
Positive: The lock unlocks when power is ON and locks when power is OFF. Suitable for scenarios where the door should remain locked during a power outage.
Negative: The lock unlocks when power is OFF and locks when power is ON. Commonly used in places like fire escapes or emergency exits, ensuring that the door opens automatically during a power outage, allowing people to evacuate safely.
Lock Delay: Select door unlock delay time after you are granted door access. The delay time range is from 0-10 seconds.
Magnetism Type:
OFF: Disable the door sensor and alarm.
ON_ALARM: The positive lock is used.
OFF_ALARM: The negative lock is used.
Magnetism Delay: Select the alarm delay time after it is triggered. The delay range is from 10-120 seconds.
Client Certificate Setting
Les certificats garantissent l’intégrité de la communication et la confidentialité. Pour utiliser le protocole SSL, vous devez télécharger les bons certificats pour la vérification.
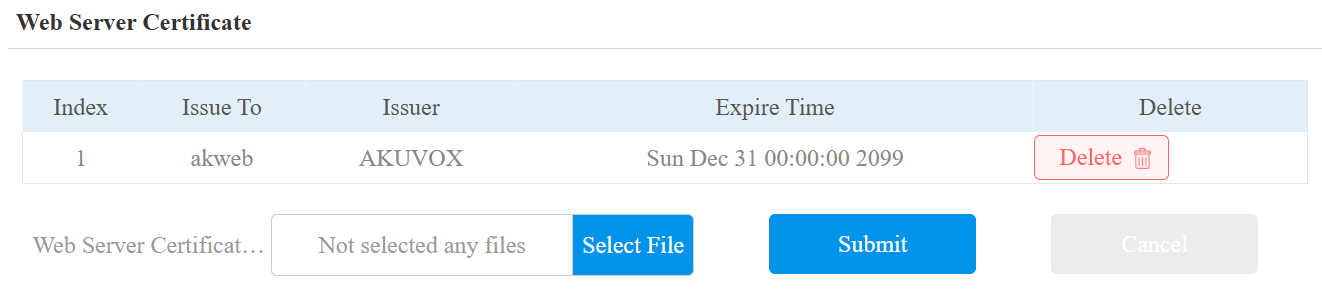
Web Server Certificate
C’est un certificat envoyé au client pour authentification lorsque celui-ci demande une connexion SSL avec le téléphone porte Akubox. Veuillez télécharger les certificats dans les formats acceptés.
Upload a web server certificate on the Security > Advanced > Web Server Certificate interface.
Client Certificate
Ce certificat vérifie le serveur sur le téléphone porte Akuvox lorsqu’ils souhaitent se connecter via SSL. Le téléphone de porte vérifie le certificat du serveur par rapport à sa liste de certificats clients.
Upload and configure client certificates on the web Security > Advanced > Client Certificate interface.
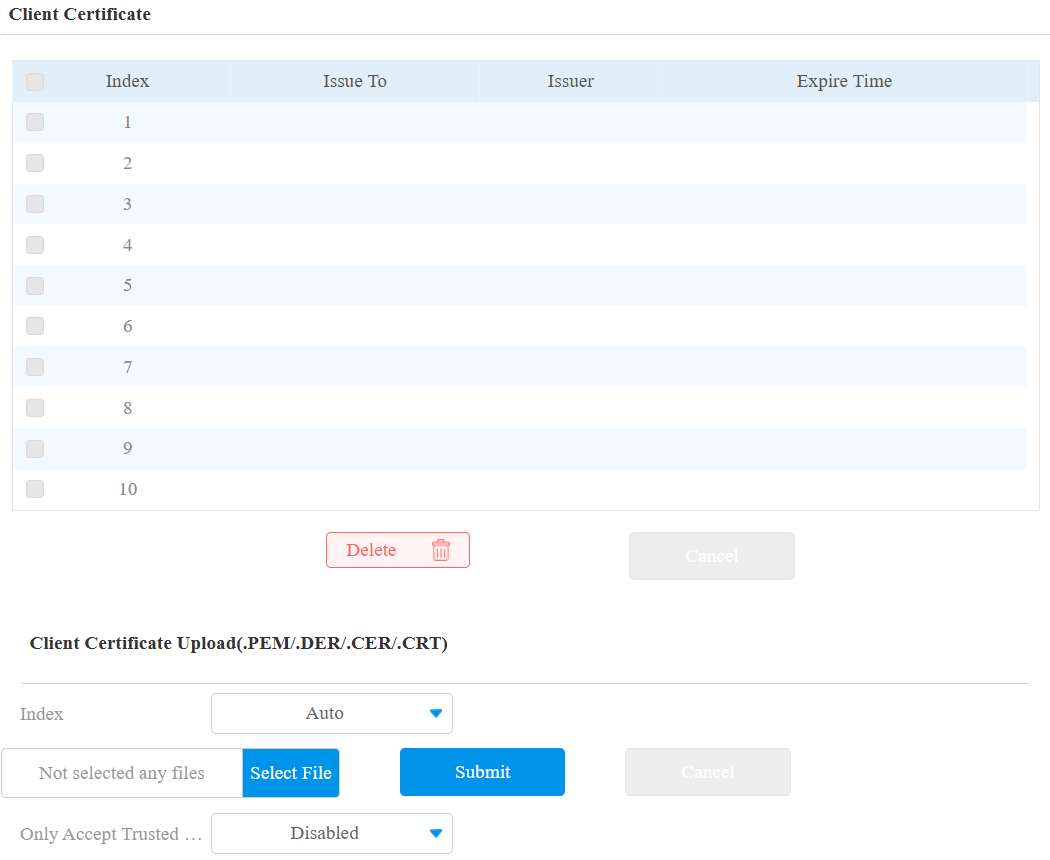
Index: Select the desired value from the drop-down list of Index. If you select Auto, the uploaded certificate will be displayed in numeric order. If you select the value from 1 to 10, the uploaded certificate will be displayed according to the number.
Client Certificate Upload: Locate and upload the desired certificate (Format: .pem,.der,.cer,.crt).
Only Accept Trusted Certificates: When enabled, as long as the authentication is successful, the phone will verify the server certificate based on the client certificate list. When disabled, the phone will not verify the server certificate no matter whether the certificate is valid or not.
Motion Detection
La détection de mouvement est une fonctionnalité qui permet la surveillance vidéo sans surveillance et les alarmes automatiques. Il détecte tout changement dans l’image capturé par la caméra, comme un passage ou un déplacement de l’objectif, et active le système pour effectuer l’action appropriée.
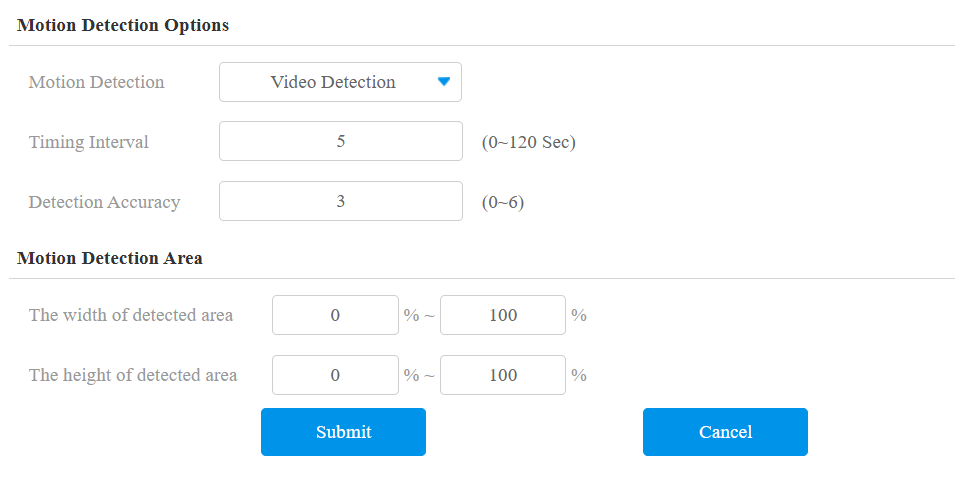
Set it up on the web Intercom > Motion > Motion Detection Options interface.
Motion Detection:
Disabled: Turn off the motion detection function.
Video Detection: When the video camera detects moving objects, preset actions will be triggered. Focus on analyzing visual information captured through cameras.
IR Detection: When the infrared detects moving objects, preset actions will be triggered. It offers better detection in low-light or dark conditions.
Timing Interval: Available for video detection. Determine how to delay and trigger motion detection.
Timing Interval between 1–3 seconds: Only need 1 detection during this interval to trigger actions.
Timing Interval > 3 seconds (e.g., 10 seconds): To perform actions, require a second detection within the final 3 seconds of the interval (e.g., between 7–10 seconds for a 10-second interval) after the first detection.
The default interval is 10 seconds.
Detection Accuracy: The detection sensitivity. Specify this option when selecting Video Detection. The greater the value is, the more accurate the detection is. The default value is 3.
Motion Detection Area: Available for video detection. To determine the detection area, start by measuring it as a percentage from left to right, with 100% representing the entire width. You can then choose a horizontal detection range from 0% to 100% and a vertical detection range from 0% to 100%. The intersection of these selected ranges will give you the exact detection area you want, allowing for easy customization.
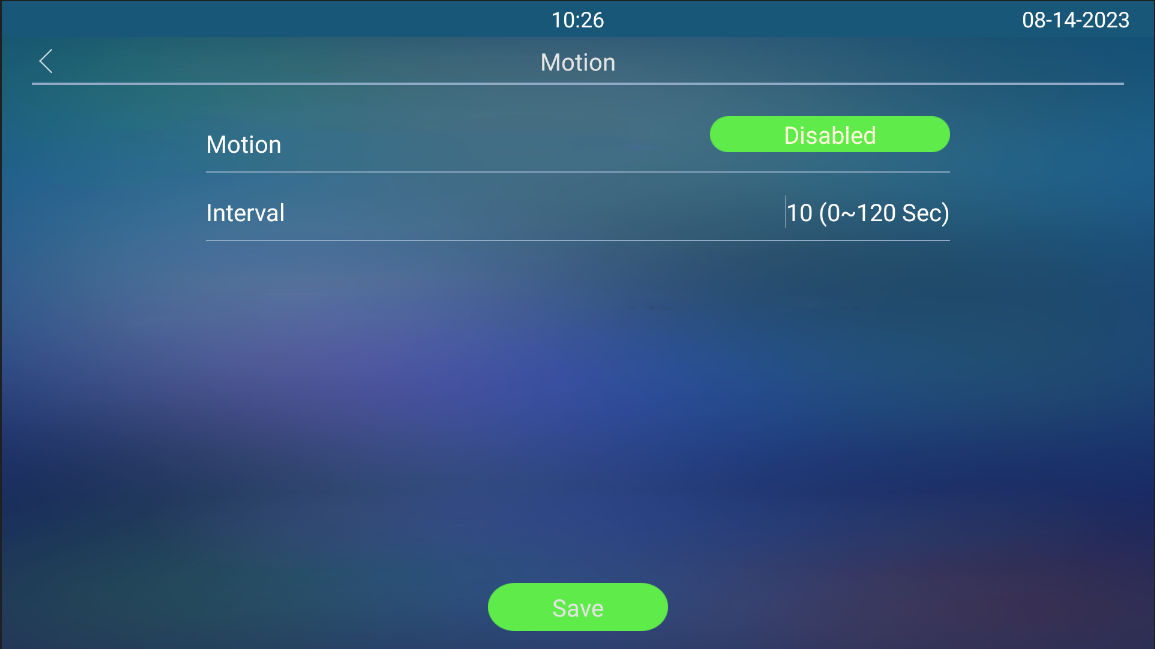
You can also set up the feature on the Setting > Motion screen.
Security Notification
Une notification de sécurité informe les utilisateurs ou le personnel de sécurité de toute violation ou menace détectée par l’appareil. Par exemple, si l’appareil détecte quelque chose d’inhabituel, le système envoie une notification aux utilisateurs ou à la sécurité par email, appels téléphoniques ou autres moyens.
Set up security notifications on the Intercom > Action interface.
Email Notification
Configurez des notifications par e-mail pour recevoir des captures d’écran de mouvements inhabituels provenant de l’appareil.
Cliquez ici pour voir comment configurer cette fonctionnalité.
Find the Email Notification part.
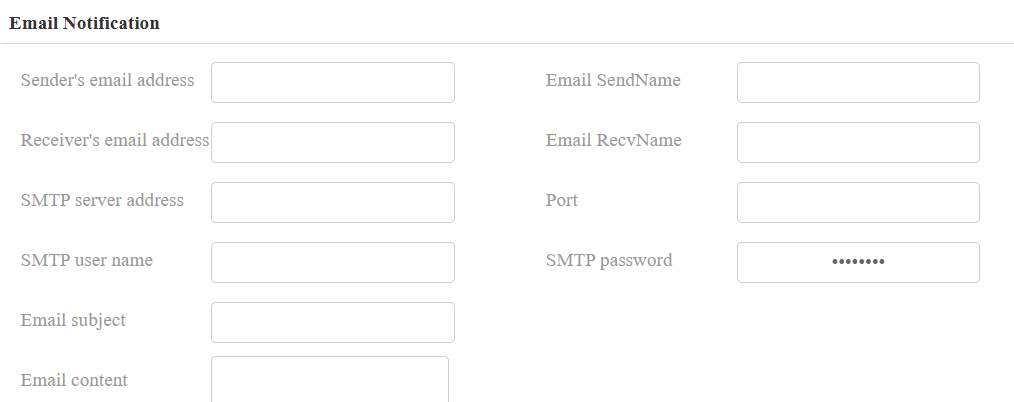
SMTP Server Address: The SMTP server address of the sender.
SMTP User Name: The SMTP username is usually the same as the sender's email address.
SMTP Password: The password of the SMTP service is the same as the sender's email address.
FTP Notification
Pour recevoir des notifications via le serveur FTP, il faut configurer les paramètres FTP. Le téléphone téléverra une capture d’écran dans le dossier FTP spécifié s’il détecte un mouvement inhabituel.
Cliquez ici pour voir les étapes de configuration.
Set it up on the FTP Notification section.

TFTP Notification
Pour recevoir les notifications de sécurité via le serveur TFTP, vous devez entrer l’adresse du serveur TFTP.
Cliquez ici pour voir les étapes de configuration.
Set it up on the TFTP Notification section.

Action URL
You can use the device to send specific HTTP URL commands to the HTTP server for certain actions. These actions will be triggered when the relay status, input status, PIN code, or RF card access changes.
Akuvox Action URL:
No | Event | Parameter format | Example |
1 | Make Call | $remote | Http://server ip/ Callnumber=$remote |
2 | Hang Up | $remote | Http://server ip/ Callnumber=$remote |
3 | Relay Triggered | $relay1status | Http://server ip/ relaytrigger=$relay1status |
4 | Relay Closed | $relay1status | Http://server ip/relayclose=$relay1status |
5 | Input Triggered | $input1status | Http://server ip/inputtrigger=$input1status |
6 | Input Closed | $input1status | Http://server ip/inputclose=$input1status |
7 | Valid Code Entered | $code | Http://server ip/validcode=$code |
8 | Invalid Code Entered | $code | Http://server ip/invalidcode=$code |
9 | Valid Card Entered | $card_sn | Http://server ip/validcard=$card_sn |
10 | Invalid Card Entered | $card_sn | Http://server ip/invalidcard=$card_sn |
11 | Facial Recognition | $unlocktype | Http://serverip/unlocktype=$unlocktype:floor=$floor:webrelay=$webrelay:userid=$userid |
12 | Break-in Alarm | $input1status | Http://server ip/inputtrigger=$input1status NOTE:$input1-4 corresponds to inputA-D. |
13 | Setup Completed | $model | Http://server ip/model/$model |
For example: http://192.168.16.118/help.xml? mac=$mac:ip=$ip:model=$model:firmware=$firmware:card_sn=$card_sn
Set it up on the Phone > Action URL interface.
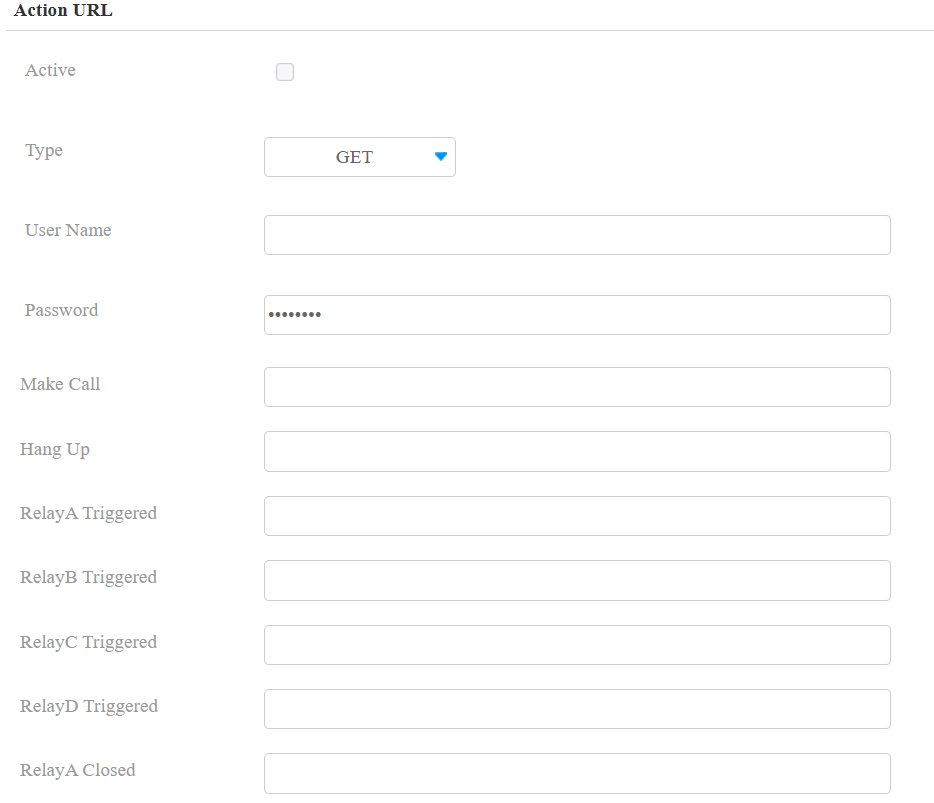

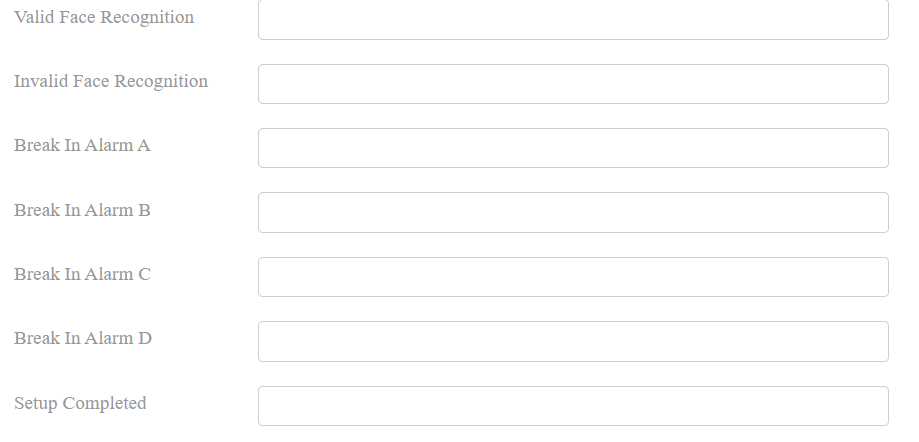
Setup Completed: This URL is sent after the device boots up, and it is not controlled by the Action URL Active switch. If you do not want to use this action URL, leave the field blank.
GDPR Setting
Le Règlement général sur la protection des données (RGPD) est un règlement du droit européen sur la protection des données et la vie privée. La fonctionnalité RGPD dans le téléphone d’entrée Akuvox est de chiffrer les données de carte saisies pour une meilleure sécurité.
Enable/disable this feature on the Intercom > Advanced > GDPR interface.

User Agent
L’agent utilisateur est utilisé à des fins d’identification lorsque vous analysez le paquet de données SIP.
To set it up, go to the Account > Advanced > User Agent interface.

Web Interface Automatic Log-out
Vous pouvez configurer le timing automatique de la déconnexion de l’interface web, nécessitant une reconnexion en saisissant le nom d’utilisateur et les mots de passe pour des raisons de sécurité ou de commodité.
Set it up on the Security > Basic > Session Time Out interface.

Emergency Action
Cette fonctionnalité fonctionne avec Akuvox SmartPlus Cloud. Cela garde la porte ouverte en cas d’urgence. Vous devez spécifier l’entrée qui applique la fonctionnalité.
Cliquez ici pour voir la configuration détaillée de cette fonctionnalité.
Set it up on the Security > Basic > Emergency Action interface.

Real-time Monitoring
Cette fonctionnalité affiche l’état de la porte lorsque l’appareil est connecté au SmartPlus Cloud. Les gestionnaires immobiliers et les utilisateurs finaux peuvent vérifier respectivement l’état de la porte sur la plateforme SmartPlus Property Manager et l’application SmartPlus. Vous devez spécifier le(s) relais ou entrée(s) qui appliquent cette fonctionnalité. Cliquer
pour voir la configuration détaillée.
Set it up on the Security > Basic > Real-time Monitoring interface.

High Security Mode
Le mode haute sécurité est conçu pour renforcer la sécurité. Il utilise le chiffrement à travers divers aspects, notamment le processus de communication, les commandes d’ouverture de porte, les méthodes de stockage des mots de passe, et plus encore.
Enable/disable the feature on the Security > Basic interface.

Notes importantes
1. Le mode Haute Sécurité est désactivé par défaut lorsque vous mettez à jour l’appareil d’une version sans ce mode vers une version qui l’inclut. Mais si vous réinitialisez l’appareil à ses paramètres d’usine, le mode est activé par défaut.
2. Ce mode rend les anciens outils incompatibles. Il faut les mettre à niveau vers les versions suivantes ou supérieures pour pouvoir les utiliser.
Gestionnaire PC : 1.2.0.0
Scanner IP : 2.2.0.0
Outil de mise à jour : 4.1.0.0
SDMC : 6.0.0.34
3. Le format HTTP pris en charge pour le déclenchement par relais varie selon que le mode hautement sécurisé est activé ou désactivé.
Si le mode est activé, l’appareil n’accepte que les nouveaux formats HTTP ci-dessous pour l’ouverture de porte.
http://username:password@deviceIP/fcgi/OpenDoor?action=OpenDoor&DoorNum=1
http://deviceIP/fcgi/OpenDoor?action=OpenDoor&DoorNum=1
Si le mode est désactivé, l’appareil peut utiliser à la fois les nouveaux formats ci-dessus et l’ancien format ci-dessous :
http://deviceIP/fcgi/do?action=OpenDoor&UserName=username&Password=password&DoorNum=1
4. Il n’est pas permis d’importer/exporter des fichiers de configuration dans tgz. Formatez entre un appareil avec le mode haute sécurité et un autre sans. Pour obtenir de l’aide au transfert de fichiers, veuillez contacter le support technique d’Akubox.